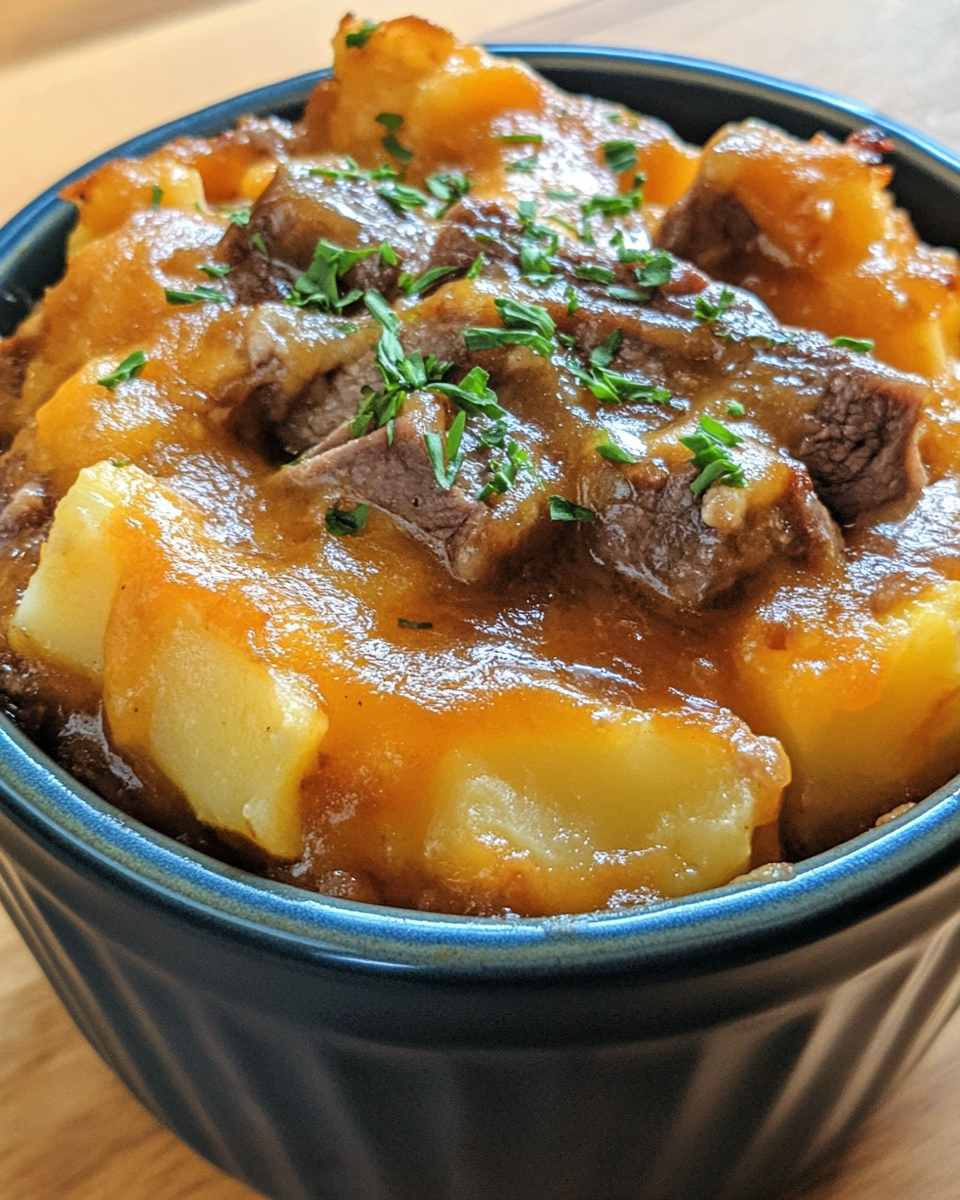
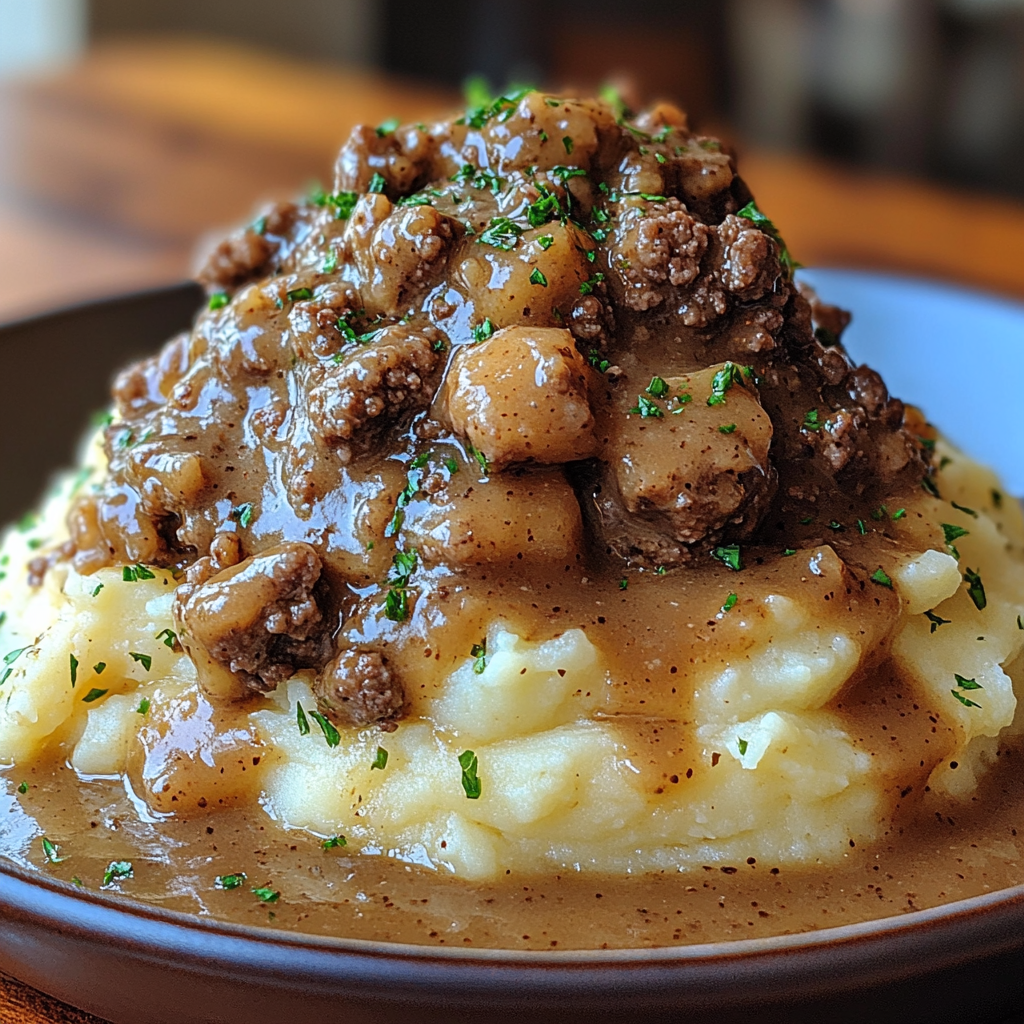
Chicken Alfredo Stuffed Crescent Rolls: A Creamy, Savory Delight

Alfredo crescent rolls, cheesy stuffed crescent rolls, chicken crescent roll appetizers, creamy Alfredo chicken rolls, stuffed crescent roll recipe, easy Alfredo crescent rolls

Chicken Alfredo Stuffed Crescent Rolls: A Delicious Fusion Recipe

Chicken Alfredo stuffed crescent rolls bring together the creamy richness of Alfredo sauce and the flaky goodness of crescent rolls. This unique fusion is ideal for quick dinners, snacks, or even a crowd-pleasing appetizer. Here, we’ll guide you through every step, ensuring you master this simple yet flavorful recipe.

For more comforting, easy-to-make dishes, check out our Ultimate Comfort Food: Crockpot Potato Soup with Hashbrowns.

Why You’ll Love Chicken Alfredo Stuffed Crescent Rolls

This dish is loved for its versatility and flavor. The buttery crescent roll crust encases a filling of tender chicken mixed with a rich Alfredo sauce, making it perfect for meals or appetizers. If you’re a fan of quick and hearty meals, don’t miss our guide on Slow Cooker Baked Ziti.

Ingredients Needed for Chicken Alfredo Stuffed Crescent Rolls

To make this delightful recipe, gather these ingredients:

  • Cooked Chicken: Pre-shredded rotisserie chicken or leftover cooked chicken works well.
  • Crescent Roll Dough: Store-bought or homemade for convenience.
  • Alfredo Sauce: Store-bought or homemade for added flavor.
  • Cheese: Mozzarella or parmesan for a creamy, cheesy interior.
  • Seasonings: Garlic powder, salt, pepper, and parsley for added flavor.

Optional Additions

  • Spinach or Mushrooms: For extra nutrients and flavor.
  • Bacon Bits: For a smoky twist that complements the Alfredo sauce.

Preparing the Filling

1. Choosing the Right Chicken and Alfredo Sauce

  • Chicken: Rotisserie chicken is convenient, but any leftover cooked chicken will work.
  • Alfredo Sauce: Opt for a thick, creamy Alfredo sauce for the best texture and flavor.

For more Alfredo sauce tips, check out our Perfect Alfredo Sauce Tips.

2. Mixing the Filling

  • Combine shredded chicken, Alfredo sauce, cheese, and seasonings in a bowl.
  • Adjust seasoning as desired for a balance of flavor.

Assembling the Crescent Rolls

  1. Prepare the Crescent Rolls: Unroll the crescent dough and separate it into triangles on a baking sheet.
  2. Add Filling: Spoon the chicken Alfredo mixture onto each triangle, focusing near the wide end.
  3. Roll Up: Starting from the wide end, gently roll up the crescent dough to enclose the filling.
  4. Sealing: Pinch the sides lightly to seal in the filling, preventing leaks.

For more easy roll-up ideas, check out our Delicious Crescent Roll Pizza, another fun way to use crescent dough for creative dishes.


Baking the Chicken Alfredo Stuffed Crescent Rolls

Baking Tips

  • Temperature: Bake at 375°F for about 12-15 minutes or until golden brown.
  • Check for Doneness: Ensure rolls are cooked through and golden on top for a crisp texture.
  • Serving Suggestion: Serve warm, garnished with fresh parsley or grated parmesan.

Serving Suggestions for Chicken Alfredo Crescent Rolls

These stuffed rolls can be served as a main dish or snack:

  • Dipping Sauce: Serve with marinara or extra Alfredo sauce for dipping.
  • Side Dishes: Pair with a Caesar salad or steamed broccoli for a complete meal.
  • Garnishing: Sprinkle with parmesan or fresh parsley for added flavor.

Looking for another delicious dish? Try our Garlic Bread Pizza Rolls for another fun, shareable option.

Storing and Reheating Leftovers

  • Refrigeration: Store leftovers in an airtight container in the refrigerator for up to 3 days.
  • Freezing: Freeze for up to 2 months in a freezer-safe container.
  • Reheating: For best results, reheat in the oven or air fryer to retain crispness.

Health Benefits and Nutritional Information

Chicken provides lean protein, while Alfredo sauce offers calcium and essential fats. For a lighter version, consider using low-fat cheese and sauce, or add vegetables like spinach to boost nutritional content.

Frequently Asked Questions (FAQs)

1. Can I Make Chicken Alfredo Crescent Rolls Without Cheese?

Yes, the rolls will still be creamy and flavorful, though cheese adds richness.

2. How Do I Prevent the Filling from Leaking?

Ensure crescent dough is sealed tightly around the filling, and avoid overstuffing.

3. Can I Prepare These Crescent Rolls Ahead of Time?

Yes, assemble ahead, refrigerate, and bake fresh when ready.

4. Can I Substitute Alfredo Sauce with Another Sauce?

Pesto or marinara works well if you want to try a different flavor profile.

5. How Can I Make These Rolls Spicier?

Add red pepper flakes or a spicy Alfredo sauce for an extra kick.


Troubleshooting Common Issues

  • Preventing Over-Browning: If rolls brown too quickly, cover with foil for the last few minutes.
  • Avoiding Soggy Rolls: Bake on a baking sheet, not a glass dish, for crispier results.

Final Thoughts: A Simple and Delicious Treat

Chicken Alfredo stuffed crescent rolls are a versatile recipe perfect for any occasion. With minimal ingredients and quick preparation, it’s an easy way to impress. For more easy and fun meal ideas, visit our Comfort Recipes Collection, where you’ll find an array of satisfying recipes for every taste.

Crockpot Loaded Steak and Potato Bake: An Easy Comfort Meal

slow cooker steak and potatoes, crockpot steak bake, loaded steak and potato casserole, cheesy steak and potatoes, crockpot beef and potatoes, loaded potato bake with steak

Crockpot Loaded Steak and Potato Bake: A Hearty Comfort Food

Steak and potatoes are a classic pairing, but when cooked in a crockpot, they become tender and flavorful, making this dish an effortless comfort meal. This loaded steak and potato bake is perfect for busy weeknights or cozy family dinners, combining hearty ingredients and rich flavors that everyone will love.

For more hearty meal ideas, check out our Slow Cooker Magic: Crock-Pot Baked Ziti, an Italian-inspired favorite.

Why Crockpot Steak and Potato Bake is the Ultimate Comfort Food

Cooking steak and potatoes in a crockpot enhances their flavors through slow cooking, while the added toppings make it a satisfying, loaded meal. The versatility of this dish allows for various flavor additions and side pairings, making it ideal for any occasion. If you’re a fan of comfort food casseroles, don’t miss our Ultimate Comfort Food: Crockpot Potato Soup with Hashbrowns.

Ingredients Needed for Crockpot Loaded Steak and Potato Bake

To make this savory dish, gather the following ingredients:

  • Steak: Sirloin or chuck roast, cubed for tender results.
  • Potatoes: Russet or Yukon Gold for a creamy texture.
  • Onions and Garlic: Adds depth and aroma.
  • Beef Broth: Enhances the savory flavor of the meat.
  • Seasonings: Salt, pepper, garlic powder, smoked paprika.
  • Toppings: Shredded cheddar cheese, bacon, green onions, and sour cream.

Optional Ingredients

  • Bell Peppers: For added color and crunch.
  • Mushrooms: For an earthy flavor and added texture.

Preparing Your Ingredients

1. Choosing the Right Steak and Potatoes

  • Steak: Select tender cuts like sirloin for slow cooking or more affordable options like chuck roast for budget-friendly meals.
  • Potatoes: High-starch potatoes like Russet create a creamy base; Yukon Golds provide a buttery finish.

2. Prepping and Layering in the Crockpot

  • Sear the Steak: For richer flavor, quickly sear the steak cubes in a skillet before adding to the crockpot.
  • Layer Ingredients: Layer potatoes and meat evenly, adding seasonings and broth for moisture and flavor infusion.

For a similar method, try our No-Peek Beef Tips, which also highlights the benefits of crockpot cooking.


Setting Up the Crockpot

Cooking Time and Temperature

  • Low and Slow: Set the crockpot to low for 6-8 hours for tender meat and perfectly cooked potatoes.
  • High Heat Option: If short on time, cook on high for 3-4 hours; the texture will vary slightly but still delicious.

Key Tips for a Perfectly Loaded Bake

  • Add Toppings at the End: Top with shredded cheese and bacon in the last 30 minutes for a perfectly melted finish.
  • Consistency Adjustments: If the mixture is too liquid, remove the lid during the last 30 minutes to thicken.

For more topping ideas, check out our Loaded Potato Skins Recipe, which provides unique topping combinations.


Serving Suggestions for Crockpot Loaded Steak and Potato Bake

  • Garnishes: Sprinkle green onions or chives and a dollop of sour cream for extra flavor.
  • Side Pairings: Pair with a simple salad or steamed green beans for a balanced meal.
  • Beverage Ideas: Red wine or iced tea complement the savory flavors of this dish.

If you’re looking for another crowd-pleasing recipe, explore our Garlic Rosemary Steak and Potatoes Skillet.

Storing and Reheating Leftovers

  • Refrigeration: Store in an airtight container for up to 3 days.
  • Freezing: Portion into freezer-safe containers for up to 2 months.
  • Reheating: Reheat in a skillet or oven for the best texture, adding a splash of broth if needed.

Health Benefits and Nutritional Information

This dish offers protein from steak and essential vitamins from potatoes. For a lighter version, opt for lean steak cuts, reduce cheese, or use low-fat toppings.

Frequently Asked Questions (FAQs)

1. Can I Make This Dish Without Searing the Steak?

Yes, you can skip searing, though it adds a richer flavor.

2. What’s the Best Cut of Beef for Crockpot Steak and Potato Bake?

Sirloin and chuck roast are ideal; they become tender with slow cooking.

3. Can I Add Other Vegetables?

Absolutely! Bell peppers and mushrooms add great flavor and texture.

4. How Do I Prevent the Cheese from Becoming Greasy?

Add cheese in the last 30 minutes to avoid over-melting.

5. Can I Use Chicken Instead of Steak?

Yes, chicken thighs work well as a substitute.


Final Thoughts: An Easy, Flavorful Meal

The crockpot loaded steak and potato bake is a delicious, all-in-one meal perfect for any occasion. With easy preparation and rich flavors, it’s a dish that will surely become a family favorite. For more meal ideas, visit our Comfort Food Recipes Collection, featuring easy and hearty dishes for every day.

Refreshing Lemon Cream Cheese Squares: A Perfect Dessert Recipe

lemon bars with cream cheese, lemon cheesecake squares, creamy lemon dessert, easy lemon cream cheese squares, tangy lemon bars, lemon cream squares

Lemon Cream Cheese Squares: A Refreshing Dessert Recipe

Nothing brings a refreshing twist to dessert like the bright tang of lemon paired with creamy textures. Lemon cream cheese squares are a delightful dessert, combining a buttery crust with a zesty, creamy filling that’s both simple to make and impressive to serve. In this guide, we’ll cover everything from ingredient selection to preparation tips, ensuring you create the most delicious lemon cream cheese squares.

For another citrus-inspired treat, consider our Best Raspberry Lemon Bars Recipe, which blends berry sweetness with lemon tartness for a refreshing twist.

Why Lemon Cream Cheese Squares Are So Popular

This dessert balances the richness of cream cheese with the bright acidity of lemon, making it light yet satisfying. It’s versatile enough for casual gatherings or special occasions and pairs wonderfully with coffee or tea. If you’re craving more creamy desserts, check out our recipe for Mini Pineapple Coconut Milk Cheesecakes, another crowd-pleasing choice.

Ingredients Needed for Lemon Cream Cheese Squares

To create the best lemon cream cheese squares, gather the following ingredients:

  • Cream Cheese: Adds richness and smoothness.
  • Lemon Juice and Zest: Provides the signature tangy flavor.
  • Sugar: Balances the tartness of the lemon.
  • Eggs: For structure and a smooth texture.
  • Graham Cracker Crust or Shortbread Crust: The choice of crust impacts the flavor and texture.

Optional Ingredients

  • Vanilla Extract: Enhances flavor.
  • Powdered Sugar: For a decorative finish.

Choosing the Right Crust for Your Lemon Cream Cheese Squares

Selecting the right crust is essential for achieving the perfect texture. A graham cracker crust provides a subtle sweetness and crunch, while a shortbread crust offers a buttery, crumbly texture.

  1. Graham Cracker Crust: A classic option for ease and flavor.
  2. Shortbread Crust: Ideal for a sturdier base, adding a slightly richer taste.

For other dessert crust ideas, try our guide on The Best Pie Crust Tips, which delves into achieving the right balance of flakiness and flavor.


Step-by-Step Instructions for Making Lemon Cream Cheese Squares

1. Preparing the Crust

  • Crush graham crackers or prepare a shortbread base, mixing with melted butter and pressing into a lined baking dish.
  • Pre-bake the crust for 10 minutes to ensure it holds up under the filling.

2. Making the Cream Cheese and Lemon Filling

  • Softening Cream Cheese: Start with room-temperature cream cheese for smooth mixing.
  • Adding Lemon Flavor: Incorporate fresh lemon juice and zest for a vibrant, natural taste.
  • Combining with Sugar and Eggs: Blend until smooth, ensuring no lumps remain.

3. Assembling the Layers

  • Pour the filling over the crust, spreading it evenly for consistent thickness.
  • Tap the pan lightly to release any air bubbles and ensure a smooth surface.

4. Baking and Cooling

  • Bake at a low temperature (around 325°F) for even cooking without cracks.
  • Let cool at room temperature before refrigerating to set.

For more dessert-baking tips, explore our Perfect Baking Techniques for Beginners guide.


Serving Suggestions for Lemon Cream Cheese Squares

Serve these squares with various toppings or side pairings:

  • Dusting of Powdered Sugar: Adds a decorative touch and subtle sweetness.
  • Fresh Berries: Strawberries or blueberries add color and complement the lemon flavor.
  • Whipped Cream: Balances the tartness of the lemon.

If you’re interested in more ways to elevate dessert presentations, see our Ultimate Guide to Dessert Toppings.

Storing and Freezing Lemon Cream Cheese Squares

  1. Refrigerating: Store in an airtight container in the refrigerator for up to a week.
  2. Freezing: Place cut squares in a single layer on a baking sheet to freeze individually, then transfer to an airtight container. They’ll keep for up to 2 months and can be thawed in the fridge before serving.

Health Benefits and Nutritional Information

Lemon cream cheese squares offer a balance of flavors with modest nutritional content. Lemons are rich in vitamin C and antioxidants, while cream cheese provides calcium and protein. For a lighter version, try using reduced-fat cream cheese or lower sugar levels.

Frequently Asked Questions (FAQs)

1. Can You Make Lemon Cream Cheese Squares Without Eggs?

Yes, you can substitute eggs with a cornstarch slurry or a vegan egg substitute to achieve a similar texture.

2. How Do You Prevent Cracking in Lemon Cream Cheese Squares?

Use room-temperature ingredients and bake at a low temperature to prevent the filling from cracking.

3. Can I Use Bottled Lemon Juice Instead of Fresh?

Fresh lemon juice is recommended for the best flavor, but bottled can work in a pinch. Adjust sugar levels if the bottled juice is very tart.

4. How Long Should Lemon Cream Cheese Squares Chill?

For optimal texture, chill for at least 2 hours before slicing and serving.

5. Can I Add Toppings to the Lemon Cream Cheese Squares?

Absolutely! Consider whipped cream, fresh berries, or a drizzle of white chocolate.


Final Thoughts: A Dessert That’s Sure to Impress

Lemon cream cheese squares bring together the best of sweet, creamy, and tangy flavors in one easy-to-make dessert. Whether you’re looking for a casual treat or a show-stopping dessert, this recipe offers versatility and a flavor profile that everyone will love. For more delightful dessert ideas, explore our Dessert Recipe Collection, where classic flavors meet creative twists.

Ground Beef and Gravy Over Mashed Potatoes: A Hearty Comfort Food Classic

ground beef mashed potatoes, beef and gravy recipe, hamburger gravy with mashed potatoes, creamy mashed potatoes and beef, homestyle beef gravy, ground beef comfort meal, easy mashed potatoes and gravy

Ground Beef and Gravy Over Mashed Potatoes: A Comfort Food Classic

Ground beef and gravy over mashed potatoes is a hearty, budget-friendly dish that’s perfect for family dinners or whenever you need a comforting meal. This classic dish brings together tender ground beef in a rich gravy, served over creamy mashed potatoes. In this guide, we’ll cover everything from choosing the right ingredients to helpful tips on creating a flavorful, satisfying meal.

If you’re craving more comforting dishes, try our Ultimate Comfort Food: Crockpot Potato Soup with Hashbrowns, perfect for pairing with this dish on a cozy night.

Why Ground Beef and Gravy Over Mashed Potatoes Is So Popular

This recipe is loved for its simplicity and flavor. Ground beef is easy to cook and cost-effective, while homemade gravy elevates the taste, making it a family favorite. The fluffy mashed potatoes create a satisfying base, complementing the richness of the beef and gravy. For a twist on comfort food with similar warmth and texture, check out our Slow Cooker Baked Ziti, another effortless and comforting meal.

Ingredients Needed for Ground Beef and Gravy Over Mashed Potatoes

To make this delicious dish, gather these ingredients:

  • Ground Beef: Choose lean ground beef (80/20) for flavor and less grease.
  • Onion: Adds sweetness and depth to the gravy.
  • Garlic: Provides aromatic depth.
  • Beef Broth: Essential for a flavorful gravy base.
  • Flour: For thickening the gravy.
  • Worcestershire Sauce: Enhances the umami flavor.
  • Salt and Pepper: Basic seasonings to taste.
  • Potatoes: Russet or Yukon Gold for creamy mashed potatoes.
  • Milk and Butter: Essential for rich, creamy mashed potatoes.

Optional Ingredients

  • Mushrooms: For an earthy addition to the gravy.
  • Peas or Carrots: Adds color and nutrition.

Preparing the Ground Beef and Gravy

1. Browning the Ground Beef

  • Start by browning the ground beef in a skillet. Breaking it into crumbles as it cooks helps create even texture. Add salt and pepper as it browns to lock in flavor.

2. Adding Aromatics

  • Sauté finely chopped onions and garlic with the beef until softened. This step builds a flavor base for the gravy.

3. Making the Gravy

  • Sprinkle flour over the beef mixture and stir, letting it cook for 1-2 minutes to remove the raw flour taste. Slowly add beef broth, stirring constantly to create a smooth, thickened gravy.

For tips on making smooth, lump-free gravy, see our guide on the Perfect Brown Gravy for more insights.


Preparing the Mashed Potatoes

Step-by-Step for Creamy Mashed Potatoes

  1. Boil the Potatoes
    • Peel and chop potatoes into even pieces. Boil until fork-tender, about 15-20 minutes.
  2. Mashing and Adding Ingredients
    • Drain potatoes and mash with butter and warm milk until smooth and creamy. Adjust seasoning with salt and pepper.

For a twist, try adding roasted garlic or herbs like chives to your mashed potatoes. To explore more side options, check out our Ultimate Cheesy Bacon Potato Casserole, a flavorful accompaniment that pairs well with ground beef dishes.


Assembling and Serving the Dish

Serve this dish by ladling a generous amount of beef and gravy over a bed of mashed potatoes. Garnish with fresh parsley or green onions for a pop of color. For extra richness, add a dollop of sour cream to the mashed potatoes.

Cooking Tips for Ground Beef and Gravy Over Mashed Potatoes

  • Use a Roux for Thick Gravy: The combination of flour and fat from the beef creates a roux, resulting in a smooth, velvety gravy.
  • Keep Seasoning Balanced: Taste and adjust salt and pepper as you go to prevent over- or under-seasoning.
  • Add Vegetables for Color and Nutrition: Mushrooms, peas, or carrots blend well and add nutritional value.

For an easy weekday option, try our Creamy Chicken Gravy Over Noodles, a versatile alternative that’s quick and equally comforting.


Storing and Reheating Leftovers

Ground beef and gravy over mashed potatoes stores well, making it ideal for meal prep:

  • Refrigerate: Store leftovers in an airtight container for up to 3 days.
  • Freeze: Portion into freezer-safe containers for up to 2 months.
  • Reheat: Warm in a skillet over low heat, adding a splash of broth to revive the gravy’s consistency.

Health Benefits and Nutritional Information

Ground beef and potatoes are great sources of protein and carbs. Potatoes provide fiber, vitamin C, and potassium, while ground beef contributes iron and B vitamins. To lighten up the dish, try using leaner ground beef or substitute some of the butter in the mashed potatoes with Greek yogurt.

Frequently Asked Questions (FAQs)

1. Can I Use Instant Potatoes Instead?

While instant potatoes are convenient, they lack the creamy texture and flavor of fresh potatoes. However, they can be a time-saving substitute in a pinch.

2. Can This Dish Be Made with Turkey or Chicken?

Yes, ground turkey or chicken works as a leaner alternative, though you may need additional seasonings to match the richness of beef.

3. What’s the Secret to Lump-Free Gravy?

The key is to cook the flour thoroughly with the fat before adding liquid and to whisk continuously as you pour in the broth.

4. Can I Add Cheese to the Mashed Potatoes?

Absolutely! Cheddar or Parmesan are excellent additions, adding depth and creaminess to the mashed potatoes.

5. Can You Make This Dish Ahead of Time?

Yes, both the mashed potatoes and beef gravy can be made ahead and stored separately. Reheat before serving.


Final Thoughts: A Comfort Meal to Savor

Ground beef and gravy over mashed potatoes is a simple yet satisfying meal that’s both hearty and adaptable. Whether you stick to the classic recipe or add your twist with extra veggies or herbs, this dish is a guaranteed hit for any occasion. For more easy-to-make comfort food recipes, visit ExoRecipes and explore our variety of comforting meals and creative recipes.

Irresistible German Potato Pancakes (Kartoffelpuffer): Crispy and Delicious

Kartoffelpuffer recipe, German potato cakes, crispy potato pancakes, traditional German pancakes, Reibekuchen, fried potato pancakes, German potato side dish

Irresistible German Potato Pancakes (Kartoffelpuffer): A Crispy Delight You Can’t Resist!

German potato pancakes, also known as Kartoffelpuffer, are a delicious treat that’s loved in Germany and beyond. These golden, crispy pancakes, made from grated potatoes, are easy to make and pair well with both sweet and savory toppings. In this guide, we’ll explore everything you need to know about making the perfect German potato pancakes, from ingredients and techniques to serving suggestions and FAQs.

If you’re interested in more classic comfort foods, check out our recipe for Creamy Garlic Parmesan Chicken.

Why German Potato Pancakes are Special

German potato pancakes are different from other potato pancakes in their unique blend of grated potatoes and onions, giving them a distinct flavor and texture. They’re often enjoyed as a street food in Germany, served with applesauce for a sweet touch or sour cream for a savory bite. These pancakes are a fantastic comfort food, perfect for breakfast, lunch, or even as a side dish for dinner.

For another beloved German dish, check out our Classic Beef Stew, a warm and hearty option that pairs wonderfully with Kartoffelpuffer.


Ingredients Needed for German Potato Pancakes

To make authentic German potato pancakes, you’ll need the following:

  • Potatoes: High-starch potatoes like Russets work best, as they provide a crispy texture.
  • Onion: Adds a mild, aromatic flavor that enhances the potatoes.
  • Eggs: Acts as a binder to hold the pancakes together.
  • Flour: Just a small amount for structure.
  • Salt and Pepper: For seasoning.
  • Oil for Frying: A neutral oil like vegetable oil is ideal.

Optional Ingredients

  • Garlic: For an extra kick.
  • Parsley or Chives: For a burst of color and flavor.

Step-by-Step Instructions for Perfect Potato Pancakes

1. Grating the Potatoes and Onion

  • Grate potatoes and onion using a coarse grater. High-starch potatoes give the best texture, as they allow the pancakes to crisp up beautifully when fried.

2. Removing Excess Moisture

  • Place the grated potatoes and onion in a clean kitchen towel and squeeze out as much liquid as possible. Removing excess moisture is crucial for getting crispy pancakes.

3. Mixing the Batter

  • In a large bowl, combine the potatoes, onion, eggs, flour, salt, and pepper. Stir until well mixed and adjust the flour as needed to achieve a cohesive mixture.

4. Shaping and Frying

  • Heat a thin layer of oil in a skillet over medium-high heat. Form small, flat pancakes with the mixture and fry until golden brown on each side, approximately 3-4 minutes per side.

For a complete guide on mastering frying techniques, check out our Guide to Fried Foods for essential tips and tricks.


Serving Suggestions for German Potato Pancakes

German potato pancakes are versatile and can be served with a variety of accompaniments:

  • Applesauce: A classic sweet pairing that balances the savory flavors.
  • Sour Cream: Adds creaminess and tang.
  • Smoked Salmon: For a luxurious touch.
  • Herbs: Fresh parsley or chives sprinkled on top add freshness.

For an additional side that pairs well, consider our Garlic Rosemary Steak and Potatoes Skillet, which makes for a hearty meal alongside these pancakes.


Storing and Reheating German Potato Pancakes

  • Refrigerating: Store leftover pancakes in an airtight container in the fridge for up to 3 days.
  • Freezing: For longer storage, place pancakes between layers of parchment paper and freeze in an airtight container for up to 2 months.
  • Reheating: Reheat in the oven at 350°F for 10 minutes or in a skillet to restore crispiness.

Health Benefits and Nutritional Information

Potatoes are a great source of vitamin C, potassium, and fiber. While frying adds calories, opting for a healthy oil and serving with fresh toppings can make this dish a balanced treat. For a gluten-free option, substitute flour with almond flour or cornstarch.

Frequently Asked Questions (FAQs)

1. What is the difference between German potato pancakes and hash browns?

German potato pancakes contain flour and egg as binders, creating a cohesive batter, whereas hash browns are usually just shredded potatoes fried until crispy.

2. Can I make German potato pancakes without eggs?

Yes, a flaxseed mixture or applesauce can act as an egg substitute.

3. How can I make German potato pancakes crispy?

Removing excess water from the potatoes and using high-starch potatoes are key. Frying over medium-high heat helps achieve a crispy texture.

4. What can I serve with German potato pancakes?

Apart from applesauce and sour cream, they’re delicious with bacon, smoked fish, or a side salad.

5. Can I bake instead of frying?

Yes, baking at 425°F on a parchment-lined baking sheet with a light oil spray is a healthier alternative, though the texture will be slightly different.


Final Thoughts: Enjoying the Best of German Comfort Food

German potato pancakes, with their crispy edges and tender centers, are a simple yet satisfying dish. Perfect for breakfast, as a side, or even a snack, they bring the comfort of German cuisine right to your kitchen. Whether you serve them with sweet applesauce or savory sour cream, they’re sure to become a family favorite. For more savory breakfast options, explore our Easy Breakfast Casserole for another comforting start to your day.