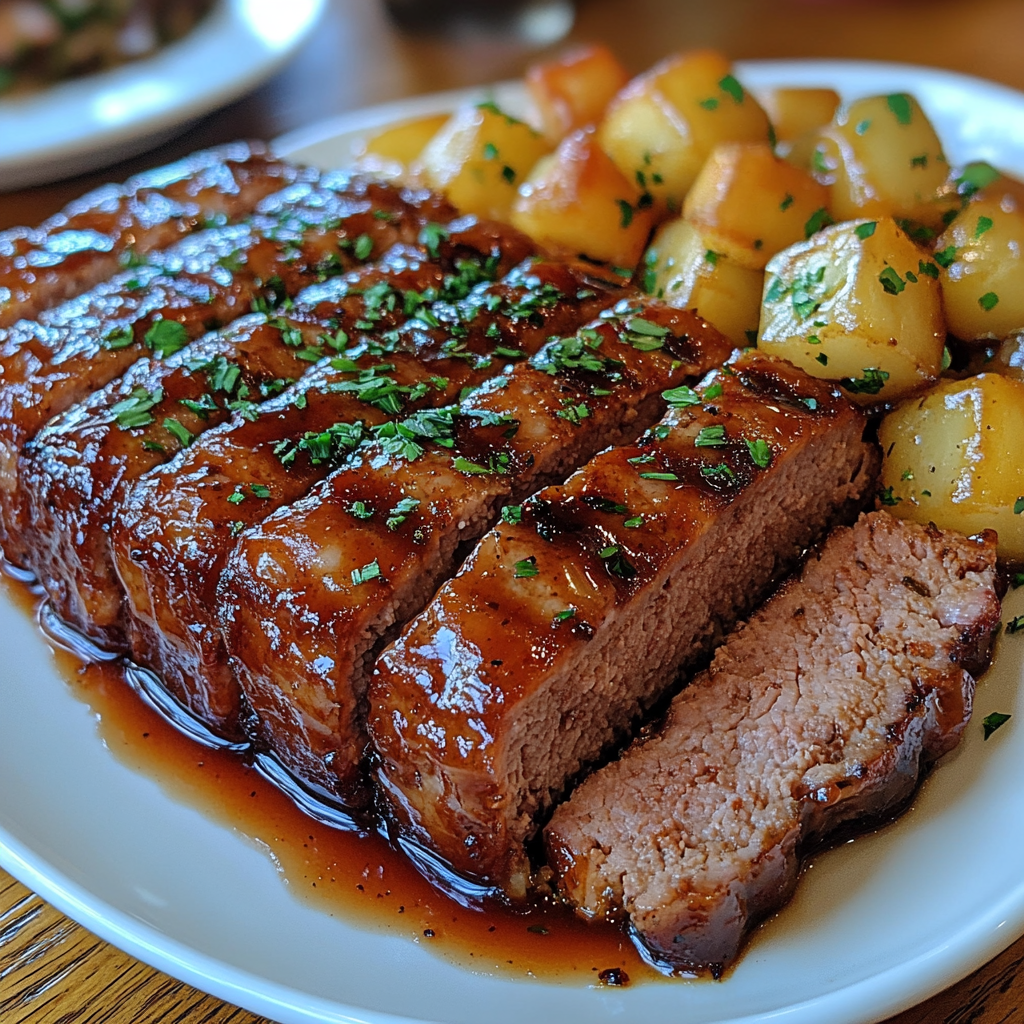
Cracker Barrel Meatloaf Recipe: Make This Delicious Copycat at Home

Cracker Barrel copycat meatloaf, homemade meatloaf recipe, Southern meatloaf, classic meatloaf with crackers, best meatloaf recipe, copycat meatloaf

Cracker Barrel Meatloaf Recipe: A Delicious Copycat Version

Cracker Barrel’s meatloaf is a staple of Southern comfort food, bringing savory flavors and hearty satisfaction to any meal. This recipe lets you recreate the Cracker Barrel meatloaf experience in your own kitchen, with just the right blend of ingredients and a delicious glaze to top it off. Whether you’re a fan of the classic flavor or interested in trying variations, this recipe is sure to become a family favorite.

Before you start cooking, check out this guide on Perfect Meatloaf Glaze from The Spruce Eats for tips on creating a flavorful glaze. For those planning a full meal, pair the meatloaf with a comforting dish like Crockpot Potato Soup from ExoRecipes, making an ideal side for a cozy dinner.


Ingredients for Cracker Barrel Meatloaf

To achieve the signature flavor and texture of Cracker Barrel’s meatloaf, high-quality ingredients are essential. Here’s what you’ll need:

  • Ground Beef: Use a mix of lean and regular ground beef for a balance of flavor and juiciness.
  • Crushed Crackers: Ritz crackers or saltines add a tender texture to the meatloaf.
  • Vegetables: Chopped onions and bell peppers give the meatloaf depth and a hint of sweetness.
  • Cheddar Cheese: Adds a savory, creamy richness.
  • Eggs and Milk: For binding and moisture.

Ingredients for the Glaze

  • Ketchup
  • Brown Sugar
  • Mustard: Adds a tangy kick.

If you’re interested in more recipes with a hearty, Southern flavor, you might enjoy Crock-Pot Baked Ziti from ExoRecipes, which offers a similar comfort food experience with minimal preparation.


Step-by-Step Instructions

  1. Preheat the Oven: Set your oven to 350°F (175°C).
  2. Prepare the Meat Mixture:
    • In a large bowl, combine ground beef, cracker crumbs, chopped onions, bell peppers, and cheddar cheese.
    • Add eggs and milk, then season with salt and pepper. Mix until just combined (overmixing can make the meatloaf tough).
  3. Shape the Meatloaf:
    • Press the mixture into a loaf shape and place it in a loaf pan or on a baking sheet lined with parchment paper.
  4. Prepare the Glaze:
    • In a small bowl, combine ketchup, brown sugar, and mustard. Stir until smooth.
    • Spread half of the glaze on top of the meatloaf before baking.
  5. Bake:
    • Bake in the preheated oven for 1 hour, or until the internal temperature reaches 160°F. About 15 minutes before the end of the cooking time, spread the remaining glaze on top for a shiny, caramelized finish.

Pro Tip:

If you’re exploring new variations, consider trying the No Peek Beef Tips from ExoRecipes. This dish offers another way to enjoy tender beef with a rich, flavorful sauce.


Serving Suggestions

Cracker Barrel meatloaf pairs wonderfully with classic sides that enhance its hearty flavors:

  • Mashed Potatoes: Creamy and smooth, mashed potatoes are a natural pairing.
  • Green Beans: Adds a crisp, fresh contrast to the meatloaf’s richness.
  • Cornbread: A touch of sweetness that balances the savory meat.

For more inspiration on sides, check out Best Side Dishes for Meatloaf from Delish, which offers a range of ideas to complement your meatloaf.


Flavor Variations and Tips

1. Gluten-Free Meatloaf

  • Substitute the crackers with gluten-free breadcrumbs or rolled oats for a similar texture.

2. Lower-Fat Version

  • Use ground turkey or chicken instead of beef. Add a touch of olive oil to maintain moisture.

3. Vegetarian Meatloaf

  • Swap ground beef for a plant-based meat substitute and use vegan cheese.

Tips for Success

  • Avoid Overmixing: Mixing too much can make the meatloaf tough.
  • Check for Doneness: Use a meat thermometer to ensure the internal temperature reaches 160°F.

Storing and Reheating Meatloaf

To keep your meatloaf fresh and delicious for future meals, follow these steps:

  • Refrigerating: Store leftover meatloaf in an airtight container for up to 3 days.
  • Freezing: Wrap individual slices in plastic wrap and place them in a freezer bag for up to 3 months.
  • Reheating: For best results, reheat in the oven at 250°F until warm. Add a bit of water or ketchup if it looks dry.

Looking for more inspiration? Try the Family Night Favorite: Easy French Bread Pizza, another comforting meal idea that pairs well with this meatloaf.


FAQs about Cracker Barrel Meatloaf

Q: Can I freeze Cracker Barrel Meatloaf?

Yes, you can freeze it either before or after cooking. Wrap tightly and store for up to 3 months. Thaw overnight in the fridge before reheating.

Q: What are good substitutes for Ritz crackers?

Breadcrumbs, panko, or crushed cornflakes work well as substitutes.

Q: How do I keep my meatloaf from falling apart?

Make sure to use eggs and a binder like crackers or breadcrumbs. Avoid overmixing.

Q: Can I make this meatloaf in an air fryer?

Yes, you can shape it to fit in the air fryer basket and cook at 350°F for about 25-30 minutes, checking for doneness with a thermometer.

Q: Can I make this dairy-free?

Use almond or oat milk and skip the cheese, or substitute with dairy-free cheese.


Conclusion

Cracker Barrel meatloaf is a classic comfort dish that’s perfect for any occasion, bringing warmth and nostalgia to your dinner table. With a few simple ingredients and steps, you can recreate this restaurant favorite at home, and with the tips provided, customize it to suit your taste and dietary needs.

For more comforting recipes, try the Slow Cooker Chicken and Gravy Over Noodles from ExoRecipes, which makes another great addition to family meals.
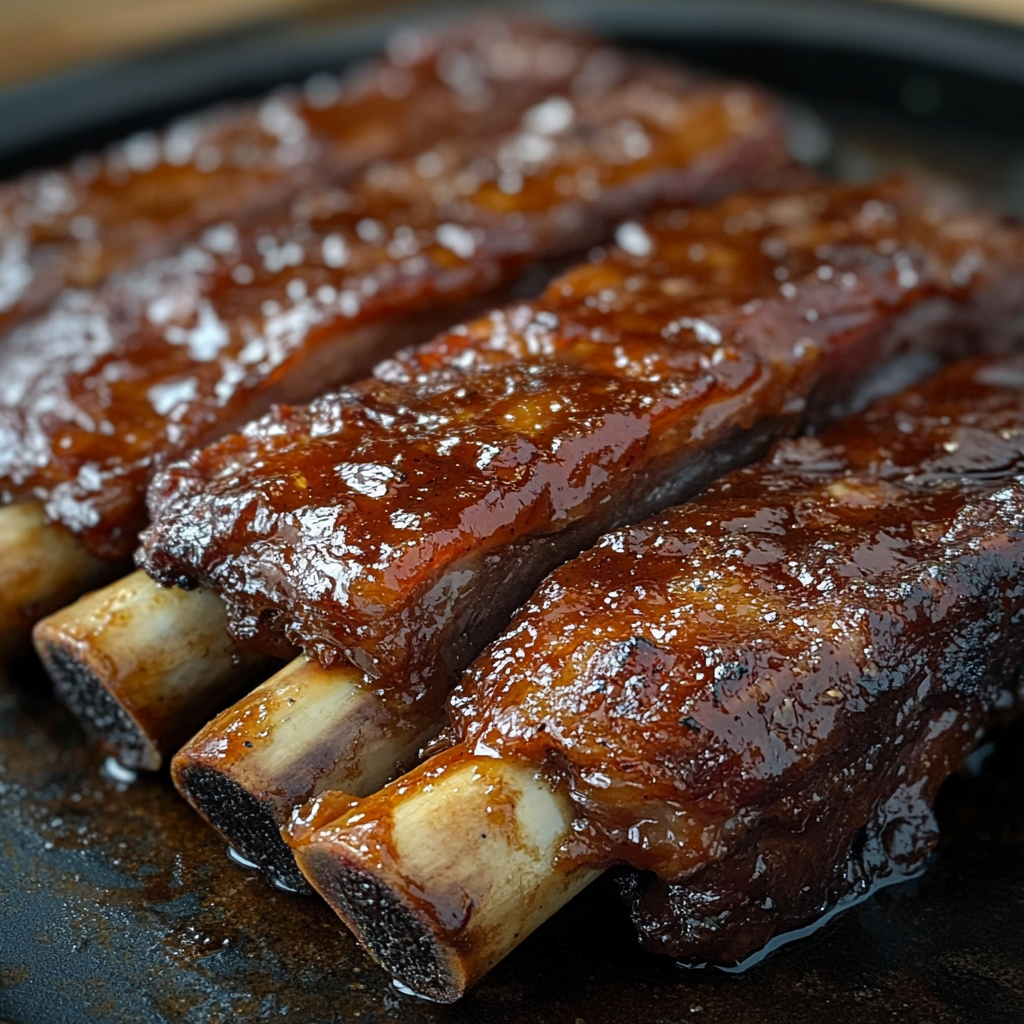
Slow Cooker Barbequed Beef Ribs Recipe: Tender, Flavorful, and Easy to Make

slow-cooked BBQ beef ribs, crockpot beef ribs, barbeque beef ribs, slow cooker BBQ ribs, tender beef ribs recipe, easy slow cooker ribs

Slow Cooker Barbequed Beef Ribs Recipe

For lovers of succulent, fall-off-the-bone ribs, there’s nothing quite like the flavors achieved by slow cooking. This Slow Cooker Barbequed Beef Ribs Recipe offers a blend of smoky, tangy, and slightly sweet flavors, making it an ideal main dish for gatherings or a cozy family dinner. With minimal preparation and easy-to-follow steps, these ribs will become a go-to comfort food in your kitchen. Plus, with a few side suggestions and flavor variations, you can customize the recipe to suit any preference.

Before diving into the recipe, check out this guide on choosing the perfect BBQ sauce style from Serious Eats. Whether you prefer a sweet or tangy sauce, selecting the right one can elevate the flavor of your beef ribs.

For those planning a full meal, pairing these ribs with a creamy dish like Ultimate Comfort Food: Crockpot Potato Soup is highly recommended. The combination of tender ribs and creamy potato soup creates a comforting, satisfying experience.


Ingredients for Slow Cooker BBQ Beef Ribs

To make this BBQ beef ribs recipe shine, high-quality ingredients and the right cuts are essential. Here’s what you’ll need:

  • Beef Ribs: Choose back ribs or short ribs for a balance of tenderness and flavor.
  • BBQ Sauce: Pick your favorite BBQ sauce, or make a homemade version.
  • Dry Rub: Create a rub using smoked paprika, garlic powder, onion powder, salt, and pepper.
  • Optional Additions: For added depth, consider adding brown sugar or cayenne pepper for a hint of heat.

If you’re interested in another slow-cooked meal to try, the Slow-Cooker Magic: Crockpot Baked Ziti is a simple, hearty pasta recipe that’s also great for gatherings.


Preparing the Beef Ribs for Slow Cooking

Preparation is the foundation of great ribs. A few extra steps can enhance the flavor profile of the ribs tremendously.

  1. Trim and Season: Rinse the ribs, pat them dry, and trim any excess fat for a leaner result.
  2. Marinate: Generously coat the ribs with your dry rub and let them marinate for at least 30 minutes. For more intense flavor, refrigerate and marinate overnight.
  3. BBQ Sauce Selection: Choose a sauce that complements the rub. Smoky or spicy sauces pair well with this recipe.

Pro Tip: If you enjoy beef dishes, try the No Peek Beef Tips. This flavorful recipe offers a similar melt-in-your-mouth experience with a unique seasoning blend.


Cooking the Ribs in the Slow Cooker

The beauty of a slow cooker is its ability to bring out rich, deep flavors with minimal effort.

  • Setting the Slow Cooker: Place the ribs in the slow cooker and add a small amount of water or beef broth to keep them moist.
  • Cook Time and Temperature:
    • Low: 8 hours for maximum tenderness.
    • High: 4 hours for a faster option.
  • Adding BBQ Sauce: Halfway through cooking, add half of the BBQ sauce. This lets the flavors meld into the meat. Save the other half for brushing on at the end.
  • Optional Finishing Touch: For a crispy exterior, broil the ribs for a few minutes after they’re done in the slow cooker.

Side Suggestions

To complete your meal, here are a few sides that pair perfectly with BBQ beef ribs:

  • Cornbread: Its subtle sweetness balances the savory BBQ flavors.
  • Coleslaw: Adds a crunchy, refreshing contrast.
  • Baked Beans: Enhance the BBQ theme with smoky, slightly sweet beans.

Consider adding a family favorite side like Easy French Bread Pizza as a tasty, satisfying complement to the ribs.


Flavor Variations

While classic BBQ ribs are delicious, don’t hesitate to experiment with flavors:

  1. Sweet and Spicy: Add honey and extra cayenne for a sweet-heat twist.
  2. Garlic-Herb: Mix rosemary, thyme, and garlic into the rub for a savory, aromatic flavor.
  3. Asian-Style: Incorporate soy sauce, ginger, and sesame oil for a fusion-inspired taste.

For a unique twist on potatoes as a side, try Chicken Bacon Ranch Potatoes. The creamy ranch flavor adds a new dimension to the BBQ ribs meal.


Storing and Reheating Leftover Ribs

Proper storage ensures your ribs stay juicy and delicious for days:

  • Storage: Wrap the ribs tightly in foil or an airtight container. Refrigerate for up to 3 days or freeze for up to 3 months.
  • Reheating: To retain moisture, reheat ribs in the oven at a low temperature (250°F) and brush with additional BBQ sauce before serving.

Another great leftover beef dish to try is the Perfect Ribeye Steak recipe. It’s an ideal choice if you want to explore new ways to cook beef.


FAQs about Slow Cooker BBQ Beef Ribs

Q: Can I use pork ribs instead of beef ribs?

Absolutely! Pork ribs work well with this recipe, though they may require less cooking time. Adjust the seasoning to complement the pork flavor.

Q: What if I don’t have a slow cooker?

You can achieve similar results in an oven. Set it to a low temperature (250°F) and bake for 6-8 hours, depending on the rib thickness.

Q: How do I make ribs less sweet or more spicy?

Modify the BBQ sauce by reducing sugar or adding hot sauce for extra heat.

Q: Should I brown the ribs before slow cooking?

Browning adds a caramelized flavor, but it’s optional. Searing the ribs in a skillet before placing them in the slow cooker can enhance the overall flavor.


Conclusion

This Slow Cooker BBQ Beef Ribs Recipe provides a straightforward method for creating restaurant-quality ribs at home. Perfect for family dinners, gatherings, or meal prepping, these ribs deliver a savory, tender experience with minimal effort. For more hearty and satisfying slow-cooker recipes, explore the Slow Cooker Chicken and Gravy Over Noodles for another comforting, slow-cooked delight.

With the right BBQ sauce, a few seasonings, and a good slow cooker, you’ll have a flavorful, melt-in-your-mouth dish that will become a regular favorite.

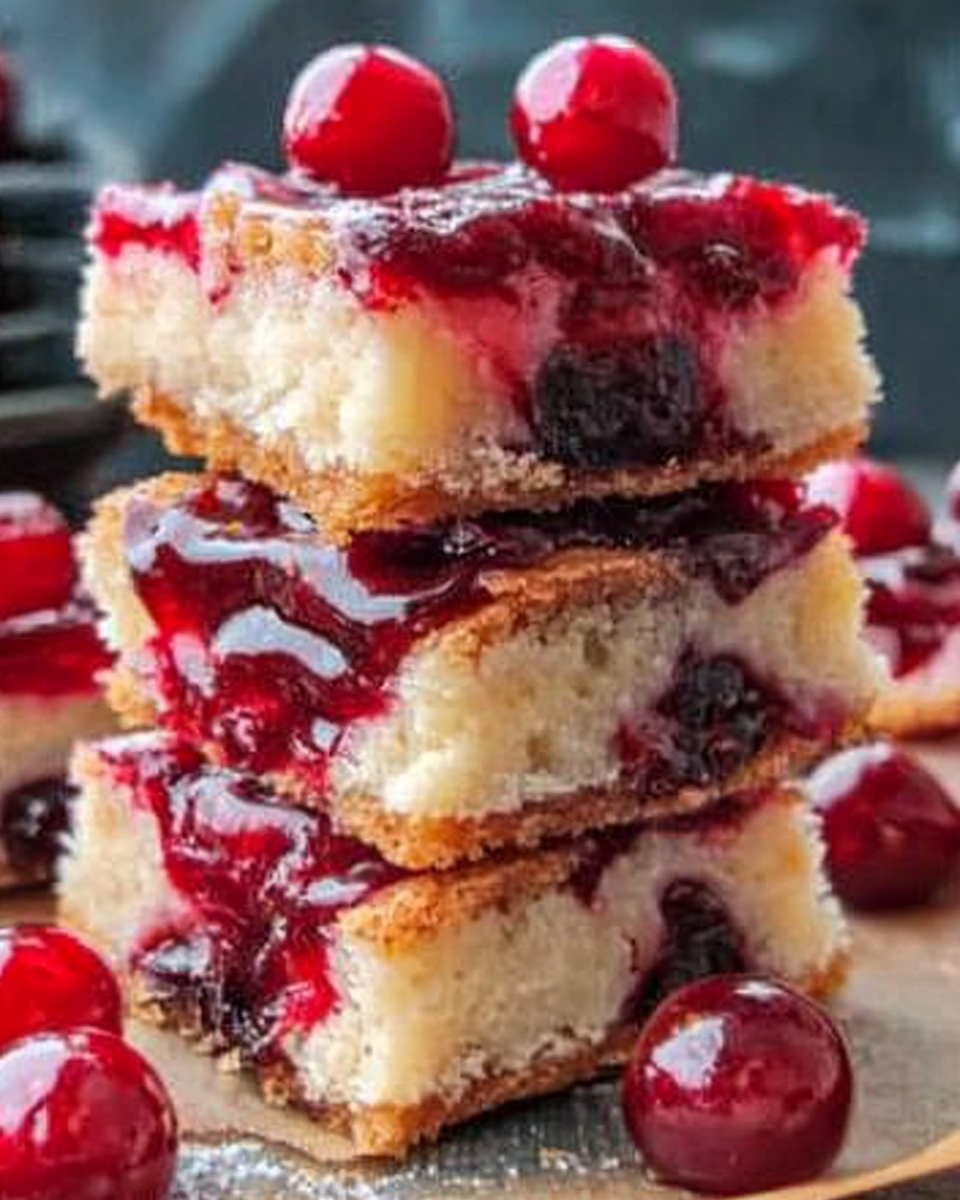
Christmas Cherry Bars: Festive and Easy Holiday Dessert Recipe

holiday cherry bars, festive cherry dessert, cherry bars recipe, Christmas dessert bars, cherry pie bars

Christmas Cherry Bars: A Festive Holiday Treat 🎄🍒

Nothing says Christmas quite like a festive dessert that’s easy to make, delicious, and perfect for sharing. Christmas Cherry Bars check all those boxes and more. With a buttery crust, a layer of tart cherry filling, and a crumbly topping, these bars are sure to be a holiday favorite. Whether you’re hosting a gathering or looking for a treat to gift, these bars make the perfect addition to your holiday dessert table.

For other easy holiday desserts, check out our Easy Apple Hand Pies for a quick, hand-held treat that’s just as delightful.

Ingredients for Christmas Cherry Bars

To make these delicious cherry bars, you’ll need the following ingredients:

  • Cherry Pie Filling: The main flavor component, providing a sweet and tangy taste.
  • All-Purpose Flour: For creating a light, crumbly texture.
  • Butter: Adds richness to the crust and topping.
  • Granulated Sugar: For sweetness in both the crust and topping.
  • Eggs: Helps bind the crust and adds richness.
  • Vanilla Extract: Enhances the flavors and adds warmth to the recipe.
  • Optional Add-Ins: Chopped nuts like pecans or almonds for added texture and flavor.

If you love fruity dessert bars, our Raspberry Lemon Bars with Shortbread Crust are another perfect option for a festive, flavorful treat.

Preparing the Base and Topping

  1. Creating the Crust
    • Combine flour, sugar, and softened butter until the mixture resembles coarse crumbs.
    • Press two-thirds of this mixture firmly into a greased baking pan to form the crust.
    • Set aside the remaining crumb mixture for the topping.
  2. Making the Cherry Layer
    • Spread the cherry pie filling evenly over the crust, ensuring an even layer for the perfect bite in every bar.
    • If desired, sprinkle nuts on top of the cherry layer for added crunch.
  3. Adding the Topping
    • Crumble the reserved mixture over the cherry layer, covering the cherries but allowing some to peek through.
    • Bake at 350°F (175°C) for about 30-35 minutes or until the top is golden brown and the filling is bubbly.

Serving Suggestions and Presentation

  1. Cutting and Serving
    • Allow the bars to cool completely in the pan before cutting for clean, defined edges.
    • Slice into squares or triangles for a festive look.
  2. Garnishing Ideas
    • Dust with powdered sugar for a snowy, holiday appearance.
    • Add a dollop of whipped cream or a drizzle of white chocolate for extra richness.

For a no-bake holiday dessert option, our No-Bake Pumpkin Cheesecake is another excellent choice for festive gatherings.


Creative Variations for Christmas Cherry Bars

  1. Chocolate Cherry Bars
    • Add chocolate chips to the crumb mixture or drizzle melted chocolate over the bars after they cool for a chocolate-cherry combination.
  2. Nutty Cherry Bars
    • Incorporate chopped walnuts, pecans, or almonds into the topping for an added crunch and nutty flavor.
  3. Tropical Cherry Bars
    • Add shredded coconut to the topping for a tropical twist that pairs wonderfully with the tart cherries.

Storage and Shelf Life Tips

  • Refrigeration: Store the bars in an airtight container in the refrigerator for up to one week.
  • Freezing: Wrap each bar individually in plastic wrap, then place in a freezer-safe container for up to three months. Thaw in the refrigerator overnight before serving.

Frequently Asked Questions (FAQs)

Can I use fresh cherries instead of canned cherry pie filling?

Yes, you can use fresh cherries if you prefer. Simply cook them down with a little sugar and cornstarch until they become thick and syrupy, similar to pie filling.

How do I prevent the bars from becoming soggy?

Ensure the bars are fully baked and allow them to cool completely before cutting. Storing them in an airtight container also helps maintain their texture.

Can I make these bars gluten-free?

Yes, substitute the all-purpose flour with a gluten-free flour blend that is suitable for baking.

How long can I store the bars at room temperature?

These bars are best stored in the refrigerator, especially if you plan to keep them for more than a day. They can stay at room temperature for a few hours, making them ideal for parties and gatherings.


Conclusion

Christmas Cherry Bars are a festive, flavorful addition to any holiday dessert spread. With a buttery crust, tart cherry filling, and crumbly topping, they capture the holiday spirit in each bite. Whether you’re preparing them for a holiday gathering or packaging them up as gifts, these bars are sure to be a hit.

Enjoy experimenting with these variations, and don’t forget to explore our other festive treats like Raspberry Lemon Bars with Shortbread Crust and No-Bake Pumpkin Cheesecake for more holiday dessert ideas!

Banana Vanilla Pudding Delight: A Creamy and Classic Dessert Recipe

banana pudding layers, vanilla banana dessert, classic banana vanilla pudding, banana vanilla trifle, creamy banana pudding

Banana Vanilla Pudding Delight: A Creamy, Classic Dessert

Banana Vanilla Pudding Delight is a timeless, creamy dessert that layers ripe bananas with rich vanilla pudding and crunchy wafers. Perfect for gatherings and nostalgic for many, this dessert brings a touch of Southern charm to the table. Whether you’re a fan of banana pudding or simply looking for an easy-to-make treat, this recipe is sure to impress.

For a more traditional approach, try our Southern Banana Pudding Classic Recipe, where the flavors of classic banana pudding truly shine.

Ingredients for Banana Vanilla Pudding Delight

To make this creamy delight, gather the following ingredients:

  • Vanilla Pudding Mix: For a quick and easy base, use instant pudding mix or make it from scratch.
  • Milk: To mix with the pudding for a creamy consistency.
  • Bananas: Ripe but firm bananas for the best flavor and texture.
  • Vanilla Wafers: Adds a crunchy texture and layers of flavor.
  • Whipped Cream: Optional for topping.
  • Sweetened Condensed Milk (Optional): Adds extra richness and depth to the pudding.

If you’d like to make your own condensed milk, check out our Homemade Sweetened Condensed Milk recipe for a simple, creamy alternative.

Preparing the Vanilla Pudding

  1. Making the Pudding
    • If using instant pudding mix, follow package instructions for a thick, creamy consistency.
    • For homemade pudding, combine milk, sugar, cornstarch, and vanilla extract in a saucepan. Cook over medium heat, stirring constantly until thickened.
    • Let the pudding cool before layering it with the bananas and wafers.
  2. Choosing the Bananas
    • Use ripe, yellow bananas with minimal browning for the perfect balance of sweetness and firmness.
    • Slice them evenly to ensure each layer of the dessert has a consistent banana flavor.

Assembling the Banana Vanilla Pudding Delight

  1. Creating Layers
    • First Layer: Place a single layer of vanilla wafers on the bottom of a serving dish.
    • Second Layer: Add a layer of banana slices over the wafers.
    • Third Layer: Spread a thick layer of vanilla pudding over the bananas.
  2. Repeat and Finish
    • Continue layering wafers, bananas, and pudding until you reach the top of your dish.
    • End with a final layer of pudding and top with whipped cream, banana slices, or crushed wafers for garnish.
    • Cover and refrigerate for at least 2 hours to allow flavors to meld.

For an alternative twist, check out our No-Bake Banana Pudding Cheesecake, combining the best of cheesecake and banana pudding.


Creative Variations for Banana Vanilla Pudding Delight

  1. Cream Cheese Addition
    • Add a layer of sweetened cream cheese for an extra creamy, tangy flavor.
    • Mix softened cream cheese with powdered sugar and spread between pudding layers.
  2. Nutty Banana Pudding
    • Sprinkle chopped pecans or walnuts between layers for a nutty crunch that complements the creamy pudding.
  3. Chocolate Banana Delight
    • Add a layer of chocolate ganache or chocolate shavings for a chocolatey twist.

Serving Suggestions and Storage Tips

  • Presentation Ideas: Use small glass cups or jars for individual servings, showcasing each layer.
  • Garnishing Tips: Top with whipped cream, caramel drizzle, or a few extra wafers for added crunch.
  • Storage: Refrigerate in an airtight container for up to 3 days. Avoid storing bananas directly on top to prevent browning.

Frequently Asked Questions (FAQs)

Can I use homemade vanilla pudding instead of instant?

Yes, homemade pudding works beautifully in this recipe. Use a vanilla custard recipe if you prefer a richer, more decadent base.

How can I keep bananas from browning?

Layer bananas in lemon juice briefly before adding them to the dish, or cover the top layer with pudding to minimize air exposure.

Can I make this dessert in advance?

Yes, banana pudding is best made in advance as chilling allows flavors to meld. However, add whipped cream and garnish just before serving.


Conclusion

Banana Vanilla Pudding Delight is a classic dessert that brings creamy layers of vanilla pudding, fresh bananas, and crunchy wafers together in a dish perfect for any occasion. Whether you’re hosting a family gathering or looking for a nostalgic treat, this pudding will bring smiles all around.

For a more elaborate dessert, try pairing this with our No-Bake Banana Pudding Cheesecake for a delightful duo that everyone will love!

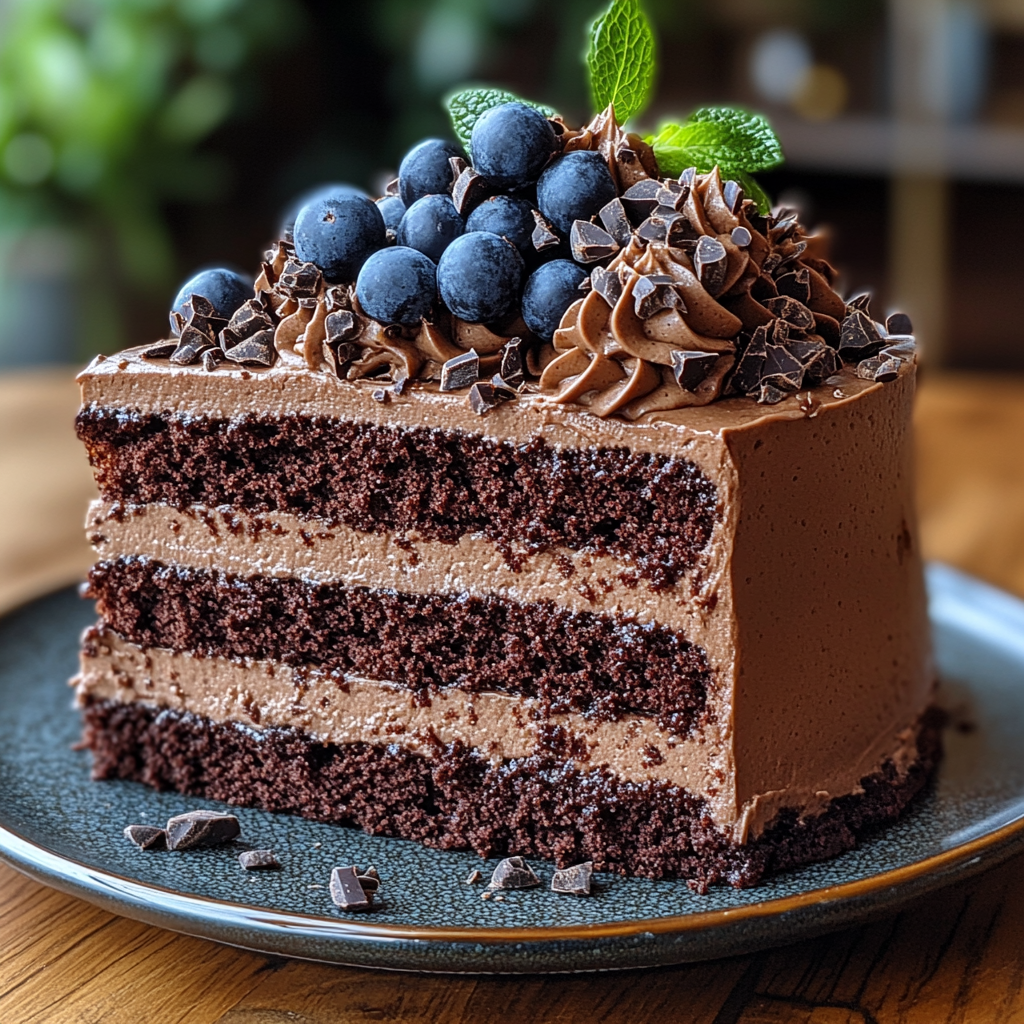
Triple Chocolate Mousse Cake Dream Come True: A Decadent Dessert Recipe

three-layer chocolate mousse cake, chocolate lover’s mousse cake, decadent chocolate mousse dessert, layered mousse cake recipe, chocolate mousse delight

Triple Chocolate Mousse Cake Dream Come True: A Chocolate Fantasy in Layers

Imagine sinking your fork into layers of rich, creamy mousse made from dark, milk, and white chocolate, all resting on a moist chocolate cake base. This Triple Chocolate Mousse Cake is a luxurious dessert perfect for any special occasion, making it a true dream come true for chocolate lovers.

For those who want a simpler but equally creamy treat, try our Mama Dee’s Never-Fail Creamy Fudge for a guaranteed smooth texture and rich chocolate flavor.

Ingredients for Triple Chocolate Mousse Cake

To make this indulgent dessert, gather the following ingredients:

  • Cake Base: Flour, cocoa powder, sugar, eggs, butter, and vanilla.
  • Dark Chocolate Mousse: Dark chocolate, heavy cream, and gelatin for setting.
  • Milk Chocolate Mousse: Smooth milk chocolate, whipped cream, and gelatin.
  • White Chocolate Mousse: Creamy white chocolate blended with whipped cream and a hint of gelatin for firmness.
  • Optional Toppings: Chocolate shavings, cocoa powder dusting, or a drizzle of chocolate ganache.

For a twist on chocolate desserts, our Gone to Heaven Chocolate Pie is another recipe that truly satisfies a chocolate craving.


Preparing the Triple Chocolate Mousse Cake

  1. Making the Cake Base
    • Instructions: Mix flour, cocoa powder, sugar, and baking powder in a bowl. Add melted butter, eggs, and vanilla extract, stirring until smooth.
    • Baking: Pour the mixture into a greased springform pan and bake at 350°F (175°C) for about 20-25 minutes, or until a toothpick comes out clean.
    • Cooling: Let the cake cool completely in the pan, as it will be the base for the mousse layers.
  2. Creating the Dark Chocolate Mousse Layer
    • Melt dark chocolate in a double boiler, stirring until smooth.
    • Whip the cream to soft peaks, then fold in the melted chocolate and gelatin.
    • Spread the dark chocolate mousse evenly over the cooled cake base. Chill in the refrigerator for at least 30 minutes.

Assembling the Milk Chocolate and White Chocolate Mousse Layers

  1. Milk Chocolate Mousse Layer
    • Melt milk chocolate and allow it to cool slightly.
    • Fold the chocolate into whipped cream with dissolved gelatin, then spread evenly over the dark chocolate layer.
    • Chill for another 30 minutes to allow the mousse to set.
  2. White Chocolate Mousse Layer
    • Melt white chocolate carefully to avoid burning, then fold it into whipped cream and gelatin.
    • Spread over the milk chocolate layer and refrigerate the entire cake for 4 hours or overnight for best results.

For an extra treat, you can try our Decadent Caramel Chocolate Cupcakes for a dessert that combines chocolate and caramel in a delicious way.


Decorating and Serving Ideas

Triple Chocolate Mousse Cake is as beautiful as it is delicious. Here are some ways to add the finishing touch:

  • Chocolate Curls or Shavings: Use a vegetable peeler to make chocolate curls and sprinkle them on top.
  • Dusting with Cocoa Powder: For a classic look, dust the top with a fine layer of cocoa powder.
  • Ganache Drizzle: Drizzle chocolate ganache over each slice for an extra decadent presentation.

Frequently Asked Questions (FAQs)

How can I make this cake gluten-free?

Use a gluten-free flour blend for the cake base to accommodate dietary needs.

How do I keep the mousse layers light and fluffy?

Be careful not to over-mix the whipped cream when folding in the chocolate. Gently fold to maintain the airy texture.

Can I use agar-agar instead of gelatin?

Yes, but adjust the amount, as agar-agar is more potent. Follow package instructions for best results.

What’s the best way to slice the cake cleanly?

Use a sharp knife dipped in hot water, wiping the blade between slices for neat, clean cuts.


Conclusion

With three layers of mousse and a chocolate cake base, this Triple Chocolate Mousse Cake truly is a dream come true. Perfect for special celebrations, this cake is sure to be the star of any dessert table. Whether you’re a dark chocolate lover or partial to the smoothness of milk and white chocolate, this cake has something for everyone.

Enjoy this indulgent dessert, and don’t forget to explore more of our chocolate-inspired treats like Gone to Heaven Chocolate Pie and Mama Dee’s Never-Fail Creamy Fudge for more chocolate bliss.