Winter Wonderland Chocolate Chip Christmas Cookies: A Festive Treat

festive chocolate chip cookies, holiday chocolate chip cookies, Christmas chocolate chip cookies, winter-themed cookies, peppermint chocolate chip cookies

Winter Wonderland Chocolate Chip Christmas Cookies

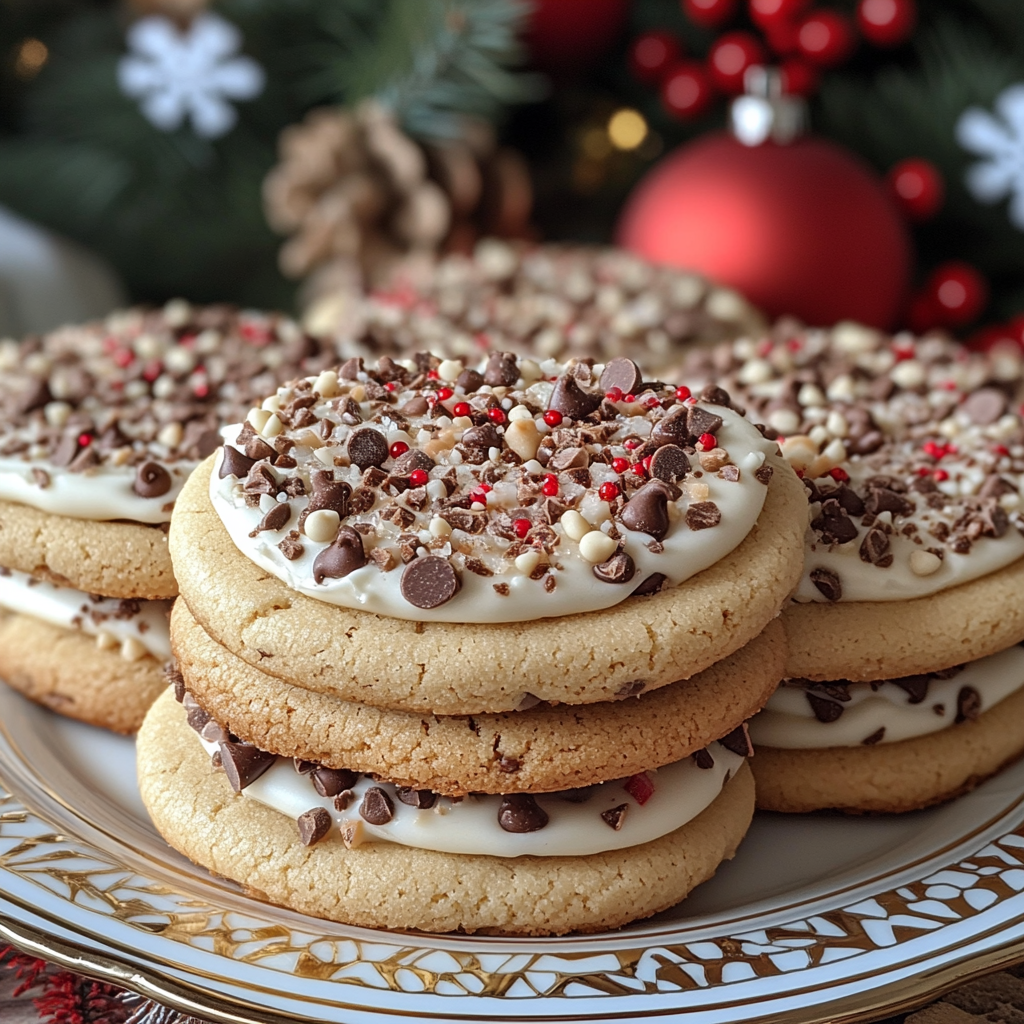
Winter Wonderland Chocolate Chip Christmas Cookies bring together the timeless appeal of chocolate chip cookies with a festive twist perfect for the holiday season. Packed with white chocolate chips, crushed peppermint candy, and glittery decorations, these cookies are sure to become a family favorite. Whether you’re hosting a cozy gathering or preparing holiday gift boxes, these cookies bring the magic of a winter wonderland to life.

For those looking to master baking techniques, explore King Arthur Baking for tips on achieving flawless cookie dough. Additionally, decorate your creations like a professional with insights from Wilton’s Decorating Guide.


Why These Cookies are a Must-Try

These cookies stand out because of their versatility. They’re not just delicious—they’re a canvas for your creativity. The combination of semi-sweet chocolate chips, peppermint sprinkles, and white chocolate drizzle delivers layers of flavor. The festive decorations add a magical charm, making these cookies perfect for holiday celebrations.

Pair these cookies with a comforting soup like Crockpot Potato Soup for a cozy winter treat.


Ingredients to Make the Magic Happen

Core Ingredients

  • 2 1/4 cups all-purpose flour
  • 1 tsp baking soda
  • 1/2 tsp salt
  • 1 cup (2 sticks) unsalted butter, softened
  • 3/4 cup granulated sugar
  • 3/4 cup packed brown sugar
  • 1 tsp vanilla extract
  • 2 large eggs
  • 2 cups semi-sweet chocolate chips

Winter Wonderland Add-Ons

  • 1 cup white chocolate chips
  • 1/2 cup crushed peppermint candy
  • Edible glitter or sugar crystals
  • Snowflake sprinkles

Optional Additions

  • A few drops of peppermint extract
  • A pinch of cinnamon for warmth

These ingredients ensure the cookies have both the classic chocolate chip flavor and a holiday flair. For additional festive recipes, check out Kentucky Butter Cake, which complements these cookies beautifully.


Step-by-Step Baking Instructions

  1. Preheat and Prep
    • Preheat your oven to 350°F (175°C).
    • Line two baking sheets with parchment paper.
  2. Mix Dry Ingredients
    • In a medium bowl, whisk together flour, baking soda, and salt. Set aside.
  3. Cream Butter and Sugars
    • In a large bowl, beat butter, granulated sugar, and brown sugar until fluffy.
    • Add vanilla extract and eggs one at a time, mixing well after each addition.
  4. Combine and Add Mix-Ins
    • Gradually add the dry ingredients to the wet mixture.
    • Stir in chocolate chips, white chocolate chips, and crushed peppermint candy.
  5. Chill and Shape
    • Chill the dough for 30 minutes. This helps maintain the cookie shape during baking.
    • Roll dough into balls (about 1.5 tablespoons each) and place on the prepared baking sheets.
  6. Bake and Cool
    • Bake for 10-12 minutes or until the edges are golden brown.
    • Let cookies cool on the baking sheet for 2 minutes before transferring to a wire rack.

Decorating Like a Pro

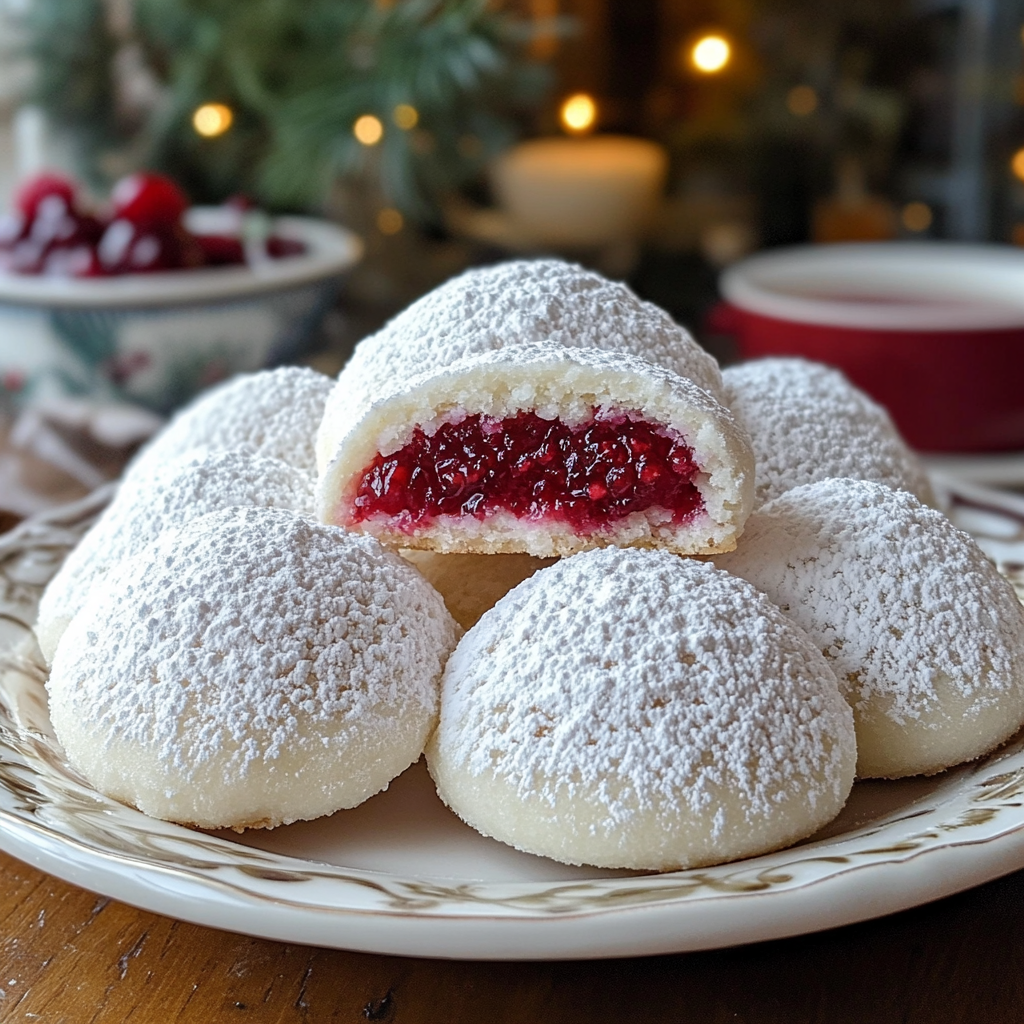
  • Snowy Look: Dust cookies with powdered sugar after baking for a frosty finish.
  • Icing Touch: Drizzle melted white chocolate or royal icing in zigzag patterns.
  • Shimmering Magic: Sprinkle edible glitter or snowflake sprinkles while the icing is wet for a dazzling effect.

Looking for more holiday-themed decorations? The article on Cinnamon Roll Cookies with Cream Cheese Drizzle provides additional ideas for festive cookie designs.


Creative Variations

  • Peppermint Explosion: Double the crushed peppermint for an intense minty flavor.
  • Vegan Adaptation: Replace butter with plant-based margarine and eggs with flaxseed meal.
  • Gluten-Free Option: Swap all-purpose flour with a gluten-free blend.

Perfect Pairings

These cookies are a delightful standalone treat, but pairing them with other holiday recipes can elevate your dessert table.


Pro Tips for Perfect Cookies

  • Chilling Dough: Ensures the cookies hold their shape during baking.
  • Even Sizing: Use a cookie scoop for consistent results.
  • Avoid Overbaking: Remove the cookies when edges are golden; the centers will set as they cool.

FAQs About Winter Wonderland Chocolate Chip Cookies

1. How can I store these cookies?

Store in an airtight container at room temperature for up to one week or freeze for up to three months.

2. Can I prepare the dough ahead of time?

Yes, refrigerate the dough for up to three days. Let it come to room temperature before baking.

3. What makes these cookies “Winter Wonderland”?

The use of white chocolate, peppermint candy, and edible glitter captures the essence of winter.

4. Can I use dark chocolate instead of semi-sweet?

Absolutely! Dark chocolate adds a richer flavor to the cookies.


Internal Linking Opportunities


Conclusion

Winter Wonderland Chocolate Chip Christmas Cookies are more than just a treat—they’re a symbol of holiday joy and creativity. With their festive decorations and rich flavors, they’re perfect for sharing or gifting. By incorporating peppermint sprinkles, white chocolate chips, and a touch of edible glitter, you’ll create cookies that are as beautiful as they are delicious.

Perfect Brown Sugar Ham Glaze Recipe: Sweet & Savory for Any Occasion

ham glaze with brown sugar, brown sugar glaze recipe, sweet ham glaze, caramelized ham glaze, holiday ham glaze

Perfecting Your Brown Sugar Ham Glaze

Indulge in the symphony of flavors that only a Brown Sugar Ham Glaze can deliver. Whether you’re preparing for a holiday feast or simply elevating your culinary skills, mastering the art of glazing is essential. In this guide, we’ll explore ingredients, methods, and tips that promise to make your ham the centerpiece of any table.


Why Choose a Brown Sugar Ham Glaze?

The Brown Sugar Ham Glaze has become synonymous with festive meals due to its unmatched ability to marry sweetness and spice. This culinary technique creates a caramelized crust, locking in moisture and flavor. The combination of brown sugar, spices, and acidic notes such as pineapple juice creates a versatile glaze that complements the smoky richness of ham.

For additional inspiration, check out recipes for Honey Garlic Boneless Pork Chops and Sweetly Glazed Pork Loin, which showcase how glazing techniques can transform dishes.


Essential Ingredients for the Ultimate Glaze

Creating the perfect glaze requires a balance of flavors. Here are the must-have ingredients:

  • Brown Sugar: The star ingredient that caramelizes beautifully.
  • Mustard: Adds a tangy contrast.
  • Honey or Maple Syrup: Enhances sweetness while adding complexity.
  • Spices: Cinnamon, cloves, or nutmeg for warmth.
  • Acidic Element: Pineapple juice, orange zest, or even a splash of bourbon.

For inspiration on additional flavors, explore how ingredients like citrus are incorporated in Homemade Picadillo with Flour Tortillas.


Step-by-Step Recipe for Brown Sugar Glaze

Ingredients:

  • 1 cup brown sugar
  • 2 tablespoons honey
  • 1 tablespoon Dijon mustard
  • 1/4 cup pineapple juice
  • 1/4 teaspoon cinnamon
  • Optional: 2 tablespoons bourbon

Directions:

  1. Combine Ingredients: Mix all ingredients in a saucepan over medium heat. Stir continuously until the sugar dissolves.
  2. Simmer: Allow the mixture to simmer for 5 minutes until slightly thickened.
  3. Apply: Brush the glaze onto the ham in layers during the last 30 minutes of baking.

Enhance your meal with sides like Cheesy Bacon Jalapeño Corn Dip for a perfect pairing.


Tips for Applying and Baking

Mastering the application is just as crucial as the recipe itself.

  • Layer Gradually: Apply multiple layers of glaze during the cooking process for depth of flavor.
  • Prevent Burning: Cover the ham with foil if the glaze darkens too quickly.
  • Resting: Let the ham rest for 15 minutes before carving to retain juices.

Common Mistakes and How to Avoid Them

  • Skipping Layers: Applying glaze only once will result in a bland flavor profile.
  • Overcooking: Use a thermometer to ensure the internal temperature doesn’t exceed 145°F.
  • Poor Quality Ingredients: Always opt for fresh spices and high-quality brown sugar.

For additional cooking tips, visit the guide on Perfect Ribeye Steak.


FAQs About Brown Sugar Ham Glaze

1. Can I substitute white sugar for brown sugar?

While possible, it will lack the caramelized depth of brown sugar. For best results, stick to the classic.

2. How do I store leftover glazed ham?

Store in an airtight container in the fridge for up to five days. Reheat gently to maintain moisture.

3. What sides pair well with glazed ham?

Consider pairing with Garlic Bacon Kale or a fresh Apple Cranberry Walnut Salad.

4. Can I make the glaze ahead of time?

Yes, prepare the glaze up to two days in advance and store it in the refrigerator. Reheat before use.


Creative Variations to Try

1. Pineapple-Brown Sugar Glaze

Add crushed pineapple to the glaze mixture for a tropical twist.

2. Spicy Maple Glaze

Incorporate chili flakes or cayenne pepper for heat.

3. Bourbon-Barrel Glaze

Replace some of the pineapple juice with bourbon for a smoky undertone.


Serving and Presentation Tips

  • Slice the ham thinly and arrange on a platter with roasted vegetables for a stunning presentation.
  • Use leftover ham in recipes like casseroles or sandwiches for added versatility.

Internal Linking Opportunities

For additional user engagement, link to the following internal recipes:


Conclusion

Elevate your holiday feast or special occasion with the irresistible combination of sweet and savory that only a Brown Sugar Ham Glaze provides. With the right ingredients, application techniques, and pairings, you’ll deliver a show-stopping dish that leaves everyone asking for seconds.

The Best Banana Pudding Ever: A Creamy Southern Dessert Recipe

banana pudding recipe, Southern banana pudding, creamy banana dessert, banana custard dessert, homemade banana pudding, classic banana pudding

The Best Banana Pudding Ever: A Timeless Classic Dessert

Introduction

Banana pudding is a dessert that transcends time, bringing together the comforting taste of ripe bananas, the smoothness of vanilla custard, and the delightful crunch of wafers in perfect harmony. Its appeal lies in its simplicity, yet it remains one of the most beloved desserts in the United States, especially in the South.

Making the best banana pudding ever requires attention to detail. From selecting the ripest bananas to mastering a silky custard, every step contributes to the ultimate dessert experience. If you’re just starting out with custard-based desserts, explore How to Make Homemade Custard to ensure you achieve the right consistency every time.


A Brief History of Banana Pudding

While its exact origins are unclear, banana pudding became popular in the United States in the early 20th century. Its rise coincided with the increasing availability of bananas, a tropical fruit that quickly became a kitchen staple. Traditional banana pudding recipes featured layers of sponge cake, which were later replaced by vanilla wafers for added crunch.

Banana pudding has since become a Southern icon, served at family gatherings and potlucks alike. For insights into the history and cultural significance of Southern desserts, check out Southern Dessert Traditions.


Key Ingredients for the Best Banana Pudding

Creating the best banana pudding requires the right ingredients. Each one plays a critical role in achieving the perfect flavor and texture.

Essential Ingredients:

  • Bananas: Choose bananas that are ripe but firm to avoid mushiness.
  • Vanilla Wafers: These are the foundation of the dish, adding texture and sweetness.
  • Custard Base: A rich, homemade vanilla custard elevates the dessert’s flavor.
  • Whipped Topping: Fresh whipped cream adds lightness to balance the creamy custard.

Optional Additions:

  • Chocolate Shavings: Sprinkle on top for added decadence.
  • Coconut Flakes: Lightly toasted, they bring a tropical twist.
  • Caramel Sauce: Drizzle over the layers for a rich, sweet finish.

If you enjoy experimenting with flavors, consider trying Homemade Banana Pudding Ice Cream for a frozen variation of this classic dessert.


Step-by-Step Recipe for Banana Pudding

Preparing the Custard

  1. Mix Ingredients: In a saucepan, combine sugar, cornstarch, and a pinch of salt. Gradually whisk in milk.
  2. Cook the Mixture: Heat over medium, stirring constantly, until thickened.
  3. Temper the Eggs: In a separate bowl, beat egg yolks. Slowly add a small amount of the hot milk mixture, whisking constantly, then return the mixture to the saucepan.
  4. Finish with Vanilla: Remove from heat, stir in vanilla extract, and cool.

Assembling the Layers

  1. Base Layer: Spread a layer of vanilla wafers at the bottom of your dish.
  2. Add Bananas: Slice bananas evenly and layer them over the wafers.
  3. Spread Custard: Pour custard over the banana layer and smooth out with a spatula.
  4. Repeat Layers: Continue layering wafers, bananas, and custard until the dish is full, finishing with a custard layer on top.

Final Touches

  • Top with Whipped Cream: Spread whipped cream or meringue over the final layer of custard.
  • Garnish: Add crushed wafers or banana slices for decoration.

Tips for the Perfect Banana Pudding

To elevate your banana pudding from good to exceptional, follow these expert tips:

  • Prevent Soggy Wafers: Assemble shortly before serving or use a thicker custard to limit moisture absorption.
  • Keep Bananas Fresh: Toss banana slices in lemon or pineapple juice to prevent browning.
  • Add Texture: Sprinkle nuts, like pecans, between layers for an extra crunch.

For another variation of this beloved dessert, try No-Bake Banana Split Cheesecake, which incorporates similar ingredients in a chilled, no-bake format.


Nutritional Breakdown and Adjustments

Traditional banana pudding is rich and indulgent, but there are ways to adapt it for various dietary preferences.

Nutritional Overview

  • Calories: Around 300–400 per serving, depending on portion size.
  • Key Nutrients: High in potassium (from bananas) and protein (from custard and cream).

Healthier Alternatives

  • Low-Calorie Version: Use low-fat milk and sugar substitutes in the custard.
  • Gluten-Free Option: Swap vanilla wafers with gluten-free cookies.
  • Vegan-Friendly: Replace milk with almond or coconut milk, and use a plant-based whipped topping.

Variations of Banana Pudding

Southern Classic Banana Pudding

This version includes meringue on top, baked briefly for a golden finish. It’s a staple at Southern gatherings and loved for its homemade custard.

No-Bake Banana Pudding

A convenient option that layers instant vanilla pudding, bananas, and whipped cream. Ideal for quick preparations.

Gourmet Banana Pudding

Add layers of Nutella, salted caramel, or coffee-flavored custard for a modern, indulgent twist.


Serving Suggestions and Pairings

  • Serving Style: Present banana pudding in individual jars or cups for a visually appealing dessert option.
  • Pairings:
    • A hot cup of coffee or espresso balances the sweetness.
    • A glass of sweet iced tea adds a Southern touch.
  • Garnishes: Top with shaved chocolate or a drizzle of caramel for extra flair.

For more ideas, explore Homemade Fried Donuts as a complementary dessert for a larger spread.


FAQs About Banana Pudding

1. How can I keep bananas from browning?

Toss banana slices in lemon or pineapple juice before layering them.

2. Can banana pudding be made in advance?

Yes, prepare it up to 24 hours in advance. Add the whipped topping just before serving.

3. Is banana pudding freezer-friendly?

Freezing can alter the texture of the custard and bananas, so it’s best enjoyed fresh.

4. Are there gluten-free alternatives for banana pudding?

Yes, use gluten-free cookies in place of vanilla wafers.

5. What’s the best way to store banana pudding?

Cover tightly with plastic wrap and refrigerate for up to 3 days.


Internal Linking Opportunities

To improve user navigation and engagement on ExoRecipes, consider adding internal links to:


Conclusion

Banana pudding is more than just a dessert—it’s a cherished tradition that continues to delight people of all ages. Whether you stick to the classic Southern recipe or explore modern twists, this dish is a guaranteed crowd-pleaser. By following the tips and techniques outlined above, you’ll create a pudding that’s not just good but unforgettable. Don’t forget to pair it with Homemade Fried Donuts for an indulgent dessert spread everyone will love!

Beef-Stuffed Shells with Creamy Ricotta Filling: The Ultimate Comfort Food Recipe

beef and ricotta pasta, stuffed pasta shells recipe, ricotta-filled jumbo shells, Italian stuffed shells, creamy beef-stuffed pasta

Beef-Stuffed Shells with Creamy Ricotta Filling: A Comforting Italian Recipe

Nothing says comfort food quite like beef-stuffed shells with a creamy ricotta filling. This classic Italian-American dish combines tender pasta, seasoned beef, creamy cheese, and rich marinara sauce, all baked to bubbling perfection. It’s an ideal meal for family gatherings or special occasions, bringing warmth and satisfaction to the table.

Before you dive into the recipe, let’s look at the ingredients and tips for achieving the best results. By following these guidelines, you’ll create a dish that’s rich in flavor and texture—ideal for impressing guests or simply indulging yourself on a cozy night in.


Ingredients and Their Roles

To make these beef-stuffed shells, you’ll need just a few staple ingredients. Each plays a crucial role in building the flavor and texture of the dish:

  • Jumbo pasta shells: The ideal shape for holding the creamy ricotta and beef filling.
  • Ground beef: Adds savory flavor and texture to the filling.
  • Ricotta cheese: For a smooth, creamy base that complements the beef.
  • Mozzarella and Parmesan cheeses: Offer gooey and nutty flavors to the dish.
  • Marinara sauce: A classic tomato base that ties everything together.
  • Herbs and spices (garlic, oregano, basil): Essential for depth and warmth.

These ingredients come together to create a harmonious and satisfying meal. The mixture of beef and cheeses, paired with marinara, brings a depth of flavor that’s hard to beat.

For tips on how to create the best Italian casseroles, check out Italian Casserole Cooking Tips. This guide offers insights on layering and seasoning that can take your dish to the next level.


Step-By-Step Recipe Instructions

Let’s dive into the step-by-step instructions for assembling and baking this delightful dish. Preparing the ingredients separately before combining them ensures a smooth process from start to finish.

Step 1: Prepare the Pasta and Filling

  1. Cook the pasta shells: Boil the jumbo pasta shells according to the package instructions until al dente. Drain and set aside to cool slightly.
  2. Cook the ground beef: In a skillet, cook the beef with garlic and oregano. Season with salt and pepper to taste. Drain any excess fat.
  3. Prepare the ricotta filling: In a large bowl, combine the ricotta, mozzarella, and Parmesan cheeses with a sprinkle of basil. Mix until smooth and creamy.

Step 2: Stuff and Assemble the Shells

  1. Stuff the shells: Once cooled, spoon the ricotta and beef filling into each shell. Use about a tablespoon of filling for each, adjusting based on the shell size.
  2. Layer the marinara sauce: Spread a thin layer of marinara sauce in the bottom of a baking dish. Place the stuffed shells in a single layer on top of the sauce.

For additional ideas on perfecting this classic Italian pasta bake, refer to Healthy Pasta Recipe Alternatives, which can offer unique tips for healthier ingredient swaps and flavor variations.

Step 3: Bake the Shells

  1. Add more marinara sauce: Pour the remaining marinara sauce over the shells.
  2. Top with cheese: Sprinkle additional mozzarella on top of the shells for a gooey finish.
  3. Bake: Preheat your oven to 375°F (190°C) and bake the shells for 25-30 minutes, or until the cheese is melted and bubbly.

Tips for a Perfectly Baked Dish

Creating a perfectly baked beef-stuffed shell dish involves attention to small details. Here are some additional tips:

  • Use fresh ricotta for a creamier filling.
  • Cook pasta to al dente to avoid mushy shells after baking.
  • Balance your seasoning by tasting the filling before stuffing the shells.
  • Layer sauce carefully to prevent dryness.
  • Cover the baking dish with foil for the first half of baking to avoid burning.

Nutritional Breakdown and Adjustments

This beef-stuffed shells recipe is both filling and packed with protein. For those interested in making lighter adjustments, consider the following:

  • Substitute ground beef with ground turkey or lean ground beef.
  • Use low-fat ricotta or reduced-fat cheeses.
  • Opt for a low-sodium marinara sauce to control salt intake.

By incorporating these tweaks, you can enjoy the comforting flavors of this dish while maintaining a balanced approach to your nutrition.


Serving Suggestions and Pairings

Beef-stuffed shells with creamy ricotta are delicious on their own, but they pair well with a few simple side dishes to complete the meal:

  • Garlic bread: Perfect for soaking up extra marinara sauce.
  • Caesar salad: A crisp, fresh counterpart to the rich pasta dish.
  • Red wine: A medium-bodied red, such as Chianti, complements the flavors.

Frequently Asked Questions (FAQs)

Here are some common questions people ask about beef-stuffed shells:

  1. Can I make beef-stuffed shells ahead of time?
    • Yes, you can prepare and assemble the dish a day in advance. Cover and refrigerate, then bake when ready.
  2. Can these shells be frozen?
    • Absolutely. Assemble the dish without baking, cover tightly, and freeze. When you’re ready to serve, thaw and bake as directed.
  3. What’s the best way to reheat stuffed shells?
    • For best results, reheat in the oven at 350°F (175°C) for 15-20 minutes.
  4. Can I substitute ricotta with another cheese?
    • Cottage cheese or mascarpone can be used for a different texture and flavor.
  5. How do I prevent shells from cracking?
    • Ensure pasta shells are cooked to al dente, and handle them gently during stuffing.

Conclusion

Beef-stuffed shells with creamy ricotta filling is a dish that combines the warmth of home cooking with the richness of Italian-American flavors. It’s perfect for gatherings, family meals, or even a special dinner treat.

This recipe is not only delicious but also customizable to suit various tastes and dietary needs. So gather your ingredients, set aside some time, and prepare to enjoy a heartwarming meal that’s bound to become a favorite.

Raspberry-Filled Almond Snow Cookies: A Festive Holiday Treat

almond raspberry cookies, holiday snow cookies, jam-filled almond cookies, festive raspberry cookies, powdered sugar raspberry cookies

Raspberry-Filled Almond Snow Cookies: A Festive Sweet Treat

The Raspberry-Filled Almond Snow Cookie combines the comforting flavor of almonds with a bright burst of raspberry jam, making it a standout on any holiday dessert spread. These cookies are delightfully soft, coated in powdered sugar for a snowy finish, and perfect for seasonal gatherings or gifting.

For those who enjoy delectable raspberry dessert options, you may also want to try Raspberry Cheesecake Brownie Bites, which offer another fruity, indulgent treat.


Essential Ingredients for Raspberry-Filled Almond Snow Cookies

Crafting these cookies starts with a few essential ingredients that bring out a tender, rich texture:

  • Almond Flour: Adds nutty depth and a soft texture.
  • Butter: For a melt-in-your-mouth quality.
  • Powdered Sugar: Both in the dough and as a dusting for a festive snowy effect.
  • Raspberry Jam: A fruity filling that brings a sweet-tart contrast.

For a holiday spread, you might also include classic holiday cookies like Peanut Butter Blossoms, which add a nostalgic element to any festive assortment.


Step-by-Step Guide to Making Raspberry-Filled Almond Snow Cookies

Step 1: Preparing the Almond Cookie Dough

Word Count: 300

  1. Cream Butter and Sugar: Start by creaming softened butter with powdered sugar until fluffy. This step creates a smooth, soft base.
  2. Add Almond Flour: Gradually add almond flour, mixing until a dough forms.

Step 2: Shaping and Adding Raspberry Filling

Word Count: 250

  1. Shape the Dough: Roll the dough into balls and press an indentation in each for the jam.
  2. Fill with Raspberry Jam: Carefully spoon a small amount of raspberry jam into each indentation.

Step 3: Baking and Finishing Touches

Word Count: 300

  1. Bake the Cookies: Preheat oven to 350°F (175°C) and bake until edges are lightly golden.
  2. Cool and Dust with Powdered Sugar: Once cool, roll cookies in powdered sugar for a snowy effect.

For beautiful holiday desserts, consider Salted Caramel Apple Cheesecake with Apple Roses, another option for elegant holiday gatherings.


Creative Variations and Tips

  1. Alternative Fillings: Try blackberry, apricot, or lemon curd for a unique flavor twist.
  2. Extra Sparkle: Add a touch of edible glitter or crushed freeze-dried raspberries for added color.

Presentation and Storage Tips

  1. Holiday Plating Ideas: Arrange the cookies with sprigs of fresh mint or holly for a seasonal touch.
  2. Storage: Store in an airtight container at room temperature for up to one week, or refrigerate to keep fresh longer.
  3. Freezing Tips: Freeze unbaked dough or fully baked cookies, but add the powdered sugar dusting after defrosting.

Frequently Asked Questions (FAQs)

  • Can I make these cookies gluten-free?
    Yes, almond flour is naturally gluten-free, but ensure all other ingredients meet gluten-free standards.
  • How can I prevent the filling from spilling out?
    Use a thicker jam, and avoid overfilling the indentations.
  • Can I use fresh raspberries instead of jam?
    Stick to jam for consistency; fresh raspberries may release too much moisture.

Enjoy baking and sharing these Raspberry-Filled Almond Snow Cookies, perfect for adding festive charm and delightful flavors to your holiday traditions.