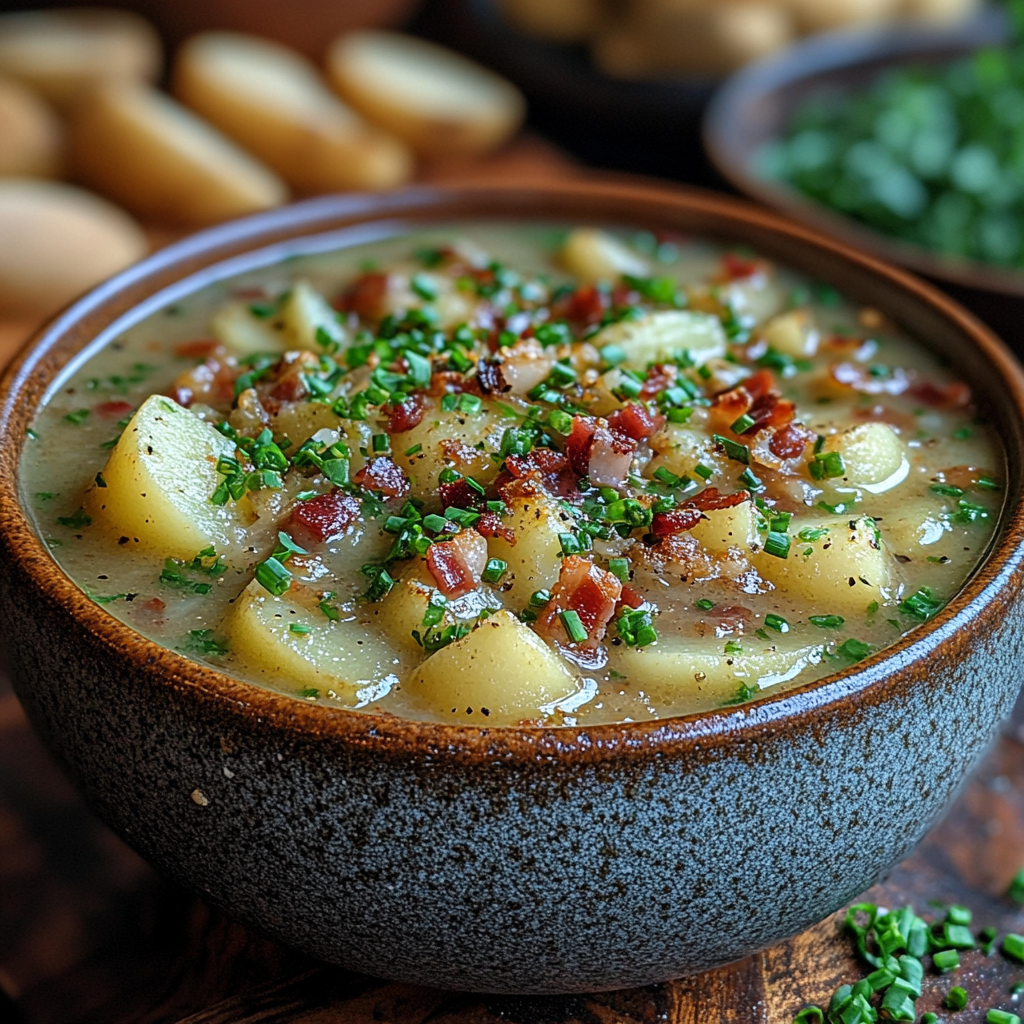
Potato and Bacon Soup: Creamy Comfort in Every Spoonful

creamy potato bacon soup, homemade potato soup with bacon, hearty potato chowder, easy bacon potato soup recipe, comfort food soup

Potato and Bacon Soup: A Comfort Food Favorite

Potato and Bacon Soup combines creamy potatoes, savory bacon, and hearty vegetables into one delicious bowl of comfort. It’s a recipe loved for its rich flavors and easy preparation. Whether served as a meal or starter, this soup will quickly become a family favorite.


Why Potato and Bacon Soup is Perfect for Any Occasion

The Appeal of a Classic Comfort Food

  • Rich and creamy texture with the perfect balance of smoky bacon and tender potatoes.
  • Versatile dish that pairs well with salads, bread, or as a stand-alone meal.

For another hearty potato dish, explore The Ultimate Comfort Food: Crockpot Potato Soup with Hashbrowns.


Ingredients for Potato and Bacon Soup

Key Ingredients

  • Vegetables:
    • 4 medium russet potatoes, peeled and diced
    • 1 medium onion, finely chopped
    • 2 celery stalks, diced
    • 1 large carrot, diced
  • Meat and Broth:
    • 6 slices of bacon, cooked and crumbled
    • 4 cups chicken broth
  • Dairy and Seasoning:
    • 1 cup heavy cream
    • 1 cup shredded cheddar cheese
    • Salt, pepper, and smoked paprika to taste

How to Make Potato and Bacon Soup

Step 1: Cook the Bacon

  • Cook bacon in a large pot until crispy. Set aside and reserve 2 tablespoons of the grease.

Step 2: Sauté Vegetables

  • In the same pot, sauté onions, celery, and carrots in the bacon grease until softened.

Step 3: Add Potatoes and Broth

  • Add diced potatoes and chicken broth to the pot. Bring to a boil, then reduce heat and simmer until potatoes are tender.

Step 4: Blend and Finish

  • Blend part of the soup for a creamy texture, leaving some chunks for a rustic feel. Stir in heavy cream, cheese, and seasonings.

Tips for the Best Potato and Bacon Soup

Flavor Boosters

  • Use smoked paprika or garlic powder to enhance the smoky flavor.
  • For an herby twist, garnish with fresh parsley or chives.

Consistency Tips

  • For a thicker soup, mash some of the potatoes or add a slurry of cornstarch and water.

Learn more about soup-making techniques at Tips for Making Comfort Soups.


Serving Suggestions and Variations

Topping Ideas

  • Crispy croutons or toasted breadsticks
  • A dollop of sour cream and a sprinkle of shredded cheese
  • Fresh herbs like thyme or chives

Creative Variations

  • Loaded Potato Soup: Add sour cream, green onions, and extra cheese.
  • Vegetarian Option: Replace bacon with smoked tofu and use vegetable broth.
  • Spicy Potato Soup: Add diced jalapeños or cayenne pepper for a kick.

For another comforting meal, try Ham and Potato Casserole.


FAQs About Potato and Bacon Soup

Can I Use Frozen Potatoes?

Yes, but adjust the cooking time slightly to ensure they’re heated through.

What’s the Best Way to Store Leftovers?

Refrigerate the soup in an airtight container for up to 4 days or freeze for up to 3 months.

How Do I Reheat This Soup?

Reheat gently on the stove over low heat, adding a splash of milk or broth if needed.

Can I Make It Gluten-Free?

Ensure the broth and any added seasonings are certified gluten-free.


Internal Linking Opportunities


Why You Should Make This Soup Tonight

Potato and Bacon Soup is a crowd-pleasing recipe that’s easy to make and full of bold flavors. With its creamy base and smoky bacon finish, it’s the ultimate comfort food. Whether for a cozy family dinner or meal prep, this soup delivers satisfaction every time.

For more warming recipes, visit ExoRecipes.
Italian Lemon Pound Cake: A Moist and Zesty Delight

lemon pound cake, Italian dessert recipes, citrus pound cake, lemon loaf cake, zesty lemon cake, lemon-glazed cake

Italian Lemon Pound Cake: A Refreshing Citrus Treat

The Italian Lemon Pound Cake is a perfect blend of tangy citrus flavor and rich, moist texture. Inspired by Italian dessert traditions, this cake stands out for its simplicity, elegance, and versatility. Whether for a casual afternoon tea or a festive occasion, this pound cake will delight everyone with its fresh lemony aroma and a luscious glaze.


Why Italian Lemon Pound Cake is a Must-Try

  • Balanced Flavor: The combination of tart lemon zest and sweet glaze creates a harmonious dessert.
  • Moist Texture: Ingredients like buttermilk and sour cream keep the cake tender and rich.
  • Versatility: Ideal for brunches, holidays, or as an after-dinner treat.

For more sweet inspiration, explore Granny’s Famous Coconut Cake.


Ingredients for Italian Lemon Pound Cake

Core Ingredients

  • 3 cups all-purpose flour
  • 1 teaspoon baking powder
  • ¼ teaspoon salt
  • 1 cup unsalted butter, softened
  • 2 cups granulated sugar
  • 3 large eggs
  • ½ cup buttermilk
  • ½ cup sour cream
  • 4 tablespoons fresh lemon juice
  • Zest of 2 lemons
  • 1 teaspoon vanilla extract

Lemon Glaze

  • 1 cup powdered sugar
  • 2-3 tablespoons fresh lemon juice

Step-by-Step Instructions

1. Preparing the Batter

  1. Preheat the oven to 350°F (175°C) and grease a 9×5-inch loaf pan.
  2. In a bowl, sift flour, baking powder, and salt.
  3. Cream butter and sugar until light and fluffy. Add eggs one at a time, followed by lemon juice, lemon zest, and vanilla.

2. Combining and Baking

  1. Gradually mix in the dry ingredients, alternating with buttermilk and sour cream.
  2. Pour the batter into the prepared pan and bake for 55-65 minutes.
  3. Cool completely before adding the glaze.

3. Preparing the Lemon Glaze

  • Whisk powdered sugar and lemon juice until smooth.
  • Drizzle the glaze over the cooled pound cake.
  • For a decorative touch, add candied lemon slices or a sprinkle of lemon zest.

Tips for the Perfect Pound Cake

Maintaining Moisture and Texture

  • Use room-temperature ingredients for even mixing.
  • Avoid overmixing the batter to keep the cake fluffy.

Baking Tips

  • Test for doneness with a toothpick—it should come out clean.
  • Let the cake cool completely to avoid a soggy texture when glazing.

For expert advice on perfecting pound cakes, visit How to Perfect Pound Cakes.


Variations and Serving Suggestions

Creative Twists

  • Lemon Blueberry Pound Cake: Fold in fresh or frozen blueberries.
  • Limoncello Pound Cake: Replace some lemon juice with limoncello liqueur.
  • Coconut Lemon Cake: Add shredded coconut for tropical flavor.

Serving Ideas

  • Pair with whipped cream and fresh berries for a light dessert.
  • Serve with a scoop of vanilla ice cream for extra indulgence.

Explore other citrus-based treats like Mini Pineapple Coconut Milk Cheesecakes.


FAQs About Italian Lemon Pound Cake

1. Can I Use Meyer Lemons?

Yes! Their sweeter flavor enhances the cake’s taste.

2. How Do I Store the Cake?

Wrap tightly in plastic wrap and store at room temperature for up to 3 days or freeze for up to 3 months.

3. Can I Make This Cake Gluten-Free?

Yes, substitute all-purpose flour with a gluten-free blend.

4. How Do I Keep the Cake from Sticking to the Pan?

Grease and flour the pan thoroughly, or line it with parchment paper.

5. Can I Double the Recipe?

Absolutely, but use multiple loaf pans or a large Bundt pan.


Internal Linking Opportunities


Why Italian Lemon Pound Cake is a Must-Bake

The Italian Lemon Pound Cake is a perfect balance of sweet and tangy, moist and tender, making it a dessert staple for any occasion. Its simple preparation and timeless flavor ensure that it will quickly become a household favorite. Whether paired with a warm cup of tea or served as a festive dessert, this cake promises to delight.

For more dessert recipes and baking tips, visit ExoRecipes.com.

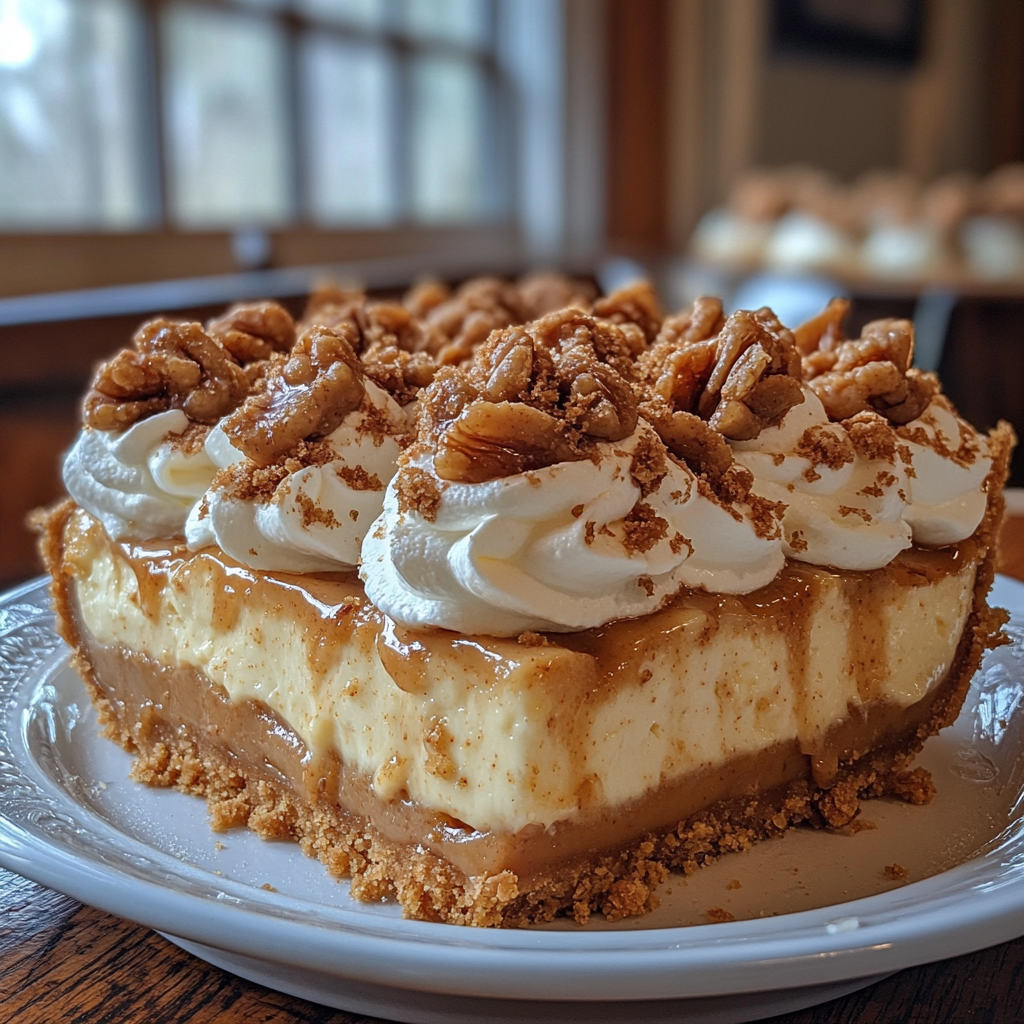
Best Carrot Cake Ever: Moist, Spiced, and Perfectly Frosted

moist carrot cake, spiced carrot cake recipe, classic carrot cake, homemade carrot cake, carrot cake with cream cheese frosting

Best Carrot Cake Ever: The Ultimate Guide

Carrot Cake is a dessert classic, celebrated for its moist texture, spiced flavor, and rich cream cheese frosting. With its blend of grated carrots, pineapple, and optional add-ins like walnuts or raisins, this recipe ensures the most flavorful, crowd-pleasing cake you’ve ever made.


Why This Carrot Cake Stands Out

  • Incredible Moisture: Freshly grated carrots and crushed pineapple keep the cake perfectly moist.
  • Balanced Sweetness and Spice: The combination of brown sugar, cinnamon, and nutmeg creates a harmonious flavor.
  • Adaptable for Any Occasion: From birthdays to holidays, this cake is always a hit.

For other timeless dessert ideas, check out Granny’s Famous Coconut Cake.


Ingredients for the Best Carrot Cake

Wet Ingredients

  • 4 large eggs
  • 1 cup vegetable oil
  • 1 cup brown sugar
  • 1 cup white sugar
  • 1 teaspoon vanilla extract
  • 1 cup crushed pineapple, drained

Dry Ingredients

  • 3 cups all-purpose flour
  • 2 teaspoons baking soda
  • 1 teaspoon salt
  • 4 teaspoons cinnamon

Optional Add-Ins

  • 6 cups grated carrots
  • 1 cup chopped walnuts
  • 1 cup raisins

Step-by-Step Recipe

1. Preparing the Carrots

  • Use freshly grated carrots for the best texture.
  • Combine the carrots with brown sugar and let them sit for 1 hour to enhance moisture.

2. Mixing the Batter

  • Beat eggs, sugar, oil, and vanilla until fluffy.
  • Sift dry ingredients together and fold them into the wet mixture.
  • Add carrots, pineapple, and any optional mix-ins. Stir until just combined.

3. Baking

  • Divide the batter evenly between two greased 10-inch round pans.
  • Bake at 350°F for 45-50 minutes or until a toothpick inserted comes out clean.
  • Cool completely before frosting.

Cream Cheese Frosting Recipe

Ingredients

  • 1 brick cream cheese, softened
  • ½ cup unsalted butter, softened
  • 1 teaspoon vanilla extract
  • 3 cups powdered sugar

Preparation

  1. Beat cream cheese and butter until creamy.
  2. Mix in vanilla, then gradually add powdered sugar until the frosting is smooth and spreadable.
  3. Spread frosting between layers and over the top of the cooled cake.

Tips for Success

Moisture and Flavor

  • Use room-temperature ingredients to ensure a smooth batter.
  • Thoroughly drain the pineapple to avoid a soggy cake.

Common Mistakes

  • Avoid overmixing the batter to keep the cake light.
  • Use freshly grated carrots instead of pre-packaged for better texture and moisture.

For more tips on achieving the perfect texture, visit Carrot Cake Baking Tips.


Creative Variations

Flavor Twists

  • Nut-Free: Swap walnuts with coconut flakes for texture.
  • Tropical Version: Add a splash of rum extract and shredded coconut.
  • Vegan Adaptation: Use flaxseed eggs and dairy-free cream cheese.

For an alternative carrot-based treat, try Carrot Cake Muffins.


FAQs About Carrot Cake

1. Can I Make Cupcakes Instead?

Yes, this recipe works perfectly for cupcakes. Reduce the baking time to 20-25 minutes.

2. What Can I Use Instead of Pineapple?

You can substitute applesauce for a similar moist texture.

3. How Long Does the Cake Last?

Refrigerate for up to 5 days or freeze for up to 3 months.

4. Can I Use Pre-Shredded Carrots?

Freshly grated carrots are recommended for the best texture and flavor.


Internal Linking Opportunities

Enhance your dessert repertoire with these related recipes:


Why This Carrot Cake Recipe is a Must-Try

The Best Carrot Cake Ever is more than just a dessert; it’s a celebration of flavor and tradition. With its moist layers, rich cream cheese frosting, and customizable options, it’s guaranteed to impress your family and friends. Whether you’re a seasoned baker or a novice, this recipe is straightforward and rewarding.

For more dessert inspirations, visit ExoRecipes.com.

Berry Pancakes: Fluffy, Fruity, and Perfect for Breakfast

mixed berry pancakes, fresh fruit pancakes, blueberry strawberry pancakes, breakfast pancake recipes, berry-stuffed pancakes

Berry Pancakes: A Vibrant Breakfast Delight

The Berry Pancakes recipe combines the freshness of seasonal berries with the fluffiness of perfectly cooked pancakes, creating a breakfast dish that’s as delightful to eat as it is to look at. This dish is not only visually appealing but also packed with the nutritional benefits of berries, making it a popular choice for weekend brunches and everyday breakfasts.


Why Berry Pancakes Are a Perfect Choice

Flavorful and Nutritious

  • Fresh berries add a burst of sweetness and tartness, perfectly balancing the pancake batter’s mild flavor.
  • Packed with antioxidants and vitamins, berries contribute to a healthy start to your day.

For more pancake inspiration, explore Sheetpan Pancakes: A Simple Breakfast Delight.


Ingredients for Berry Pancakes

Core Ingredients

  • Wet Ingredients:
    • 1 cup milk
    • 1 large egg
    • 2 tablespoons melted butter
    • 1 teaspoon vanilla extract
  • Dry Ingredients:
    • 1 ½ cups all-purpose flour
    • 1 tablespoon baking powder
    • 2 tablespoons sugar
    • ½ teaspoon salt
  • Berries:
    • ½ cup fresh blueberries
    • ½ cup sliced strawberries
    • Optional: raspberries or blackberries

Step-by-Step Instructions

1. Preparing the Batter

  1. Whisk together the milk, egg, melted butter, and vanilla in a large bowl.
  2. In a separate bowl, combine the flour, baking powder, sugar, and salt.
  3. Gradually mix the dry ingredients into the wet mixture until just combined. Avoid overmixing to keep the batter light.

2. Adding the Berries

  1. Gently fold in the berries, ensuring they are evenly distributed.
  2. To prevent bursting, sprinkle the berries onto the pancakes while cooking rather than mixing them entirely into the batter.

3. Cooking the Pancakes

  1. Heat a lightly greased griddle or non-stick pan over medium heat.
  2. Pour ¼ cup of batter for each pancake onto the griddle.
  3. Cook until bubbles form on the surface, then flip and cook until golden brown on the other side.

Creative Toppings and Syrups

Homemade Berry Syrup

  • Combine mixed berries, ¼ cup sugar, and ½ cup water in a saucepan.
  • Simmer until the berries break down, then strain for a smooth syrup.
  • Drizzle over the pancakes for a fresh berry flavor.

For another fruity delight, check out Refreshing Summer Mango Strawberry Swirled Slushies.


Storage and Reheating Tips

How to Store

  • Refrigerate leftover pancakes in an airtight container for up to three days.
  • Freeze pancakes in a single layer with parchment paper in between for up to two months.

Reheating

  • Reheat pancakes in a toaster or skillet for a crisp texture.
  • Avoid microwaving for too long, as it may make them soggy.

FAQs About Berry Pancakes

Can I Use Frozen Berries?

Yes, but thaw and drain them to prevent excess moisture in the batter.

How Can I Make the Pancakes Gluten-Free?

Replace the all-purpose flour with a gluten-free flour blend.

What Other Fruits Can Be Used?

Bananas, peaches, or apples can be substituted or added to the batter.

Can I Make Vegan Pancakes?

Yes, use almond milk and a flaxseed egg substitute.


Internal Linking Opportunities


Why You Should Try Berry Pancakes Today

Berry Pancakes offer a delicious balance of fresh flavors and fluffy texture, perfect for any breakfast table. With endless customization options, these pancakes can be tailored to your taste, making them a versatile and crowd-pleasing choice. Pair them with homemade syrups and creative toppings for a breakfast experience that’s both satisfying and delightful.

For more amazing recipes, visit ExoRecipes.com.

Amish Peanut Butter Cream Pie: A Rich and Creamy No-Bake Delight

no-bake peanut butter pie, creamy peanut butter dessert, Amish peanut butter pie recipe, easy peanut butter pie, peanut butter cream pie

Amish Peanut Butter Cream Pie: A Decadent Dessert for All Occasions

The Amish Peanut Butter Cream Pie is a luscious dessert that blends rich peanut butter flavor with a creamy texture, creating an unforgettable treat. Originating from Amish traditions, this no-bake pie is a perfect choice for gatherings, holidays, or any sweet craving. Its layers of buttery crust, peanut butter crumbles, and smooth filling make it a crowd-pleaser.


Why You’ll Love Amish Peanut Butter Cream Pie

  • Unique Texture and Flavor: A delightful contrast of crumbly and creamy layers.
  • No-Bake Convenience: Perfect for quick dessert preparation.
  • Versatility: Ideal for special occasions or casual indulgence.

For a similarly indulgent dessert, check out Peanut Butter Fudge.


Ingredients for Amish Peanut Butter Cream Pie

Crust Options

  • Graham cracker crust
  • Pre-made shortbread crust
  • Oreo cookie crust for a chocolate twist

Peanut Butter Crumbles

  • ½ cup powdered sugar
  • ¼ cup creamy peanut butter

Creamy Filling

  • 1 box (3.4 oz) instant vanilla pudding mix
  • 1 ½ cups milk
  • ½ cup creamy peanut butter
  • 1 cup whipped cream or Cool Whip

Topping

  • 1 cup whipped cream
  • Remaining peanut butter crumbles

Step-by-Step Instructions

1. Prepare the Crust

  1. Use a pre-made crust or make your own with crushed graham crackers or cookies.
  2. If baking the crust, let it cool completely before adding the filling.

2. Make the Peanut Butter Crumbles

  1. In a bowl, mix powdered sugar and peanut butter with a fork until crumbly.
  2. Spread half the crumbles on the bottom of the crust.

3. Whip Up the Filling

  1. Whisk together vanilla pudding mix, milk, and peanut butter until smooth.
  2. Fold in whipped cream to create a light, fluffy texture.
  3. Pour the filling over the crust and crumbles.

4. Assemble and Chill

  1. Top the filling with a generous layer of whipped cream.
  2. Sprinkle the remaining peanut butter crumbles over the top.
  3. Refrigerate for at least 2 hours to set.

For tips on perfect pie crusts, explore Tips for Perfect Pie Crusts.


Tips for Success

Secrets to a Great Pie

  • Use cold milk for the pudding to ensure a smooth filling.
  • Chill the pie thoroughly to enhance the flavors.
  • Adjust the sweetness of the crumbles to your preference.

Creative Variations

Flavor Twists

  • Chocolate Peanut Butter Pie: Use a chocolate crust and add cocoa powder to the filling.
  • Nutty Crunch: Add chopped roasted peanuts to the crumbles.
  • Frozen Dessert: Freeze the pie for an ice-cream-like consistency.

Explore other unique desserts like Mini Pineapple Coconut Cheesecakes.


Storage and Make-Ahead Tips

How to Store

  • Refrigerate the pie in an airtight container for up to 4 days.
  • Freeze individual slices wrapped in plastic wrap for up to 2 months.

Make-Ahead Convenience

  • Prepare the crust and crumbles in advance.
  • Assemble the pie the day before serving to save time.

FAQs About Amish Peanut Butter Cream Pie

1. Can I Use a Different Crust?

Yes! Graham cracker or Oreo crusts work well.

2. How Can I Make It Dairy-Free?

Substitute milk with almond milk and use dairy-free whipped topping.

3. What’s the Best Way to Cut Clean Slices?

Use a sharp knife dipped in hot water and wiped clean between cuts.

4. Can I Add a Chocolate Layer?

Absolutely! Melt chocolate and spread it over the crust before adding the crumbles.

5. Is It Okay to Make the Pie in Advance?

Yes, this pie holds well when refrigerated for up to 24 hours before serving.


Internal Linking Opportunities

Enhance navigation with related recipes:


Why Amish Peanut Butter Cream Pie is a Must-Try

With its creamy texture, rich peanut butter flavor, and no-bake convenience, the Amish Peanut Butter Cream Pie is an irresistible addition to any dessert menu. Easy to customize and perfect for sharing, this pie is bound to become a household favorite.

For more delectable desserts, visit ExoRecipes.com.