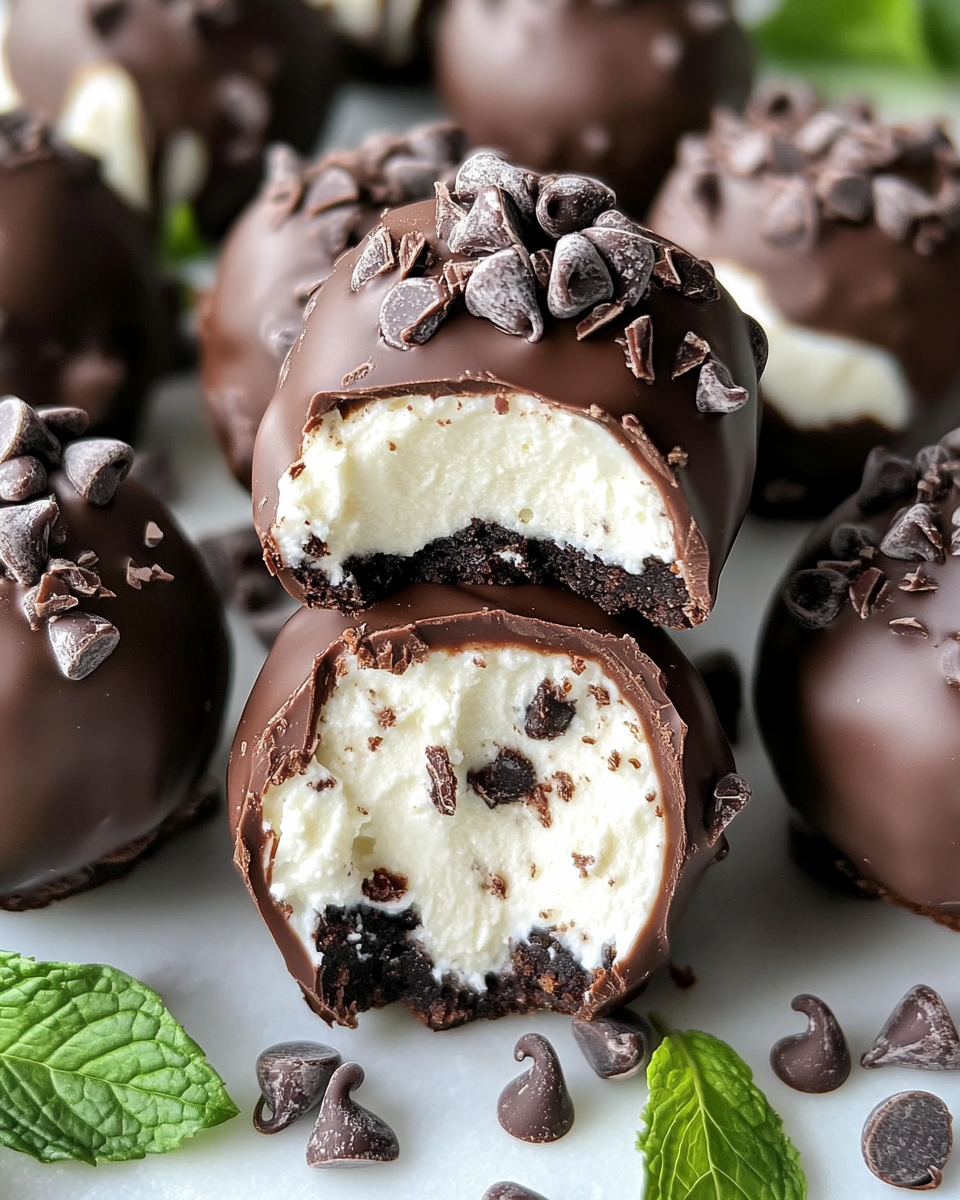
Mint Chocolate Chip Cheesecake Balls: A Refreshing No-Bake Dessert
Mint Chocolate Chip Cheesecake Balls are the perfect no-bake treat combining the creaminess of cheesecake with the refreshing flavor of mint and the rich crunch of chocolate chips. These bite-sized delights are ideal for parties, dessert platters, or as a quick indulgence at home.
For more no-bake inspiration, explore Easy No-Bake Banana Split Cheesecake for a fruity twist on cheesecake.
Why You’ll Love This Recipe
- No-Bake Simplicity: No oven required, making it ideal for warm days or busy schedules.
- Refreshing Flavor: A minty twist enhances the traditional cheesecake flavor.
- Customizable: Change the coatings, add festive decorations, or adjust the mint flavor to suit your taste.
Ingredients You’ll Need
Core Ingredients:
- Cream cheese (softened): The base for the cheesecake mixture.
- Powdered sugar: Adds sweetness and structure.
- Mint extract: For that classic minty flavor.
- Mini chocolate chips: Mix into the dough for added texture and flavor.
- Green food coloring: Optional but creates the signature mint look.
Coatings and Toppings:
- Graham cracker crumbs: For a classic coating.
- Crushed chocolate cookies: Adds a rich, crunchy layer.
- White or dark chocolate drizzle: For an elegant touch.
Tools You’ll Need
- Mixing bowl and spatula for combining ingredients.
- Food processor for crushing coatings like graham crackers.
- Parchment-lined baking sheet for setting the balls.
Step-by-Step Instructions
1. Prepare the Cheesecake Mixture
- In a large bowl, combine softened cream cheese, powdered sugar, and mint extract until smooth.
- Fold in mini chocolate chips and a few drops of green food coloring for a minty look.
2. Shape the Cheesecake Balls
- Use a cookie scoop or tablespoon to portion out the mixture.
- Roll each portion into balls and place them on a parchment-lined baking sheet.
- Chill in the refrigerator for at least 30 minutes.
3. Coat and Decorate
- Roll chilled balls in graham cracker crumbs, crushed cookies, or coconut flakes for a flavorful coating.
- For an elegant touch, drizzle with melted white or dark chocolate.
4. Chill and Serve
- Refrigerate the coated cheesecake balls for an additional hour to firm up.
- Serve chilled for the best flavor and texture.
Tips for Success
- Chill Well: Ensure the mixture is cold to make rolling easier.
- Avoid Over-Mixing: Over-mixing can make the dough too soft.
- Custom Decorations: Use holiday-themed sprinkles or candy for festive occasions.
Pair this dessert with Kentucky Butter Cake for a delightful dessert spread.
Creative Variations
- Festive Mint Cheesecake Balls: Roll in red and green sprinkles for a holiday twist.
- Double Chocolate Mint: Dip in melted dark chocolate and top with mini chocolate chips.
- Gluten-Free Option: Use gluten-free cookies for the coating.
- Vegan Adaptation: Substitute cream cheese with dairy-free alternatives and use vegan chocolate chips.
- Candy Cane Coating: Roll in crushed candy canes for a holiday flavor boost.
Serving Suggestions
- Arrange on a dessert platter with Raspberry Cheesecake Brownie Bites for a rich contrast.
- Serve alongside hot chocolate or a mint-flavored coffee for a cozy pairing.
- Package in decorative boxes for festive gifts.
Storing Mint Chocolate Chip Cheesecake Balls
Refrigeration:
- Store in an airtight container in the fridge for up to 5 days.
Freezing:
- Freeze individual balls on a tray, then transfer to a freezer-safe bag. Store for up to 2 months.
Thawing:
- Thaw in the refrigerator for 1-2 hours before serving.
Frequently Asked Questions (FAQs)
Q1: Can I use peppermint extract instead of mint extract?
A: Yes, but peppermint is stronger, so start with a smaller amount.
Q2: How do I prevent the mixture from sticking to my hands?
A: Chill the mixture well and dust your hands with powdered sugar.
Q3: Can I make these ahead of time?
A: Yes, they’re perfect for making ahead and storing in the fridge or freezer.
Q4: What other coatings work well?
A: Try crushed nuts, cocoa powder, or shredded coconut.
Q5: Are these kid-friendly?
A: Absolutely! Kids will love the minty flavor and bite-sized format.
Internal Linking Opportunities
- Suggest German Chocolate Poke Cake as a pairing for a dessert buffet.
- Highlight Cheesy Bacon Jalapeño Corn Dip for a savory option to balance the sweetness.
- Include Easy No-Bake Banana Split Cheesecake for more no-bake cheesecake ideas.
Conclusion
Mint Chocolate Chip Cheesecake Balls are a refreshing, no-bake dessert that’s easy to make and perfect for any occasion. With their creamy texture, minty flavor, and customizable coatings, these cheesecake balls will quickly become a favorite for both kids and adults alike. Try this recipe today and let us know your favorite variations in the comments below!