Cheddar Donut Melt: A Sweet and Savory Culinary Fusion

savory donut sandwich, cheesy donut melt, donut sandwich recipe, sweet and savory meal, cheddar cheese donut dish

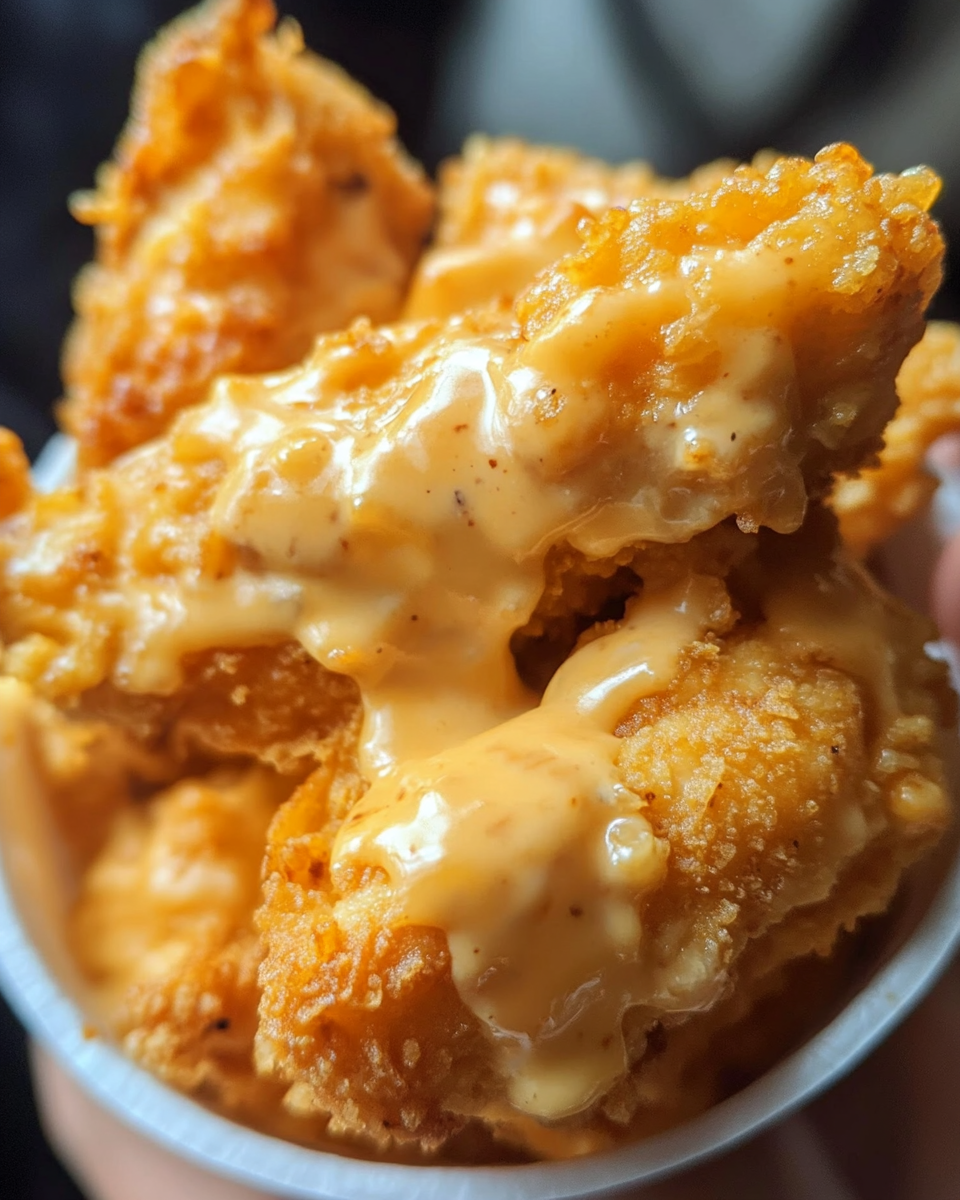
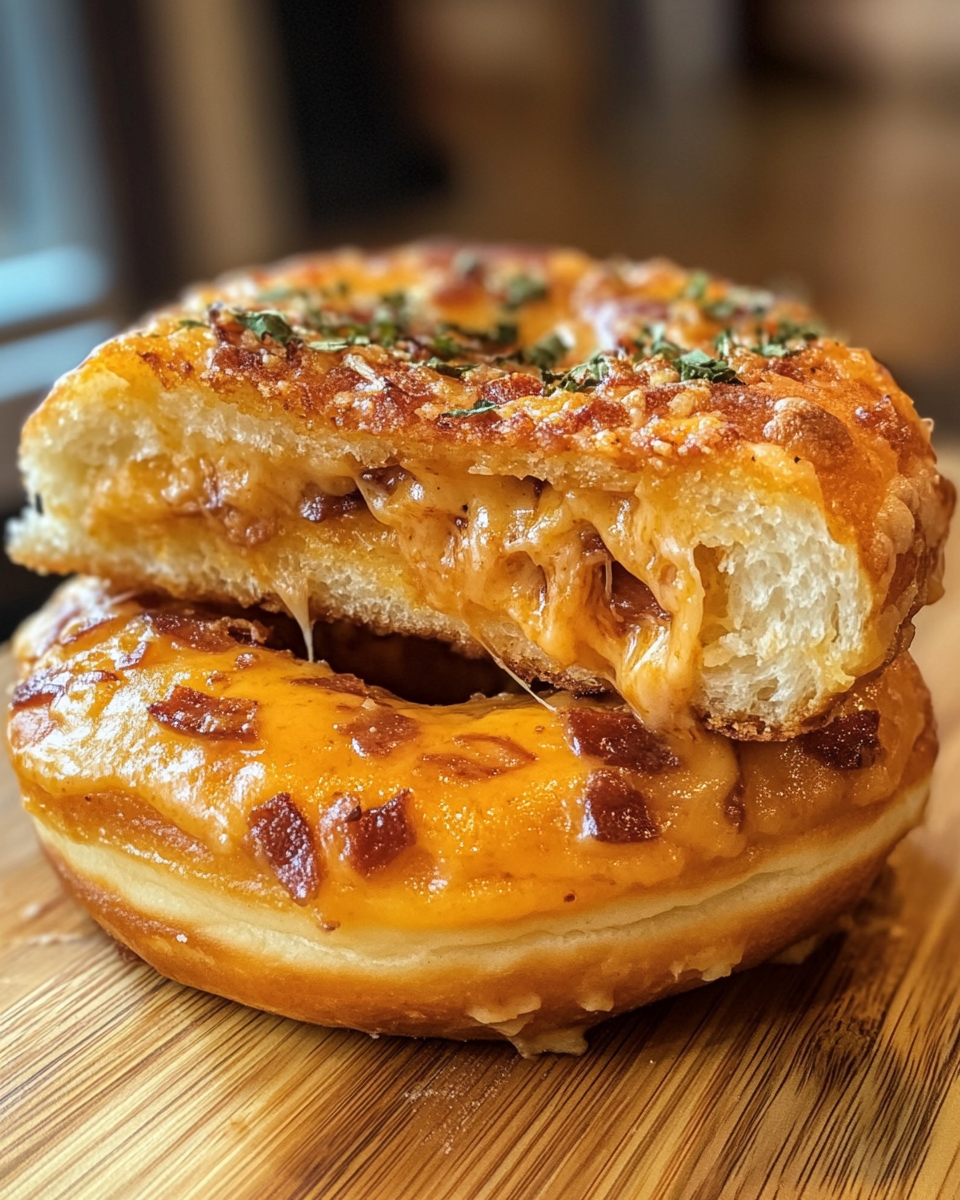
Cheddar Donut Melt: A Unique Sweet and Savory Treat

Cheddar Donut Melt takes indulgence to a whole new level, combining the sweet charm of donuts with the savory depth of cheddar cheese. Perfect for brunch, dinner, or even a creative snack, this dish is a true culinary masterpiece that’s surprisingly easy to prepare.

To explore a similarly unique dessert, check out Crispy Fried Cheesecake Bites for a sweet pairing option.


Why Cheddar Donut Melt is a Must-Try

  • Sweet and Savory Combination: Appeals to both flavor profiles.
  • Simple Ingredients: Easily sourced, making this an accessible recipe.
  • Versatile Serving Options: Ideal for meals or gatherings.

For an indulgent complement, try Kentucky Butter Cake to add a buttery finish to your meal.


Ingredients You’ll Need

Essential Ingredients:

  • 4 plain glazed donuts (halved)
  • 1 cup shredded cheddar cheese
  • ½ cup heavy cream
  • 1 tablespoon butter
  • Pinch of salt and pepper

Optional Add-ins:

  • Crispy bacon slices
  • Caramelized onions
  • Pickled jalapeños

Protein Options:

  • Beef patty
  • Grilled chicken breast
  • Vegetarian alternatives like roasted portobello mushrooms

Tools You’ll Need

  • Skillet or griddle
  • Small saucepan for the cheddar sauce
  • Spatula and whisk

Step-by-Step Instructions

1. Prepare the Cheddar Sauce

  • Heat butter in a saucepan over medium heat.
  • Stir in heavy cream and bring to a gentle simmer.
  • Gradually whisk in cheddar cheese until smooth.
  • Season with salt and pepper to taste.

2. Cook the Protein

  • Beef Patty:
    • Season with salt and pepper, grill to your desired doneness.
  • Chicken Breast:
    • Marinate in olive oil and paprika before grilling.
  • Vegetarian Option:
    • Sear portobello mushrooms with garlic for a hearty flavor.

3. Assemble the Donut Melt

  • Toast donut halves on a hot griddle until golden brown.
  • Layer with your chosen protein, pour the cheddar sauce generously, and add toppings like bacon or onions.
  • Finish with the second donut half and serve warm.

Tips for Success

  • Use Fresh Donuts: For optimal texture and flavor.
  • Toast the Donuts: Helps prevent sogginess from the cheddar sauce.
  • Serve Immediately: Enjoy while warm for the best experience.

Creative Variations

  1. Spicy Cheddar Donut Melt
    • Add sriracha or chili flakes to the cheddar sauce for heat.
  2. Breakfast Style
    • Use a fried egg and crispy bacon as the protein base.
  3. Vegetarian Delight
    • Layer roasted vegetables and mushrooms for a meat-free option.

Serving Suggestions

  • Pair with Cheesy Bacon Jalapeño Corn Dip for a cheesy side dish.
  • Add a fresh salad or sweet potato fries to balance the flavors.
  • Garnish with chives or parsley for a touch of freshness.

Storing and Reheating

Storage:

  • Refrigerate in an airtight container for up to 2 days.

Reheating:

  • Warm in the oven at 350°F for 10–15 minutes to retain texture.

Freezing:

  • Not recommended due to the texture changes in donuts after freezing.

Frequently Asked Questions (FAQs)

Q1: Can I use a different type of cheese?
A: Yes, mozzarella or gouda can work well for a milder flavor.

Q2: Are there healthier alternatives to donuts?
A: Whole-grain English muffins or brioche buns are great substitutes.

Q3: Can I make this dish ahead of time?
A: Prepare the cheddar sauce and protein separately, then assemble and toast just before serving.

Q4: What other toppings work well?
A: Try avocado slices, crispy onions, or a drizzle of honey for added complexity.

Q5: How can I prevent the donuts from getting too sweet?
A: Opt for lightly glazed or plain donuts if you prefer less sweetness.


Internal Linking Opportunities


Conclusion

The Cheddar Donut Melt is a bold culinary innovation that fuses the sweetness of donuts with the savory depth of cheddar and protein. This recipe is versatile, indulgent, and sure to be a conversation starter at any meal. Give it a try today and discover your favorite variation!

Cheesy Chicken Delight: A Creamy and Flavorful Dinner Recipe

creamy chicken dish, cheesy baked chicken, comfort food chicken recipe, chicken dinner ideas, baked chicken with cheese

Cheesy Chicken Delight: A Comforting, Flavorful Dinner Option

Cheesy Chicken Delight is a creamy, cheesy, and utterly delicious dish that’s perfect for weeknight dinners or special occasions. This recipe combines tender chicken breasts with a rich, cheesy coating to create a crowd-pleaser that’s easy to prepare and sure to impress.

To elevate your dinner spread, pair this dish with Slow Cooker Magic: Crockpot Baked Ziti for a complementary pasta option.


Why Cheesy Chicken Delight is a Must-Try

  • Quick and Easy: Minimal preparation for a flavorful result.
  • Family-Friendly: Loved by kids and adults alike.
  • Customizable: Swap ingredients to suit your taste preferences.

Explore another comfort food favorite with The Ultimate Comfort Food: Crockpot Potato Soup with Hashbrowns for a warming side dish.


Ingredients You’ll Need

For the Chicken:

  • 4 boneless, skinless chicken breasts
  • 1 cup mayonnaise or Greek yogurt
  • ½ cup Parmesan cheese (shredded)
  • 1 teaspoon garlic powder
  • Salt and black pepper (to taste)

Optional Additions:

  • Shredded cheddar or mozzarella for extra cheesiness.
  • Fresh herbs like thyme or parsley for garnish.
  • A dash of paprika or chili flakes for a spicy kick.

Tools You’ll Need

  • Baking dish
  • Mixing bowls
  • Oven preheated to 375°F

Step-by-Step Instructions

1. Preparing the Chicken

  • Slice chicken breasts into even portions for consistent cooking.
  • Season generously with garlic powder, salt, and black pepper.

2. Creating the Cheesy Mixture

  • In a bowl, combine mayonnaise (or Greek yogurt), Parmesan cheese, and garlic powder.
  • Spread the mixture evenly over each chicken breast.

3. Baking the Dish

  • Arrange chicken in a greased baking dish.
  • Bake for 40-45 minutes until golden and cooked through (internal temperature of 165°F).

Tips for Success

  • Use Fresh Cheese: Freshly grated Parmesan provides the best flavor.
  • Marinate for Extra Flavor: Let the chicken marinate with garlic and spices for 30 minutes before baking.
  • Avoid Overbaking: Check the internal temperature to ensure the chicken stays tender and juicy.

Serving Suggestions

  • Pair with Cheesy Bacon Jalapeño Corn Dip for a cheesy appetizer.
  • Add a side of garlic mashed potatoes or roasted asparagus for a balanced meal.
  • Garnish with fresh parsley for a pop of color and freshness.

Creative Variations

  1. Herbed Cheesy Chicken Delight
    • Add fresh rosemary or thyme to the cheese mixture for a fragrant twist.
  2. Spicy Cheesy Chicken
    • Mix chili flakes or hot sauce into the mayonnaise mixture.
  3. Low-Carb Option
    • Use Greek yogurt instead of mayonnaise and serve with steamed vegetables.

Storing and Reheating

Storage:

  • Refrigerate leftovers in an airtight container for up to 3 days.

Reheating:

  • Reheat in the oven at 350°F for 10-15 minutes to maintain texture.

Freezing:

  • Freeze uncooked chicken with the cheesy topping for a quick future meal.

Frequently Asked Questions (FAQs)

Q1: Can I use chicken thighs instead of breasts?
A: Yes, chicken thighs work well and offer a juicier alternative.

Q2: How do I know the chicken is fully cooked?
A: Use a meat thermometer to ensure an internal temperature of 165°F.

Q3: Can I prepare this dish ahead of time?
A: Yes, assemble the dish and refrigerate for up to 24 hours before baking.

Q4: What can I substitute for Parmesan cheese?
A: Romano or Asiago cheese are great substitutes.

Q5: Can I make this dish spicy?
A: Add chili flakes, paprika, or hot sauce to the cheese mixture for a spicy kick.


Internal Linking Opportunities


Conclusion

Cheesy Chicken Delight is the ultimate comfort food, combining tender chicken with a rich, cheesy topping. Simple to make and customizable to suit any taste, it’s perfect for busy weeknights or special gatherings. Give it a try and share your favorite variations!

Chocolate Banana Tart: A Simple Yet Decadent Dessert

banana chocolate tart, creamy banana tart, easy chocolate tart, banana dessert tart, chocolate ganache banana tart, no-bake chocolate tart

Chocolate Banana Tart: A Decadent and Simple Dessert

Chocolate Banana Tart is the perfect combination of creamy chocolate ganache, ripe bananas, and a buttery crust. This dessert is simple to prepare yet elegant enough to impress at any gathering. Whether you’re hosting a dinner party or looking for a sweet treat for the family, this tart will leave everyone asking for more.

To explore more rich dessert ideas, check out Gone to Heaven Chocolate Pie for another decadent chocolate treat.


Why You’ll Love Chocolate Banana Tart

  • Elegant Yet Simple: Minimal effort for maximum sophistication.
  • Flavorful Combination: Sweet bananas paired with velvety chocolate.
  • Customizable: Perfect for adding your own twist with toppings or flavors.

For another dessert with similar ease and appeal, visit Crispy Fried Cheesecake Bites for a delightful handheld option.


Ingredients You’ll Need

For the Crust:

  • 200g graham crackers or vanilla wafers (crushed)
  • 2 tablespoons cocoa powder
  • 7 tablespoons melted butter

For the Filling:

  • 3 ripe bananas (sliced)
  • 300g milk chocolate (chopped)
  • ¾ cup Nutella or chocolate spread
  • 1 cup heavy cream

Optional Toppings:

  • Chopped hazelnuts
  • Shaved chocolate
  • Fresh whipped cream

Tools You’ll Need

  • Mixing bowl
  • Food processor (optional)
  • Microwave or double boiler
  • 9-inch tart pan with a removable bottom

Step-by-Step Instructions

1. Prepare the Crust

  • Mix crushed graham crackers, cocoa powder, and melted butter in a bowl.
  • Press the mixture into the tart pan, ensuring an even layer.
  • Bake at 350°F for 8 minutes or refrigerate for an hour for a no-bake option.

2. Add the Banana Layer

  • Slice ripe bananas into even rounds.
  • Layer the banana slices over the cooled crust, ensuring full coverage.

3. Make the Ganache

  • Microwave the chocolate, Nutella, and cream in 30-second intervals, stirring until smooth.
  • Pour the ganache over the banana layer, spreading it evenly with a spatula.

4. Refrigerate and Serve

  • Chill the tart in the refrigerator for at least 4 hours or overnight.
  • Garnish with toppings like hazelnuts or whipped cream before serving.

Creative Variations

  1. Caramel Banana Tart
    • Drizzle caramel sauce over the bananas before adding ganache.
  2. Peanut Butter Chocolate Tart
    • Replace Nutella with peanut butter for a nutty twist.
  3. Dark Chocolate Tart
    • Swap milk chocolate for dark chocolate to intensify the flavor.
  4. Gluten-Free Option
    • Use gluten-free cookies for the crust.

Tips for Success

  • Use Firm Bananas: Overripe bananas can become mushy.
  • Cool the Crust: Ensure the crust is completely cool before layering bananas.
  • Chill Thoroughly: Allow the ganache to set fully in the fridge for clean slices.

Serving Suggestions

  • Pair with Kentucky Butter Cake for a dessert spread.
  • Serve with fresh coffee or a dessert wine for a luxurious experience.
  • Add a scoop of vanilla ice cream for an indulgent pairing.

Storing Your Tart

In the Fridge:

  • Store in an airtight container for up to 5 days.

Freezing:

  • Not recommended due to the texture changes in bananas.

Reheating:

  • If the crust becomes too hard, let the tart sit at room temperature for 10 minutes before serving.

Frequently Asked Questions (FAQs)

Q1: Can I make this tart ahead of time?
A: Yes, prepare it 1-2 days in advance and store in the fridge.

Q2: Can I omit Nutella?
A: Yes, replace it with more chocolate or use a different spread like peanut butter.

Q3: How do I slice the tart cleanly?
A: Use a sharp knife dipped in warm water, wiping it clean between cuts.

Q4: What’s the best way to ripen bananas quickly?
A: Place them in a brown paper bag with an apple to speed up the process.

Q5: Can I use a pre-made crust?
A: Absolutely! A store-bought crust works perfectly if you’re short on time.


Internal Linking Opportunities


Conclusion

Chocolate Banana Tart combines the best of creamy chocolate, fresh bananas, and a buttery crust to create a show-stopping dessert. With its simple preparation and rich flavor, it’s a must-try for chocolate and banana lovers alike. Give it a try, and don’t forget to share your favorite variations!

Funnel Cake Bites: Easy Homemade Fair Treat

mini funnel cakes, easy fairground treats, crispy funnel cake bites, homemade funnel cakes, bite-sized desserts, fair-inspired snacks

Funnel Cake Bites: Mini Fair Treats for Any Occasion

If you love the crispy, fluffy delight of funnel cakes, these miniature funnel cake bites bring the same nostalgic joy in a bite-sized package. Perfect for parties, dessert tables, or a casual indulgence at home, they’re a treat everyone will enjoy.

For more delightful treats, explore Crispy Fried Cheesecake Bites to add variety to your dessert table.


Why Funnel Cake Bites Are Perfect for Any Occasion

  • Portable Portions: Easy to serve and share.
  • Quick to Make: Ready in less than 30 minutes.
  • Customizable: Pair with your favorite toppings and sauces.

Pair these with The Ultimate Comfort Food Crockpot Potato Soup for a cozy, balanced snack spread.


Ingredients You’ll Need

Core Ingredients:

  • All-purpose flour
  • Eggs
  • Milk
  • Sugar
  • Baking powder
  • Vanilla extract
  • Vegetable oil (for frying)
  • Powdered sugar (for dusting)

Optional Toppings:

  • Cinnamon sugar
  • Chocolate or caramel drizzle
  • Fresh fruit or whipped cream

Tools You’ll Need

  • Mixing bowl
  • Whisk or hand mixer
  • Deep frying pan or electric fryer
  • Parchment paper or wire rack for cooling
  • Tongs or slotted spoon

How to Make Funnel Cake Bites

1. Prepare the Batter

  • Combine dry ingredients (flour, sugar, baking powder) in a mixing bowl.
  • Whisk together wet ingredients (milk, eggs, vanilla) in another bowl.
  • Gradually add wet ingredients to dry until a smooth batter forms.

2. Heat the Oil

  • Preheat oil to 375°F in a deep frying pan. Test with a drop of batter; it should sizzle and rise.

3. Fry the Bites

  • Drop small spoonfuls of batter into the hot oil.
  • Fry until golden brown, flipping halfway (1-2 minutes per side).

4. Drain and Dust

  • Remove with a slotted spoon and drain on parchment or a wire rack.
  • Dust with powdered sugar or your desired topping while still warm.

Creative Variations

  1. Chocolate Funnel Cake Bites
    • Add cocoa powder to the batter for a rich flavor.
    • Top with powdered sugar and chocolate drizzle.
  2. Savory Funnel Cake Bites
    • Skip sugar and vanilla. Add shredded cheese and herbs for a unique twist.
  3. Holiday Bites
    • Top with colored sprinkles for festive celebrations.
  4. Cinnamon Sugar Bites
    • Roll in a mix of cinnamon and granulated sugar for a churro-like treat.

Tips for Perfect Funnel Cake Bites

  • Fresh Oil: Use clean oil for the best flavor.
  • Small Batches: Fry a few bites at a time to maintain oil temperature.
  • Test Consistency: Batter should be thick enough to hold its shape when dropped.

Serving Suggestions


Storing and Reheating

Storage:

  • Store in an airtight container at room temperature for up to 2 days.

Reheating:

  • Reheat in an oven at 350°F for 5-7 minutes to restore crispness.

Freezing:

  • Freeze in single layers, then reheat directly from frozen at 375°F for 8-10 minutes.

Frequently Asked Questions (FAQs)

Q1: Can I bake Funnel Cake Bites instead of frying?
A: Yes! Use a mini muffin tin and bake at 375°F for 10-12 minutes.

Q2: Can I prepare the batter ahead of time?
A: Yes, refrigerate the batter for up to 24 hours. Stir before frying.

Q3: How do I prevent bites from absorbing too much oil?
A: Maintain a steady oil temperature of 375°F and avoid overcrowding.

Q4: Are Funnel Cake Bites suitable for kids?
A: Absolutely! They’re perfect for kids’ parties and easy to customize.

Q5: What dipping sauces pair well with Funnel Cake Bites?
A: Chocolate, caramel, berry compote, or a simple vanilla glaze are excellent options.


Internal Linking Opportunities


Conclusion

Funnel Cake Bites are a fun, versatile treat that captures the joy of fairground desserts in a convenient, sharable format. Crispy, fluffy, and endlessly customizable, they’re perfect for any occasion. Try them today and let us know your favorite toppings or variations!

Muddy Buddy Rice Krispies: Easy No-Bake Dessert Recipe

Rice Krispies Muddy Buddies, no-bake Muddy Buddy treats, chocolate peanut butter Rice Krispies, crunchy dessert recipes, easy Muddy Buddies

Muddy Buddy Rice Krispies: A Delightful No-Bake Dessert

If you’re looking for a treat that’s easy to make, crunchy, and satisfyingly sweet, Muddy Buddy Rice Krispies are the perfect choice. Combining the classic flavors of chocolate, peanut butter, and powdered sugar with the light, crispy texture of Rice Krispies, this snack is a hit at parties, holidays, or any casual gathering.

For more dessert inspirations, check out Kentucky Butter Cake for a rich, indulgent pairing.


Why You’ll Love This Recipe

  • Quick and Easy: No baking required.
  • Versatile: Perfect for parties, gift packaging, or casual snacking.
  • Customizable: Add your favorite mix-ins like pretzels or candies.

Pair this with Cheesy Bacon Jalapeño Corn Dip for a sweet and savory combination that will wow your guests.


Ingredients You’ll Need

Core Ingredients:

  • 6 cups Rice Krispies cereal
  • 2 cups chocolate chips
  • 1/2 cup creamy peanut butter
  • 1/4 cup unsalted butter
  • 1 teaspoon vanilla extract
  • 1 1/2 cups powdered sugar

Optional Add-ons:

  • Mini marshmallows for added chewiness.
  • Pretzels or M&Ms for a festive crunch.
  • Coconut flakes for a tropical twist.

Tools You’ll Need

  • Large mixing bowl.
  • Microwave-safe bowl for melting.
  • Parchment-lined baking sheet.
  • Large resealable bag for coating.

Step-by-Step Instructions

1. Melt Chocolate and Peanut Butter

  • Combine chocolate chips, peanut butter, and butter in a microwave-safe bowl.
  • Heat in 30-second intervals, stirring until smooth.
  • Mix in vanilla extract.

2. Combine with Rice Krispies

  • Pour the melted mixture over the Rice Krispies in a large mixing bowl.
  • Stir gently to coat the cereal evenly.

3. Coat with Powdered Sugar

  • Spread the mixture on a parchment-lined baking sheet to cool.
  • Once cooled, transfer to a resealable bag, add powdered sugar, and shake until evenly coated.

4. Set and Serve

  • Spread the coated Rice Krispies back onto the baking sheet to set.
  • Serve in bowls or portion into snack bags.

Creative Variations

  1. Nut-Free Option:
    • Use sunflower seed butter or cookie butter instead of peanut butter.
  2. Dark Chocolate Delight:
    • Substitute milk chocolate with dark chocolate chips for a richer flavor.
  3. Festive Mix:
    • Add red and green M&Ms for Christmas or pastel candies for Easter.
  4. Gluten-Free:
    • Use certified gluten-free Rice Krispies and powdered sugar.
  5. Tropical Flavor:
    • Add coconut flakes and white chocolate for a refreshing twist.

Tips for Success

  • Use Fresh Cereal: Stale Rice Krispies won’t provide the desired crunch.
  • Melt Slowly: Avoid overheating chocolate to prevent burning.
  • Cool Before Coating: Ensure the mixture is cool before adding powdered sugar to avoid clumping.

Serving Suggestions

  • Arrange on a dessert platter with Raspberry Cheesecake Brownie Bites for a variety of textures.
  • Package in festive bags as holiday gifts or party favors.
  • Serve alongside coffee or hot cocoa for a cozy treat.

Storage and Shelf Life

Short-Term Storage:

  • Store in an airtight container at room temperature for up to a week.

Long-Term Storage:

  • Freeze portions in a zip-top bag for up to 3 months. Thaw at room temperature before serving.

Re-crisping:

  • If the mixture softens, spread it on a baking sheet and bake at 250°F for 5-10 minutes.

Frequently Asked Questions (FAQs)

Q1: Can I use a different cereal instead of Rice Krispies?
A: Yes, Rice Chex or Corn Chex are great alternatives.

Q2: How can I prevent clumping when adding powdered sugar?
A: Let the mixture cool completely before coating with powdered sugar.

Q3: Can I make this recipe nut-free?
A: Absolutely! Use nut-free spreads like cookie butter or sunflower seed butter.

Q4: What’s the best way to package these for gifts?
A: Use clear cellophane bags tied with a ribbon or festive tins.

Q5: How many servings does this recipe make?
A: This recipe yields about 12 servings, depending on portion size.


Internal Linking Opportunities


Conclusion

Muddy Buddy Rice Krispies are the ultimate no-bake treat for any occasion. Their irresistible combination of crunch, sweetness, and chocolatey goodness makes them a crowd-pleaser. Try them for your next gathering or as a fun family snack, and let us know your favorite variations!