Beef and Napa Cabbage Stir-Fry: Quick, Healthy, and Flavorful

Napa cabbage and beef recipe, healthy cabbage stir-fry, quick beef stir-fry, beef and vegetable skillet, Napa cabbage dinner recipe

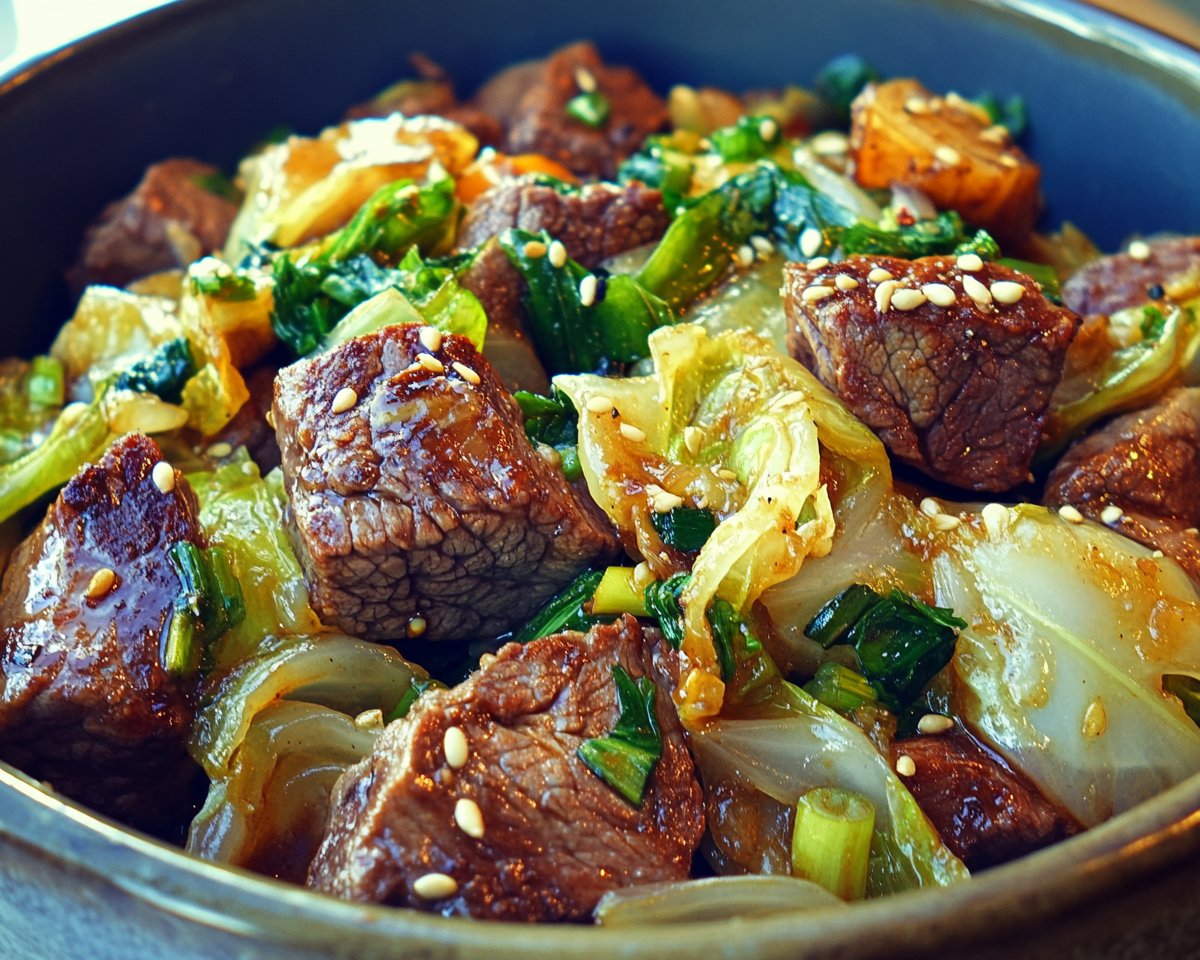
Beef and Napa Cabbage Stir-Fry: A Quick, Healthy, and Flavorful Dish

The combination of tender beef and crispy Napa cabbage creates a delightful stir-fry that’s both nutritious and delicious. This easy recipe is perfect for weeknight dinners or as part of a well-balanced meal. Packed with vibrant flavors and a balance of protein and vegetables, it’s a dish that promises satisfaction in every bite.

Explore complementary dishes like Hearty Chicken Chili or Garlic Rosemary Steak and Potatoes Skillet for more dinner ideas.


Ingredients

Main Components

  • Beef: Flank steak or sirloin, thinly sliced.
  • Napa Cabbage: Cleaned and chopped into bite-sized pieces.
  • Aromatics: Fresh garlic, ginger, and green onions.

For the Sauce

  • Soy sauce, oyster sauce, sesame oil, and a dash of rice vinegar.
  • Cornstarch slurry for thickening.

Optional Add-Ins

  • Bell peppers, mushrooms, or shredded carrots for added texture.
  • A sprinkle of crushed red pepper for heat.

Tools

  • A wok or large skillet, sharp knife, and mixing bowls.

For additional tips on stir-frying, check out How to Stir-Fry Like a Pro.


Step-by-Step Instructions

1. Prepare the Ingredients

  • Thinly slice beef against the grain for tenderness.
  • Cut Napa cabbage and optional vegetables into uniform pieces for even cooking.
  • Mix sauce ingredients in a bowl, ensuring the cornstarch is fully dissolved.

2. Cook the Beef

  • Heat oil in a wok over high heat. Sear beef slices quickly until browned, then remove from the wok.

3. Stir-Fry the Vegetables

  • Sauté garlic and ginger until aromatic.
  • Add cabbage and other vegetables, stir-frying until slightly softened.

4. Combine and Serve

  • Return beef to the wok. Add the sauce and stir until the mixture thickens.
  • Serve hot over rice or noodles, garnished with sesame seeds and green onions.

Creative Variations

Protein Alternatives

  • Swap beef for chicken, tofu, or shrimp for variety.

Vegetable Options

  • Include water chestnuts, bok choy, or snap peas for texture.

Sauce Enhancements

  • Add hoisin sauce for sweetness or chili paste for spice.

Explore Crispy Chicken and Potato Ball Snacks for a side dish to pair with your stir-fry.


FAQs About Beef and Napa Cabbage Stir-Fry

Q1: Can I use regular cabbage instead of Napa cabbage?

Yes, though Napa cabbage has a milder flavor and softer texture.

Q2: How can I make this dish gluten-free?

Use tamari or coconut aminos instead of soy sauce, and ensure the oyster sauce is gluten-free.

Q3: Can this recipe be made ahead?

Yes, prep the ingredients and sauce in advance for quick cooking.

Q4: What’s the best way to reheat leftovers?

Reheat in a skillet over medium heat for the best texture.


Pro Tips for the Perfect Stir-Fry

  • High Heat is Key: Use high heat to achieve that characteristic smoky flavor.
  • Prep Before Cooking: Stir-frying is quick, so have all ingredients ready beforehand.
  • Don’t Overcrowd the Pan: Cook in batches if necessary to avoid steaming the beef.

Why You Should Try This Recipe

Beef and Napa cabbage stir-fry is a healthy, quick, and flavorful dish that’s easy to customize. It’s ideal for busy nights and pairs well with a variety of sides, making it a versatile addition to your meal rotation.

Crockpot Cream Cheese Chicken Chili: Easy and Delicious Comfort Food

slow cooker chicken chili, creamy chicken chili recipe, ranch chicken chili, crockpot chicken chili with cream cheese, creamy crockpot chili

Crockpot Cream Cheese Chicken Chili: A Comfort Food Classic

Creamy, spicy, and incredibly easy to prepare, Crockpot Cream Cheese Chicken Chili is the ultimate comfort food for cozy evenings or family gatherings. This dish combines tender shredded chicken, hearty beans, and a luscious cream cheese base for a one-pot meal that satisfies every craving.

For more crockpot inspiration, explore Crockpot Ranch Chicken and Potatoes or Crockpot Baked Ziti.


Ingredients You’ll Need

Core Ingredients

  • Protein: Boneless, skinless chicken breasts or thighs.
  • Base: Cream cheese, ranch dressing mix, and chicken broth.
  • Veggies and Beans: Black beans, corn, diced tomatoes with green chilies.
  • Seasoning: Chili powder, garlic powder, cumin, and a pinch of salt.

Optional Add-Ons

  • Jalapeños for a spicy kick.
  • Shredded cheese or sour cream for garnish.

Equipment Needed

  • Crockpot (4-6 quarts), mixing bowl, and a ladle for serving.

For a lighter chili option, check out Embracing Autumn with Hearty Chicken Chili.


Step-by-Step Recipe Instructions

1. Prepare Your Crockpot

  • Spray the crockpot with non-stick spray or line with a crockpot liner.

2. Add Ingredients

  • Layer chicken at the bottom of the crockpot.
  • Top with black beans, corn, diced tomatoes, and seasonings.

3. Cook Low and Slow

  • Cook on low for 6-8 hours or on high for 3-4 hours.

4. Incorporate Cream Cheese

  • In the last 30 minutes, add cream cheese and stir until fully melted.

5. Shred the Chicken

  • Use two forks to shred the chicken and mix it back into the chili.

6. Serve

  • Ladle into bowls and top with shredded cheese, cilantro, or tortilla strips.

Creative Variations

  • Spicy Twist: Add cayenne pepper or a splash of hot sauce.
  • Vegetarian Option: Replace chicken with diced sweet potatoes or jackfruit.
  • Low-Carb Version: Skip the beans and add cauliflower rice.

FAQs About Crockpot Cream Cheese Chicken Chili

Q1: Can I use frozen chicken?

Yes, but make sure to cook until the internal temperature reaches 165°F.

Q2: Can this recipe be doubled?

Absolutely! Ensure your crockpot is large enough to hold the increased volume.

Q3: How do I store leftovers?

Store in an airtight container in the fridge for up to 3 days or freeze for up to 3 months.

Q4: What’s the best way to reheat?

Reheat on the stove over low heat or in the microwave in 1-minute intervals.


Why You’ll Love This Recipe

Crockpot Cream Cheese Chicken Chili is a creamy, flavorful, and hearty meal that’s as easy to prepare as it is delicious. Whether you’re feeding a crowd or meal-prepping for the week, this recipe is a winner.

Easy Christmas Funfetti Bread: A Festive Holiday Treat

Christmas sprinkle bread, festive funfetti loaf, holiday quick bread, sprinkle holiday bread, funfetti dessert bread

Easy Christmas Funfetti Bread: A Festive Holiday Delight

Easy Christmas Funfetti Bread is the perfect treat to brighten up your holiday season. With colorful sprinkles and a moist, sweet base, it’s a quick bread recipe that’s easy to make and bursting with holiday cheer. Whether enjoyed as a breakfast, dessert, or festive gift, this bread is sure to be a hit!

For more holiday inspiration, check out Kentucky Butter Cake: A Slice of Southern Comfort or Bacon Cinnamon Rolls.


Ingredients You’ll Need

Core Ingredients

  • Dry Ingredients: All-purpose flour, baking powder, and a pinch of salt.
  • Wet Ingredients: Unsalted butter, granulated sugar, eggs, vanilla extract, and milk.
  • Add-Ins: Holiday-themed sprinkles and optional white chocolate chips.

For the Glaze

  • Powdered sugar, milk, and vanilla extract. Add food coloring for a festive touch.

Tools and Equipment

  • Mixing bowls, loaf pan, whisk, and spatula.

For another fun, colorful recipe, explore Smores Jars: Bringing the Campfire to Your Kitchen.


Step-by-Step Recipe Instructions

1. Prepare the Batter

  • Preheat your oven to 350°F (175°C). Grease and line a loaf pan.
  • Cream butter and sugar until fluffy. Add eggs one at a time, followed by vanilla extract.
  • In a separate bowl, whisk together dry ingredients.
  • Gradually mix dry ingredients into the wet mixture. Stir in milk and fold in sprinkles.

2. Bake the Bread

  • Pour the batter into the prepared loaf pan.
  • Bake for 60-70 minutes, or until a toothpick inserted into the center comes out clean.
  • Allow to cool for 10 minutes before transferring to a wire rack.

3. Glaze and Decorate

  • Mix powdered sugar, milk, and vanilla extract to create the glaze.
  • Drizzle over the cooled bread and add more sprinkles for decoration.

Creative Variations

  • Chocolate Funfetti Bread: Add cocoa powder to the batter and sprinkle with chocolate chips.
  • Cinnamon Swirl Funfetti Bread: Add a layer of cinnamon sugar between the batter layers.
  • Mini Loaves: Divide the batter into mini loaf pans for personalized gifts.

FAQs About Christmas Funfetti Bread

Q1: Can I use different sprinkles?

Yes! Customize with any sprinkles to match other holidays or events.

Q2: How long does this bread stay fresh?

Store in an airtight container for up to 3 days or freeze for up to 3 months.

Q3: Can I make this gluten-free?

Use a 1:1 gluten-free baking flour for a gluten-free version.

Q4: What’s the best way to avoid sprinkles bleeding?

Fold sprinkles gently into the batter and avoid overmixing.


Why You’ll Love This Recipe

Easy Christmas Funfetti Bread is a delightful combination of simplicity and festive charm. It’s a recipe that brings joy to both the baker and the lucky recipients of this holiday treat. With endless variations, this bread is as versatile as it is delicious.

Donut Grilled Cheese with Bacon: Sweet and Savory Perfection

bacon grilled cheese with donuts, sweet and savory sandwich, glazed donut grilled cheese, bacon cheese donut sandwich, donut bacon breakfast sandwich

Donut Grilled Cheese with Bacon: The Sweet and Savory Sandwich

Donut Grilled Cheese with Bacon is a bold and indulgent creation that combines the sweetness of donuts with the savory delight of crispy bacon and gooey melted cheese. This unexpected yet delectable dish is perfect for brunches, snacks, or anytime you’re craving a unique treat.

For those exploring more unique sandwich recipes, try Ultimate BBQ Pulled Pork Grilled Cheese or Jalapeño Popper Grilled Cheese.


Ingredients You’ll Need

Core Ingredients

  • Donuts: Glazed donuts work best, but cinnamon sugar or chocolate-glazed are great alternatives.
  • Cheese: Cheddar, Gouda, or a mix for optimal meltiness.
  • Bacon: Crispy, smoky bacon is a must.
  • Butter: For grilling.

Optional Add-Ons

  • Sriracha mayo for a spicy kick.
  • Caramelized onions for added sweetness.
  • Maple syrup for extra indulgence.

Tools and Equipment

  • Non-stick skillet, spatula, and parchment paper.

For a similar creative breakfast dish, explore Bacon Cinnamon Rolls.


Step-by-Step Recipe Instructions

1. Prep the Ingredients

  • Cook bacon in a skillet over medium heat until crispy. Set aside on paper towels.
  • Slice the donuts in half horizontally.

2. Assemble the Sandwich

  • On the bottom half of each donut, layer cheese and bacon.
  • Top with the other half of the donut.

3. Grill the Sandwich

  • Heat a skillet over medium heat and add a small amount of butter.
  • Grill the sandwich for 1-2 minutes on each side, pressing gently, until the cheese melts and the donut is golden.

4. Serve

  • Slice the sandwich in half and serve immediately.
  • Optional: drizzle with maple syrup or add a side of hash browns.

Creative Variations

Cheese Alternatives

  • Use Brie for a creamy texture.
  • Add a spicy kick with Pepper Jack.

Donut Options

  • Experiment with filled donuts like jelly or Boston cream for extra flavor layers.

Additional Toppings

  • Add crispy fried eggs for a breakfast twist.
  • Layer sautéed spinach or arugula for a fresh touch.

FAQs About Donut Grilled Cheese with Bacon

Q1: Can I use any type of donut?

Yes, but glazed donuts are ideal for their sweetness and texture. Other options like plain or flavored work too.

Q2: How do I keep the sandwich from getting too greasy?

Blot the bacon and lightly toast the donut halves to reduce grease.

Q3: Can I make these sandwiches ahead of time?

It’s best served fresh, but you can pre-cook the bacon and assemble just before grilling.

Q4: What’s the best cheese for this recipe?

Cheddar is a classic choice, but Gouda and Mozzarella also work well.


Pro Tips for the Perfect Donut Grilled Cheese

  • Grill Slowly: Use medium heat to ensure the cheese melts without burning the donut.
  • Crisp the Bacon: Crispy bacon balances the sweetness of the donut.
  • Experiment: Try savory fillings like ham or spicy aioli for unique flavors.

For more savory-sweet combinations, visit Crispy Fried Cheesecake Bites.


Why You’ll Love This Dish

Donut Grilled Cheese with Bacon is the ultimate fusion of flavors, blending sweet and savory into every bite. Whether you’re hosting brunch or indulging in a late-night snack, this sandwich is guaranteed to impress.

Baileys Chocolate Cheesecake Trifle: A Decadent Dessert for Any Occasion

Baileys dessert trifle, chocolate cheesecake trifle with Baileys, Baileys trifle recipe, Irish cream trifle, chocolate Baileys dessert

Baileys Chocolate Cheesecake Trifle: A Luxurious Dessert for Any Occasion

Baileys Chocolate Cheesecake Trifle is the perfect dessert for anyone who loves the indulgent combination of chocolate, cheesecake, and Baileys Irish Cream. This trifle layers moist chocolate cake, creamy cheesecake filling, and rich chocolate pudding into a visually stunning and irresistibly delicious treat.

For more chocolate-infused desserts, check out Raspberry Cheesecake Brownie Bites or Decadent Salted Caramel Apple Cheesecake.


Ingredients and Tools You’ll Need

Core Ingredients

  • Chocolate Cake:
    • 1 box of chocolate cake mix or homemade chocolate cake.
    • Substitute ½ cup of water with Baileys Irish Cream for extra flavor.
  • Cheesecake Filling:
    • 16 oz cream cheese (softened).
    • 1 cup powdered sugar.
    • 1 cup Baileys Irish Cream.
    • 2 cups whipped cream.
  • Chocolate Pudding:
    • 1 package of instant chocolate pudding mix.
    • 2 cups cold milk.

Optional Toppings

  • Whipped cream, chocolate shavings, or cocoa powder.
  • A drizzle of Baileys Irish Cream.

Tools Needed

  • Mixing bowls, electric mixer, spatula, whisk, and trifle dish.

For a similar no-bake dessert, try No-Bake Pumpkin Cheesecake.


Step-by-Step Recipe Instructions

1. Prepare the Chocolate Cake

  • Bake your favorite chocolate cake following the package or recipe instructions.
  • Allow the cake to cool completely before cutting it into small cubes or crumbling.

2. Make the Cheesecake Filling

  • Beat cream cheese until smooth.
  • Gradually mix in powdered sugar and Baileys Irish Cream until fully incorporated.
  • Gently fold in whipped cream for a light, fluffy texture.

3. Prepare the Chocolate Pudding

  • Whisk pudding mix with cold milk until thickened.
  • Let it sit for 5-10 minutes before layering.

4. Assemble the Trifle

  • In a trifle dish or individual serving glasses, layer the ingredients:
    • Start with chocolate cake cubes as the base.
    • Add a generous layer of cheesecake filling.
    • Follow with chocolate pudding.
    • Repeat layers until the dish is full, finishing with whipped cream or cheesecake filling on top.

5. Add Garnishes and Chill

  • Top with whipped cream, chocolate shavings, and a drizzle of Baileys Irish Cream.
  • Chill for at least 2 hours before serving to allow the flavors to meld.

Creative Variations

Flavor Twists

  • Mint Chocolate Trifle: Replace Baileys Irish Cream with Baileys Mint Chocolate.
  • Caramel Delight Trifle: Add a caramel drizzle between layers and use Baileys Salted Caramel.
  • Mocha Lover’s Trifle: Add espresso powder to the pudding mix and replace Baileys with Baileys Espresso Creme.

Serving Ideas

  • Serve in clear individual glasses for elegant presentation.
  • Pair with a Baileys-spiked coffee for a complete experience.

For a similar elegant dessert, check out Mini Pineapple Coconut Milk Cheesecakes.


FAQs About Baileys Chocolate Cheesecake Trifle

Q1: Can I make this trifle in advance?

Yes, it’s best to prepare it a day ahead to let the flavors meld together.

Q2: What can I substitute for Baileys Irish Cream?

You can use an alcohol-free Irish cream-flavored creamer or another liqueur like Kahlúa.

Q3: Can I freeze the trifle?

Freezing is not recommended as the texture of the cheesecake filling and pudding may change.

Q4: How can I avoid soggy layers?

Ensure the cake is completely cooled and use a light hand when adding Baileys Irish Cream to avoid oversaturating.


Pro Tips for Perfect Trifles

  • Layering Matters: Use clear dishes to showcase the beautiful layers.
  • Keep It Smooth: Always use room-temperature cream cheese for the filling to avoid lumps.
  • Chill for the Best Flavor: Allow at least 2-4 hours of chilling before serving.

Nutritional Information

  • Calories: ~350 per serving.
  • Protein: ~6 grams.
  • Fat: ~20 grams.
  • Carbohydrates: ~30 grams.

Internal Linking Opportunities


Why You Should Try Baileys Chocolate Cheesecake Trifle

Baileys Chocolate Cheesecake Trifle is more than a dessert—it’s an experience. The rich, creamy layers paired with the subtle warmth of Baileys Irish Cream create a show-stopping centerpiece for any occasion. Whether for a holiday gathering or a cozy evening, this trifle will leave your guests raving.