Pan Fried Cinnamon Bananas: Quick and Easy Sweet Treat
Pan Fried Cinnamon Bananas: A Sweet, Quick Treat
Pan fried cinnamon bananas are the perfect combination of simplicity and indulgence. Whether you need a quick dessert, a sweet breakfast topping, or a healthy snack, this recipe is incredibly versatile. With a caramelized coating and warm cinnamon flavor, these bananas are sure to satisfy any sweet tooth.
Pan fried cinnamon bananas are an easy and delicious way to elevate any meal or snack. With minimal ingredients and maximum flavor, they’re perfect for satisfying sweet cravings in no time. Pair them with other comforting recipes like Delightful Mini Pineapple Upside-Down Cakes to impress family and friends.
Deliciously Irresistible Blueberry Heaven Cookies Recipe for Your Sweet Tooth
Blueberry Heaven Cookies: A Bite of Bliss
⚖️
Difficulty
Easy
⏲️
Prep Time
15 mins
🕒
Cook Time
12 mins
⏱️
Total Time
27 mins
🍽️
Servings
24 cookies
Imagine biting into a cookie that’s as blissful as a summer day. These Blueberry Heaven Cookies bring a burst of fresh blueberry flavor to each bite, offering a delightful mix of sweetness and tang. They’re soft yet slightly chewy, making for an addictive treat that’s hard to resist. With simple ingredients and minimal preparation time, these cookies are perfect for both novice bakers and seasoned pros looking for a new twist on cookie classics.
Quick Recipe Highlights
Flavor Profile: With notes of sweet vanilla balanced by the tartness of blueberries, these cookies are a fruit-forward treat with a buttery underpinning.
Texture: Expect a soft and tender crumb with bursts of juicy blueberries, offering a delightful mouthfeel with each bite.
Aroma: The cookies emit a warm, inviting fragrance of freshly baked bread and berries that will fill your kitchen.
Visual Appeal: Each cookie is a picturesque pale golden hue dotted with vibrant blue blueberries.
Skill Level Needed: Easy to make with straightforward steps, no advanced baking techniques required.
Special Equipment: Just a hand mixer and baking sheet will do.
Recipe Overview
Difficulty Level: Chosen as ‘Easy’ because the recipe involves basic mixing and baking techniques common to cookie recipes, perfect for beginners.
Category: Ideal for dessert or an afternoon snack, these cookies cut into both sweet cravings and the need for something wholesome.
Cuisine: Takes cues from classic American baking traditions with a modern, fruity twist.
Cost: Relatively inexpensive, with blueberries accounting for the primary cost element.
Season: Best made in blueberry season, yet easily recreatable all year round thanks to frozen berries.
Occasion: Perfect for casual gatherings, tea parties, or as a quick go-to snack.
Why You’ll Love This Recipe
These Blueberry Heaven Cookies are a taste revelation, marrying the sweet decadence of a classic cookie with the refreshing bite of blueberries. The balance of soft dough and juicy fruit creates a combo that delights the palate. Convenience is another high point; with minimal prep and cook time, you can whip them up in less than half an hour. They even pack a nutritional punch courtesy of the blueberries, which are rich in antioxidants. Not to mention, they are a hit at social gatherings, offering crowd-pleasing appeal without the hefty price tag.
Historical Background and Cultural Significance
The story of blueberry cookies spans from utilitarian roots where harvests dictated ingredients. Blueberries, often termed a superfruit, have long been staple in indigenous diets in North America. Their incorporation into cookies shows the evolution of dessert in American kitchens, shifting from simple biscuits to more decadent, fruit-infused baked goods. New England, with its plentiful blueberry fields, is known for presenting such rustic, fruit-based desserts, adapting them through time to today’s beloved variations.
Ingredient Deep Dive
Blueberries, the star in this recipe, not only add flavor but also provide crucial nutrients. High in vitamin C and potassium, they offer health benefits that take this dessert up a notch. To select, look for firm, plump berries without any damage. When storing, keep them in a shallow container in the fridge to extend freshness. Should fresh blueberries not be available, frozen alternatives work just as well, simply incorporate them directly into the batter.
Common Mistakes to Avoid
Overmixing the dough can lead to tough cookies; mix just until combined.
Not measuring the blueberries precisely might alter texture; maintain balance by weighing your fruit.
Using overly soft butter may result in greasy cookies that spread too much.
Baking at incorrect temperatures can undercook or overbake them—always preheat your oven.
Insufficient dough chilling time can lead to flat cookies with runny centers.
Skipping parchment paper might lead to sticking; it ensures easy release and even baking.
Ignoring storage instructions can lead to stale cookies; always cool and store in airtight containers.
Adding too much leavening will end in a bitter aftertaste; stick to prescribed amounts.
Essential Techniques
Creaming butter and sugar forms the backbone of a good cookie texture. This classic technique involves beating softened butter with sugar until fluffy. This allows for air incorporation, ensuring light, tender cookies. Mastery here involves patience—watch for the batter’s color to lighten significantly as a sign. Also key is the folding technique; incorporating blueberries should be done gently to prevent bursting and excess moisture release into the dough.
Pro Tips for Perfect Blueberry Heaven Cookies
Chill the dough for at least an hour to manage spread and enhance flavor—the texture payoff is worth the planning. For additional flavor depth, try toasting your flour lightly before use, infusing it with a nutty undertone. Bring a marbled effect by gently swirling in ¼ cup of melted white chocolate into the dough. Always bake on the middle oven rack to ensure even heat distribution, giving the cookies a perfect texture.
Variations and Adaptations
Elevate your cookies regionally by incorporating dried cranberries for a New England twist. Seasonal adaptations could involve adding a hint of cinnamon in autumn, while summertime might welcome a zest of lemon. Dietary needs can be accommodated by swapping in gluten-free flour mixes; a little xanthan gum can aid in binding. Feel adventurous? Try a savory adaptation with a dash of balsamic glaze after baking.
Serving and Presentation Guide
For a stunning presentation, serve these cookies with a dusting of powdered sugar and a garnish of fresh mint leaves. Plating alongside a scoop of vanilla ice cream adds a delightful contrast. To modernize, layer them in a tall jar with parchment discs as a gifting idea. Measure portions to keep sizes uniform—using an ice cream scoop can assist.
Wine and Beverage Pairing
These cookies pair splendidly with a crisp Prosecco or a sweet Moscato wine, whose bubbles and notes complement the berry undertone. Non-alcoholic options include a chilled blueberry iced tea or a cozy cup of chamomile. For colder days, a steaming mug of rich dark hot chocolate creates a comforting contrast. Serve beverages at an optimal temperature to heighten experience.
Storage and Shelf Life
Store cookies in an airtight container at room temperature for up to a week to maintain freshness. If longer storage is needed, freeze them for up to two months using freezer-safe bags. Signs of spoilage include an off-smell or visible mold growth. To reheat, use a low oven setting to gently warm, reviving some of the cookie’s fresh-baked magic.
Make Ahead Strategies
The cookie dough can be prepared ahead and stored in the refrigerator for three days, giving flexibility to bake in spurts or all at once. During prep, form the dough into balls prior to chilling to streamline baking. Once ready to bake, add a couple of minutes extra to the cook time if chilled. Post-refrigeration, allow the dough to come slightly closer to room temperature for even cooking.
Scaling Instructions
For halving this recipe, maintain the integrity by precise measurement adjustments, especially leavening agents. Doubling means having enough baking sheets on hand to avoid crowding. Timing remains largely unaffected, though increase resting time for large batches as oven temps fluctuate. Keep batch sizes manageable to ensure consistent quality.
Nutritional Deep Dive
Rich in both macro and micronutrients, each cookie offers a balance of fats, carbs, and a sweetness countered by fiber and antioxidates from the blueberries. Suitable for indulging moderately during snack times or desserts, it supports portion control strategies given its gentle sweetness and hearty ingredients. The replacement of white with whole wheat flour adds wholesome elements while modifying texture subtly.
Dietary Adaptations
For a gluten-free option, substitute almond flour, which naturally extends the nutty profile. Choose lactose-free margarine instead of butter to cater to dairy-free needs, with no compromise in taste. Go vegan by replacing the egg with flaxseed meal and water; a ratio of one tablespoon of flax to three of water works wonders. Incorporate coconut sugar instead of regular for a low-GI choice.
Troubleshooting Guide
Measure all ingredients accurately to sidestep texture issues, such as overly dry or dense cookies. If flavors dull, enhance by adding a splash of vanilla essence. Ensure ingredients are at room temperature to prevent undesirable temperature imbalances. Invest in quality parchment paper or silicon mats to neutralize equipment challenges, preventing sticking. Timing concerns, such as underbaked centers, can often be rectified by ensuring an oven thermometer verifies correct preheating.
Recipe Success Stories
These cookies have made waves in our community, inspiring variations like adding nuts for texture contrast. Readers have suggested incorporating mixed berries for a veritable fruit medley. Many praise the welcoming, homey aroma and recommend experimenting with size—create mini versions ideal for kids’ snacks or party platters. Photos shared are stunning; capture the contrast of blueberries against the cookie dough for full Instagram-worthy effect!
Frequently Asked Questions
Can I use frozen blueberries? Yes, they work well, but avoid thawing to keep the dough from becoming too wet. What can I substitute for butter? Margarine or coconut oil can be perfect alternatives while maintaining taste. How do I prevent my cookies from spreading too much? Chilling the dough adequately and using parchment paper will help maintain proper shape. Can I add nuts to this recipe? Adding chopped almonds or walnuts provides a delicious texture contrast. Why do my cookies look raw inside? Ensure your oven is heating evenly and the temperature setting is accurate. Is it possible to make these sugar-free? You can use erythritol or monk fruit sweetener as a substitute. Do I need to adjust for high-altitude baking? Yes, you may need to decrease sugar and slightly increase liquids. How do I keep my cookies soft? Store in an airtight container with a slice of bread or apple to retain moisture. What if I don’t have parchment paper? Silicone baking mats are a wonderful reusable choice. Could I replace the egg? A tablespoon of flaxseed mixed with three tablespoons of water works as a vegan substitute. Can I add spices? A dash of cinnamon or nutmeg provides a warm aromatic twist.
Additional Resources
Dive deeper into cookie-making techniques with our detailed guide on baking essentials, from ingredient science to equipment handling. Explore other berry-forward recipes that bring similar flavor explosions. For those curious about complementary bakes, discover our collection of biscuit and pound cake ideas. Equipment suggestions and bi-ingredient swaps are detailed for ease of experimentation. Tailor seasonal elements with our handy reference chart for produce that’s at its peak.
Join the Conversation
Share your baking journey on social media and tag #BlueberryHeavenCookies for a chance to be featured! Engage with fellow bakers and exchange tips and tricks in our online community. Post your recipe reviews, and let us know any creative twists you’ve tried. Our discussions are buzzing with suggestions, ensuring your baking experience keeps evolving. From urban kitchens to rustic country homes, celebrate the joy of baking with us!
The Recipe
Blueberry Heaven Cookies
Serves: 24 cookies
Prep Time: 15 mins
Cook Time: 12 mins
Total Time: 27 mins
Kitchen Equipment Needed
Hand mixer
Baking sheet
Parchment paper
Ingredients
1/2 cup unsalted butter, softened
1 cup granulated sugar
1 large egg
1 teaspoon vanilla extract
1 1/2 cups all-purpose flour
1/2 teaspoon baking soda
1/4 teaspoon salt
1 cup fresh or frozen blueberries
Directions
Preheat your oven to 350°F (175°C) and line a baking sheet with parchment paper.
Cream together the butter and sugar until light and fluffy.
Mix in the egg and vanilla, beating well.
In a separate bowl, combine flour, baking soda, and salt.
Gradually add dry ingredients to butter mixture, mixing just until combined.
Gently fold in blueberries, taking care not to overmix.
Scoop tablespoons of dough onto the prepared baking sheet.
Bake for 12 minutes or until edges are lightly brown.
Cool on a baking sheet for 5 minutes before transferring to wire racks.
Recipe Notes
For a zesty twist, add the zest of one lemon to the dough.
Ensure butter is at room temperature for best mixing.
Store extras in an airtight container to maintain freshness.
One-Pot Macaroni Cheeseburger Soup: A Quick Comfort Food Fix
One-Pot Macaroni Cheeseburger Soup: Cozy Comfort in a Bowl
⚖️
Difficulty
Easy
⏲️
Prep Time
15 mins
🕒
Cook Time
25 mins
⏱️
Total Time
40 mins
🍽️
Servings
6
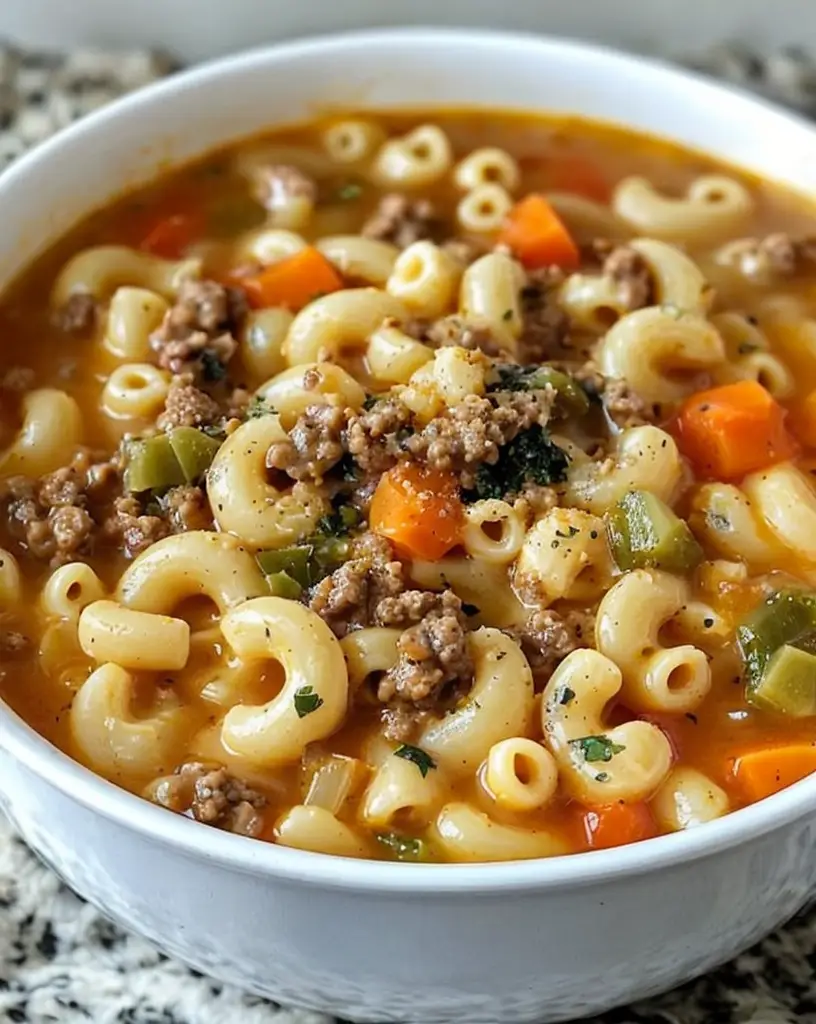
Imagine a chilly fall evening, enveloped in a cozy blanket, as you savor a bowl of One-Pot Macaroni Cheeseburger Soup. This delightful dish combines the classic flavors of a cheeseburger with the comforting warmth of a soup, making it an irresistible meal for soup enthusiasts and burger aficionados alike. Perfectly seasoned beef, tender macaroni, and rich, melty cheese come together to create a savory symphony that warms the soul.
The One-Pot Macaroni Cheeseburger Soup is an excellent example of comfort food at its best. This recipe is not only heartwarming but also convenient, as it simplifies cleanup by requiring only one pot. It is a perfect dinner option for busy weeknights, ensuring you can enjoy a wholesome, homemade meal without spending hours in the kitchen. Serve this comforting bowl of deliciousness with a slice of crusty bread for an extra touch of indulgence.
Quick Recipe Highlights
Flavor Profile: Savory cheeseburger essence with hints of tomato and mild spices, delivering a comforting, home-cooked taste
Texture: Creamy and hearty, with tender macaroni and juicy beef in every spoonful
Aroma: Warm, inviting notes of cheese and herbs fill the kitchen as it cooks
Visual Appeal: Vibrant yellows from the cheese, coupled with the rich browns of beef and specks of green herbs
Skill Level Needed: Simple enough for beginner cooks, with straightforward steps and ingredients
Special Equipment: Requires only a large pot or Dutch oven
Recipe Overview
Difficulty Level: This recipe’s simplicity lies in its one-pot method, minimal prep, and everyday ingredients, making it accessible to novice cooks.
Category: Perfect as a main course or hearty lunch, ideal for family meals.
Cuisine: Inspired by American classics, blending the beloved burger elements with creamy soup.
Cost: Affordable and budget-friendly, utilizing common pantry staples and inexpensive proteins.
Season: Best enjoyed in fall and winter for its warming, satisfying qualities.
Occasion: Great for casual dinners, family gatherings, or potlucks.
Why You’ll Love This Recipe
Taste and texture come together beautifully in the One-Pot Macaroni Cheeseburger Soup. Each spoonful delivers a satisfying blend of flavors that mimic a classic cheeseburger, without the need for a bun. The rich, creamy texture paired with soft macaroni and juicy beef makes every bite a delightful experience.
Convenience is key in this recipe, saving you time and reducing cleanup by using a single pot. It’s a dinner option that lets you relax and enjoy more time with family or friends, while the soup simmers to perfection on the stove. Plus, most ingredients are likely already in your kitchen, making this meal even easier to prepare.
Nutritionally, this soup offers a balance of protein and carbs, providing a filling meal that satiates hunger and satisfies taste buds. Adjusting cheese amounts or incorporating additional vegetables can further enhance its nutritional value to meet personal dietary needs.
Socially, this soup is a conversation starter, making it perfect for entertaining. Its unique concept of transforming a beloved fast-food item into a gourmet soup invites discussions about culinary creativity and food fusion.
Cost-effectiveness is at the heart of this dish, as it relies on affordable ingredients such as ground beef, macaroni, and cheese, making it a great option for anyone looking to feed a family on a budget without compromising on flavor.
Historical Background and Cultural Significance
The origins of the One-Pot Macaroni Cheeseburger Soup are rooted in the American culinary tradition, where comfort food reigns supreme. It brings together two iconic American staples—macaroni and cheese, and hamburgers—into a single, cohesive dish that appeals to young and old alike.
Culturally, this dish signifies the ongoing evolution of American cuisine, where experimentation and blending of popular foods lead to new, exciting recipes. The soup speaks to the inclination towards dishes that are hearty yet convenient, reflecting a modern lifestyle while honoring classic tastes.
Over the years, this recipe has evolved, with home cooks adapting it to include various spices, vegetables, and cheeses, reflecting regional tastes and availabilities. Some variations even incorporate bacon or pickles, further enhancing the authentic cheeseburger experience.
Across different regions, the soup might display variations, with possible inclusions like jalapenos in Southern versions or added mushrooms in Northern adaptations. Each rendition offers its unique twist, showcasing local flavor preferences while maintaining the foundational flavors of the original concept.
Ingredient Deep Dive
Ground beef serves as the cornerstone of this dish, infusing it with a rich, savory profile reminiscent of a traditional hamburger. A staple in American diets, ground beef is a versatile protein that’s economically accessible and rich in essential nutrients like iron and B vitamins. When selecting ground beef, opting for lean cuts can reduce fat content while maintaining flavor integrity.
Macaroni, a small, tube-shaped pasta, is critical to achieving the hearty texture in this soup. Its Italian origins are evident, yet it has become an integral element of American cuisine, largely due to its adaptability and quick-cooking nature. Store sealed in a cool, dry place to preserve freshness and avoid clumping.
Cheddar cheese adds the creamy, cheesy finish essential to replicating the cheeseburger experience. This British-origin cheese has become a fan-favorite in American cooking due to its robust flavor and excellent melting qualities. For the best results, choose aged cheddar for a bolder taste, and grate it fresh to enhance meltability.
Strong aromatics like garlic and onion provide a base of flavor, enhancing the meatiness of the soup. When fresh garlic and onions are unavailable, powdered versions offer a convenient alternative without sacrificing much flavor. Store in a cool, dark pantry to maintain potency.
Common Mistakes to Avoid
Overcooking the macaroni can lead to a mushy texture, so add it towards the end of the cooking time.
Underseasoning the beef diminishes the overall flavor. Ensure adequate seasoning with salt, pepper, and spices.
Adding cheese before sufficient cooling can result in a grainy texture. Allow the soup to slightly cool before stirring in the cheese.
Choosing canned beef broth with high sodium levels can overwhelm flavors. Opt for low-sodium options to control seasoning.
Skipping browning the beef can lead to a bland and greasy soup. Brown beef properly to enhance taste and texture.
Ignoring the simmering step can cause thin soup consistency. Be sure to simmer long enough for flavors to meld and thicken.
Using pre-shredded cheese can result in poor melting due to anti-caking agents. Grate your own cheese for optimal results.
Failure to stir during cooking can cause ingredients to stick or burn. Regular stirring ensures even cooking and consistent texture.
Essential Techniques
Browning the beef is a crucial step in this recipe, enhancing the soup’s depth of flavor. Ensure the beef is cooked on medium-high heat to achieve a perfect browning, which seals in juices while creating a savory base. Use a heavy-bottomed pot to evenly distribute heat and prevent sticking.
Timing the addition of ingredients like pasta and cheese is paramount for texture and taste. Macaroni should cook just until al dente, as it will soften further in the soup’s heat. Cheese is best added off-heat, stirring gently to create a creamy consistency without curdling.
Thickening the soup requires a gentle simmer. Allow the soup to simmer at a low, steady pace after adding all ingredients. This process blends flavors and naturally thickens the base, resulting in a satisfying mouthfeel. Avoid boiling to maintain the creamy texture and prevent ingredient breakdown.
Pro Tips for Perfect One-Pot Macaroni Cheeseburger Soup
Ensuring your beef is finely crumbled during cooking will yield a uniform texture throughout the soup. Use a fork or spatula to break down larger chunks as the beef browns.
Fresh herbs like parsley or chives add a pop of color and flavor when sprinkled on top just before serving. A small addition that makes a visual impact, playing up the soup’s appetizing appearance.
If you prefer a spicier version, incorporate chili flakes or jalapeños during the beef browning step to infuse the soup with heat, adjusting the spice level to fit your taste.
To achieve a heartier texture, incorporate diced tomatoes or bell peppers. Sauté these along with onions to release natural sweetness, which complements the savory components of the soup.
Experimenting with different cheeses can lead to exciting flavor variations. Consider mixing in a bit of smoked gouda for a subtle depth or Monterey jack for a milder profile.
When cooking for a crowd, batch-cooking this soup ahead of time is a game-changer. Reheat over low heat to gently return it to serving temperature, ensuring flavors remain intact without overcooking the pasta.
Variations and Adaptations
Regional variations add personality to this versatile recipe. Try a Southern twist by adding bacon and green onions, creating a familiar, down-home flavor profile. Or explore a Midwest version with mushrooms and Worcestershire sauce for an umami boost.
Adapting this recipe to different seasons is easy; incorporate seasonal vegetables such as zucchini in summer or butternut squash in fall. This approach ensures freshness and highlights local produce availability.
Dietary modifications like using gluten-free pasta or dairy-free cheese options cater to specific needs without compromising on flavor. Explore plant-based ground meat alternatives, maintaining texture while accommodating vegetarian or vegan diets.
Flavor variations can include incorporating barbecue or hot sauce for a bold kick, appealing to those looking for adventurous bites. Alternatively, experimenting with various herb blends, like Italian seasoning or Cajun mix, can offer new dimensions.
For a textural twist, include croutons or crispy fried onions as a topping, adding a delightful crunch that contrasts the creamy soup. Consider mixing in quinoa or barley for a texture shift while enhancing nutrition and chewiness.
Presentation alternatives include serving the soup in a bread bowl, offering an interactive, edible vessel experience. This method adds visual appeal and suggests a rustic, cozy dining setting suitable for casual gatherings or themed dinners.
Serving and Presentation Guide
Mastering the plating of One-Pot Macaroni Cheeseburger Soup requires minimal effort but impactful results. Serve in deep bowls to retain heat and capture the hearty look, encouraging immediate appetites.
Garnishing with fresh chopped parsley or a sprinkle of grated cheese invites vibrant colors, while an additional drizzle of mild olive oil or cream elevates the presentation, adding an elegant touch.
Traditional accompaniments like a side of crusty bread or a small green salad provide balanced nutrition alongside satisfying, hearty bites.
Modern serving suggestions might include individual-sized portions in ramekins or small skillets, perfect for elegant dinner parties while ensuring uniform presentation and ease of dining.
Temperature considerations suggest keeping the soup warm without boiling, preserving the creamy consistency. Pre-warming serving bowls enhances dining pleasure, as it extends the moment of the first delicious bite.
Portion control tips suggest serving the soup with smaller portions of rich sides, such as cheese-topped toasts, ensuring a balanced meal that indulges without overwhelming, making it suitable for guests mindful of intake.
Wine and Beverage Pairing
Wine pairing with Macaroni Cheeseburger Soup can enhance experience, with medium-bodied reds like Merlot complementing the richness perfectly. The fruity notes balance the depth and creaminess of the soup.
For non-alcoholic alternatives, consider light herbal teas or flavored sparkling water with citrus, as they cleanse the palate and highlight the soup’s savory elements.
For those inclined towards coffee pairings, a smooth medium roast complements the creaminess, offering a comforting meal conclusion.
Serving suggestions for beverages include chilled wines or room-temperature teas, providing a refreshing counterbalance to the soup’s warmth, enhancing flavor interplay.
Storage and Shelf Life
Proper storage extends the soup’s shelf life elegantly. Use airtight containers to prevent moisture and odor absorption, refrigerating promptly once cooled to maintain freshness.
Temperature requirements suggest refrigeration for 3-4 days, ensuring consistent texture and safety. For extended storage, consider dividing into portions, freezing for up to 3 months.
Recommended containers are glass for neutral odor retention, or BPA-free plastic for lightweight travel convenience.
Signs of spoilage include sour smell or off-coloration; discard if these appear to ensure safety. Reheat gently over low heat, stirring to avoid separation and reserving full flavor impact.
For freezing, tolerate minor texture changes by slightly undercooking the pasta initially, ensuring firmer consistency post-thaw, with reheating options like stove or microwave available.
Make Ahead Strategies
Master make-ahead techniques by preparing ingredients separately. Cook ground beef and mince vegetables up to 2 days in advance, storing them separately to maintain texture and freshness.
A sensible storage timeline involves refrigerating prepped elements and combining them on cooking day, reducing day-of commitment while retaining the soup’s integrity.
Quality assessment should include ingredient examination, avoiding losses. Assemble the soup progressively, following a structured add-in order to ensure flavor continuity.
Reheating is best on low, allowing gradual thickening without haste. Add fresh herbs or cheese once reheated to restore vibrancy and aroma, reminiscent of first-day preparation.
Scaling Instructions
Scaling recipes effectively requires precision. When halving, maintain ingredient proportions closely, using smaller pots for depth and attention to cooking times.
Doubling demands larger pot accommodations, ensuring heat distribution remains consistent for even seasoning and texture. Extend cooking time by minutes, observing pasta for al dente stage finely.
Adjust kitchen equipment by incorporating additional utensils or implements, avoiding cross-contamination or flavor dilution with scaled ingredients.
Storage remains a priority; divide portions accordingly, embracing refrigerator space for fresh storage and freezer solutions for longer-term mining.
Nutritional Deep Dive
Exploring Macaroni Cheeseburger Soup’s nutritional landscape reveals a balanced macro breakdown. Protein, carbs, and fats derive mainly from beef, macaroni, and cheddar, making a mid-range calorie option.
Micronutrient analyses show strong iron and calcium content from beef and cheese, supporting bone health and energy levels. Nutritional benefits extend to digestive balance attributed to fiber.
Dietary considerations invite balance with additional veggies or substituting reduced-fat cheese options; these alter nutrient content while preserving core flavors and satisfaction.
Portion analysis assures gratifying servings without overconsumption. Considering weight management tips, align soup consumption within broader dietary structure aligning with individual health goals.
Dietary Adaptations
Gluten-free adaptations can include corn or rice pasta substitutes, levying taste and texture similar to classic macaroni minimizing gluten intake.
Dairy-free benefits rely on plant-based cheeses or nutritional yeast for cheese flavor, using almond milk for creamy consistency resolved without dairy. Vegan choices extend to utilizing lentils for protein, effectively creating vegan-friendly indulgence, highlighting flavor complexity.
Exploring low-carb alterations like using spiralized zucchini invites hearty satisfaction without glycemic impact; keto variations could capitalize on cream and moderate cheese cheese inclusion for full-bodied stew dynamics.
Range of modifications like Paleo influence or low-FODMAP adaptation creates accessibility, ensuring all diners enjoy a harmonious meal experience without dietary limitations.
Troubleshooting Guide
Texture issues typically arise from overcooking pasta, resolved by careful monitoring and controlled timing, ensuring desired al dente outcome distinctively remains.
Flavor balance considerations revolve around incremental seasoning adjustments—sensitive taste testing should accompany gradual additions to avoid overpowering cheesiness or saltiness.
Temperature problems often occur if soup boils during cheese addition, remedy suggesting immediate stir-off-heat technique; correcting curdling malfunctions effortlessly.
Equipment challenges manifest through inadequate pot sizes, fixed by aligning scale adjustments with kitchen implements adequately accommodating batch size, preserving safety and cooking precision.
Ingredient substitutions, such as alternative protein sources, necessitate texture consideration, with larger beans or tofu cautiously incorporated, sustaining consistency and vibrancy.
Timing concerns alleviate by organizing stages, reducing overlaps and maximizing control; reinforced with written guides reminding best approaches, outcomes align closely with posted intentions.
Recipe Success Stories
Community feedback garners significant positivity, evidenced by enthusiastic praise for its fusion success blending classic tastes with innovation, verbalized by diverse culinary backgrounds favoring sensory experiences culminating in enlightening satisfaction.
Variation successes feature elevated elements like supplementary bacon or jalapeños, creating visionary takes surpassing expectations. These express beloved classics, resulting in regional differences emphasizing cultural harmony.
Adaptation stories include family preferences accounted for, such as leaner protein choices for heart-health prioritization, immediately embraced by eager diners anxious to taste modifications seamlessly combining tailored ingredients with existing anticipations.
Reader suggestions have gracefully enriched horizons; photography tips inspire visual storytelling interwoven with dynamic culinary expression captivating online sharing communities.
Frequently Asked Questions
What type of beef is best for this soup? Ground beef with around 80-85% lean content is ideal, offering a balance between flavor and fat. Leaner versions work too, but may need extra oil for browning, minimizing dryness.
Can I make this soup vegetarian? Yes, simply substitute plant-based ground meat or lentils and use vegetarian alternatives for cheese, creating a harmonious plant-based variation with texture intact.
Is it feasible to double the recipe? Absolutely; just ensure an appropriately sized pot is used to maintain even ingredient distribution. Adjust pasta timing to reach desired consistency, effectively scaling flavor profiles.
How long does this soup last? The soup remains fresh in the refrigerator for 3-4 days, ensuring storage in airtight conditions to preserve flavor integrity. Freeze for later enjoyment within three months.
Can I substitute the cheddar cheese? Yes, other cheeses like gouda or mozzarella offer delightful substitutes, each contributing their unique profiles towards distinctively modernized taste experiences.
Is it possible to make this soup ahead? Absolutely; prepare individual elements such as browning beef or chopping vegetables beforehand, enabling swift soup preparation upon assembling delightfully vibrant final outcomes.
How should I reheat the soup? Reheat gently over low heat, stirring occasionally to prevent scorching and separation. Evoke fresh aroma with herbs or additional cheese just prior to serving.
Which pasta is best for gluten-free adaptation? Opt for quinoa or brown rice pasta, aligning with texture needs accurately while remaining gluten-free compliant, fortifying culinary experiences.
What should I do if my soup is too thick? Thin the soup gently with warmed broth or water, stirring until desired consistency is reached. Adjust seasoning if needed to ensure balanced flavors.
What are suitable accompaniments? Serve alongside crusty bread for dipping or a crisp side salad to balance the indulgent richness with fresh, light flavors complimenting meal satisfaction perfectly.
Additional Resources
Explore related recipes merging creative soup endeavors with modern classics, offering new perspectives and serving inspiration inspired directly through beloved culinary traditions.
Dive deeper into ingredient information; perceive each item’s impacts in culinary realms and dietary considerations, establishing knowledge bases for innovative adaptation and creative exploration.
Technique guides enhance mastery, empowering readers with seasoned tips that seamlessly translate intentions into successful culinary executions, imbibed by expansively shared expertise throughout profound collections.
Equipment recommendations facilitate ease across achievable home cooking during elegant creation, ensuring full engagement without hinderance from limitations, thereby effectively amplifying professional feel throughout entire meal preparation seamlessly.
Seasonal variations concepts spark culinary imagination, leading towards re-envisioned meals attuned to unique growth cycles, providing wider enjoyment pathways year-round directly aligned with production.
Join the Conversation
Engage with the Macaroni Cheeseburger Soup community, sharing your photos and experiences on social platforms. Inspire fellow foodies by sending feedback and suggestions on how you adapted social events.
Boost photography abilities through leveraging lighting and perspective tips, resulting in captivating culinary storytelling adored across digital spaces.
Provide insightful reviews based upon try-and-observe tactics encountered during recipe implementation, yielding constructive dialogue owing to cognitive sharing, illuminating continued enjoyment collectively.
Ultimately connect thriving participation alongside digital community enhancement processes, esteemed reciprocation keeping engagements rich, evermore strengthening culinary network interactions aesthetically and communicatively unified.
The Recipe
One-Pot Macaroni Cheeseburger Soup
Serves: 6
Prep Time: 15 mins
Cook Time: 25 mins
Total Time: 40 mins
Kitchen Equipment Needed
Large pot or Dutch oven
Wooden spoon or spatula
Measuring cups and spoons
Grater for cheese
Ingredients
1 lb ground beef
1 onion, diced
2 cloves garlic, minced
4 cups beef broth
2 cups macaroni
1 can diced tomatoes
2 cups shredded cheddar cheese
Salt and pepper to taste
1 tsp paprika
1 tbsp olive oil
Directions
Heat olive oil in a large pot over medium heat. Add onions and garlic, sautéing until translucent.
Add ground beef, cooking until browned. Season with salt, pepper, and paprika.
Stir in beef broth and bring to a boil before adding macaroni.
Reduce to a simmer, cooking macaroni until al dente.
Stir in diced tomatoes and remove from heat. Gradually add cheddar cheese, stirring until melted and creamy.
Serve hot, garnished with parsley or extra cheese if desired.
Recipe Notes
For a spicier version, add cayenne pepper or red pepper flakes.
Vegetarians can replace ground beef with textured vegetable protein.
Leftovers can be stored in the refrigerator for up to 3 days.
Irresistibly Soft and Chewy Raspberry Sugar Cookies Recipe
Soft and Chewy Raspberry Sugar Cookies: A Delightful Treat for Every Occasion
⚖️
Difficulty
Easy
⏲️
Prep Time
15 mins
🕒
Cook Time
10 mins
⏱️
Total Time
25 mins
🍽️
Servings
24
There’s nothing quite like the sweet, tangy burst of raspberry to tantalize your taste buds. Our Soft and Chewy Raspberry Sugar Cookies offer an irresistible combination of sugary sweetness and fruity tartness, making them a perfect treat for any occasion. Whether you’re serving them at a gathering or enjoying solo with a cup of tea, these cookies will surely delight.
These raspberry-infused cookies are a sensory experience from start to finish. Upon baking, the kitchen fills with a warm, inviting aroma that promises something delicious is on the way. The soft, chewy texture complements the sharp raspberry notes, creating a balanced flavor profile that both adults and children will love.
Quick Recipe Highlights
Flavor Profile: The sweet vanilla base complements the tart raspberry, creating a harmonious burst of flavors with each bite.
Texture: These cookies offer a delightful chewiness with a slightly crisp edge, making every mouthful a pleasure.
Aroma: Expect a warm, sugary fragrance mingled with fruity undertones that will have everyone salivating.
Visual Appeal: Soft pink hues dotted with ruby-red raspberry chunks make these cookies as beautiful as they are delicious.
Skill Level Needed: Perfect for novice bakers, these cookies require simple mixing and formulating techniques.
Special Equipment: All you need is a standard oven and a baking sheet—no fancy gadgets required.
Recipe Overview
Difficulty Level: Rated as easy, this recipe requires basic baking skills, making it perfect for those just starting their baking journey.
Category: This versatile cookie fits well in both dessert and snack categories, suitable for any time of day.
Cuisine: Drawing influences from American cookie traditions, these treats have a modern twist with the addition of real raspberries.
Cost: With affordable pantry staples and seasonal raspberries, this recipe is cost-effective and doesn’t require expensive ingredients.
Season: Best enjoyed in summer when raspberries are at their peak, but frozen raspberries work perfectly for an off-season treat.
Occasion: Great for holiday platters, picnics, or a casual family dessert, these cookies bring joy to any occasion.
Why You’ll Love This Recipe
These Soft and Chewy Raspberry Sugar Cookies are loved for their exquisite taste and unique texture. The blend of sugary and tart flavors offers a refreshing twist on traditional sugar cookies, appealing to both kids and adults alike. Their chewy consistency with a slight crispiness at the edges creates a delightful mouthfeel that’s hard to resist.
The convenience of this recipe is unmatched. With a short prep and cook time, you can whip up these cookies quickly, making them an ideal last-minute dessert option or a delightful gift for unexpected guests. The easy-to-follow instructions mean no fuss and guaranteed delicious results every time.
Not only tasty, but these cookies also come with nutritional perks. Raspberries are known for their high antioxidant content and fiber, adding a healthful element to this indulgent treat. Enjoy a sweet treat with the reassurance of receiving some nutritional benefits.
In social gatherings or family get-togethers, these raspberry cookies are a crowd-pleaser. Their vibrant color and inviting aroma enhance the dessert table, sparking conversations and compliments. Whether shared at a picnic or served at a formal event, these cookies are always a hit.
For those conscious of budget, this recipe stands out as both cost-effective and accessible. With ingredients that are often on hand in most kitchens and a simple list of additional items, you won’t break the bank to enjoy these delights. Plus, using seasonal or frozen raspberries helps keep costs low while maximally enjoying their flavor.
Historical Background and Cultural Significance
Cookies, derived from the Dutch word “koekje,” have been a part of culinary tradition for centuries, evolving from small cakes to the varied types we have today. As sugar became more accessible in the 16th and 17th centuries, sugar cookies began to gain popularity, adapting into different versions across cultures.
Raspberry-flavored treats hold a special place in culinary history, often associated with summer and harvest. Their incorporation into the cookies evolved as bakers sought to balance tartness with sweetness, capturing the essence of summer’s bounty in a simple dessert.
Over the years, raspberry cookies have seen numerous adaptations. Across different regions, bakers have added unique twists—some incorporating nuts for added texture, while others experiment with glazes for extra sweetness. Despite these variations, the core flavors remain beloved.
Today, raspberry sugar cookies resonate with many as a nostalgic treat reminiscent of childhood and family gatherings. From family dinners to farmer’s markets, the simple pleasure of these cookies transcends regional boundaries, bringing smiles to faces young and old.
Ingredient Deep Dive
Flour is the backbone of these cookies, providing the structure and body. It’s crucial to use all-purpose flour, which balances protein content perfectly for soft, chewy cookies. When storing flour, keep it in an airtight container to avoid spoilage and ensure freshness.
Sugar, primarily white granulated, adds sweetness and helps with browning. Its role in these cookies is pivotal for achieving the sugar cookie’s classic taste and texture. Ensure your sugar is free-flowing and lump-free by storing it in a dry place.
Raspberries are enriched with vitamin C, fiber, and antioxidants, making them a nutritious and flavorful addition. Choose ripe, firm berries for the best taste. Frozen berries are a great alternative when fresh ones are unavailable, maintaining the cookie’s delightful raspberry burst.
Butter provides richness and aids in developing a tender crumb in these cookies. For vegan adaptations, plant-based butter substitutes are available that can mimic the effects of real butter, ensuring a buttery flavor and texture.
Vanilla extract enhances the overall flavor with its aromatic sweetness, rounding off the taste profile of the cookies. When selecting vanilla extract, pure is preferred over imitation for a more authentic flavor. Store it in a cool, dark place to maintain potency.
Common Mistakes to Avoid
Avoid overmixing the dough. Overworking can result in tough cookies, as gluten develops more than needed when mixed excessively.
Don’t substitute ingredients thoughtlessly. Each ingredient plays a specific role, and random replacements may alter the taste and texture.
Measure ingredients precisely. Baking is a science, and too much flour or sugar can lead to dense, overly sweet cookies.
Ensure butter is the correct temperature—too cold, it won’t incorporate well; too warm, it leads to overly thin cookies.
Be cautious with baking time. Underbaking can result in overly chewy centers, while overbaking leads to dry cookies.
Don’t overcrowd the baking sheet. Cookies need space to spread to ensure even cooking.
Avoid baking on non-preheated sheet pans. This can prevent proper spreading and can affect texture.
Store cookies properly post-baking to maintain their freshness. Leaving them exposed can lead to staleness.
Essential Techniques
Creaming butter and sugar effectively is crucial. It incorporates air into the mixture, contributing to a lighter texture in cookies. Use room temperature butter, and mix until the texture becomes fluffy and pale, approximately 2-3 minutes.
Accurate dough portioning ensures uniform cooking. Use a cookie scoop or a similar size utensil to get even-sized cookies, ensuring they all bake at the same rate, avoiding under- or over-baked edges.
Chilling the dough slightly, if it’s too soft, helps hold its shape during baking. This step is particularly essential in warmer kitchens where butter tends to melt quickly, leading to flat cookies.
Recognize the appearance cues that indicate completion. Edges should be set and slightly golden, while the center remains soft—ensure they’re not overly browned, which indicates overbaking.
Pro Tips for Perfect Soft and Chewy Raspberry Sugar Cookies
For heightened raspberry flavor, consider using raspberry extract along with whole berries. It intensifies the taste without altering the cookie’s texture.
Chill the cookie dough for 30 minutes before baking. This not only firms the dough, leading to less spread, but also allows flavors to meld, resulting in a richer taste profile.
Maintain consistent oven temperature for accuracy. Preheat well and avoid opening the door frequently during baking to prevent temperature fluctuations that could affect baking time and texture.
Experiment with adding white chocolate chips or chopped nuts for enhanced texture and taste contrast, creating more complex flavor experiences with each bite.
Double up on parchment paper when lining the baking tray. This adds an extra layer of insulation, preventing the bottoms of your cookies from browning too quickly.
For presentation, reserve a few whole raspberries to press lightly into the tops of each dough ball before baking, adding a visual raspberry cue and extra flavor dimension.
Variations and Adaptations
Regional variations can include using local fruit varieties or spices to complement the raspberry flavor, like cardamom or cinnamon additions in colder regions.
For seasonal adaptations, swap raspberries with available berries like strawberries, blueberries, or blackberries, each bringing a unique flavor twist while maintaining the cookie’s core texture.
For dietary modifications, use gluten-free flour blends and dairy-free butter substitutes, ensuring the consistency remains intact while keeping the chewy quality.
Vary the flavor with citrus zest, such as lemon or lime, which adds a fresh zing to the cookie’s sweetness, offering a delightful tangy complement to the raspberries.
Experiment with texture by incorporating rolled oats into the dough, adding a hearty chew and additional fiber, while keeping the dough texture balanced and not overly dense.
Presentation alternatives could involve drizzling cooled cookies with a simple glaze made from powdered sugar and lemon juice, enhancing appeal and introducing new flavor dimensions.
Serving and Presentation Guide
Serve these cookies on a decorative platter lined with mint leaves, adding a touch of greenery that complements the pink raspberry hues beautifully.
Consider garnishing with edible flowers—violets or pansies enhance the visual appeal and offer a sophisticated touch without altering the cookie’s flavor.
Traditional accompaniments include serving with vanilla ice cream or fresh whipped cream, which highlights the cookie’s flavors while adding luxurious creaminess.
For modern suggestions, pair cookies with a raspberry-infused iced tea or lemonade, echoing the raspberry notes and providing a refreshing contrast to the cookie’s sweetness.
Keep portion sizes manageable by baking smaller cookies, allowing them to serve as a light dessert or snack, rather than overly filling portions, ensuring enjoyment without overpowering.
Remember the temperature considerations. Serve cookies at room temperature for the optimal texture, allowing flavors to fully develop without the inhibitive cold that can mute taste.
Wine and Beverage Pairing
With their sweet profile, pair these cookies with a light, fruity Moscato wine. The sparkling sweetness complements the fruity raspberry notes while not overpowering them.
Non-alcoholic alternatives, such as a raspberry iced tea or a mixed berry smoothie, highlight the cookie’s flavors, creating a complete, themed snack or dessert time experience.
For coffee lovers, a mild, nutty flavored brew pairs well, balancing the cookie’s sweetness with a slight bitterness, enhancing each bite while offering a satisfying finish.
Serve beverages chilled to contrast with the room temperature of the cookies, highlighting refreshing, crisp flavor profiles, especially in warmer settings or summer gatherings.
Garnish beverages with fresh mint or lemon slices for added aroma and color, creating a visually appealing presentation that’s inviting and delectable alongside the cookies.
Storage and Shelf Life
Store cookies in an airtight container at room temperature to maintain freshness and prevent them from drying out. Layer with parchment paper, avoiding them sticking together.
Ideal storage temperature for prolonging shelf life is slightly cooler than standard room temperature but not as cold as a fridge, anywhere around 15-18°C (59-64°F).
Glass or BPA-free plastic containers with tight-fitting lids are ideal, as they seal well, maintaining the cookies’ delicate texture and preventing staleness.
Look for signs of spoilage, such as unusual odor or discoloration, as indications that the cookies are no longer fresh, understanding that homemade cookies contain less preservative.
To reheat, place cookies on a microwave-safe plate and cover with a damp paper towel to preserve moisture. Heat for 10 seconds until warm, avoiding overheating, which can dry them out.
For longer storage, freeze cookies by wrapping them individually in wax paper, placing them in a freezer-safe bag. Thaw at room temperature for a quick treat whenever desired.
Make Ahead Strategies
Prepare dough a day in advance, wrapping tightly in plastic before refrigerating. This method enhances flavor while ensuring dough firms up for more precise shaping.
Efficiently store dough between baking sessions by pre-scooping onto a baking sheet and freeze them. Once frozen, transfer to a resealable bag, allowing for easy baking whenever needed.
Assess the quality impact when making ahead. Prepared dough can retain or improve in flavor after resting, though shape consistency and rise may vary slightly upon longer storage.
For assembly, scoop chilled dough directly onto baking sheets without thawing. Slightly adjust bake time by adding 1-2 minutes to accommodate the cold dough.
Reheated elements retain their taste best when cookies are returned to room temperature naturally, helping preserve moisture and flavor, unveiling the intended texture.
Add fresh elements like extra berries or zest on the day of serving for a hint of fresh vibrancy without drastically changing the recipe or preparation ease.
Scaling Instructions
Halving the recipe is straightforward, reducing ingredients proportionately while maintaining the original ingredient ratios to ensure flavor and texture stay consistent.
Increase the recipe by doubling or even tripling for larger gatherings. Ensure mixing bowls and ovens can accommodate the larger batch without compromising quality or baking time.
Adjust equipment, using larger baking sheets or multiple racks, for efficient baking. Avoid overcrowding by staggering batches if necessary, ensuring even heat distribution.
Consider timing modifications. Larger batches may require slightly longer baking times or mixed batches depending on oven space and airflow, ensuring cookies bake evenly.
Reflect on storage needs with a bigger batch. These cookies freeze well, allowing bulk preparation to be enjoyed over time, maintaining freshness with proper wrapping and freezing techniques.
Nutritional Deep Dive
A macro breakdown shows these cookies consist primarily of carbohydrates from flour and sugar with moderate fats from butter and minimal protein content.
Raspberries bring a micronutrient boost, offering vitamin C, manganese, and dietary fiber, contributing to an overall nutritional benefit compared to plain sugar cookies.
Health benefits include antioxidant properties from raspberries and balanced energy release due to carb and fat content, making these an occasional indulgence that doesn’t overly compromise health.
When considering dietary needs, be aware of the sugar and calorie content. Balancing portions ensures enjoyment without overindulgence, suitable for various dietary requirements.
Portion analysis shows that smaller-sized cookies or halves make great mini-snacks, delivering the same delightful taste while keeping calorie and sugar intake moderate.
Weight management choices include conscious portion control, enjoying these treats as part of a balanced diet and active lifestyle, preventing excessive intake while indulging responsibly.
Dietary Adaptations
For a gluten-free version, substitute all-purpose flour with a 1:1 gluten-free baking blend, ensuring the texture stays compatible with the original recipe.
Dairy-free adaptations include using plant-based butter alternatives, which perform similarly in providing moisture and richness while adhering to dietary preferences.
A vegan version is achievable by replacing butter with vegan butter and using an egg replacer found in the baking aisle, maintaining the cookie’s delightful traits.
To create a low-carb or keto-friendly variant, swap sugar with a natural sweetener like erythritol and choose almond flour, mindful of the texture differences these replacements might create.
For paleo dieters, opt for coconut flour and a natural sweetener, recognizing the cookie will have a slightly different texture and density while retaining core flavors.
Low-FODMAP modifications involve using substitutions compatible with FODMAP guidelines, including safe sweeteners and flour choices, ensuring taste satisfaction without gastrointestinal discomfort.
Troubleshooting Guide
For texture issues like overly dry cookies, check for overbaking or incorrect ingredient measurements. Use a timer and level measuring cups for accuracy.
Balance flavor issues by managing sweetness and tartness. If the cookies are too sweet, reduce sugar, or add more tangy raspberries for a contrasting touch.
Adjust temperatures adequately if cookies spread too much; ensure a preheated oven and use room-temperature ingredients without overheating beforehand.
For equipment challenges, ensure baking trays are nonstick or lined to prevent sticking and encourage even heat distribution, influencing cookie shape and texture.
Substitute ingredients carefully, with compatible alternatives that mimic texture and flavor closely, avoiding drastic changes that can alter the cookie’s core attributes.
Timing concerns are alleviated with consistent use of timers and familiarity with your specific oven dynamics, noting any hot spots or irregular heating patterns.
Recipe Success Stories
Our readers have shared the joy of these cookies. One enthusiast crafted mini versions for a child’s birthday party, receiving praise for the delightful flavor and chewy texture.
Others added white chocolate chips, enhancing both visual appeal and taste, and noted how the creamy flavor beautifully complemented the raspberry profile without overpowering it.
Another reader tailored the recipe to a keto-friendly version, successfully using almond flour and sugar substitutes, preserving the cookies’ base flavors while adhering to dietary needs.
Community feedback often highlights the cookies’ success as gifts. Wrapped in decorative boxes, they make thoughtful, homemade presents that bring smiles and sweet moments.
On the photography side, readers have creatively styled these cookies with contrasting backdrops, highlighting their pinkish hue and sharing stunning imagery on social media.
Frequently Asked Questions
Can I use frozen raspberries in this recipe?
Yes, frozen raspberries are an excellent substitute for fresh ones. Thaw them first, then pat dry before incorporation, maintaining the desired texture without excess moisture.
How should I store the baked cookies to keep them fresh?
Store the cookies in an airtight container at room temperature for up to a week. If aiming for longer storage, consider freezing, ensuring they’re well-wrapped to prevent freezer burn.
What’s the secret to making cookies evenly chewy?
The key lies in properly creaming the butter and sugar and monitoring the baking time closely. Ensure your oven is accurately preheated to keep consistency across batches.
Can this recipe be adapted for bulk baking for events?
Absolutely! You can double or triple the recipe, making sure to have adequate equipment and oven space to handle larger volumes, cooking in staggered batches if necessary.
What if my cookies aren’t spreading enough?
Ensure your butter isn’t too cold. Giving the dough time to rest and warm slightly before baking can encourage a more natural spread, resulting in optimal thickness.
Is it okay to add nuts to this recipe?
Yes, adding nuts like pecans or walnuts provides additional texture and flavor contrast, complementing the sweetness of the cookie with a delightful crunch.
What can I use instead of vanilla extract?
Almond extract can be an alternative, imparting a delicate nuttiness, though in a smaller amount due to its strength. Use sparingly to avoid overpowering other flavors.
How do I know when the cookies are done baking?
Look for slightly golden edges with a still soft center. Cookies should continue to firm up on the baking sheet once removed from the oven, so don’t overbake.
Will using a baking stone affect the texture?
Baking stones retain and distribute heat evenly, often enhancing baking results. They may produce a crisper base, so watch the baking time to prevent overdone bottoms.
Can I prepare this dough in advance?
Yes, preparing the dough in advance is beneficial for flavor development. Store it well wrapped in the refrigerator for up to 48 hours or freeze for longer durations.
Are there vegan adaptations for this recipe?
Vegan adaptations include subbing butter with a plant-based version and replacing eggs with suitable alternatives like flaxseed meal or commercial egg replacers.
Is a food processor necessary for this recipe?
No, a food processor is not required. A hand mixer or stand mixer works perfectly for creaming and mixing ingredients until well combined.
Additional Resources
Explore more cookie recipes, from classic chocolate chip to seasonal pumpkin spice, each offering unique flavors and textures for variety in your baking repertoire.
Guides on baking techniques, like mastering the creaming method and understanding temperature impact on baked goods, provide further insights to enhance results consistently.
Ingredient information sheets highlight the best substitutes and fresh sourcing tips, ensuring you get the most flavorful, high-quality results in all your baking endeavors.
Equipment recommendations are available for those looking to invest in essential tools, ensuring efficiency and ease in creating consistent bakery-worthy treats at home.
Seasonal variations advise on experimenting with local produce to reflect times of the year, ensuring freshness in your approach and a dynamic cooking experience.
Join the Conversation
Share your baking adventures with us on social media, hashtagging your photos with #RaspberrySugarCookies for a chance to be featured on our page.
We encourage photography tips sharing, from lighting tricks to settings, to ensure your culinary creations look as good as they taste in every captured image.
Leave recipe reviews and tell us your story. What worked well? What tweaks did you implement? Your feedback helps us improve and encourages others to try this recipe.
Engage with our community by exploring shared variations and adaptations, discovering new flavor pairings or techniques for even more exciting baking outcomes.
Share your kitchen experiences by tagging us, and let your family and friends know about the joy found in baking these delightful raspberry cookies through your unique perspective.
The Recipe
Soft and Chewy Raspberry Sugar Cookies
Serves: 24
Prep Time: 15 mins
Cook Time: 10 mins
Total Time: 25 mins
Kitchen Equipment Needed
Mixing Bowls
Electric Mixer or Stand Mixer
Measuring Cups and Spoons
Baking Sheets
Parchment Paper
Cooling Rack
Ingredients
2 cups all-purpose flour
1 cup granulated sugar
1/2 cup unsalted butter, softened
1 large egg
1 teaspoon vanilla extract
1/2 teaspoon baking soda
1/4 teaspoon salt
1 cup raspberries, halved
Directions
Preheat the oven to 350°F (175°C). Line baking sheets with parchment paper.
In a bowl, mix flour, baking soda, and salt. Set aside.
Cream the butter and sugar with an electric mixer on medium speed until light and fluffy.
Add the egg and vanilla extract, blending until fully incorporated.
Gradually add the flour mixture to the wet ingredients, mixing until just combined.
Fold in the raspberries gently to avoid crushing them.
Scoop tablespoons of dough onto prepared baking sheets, spacing them 2 inches apart.
Bake for 9-11 minutes or until the edges are golden, and centers are set.
Allow cookies to cool on the baking sheet for 5 minutes before transferring to a wire rack.
Recipe Notes
Substitute with alternative berries if raspberries are unavailable.
Add white chocolate chips for a sweeter variation.
For vegan options, replace the egg with a flaxseed egg substitute.
Deliciously Easy Tuna Pasta Salad Recipe for Quick Lunches
Tuna Pasta Salad: A Refreshing and Nutritious Delight
⚖️
Difficulty
Easy
⏲️
Prep Time
15 mins
🕒
Cook Time
10 mins
⏱️
Total Time
25 mins
🍽️
Servings
4
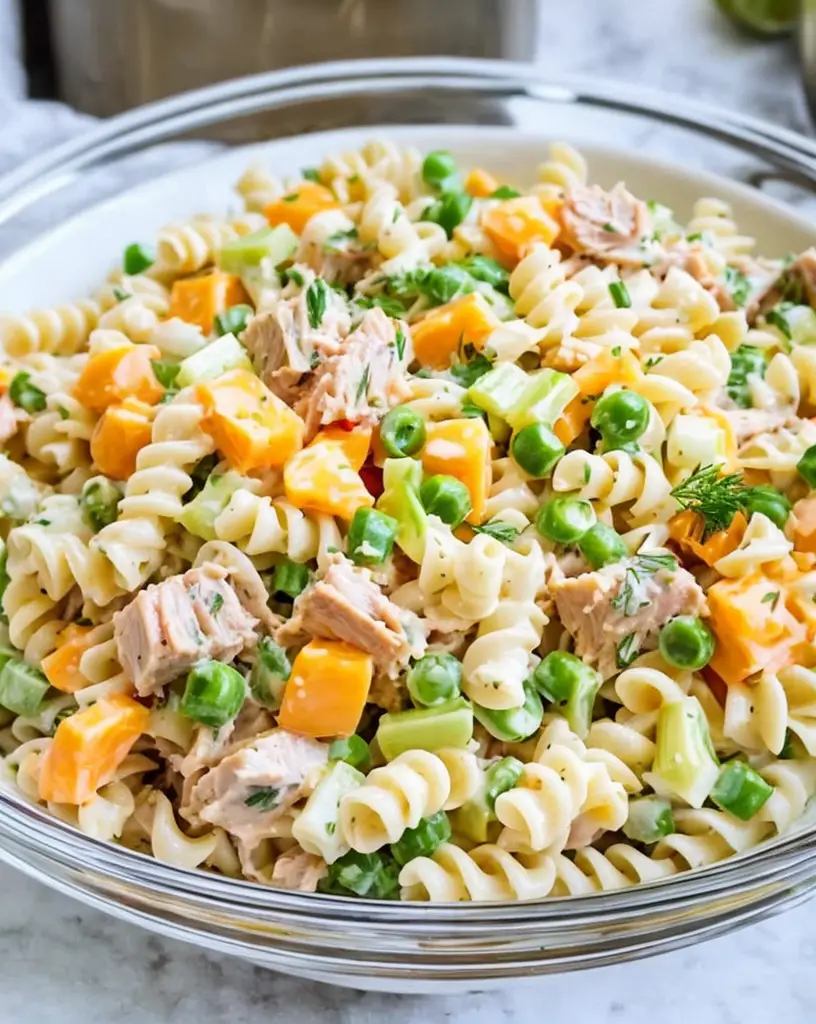
Indulge in the delightful simplicity of Tuna Pasta Salad, a dish that pairs tender pasta with the robust flavors of tuna, vibrant vegetables, and a zesty dressing. Perfect for a light lunch or a hearty side dish at your next barbecue, this recipe enhances every occasion with its bright and refreshing taste profile. Its seamless blend of textures and flavors makes it a family favorite that’s both satisfying and nourishing, offering a wholesome option for those seeking a quick yet gourmet meal.
Contrasting the gentle chewiness of al dente pasta with the creamy richness of tuna and the crunch of fresh vegetables, Tuna Pasta Salad is more than just a dish—it’s an experience. The subtle aroma of herbs in the dressing elevates this meal into a feast for the senses, while the visual splendor of colorful vegetables ensures every serving is a feast for the eyes. Whether enjoyed on its own or paired with other culinary delights, this easy tuna pasta recipe is a testament to effortless culinary elegance.
Quick Recipe Highlights
Flavor Profile: A savory, tangy harmony with a hint of sweetness from the vegetables and a creamy touch from the dressing.
Texture: A delightful mix of chewy pasta, moist tuna, and crisp vegetables.
Aroma: Inviting notes of herbs and spices with a hint of oceanic freshness.
Visual Appeal: A colorful medley of greens, reds, and yellows against a backdrop of creamy pasta.
Skill Level Needed: Basic cooking skills suffice, perfect for beginners and seasoned cooks alike.
Special Equipment: Simple kitchen tools such as a pot for boiling and a mixing bowl.
Recipe Overview
Difficulty Level: This Tuna Pasta Salad is labeled as easy, requiring minimal kitchen experience and straightforward instructions.
Category: Ideal as a main dish or a versatile side, enhancing any dining table.
Cuisine: Echoing influences from Mediterranean and classic American cuisines, blending fresh, wholesome ingredients.
Cost: Affordable, with ingredients accessible in most supermarkets, making it budget-friendly.
Season: Best enjoyed in spring and summer when fresh produce is abundant, but adaptable year-round.
Occasion: Perfect for casual weekday dinners, picnics, and festive potluck gatherings.
Why You’ll Love This Recipe
Tuna Pasta Salad combines the savory depth of tuna with vibrant, fresh vegetables, offering a delightful taste and texture in every bite. Its balance of crisp and creamy textures encourages satisfaction without heaviness, making it an ideal choice for a nutritious yet fulfilling meal.
This recipe’s convenience lies in its rapid preparation and straightforward cooking steps, making it an excellent choice for busy days or spontaneous gatherings. Its simple setup allows for quick assembly, enabling anyone to whip up a flavorful dish in under 30 minutes.
Beyond its delightful taste, Tuna Pasta Salad provides nutritional benefits with its combination of protein-rich tuna, fiber-loaded pasta, and vitamins from fresh vegetables. It serves as a wholesome meal that is aligned with health-conscious eating.
Social and entertaining value also shine, as it’s a dish that is easily doubled, shared, and cherished in group settings. Its vibrant colors and satisfying flavors make it a crowd-pleaser.
This recipe is cost-effective, utilizing pantry staples and fresh produce, ensuring accessibility and affordability without compromising on taste or quality.
Historical Background and Cultural Significance
Tuna Pasta Salad emerged as a fusion of practical pantry ingredients with Mediterranean-influenced additions, creating an adaptable dish reflecting social shifts towards easy-to-make, nutritious meals. Its origins can be traced back to mid-20th-century innovations as cooks combined readily available canned tuna with pasta, a staple from Italian cuisine.
As a cultural touchstone in American cuisine, Tuna Pasta Salad has evolved alongside family dining preferences, emphasizing convenience without sacrificing flavor. Its adaptability reflects culinary creativity, blending influences from various cuisines to enhance appeal with local ingredients.
Regionally, variations abound—some might add olives for a Mediterranean touch or avocado for a modern twist. These adaptations showcase the recipe’s cultural flexibility and the willingness of cooks to personalize dishes based on local tastes and traditions.
Ultimately, Tuna Pasta Salad’s enduring popularity resides in its symbolic representation of simple, satisfying meals that bridge the gap between busy modern lifestyles and the innate desire for homemade comfort food.
Ingredient Deep Dive
Tuna, the star of the dish, provides a robust flavor and substantial texture, enriched by a history tracing back to Mediterranean fishing cultures. Rich in Omega-3 fats, it offers numerous heart health benefits. When selecting, choose firm, high-quality tuna to ensure the best flavor. For storage, keep refrigerated in a sealed container, and opt for water-packed varieties to reduce excess oil.
Pasta is the versatile base, often used in Italian cuisine as a comforting staple. It’s a source of carbohydrates crucial for energy, available in a variety of shapes—though farfalle or fusilli are typical favorites for this salad. Store in a cool, dry place before cooking, and consider whole grain pasta for a healthy alternative.
Strong vegetables like bell peppers and celery add color and crunch, celebrated for their vibrant hues and numerous essential nutrients, such as vitamin C. Select firm, brightly colored specimens, and store in the refrigerator for optimal freshness.
Common Mistakes to Avoid
Overcooking the pasta can lead to a mushy salad; ensure it’s cooked al dente.
Skipping the rinse step after cooking pasta can cause it to clump and excess starch.
Using low-quality tuna may result in an overpowering fishy taste; opt for high-quality, light tuna in water.
Not allowing the salad to chill can dull the flavor; a brief refrigeration enhances overall taste.
Over-mixing the ingredients results in a breakdown of textures; fold gently to preserve the salad’s integrity.
Forgetting to drain canned ingredients well can make the salad watery; thorough draining is crucial.
Adding dressing too early can cause the salad to become overly absorbed and dry; add it just before serving.
Preparing too far in advance without dressing may cause dry ingredients; keep slightly moist.
Essential Techniques
The pasta cooking technique is crucial; aim for al dente texture to maintain chewiness. Cook in salted water to enhance taste, boil them to perfection, and quickly cool to prevent overcooking. Watch the pasta closely as it nears completion, testing for bite readiness with visual cues of slight opacity in the center.
Mixing ingredients gently is important to maintain structural integrity, which encourages varied textures within each bite. Fold with a large spoon or spatula to minimize over-compression. This step ensures the salad retains its robustness and showcases each component effectively.
Pro Tips for Perfect Tuna Pasta Salad
Consider introducing fresh herbs such as parsley or dill for added brightness and aroma that uplifts the entire dish. Herbal additions underscore existing notes, bridging ingredients harmoniously.
Ice down the cooked pasta quickly to stop cooking and lock in the ideal firmness; this step also enhances the chilled experience of the salad. Rapid cooling aids during high-temperature seasons, preserving texture integrity.
Experiment with different pasta shapes like rotini or shells for unique visual interest and mouthfeel. These shapes capture dressing and chunkier elements more effectively than flat pastas.
Use olive oil-based dressings for Mediterranean authenticity, enriching with a squeeze of lemon juice for that extra citrus zest, honing in crispness.
To add playful complexity, toss in nuts or seeds like almonds or sunflower seeds, adding a welcome crunch and enhancing the salad’s nutritional profile.
Infuse proteins through canned or fresh additions like white beans or extra tuna, if desired, to increase options for protein-rich meals.
Variations and Adaptations
Explore regional Mediterranean influences by adding olives or sun-dried tomatoes, infusing further depth of flavor. Their natural brine and umami contribute a rich contrast to the creamy elements.
Incorporate seasonal adaptations by utilizing fresh vegetables at peak ripeness, substituting zucchini or cherry tomatoes in spring and summertime for crisp freshness and bright notes.
For dietary modifications, opt for gluten-free pasta varieties, making this recipe accessible to individuals with gluten sensitivities. Ensure ingredients meet certified gluten-free standards.
Introduce flavor variations using flavored oils like garlic-infused olive oil or adding a touch of balsamic glaze for sweetness—a quick alteration with significant impact.
Transform the texture with creamy elements like feta cheese or diced avocado if dietary preferences permit, offering an indulgent contrast amidst the existing framework.
For presentation alternatives, use hollowed-out bell peppers as edible bowls for an eye-catching display that doubles as an additional nutrient boost.
Serving and Presentation Guide
Master the art of plating by arranging individual servings in shallow bowls or on plates, showcasing the vibrant layers of pasta, tuna, and vegetables. This approach highlights the dish’s visual complexity.
Garnish with fresh parsley or a sprinkle of sesame seeds atop each serving, adding a flourish of color and texture that elevates the presentation dimensionally.
Pair with traditional accompaniments like fresh bread or a green salad, echoing classic pairings that balance and amplify the main dish’s flavors.
Consider modern serving suggestions such as incorporating the salad into wraps for a portable meal, aligning with contemporary on-the-go dining practices.
Serve chilled to optimize flavor clarity, a key consideration in achieving the crisp taste and texture essential to a satisfying salad experience.
Portion control ensures multiple small servings over singular large helpings, fixed with ample space between elements to prevent overcrowding.
Wine and Beverage Pairing
Complement Tuna Pasta Salad with a crisp Sauvignon Blanc, its acidity and herbal characteristics harmonize perfectly with the light, zesty nature of the dish.
Non-alcoholic alternatives might include sparkling water with a twist of lime or lemon zest, providing a refreshing palate cleanser thanks to its fizz and acidity.
Coffee pairings might seem unconventional, but lighter, sweeter brews or iced coffee can introduce a unique contrast to this savory dish.
Serve all beverages chilled for a harmonious dining experience that heightens the dish’s refreshing qualities during warmer seasons, maintaining a cool, invigorating focus.
Consider serving options that include a homemade iced tea with fresh mint or light citrus infusions, contributing a gentle sweetness and aromatic complexity.
Storage and Shelf Life
Store any remaining salad in an airtight container to retain maximum freshness, preventing exposure to air, which could spoil its vibrant flavors.
Refrigerate leftovers promptly, ideally within two hours post-preparation, at a temperature below 40°F (4°C) to ensure safety and taste preservation.
Be observant of signs of spoilage, such as off odors or texture changes—spoilage signs might manifest faster in dishes incorporating fresh vegetables like this one.
For optimal quality, consume within 3 days of preparation, though the salad remains consumable for up to 5 days when stored correctly.
Reheat gently only if necessary; it is best served cold to retain maximum flavor and texture integrity. If warming is needed, do so minimally.
Freezing is not recommended due to potential quality shifts in the pasta and vegetables upon thawing, impacting overall dish experience.
Make Ahead Strategies
Prepare components separately, such as chopping vegetables and mixing the dressing in advance, storing them individually to combine when ready to serve.
Focus on the pasta being cooked ahead of time and cooled properly, minimizing last-minute kitchen work on the day of the serving event.
Evaluate potential quality impacts when storing between steps, considering if gradual ingredient softening aligns with personal texture preferences.
Plan assembly shortly before serving to maintain the freshest, most vibrant presentation and taste, allowing assembled components to blend but not overly meld.
Implementing detailed reheating guidelines should be unnecessary, as refrigeration aligns better with retaining freshness.
Enhancing flavors upright through a final touch of freshly added herbs or lemon zest on serving day adds brightness, compensating for any absorbed dressing.
Scaling Instructions
For smaller portions, consider halving the recipe effectively, adjusting ingredient quantities while maintaining the same preparation methods.
When doubling or tripling, use larger mixing bowls to accommodate ingredients comfortably, ensuring all elements are combined efficiently.
Adapt equipment needs like using larger pots for boiling pasta or mixing extra-large batches during increased scaling efforts.
Modify timing slightly when increasing quantities, mindful of staggered ingredient incorporation to maintain even cooking and mixing processes.
Be prepared for expanded storage needs, ensuring larger containers or multiple smaller ones are available for space-efficient storage solutions.
Nutritional Deep Dive
Examine the macronutrients derived from this dish, with pasta providing carbohydrates, tuna offering protein, and vegetables contributing necessary fiber.
The micronutrient analysis reveals essential vitamins such as vitamin C, present in vegetables, and omega-3 fatty acids from tuna beneficial for heart health.
Emphasize portion control and balance among healthy fats and calories, especially when served as a main dish, aiding in weight management.
Evaluate dietary considerations, staying aware of sodium levels due to canned ingredients and opting for low-sodium versions when possible.
Highlighting its health benefits showcases protein support from tuna and vegetable-based vitamins, aligning it with overall wellness goals.
Optimize portion analysis by choosing smaller bowled meals or serving as a complement, ensuring meals with balanced nutrition distributions.
Dietary Adaptations
For gluten-free adaptations, swap traditional pasta with verified gluten-free pasta, keeping the integrity of taste and texture akin to traditional versions.
Dairy-free adaptations naturally align with base recipe components, without additional modifications, making it accessible for dairy avoidance diets.
Vegan-friendly adaptations include using plant-based tuna or bean alternatives like chickpeas, mirroring the original tuna texture and protein.
Low-carb and keto adaptations can be achieved by substituting traditional pasta with zucchini noodles or cauliflower rice.
For paleo compliance, eliminate pasta, substituting with spiralized vegetables to uphold robust health ideals while maintaining the salad’s edible appeal.
Develop low-FODMAP adaptations by selecting ingredients that gently adhere to digestive necessities, replacing high-FODMAP elements with approved swaps.
Troubleshooting Guide
Address texture issues by ensuring pasta is cooked correctly and quickly cooled; soggy results often denote improper cooking methods.
Flavor balance may be skewed by under-seasoning or overuse of a pungent dressing; mindful tasting and adjusting are crucial for optimal balance.
Temperature problems during storage might arise if the salad isn’t promptly refrigerated, risking impaired quality and potential food safety concerns.
Resolve equipment challenges by ensuring correct kitchen tool usage, following utensil recommendations to preserve the salad’s desired consistency and shape.
Substitute creatively in case of ingredient shortages, leveraging similar textures or flavors, like swapping different vegetable colors without drastic taste shifts.
Address timing concerns with strategic planning, mindful of recommended chilling time to enhance flavor amalgamation.
Recipe Success Stories
Enthusiastic feedback emerges from a diverse community of cooks, where variations reflect local ingredients and preferences, celebrating the salad’s adaptability.
Success stories often highlight satisfying experiences and positive responses from shared meals, particularly in family-centric contexts encouraging communal dining.
Cheerful adaptation stories include incorporations of regional specialties or alternative ingredient sourcing, establishing diverse enjoyment bases across demographics.
Reader suggestions often focus on incorporating specific family-favorite tweaks, helping extend the recipe’s impact beyond its original specifications.
Photography shared in community spaces elevates the dish’s presentation, showcasing vibrant visual artistry that captures the salad’s appeal through innovative angles and lighting.
Frequently Asked Questions
Q: Can I use canned chicken instead of tuna?
A: Yes, canned chicken can replace tuna for a different protein profile. Ensure it’s shredded or diced finely for better integration with other ingredients.
Q: How can I reduce the sodium content in Tuna Pasta Salad?
A: Choose low-sodium canned tuna, rinse it thoroughly, and opt for fresh vegetables. Consider minimizing or omitting additional salty dressings and seasonings.
Q: Does the type of pasta affect the salad’s outcome?
A: Absolutely! Choose pasta with shapes that hold dressing well, like fusilli or rotini, to maintain optimal flavor distribution within each bite.
Q: What’s the best type of dressing for Tuna Pasta Salad?
A: A light vinaigrette with lemon and olive oil complements the tuna well, while a more classic creamy dressing can add richness and balance.
Q: Can I serve the salad warm?
A: While traditionally served cold for a refreshing touch, you may serve warm by gently heating components separately, carefully mixing to avoid wilting fresh vegetables.
Q: What other protein options can I add?
A: Besides tuna, consider adding hard-boiled eggs, cooked shrimp, or grilled chicken, each contributing unique textures and flavors.
Q: How long should I chill before serving?
A: Aim for at least 30 minutes of chilling to allow flavors to meld and enhance the overall taste, producing a more cohesive salad.
Q: Are there vegan substitutes for tuna?
A: Chickpeas and jackfruit serve as popular vegan substitutes, providing similar textures and adaptability in flavor absorption to mimic tuna’s role.
Q: How much pasta should I use per person?
A: Approximately 2 ounces of pasta per serving is typical; adjust based on appetites and whether the salad is a main dish or a side.
Q: What’s the best storage method?
A: Use an airtight container in the refrigerator, ensuring minimal air exposure to extend storage life and preserve ingredient freshness.
Additional Resources
Explore related recipes such as Light Italian Pasta Salad or Warm Mediterranean Seafood Mix for further culinary inspiration, borrowing adaptable techniques for ingredient coherence.
Accessible technique guides on pasta preparation can improve cooking accuracy, from achieving al dente textures to innovative chilling methods preserving quality.
Ingredient features illuminating origins and processing offer comprehensive understandings, supplemented by seasonal variations aligning with peak freshness periods.
Equipment recommendations provide insight into meal preparation efficiency, suggesting essential tools enhancing experience while creating delicious meals.
Join the Conversation
Converse with fellow food enthusiasts by sharing variations and personal tips across social media platforms, contributing photos to inspire others visually.
Discuss unique experiences and gather feedback to engage community members, fostering interactive, varied culinary discussions centered around this versatile salad.
Encouraging photography tips and genuine user reviews provides valuable insights into how the Tuna Pasta Salad recipe adapts across different households and occasions.
Amplifying community engagement through interactive dialogues facilitates expansion of culinary horizons, furthering individual connection to the versatile Tuna Pasta Salad.
Incorporate diversity by recommending personalized twists, allowing individuals to make the recipe their own while embracing a globally shared passion for delightful culinary creations.
The Recipe
Tuna Pasta Salad
Serves: 4
Prep Time: 15 mins
Cook Time: 10 mins
Total Time: 25 mins
Kitchen Equipment Needed
Large pot for boiling pasta
Colander for draining
Mixing bowl
Spatula or large spoon
Ingredients
8 oz pasta (farfalle or fusilli)
1 can (12 oz) tuna packed in water, drained
1 cup cherry tomatoes, halved
1 cup bell pepper, diced
1/4 cup red onion, finely chopped
1/4 cup olives, sliced
1/3 cup mayonnaise or Greek yogurt
2 tbsp lemon juice
Salt and pepper to taste
Fresh parsley for garnish (optional)
Directions
Boil pasta in salted water until al dente, following package directions. Drain and rinse under cold water.
In a large bowl, combine pasta, drained tuna, cherry tomatoes, bell pepper, red onion, and olives.
In a small bowl, whisk mayonnaise or Greek yogurt with lemon juice, salt, and pepper.
Pour dressing over salad and gently toss to coat all ingredients evenly.
Chill for 20 minutes before serving, allowing flavors to meld.
Garnish with fresh parsley, if desired, before serving.
Recipe Notes
Consider substituting Greek yogurt for a lighter, tangier dressing option.
Additional vegetables like cucumber or corn can enhance texture and flavor.
Adjust lemon juice based on personal preference for a zestier or milder taste.