Cilantro-Lime Chicken Quesadillas: Zesty, Cheesy, and Irresistible
Cilantro-Lime Chicken Quesadillas: A Flavorful Delight
Introduction
Cilantro-lime chicken quesadillas are the ultimate fusion of zesty, fresh flavors and creamy, cheesy goodness. Packed with marinated chicken, fresh herbs, and gooey melted cheese, these quesadillas are a crowd-pleaser for any occasion. Their versatility and quick preparation make them a go-to for weeknight dinners or festive gatherings.
The combination of cilantro and lime adds a vibrant, refreshing kick to dishes. Lime’s tangy zest cuts through the richness of the cheese, while cilantro brings an aromatic depth. This pairing is not only flavorful but also nutrient-packed, offering vitamin C, antioxidants, and detoxifying properties. For more about the magic of marinades, check “Master the Art of Chicken Marinades”.
Part 1: Ingredients and Preparation
Core Ingredients
Chicken breasts or thighs (boneless and skinless).
Fresh cilantro and lime juice.
Tortillas (flour or corn).
Cheese (cheddar, Monterey Jack, or a Mexican blend).
Optional Additions
Diced bell peppers.
Sliced onions for caramelization.
Avocado or guacamole.
Kitchen Tools
Sharp knife for precise chopping.
Non-stick skillet or griddle.
Zester for lime.
Marinating the Chicken
Combine lime juice, chopped cilantro, olive oil, garlic, and spices in a bowl.
Add chicken and let it marinate for at least 30 minutes (overnight for maximum flavor).
Cilantro-lime chicken quesadillas are the perfect balance of freshness, zest, and comfort. Whether you’re hosting a party or preparing a quick meal, these quesadillas never disappoint. Experiment with different fillings and serve them with your favorite dips for an unforgettable dining experience!
Delicious Hearty Chicken and Vegetable Stew for Comforting Meals
Hearty Chicken and Vegetable Stew: Comfort in Every Bite
⚖️
Difficulty
Easy
⏲️
Prep Time
15 mins
🕒
Cook Time
45 mins
⏱️
Total Time
60 mins
🍽️
Servings
4 servings
Hearty Chicken and Vegetable Stew is a classic southern dish that warms the soul with every spoonful. Packed with tender chicken and a rainbow of fresh vegetables, this wholesome stew is perfect for family dinners or a cozy night in. The rich, savory broth enriches the flavors, bringing out the best in each ingredient. Imagine the comforting aroma wafting through your home as this stew simmers on the stove, inviting loved ones to gather around the table and enjoy a meal made with love.
This recipe not only promises a delicious meal but redefines home-cooked comfort food. Each bite is filled with succulent chicken, fresh carrots, potatoes, and peas, creating a delightful tapestry of flavors and textures. It is truly a recipe to bring everyone together, making memories as you enjoy this nourishing dish on cold evenings. Whether you’re serving it up for a special occasion or simply on a busy weekday, this hearty chicken stew is sure to impress.
Quick Recipe Highlights
Flavor Profile: Rich, savory, and aromatic, featuring tender chicken and a blend of fresh, seasonal vegetables.
Texture: A delightful contrast between the tender chicken, hearty vegetables, and thick, stew-like broth.
Aroma: A fragrant mix of herbs and spices that fills your kitchen and beckons tastiness with every stir.
Visual Appeal: Vibrant colors of carrots, peas, and bell peppers make this stew as pleasing to the eyes as it is to the palate.
Skill Level Needed: Perfect for novice cooks, this recipe is straightforward but offers delicious results.
Special Equipment: A large pot or Dutch oven is best for preparing this nourishing chicken stew.
Recipe Overview
Difficulty Level: This recipe is suitable for beginners, featuring simple steps and easily accessible ingredients. Perfect for anyone looking to build confidence in the kitchen.
Category: This chicken stew falls under comfort food and is ideal for hearty dinners, perfect for family gatherings.
Cuisine: The dish is inspired by rustic Southern cooking traditions, where hearty stews are a popular staple for family meals.
Cost: The ingredients are budget-friendly, making it an economical choice for feeding a group without breaking the bank.
Season: Best enjoyed in the cooler months, this stew provides warmth and nourishment, ideal for fall and winter dinners.
Occasion: Perfect for gatherings, game nights, or potlucks, this stew is bound to please a hungry crowd.
Why You’ll Love This Recipe
This Hearty Chicken and Vegetable Stew is a dish that satisfies your taste buds with its rich flavor while providing a delightful texture. The combination of juicy chicken, tender vegetables, and savory broth creates a symphony of flavors that is both comforting and energizing. Each spoonful is packed with nutrients, making it ideal for anyone looking to enjoy a healthy meal without sacrificing taste.
It’s also incredibly convenient! With minimal prep and cooking time, you can whip up this delicious stew on a busy weeknight. The process is simplified with straightforward steps that yield a satisfying result. Plus, the ingredients can be prepared ahead of time, allowing for efficient cooking once you’re ready to eat.
Speaking of nutrition, this stew is a powerhouse of vitamins and minerals. Chicken is a great source of lean protein, while a variety of colorful vegetables supply essential nutrients like fiber, vitamins A and C, and antioxidants. This dish supports your health while also filling you up, making it a win-win for mealtime.
Socially, this recipe brings people together. It’s perfect for sharing and encourages conversation around the dinner table. Whether you serve it family-style or in individual bowls, the warmth and comfort of this stew foster a cozy atmosphere, ideal for connecting with family and friends.
Lastly, the affordability of this recipe allows you to prepare a hearty meal without spending a fortune. Most ingredients can be found in your pantry or local grocery store, making it accessible for everyone. It’s a meal that suits both the casual cook and the experienced chef, providing value and satisfaction for all.
Historical Background and Cultural Significance
The history of chicken stew can be traced back to various culinary traditions, with roots in both European and Southern American cultures. Originally designed to make use of leftover meats and vegetables, stews were a practical solution that transformed simple ingredients into nourishing meals. The method of slow cooking allowed flavors to meld beautifully, resulting in the comforting stews we know today.
Culturally, chicken stew has served as a bonding dish for families and communities. Whether shared at home during casual dinners or at communal gatherings, stews symbolize nourishment and sharing. They have been a staple in numerous households, passed down through generations as family recipes, each with its own special twist.
Over the years, the chicken stew evolved to incorporate local vegetables, herbs, and spices, reflecting the tastes of the region. In Southern cooking, the use of varieties of vegetables and spices has become a hallmark, giving each stew a unique flair depending on the cook’s preferences and available ingredients.
Today, the recipe for chicken and vegetable stew still varies widely but continues to hold a special place in people’s hearts, symbolizing comfort and warmth in every bowl. From family dinners to potlucks, this dish remains a beloved comfort food for many.
Ingredient Deep Dive
Chicken: Chicken is the star ingredient in this hearty stew. It provides rich, lean protein that is low in fat, making it a staple in various cuisines. When selecting chicken, look for fresh, free-range options for the best flavor and quality. Store it in the refrigerator for up to two days or freeze for longer preservation. If you’re looking for alternatives, turkey or lean cuts of beef can be great substitutes.
Vegetables: The assorted vegetables in the stew add not only flavor but also a spectrum of nutrients. Carrots, potatoes, and peas are common choices due to their sweetness and texture. When buying vegetables, opt for vibrant, firm produce, and use fresh ones for the best taste. For storage, keep in cool, dry places and avoid washing until ready to use. You can swap in seasonal vegetables like squash in the fall or fresh herbs for extra flavor.
Common Mistakes to Avoid
Not searing the chicken: A quick sear before simmering enhances the flavor of the stew.
Overcrowding the pot: If too many ingredients are added at once, they may not cook evenly, resulting in a less flavorful dish.
Skipping the simmering step: A proper simmer allows the flavors to meld together effectively; rushing this process can compromise taste.
Using stale spices: Fresh herbs and spices are crucial for a rich flavor; ensure your pantry is stocked with fresh ones.
Neglecting to taste: Regularly tasting the stew while cooking allows you to adjust seasoning and ensure balanced flavors.
Not preparing vegetables uniformly: Cutting them into different sizes can lead to uneven cooking; keep them consistent.
Using cold broth: Use room temperature or warm broth to ensure a consistent cooking temperature.
Serving immediately: Allowing the stew to rest enhances the flavors as they continue to develop even after cooking.
Essential Techniques
Sauteing: This technique is essential for developing a rich base for your stew. Start by heating oil, then add your aromatics like onions and garlic until they are fragrant. Mastering this will ensure a flavorful foundation for your dish. Look for visual cues; once aromatic and golden, proceed to the next step of your recipe.
Simmering: Simmering is critical to allow ingredients to cook slowly, melding their flavors together. After bringing your stew to a boil, reduce to a gentle simmer; this low and slow approach brings out the best in all ingredients. Avoid boiling vigorously, which can overcook the proteins and vegetables.
Pro Tips for Perfect Hearty Chicken and Vegetable Stew
1. Prioritize fresh ingredients. Fresh vegetables will enhance both the flavor and nutritional value of your dish.
2. Don’t forget to adjust seasonings as you go. Every ingredient can change the flavor dynamics; be sure to taste frequently.
3. Consider cooking in batches. Stews often taste better the next day as the flavors develop further.
4. Experiment with herbs. Adding a fresh sprig of rosemary or thyme right before serving can elevate the flavors significantly.
5. Don’t rush the process. Letting your stew simmer longer really helps the ingredients break down and absorb flavors.
6. Thicken your stew with cornstarch or a roux if desired. This creates a richer texture that many find satisfying.
Variations and Adaptations
You can switch up the vegetables depending on what’s in season. For example, using butternut squash or sweet potatoes in place of regular potatoes can add a new dimension to the dish. Additionally, feel free to swap in different beans or lentils as a base for a heartier stew.
For those on a low-carb diet, consider using cauliflower instead of potatoes or adding more greens such as kale or spinach for added nutrition without the carbs.
Seasonal adaptations can also significantly alter this stew. In winter, incorporating root vegetables like parsnips or turnips can bring warming flavors, whereas in spring, lighter vegetables like asparagus and peas can offer freshness.
If you prefer a spicier version, adding jalapeños or a splash of hot sauce can elevate the heat. Conversely, to make it creamier, a splash of cream or coconut milk can turn this stew into a comforting chowder-like dish.
Serving and Presentation Guide
When serving your hearty chicken stew, consider garnishing it with fresh parsley or a drizzle of olive oil for an appealing presentation. Additionally, this stew can be served hot, accompanied by a side of warm crusty bread, which is perfect for dipping into the rich broth.
Plating techniques can also play a role; serve in deep bowls with ample broth and a few pieces of grilled chicken visible on top for aesthetic appeal. Modern touches can include serving in mason jars or rustic bowls that enhance the homey feel of this dish.
Temperature matters when it comes to serving; always ensure the stew is piping hot before serving. If preparing ahead, store in a slow cooker on low heat so it stays warm and ready for guests.
Wine and Beverage Pairing
For wine lovers, a full-bodied white wine such as Chardonnay or a light red like Pinot Noir pairs beautifully with the richness of chicken stew. These wines complement the savory notes without overpowering the dish.
If you’re looking for non-alcoholic alternatives, a crisp apple cider or sparkling water garnished with citrus can refresh your palate while enjoying this hearty meal. For those who prefer tea, a herbal blend with chamomile or lemon can provide a soothing complement to the flavors of the stew.
Storage and Shelf Life
For storage, allow the stew to cool completely before transferring it to an airtight container. It can be stored in the refrigerator for about 3-4 days or can be frozen for up to 3 months. Make sure to label the container with the date for longevity tracking.
When reheating, do so gently on the stove over medium-low heat, adding a splash of broth or water if necessary to loosen it up. Signs of spoilage include off odors or unusual texture; never consume if in doubt.
Make Ahead Strategies
To make your cooking process seamless, prep your vegetables a day in advance to save time on cooking day. Chop and store them in the refrigerator, and prepare your chicken by marinating it overnight for enhanced flavor.
Assemble the ingredients and seasonings so they’re ready to go when you’re prepared to cook. This way, you can quickly throw everything together and let it simmer without delay.
Scaling Instructions
To halve this recipe, simply cut all ingredients in half, and it should yield about two servings. If doubling or tripling the recipe, calculate ingredients carefully. Ensure you have a large enough pot to accommodate the increased volume while allowing for bubbling space.
If you adjust the quantities, you may need to increase the cooking time slightly to ensure all ingredients are cooked evenly, especially when dealing with larger pieces of chicken or root vegetables.
Nutritional Deep Dive
This Hearty Chicken and Vegetable Stew is not only delicious but also nutritious. Each serving is packed with lean protein from the chicken, which supports muscle growth and maintenance. The variety of vegetables, including carrots and peas, provide essential vitamins and fiber, aiding digestion and overall health.
For those conscious of their diet, the stew can be tailored to support weight management. It is low in calories while being high in satiety, making it an ideal meal for those trying to eat healthily without feeling deprived.
Dietary Adaptations
For a gluten-free version of this stew, simply ensure that all store-bought items are certified gluten-free, and opt for gluten-free broth. This dietary option is crucial for those with sensitivities while still enjoying this comforting dish.
Dairy-free adaptations can be achieved by using coconut milk instead of cream if you prefer a creaminess without dairy. Additionally, shift to plant-based broth, allowing this recipe to cater to vegan diets by substituting chicken for chickpeas or tofu.
Troubleshooting Guide
If your stew is too watery, you might consider simmering it for longer to allow some liquid to evaporate or adding a cornstarch slurry to thicken the broth. Beware; this should be done gradually to achieve the desired consistency without overpowering the original flavors.
If you find the flavor lacking, adjust the seasoning by incorporating a pinch more salt or acid like lemon juice for brightness. Taste regularly while doing this to ensure balance in flavors.
Recipe Success Stories
Feedback indicates that it’s a go-to recipe for family gatherings as it accommodates various palates and dietary preferences with simple modifications, making it a trusted favorite among friends and families.
Frequently Asked Questions
Can I freeze this stew? Yes, this stew freezes very well. Ensure it’s in an airtight container and consume within three months for best quality.
What sides do you recommend with this stew? This stew pairs wonderfully with crusty bread, rice, or a fresh salad. These sides complement the hearty flavor of the stew beautifully.
Is it possible to make this stew in a slow cooker? Absolutely! Simply place all the ingredients in the slow cooker and let it cook on low for 6-8 hours for a convenient meal.
Can I add pasta to this stew? You can! Add cooked pasta toward the end of the cooking time to avoid overcooking and ensure the pasta maintains its texture.
How do I store leftovers? Once cooled, store leftovers in an airtight container in the fridge for up to four days or freeze for longer preservation.
Can I substitute chicken thighs for breasts? Yes! Chicken thighs provide a richer flavor and remain tender during the cooking process, making them an excellent choice for this stew.
Can I make this dish vegetarian? For a vegetarian version, replace chicken with hearty vegetables and proteins like lentils or chickpeas and use veggie broth.
How can I make this stew spicier? To add spice, consider incorporating crushed red pepper flakes or diced jalapeños at the beginning of the cooking process.
What’s the best way to reheat this stew? Reheat gently in a saucepan over medium heat, adding a splash of broth if it has thickened too much during storage.
Can I use canned vegetables? While fresh is preferred for flavor, you can use canned vegetables, but please note they may change the texture of the stew.
Additional Resources
For those looking to expand their savory repertoire, you might also enjoy our other comforting recipes such as Beef Stroganoff or a classic Vegetable Soup. Additionally, our technique guides on mastering the perfect sauté or simmer can elevate your cooking skills further, making you a more confident home chef.
Explore ingredient resources that provide insight on selecting the freshest produce, and check out our equipment recommendations for the best pots and pans to use for stewing, ensuring optimal cooking results in all your dishes.
Join the Conversation
We’d love to hear about your experience with this Hearty Chicken and Vegetable Stew! Share your photos and tweak the recipes on social media, and tag us to become part of our community. Your feedback not only helps us grow but also inspires others to try new variations and techniques. Share your thoughts and let us know how you made this recipe your own!
The Recipe
Hearty Chicken and Vegetable Stew
Serves: 4 servings
Prep Time: 15 mins
Cook Time: 45 mins
Total Time: 60 mins
Kitchen Equipment Needed
Large pot or Dutch oven
Cutting board
Sharp knife
Ladle for serving
Ingredients
2 tablespoons olive oil
1 pound chicken breast, cubed
2 cups carrots, sliced
2 cups potatoes, diced
1 cup frozen peas
1 medium onion, chopped
2 cloves garlic, minced
4 cups chicken broth
1 teaspoon dried thyme
Salt and pepper to taste
Directions
In a large pot, heat olive oil over medium heat. Add chopped onion and cook until translucent.
Add garlic and cook until fragrant, about one minute.
Introduce the cubed chicken and cook until browned on all sides.
Stir in the sliced carrots and diced potatoes, cooking for about five minutes.
Pour in the chicken broth, add thyme, and season with salt and pepper.
Bring to a boil, then reduce heat and let it simmer covered for about 30 minutes.
Finish by adding frozen peas and cook for an additional 5 minutes.
Adjust seasoning if necessary and serve hot.
Recipe Notes
Feel free to substitute chicken breasts with thighs for added flavor.
Any seasonal vegetables can be added based on your preference.
This stew can be made ahead of time and stored in the fridge for three days.
Butter Baked Chicken Wings: Crispy, Flavorful, and Easy to Make
Butter Baked Chicken Wings: The Ultimate Guide
Introduction
Butter baked chicken wings are a delightful combination of crispiness and rich buttery flavor. Perfect as a game-day snack or a comforting meal, these wings stand out for their simplicity and deliciousness. Unlike fried wings, baking with butter adds depth to the flavor while keeping them healthier and easier to prepare.
Baking wings in butter creates a crispy yet moist texture, making each bite flavorful. It’s a healthier option compared to frying and allows for easy customization with various seasonings. Butter also acts as an excellent carrier for spices and herbs, ensuring an even coating.
Lower in calories and fat compared to fried wings.
Butter provides healthy fats and enhances flavor without the need for heavy sauces.
Serving Suggestions
Pair with blue cheese dressing or ranch dip.
Serve alongside celery sticks or loaded potato skins for a complete meal.
Conclusion
Butter baked chicken wings are a must-try for anyone looking to combine rich flavors with a healthier cooking method. With endless variations and easy preparation, these wings are perfect for any occasion.
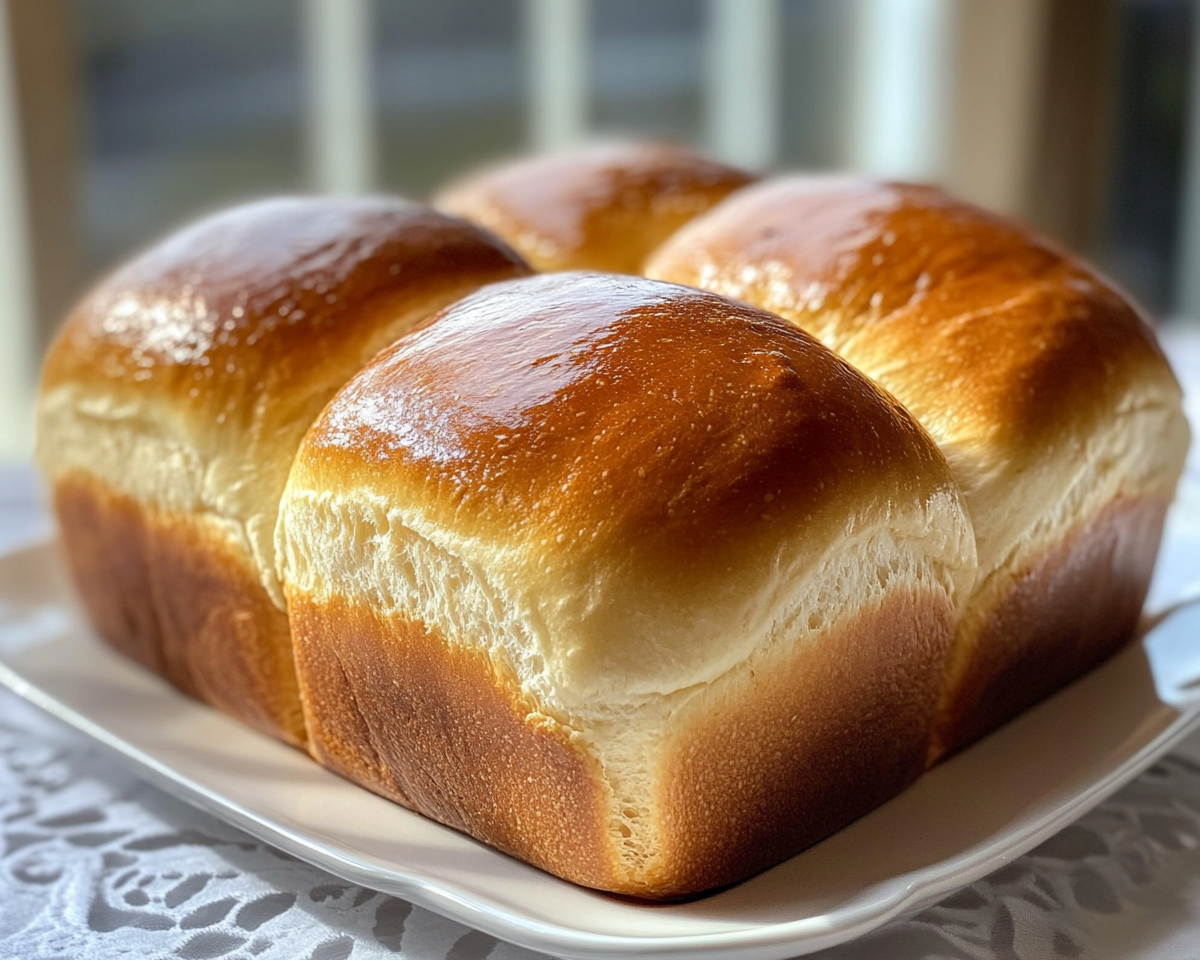
Mastering Homemade Bread: Step-by-Step Guide for Perfect Loaves Every Time
Article: Homemade Bread: Your Comprehensive Guide to Baking the Perfect Loaf
Introduction to Homemade Bread
There’s something magical about homemade bread. From the moment the dough starts to rise to the intoxicating aroma wafting through your home, bread baking is a therapeutic and rewarding experience. Unlike store-bought loaves, homemade bread allows you to control every ingredient, making it healthier and more delicious.
For a hearty side dish to accompany your bread, try Garlic Bacon Kale.
What Makes Homemade Bread Special?
Control Over Ingredients: Avoid preservatives and use whole-grain flours or low-sodium options.
Endless Customization: Add herbs, spices, or seeds to create unique flavors.
Cost-Effective: Save money while enjoying superior taste and quality.
Making homemade bread is a culinary journey that rewards you with flavor, texture, and the satisfaction of creating something from scratch. Whether you’re a novice baker or an experienced pro, the possibilities with bread baking are endless. Start today and experience the difference in every bite.
Delicious Garlic Parmesan Chicken Meatloaf Recipe You Must Try
Garlic Parmesan Chicken Meatloaf: A Flavorful Twist on a Classic Dish
⚖️
Difficulty
Easy
⏲️
Prep Time
15 mins
🕒
Cook Time
1 hour
⏱️
Total Time
1 hour 15 mins
🍽️
Servings
6 servings
Embrace the rich, savory flavors of Garlic Parmesan Chicken Meatloaf, a delightful twist on a traditional comfort food favorite. This recipe brings together the hearty essence of classic meatloaf with the aromatic allure of garlic and the nutty goodness of Parmesan cheese, making it a meal that’s not just filling but also packed with flavor. Perfect for family dinners or meal prepping for the week, this meatloaf will quickly become a staple in your kitchen.
As you slice into the meatloaf, the scent of roasted garlic will greet you, enticing everyone to the table. Each bite offers a tender texture complemented by the crispy, cheesy topping, creating a satisfying contrast that elevates the simple meatloaf into something extraordinary. Enjoy it with a side of seasonal vegetables or creamy mashed potatoes for the ultimate dining experience.
Quick Recipe Highlights
Flavor Profile: The Garlic Parmesan Chicken Meatloaf boasts a robust flavor from freshly minced garlic enhanced by the richness of Parmesan cheese.
Texture: Tender and juicy on the inside, with a crispy, cheesy crust that offers delightful texture in every bite.
Aroma: A delightful garlic aroma fills your kitchen, inviting everyone to enjoy this savory dish.
Visual Appeal: Golden brown on the outside with a mouthwatering cheesy topping, it looks as delicious as it tastes.
Skill Level Needed: This easy recipe suits cooks of all skill levels, making it perfect for both beginners and seasoned home chefs.
Special Equipment: Just a mixing bowl, meatloaf pan, and an oven – simple tools for a divine dish!
Recipe Overview
Difficulty Level: Easy to moderate, this recipe doesn’t require advanced cooking techniques and can be made with basic kitchen skills.
Category: Ideal for dinner entrées, this meatloaf fits well into family meals and gatherings.
Cuisine: This recipe blends American comfort food traditions with Italian influences, showcasing garlic and Parmesan as central flavors.
Cost: Economical, this dish makes use of affordable ground chicken and simple pantry staples, providing great value.
Season: Enjoy this hearty meal throughout the year, but it’s especially comforting in fall and winter when warm, nourishing foods are in high demand.
Occasion: Perfect for family dinners, potlucks, or as a comforting meal during a busy week.
Why You’ll Love This Recipe
Every bite of Garlic Parmesan Chicken Meatloaf bursts with flavor, combining savory garlic, zesty parsley, and rich Parmesan cheese for a delightful taste experience. The tender meat, seasoned to perfection, provides an unforgettable flavor; it’s a dish that will leave you craving more and enhance any meal plan.
This recipe is incredibly convenient and quick to prepare, making it ideal for busy weeknights. You can mix the ingredients in just 15 minutes, pop it into the oven, and have a delicious meal ready in no time. The leftovers also taste even better the next day, saving you effort on lunch preparation!
Nutritionally, chicken is a lean meat choice packed with protein, and combined with the garlic’s health benefits, this recipe offers a wholesome meal that won’t weigh you down. Enjoy a satisfying dish that supports your health goals.
Entertaining guests becomes effortless with this meatloaf—the aromas filling your home will create a welcoming atmosphere. Cook it in advance, slice, and serve; it’s a perfect centerpiece for gatherings and casual dinners alike.
Lastly, the cost-effectiveness of this dish is unbeatable. Using ground chicken instead of pricier meats, along with staple ingredients, means you can feed the whole family without breaking the bank.
Historical Background and Cultural Significance
The meatloaf has a storied history, emerging as a popular dish during economic hardships in the early 20th century when resourceful cooks sought to stretch their food budgets. This dish has evolved over time but remains a comforting family favorite.
While meatloaf is often seen as an American classic, many cultures have their variations of meatloaf, each adapting local flavors. The addition of garlic and Parmesan in this recipe introduces an Italian twist, enhancing its flavor and contributing to a broader culinary conversation.
The evolution of the recipe reflects cooking trends that embrace flavor and nutrition, adapting to modern palates while retaining the heartiness associated with meatloafs of the past. This Garlic Parmesan version celebrates that history while inviting a contemporary twist.
Regional variations of meatloaf abound, showing how different areas of the world incorporate their local ingredients. This Garlic Parmesan Chicken Meatloaf can be adapted to include various cheeses or spices, making it a versatile dish that can fit any cuisine.
Ingredient Deep Dive
Ground Chicken: A lean source of protein, ground chicken has gained popularity due to its versatile flavor and lower fat content compared to other meats. Select high-quality, fresh chicken for the best taste, and store it in the refrigerator for up to two days after purchase. Freeze any unused portion immediately to preserve flavor.
Parmesan Cheese: This hard Italian cheese is valued for its salty, nutty flavor and is a great source of calcium and protein. When buying, look for freshly grated cheese or a block to grate on your own for maximum freshness. Store in an airtight container in the refrigerator and consume within a week for optimal flavor.
Common Mistakes to Avoid
Using old or expired ingredients: Always check the freshness of your ground chicken and Parmesan to avoid off flavors.
Overmixing the meatloaf mixture: Mixing too much can result in a dense texture; mix just until combined.
Not preheating the oven: Ensure your oven is properly preheated for even cooking.
Skipping the meat thermometer: Using a meat thermometer ensures that your meatloaf is fully cooked without being dry.
Not letting it rest: Allow the meatloaf to rest after baking for better slicing and flavor retention.
Choosing the wrong baking dish: A loaf pan helps shape the meatloaf properly; other pans may not work as well.
Neglecting to season: Don’t forget to salt your mixture well; it’s key for flavor.
Adding too many fillers: Stick to the suggested ingredients; too many fillers can dilute the taste.
Ignoring structural integrity: If you want your meatloaf to hold its shape, use proper binding agents.
Overcooking: Monitor cooking time closely to avoid dry meatloaf.
Essential Techniques
Mixing: The way you mix your ingredients is crucial. Take care not to overmix, as this results in a tough meatloaf. The goal is to combine ingredients just enough so everything is incorporated.
Forming the Loaf: Properly shaping your meatloaf is important to ensure even cooking. Use your hands to form a loaf that is slightly wider at the base than at the top, which helps it cook evenly.
Pro Tips for Perfect Garlic Parmesan Chicken Meatloaf
1. Use freshly minced garlic for maximum flavor instead of pre-minced versions, which can lose their potency over time.
2. Experiment with different cheeses; mixtures of mozzarella and Parmesan can add a delightful stretchiness to your meatloaf.
3. For added moisture, consider adding a splash of milk or cream to the mixture.
4. Let the meatloaf cool for a few minutes before slicing, allowing the juices to redistribute.
5. Consider adding finely chopped vegetables like carrots or onions for added nutrition.
6. Always taste your mixture before cooking; adjust seasoning as needed to ensure full flavor.
7. For extra depth of flavor, add some Worcestershire sauce or hot sauce to the mix.
8. Use parchment paper in your loaf pan for easier cleanup.
Variations and Adaptations
Regional variations can introduce unique spices or ingredients to the mix. Consider adding green chiles for a Southwestern flair or Italian seasoning for an enhanced herb profile.
Incorporating seasonal ingredients, like roasted squash or zucchini, can provide a fresh twist suitable for various occasions throughout the year.
For dietary modifications, ground turkey can be swapped for chicken to lower fat content while maintaining great flavor.
If desired, experiment with bolder flavors such as barbecue sauce or mustard, providing a unique kick while staying within the realm of meatloaf.
To adjust for texture, mixing in some bread crumbs can yield a more traditional meatloaf structure, while oatmeal can add fiber without compromising flavor.
Creative presentation can also make a difference; try garnishing with fresh herbs or serving in individual portions for a modern look.
Serving and Presentation Guide
For an elegant presentation, slice your meatloaf and arrange on a large platter; drizzle with a sauce or glaze for a pop of color and added flavor.
Garnish with freshly chopped parsley or basil for a vibrant touch that catches the eye. Serve alongside creamy mashed potatoes and steamed vegetables for a vibrant plate.
Consider temperature while serving; this dish is best enjoyed warm but can also be served cold for those who appreciate meatloaf sandwiches!
For portion control, serve with individual side dishes, allowing guests to customize their servings according to their preferences.
Wine and Beverage Pairing
For wine pairings, a robust red like Cabernet Sauvignon complements the rich flavors of meatloaf beautifully. Alternatively, for those preferring white, a Chardonnay works well with garlic and chicken.
If you’re looking for non-alcoholic options, consider pairing with iced tea or a sparkling water with citrus for a refreshing contrast.
Coffee or a rich, dark tea can be served for those who enjoy a warm beverage at mealtime, especially during cooler seasons.
Storage and Shelf Life
Store any leftovers in an airtight container in the refrigerator for up to 4 days. Reheat gently in the oven to retain moisture.
If you wish to freeze, wrap the meatloaf tightly in plastic wrap followed by aluminum foil to prevent freezer burn, allowing for up to 3 months of storage. Thaw in the refrigerator before reheating.
Signs of spoilage include off-odors and changes in texture; always err on the side of caution when it comes to food safety.
Make Ahead Strategies
To save time, prepare the meatloaf mixture the night before, cover tightly, and refrigerate. This allows flavors to meld and can enhance the final taste.
Split the preparation over two days; cook your meatloaf one day and reheat the next for a quick weeknight dinner.
When reheating, consider adding fresh herbs or a bit of cheese on top to refresh the dish and add appeal.
For gatherings, you can prepare individual portions ahead of time; they will cook faster and be easier to serve.
Scaling Instructions
To halve the recipe, use a smaller loaf pan and adjust cooking time accordingly; the meatloaf may cook slightly quicker.
For large gatherings, doubling or even tripling the ingredients works beautifully; simply adjust your baking time depending on the size of the loaf pan.
Be mindful of equipment; larger quantities may require multiple pans or larger-sized equipment to manage baking effectively.
Nutritional Deep Dive
This Garlic Parmesan Chicken Meatloaf is high in protein due to the ground chicken and cheese, essential for muscle repair and growth.
A single serving can provide significant amounts of several vitamins and minerals, including B vitamins, calcium, and phosphorus, supporting overall health.
With careful portioning, this dish fits well into tranquil weight management plans, providing satisfaction without excessive calories.
Dietary Adaptations
For a gluten-free version, substitute breadcrumbs with gluten-free alternatives like almond meal or ground oats.
Dairy-free adaptations can include using non-dairy cheese substitutes, ensuring the dish remains creamy and flavorful.
To make it vegan, try using lentils or black beans as the base, adjusting flavors accordingly with herbs and spices.
For keto diets, consider reducing breadcrumbs substantially and increasing egg content for binding.
Paleo adaptations might include adding crushed nuts instead of traditional breadcrumb fillers, enhancing the texture while keeping it natural.
Troubleshooting Guide
If your meatloaf turns out dry, ensure you’re not overcooking it—using a thermometer can help gauge doneness accurately. Adding moisture in the mixture can also help.
Flavor balance issues can usually be rectified with added seasoning; tasting your mixture pre-cooking is critical for a perfectly seasoned meatloaf.
Temperature problems may arise from oven calibration; using an oven thermometer can ensure accurate cooking temperatures.
Ingredient substitutions can sometimes lead to unexpected results—maintaining ratios of binders and proteins is essential for achieving the desired texture.
If timing is a concern, consider pre-cooking some components; you can mix and match ingredients according to preparation schedules.
Recipe Success Stories
Readers have consistently praised this recipe for its straightforward execution and satisfying flavors. Many have shared their own variations, such as adding different cheeses or using a mix of ground meats.
Adaptation successes include using local herbs and spices, showcasing the versatility of this dish and its appeal to wider culinary palettes.
The photography aspect has also received positive comments, with many users enjoying capturing their creations before serving.
Frequently Asked Questions
Can I freeze the meatloaf? Yes, you can freeze leftovers. Wrap tightly and consume within three months for best results.
How do I know when it’s done? Use a meat thermometer; chicken should reach an internal temperature of 165°F.
Can I substitute ground turkey? Absolutely! Ground turkey is a great alternative for a leaner option.
How long can I store leftovers? Store in an airtight container for up to 4 days in the refrigerator.
What sides go well with this dish? Serve with mashed potatoes, green beans, or a fresh salad for a complete meal.
Can I make it gluten-free? Yes, swap out breadcrumbs for gluten-free alternatives.
Is this recipe suitable for kids? Definitely! Kids often enjoy the flavors of garlic and cheese.
How can I spice things up? Add red pepper flakes or spices to the meatloaf mixture for heat and flavor.
Can I use other meats? Yes, beef, pork, or mixtures can also be used for meatloaf.
How can I improve the flavor? Taste the mixture before cooking and adjust seasonings as needed.
Additional Resources
For similar recipes, explore our selection of comforting casseroles, savory bakes, and hearty pasta dishes. Enhance your cooking skills with our technique guides focused on meat handling and flavor building.
Ingredient information can help you understand the health benefits of each component in your meals, leading to healthier choices in your cooking.
Equipment recommendations for meatloaf making, like quality loaf pans or meat thermometers, can further enhance your kitchen experience.
Join the Conversation
We encourage our readers to share their takes on this recipe! Post your variations on social media or comment below with any adjustments you’ve made.
Photography enthusiasts – we invite you to showcase your best shots of the Garlic Parmesan Chicken Meatloaf. Engage with our community to swap tips and ideas!
Reader reviews and suggestions continue to inspire our community; feel free to leave feedback or share your success stories as you bring this dish to your family table.
The Recipe
Garlic Parmesan Chicken Meatloaf
Serves: 6 servings
Prep Time: 15 mins
Cook Time: 1 hour
Total Time: 1 hour 15 mins
Kitchen Equipment Needed
Mixing bowl
Loaf pan
Measuring cups and spoons
Meat thermometer
Oven
Ingredients
1 lb ground chicken
1 cup breadcrumbs
2 cloves garlic, minced
1/2 cup grated Parmesan cheese
1 egg
1/4 cup fresh parsley, chopped
Salt and pepper to taste
1 tsp Italian seasoning
Directions
Preheat your oven to 350°F (175°C).
In a large mixing bowl, combine the ground chicken, breadcrumbs, minced garlic, Parmesan cheese, egg, and parsley. Season with salt, pepper, and Italian seasoning.
Mix gently until all ingredients are well incorporated but do not overmix.
Transfer the mixture to a loaf pan and shape into a loaf.
Bake in the preheated oven for approximately 1 hour, or until a meat thermometer reads 165°F (75°C).
Remove from the oven and let it rest for 10 minutes before slicing.
Recipe Notes
For extra flavor, consider adding finely shredded carrots or chopped bell peppers into the mix.
Leftovers can be stored in the fridge for up to 4 days.
Meatloaf can be frozen for up to 3 months; wrap tightly and thaw before reheating.