Pistachio and Raspberry Cheesecake Domes: A Decadent Dessert Delight
Pistachio and Raspberry Cheesecake Domes: A Culinary Masterpiece
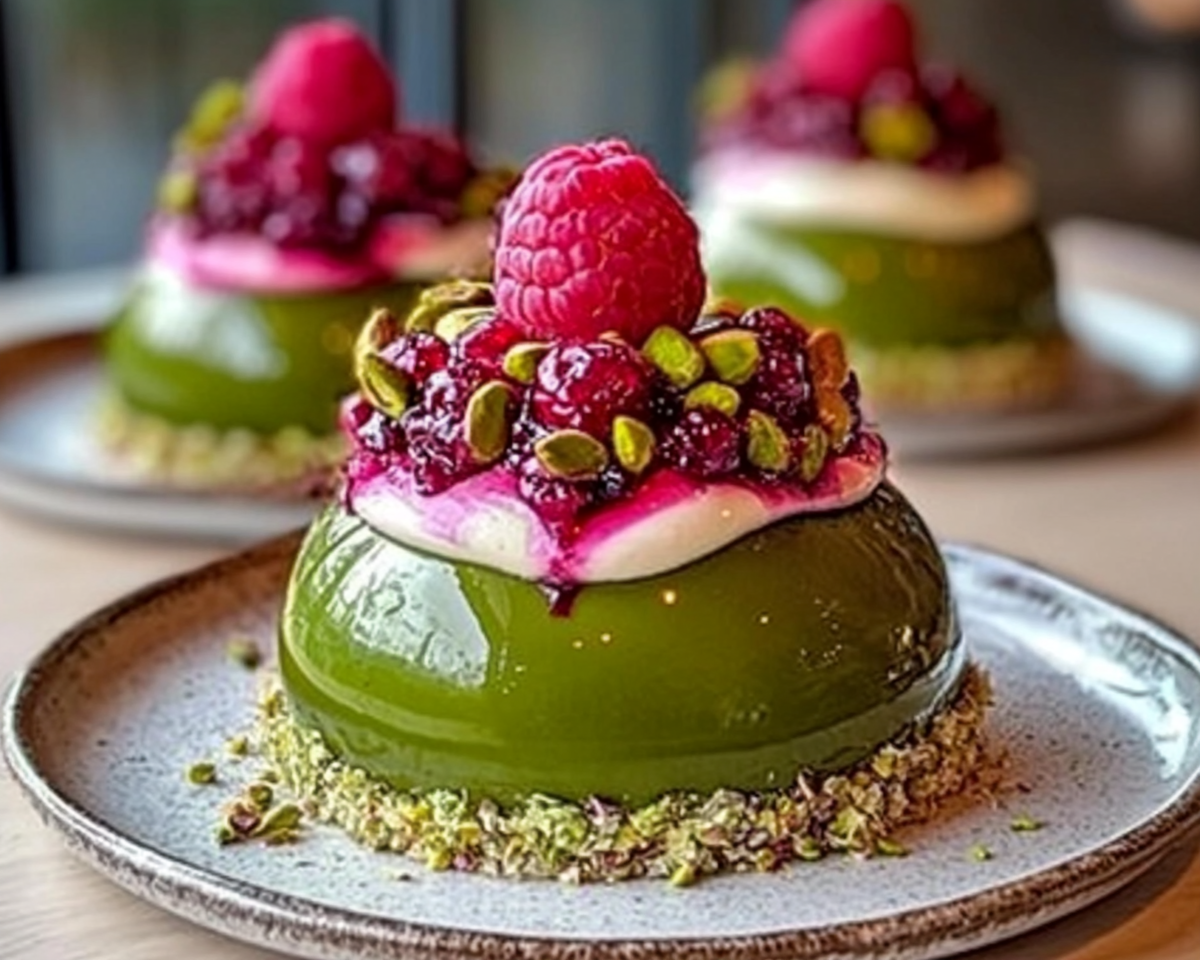
Pistachio and Raspberry Cheesecake Domes are the epitome of a sophisticated dessert. These delicately layered domes offer a delightful combination of nutty pistachios, creamy cheesecake, and tart raspberry centers. Whether served at dinner parties or as a standout feature of a dessert menu, they never fail to impress.
Perfect Balance of Flavors: The nuttiness of pistachios complements the tartness of raspberries, while the creamy cheesecake binds the flavors seamlessly.
Elegant Presentation: The dome shape adds a professional, bakery-style touch.
Versatile Appeal: Perfect for formal gatherings, holidays, or romantic dinners.
Pistachio and Raspberry Cheesecake Domes combine elegance, flavor, and creativity in a dessert that’s as delightful to make as it is to eat. With layers of rich cheesecake, a tangy raspberry core, and a nutty pistachio base, this recipe is sure to elevate your dessert game.
Air Fryer Peanut Butter Cookies: Quick, Easy, and Perfectly Chewy
Air Fryer Peanut Butter Cookies: A Quick and Easy Dessert
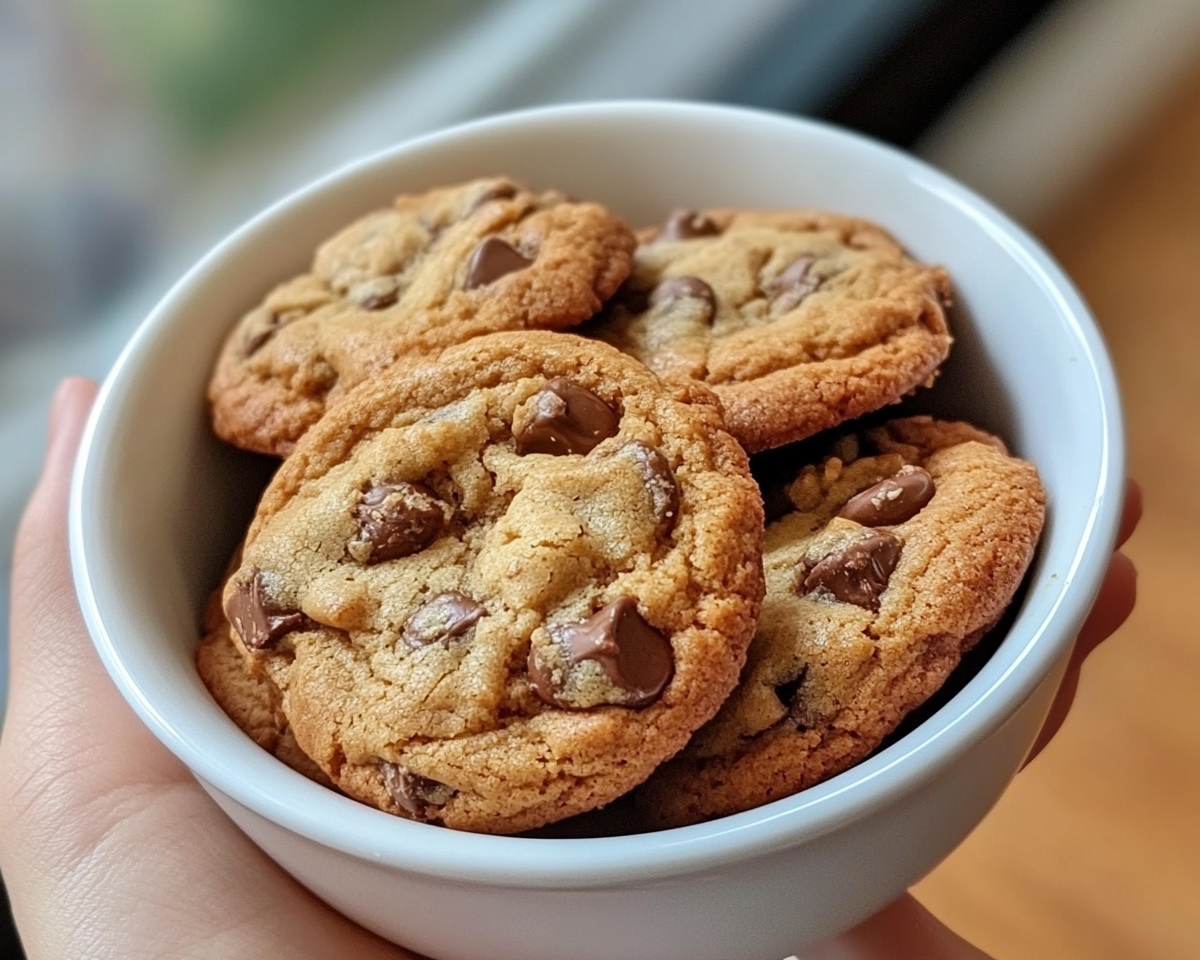
Peanut butter cookies are a timeless treat, loved for their nutty flavor and soft texture. But did you know you can make them even easier and faster with an air fryer? Using this versatile kitchen appliance not only saves time but also delivers perfectly crispy edges and chewy centers.
Air fryer peanut butter cookies are the perfect fusion of tradition and modern convenience. With a quick prep time and endless customization options, these cookies are sure to become a household favorite. Whether you’re a seasoned baker or new to using an air fryer, this recipe guarantees delicious results.
Korean BBQ Meatballs with Spicy Mayo Dip: Bold Flavors in Every Bite
Korean BBQ Meatballs with Spicy Mayo Dip: A Flavorful Twist on Classic Appetizers
Whether you’re hosting a party, preparing a game-day snack, or planning a weeknight meal, Korean BBQ Meatballs with Spicy Mayo Dip is a dish that delivers on every level. Packed with the bold, savory-sweet flavors of Korean BBQ and complemented by a creamy, spicy dip, this recipe is sure to wow your taste buds and your guests.
Korean BBQ Meatballs with Spicy Mayo Dip is a recipe that’s sure to impress. From the bold flavors of the BBQ sauce to the creamy kick of the dip, this dish is a perfect balance of taste and texture. Whether you’re serving them at a party or enjoying them as a weeknight meal, these meatballs are a surefire hit.
Praline Crunch: A Sweet and Crunchy Treat for Every Occasion
Praline Crunch: The Perfect Sweet and Crunchy Snack
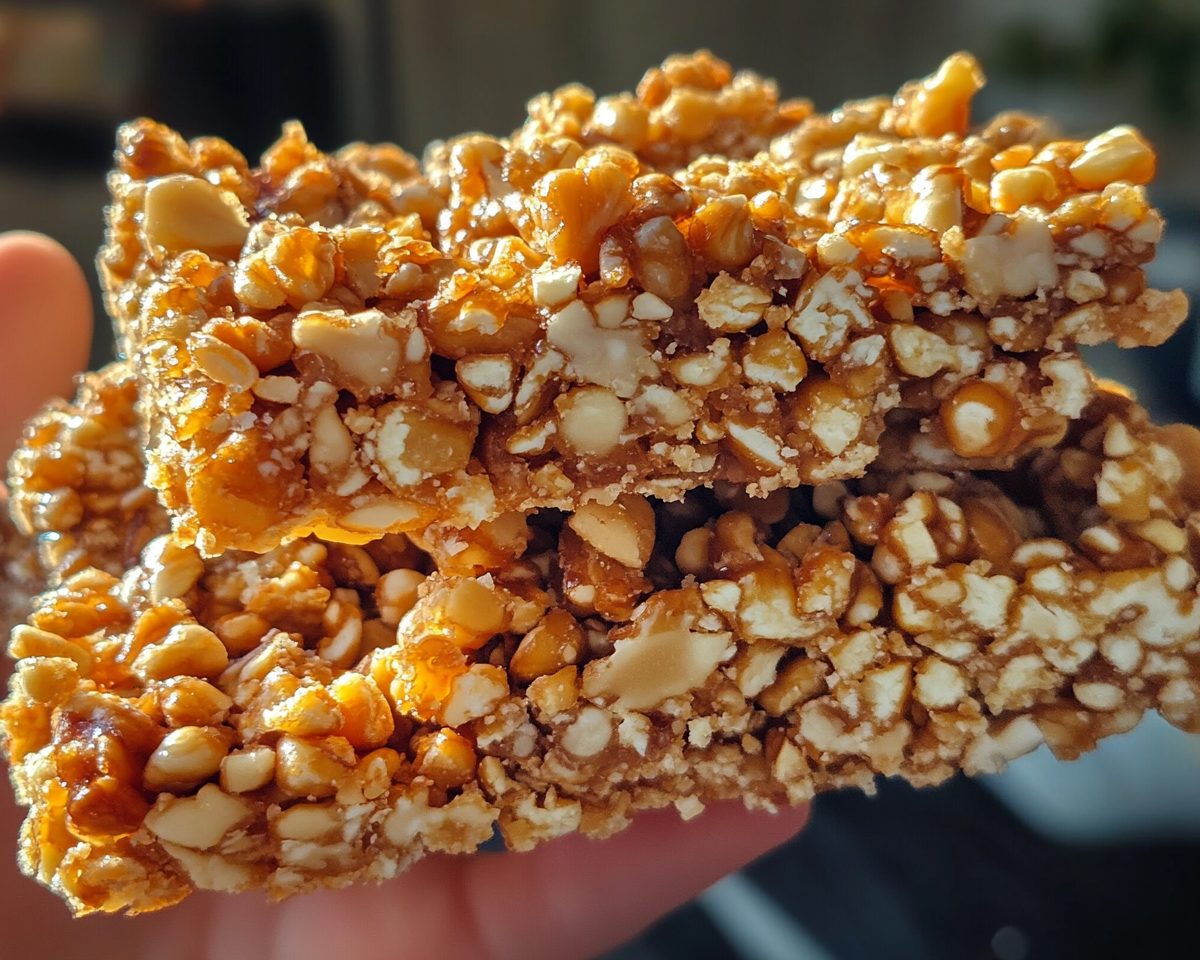
Praline Crunch is a delightful combination of crispy cereal, caramelized pecans, and a buttery praline coating. This versatile treat is perfect for holidays, gatherings, or just a snackable indulgence at home. Easy to prepare and even easier to enjoy, Praline Crunch has earned its place as a beloved dessert staple.
Praline Crunch combines the best of sweet, crunchy, and buttery flavors, making it a must-try treat for any occasion. Whether you’re preparing snacks for a holiday party or creating an indulgent gift, this recipe is sure to impress. Add your own twist with creative variations and enjoy the perfect blend of flavor and texture
Indulge in the Best German Chocolate Cake Recipe Ever
Delicious German Chocolate Cake: A True Classic Dessert
⚖️
Difficulty
Moderate
⏲️
Prep Time
30 mins
🕒
Cook Time
30 mins
⏱️
Total Time
1 hour
🍽️
Servings
12
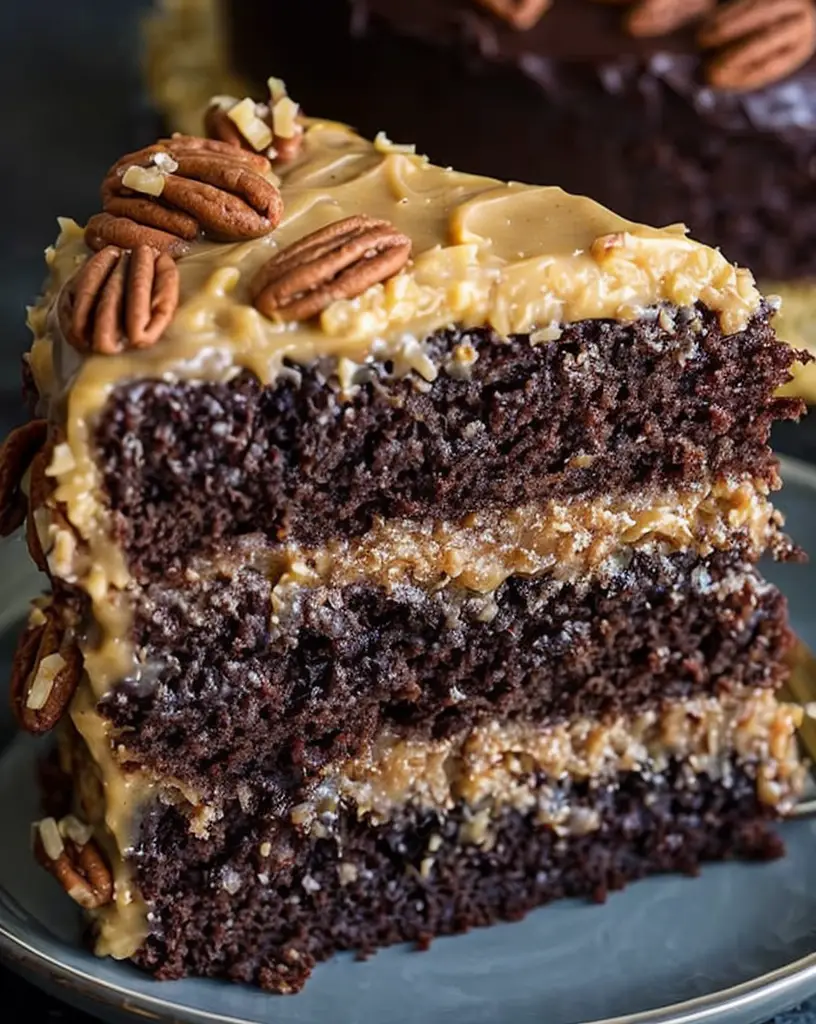
Indulge in the rich flavors of a traditional German Chocolate Cake, a dessert that blends sweet chocolate, creamy frosting, and a delightful blend of pecans and coconut. This cake is not just a treat; it’s a celebration of texture and flavor that captures the essence of home baking. The layered structure of this cake offers a stunning presentation, making it perfect for birthdays, holidays, or any special occasion where you want to impress your guests.
As you slice into the cake, the moist layers reveal a luscious interior that is perfectly balanced by the crunch of toasted pecans and the chewiness of coconut. Each forkful is a heavenly experience; the rich, dark chocolate cake envelops your senses, while the sweet, nutty frosting adds a delightful contrast, creating a symphony of flavors. This German Chocolate Cake recipe is a timeless choice that embodies joy and comfort with every bite.
Quick Recipe Highlights
Flavor Profile: This cake features a rich chocolate flavor complemented by sugary coconut and nutty notes.
Texture: Expect a moist, tender crumb with a delightful crunch from the pecans and coconut flakes.
Aroma: The cake has a heavenly chocolate aroma enhanced by the nutty scent of toasted pecans and the freshness of coconut.
Visual Appeal: The rich, dark layers juxtaposed with the creamy frosting topped with toasted coconut create a stunning dessert display.
Skill Level Needed: Intermediate baking skills are required to master the cake layers and frosting techniques.
Special Equipment: A round cake pan, mixing bowls, and an electric mixer are essential for this recipe.
Recipe Overview
Difficulty Level: The moderate difficulty level is attributed to the multi-step process of baking and frosting, but the results are well worth the effort.
Category: This cake falls under the dessert category, ideal for satisfying sweet cravings.
Cuisine: German Chocolate Cake is rooted in American baking culture and named after a British West Indian named Samuel German, who developed a type of dark-baking chocolate.
Cost: Approximate costs are reasonable, making this a cost-effective choice for gatherings and celebrations.
Season: This dessert shines in any season, but it is especially popular during holidays like Easter and Christmas.
Occasion: Perfect for birthdays, anniversaries, and any festive celebration, it’s sure to be a crowd-pleaser.
Why You’ll Love This Recipe
Fall in love with the layers of flavor and texture in every bite of this German Chocolate Cake. The balance of sweetness from the chocolate cake and the nutty coconut frosting creates a perfect dessert that is both satisfying and delicious. It’s not just a cake, it’s an experience that beckons you to savor each mouthful, making it perfect for both casual family dinners and elegant celebrations.
One of the reasons this cake is so appealing is its relatively straightforward preparation. With minimal fuss, you can create a dessert that looks as beautiful as it tastes. The process can be therapeutic, allowing home bakers to immerse themselves in the art of baking. It’s a great way to spend time in the kitchen, especially when loved ones are involved in the joy of creating something delicious together.
Nutritionally, while this cake is indulgent, it offers the benefits of cocoa and nuts, both rich in antioxidants. The use of real ingredients means you can feel good about serving it to friends and family, satisfying their sweet cravings while still providing some nutritional benefits compared to mass-produced alternatives.
This cake truly shines during social gatherings. Its rich flavors and beautiful presentation make it a centerpiece dessert that people will gather around. It’s perfect for bringing people together over a sweet indulgence, sparking conversations and creating memorable moments.
Finally, German Chocolate Cake is accessible to every home baker, regardless of skill level. The ingredients are easy to find, and while it requires careful baking and assembly, the joy of creating such a classic dessert makes it worth every effort. Plus, the cost-effectiveness allows everyone to enjoy a slice of heaven without breaking the bank.
Historical Background and Cultural Significance
The origin of German Chocolate Cake dates back to the 19th century when American writer Samuel German developed dark-baking chocolate for the Baker’s Chocolate Company. The recipe featuring this chocolate was published in a Dallas, Texas newspaper in 1957, resulting in its popularity as a distinct cake. Interestingly, the name reflects the type of chocolate used rather than a direct connection to Germany itself.
German Chocolate Cake has since gained cultural importance in America, often serving as a symbol of celebration and indulgence. Over the years, it has become associated with various occasions, especially birthdays, where its decadent layers are a guaranteed hit among guests of all ages.
This cake has evolved from a mere regional novelty into a nationwide favorite, adapted by home bakers and pastry chefs alike. Every family may claim their version of the recipe, often adding a personal twist to the traditional preparation.
Regional variations of this cake can be found across the United States, from different frosting recipes to alternative additions like caramel or additional chocolate layers. Each variation tells a story of the community and influences that shape American baking traditions.
Ingredient Deep Dive
Flour: An essential ingredient that provides structure, all-purpose flour works best for this cake, offering balance between fluffiness and density. When selecting flour, ensure it’s fresh for the best results. Store it in a cool, dry place to extend its shelf life, and consider alternatives for gluten-free options.
Sugar: Sugar not only sweetens but also helps retain moisture in the cake. Granulated white sugar is the most commonly used, but for variation, brown sugar can add depth. Store sugar in a sealed container; moisture can clump it. When substituting, keep in mind that not all sugars have the same sweetness level.
Cocoa Powder: Cocoa adds the deep chocolate flavor that makes this cake irresistible. Choose high-quality unsweetened cocoa for the best flavor profile. Store cocoa powder in an airtight container away from heat. If you’re out, consider using melted chocolate as a substitute, adjusting for liquid content.
Butter: Butter provides richness and moisture to the cake. Unsalted butter is ideal for baking, allowing you to control the saltiness of your cake. Ensure it’s softened for easier mixing. Store butter in the fridge, and for long-term storage, freezing is a good option. Vegan options can include plant-based butters.
Common Mistakes to Avoid
Using cold ingredients: Always bring eggs and butter to room temperature for a better emulsion and texture.
Overmixing the batter: This can lead to a tough cake; mix just until combined.
Not measuring ingredients accurately: Use a kitchen scale for precise measurements to achieve consistent results.
Baking at the wrong temperature: Ensure your oven is preheated, as incorrect temperatures can affect baking times.
Skipping the cooling period: Allow layers to cool fully before frosting to prevent melting.
Using stale ingredients: Check the expiry dates on your chocolate and baking powder to ensure freshness.
Failing to line cake pans: Prevent sticking by greasing and lining your pans with parchment paper.
Not tasting: Adjust sweetness based on your preference before baking; not all cakes are created equal.
Neglecting oven rotation: To ensure even baking, rotate your cakes halfway through the cooking time.
Ignoring the frosting ratio: Balance the cake and frosting; too much frosting can overwhelm the cake’s flavor.
Essential Techniques
Whipping Egg Whites: This technique adds lightness to your cake batter. Ensure your mixing bowl and whisk are clean and free of grease for maximum volume. Whip to stiff peaks and fold gently into your batter to maintain the airiness without deflating the whites.
Layering a Cake: Proper layering is crucial for an appealing presentation. Use a serrated knife to level each cake layer before stacking. Frosting between layers should be even; a turntable can help achieve this. Don’t be afraid to use a generous amount of frosting to ensure a delicious bite every time.
Pro Tips for Perfect German Chocolate Cake
1. Use high-quality ingredients for the richest flavor. Freshly ground cocoa and organic butter can make a significant difference.
2. Don’t rush the mixing process; take your time to ensure ingredients are well combined to achieve the best texture.
3. Consider chilling the cake layers after baking to retain moisture while making assembly easier.
4. Optionally add a splash of vanilla extract to your frosting for an additional layer of flavor.
5. Toast the pecans lightly before incorporating them into the frosting for enhanced flavor and texture.
6. Cover the cake with plastic wrap overnight for improved moisture retention if not serving immediately.
7. Experiment with different types of nuts or coconut for unique variations; try hazelnuts or macadamia nuts to switch things up.
8. For a more chocolatey experience, drizzle melted chocolate over the finished cake for a gourmet touch.
Variations and Adaptations
Regional variations of German Chocolate Cake often include additional flavors or textures. For instance, you can incorporate coffee into your chocolate cake batter for a mocha twist. Seasonally, consider adding pumpkin puree or spice to your cake for autumn gatherings.
Dietary modifications can also be explored, such as using gluten-free flour blends or dairy-free alternatives in frosting. If you desire lighter varieties, creating a German Chocolate Cake with less sugar or using alternative sweeteners can cater to health-conscious individuals.
For a unique flavor profile, try introducing ingredients like chili powder or espresso powder, which can deepen the chocolate’s richness while adding a spicy kick. Additionally, experiment with how you present the cake; using cupcake forms can turn this classic recipe into delightful individual portions.
Serving and Presentation Guide
Plating your German Chocolate Cake can enhance the overall dining experience. Start by placing the cake on a beautiful cake stand to showcase its layers. You can garnish with extra toasted pecans and coconut on top for visual appeal.
If you prefer a more rustic look, serve the cake directly from the baking pan, but be sure it’s well-cut for neat presentation. Pair the cake with a side of vanilla ice cream or whipped cream for a delightful contrast of temperatures.
Consider the temperature of the cake; it should be slightly warm or at room temperature for the best flavor release. Portion control is essential; cut uniform sizes to ensure everyone gets an equal share of cake.
Wine and Beverage Pairing
When pairing beverages with German Chocolate Cake, consider rich, full-bodied wines like a Merlot or a zinfandel. The fruity notes of these wines complement the cake’s sweetness while balancing its richness.
For non-alcoholic options, consider serving a robust coffee or a lightly spiced chai tea that can enhance the chocolate flavors. Additionally, a cool glass of milk or a creamy milkshake serves as a classic pairing that satisfies.
It’s essential to serve beverages at the proper temperature to maintain the harmony of flavors. Wines should be slightly chilled, and teas can be served warm.
Storage and Shelf Life
To ensure your German Chocolate Cake remains fresh, store leftovers in an airtight container at room temperature for up to three days. For longer storage, it can be refrigerated for up to a week.
If freezing is necessary, wrap the cake tightly in plastic wrap, followed by aluminum foil. A well-wrapped cake can last up to three months in the freezer. When reheating, allow the cake to thaw in the refrigerator overnight before bringing it to room temperature.
Signs of spoilage include mold growth, off-smells, or changes in texture. If the cake begins to dry out, serving it with a drizzle of chocolate or cream can refresh the flavor experience.
Make Ahead Strategies
Making German Chocolate Cake ahead of time can be beneficial, especially for gatherings. You can bake the cake layers 1-2 days in advance, wrap them tightly, and store them in the fridge until you’re ready to frost. This method also allows the flavors to meld and improves the cake’s moistness.
Frosting can also be prepared well in advance; it can be refrigerated for approximately a week. When you’re ready to assemble, simply re-whip the frosting to restore its creamy texture.
Lastly, consider preparing any garnishes, such as toasted coconut and pecans, ahead of time. These elements can be stored in separate airtight containers and added just before serving to maintain freshness.
Scaling Instructions
Scaling German Chocolate Cake is straightforward. To halve the recipe, simply divide the ingredient quantities in half, taking care to adjust cooking times as they may vary.
When doubling or tripling the recipe, you may need larger pans or additional baking sheets. Make sure to monitor time closely, as larger batches can take slightly longer to bake thoroughly.
For timing modifications, keep in mind that larger cakes may require more time at lower temperatures for even baking without burning the edges. Adjust your cooling rack space accordingly and ensure that there’s enough room for your creations to breathe.
Nutritional Deep Dive
A slice of German Chocolate Cake provides a delightful mix of macronutrients; typically, each serving includes a healthy balance of carbohydrates, fats, and protein. While indulging, it’s important to be aware of portion sizes to enjoy this dessert while managing caloric intake.
Micronutrient-wise, the cake offers beneficial vitamins and minerals, particularly when made with whole ingredients like dark chocolate and nuts. These nutrients contribute positively to your well-being, provided you enjoy them in moderation.
In terms of health benefits, the use of nuts can provide heart-healthy fats and antioxidants, while dark chocolate is linked to potential benefits including improved heart health and mood enhancement. Incorporating the cake into a balanced diet allows you to savor the other nutritional advantages it offers.
Considering dietary needs is essential; traditional recipes can be high in sugar and calories. Be mindful of this when enjoying this sweet treat, and consider modifications if necessary for health-conscious diners.
Dietary Adaptations
For those with dietary restrictions, German Chocolate Cake can be tailored easily. Gluten-free options can be achieved using a combination of almond flour and coconut flour, maintaining the cake’s moist texture.
Dairy-free alternatives can include using coconut cream for the frosting and plant-based milk in the batter. For vegan adaptations, replacing eggs with flaxseed or applesauce can provide structure without compromising on flavor.
Low-carb or keto modifications can be realized using sugar substitutes like erythritol or stevia. While the texture may slightly differ, you can still achieve a decadent chocolate flavor. Each adaptation opens up opportunities to enjoy this classic dessert without guilt.
Other options can include paleo variants using almond flour and coconut oil, making the cake suitable for those following this popular dietary lifestyle without sacrificing flavor or enjoyment.
Troubleshooting Guide
If the cake turns out too dry, it may have been overbaked. Always check for doneness a few minutes before the suggested time. Similarly, if it’s too soggy, make sure not to overdo the frosting or filling between layers.
If the frosting fails to set or is too runny, consider mixing in more confectioners’ sugar gradually until the desired texture is attained. This can also apply to the cake, as incorporating less liquid into the batter can help balance the moisture when cakes feel off.
Inconsistent flavor can be remedied by ensuring all ingredients are properly balanced; taste the batter before baking to ensure it meets your sweetness preference. If it lacks flavor, consider adding a pinch of salt or a splash of vanilla extract before baking.
When working with equipment, if your cake pan is too small, the cake may not rise appropriately. Using the right size ensures even cooking, resulting in the perfect texture.
Recipe Success Stories
Community feedback on German Chocolate Cake often reflects a sense of nostalgia and love for classic recipes. Many share personal variations, often adding family secrets that enhance the richness of flavor.
Adaptation stories abound, with readers submitting photos of their stylized presentations. Many have experiment with flavors, sharing their successes with unique twist variations that often inspire others to recreate and make their own.
Photographers often capture the beauty of this cake during gatherings, suggesting tips on how to take great shots showing off the layers and intricate details of frosting.
The sense of community in sharing these recipes fosters engagement, where other aspiring bakers can learn and seek encouragement in their own baking ventures.
Frequently Asked Questions
1. Can I make this cake ahead of time?
Yes, you can bake the cake layers a day or two in advance and store them well-wrapped in the refrigerator until you are ready to frost and serve.
2. How can I tell when my cake is done baking?
A cake is done when a toothpick inserted into the center comes out clean or with a few moist crumbs, not wet batter.
3. What are the best substitutes for eggs in this recipe?
You can use flaxseed meal mixed with water or unsweetened applesauce as a replacement for eggs to make this cake vegan.
4. Can I freeze leftover cake?
Absolutely! Wrap the cake tightly in plastic wrap and foil, then freeze for up to three months. Thaw overnight in the refrigerator before serving.
5. What can I use instead of pecans?
If you’re allergic or prefer something different, walnuts or even almonds work well as substitutes for pecans in this recipe.
6. Can I add my own flavors to the batter?
Yes! Incorporating espresso powder or cinnamon can elevate the flavor profile of the cake, offering a delightful twist.
7. Is there a gluten-free version of this cake?
Yes, substitute regular flour with a gluten-free blend. Ensure all other components like baking powder are also gluten-free.
8. What is the best way to store this cake?
Store in an airtight container at room temperature for up to three days or refrigerate for a week. If frozen, ensure it’s well-wrapped.
9. How do I make the frosting more chocolatey?
You can melt some chocolate and mix it into the frosting or use cocoa powder to enhance the chocolate flavor.
10. Can I make cupcakes instead of a layered cake?
Yes, this recipe can easily be adapted for cupcakes; just adjust the baking time to about 20 minutes.
Additional Resources
If you’re interested in exploring more baking recipes, check out our other dessert blogs featuring classic favorites like carrot cake or red velvet cake. Beyond cakes, we offer technique guides that teach essential baking skills.
For ingredient information, our posts delve into the benefits of using local, organic products that elevate your baking game. We also provide recommendations for must-have baking equipment, helping home bakers outfit their kitchens better.
Seasonal variations can inspire you to adapt traditional recipes like this one for different holidays. Explore our site for exciting new takes on beloved classics!
Join the Conversation
We encourage you to share your German Chocolate Cake experiences on social media! Post photos of your baked masterpieces and tag us to showcase your lovely creations.
Engage with our community through comments and feedback. Sharing variations can inspire other bakers to try new spins on classic recipes, transforming this beloved dessert.
Whether you’ve made a unique twist or have creative garnishing ideas, we’re thrilled to celebrate your baking successes together. Join our mailing list for tips and exclusive recipes to keep your baking journey exciting.
The Recipe
German Chocolate Cake
Serves: 12
Prep Time: 30 mins
Cook Time: 30 mins
Total Time: 1 hour
Kitchen Equipment Needed
2 round cake pans (9-inch)
Mixing bowls
Electric mixer
Rubber spatula
Cooling rack
Offset spatula for frosting
Ingredients
2 cups all-purpose flour
2 cups granulated sugar
3/4 cup unsweetened cocoa powder
1 1/2 teaspoons baking powder
1 1/2 teaspoons baking soda
1 teaspoon salt
2 large eggs
1 cup milk
1/2 cup vegetable oil
2 teaspoons vanilla extract
1 cup boiling water
Frosting: 1 cup coconut, shredded
1 cup pecans, chopped
1 1/2 cups heavy cream
1 cup confectioners’ sugar
Directions
Preheat the oven to 350°F (175°C). Prepare your cake pans by greasing them and lining the bottoms with parchment paper.
In a large bowl, mix together flour, sugar, cocoa, baking powder, baking soda, and salt.
Add eggs, milk, oil, and vanilla to the dry ingredients and mix on medium speed until well combined. Stir in boiling water until smooth.
Divide the batter equally between the prepared pans and bake for 30 minutes, or until a toothpick comes out clean.
Let cakes cool in pans for 10 minutes, then turn out onto a wire rack to cool completely.
For the frosting, in a medium bowl, combine coconut, pecans, cream, and confectioners’ sugar; beat until thickened.
Layer the cooled cakes with frosting between and on top. Decorate with extra coconut and pecans if desired.
Recipe Notes
For a chocolate ganache, melt chocolate and mix it with cream for a rich topping.
This cake can be made ahead of time and stored in the fridge for up to a week. Frost just before serving for the best texture.