Slow Cooker Lipton Onion Potatoes: Easy and Flavorful Side Dish
Article: Slow Cooker Lipton Onion Potatoes: Simple Comfort Food at Its Best
Introduction
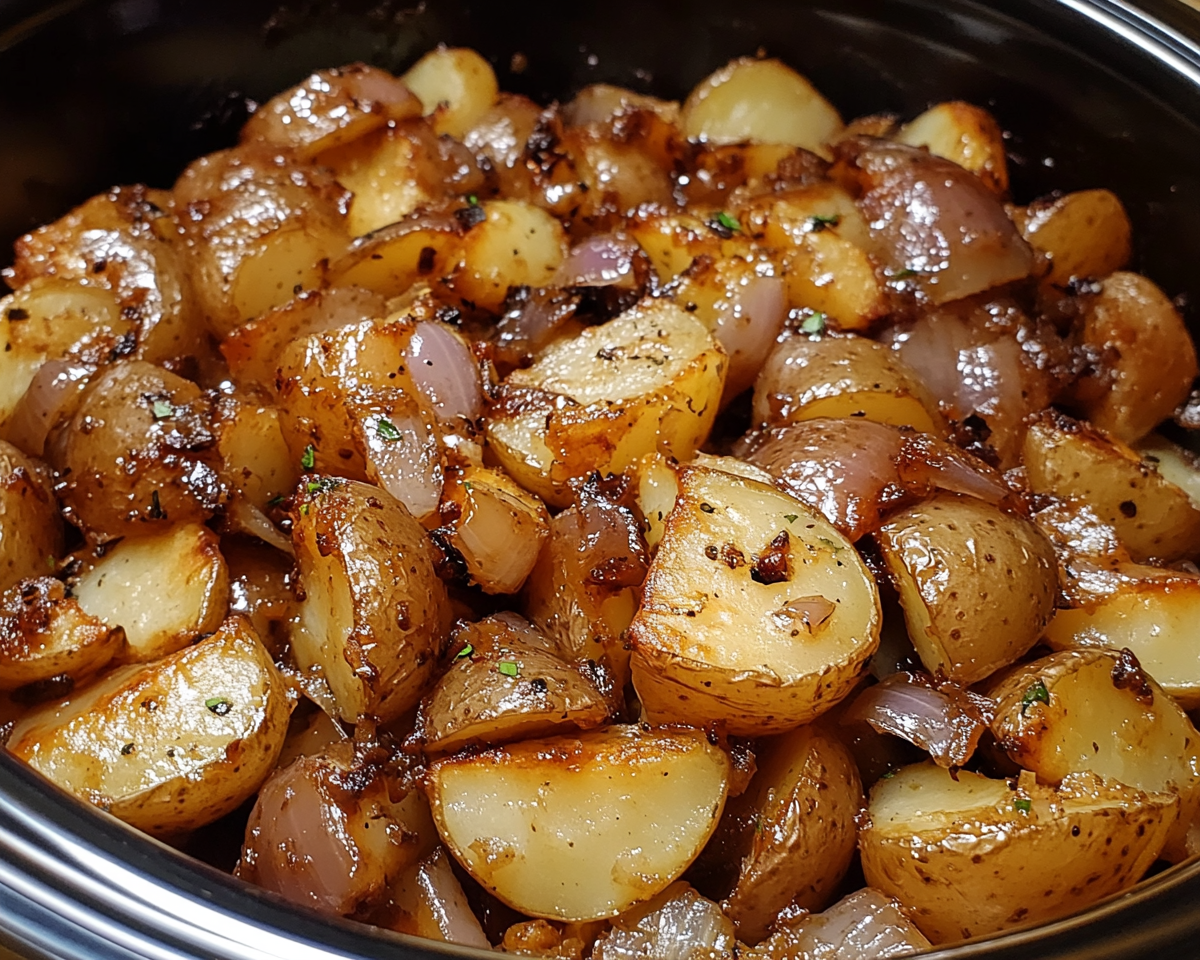
Slow Cooker Lipton Onion Potatoes are an effortless way to create a flavorful and hearty side dish. The blend of tender potatoes, savory Lipton Onion Soup Mix, and the magic of slow cooking produces a comforting dish perfect for family meals or gatherings. Whether paired with meats, casseroles, or salads, these potatoes elevate any meal. For more slow cooker tips, explore the magic of slow-cooked baked ziti.
Ingredients for Lipton Onion Potatoes
Core Ingredients
Potatoes: 6 medium Russet or Yukon Gold potatoes, sliced thinly.
Soup Mix: 1 packet Lipton Onion Soup Mix.
Liquid: 1/2 cup chicken broth or vegetable stock.
Optional Add-ons:
1/3 cup melted butter.
1/2 cup shredded cheddar cheese for a cheesy twist.
Main Courses: Serve with roasted chicken, grilled steak, or barbecue ribs.
Vegetarian Options: Pair with a crisp green salad or roasted vegetables.
Breakfast Twist: Top with fried eggs and serve as part of a hearty breakfast.
Presentation Tips
Serve directly from the slow cooker for casual meals.
For formal settings, transfer to a ceramic dish and garnish with fresh herbs.
FAQs
Q: Can I use other types of potatoes?
A: Yes, Yukon Gold, Red, or Fingerling potatoes work well. Adjust cooking times as needed.
Q: Can I prepare this dish in advance?
A: Absolutely! Prep the potatoes and seasonings the night before. Store in the refrigerator and cook the next day.
Q: How do I store leftovers?
A: Store in an airtight container in the refrigerator for up to 3 days. Reheat in the oven or microwave.
Q: Can I make this dish dairy-free?
A: Yes, replace butter with olive oil and skip the cheese topping.
Q: Is it possible to double the recipe?
A: Yes, just ensure your slow cooker has enough space and adjust cooking time slightly.
Slow Cooker Lipton Onion Potatoes are a classic dish that combines simplicity with mouthwatering flavors. Whether you’re hosting a gathering or planning a weeknight dinner, these potatoes are sure to impress. Experiment with different variations and make this dish your own. Give it a try and bring comfort food to your table!
Lemony White Chocolate Cheesecake: A Tangy and Creamy Dessert Delight
Article: Lemony White Chocolate Cheesecake: A Zesty and Decadent Delight
Introduction
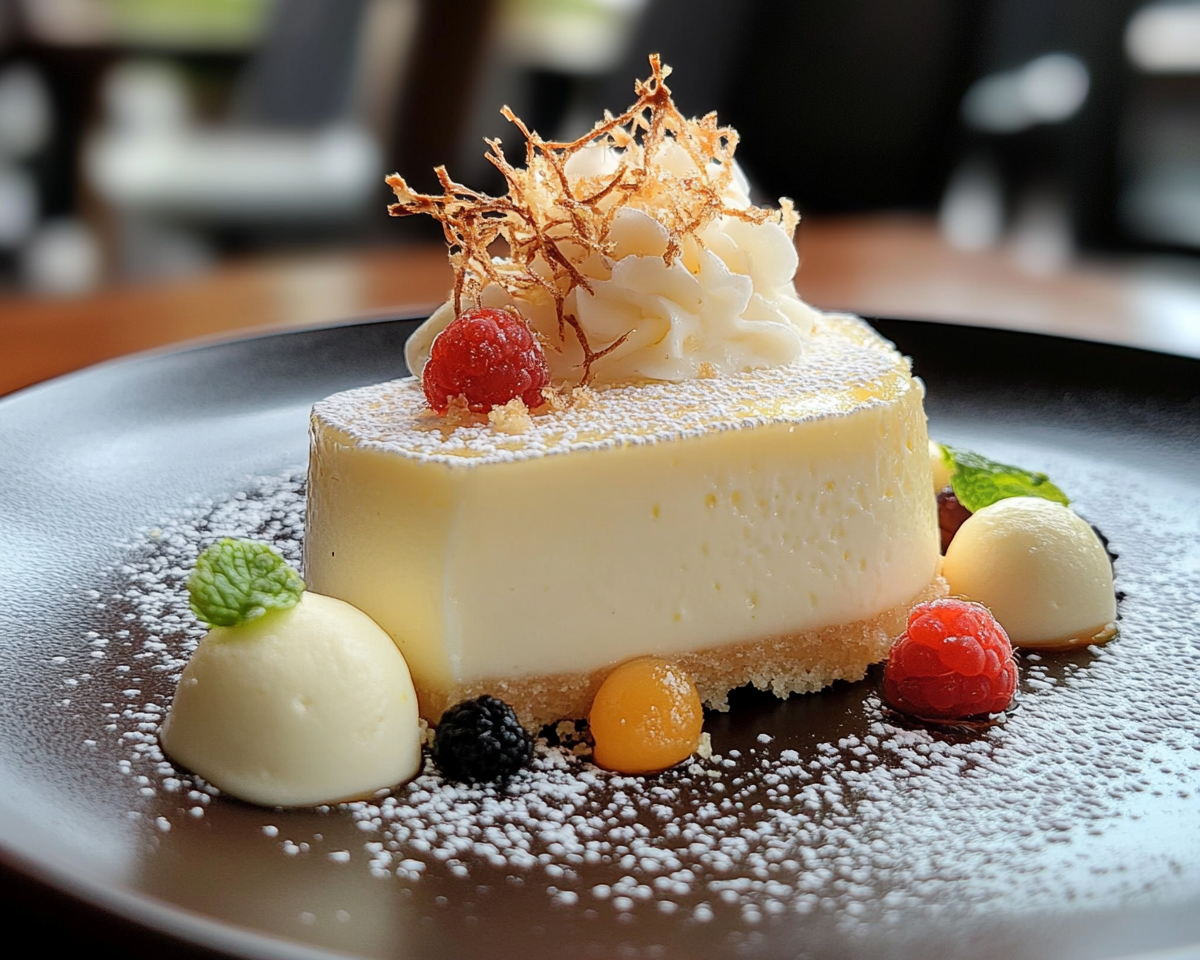
Imagine a dessert that combines the velvety richness of white chocolate with the vibrant tang of fresh lemon—Lemony White Chocolate Cheesecake delivers exactly that. This stunning dessert is perfect for special occasions, summer gatherings, or as a show-stopping finale to any meal. Learn how to melt white chocolate effortlessly for this recipe by checking out how to melt white chocolate perfectly.
Lemony White Chocolate Cheesecake is a luxurious dessert that balances the zesty brightness of lemon with the creamy decadence of white chocolate. Perfect for any occasion, this recipe is sure to impress your guests and leave them wanting more. Give it a try and share your creative twists on this classic cheesecake!
Italian Drunken Noodles: A Flavorful Fusion of Comfort and Elegance
Article: Italian Drunken Noodles: A Fusion of Bold Flavors
Introduction
When it comes to comfort food with a twist, Italian Drunken Noodles stand out as a delightful fusion of hearty Italian ingredients and a wine-infused sauce. Combining savory Italian sausage, vibrant bell peppers, and tender egg noodles, this dish offers a sophisticated take on weeknight dinners or special occasions. For a better understanding of wine pairings, check out the best wine pairings for Italian dishes.
Pair this dish with a side of Kentucky Butter Cake for a sweet finish to your meal.
Ingredients
Essential Ingredients
To prepare a meal that serves 4–6:
Main Ingredients:
1 lb Italian sausage (mild or spicy)
12 oz egg noodles
1/2 cup white wine
1 (28 oz) can diced tomatoes
1 red, 1 yellow, and 1 orange bell pepper, thinly sliced
Heat a large skillet over medium heat with olive oil.
Add Italian sausage, breaking it apart as it cooks, and brown evenly.
Remove sausage and set aside, leaving the drippings in the skillet.
Step 2: Sauté the Vegetables
Add onions and bell peppers to the skillet.
Sauté until softened, about 5 minutes.
Stir in garlic and cook for 1 minute until fragrant.
Step 3: Deglaze with Wine
Pour white wine into the skillet, scraping up any browned bits.
Let the wine reduce by half to concentrate the flavors.
Step 4: Build the Sauce
Stir in diced tomatoes, Italian seasoning, and red pepper flakes.
Simmer for 10 minutes to allow the flavors to meld.
Step 5: Cook the Noodles
While the sauce simmers, cook egg noodles in salted boiling water until al dente.
Reserve 1/2 cup pasta water before draining the noodles.
Step 6: Combine and Serve
Add the cooked sausage back to the sauce.
Toss in the cooked noodles, mixing well. Use reserved pasta water to adjust sauce consistency if needed.
Tips and Variations
Expert Tips
Use freshly grated Parmesan cheese for added depth of flavor.
Let the sauce simmer longer for a richer taste.
Avoid overcooking the noodles to maintain texture.
Creative Variations
Vegetarian Option: Swap sausage with sautéed mushrooms or plant-based alternatives.
Creamy Version: Add a splash of heavy cream to the sauce.
Spicy Twist: Increase red pepper flakes or use spicy Italian sausage.
Pair this dish with Garlic Bacon Kale for a well-rounded, flavorful meal.
Serving Suggestions
Perfect Pairings
Serve with crusty garlic bread or a fresh green salad.
Enjoy with a crisp white wine like Sauvignon Blanc or Pinot Grigio.
Presentation Tips
Garnish with freshly chopped parsley or basil.
Serve in shallow bowls to showcase the vibrant ingredients.
FAQs
Q: Can I make this dish ahead of time?
A: Yes, prepare the sauce in advance and store it in the refrigerator. Reheat and combine with freshly cooked noodles when ready to serve.
Q: What can I use instead of white wine?
A: Chicken or vegetable broth works well as a non-alcoholic substitute.
Q: Can I freeze leftovers?
A: Yes, store in an airtight container for up to 3 months. Thaw and reheat on the stovetop.
Q: Are there gluten-free options?
A: Use gluten-free pasta and ensure the sausage is gluten-free.
Italian Drunken Noodles blend bold flavors, hearty ingredients, and a touch of elegance into a dish that’s as versatile as it is delicious. Perfect for casual dinners or entertaining, this recipe is easy to customize and sure to become a favorite. Try it today and savor every bite!
Delicious Maraschino Cherry Chocolate Chip Cookies Recipe to Try
Maraschino Cherry Chocolate Chip Cookies: A Sweet Indulgence
⚖️
Difficulty
Easy
⏲️
Prep Time
15 mins
🕒
Cook Time
10 mins
⏱️
Total Time
25 mins
🍽️
Servings
24 cookies
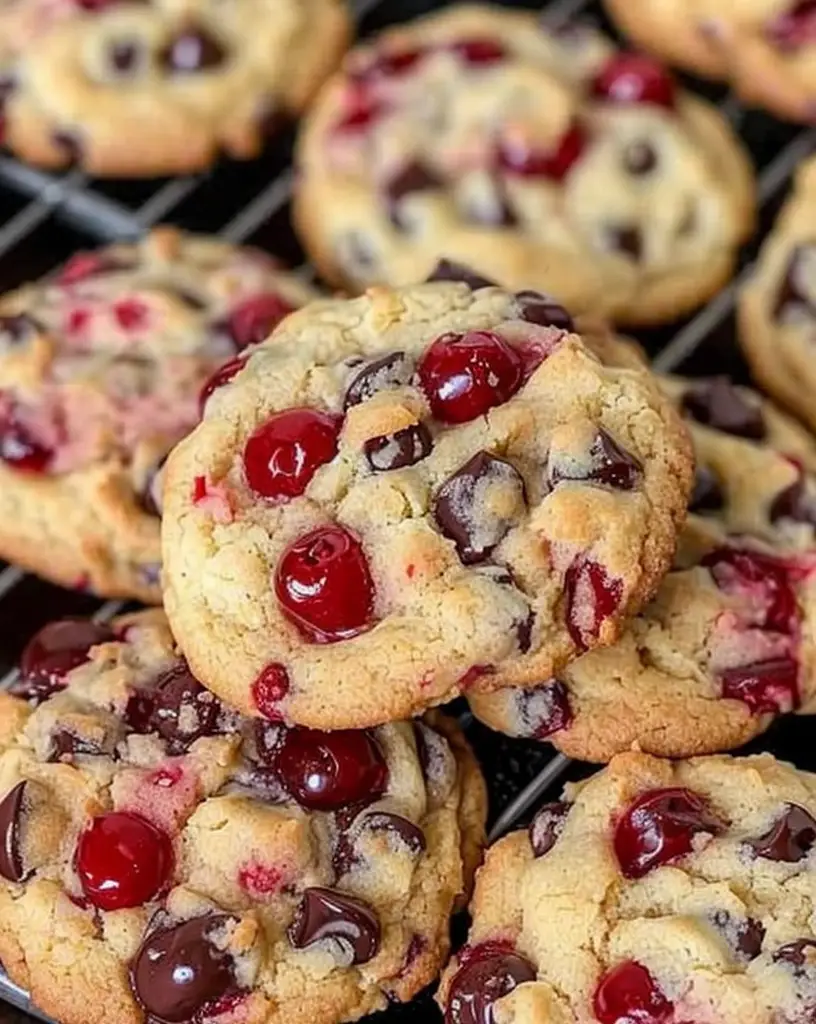
Indulge yourself in the delectable flavors of Maraschino Cherry Chocolate Chip Cookies! This delightful recipe combines the richness of chocolate with the unique sweetness of maraschino cherries, resulting in a cookie that tantalizes your taste buds. The burst of fruity flavor contrasts perfectly with the decadent chocolate chips, making every bite an explosion of joy. These cookies are not only a treat for your palate but also bring an emotional connection to joyful moments and celebrations.
Whether you’re sharing them with friends at a gathering or savoring them alone with a cup of coffee, these cookies offer a delightful experience. Imagine tearing into a warm cookie, the gooey chocolate melting into a sweet cherry-infused delight. The bright red cherries pop against the golden brown cookie dough, presenting an eye-catching treat that elevates any dessert table.
Quick Recipe Highlights
Flavor Profile: This cookie recipe balances sweetness with a hint of tartness from the cherries, complemented by rich semi-sweet chocolate.
Texture: Expect a wonderfully chewy cookie, with soft centers and slightly crisp edges that make each bite satisfying.
Aroma: The inviting scent of fresh cookies baking, combined with a sweet cherry fragrance, enhances the anticipation and warmth of homemade treats.
Visual Appeal: With vibrant red cherries peeking through golden dough, these cookies are as beautiful as they are delicious, perfect for any occasion.
Skill Level Needed: This recipe is approachable for bakers of all skill levels, allowing anyone to create delicious cookies.
Special Equipment: Just basic baking tools are needed, like a mixing bowl, baking sheet, and measuring cups.
Recipe Overview
Difficulty Level: This easy recipe is perfect for beginner bakers looking to experiment with new flavors without complex techniques.
Category: These cookies fall under dessert and snack categories, suitable for various occasions.
Cuisine: Influenced by American baking traditions, these cookies embody the creativity and simplicity of home cooking.
Cost: The ingredients are typically affordable, making this an economical baking project for everyone.
Season: While delightful year-round, these cookies shine during holidays and celebrations when the desserts take center stage.
Occasion: Ideal for parties, cookie swaps, or simply to enjoy at home while watching a movie.
Why You’ll Love This Recipe
The flavor and texture of Maraschino Cherry Chocolate Chip Cookies create a delightful balance of sweetness and richness that will have you reaching for just one more cookie. Each bite provides a perfectly chewy experience, enhanced by melty chocolate chips and pieces of cherry that burst with flavor. This exciting combination not only satisfies your sweet tooth but also presents a contrast of textures that is irresistible. The bright pops of red cherries bring a festive feeling, transforming regular cookie time into a party!
Preparation of these cookies is quick and straightforward, making it an ideal recipe for busy days when you need a sweet treat without spending hours in the kitchen. With just a few minutes of mixing and baking, you can enjoy freshly baked cookies in no time. This convenience allows you to whip up a batch whenever the craving hits or when unexpected guests arrive.
Nutritionally, while cookies are typically regarded as indulgent treats, these Maraschino Cherry Chocolate Chip Cookies can offer moments of joy and happiness, bringing people together. Sharing these cookies can enhance social interactions and create warm memories with friends and family. And, let’s not forget, they remain a crowd-pleaser among both kids and adults alike, making them perfect for gatherings.
The recipe is cost-effective, utilizing simple ingredients that are often readily available in your pantry. This affordability makes these cookies accessible to everyone, allowing you to indulge without breaking the bank. With minimal investment, you can create a delightful homemade treat that impresses family and friends.
Finally, these cookies are customizable. Feel free to add nuts, modify the type of chocolate, or even swap in dried fruits if cherries aren’t your favorite. This versatility allows you to tailor the recipe to your specific tastes or dietary needs, making it a true go-to cookie base.
Historical Background and Cultural Significance
The classic chocolate chip cookie was invented in the 1930s by Ruth Wakefield, who famously added chunks of chocolate to her butter drop cookie recipe. However, the addition of maraschino cherries brings a creative twist that adds both color and a unique flavor profile to this beloved classic. Cherries have long been associated with festive desserts, often used in pies and cakes, making them a natural addition to cookies.
Culturally, these cookies represent a blend of classic American baking traditions infused with modern creativity. The juxtaposition of chocolate with bright maraschino cherries mirrors broader culinary trends that celebrate vibrant flavors and visual appeal. This evolution showcases the fun and playful nature of baking today, where creativity knows no bounds.
The recipe for Maraschino Cherry Chocolate Chip cookies has evolved, prompting variations with nuts, specific chocolate types, or even alternative flours reflecting contemporary dietary preferences. Each adaptation offers bakers unique ways to express themselves while showcasing the versatility of cookies.
In different regions, you may find local spins on this recipe, perhaps by incorporating local fruits or types of chocolate, demonstrating how adaptable this classic treat can be across various culinary landscapes.
Ingredient Deep Dive
Flour is the backbone of any cookie, providing structure. Choose all-purpose flour for its versatility, or try whole wheat flour for added nutrition and a nuttier flavor. When selecting flour, store it in a cool, dry place to maintain freshness and avoid spoilage. Consider sifting flour before use for lighter cookies, and always reserve some for dusting baking sheets.
Maraschino cherries contribute sweetness and a pop of color to the cookie. Unlike fresh cherries, maraschino cherries are preserved in syrup, giving them a distinct taste. Look for high-quality brands without artificial colors for a more natural flavor. Store them in their syrup in the refrigerator once opened, and they can last for months.
Common Mistakes to Avoid
Overmixing the dough can result in tough cookies. Mix just until the ingredients are combined.
Using cold butter can lead to spreading during baking. Ensure your butter is at room temperature for optimal texture.
Skipping the chilling step can cause cookies to spread too much. Chill the dough for at least 30 minutes for thicker cookies.
Not measuring ingredients accurately may affect the cookie’s texture. Use weight measurements for consistency.
Ignoring oven temperature can result in undercooked or burnt cookies. Check your oven’s accuracy with a thermometer.
Not using parchment paper can cause cookies to stick to the baking sheet. Always line your pans for easy removal.
Using stale or expired ingredients can affect flavor. Fresh ingredients create the best-tasting cookies.
Not letting cookies cool on the sheet before transferring them may lead to breakage. Allow them to set for a few minutes first.
Using too much flour can make cookies dry. Spoon flour into measuring cups without packing it down.
Not enjoying the cookie-making process can diminish the overall experience. Relax and have fun while baking!
Essential Techniques
Knowing how to cream butter and sugar together is crucial for any cookie recipe. Creaming incorporates air into the mix, resulting in a light and fluffy texture. Aim for a pale and creamy mixture before adding other ingredients. If you notice your dough turning gritty, you may not have creamed your butter long enough.
Measuring ingredients accurately is fundamental to baking success. Use the spoon and level method for dry ingredients and liquid measuring cups for wet ones. A digital scale can significantly enhance precision, ensuring your cookies turn out perfectly every time.
Pro Tips for Perfect Maraschino Cherry Chocolate Chip Cookies
1. Try chilling your cookie dough overnight for enhanced flavor and a thicker texture when baked.
2. Substitute dark chocolate chips instead of semi-sweet for a deeper chocolate flavor.
3. Always preheat your oven to ensure even baking. This sets the structure of your cookies right.
4. Experiment with sprinkle toppings for added color and fun during special occasions.
5. Use a cookie scoop for uniform cookie sizes, ensuring even baking.
6. Add extra cherries on top before baking for a visually stunning presentation.
7. Store cookies in an airtight container with a slice of bread to maintain moisture.
8. For a fun twist, drizzle melted white chocolate on top after they cool.
Variations and Adaptations
Regional variations of these cookies can include local fruits that are more prominent in specific areas, such as adding pecans for a Southern twist or adapting the chocolate used to represent different holidays. Seasonal adaptations may involve spices like cinnamon or pumpkin pie seasoning during fall for a festive touch. Additionally, dietary modifications like using gluten-free flour or low-carb sweeteners can accommodate various eating preferences.
Serving and Presentation Guide
Plating techniques for your cookies can elevate the experience. Arrange them on a decorative platter, interspersed with fresh cherries or mint leaves for color. Garnishing ideas include a dusting of powdered sugar or a sprinkle of sea salt to enhance flavors. Cookies can be served individually or stacked in a clear jar for an inviting visual appeal. Ensure cookies are served warm during gatherings for that home-baked comfort feeling.
Wine and Beverage Pairing
Pairing these delightful cookies with a glass of sweet dessert wine can enhance the overall tasting experience. A fruity Riesling or a sparkling Moscato complements the cherries beautifully. For non-alcoholic options, consider pairing with cherry or cola beverages. Chocolate chip cookies and coffee are timeless, so a fresh brew can balance the sweetness perfectly.
Storage and Shelf Life
To store your cookies effectively, keep them in an airtight container at room temperature for up to one week. For longer shelf life, you can freeze baked cookies for up to three months. To store unbaked dough, it can also be frozen and baked directly from the freezer, extending your cookie enjoyment. Always check for signs of spoilage, such as an off smell or moisture. When reheating, a quick pop in the microwave for 10-15 seconds will revive their gooey goodness.
Make Ahead Strategies
To make these cookies ahead of time, prepare the dough and refrigerate it for up to three days, or freeze it for up to three months. When ready to bake, simply thaw in the refrigerator overnight if frozen. Prep timelines are flexible, allowing for easy schedule management while assembling other dishes for events.
Scaling Instructions
If you’re looking to adjust the batch size, halving or doubling the recipe is straightforward. Keep an eye on the baking time if you’re making larger batches, as they may need an extra minute or two. Use larger mixing bowls or multiple sheets for assembly to avoid overcrowding. Lastly, adjust your ingredient quantities based on the desired cookie count for the best outcome.
Nutritional Deep Dive
Analyzing the macros in a single Maraschino Cherry Chocolate Chip Cookie reveals approximately 150 calories. The balance of fats from butter and chocolate, carbohydrates from sugar and flour, makes these cookies a delightful treat in moderation. Additionally, the inclusion of cherries adds a unique source of antioxidants, offering some health benefits among the indulgence. Portion analysis regarding 2-3 cookies can provide an enjoyable experience without exceeding caloric goals.
Dietary Adaptations
For gluten-free cookies, substitute regular flour with a gluten-free blend, ensuring a successful texture. Dairy-free bakers can opt for coconut oil or dairy-free spreads and use vegan chocolate chips. If you’re following a keto diet, consider using almond flour and sugar substitutes to maintain lower carb counts while enjoying the textures and flavors.
Troubleshooting Guide
If your cookies come out too flat, assess the butter temperature; it should be softened but not melted. If they are too dry, it may be due to overly packed flour—spoon flour lightly into the measuring cup for accuracy. If you’re dealing with burnt edges, lowering the oven temperature slightly can prevent further issues in future bakes. Monitor bake times closely and conduct the toothpick test to check doneness without risking overbaking.
Recipe Success Stories
Many bakers have shared their love for Maraschino Cherry Chocolate Chip Cookies, noting how easily they share the joy of baking with friends and family. Variations have flourished among the community, including experimenting with different types of chocolate and introducing nut toppings, inspiring creativity. Readers often highlight how these cookies have become a staple at gatherings, sparking conversations and creating lasting memories centered around delicious treats.
Frequently Asked Questions
Can I use fresh cherries instead of maraschino cherries?
While fresh cherries can be used, they will alter the texture and flavor, as they lack the sweetness and syrupy goodness of maraschino cherries. Consider adjusting the sugar content if opting for fresh ones.
How do I keep my cookies from spreading?
Chilling your cookie dough before baking helps prevent excessive spreading. Also, ensure you’re using the correct flour measurement and appropriate butter temperatures.
Can I freeze the cookie dough?
Absolutely! You can freeze the cookie dough for up to three months. Shape the dough into balls, freeze them on a baking sheet, then transfer to a ziplock bag for easy storage, baking as needed.
Why are my cookies dry?
Dry cookies can result from overbaking or measuring too much flour. Always level your flour and monitor the baking time closely, pulling cookies when just set.
What’s the best way to store cookies?
Store cookies in an airtight container at room temperature for up to a week. To maintain softness, place a slice of bread in the container with them.
Can I add nuts to this recipe?
Adding nuts can provide a delightful crunch and flavor contrast. Toasted pecans or chopped walnuts would complement the sweet cherries and chocolate well.
How can I make these cookies healthier?
Consider substituting some of the butter for applesauce, using whole wheat flour instead of all-purpose flour, and reducing the sugar slightly to introduce a healthier twist.
What if I don’t have baking soda?
You can replace baking soda with baking powder. Use three times as much baking powder, but keep in mind this may alter the cookie’s texture slightly.
How should I reheat leftover cookies?
To revive your cookies, pop them in the microwave for about 10-15 seconds. If you prefer, you can also warm them in the oven at a low temperature for a few minutes.
Can I make these cookies vegan?
Yes! Substitute the butter with coconut oil or a vegan butter alternative and use aquafaba or flaxseed meal as an egg substitute to maintain the right consistency.
Additional Resources
If you’re interested in exploring more cookie recipes, consider trying classic chocolate chip cookies, oatmeal raisin, or sugar cookies. Technique guides on creaming butter, measuring flour accurately, and cookie decorating can be highly beneficial. Look into ingredient information for substitutes that can modify flavors while preserving texture, and don’t forget equipment recommendations for kitchen essentials to help in your baking adventures.
Join the Conversation
We invite you to share your baking adventures on social media! Post your photographs, swap tips, and tell us about your experience making Maraschino Cherry Chocolate Chip Cookies. Engaging with our recipe community can offer inspiration, while reviews and suggestions from others enhance your baking journey. Have fun experimenting and enjoy your sweet treats together!
The Recipe
Maraschino Cherry Chocolate Chip Cookies
Serves: 24 cookies
Prep Time: 15 mins
Cook Time: 10 mins
Total Time: 25 mins
Kitchen Equipment Needed
Mixing bowl
Hand or stand mixer
Measuring cups and spoons
Baking sheet
Parchment paper
Ingredients
1 cup (226g) unsalted butter, softened
1 cup (200g) granulated sugar
1 cup (220g) packed brown sugar
2 large eggs
1 tsp vanilla extract
3 cups (360g) all-purpose flour
1 tsp baking soda
1/2 tsp salt
1 cup (175g) semi-sweet chocolate chips
1 cup maraschino cherries, chopped and drained
Directions
Preheat the oven to 350°F (175°C) and line a baking sheet with parchment paper.
In a mixing bowl, cream together the softened butter, granulated sugar, and brown sugar until light and fluffy.
Add in the eggs one at a time, mixing well after each addition. Stir in vanilla extract.
In a separate bowl, whisk together the flour, baking soda, and salt.
Gradually add the dry ingredients to the wet mixture, mixing just until combined.
Fold in the chocolate chips and chopped maraschino cherries.
Drop tablespoonfuls of dough onto the prepared baking sheet, spacing them about 2 inches apart.
Bake for 10-12 minutes until the edges are lightly golden but the centers are still soft.
Remove from oven and let cool on the baking sheet for a few minutes before transferring to a wire rack to cool completely.
Recipe Notes
For extra flavor, consider adding a touch of almond extract along with the vanilla.
Ensure the maraschino cherries are well-drained to prevent excess liquid in the dough.
Cookies can be stored in an airtight container for up to a week or frozen for longer preservation.
OMG Taco Cupcakes: The Perfect Party Snack
Article: OMG Taco Cupcakes: A Delicious Party-Ready Treat
Introduction
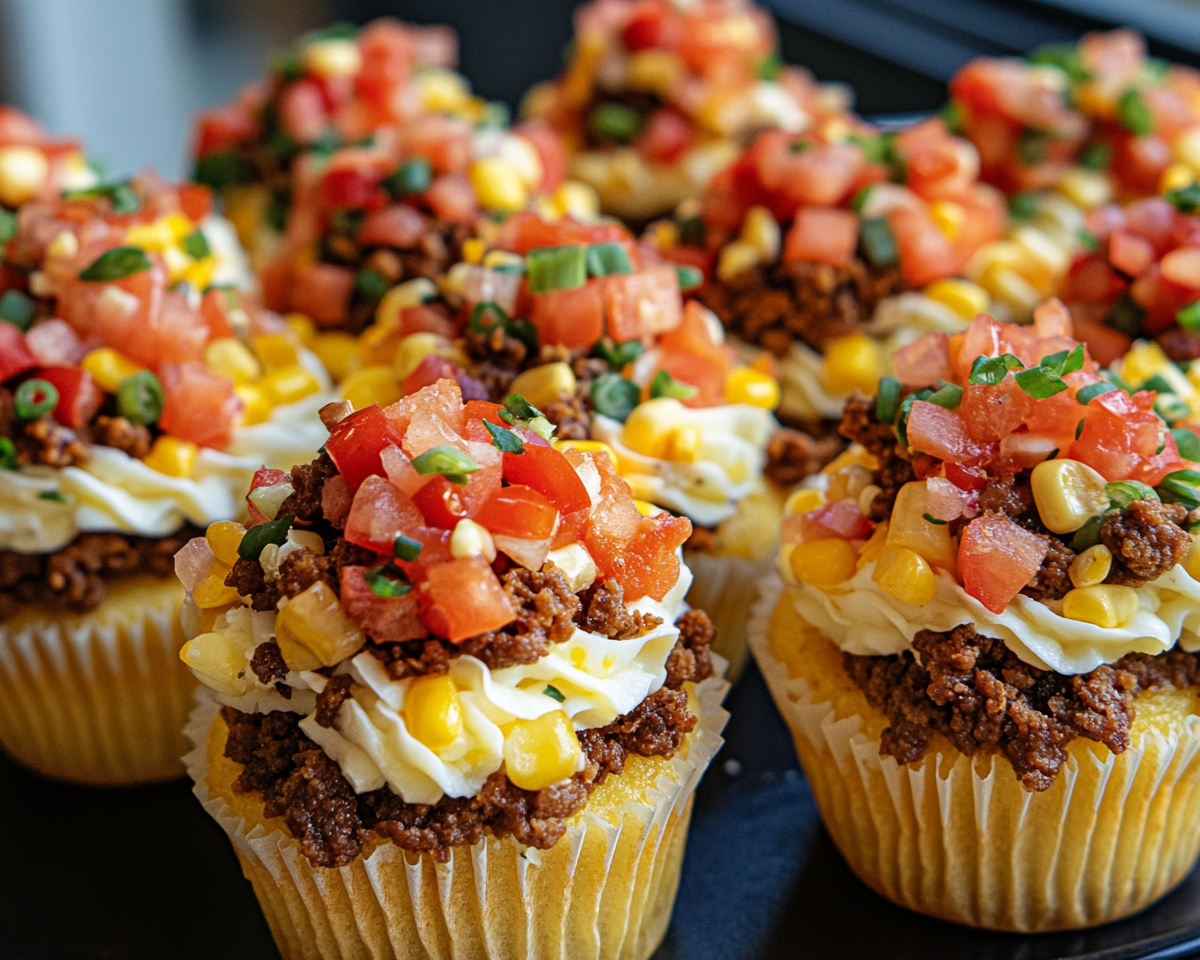
OMG Taco Cupcakes are the ultimate fusion of tacos and bite-sized convenience, making them a hit for parties, family dinners, or snacks. Packed with layers of seasoned beef, gooey cheese, and crispy wonton wrappers, these appetizers are bursting with flavor and texture. Whether you’re hosting a game night or looking for a creative weeknight dinner, taco cupcakes offer a fun twist on a classic favorite. Learn more about creative uses for wonton wrappers for unique recipe ideas.
Pair these taco cupcakes with a side of Doritos Taco Salad for a festive taco-themed spread!
Ingredients for Taco Cupcakes
Essential Ingredients
To create 12 servings of these delicious cupcakes:
Cook ground beef in a skillet over medium heat until browned.
Add taco seasoning and follow package instructions. Remove from heat and set aside.
Step 2: Prepare the Wonton Wrappers
Preheat oven to 375°F (190°C). Grease a muffin tin with oil or butter.
Place one wonton wrapper into each muffin tin cup, pressing gently to form a base.
Step 3: Assemble the Layers
Add a spoonful of seasoned beef to each wonton wrapper.
Sprinkle cheddar and Monterey Jack cheeses on top.
Place a second wonton wrapper over the cheese and repeat the layers (beef, cheese).
Step 4: Bake and Garnish
Bake for 10–12 minutes or until the wrappers are golden brown and the cheese is melted.
Remove from the oven and let cool slightly.
Garnish with sour cream, salsa, and optional toppings like green onions or jalapeños.
Tips and Variations
Expert Tips
Use freshly grated cheese for better melting and flavor.
Avoid overfilling the wrappers to ensure even baking.
Let the taco cupcakes cool slightly for easier removal from the muffin tin.
Creative Variations
Vegetarian Option: Replace beef with black beans or sautéed vegetables.
Spicy Twist: Add a dash of hot sauce or use spicy taco seasoning.
Cheesy Overload: Mix cream cheese into the beef for extra creaminess.
Pair your taco cupcakes with Homemade Picadillo for a Mexican-inspired meal.
Serving Suggestions
Perfect Pairings
Serve with dipping sauces like guacamole, queso, or spicy salsa.
Pair with a side of Mexican rice or a fresh green salad.
Presentation Tips
Use a platter for serving, garnished with extra toppings like cilantro or lime wedges.
Add small bowls of dipping sauces for guests to customize their flavors.
FAQs
Q: Can I make taco cupcakes ahead of time?
A: Yes, you can assemble them up to 24 hours in advance and refrigerate. Bake just before serving for the best results.
Q: What can I substitute for wonton wrappers?
A: Phyllo dough or even small tortillas cut to size can work as alternatives.
Q: How do I store leftovers?
A: Store in an airtight container in the fridge for up to 3 days. Reheat in an oven or air fryer to retain crispness.
Q: Are there gluten-free options?
A: Use gluten-free tortillas or wonton wrappers to make this dish gluten-free.
OMG Taco Cupcakes are a flavorful, fun, and versatile dish that works for any occasion. Whether served as a party snack or a quick weeknight meal, these crispy, cheesy cups are sure to impress. Try out your own toppings and variations to make this recipe uniquely yours, and enjoy the delicious results!