“`html
Table of Contents
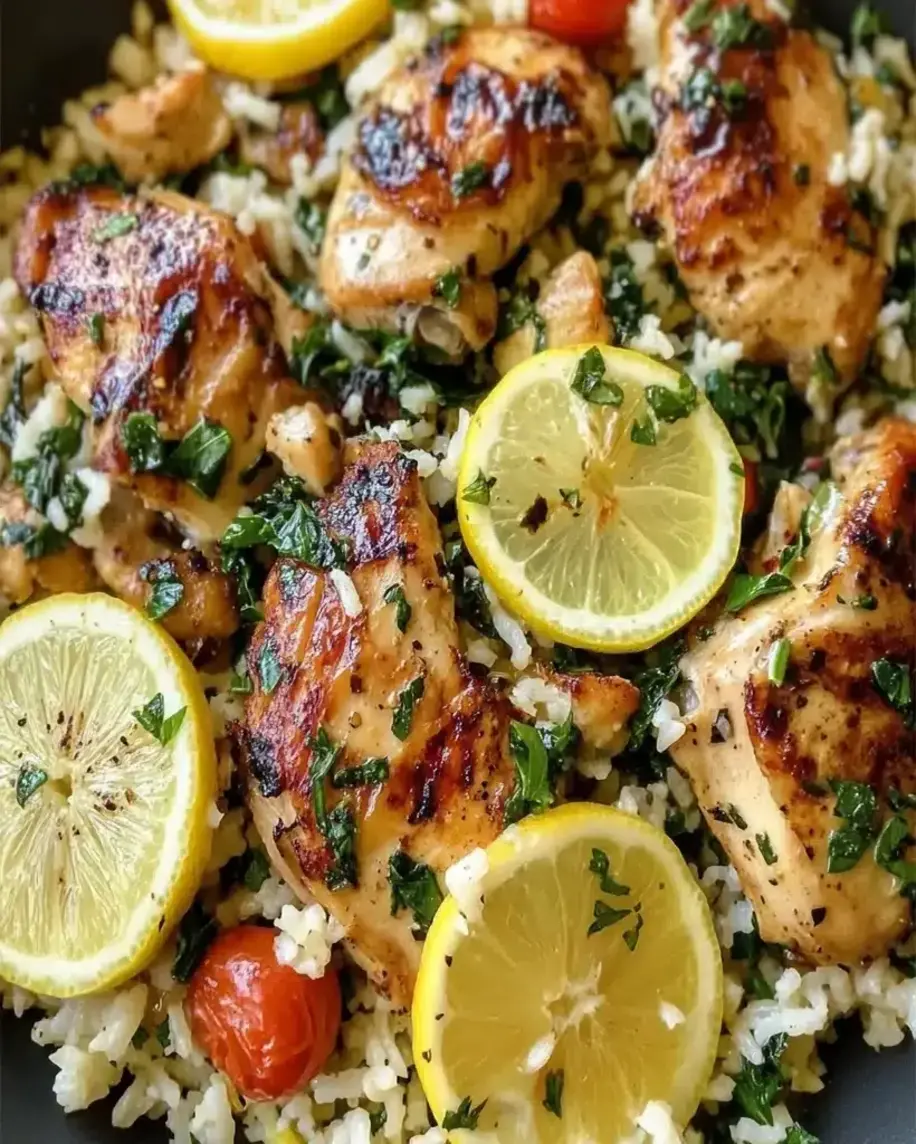
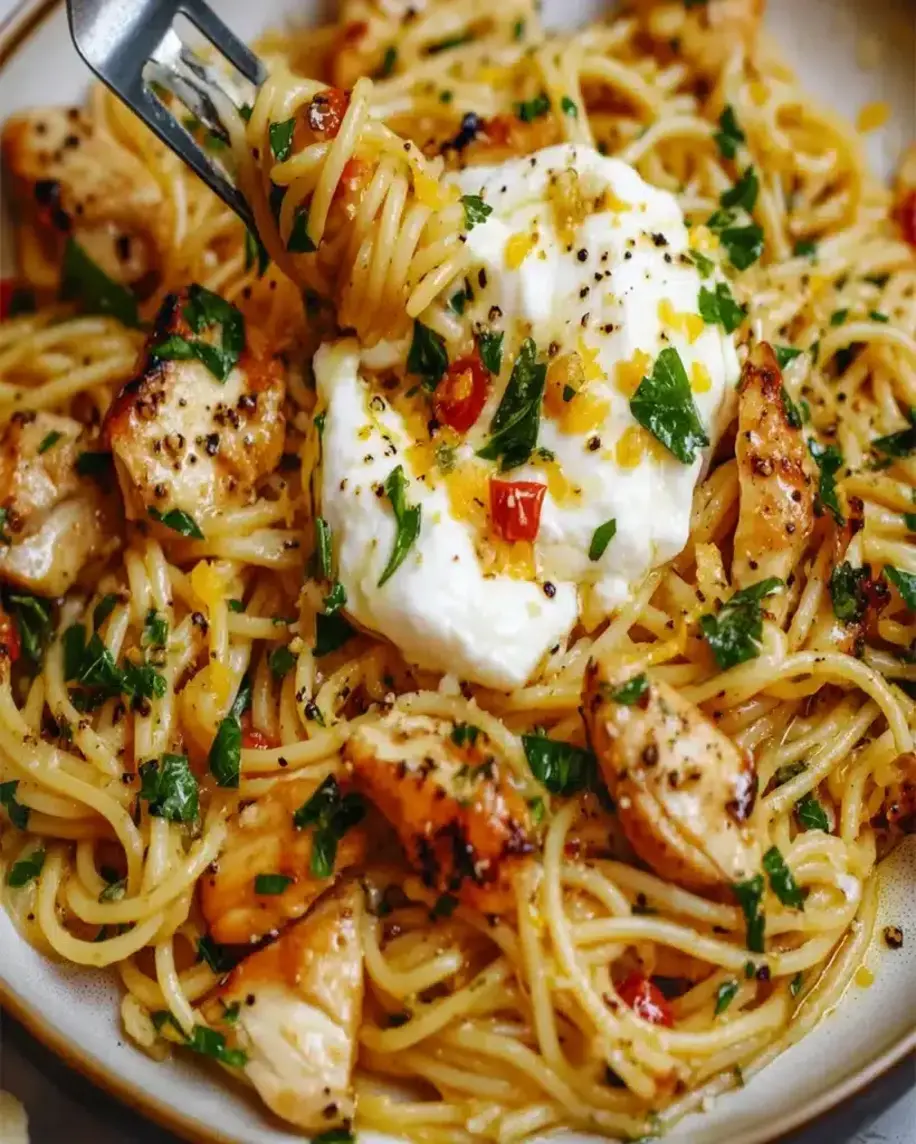
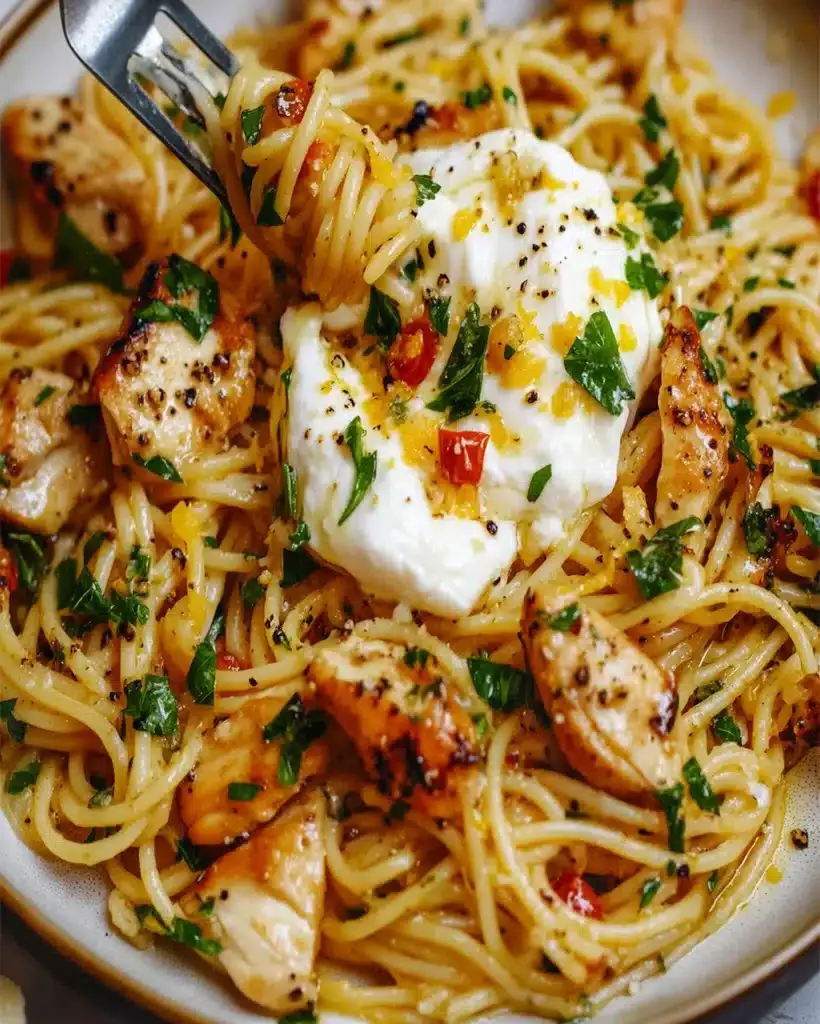
Creamy Chicken Spaghetti with Burrata & Lemon Garlic Sauce 🧄
Hello, Pasta Lovers!
Are you searching for a pasta dish that’s both incredibly comforting and delightfully decadent, perhaps something that feels like a luxurious hug in a bowl? You’re in the right place! Today, we’re diving headfirst into the irresistible world of Creamy Chicken Spaghetti with Burrata and Lemon Garlic Sauce. If you’re craving a pasta experience that’s rich, flavorful, and utterly satisfying, you’re in for a treat that’s a cut above the average weeknight meal. Imagine perfectly tender spaghetti, lovingly coated in a vibrant, zesty lemon butter garlic sauce, mingling with succulent pieces of roasted chicken. And the pièce de résistance? A generous dollop of creamy, luscious burrata cheese melting over the top. This dish is the perfect paradox: sophisticated enough to impress guests at a special occasion, yet comforting and achievable enough for a memorable weeknight dinner. Let’s embark on this culinary adventure and create something truly special together!
The Stars of the Show: Ingredients
To create this masterpiece, we’ll need a blend of familiar favorites and a touch of creamy luxury. Here’s what you’ll need for this delightful Creamy Chicken Spaghetti with Burrata and Lemon Garlic Sauce:
Pasta Perfection
- Spaghetti: 1 pound (450g). We love traditional spaghetti for its ability to hold sauce, but linguine or fettuccine also work beautifully. Ensure it’s cooked to a perfect al dente!
Tender Chicken
- Chicken Breasts or Thighs: 1.5 pounds (680g), boneless, skinless. Thighs offer more moisture and flavor, while breasts are leaner. Roasted, grilled, or even rotisserie chicken works wonderfully here for a shortcut.
- Olive Oil: 2 tablespoons, for cooking the chicken (if not using pre-cooked).
- Salt and Black Pepper: To taste, for seasoning the chicken.
The Luscious Lemon Garlic Sauce
- Butter: 4 tablespoons (1/2 stick), unsalted. The base of our rich sauce.
- Garlic: 4-6 cloves, minced. We believe more garlic is always better! Adjust to your preference. The aroma will be intoxicating.
- Heavy Cream: 1.5 cups (350ml). This is key for that luxurious, creamy texture.
- Chicken Broth: 1/2 cup (120ml). Low-sodium is best to control saltiness. This adds depth of flavor.
- Lemon Juice: From 1-2 large lemons (about 1/4 cup or 60ml). Freshly squeezed is non-negotiable for that bright, zesty kick.
- Parmesan Cheese: 1/2 cup (50g), grated. Adds a salty, umami richness.
- Red Pepper Flakes: 1/4 – 1/2 teaspoon (optional). For a subtle hint of warmth that complements the lemon.
- Fresh Parsley: 1/4 cup, chopped, for freshness and color.
The Creamy Crown: Burrata & Garnish
- Burrata Cheese: 1-2 balls (about 4-8 oz total), at room temperature. This is the indulgent star, offering a creamy, milky interior.
- Lemon Zest: From 1/2 lemon, for an extra burst of citrus aroma and flavor.
- Extra Virgin Olive Oil: For drizzling.
Timing is Everything
This Creamy Chicken Spaghetti is wonderfully quick, clocking in at just 40 minutes total. Compared to many creamy pasta dishes which can take an hour or more, this recipe is a fantastic option for a weeknight when you need something impressive yet fast. The prep is minimal, and the cooking happens efficiently, allowing you to be at the table enjoying this luxurious meal in under an hour!
Let’s Create Magic: Step-by-Step
Step 1: Cook the Spaghetti to Al Dente
First things first, get that pasta water boiling! Fill a large pot with generously salted water (it should taste like the sea!) and bring it to a rolling boil. Add your spaghetti and cook according to package directions, aiming for a perfect al dente – tender but with a slight bite. Before draining, reserve about 1.5 cups of the starchy pasta water. This liquid gold is crucial for creating a silky, emulsified sauce later. Drain the spaghetti and set aside.
Step 2: Prepare and Cook the Chicken
If you’re using raw chicken breasts or thighs, pat them dry with paper towels and season generously with salt and black pepper. Heat 2 tablespoons of olive oil in a large skillet or pan over medium-high heat. Add the chicken and cook for 6-8 minutes per side, or until cooked through and golden brown. The internal temperature should reach 165°F (74°C). Once cooked, remove the chicken from the skillet, let it rest for a few minutes, then chop or shred it into bite-sized pieces. If you’re using pre-cooked rotisserie chicken, simply shred or chop it and you can skip this cooking step, saving even more time!
Step 3: Craft the Zesty Lemon Garlic Sauce
In the same skillet you used for the chicken (no need to wash it, those little bits add flavor!), melt the butter over medium heat. Add the minced garlic and sauté for about 1 minute until fragrant, being careful not to burn it. Pour in the heavy cream and chicken broth. Bring the mixture to a gentle simmer, stirring occasionally. Let it simmer for about 3-5 minutes, allowing it to thicken slightly. Stir in the freshly squeezed lemon juice, grated Parmesan cheese, and red pepper flakes (if using). Continue to stir until the cheese is melted and the sauce is smooth and creamy. Taste and adjust seasoning with salt and pepper if needed.
Step 4: Unite Pasta, Chicken, and Sauce
Add the drained spaghetti and the cooked chicken pieces to the skillet with the luscious lemon garlic sauce. Toss everything together gently until the pasta and chicken are thoroughly coated. If the sauce seems a little too thick, gradually add some of the reserved pasta water, a tablespoon at a time, until you reach your desired consistency. The starch in the water will help the sauce cling beautifully to the spaghetti. Stir in most of the chopped fresh parsley, reserving some for garnish.
Step 5: Serve with Burrata Bliss
Divide the creamy chicken spaghetti among warm bowls. Now for the grand finale! Gently place a ball of burrata cheese on top of each serving. Drizzle a little extra virgin olive oil over the burrata and sprinkle with the reserved fresh parsley and a little fresh lemon zest for an extra pop of brightness and visual appeal. Serve immediately and watch as the warm spaghetti gently melts into the creamy burrata. It’s pure magic!
Nutritional Snapshot
While exact nutritional values can vary based on specific ingredients and portion sizes, a typical serving of this Creamy Chicken Spaghetti with Burrata and Lemon Garlic Sauce is generally rich in protein and carbohydrates, with a good amount of fat from the cream, butter, and burrata. A serving might contain approximately:
- Calories: 600-800 kcal
- Protein: 30-40g
- Carbohydrates: 50-70g
- Fat: 30-50g
*This is an estimate and should not be considered exact nutritional advice.*
Healthier Twists Without Sacrificing Flavor
We love the indulgence of this dish, but if you’re looking for lighter options, here are a few swaps:
- Whole Wheat Spaghetti: Opt for whole wheat spaghetti for added fiber.
- Lighter Cream: Substitute half-and-half or even a bit of milk (carefully, to avoid curdling) for some of the heavy cream. You might need a touch more Parmesan to thicken.
- Leaner Protein: Use chicken breast and consider grilling rather than pan-frying to reduce added oils.
- Veggie Boost: Stir in wilted spinach, sautéed mushrooms, or steamed broccoli for extra nutrients and volume.
- Reduced Cheese: Use a bit less Parmesan and consider a lighter fresh mozzarella instead of burrata if you want a similar creamy texture with fewer calories.
Elevate Your Serving Experience
This pasta is a star on its own, but consider these pairings to make it a complete meal:
- Garlic Bread: A must-have for soaking up any extra sauce!
- Simple Green Salad: A crisp salad with a light vinaigrette provides a refreshing contrast to the richness of the pasta.
- Roasted Asparagus or Broccoli: A simple side of roasted vegetables complements the meal beautifully.
- White Wine: A crisp Sauvignon Blanc or Pinot Grigio pairs wonderfully with the lemon and garlic notes.
Avoid These Common Pitfalls
To ensure your Creamy Chicken Spaghetti is perfect every time:
- Overcooked Pasta: Always cook to al dente, as it will continue to cook slightly when tossed with the sauce.
- Burning Garlic: Sauté garlic on medium-low heat and watch it closely; burnt garlic is bitter.
- Sauce Too Thin: Don’t be afraid to use the reserved pasta water judiciously to thicken and emulsify the sauce. Simmering a little longer can also help.
- Skipping the Burrata: While optional, burrata adds an irreplaceable creamy texture and luxurious finish. Use it if you can!
Savoring the Leftovers
Store any leftover Creamy Chicken Spaghetti in an airtight container in the refrigerator for up to 3 days. The sauce may thicken as it chills. To reheat, gently warm it in a saucepan over low heat, adding a splash of milk or cream to loosen the sauce. Be aware that burrata is best served fresh, so it’s usually omitted from leftovers or added as a topping to the reheated dish.
Frequently Asked Questions
***What kind of pasta is best for this recipe?***
Spaghetti is traditional, but linguine, fettuccine, or even penne work wonderfully as they can hold the creamy sauce well. The key is to cook it al dente!
***Can I make this recipe dairy-free?***
While the creaminess is central to this dish, you could experiment with dairy-free alternatives like full-fat coconut milk (be aware of subtle flavor changes) or cashew cream for the sauce. For the burrata, a high-quality vegan mozzarella alternative is the closest substitute.
***How do I make the sauce creamier?***
The heavy cream and reserved pasta water are key. Ensure the sauce simmers gently to thicken, and use the pasta water a little at a time to achieve a silky, emulsified texture. Adding a touch more butter at the end can also add richness.
***Can I add more vegetables?***
Absolutely! Sautéed mushrooms, wilted spinach, steamed broccoli, or peas are fantastic additions. Add them when you toss the pasta and chicken with the sauce.
Ready to elevate your pasta game? This Creamy Chicken Spaghetti with Burrata and Lemon Garlic Sauce is a surefire hit. Give it a try and let us know how it turns out in the comments below! We love hearing from you and seeing your culinary creations!
Chicken Spaghetti with Burrata & Lemon Garlic Sauce Recipe
Description
Hello, pasta lovers! Today, we’re diving into the irresistible world ofChicken Spaghetti with Burrata and Lemon Butter Garlic Sauce. If you’re looking for a pasta dish that’s both comforting and indulgent, you’re in for a treat! Imagine tender spaghetti drenched in a zesty lemon butter garlic sauce, combined with roasted chicken and topped with creamy Burrata cheese. This recipe is perfect for a weeknight dinner but sophisticated enough to impress your guests on a special occasion. Let’s get started!
Ingredients
- Optional Substitutions:
Instructions
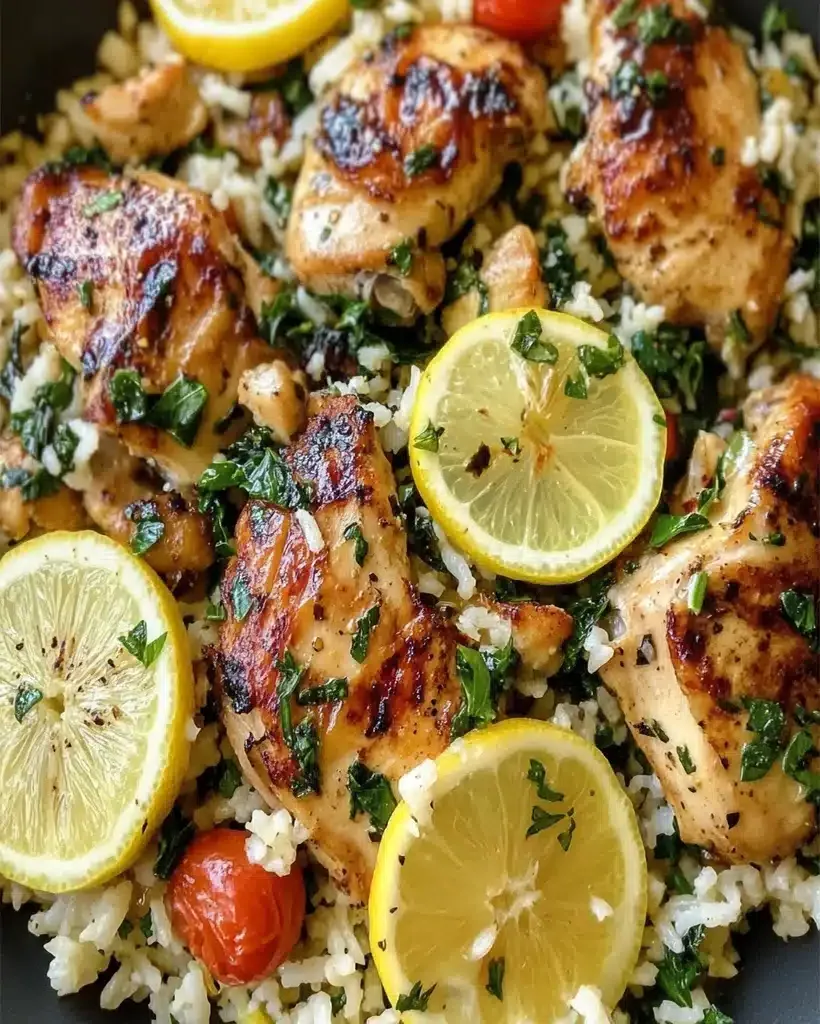
- Preheat your oven to 400°F. Toss the cherry tomatoes with olive oil, minced garlic, salt, and pepper. Arrange them on a baking sheet lined with parchment paper and roast for about 20 minutes.
- While the tomatoes are roasting, slice the chicken breasts horizontally for even cooking. Season with salt, smoked paprika, and Italian seasoning. Heat olive oil in a skillet over medium heat and cook the chicken for 5 minutes on each side, until golden brown. Remove from the pan and slice thinly.
- In the same skillet, add lemon slices, minced garlic, and butter. Cook over low-medium heat for 2-3 minutes until the garlic softens and the lemon releases its juices. Remove from heat.
- Bring a large pot of water to a boil. Add salt and cook the spaghetti according to the package instructions. Drain the pasta and add it to the skillet with the lemon butter garlic sauce. Toss well to coat the spaghetti with the sauce.
- Remove the lemon slices from the skillet. Top the pasta with the roasted tomatoes and sliced chicken. Divide the Burrata cheese among the plates, allowing the warm pasta to melt the cheese slightly.
Notes
Use Fresh Ingredients:Fresh basil, garlic, and ripe tomatoes will elevate the flavor of this dish.
Adjust the Sauce:If you prefer a thicker sauce, add a tablespoon of heavy cream to the butter and garlic mixture.
Make it Spicy:Add a pinch of red pepper flakes to the lemon butter sauce for a kick of heat.
“`