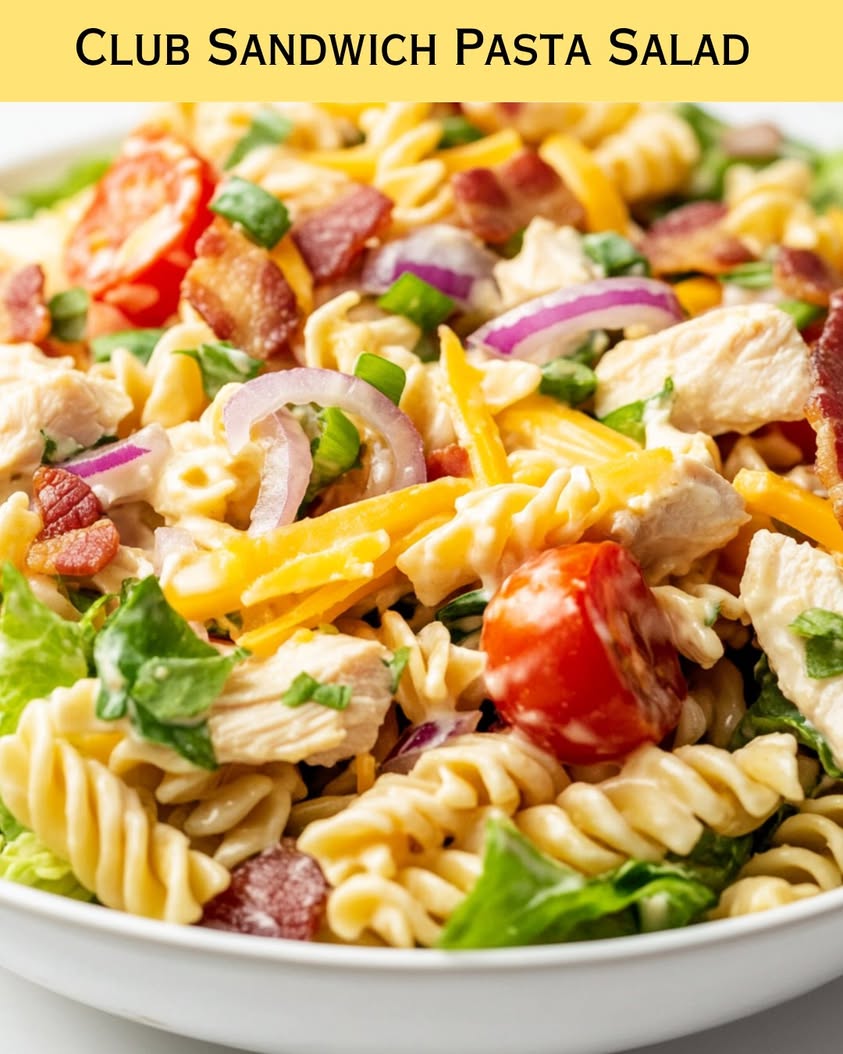
Delicious Strawberry Icebox Pie Recipe for Effortless Summer Treats

Delicious Strawberry Icebox Pie: The Perfect Summer Dessert

⚖️
Difficulty
Easy

⏲️
Prep Time
15 mins

🕒
Cook Time
0 mins

⏱️
Total Time
3 hours (chill time)

🍽️
Servings
8 servings

Indulging in the sweet, tangy flavor of strawberry icebox pie is like savoring a taste of summer with each delightful bite. This no-bake dessert captures the essence of fresh strawberries, nestled in a creamy filling and enveloped by a crunchy graham cracker crust. Whether you’re hosting a picnic or enjoying a lazy afternoon on the patio, this strawberry icebox pie is the perfect treat for any occasion. It’s cool, refreshingly sweet, and sure to impress friends and family alike.

The vibrant color and luscious texture of the filling make this pie not only a treat to taste but also a feast for the eyes. Layered with fresh strawberries, the creamy layer shines through the crust, offering a delightful contrast that makes each slice a true masterpiece. The combination of flavors and textures creates an irresistible dish that brings joy to every gathering.

Quick Recipe Highlights

  • Flavor Profile: This pie balances the sweetness of ripe strawberries with a creamy filling that has a hint of tanginess, making it a refreshing delight.
  • Texture: The pie features a smooth and creamy filling on a crisp graham cracker crust that adds a satisfying crunch, perfect for any dessert lover.
  • Aroma: The aroma is distinctly fruity, enhanced by the scent of fresh strawberries and a light touch of vanilla, inviting you to savor each slice.
  • Visual Appeal: The bright red strawberries atop the creamy filling create a stunning contrast with the golden crust, presenting beautifully on any dessert table.
  • Skill Level Needed: Even novice bakers can master this dessert, as it requires no baking and minimal ingredients, making it an accessible recipe for all.
  • Special Equipment: A mixing bowl, a pie dish, and a refrigerator are all you need to whip up this delightful treat!

Recipe Overview

  • Difficulty Level: This strawberry icebox pie is classified as easy, making it a perfect choice for both beginners and experienced cooks alike. The straightforward instructions ensure that anyone can create this delicious dessert without stress.
  • Category: As a refreshing dessert, this icebox pie falls into the category of summer treats and is ideal for gatherings, picnics, or family barbecues.
  • Cuisine: While the concept of an icebox pie is rooted in American cuisine, recipes like these are popular in many regions, especially in warmer climates where cooling desserts are essential.
  • Cost: The approximate cost of this recipe is very budget-friendly, with fresh strawberries being the primary expense, making it a delicious yet economical option for dessert lovers.
  • Season: Strawberries are typically in season during spring and early summer, making this the best time to enjoy the fresh, juicy fruit in your pie.
  • Occasion: Ideal for summer parties, holiday barbecues, or family gatherings, this strawberry icebox pie is a delightful way to celebrate any occasion.

Why You’ll Love This Recipe

The combination of taste and texture makes this strawberry icebox pie a beloved summer dessert. The sweetness of ripe strawberries complements the creamy filling perfectly, creating a balance that is both delightful and refreshing. Each bite offers a burst of flavor that celebrates the beauty of fresh fruit, making it a perfect companion for warm days. The smooth filling melts in your mouth, while the crunch of the graham cracker crust provides a satisfying contrast, rounding out the experience.

Convenience plays a significant role in the appeal of this pie. With a quick 15 minutes of preparation and no baking required, you can whip up this delightful dessert in no time. Letting the pie chill in the refrigerator allows the flavors to meld beautifully, making it a stress-free addition to any meal. Whether you’re cooking for a crowd or a cozy gathering, this icebox pie simplifies dessert planning with its ease of preparation.

From a nutritional standpoint, strawberries are rich in vitamins, particularly vitamin C, which boosts your immune health. The filling’s creamy base, often made with cream cheese or whipped topping, adds a touch of indulgence while still being light. This treat is not only delicious but also offers a guilt-free way to satisfy your sweet tooth while enjoying the benefits of fresh fruit.

The social aspect of serving this pie cannot be overstated. Desserts like this create a buzz at gatherings, inviting people to come together to share their love for sweet treats. It’s a conversation starter, a way to share memories, and a delightful end to any meal. Furthermore, the vibrant presentation of this pie encourages sharing and enjoyment among friends and family, enhancing the overall dining experience.

Finally, the cost-effectiveness of this recipe cannot be overlooked. Utilizing simple, seasonal ingredients allows you to create an impressive dessert without breaking the bank. Fresh strawberries, a few pantry staples, and minimal effort equate to an extraordinary treat that everyone will love, proving that gourmet desserts can indeed come at a reasonable price.

Historical Background and Cultural Significance

The origin of the icebox pie dates back to the early 20th century when home refrigeration became more common. These pies were designed to be enjoyed cold, taking advantage of the cooling capabilities of the icebox. The strawberry icebox pie, in particular, became a popular choice during the warmer months, as strawberries were abundant in many backyard gardens and markets.

Culturally, dishes like the strawberry icebox pie represent the American spirit of creativity in the kitchen. They reflect the tradition of using seasonal fruits to create simple yet delectable desserts that resonate with families across generations. This pie evokes nostalgia for summer picnics and backyard barbecues, holding a special place in the hearts of those who grew up enjoying it.

Over time, the recipe has evolved, adapting to the tastes and preferences of each new generation. Today, variations may include different fresh fruits, flavored fillings, or alternative crusts to cater to dietary preferences. Despite these changes, the essence of the classic strawberry icebox pie remains, celebrating the beloved fruit in a unique and refreshing way.

Regional variations of the icebox pie abound, with some areas favoring other berries or different types of crust. Coastal regions may feature citrus flavors, while southern kitchens might incorporate pecans or coconut into the crust for added texture. These adaptations showcase the versatility of the recipe, ensuring it remains a beloved staple across the nation.

Ingredient Deep Dive

  • Fresh Strawberries: Strawberries are packed with antioxidants, vitamins, and minerals that contribute to overall health. Known for their sweet flavor and vibrant color, they have a rich history in culinary traditions, especially during the summer months when they are in season. When selecting strawberries, look for fresh, plump berries that are bright red and free from blemishes. They’re best stored in the refrigerator and used within a few days for the best flavor.
  • Graham Cracker Crust: The graham cracker crust adds a delightful crunch to the creamy pie layers. Graham crackers were first introduced in the early 19th century and have since become a staple in dessert making. To create the crust, crush the crackers and mix them with melted butter, pressing them into a pie dish. For storage, keep the crust covered until you’re ready to assemble the pie. If you prefer, you can substitute with a different type of cookie crust for a unique twist.
  • Whipped Topping: Whipped topping provides a light and airy texture to the pie filling. This ingredient is often used in no-bake desserts for its ease of use and lovely finish. When selecting whipped topping, look for a brand that lists natural ingredients. Store it in the fridge and consume it within a week. If desired, you can whip your own heavy cream for a fresher option.
  • Cream Cheese: Cream cheese adds richness and a slight tang to the pie filling. This ingredient is derived from milk and is a staple in many sweet recipes, dating back to the 19th century. When buying cream cheese, opt for a full-fat version for the best flavor and texture. Leftover cream cheese can be stored in the fridge for up to two weeks. It can be substituted with Greek yogurt for a lighter version of the filling.
  • Confectioners’ Sugar: This finely powdered sugar sweetens the filling without adding graininess. It is commonly used in desserts to achieve a smooth texture and is often paired with cream cheese or whipped cream. Confectioners’ sugar can be stored indefinitely in an airtight container. If you don’t have it on hand, you can make a quick substitute by blending granulated sugar in a blender until fine.

Common Mistakes to Avoid

  • Not using fresh strawberries: Fresh strawberries yield the best flavor. Using frozen or overripe fruit can lead to a mushy texture.
  • Overmixing the filling: Overmixing can create a dense filling rather than a light, airy one. Mix just until combined to maintain the desired texture.
  • Skipping the chill time: Allowing the pie to chill is crucial for achieving the correct consistency. Skipping this step can result in a runny filling.
  • Using a warm crust: Make sure your crust is completely cool before adding the filling, as a warm crust can melt the filling and affect texture.
  • Using low-fat or non-fat cream cheese: These products may not hold their shape as well, leading to a less sturdy filling. Use full-fat for best results.
  • Not cleaning the strawberries properly: Rinse strawberries gently before use to remove any pesticides or dirt while preserving their integrity.
  • Ignoring substitutions: If you need to make substitutions due to dietary preferences, ensure to adjust ratios to maintain flavor balance.
  • Not checking for sweetness: Taste the filling before pouring it into the crust. Adjust sweetness as needed to suit your palate.
  • Not properly storing leftovers: Cover the pie tightly with plastic wrap or foil to prevent it from drying out in the refrigerator.
  • Underestimating portion size: This dessert is often very popular, and it’s better to undertake a few extra servings than to run out of pie!

Essential Techniques

  • Making the Graham Cracker Crust: This technique is vital for a delicious pie. To achieve the perfect crust, crush the graham crackers into fine crumbs and mix them with melted butter to create a buttery base. Press the mixture into the pie dish firmly, ensuring even coverage. This forms a sturdy base that can hold the filling without crumbling.
  • Whipping Cream: Achieving the right consistency while whipping cream is essential for a light filling. Start with chilled heavy cream and use a whisk or electric mixer. Whip until soft peaks form, being careful not to overbeat, which can turn the cream into butter. This fluffy texture is key for creating a sumptuous filling.
  • Chilling Time: The chilling process is crucial for any icebox dessert. Allow the pie to chill for a minimum of three hours; this allows the flavors to meld and the filling to set properly, resulting in perfect slices when served. Patience is key for achieving the best texture.
  • Layering Ingredients: When adding the filling to the crust, take care to layer the ingredients evenly for a balanced dessert. Use a spatula to spread the filling smoothly and create a lovely presentation. This attention to detail makes for an aesthetically appealing pie.
  • Decorating with Strawberries: When topping your pie, arranging the strawberries in a decorative pattern not only enhances the visual appeal but also signifies freshness. Use sliced strawberries for a beautiful presentation or whole strawberries for a more dramatic look.

Pro Tips for Perfect Strawberry Icebox Pie

  • For extra flavor, consider adding a splash of vanilla extract to the filling. It enhances the sweetness of the strawberries and adds depth to the creaminess.
  • Experiment with different fruits. Blueberries, raspberries, or peaches can also be used for a delightful twist on the classic recipe.
  • For a gluten-free option, swap out the graham crackers for gluten-free cookies or a gluten-free crust mix.
  • Balance the sweetness of the filling by adding a squeeze of lemon juice. This adds brightness and enhances the strawberry flavor.
  • When serving, allow the pie to sit at room temperature for a few minutes to make slicing easier and to enhance the flavors.
  • If you want a firmer pie, try adding a little cornstarch to the filling. This helps bind the creaminess and create that ideal slice.
  • Freeze extra slices for a refreshing treat later on; simply wrap them tightly and store in freezer-safe containers.
  • For a fun decoration, use mint leaves for garnishing, adding a fresh aroma and beautiful contrast to the red strawberries.

Variations and Adaptations

  • Regional variations can include using local fruits that are in season, such as peaches or raspberries, inviting unique flavors to the traditional recipe.
  • Seasonal adaptations may suggest using pumpkin or spiced flavors in the fall for a hearty twist on the classic icebox pie, appealing to those cozy autumn vibes.
  • Dietary modifications can cater to different needs. For a dairy-free version, use coconut cream and dairy-free whipped topping, ensuring a smooth filling full of flavor.
  • Flavor variations can include adding spices like cinnamon or nutmeg to the filling for an aromatic touch that elevates the pie experience.
  • Texture modifications could involve incorporating crushed nuts or coconut flakes into the crust for additional crunch, which provides an interesting addition to the dish.
  • Presentation alternatives such as individual serving cups can be fun for parties, allowing guests to enjoy their own mini versions of this delicious dessert.

Serving and Presentation Guide

  • Plating techniques include serving slices on chilled plates, which enhances the refreshing experience of the strawberry pie.
  • Garnishing ideas can consist of mint leaves or a dollop of whipped cream on top of each slice, creating a more delightful presentation.
  • Traditional accompaniments might involve serving with vanilla ice cream or whipped topping, adding extra indulgence to every serving.
  • Modern serving suggestions could involve layering the pie in jar portions for a trendy take on presentation at gatherings.
  • Consider temperature recommendations, serving the pie well-chilled for optimal flavor and texture, ensuring dessert is refreshing.
  • Portion control tips suggest serving smaller slices alongside other desserts, encouraging guests to sample various treats at your table.

Wine and Beverage Pairing

  • Pairing with a sweet rosé wine complements the flavors of strawberries while adding a refreshing touch to your meal.
  • For non-alcoholic options, sparkling lemonade makes a zesty companion, enhancing the pie’s berry notes beautifully.
  • A light white wine, such as a Sauvignon Blanc, can also be an excellent choice, providing crisp acidity to counterbalance the dessert’s sweetness.
  • If coffee is preferred, a light brew or iced coffee can beautifully contrast with the cool flavor profile of the pie.
  • Temperature considerations should focus on the pie being chilled, while beverage pairings can be served either cold or at room temperature for balance.

Storage and Shelf Life

  • Store the pie in the refrigerator to keep it fresh, covering it tightly with plastic wrap or foil to prevent drying out.
  • Ideal temperature requirements suggest keeping the pie chilled at all times prior to serving to maintain flavor and texture.
  • For container recommendations, use a deep pie dish that fits snugly in your fridge, allowing proper airflow around the dessert.
  • Signs of spoilage include off-smelling filling or discolored strawberries; consume the pie within a week for optimal freshness.
  • For reheating, individual slices can be left at room temperature while frozen slices may need a brief thaw before serving.
  • If you’d like to freeze portions, ensure they are wrapped tightly to maintain quality and consume within a month for best taste.

Make Ahead Strategies

  • Prep timeline allows you to make the crust and fill in advance, dedicating just a few minutes for assembly on serving day.
  • Storing between steps involves freezing the crust if needed, giving it time to set firmly while preparing the filling.
  • Assess the quality impact of making the pie ahead; flavors meld and develop further when allowed to sit overnight before serving.
  • For assembly tips, layer the filling smoothly over the crust, ensuring an even distribution for a stunning look once served.
  • Reheating guidelines focus on not applying heat to this dessert; do allow cool slices to sit before serving for best consistency.
  • Fresh element additions can include toppings of fresh fruit just before serving to maintain their vibrant colors and crunch.

Scaling Instructions

  • To halve the recipe, adjust the ingredients accordingly; utilize a smaller pie dish to fit the lesser amount, ensuring even cooking.
  • Doubling or tripling may require larger mixing bowls and pie dishes but will keep the same prep methods for consistency in flavor.
  • Equipment adjustments might include using a stand mixer if preparing larger quantities, as it helps efficiently whip cream and mix fillings.
  • Timing modifications may be less crucial for prep but ensure to allow extra chill time for larger versions to set properly.
  • Storage considerations emphasize ensuring larger portions are kept properly covered in the fridge to prevent spoilage before serving.

Nutritional Deep Dive

  • Macro breakdown highlights that this pie is relatively low in fat due to its light filling, with most calories stemming from the sugar and crust base.
  • Micronutrient analysis focuses on the vitamins from strawberries while offering beneficial nutrients from cream cheese, making it both healthy and decadent.
  • Health benefits include a dose of antioxidants from strawberries that may boost heart health and are known for their positive effects on skin vitality.
  • Dietary considerations should focus on balancing indulgence with health; this pie provides a reasonable treat option among lighter fare.
  • Portion analysis indicates that small slices can easily fit into a balanced diet without overdoing sweet treats.
  • Weight management tips suggest savoring each slice slowly to fully appreciate the flavors, which can help with satiety and satisfaction.

Dietary Adaptations

  • For a gluten-free variation, substitute gluten-free graham crackers or a nut-based crust, maintaining all the flavors you love.
  • Dairy-free adaptations may use coconut cream and vegan whipped topping, ensuring that everyone can enjoy a slice.
  • To make a vegan option, simply replace cream cheese with a plant-based alternative and use coconut cream instead of whipped topping.
  • Low-carb enthusiasts can experiment with almond flour crusts while incorporating low-carb sweeteners in the filling.
  • Keto-friendly versions may swap out strawberries for lower-carb fruits such as raspberries, adjusting the sweetness accordingly.
  • Paleo adaptations focus on using pure, whole-food ingredients like almond flour for the crust without processed sugars.
  • Low-FODMAP options can utilize lactose-free cream cheese and monitor serving sizes of strawberries to suit dietary needs.

Troubleshooting Guide

  • If your filling turns out too runny, consider incorporating a bit of cornstarch while mixing or using more cream cheese to thicken the mixture.
  • In case the texture feels too dense, be gentle while mixing the whipped cream into the filling; overmixing can lead to unwanted density.
  • Flavor balance issues can occur if the strawberries lack sweetness. Adjust the sugar in the filling or add a sprinkle of salt for contrast.
  • Temperature problems usually arise when the pie is not sufficiently chilled. Ensure at least three hours of refrigeration to set properly.
  • If your crust crumbles while slicing, try pressing it more firmly in the dish before chilling for added stability.
  • Ingredient substitutions can lead to inconsistencies; always maintain basic ratios to ensure flavor profiles work together harmoniously.
  • Timing concerns can affect the set of the pie; be diligent about the chill time as this is crucial for achieving a firm slice.

Recipe Success Stories

  • Community feedback highlights how many have enjoyed experimenting with seasonal fruits, sharing enthusiasm for adaptations like mixed berry versions.
  • Variation successes often include additions of unique crust flavors, such as chocolate graham crackers, resulting in rave reviews at gatherings.
  • Adaptation stories showcase family traditions where this pie becomes a staple at events, often becoming a “must-have” dessert among attendees.
  • Reader suggestions frequently recommend enhancements to the original recipe that provide fun twists, such as adding zest from citrus for a refreshing hint.
  • Photography tips encourage capturing vibrant colors by utilizing natural light and simple props to enhance the visual appeal of the completed pie.

Frequently Asked Questions

Can I use frozen strawberries for this recipe? While fresh strawberries provide the best flavor and texture, you can use frozen strawberries if necessary. Be sure to thaw and drain them well to avoid excess moisture in the filling.

How long does the icebox pie last in the refrigerator? This pie can last about 3-4 days in the fridge. Make sure to cover it well to retain its freshness.

Can I make this pie ahead of time? Absolutely! You can prepare the pie a day in advance and let it chill overnight for the best flavor. Just be sure to cover it tightly.

What can I use as a substitute for cream cheese? For a lighter option, you can substitute cream cheese with Greek yogurt or a vegan cream cheese alternative.

Can I make this dessert vegan? Yes! You can use coconut cream instead of whipped topping and substitute cream cheese for a dairy-free alternative to make a vegan pie.

How can I add more flavor to the filling? Feel free to add extracts such as vanilla or almond to the filling for an additional flavor boost that’s subtle yet delightful.

What is the best way to slice and serve the pie? Let the pie sit at room temperature for a few minutes before slicing to make it easier to cut clean slices without disturbing the filling.

Can this pie be frozen? Yes! You can freeze the pie for up to a month. Just wrap it tightly to avoid freezer burn, and let it thaw in the fridge before serving.

What type of crust is best for this strawberry icebox pie? A graham cracker crust is traditional and provides a delightful crunch. You can also experiment with cookie or nut-based crusts for variety.

What is the best way to serve this pie? This pie is best served well-chilled. For a decorative touch, add fresh fruits or whipped cream on top before serving.

Additional Resources

  • Explore related recipes for different icebox desserts that bring refreshing summer flavors to your dessert table.
  • Check out technique guides focused on making various types of pie crusts and fillings to enhance your baking skills.
  • Learn more about selecting seasonal fruits to incorporate into your desserts for fresh and delightful flavors throughout the year.
  • Review equipment recommendations to ensure you have the necessary tools for successful pie making and kitchen prep.
  • Discover seasonal variations on traditional recipes to keep your dessert repertoire exciting and vibrant.

Join the Conversation

Engage with your friends and family by sharing their experiences with this strawberry icebox pie! Encourage them to post photos on social media and tag your recipes for a fun way to enjoy kitchen creativity. As they share their favorites or adjustments to the recipe, it can create a dialogue around favorite flavors and culinary adventures. You can also invite readers to leave reviews and tips, fostering community engagement and new ideas for further adaptations. Discuss loved variations, special occasions for making the pie, or even favorite nakata substitutions, and unite over the joy this delicious dessert brings!

The Recipe

Strawberry Icebox Pie

Serves: 8

Prep Time: 15 mins

Cook Time: 0 mins

Total Time: 3 hours (chill time)

Kitchen Equipment Needed

  • Mixing bowl
  • Pie dish
  • Whisk or electric mixer
  • Spoon or spatula
  • Measuring cups and spoons

Ingredients

  • 1 ½ cups graham cracker crumbs
  • ½ cup unsalted butter, melted
  • 8 oz cream cheese, softened
  • 1 cup confectioners’ sugar
  • 1 cup whipped topping
  • 2 cups fresh strawberries, sliced

Directions

  1. In a mixing bowl, combine graham cracker crumbs and melted butter. Press the mixture firmly into the bottom of a pie dish to form the crust.
  2. In another bowl, beat the cream cheese until smooth. Gradually add the confectioners’ sugar and mix until well combined.
  3. Fold in the whipped topping gently until fully incorporated into the cream cheese mixture, creating a light filling.
  4. Spread the mixture over the graham cracker crust evenly with a spatula.
  5. Arrange sliced strawberries on top of the filling, displaying them beautifully.
  6. Cover the pie with plastic wrap and chill in the refrigerator for at least 3 hours before serving.
  7. Slice, serve, and enjoy your delightful strawberry icebox pie!

Recipe Notes

  • Feel free to add a splash of vanilla extract for extra flavor.
  • Use low-fat cream cheese for a lighter version, if desired.
  • This pie can also be frozen for up to a month; wrap it tightly to keep it fresh.
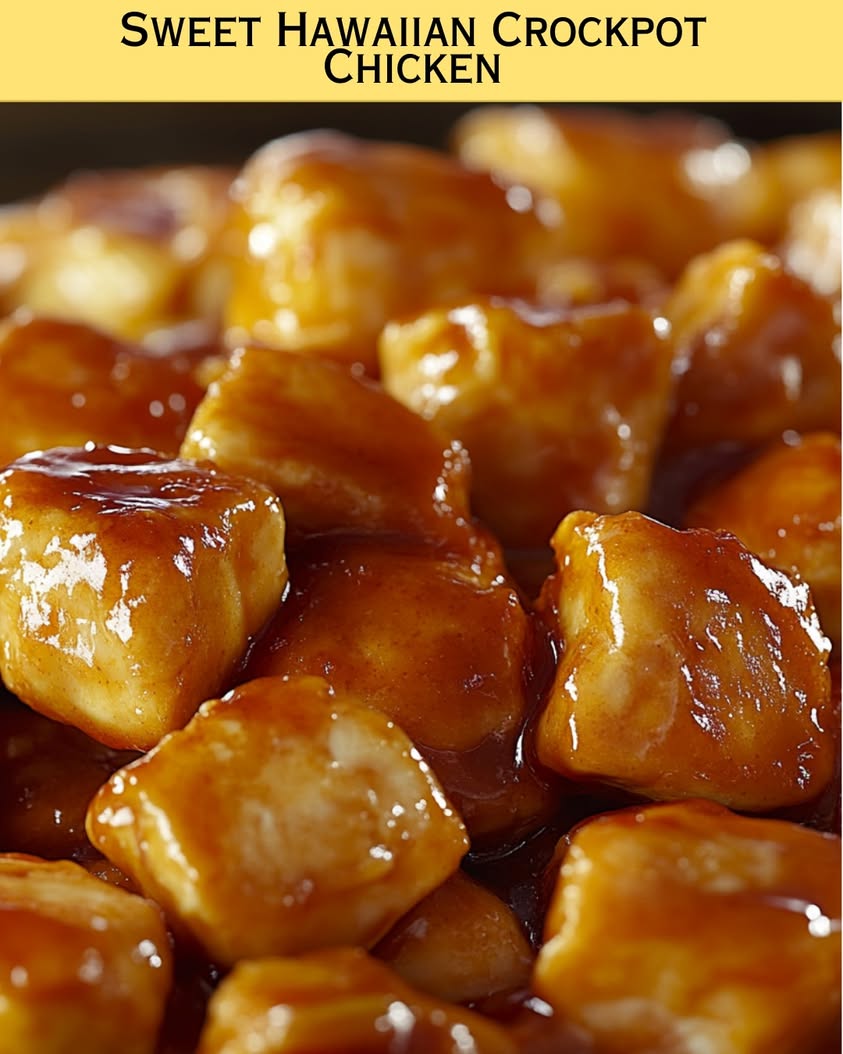
Sweet Hawaiian Crockpot Chicken: A Deliciously Easy Recipe

Sweet Hawaiian Crockpot Chicken: A Tropical Delight for Your Dinner Table

⚖️
Difficulty
Easy

⏲️
Prep Time
15 mins

🕒
Cook Time
6 hours

⏱️
Total Time
6 hours 15 mins

🍽️
Servings
4-6 servings

Create a taste of the tropics with our Sweet Hawaiian Crockpot Chicken. This dish perfectly blends savory flavors with a hint of sweetness, resulting in a meal that is both comforting and exotic. Ideal for busy nights, this crockpot chicken recipe requires minimal effort while delivering maximum flavor. Imagine tender chicken infused with pineapple juice and a delightful medley of spices, simmering all day to create a dish that transports you to a sunny Hawaiian beach.

Your family will adore the generous portions of juicy chicken enveloped in a sweet and tangy sauce. Not only does this dish make a great dinner, but it’s also perfect for parties, potlucks, or meal prep. The rich aroma fills your kitchen and makes everyone eager for a taste. Plus, it’s easy to pair with rice or vegetables, making it a versatile choice for any palate.

Quick Recipe Highlights

  • Flavor Profile: A sweet and tangy mix of pineapple and soy sauce enhances the succulent chicken.
  • Texture: Each bite yields tender chicken pieces complemented by a luscious sauce that clings to grains or veggies.
  • Aroma: The fragrant interplay of garlic and pineapple wafts through your home while it cooks.
  • Visual Appeal: The vibrant colors of the dish, featuring golden pineapple chunks and glistening chicken, make it a feast for the eyes.
  • Skill Level Needed: This recipe is beginner-friendly, requiring basic chopping and measuring skills.
  • Special Equipment: A slow cooker is essential for achieving that melt-in-your-mouth chicken texture.

Recipe Overview

  • Difficulty Level: With its straightforward steps, even novice cooks can perfect this recipe seamlessly.
  • Category: This sweet Hawaiian crockpot chicken falls under the main dinner meal category, suitable for everyday meals or gatherings.
  • Cuisine: Hawaiian cuisine is known for its use of tropical ingredients, reflecting its diverse cultural heritage.
  • Cost: Budget-friendly, as it primarily requires affordable ingredients such as chicken, soy sauce, and pineapple.
  • Season: Enjoyable year-round, but particularly comforting during cooler months or summer barbeques.
  • Occasion: Perfect for family dinners, casual get-togethers, or themed parties that celebrate Hawaiian culture.

Why You’ll Love This Recipe

This Sweet Hawaiian Crockpot Chicken is irresistible due to its unique taste and texture. The perfect harmony between savory and sweet creates a delightful experience for your taste buds. Imagine succulent chicken nestled in a glossy, tangy sauce that signals a refreshing twist in your dinner routine. Each bite encapsulates the essence of the islands, bringing a little warmth and sunshine into your meal.

Convenience is another strong point for this recipe. With minimal prep time and the ability to set it and forget it, this dish frees you to enjoy the day or spend quality time with your family. Simply toss your ingredients into the crockpot and let it do the work. You can return hours later to a fully cooked, flavorful dinner that practically serves itself.

Nutritionally, this dish shines as a source of protein and essential vitamins. Chicken is a lean meat option that aids in muscle growth, while pineapple brings a dose of tropical health benefits—packed with vitamins C and B6, benefits that can bolster your immune system. This balance makes it a choice you can feel good about serving your loved ones.

Social gatherings become more enjoyable with this dish in the spotlight. The communal nature of crockpot meals allows every guest to serve themselves, encouraging conversation and delight. As they sample the distinct flavors, the Sweet Hawaiian Crockpot Chicken often becomes a highlight of potluck meals, with friends and family clamoring for seconds.

Lastly, the cost-effectiveness of this recipe is noteworthy. Using simple and readily available ingredients, it stands out as a delicious and affordable meal option. Whether you’re cooking on a budget or preparing for a large group, this dish allows you to indulge without overspending.

Historical Background and Cultural Significance

The roots of Hawaiian cuisine can be traced back centuries, where native traditions mixed with influences from immigrants who settled on the islands. The Sweet Hawaiian Crockpot Chicken pays homage to these historical elements by featuring ingredients like pineapple and soy sauce, which are staples in Hawaiian cooking. Rooted in local crops and resources, this recipe reflects a blend of ancient practices and modern culinary trends.

Culturally, meals in Hawaii often signify community and family gathering. Traditional luaus celebrate food and togetherness with various dishes representative of the islands’ rich heritage, including pork, fish, and fruits. Sweet Hawaiian Crockpot Chicken captures this essence, making it a popular choice for family dinners and social events alike.

This recipe has evolved over time, with each generation adding its spin. The emergence of crockpot cooking allowed for convenience without sacrificing flavors, making recipes like this accessible to busy families. As tastes continued to lean toward quick and easy meals, the Sweet Hawaiian Crockpot Chicken emerged as a comforting, beloved family dish.

Regional variations exist, with some incorporating spicy elements or different fruits reflecting local tastes. Each adaptation celebrates the versatility of the core recipe, allowing home cooks to innovate while maintaining the essence of traditional Hawaiian flavors.

Ingredient Deep Dive

Chicken is the star ingredient of this dish, celebrated not only for its flavor but also for its nutritional profile. Rich in protein, it’s essential for muscle growth and repair. Chicken is also versatile, easily taking on flavors from various herbs and sauces. When selecting chicken, consider fresh, organic options that ensure quality. Store any leftovers in an airtight container in the refrigerator for up to four days.

Pineapple adds the tropical sweetness that gives this dish its name. Originating from South America, pineapples were cultivated in Hawaii and have since become emblematic of Hawaiian culture. They provide not only sweetness but important nutrients like vitamin C and manganese. When choosing pineapples, look for ones that are firm and fragrant; store them at room temperature until they ripen, and refrigerate them once cut.

Common Mistakes to Avoid

  • Overcrowding the slow cooker can lead to uneven cooking; use the recommended amounts for best results.
  • Choosing low-quality chicken can affect flavor; always use fresh or frozen chicken without additives.
  • Not searing the chicken beforehand can lead to less flavorful meat; consider a quick sear to enhance taste before slow cooking.
  • Ignoring the cooking time can result in undercooked chicken; always adhere to the recommended cooking duration for optimal safety and flavor.
  • Skipping the marinade or cooking sauce can make the dish bland; ensure to incorporate it fully for flavor enhancement.
  • Using canned pineapple juice instead of fresh can decrease the dish’s potency; choose 100% juice for the best taste.
  • Forget to taste before finishing; adjust seasonings to suit your preferences for the perfect balance of flavors.
  • Not allowing the dish to rest before serving can alter the texture; let it sit to maximize juiciness and meld flavors.
  • Serving without garnishing can make the dish visually uninviting; consider toppings like green onions or sesame seeds for a finishing touch.
  • Using insufficient liquid in the slow cooker can burn the dish; ensure there’s enough liquid to create steam and prevent drying out.

Essential Techniques

Understanding the importance of marinating can elevate your Sweet Hawaiian Crockpot Chicken profoundly. Marinating allows flavors to penetrate the meat, making it tender and juicy. To master this, aim to allow the chicken to marinate for several hours or overnight, ensuring that the marinade is well-balanced between sweet and savory elements. A common pitfall is adding too much salt; balance is key for an enjoyable flavor experience.

Using a slow cooker optimally means understanding the timing and temperature settings. Low and slow method enhances the chicken’s natural flavors while keeping it moist. To master this technique, start with a good recipe and adjust cooking times based on your specific slow cooker model. Watch for the internal temperature of the chicken for best results; it should reach at least 165°F for safety.

Pro Tips for Perfect Sweet Hawaiian Crockpot Chicken

1. Experiment with your marinade by adding spices like ginger or chili flakes for a unique twist that enhances the traditional flavors.

2. If you prefer a thicker sauce, consider adding cornstarch mixed with water in the last 30 minutes of cooking.

3. Boneless, skinless chicken thighs can add an extra depth of flavor without the dryness associated with breast meat; consider trying them for a richer taste.

4. Utilize leftovers creatively by shredding the chicken and adding it to salads or sandwiches for a delightful twist on the flavors.

5. To amp up the flavor profile, include vegetables such as bell peppers or snap peas during the last hour of cooking for texture and nutrition.

6. If you enjoy sweetness, a splash of coconut milk can impart a creamy texture that complements the rich flavors of the dish.

7. Don’t rush the coffee; let the ingredients meld for at least six hours on low heat to get that perfect balance of flavors.

8. Garnish with fresh herbs like cilantro or basil for a pop of color and freshness that will brighten up each serving.

Variations and Adaptations

For a regional adaptation, consider switching to tropical fruits such as mango or papaya, which can bring a different, delightful sweetness. You can incorporate seasonal ingredients that are more readily available or add seasonal vegetables like zucchini or squash for added nutrition and flavor.

For dietary modifications, this recipe can easily be adapted to vegan or vegetarian by using plant-based proteins such as tofu or jackfruit. These alternatives can pick up the sauce’s flavors and provide a satisfying texture that’s hearty and filling.

If you prefer a spicy kick, drizzle some sriracha or sprinkle red chili flakes over your dish at the end for an exciting flavor contrast. For a crunchier bite, toast the coconut flakes and sprinkle them over each serving—this addition works harmoniously with the tropical theme, enhancing the texture and flavor profile.

Presentation-wise, serve the dish on a vibrant platter with bright garnishes to make it visually appealing. Alternatively, using coconut shells as serving dishes can provide a fantastic thematic accent to your tropical meal.

Serving and Presentation Guide

Plating this Sweet Hawaiian Crockpot Chicken beautifully elevates the dining experience. Serve the dish on a large white plate to allow the colors to stand out. Consider layering rice on one side and the chicken on the other. This contrast highlights the enticing sauce and tender chicken.

Garnishing with fresh herbs like cilantro or green onions adds a pop of color and freshness. For a tropical touch, serve with slices of lime or lemon on the side to add a citrusy zing that enhances the flavors. Adding toasted coconut flakes can introduce an enticing crunch and further the island vibe.

Additionally, consider traditional accompaniments such as coconut rice or jasmine rice, which absorb the sauce harmoniously. Keep an eye on the serving temperature; ensure the dish is steamy hot when served, as it enhances the overall experience.

Wine and Beverage Pairing

Pairing wines with Sweet Hawaiian Crockpot Chicken can enhance your meal. A chilled Sauvignon Blanc or a light Pinot Grigio complements its sweetness and cuts through the richness of the chicken. If you prefer red, a light-bodied Merlot can also work harmoniously.

For non-alcoholic alternatives, tropical fruit juices such as mango or passion fruit add a refreshing element that echoes the dish’s flavors. These juices can also serve wonderfully in cocktails to elevate a summer gathering.

If coffee is your preference, consider a lighter roast with fruity undertones that can mirror the dish’s sweetness. Overall, select beverages that balance the tropical and savory components of the meal.

Storage and Shelf Life

Proper storage helps maintain the quality of your Sweet Hawaiian Crockpot Chicken. Store leftovers in an airtight container in the refrigerator; it will remain fresh for about three to four days. For longer storage, consider freezing portions in freezer bags, removing as much air as possible to prevent freezer burn.

To reheat, use the microwave or stove over medium heat until warmed through; ensure the internal temperature reaches 165°F for food safety. Dispose of any leftovers that show signs of spoilage, such as an off odor or discoloration.

Make Ahead Strategies

To simplify meal time, prepare your Sweet Hawaiian Crockpot Chicken in advance. Marinate the chicken a day before and store it in the refrigerator to allow the flavors to deepen. Chop your vegetables and store them separately until you are ready to combine.

Assemble the ingredients in the slow cooker the night before, refrigerate, and start cooking in the morning for a hassle-free meal when you return home. Keep in mind that adding fresh elements, such as chopped herbs, should be done just before serving to enhance the freshness of each bite.

Scaling Instructions

If you’re looking to adjust the serving size for your Sweet Hawaiian Crockpot Chicken, halving or doubling the recipe is straightforward. For larger gatherings, trebling the recipe maintains the same cooking principles. Adjust the size of your slow cooker accordingly; a larger capacity allows for more ingredients without overcrowding.

Cooking time may vary slightly based on the volume of ingredients; be sure to monitor the temperature and adjust based on the specific models. Additionally, with more chicken, ensure to keep a close eye on moisture levels, adding more liquid as needed to maintain the dish’s integrity.

Nutritional Deep Dive

This Sweet Hawaiian Crockpot Chicken is a delightful option packed with nutritional benefits. Each serving typically contains a generous protein portion, making it a strong choice for building and repairing muscles post-exercise. Monitoring your portion sizes can assist in balanced meal planning.

Additionally, it’s important to consider micronutrient benefits; pineapple contributes vitamin C, which supports the immune system and is rich in antioxidants. Taking note of the macronutrients in your meal can help accommodate dietary needs, making adjustments as necessary based on individual goals.

Dietary Adaptations

For a gluten-free version of your Sweet Hawaiian Crockpot Chicken, ensure that soy sauce alternatives, like tamari, are used. This adaptation maintains flavor while accommodating those with gluten sensitivities.

If you’re catering to dairy-free diets, this recipe naturally fits the bill as it contains no dairy products. Those on a vegan diet can substitute chicken with plant-based proteins, achieving a similar texture and flavor profile with proper marination.

Low-carb dieters can replace rice with cauliflower rice, maintaining the comforting dish’s essence with fewer carbs. Alternately, consider a paleo adaptation by eliminating soy sauce in favor of coconut aminos while retaining the rich, tropical flavors.

Troubleshooting Guide

If your Sweet Hawaiian Crockpot Chicken turns out tougher than expected, this could be due to overcooking or using chicken pieces with higher fat content. Ensure to monitor your cooking time closely and choose lean cuts for better results.

For flavor balance issues, consider boosting with additional seasoning or a splash of vinegar to brighten the dish. If the sauce is too sweet, adding a hint of salt can counterbalance the flavors effectively.

If you’re struggling with uneven cooking, check your slow cooker’s functioning. Slow cookers can differ significantly in power; adjust the cooking time accordingly as needed. If adding veggies, consider adding them within the last hour for optimal texture.

Recipe Success Stories

Community feedback for the Sweet Hawaiian Crockpot Chicken has been overwhelmingly positive, with many home cooks praising its simplicity and flavor depth. Many readers have shared delightful experiences of trying the dish at potlucks, where it quickly became a crowd favorite.

Adaptation stories highlight creative twists, from adding additional spices to changing the protein used, showcasing its versatility. Photographic submissions showcase vividly plated versions of the dish, inspiring others to try their hand at this tropical delight.

Frequently Asked Questions

Q: Can I use frozen chicken for this recipe? A: Yes, you can use frozen chicken; just ensure to extend the cooking time, and ensure it reaches the safe temperature of 165°F before serving.

Q: How can I make this dish spicier? A: You can add red pepper flakes or sliced jalapeños to the sauce during cooking to enhance the heat.

Q: What can I substitute for pineapple juice? A: Using orange juice can provide a different yet delightful flavor, or consider a mix of mango juice for a more tropical twist.

Q: How should I store leftovers? A: Store any leftovers in an airtight container in the refrigerator for up to 4 days or freeze for longer storage.

Q: Can I double the recipe? A: Absolutely! Just be mindful of your slow cooker’s capacity to ensure the ingredients fit comfortably.

Q: Is this recipe good for meal prep? A: Yes! This chicken can be made ahead and stored, making it perfect for meal prep for the week.

Q: What do I serve this dish with? A: It’s amazing served over rice, but feel free to pair it with quinoa or mixed greens for a lighter meal.

Q: Can I add vegetables to this recipe? A: Yes, vegetables like bell peppers, broccoli, or sugar snap peas can be added in the last hour of cooking for extra nutrition.

Q: What if I want it less sweet? A: Reduce the amount of pineapple juice and balance it with more soy sauce or sour elements to adjust the sweetness.

Q: How can I tell if it’s done cooking? A: Chicken should reach an internal temperature of at least 165°F for it to be safe to eat.

Additional Resources

For more recipes similar to Sweet Hawaiian Crockpot Chicken, consider exploring dishes that highlight tropical flavors or slow-cooked meals. Technique guides on slow cooking can enhance your culinary skills, offering insights on how to correctly set up and use your slow cooker.

Ingredient information can help you better understand the types of proteins and tropical fruits to use, expanding your culinary repertoire. Remember to consider seasonal variations, utilizing fresh ingredients that are in abundance during specific times of the year for an enhanced flavor profile.

Join the Conversation

Engage with others who share your passion for cooking by sharing your Sweet Hawaiian Crockpot Chicken experiences through social media platforms. Posting photographs of your creations not only inspires others but contributes to a vibrant cooking community.

Encourage friends and family to try their versions and leave reviews or feedback about their cooking experiences. Discover new variations and strategies by participating in conversations about possible adaptations to this beloved recipe.

The Recipe

Sweet Hawaiian Crockpot Chicken

Serves: 4-6 servings

Prep Time: 15 mins

Cook Time: 6 hours

Total Time: 6 hours 15 mins

Kitchen Equipment Needed

  • Slow cooker
  • Cutting board
  • Sharp knife
  • Measuring cups and spoons

Ingredients

  • 2 lbs boneless, skinless chicken breasts
  • 1 cup pineapple juice
  • 1/2 cup soy sauce
  • 1/4 cup brown sugar
  • 2 cloves garlic, minced
  • 1 tbsp cornstarch (optional for thickening)
  • Pineapple chunks for garnish
  • Chopped green onions for garnish

Directions

  1. Place the chicken breasts at the bottom of the slow cooker.
  2. In a mixing bowl, combine pineapple juice, soy sauce, brown sugar, and minced garlic; whisk until smooth.
  3. Pour the mixture over the chicken in the slow cooker.
  4. Cover and cook on low for 6 hours or until chicken is cooked through and tender.
  5. Remove chicken and shred it if desired; return to the sauce.
  6. If a thicker sauce is preferred, mix cornstarch with a little water and stir into the sauce for the last 30 minutes of cooking.
  7. Serve over rice or vegetables, garnished with pineapple chunks and green onions.

Recipe Notes

  • This recipe is easy to adapt with your favorite tropical fruits or vegetables.
  • Feel free to adjust sweetness and saltiness according to your taste.

Deliciously Savory Meaty Sausage Rolls for Your Next Gathering

Deliciously Hearty Meaty Sausage Rolls: The Perfect Snack!

⚖️
Difficulty
Easy

⏲️
Prep Time
20 mins

🕒
Cook Time
25 mins

⏱️
Total Time
45 mins

🍽️
Servings
4 servings

Indulge in the delightful world of homemade meaty sausage rolls, where the combination of seasoned meats wrapped in flaky pastry creates a symphony of flavors. These savory rolls are not just a treat for the taste buds but also a comfort food staple, perfect for gatherings, parties, or simply a cozy night in. Whether you enjoy them as a snack or a main course, their rich, hearty filling encased in golden pastry is sure to satisfy your cravings.

Preparing meaty sausage rolls affords you the chance to infuse your culinary personality into the dish. From blending spices to selecting your choice of sausages, every detail contributes to a delightful eating experience. The allure of these rolls lies in their versatility; they are equally at home in lunchboxes, as picnic fare, or served with a side of dipping sauce for a festive appetizer. With every bite, you’ll revel in the satisfying crunch of the pastry giving way to the succulent meat.

Quick Recipe Highlights

  • Flavor Profile: These sausage rolls are savory, seasoned with herbs and spices, making every bite rich and fulfilling.
  • Texture: The contrast between the crispy outer layer and juicy filling creates a delightful mouthfeel.
  • Aroma: The warm, inviting aroma of baked pastry combined with savory meat makes this dish irresistible.
  • Visual Appeal: Golden-brown crust adorned with a beautiful sheen brings an appealing look to your table.
  • Skill Level Needed: This easy recipe is perfect for beginners and skilled cooks alike, requiring minimal technical skills.
  • Special Equipment: All you need is a baking tray and parchment paper, making it easy to prepare.

Recipe Overview

  • Difficulty Level: Easy, making it accessible for home cooks of all levels, ensuring successful and enjoyable outcomes.
  • Category: Perfectly fits into snacks or appetizers, great for casual gatherings or family dinners.
  • Cuisine: Drawing influences from traditional British cuisine, where sausage rolls are cherished for their comfort and ease.
  • Cost: An economical dish, utilizing affordable ingredients that yield delicious results without breaking the bank.
  • Season: Ideal for any season, especially appreciated during colder months as a warm snack.
  • Occasion: Great for parties, birthdays, or simply as a weekend treat to please your family.

Why You’ll Love This Recipe

The meaty sausage rolls boast a robust flavor profile that marries the savory taste of seasoned meats, balanced with herbs and a hint of spice. Each bite delivers a satisfying combination of textures; the flaky pastry contrasts beautifully with the juicy filling, creating a delightful sensory experience. This dish’s ability to be enjoyed hot or cold adds to its charm and versatility, making it a favorite for both casual and festive occasions.

Moreover, making sausage rolls from scratch allows you to control the ingredients, ensuring freshness and quality in every bite. The prep is quite straightforward, taking only about 20 minutes, perfect for busy cooks. These rolls are not just convenient; they can also accommodate various dietary preferences if needed. You can easily adapt the filling to accommodate different meats or vegetarian options, ensuring that everyone at your gathering can indulge.

In terms of nutrition, these rolls can be packed with protein and can be made healthier by using lean meats and whole grain pastry. They’re filling enough to be considered a meal and can be served alongside salads or vegetables for a complete dish. Meaty sausage rolls can also be a fun way to involve kids in the kitchen and introduce them to cooking.

Socially, meaty sausage rolls are known for bringing people together. They are excellent finger food for parties, creating a laid-back atmosphere perfect for mingling. They also pair wonderfully with a range of beverages, enhancing any gathering with their presence. The satisfaction of sharing homemade treats with friends and family elevates the experience.

Lastly, this recipe is budget-friendly, allowing you to prepare a large batch without significant expenses. The ingredients are commonly available, making it easy to stock up and prepare this crowd-pleaser on demand. This cost-effectiveness makes meaty sausage rolls a staple yet indulgent snack for everyone.

Historical Background and Cultural Significance

Meaty sausage rolls have humble beginnings that trace back to the United Kingdom, where they emerged as a portable snack for the working class in the 19th century. Their adaptability and sheer deliciousness made them popular among both the working class and upper classes alike. Over time, these savory pastries adapted to regional tastes, incorporating various local meats and seasonings, thus enriching their appeal across different cultures.

Culturally, sausage rolls represent a connection to British culinary traditions, often seen during celebratory occasions and festive gatherings. Special events like football matches, picnics, or family gatherings wouldn’t be complete without these treats gracing the table. The communal nature of enjoying sausage rolls, with companions sharing and enjoying them together, adds to their allure.

As the recipe evolved, variations began to emerge, showcasing not just meats but creative fillings that included vegetables, cheese, and spices. These adaptations illustrate the culinary creativity of home cooks embracing local ingredients and personal tastes, allowing the basic sausage roll concept to flourish.

Regionally, in Australia and New Zealand, sausage rolls have become iconic, often showcasing local meats and flavors. This shows the adaptability of the dish, as it continually transforms while remaining a beloved snack.

Ingredient Deep Dive

Meat: The main ingredient in meaty sausage rolls, the choice of meat varies depending on regional preferences or personal taste. Ground pork and beef are traditional choices, offering rich flavors and great texture. Nutritionally, meats provide essential protein, vitamins B6, B12, and minerals like iron and zinc, which are vital for energy and immune health. When selecting meat, look for quality cuts that are fresh and well-seasoned. Storing raw meat requires refrigeration and should be used within two days or frozen for longer preservation. For substitutions, consider turkey or chicken for a leaner option or plant-based proteins for a vegetarian twist.

Puff Pastry: The pastry encasing our meaty filling is essential for achieving that classic flaky texture. Puff pastry is traditionally made from flour, butter, and water, and can be treated as a special indulgence or a versatile canvas. The nutritional profile of puff pastry is primarily carbohydrates with some fat, depending on the butter content. When selecting, look for frozen varieties that are all-butter for the best flavor. Proper storage involves keeping it in a cool environment and using it before the expiration date. For variations, phyllo dough can be used for a lighter alternative, while whole grain versions offer more fiber.

Common Mistakes to Avoid

  • Overworking the pastry dough, leading to tough rolls instead of flaky ones. Always handle with care.
  • Using too much filling can cause the rolls to burst. Stick to an appropriate amount for a neat presentation.
  • Not sealing the edges properly may result in leaking while baking. Ensure to crimp edges securely.
  • Skipping the egg wash can lead to uneven browning. A wash creates a beautiful golden color.
  • Using cold ingredients in the pastry can inhibit the rise. Room temperature butter helps achieve flakiness.
  • Not preheating the oven can affect cooking time and final texture. Always start with a hot oven for optimal results.
  • Overbaking sausage rolls can make them dry. Keep an eye on them in the last few minutes of baking.
  • Neglecting to let the sausage rolls cool slightly before serving can lead to burns—let them chill for a few minutes to enjoy fully.

Essential Techniques

Preparation of sausage rolls mainly involves two key techniques: making the filling and crafting the pastry. When preparing the filling, it is essential to mix the meat gently with the seasonings to maintain its texture and prevent it from becoming dense. A gentle hand ensures an airy filling, essential for a fantastic bite.

For the pastry technique, rolling out and cutting the dough correctly is vital. Use a floured surface to prevent sticking and roll to an even thickness for uniformly baked rolls. Visual cues for success include a smooth, elastic dough that springs back when poked, indicating proper gluten development.

Pro Tips for Perfect Meaty Sausage Rolls

Start with cold ingredients; cold butter keeps the pastry flaky. Incorporate it quickly into the flour, preventing it from melting prematurely. Experiment with spices in your meat mixture. Don’t shy away from flavors like paprika or garlic for a taste boost. Always test your filling by cooking a small portion before filling your rolls—this way, you can adjust seasoning and texture. If time allows, chill the filled rolls before baking to ensure they hold their shape. For extra gloss and color, brush with a beaten egg or milk before baking.

Consider adding fresh herbs to your meat mixture for a fresh burst in every bite. Try not to waste trimmings; use leftover pastry scraps to create mini rolls or decorative shapes for a delightful presentation. Lastly, allow the sausage rolls to cool slightly after baking for the perfect dipping temperature—hot rolls can burn the mouth but cool rolls enhance flavor.

Variations and Adaptations

Consider regional adaptations like the Italian-inspired version with herbs and sun-dried tomatoes for a Mediterranean twist. Seasonal variations might include a festive stuffing with cranberry and sage during holidays. Dietary modifications can result in gluten-free sausage rolls using rice or gluten-free flour blends. Flavor variations could incorporate spicy sausage or vegetarian options for interest. Texture modifications might involve adding cheese for a creamy texture. Presentation alternatives include serving with a vibrant dipping sauce or garnishing with fresh herbs for color.

Serving and Presentation Guide

For serving, place the sausage rolls on a wooden board or a colorful platter. Keep them warm under a kitchen towel or in a low oven until ready to serve. Garnishing with fresh herbs like parsley or thyme elevates their look, while a side of tangy dipping sauce complements the warm, savory flavors. Serving at a slight angle or cutting them in half shows the delicious filling inside. Opt for small, bite-sized pieces for a buffet-style presentation, ensuring guests can enjoy them easily without the need for utensils.

Wine and Beverage Pairing

For pairing with meaty sausage rolls, a medium-bodied red wine such as Merlot or Zinfandel brings out the savory flavors beautifully. If you prefer white wine, a crisp Sauvignon Blanc enhances the herbs in the filling. For non-alcoholic options, sparkling apple cider or ginger beer adds a fun, festive touch. If coffee is on your mind, a rich, dark roast can complement the flavors nicely; just remember to serve it hot.

Storage and Shelf Life

Proper storage involves keeping any leftover meaty sausage rolls in an airtight container in the fridge for up to three days. For longer shelf life, consider freezing them; wrap individually in foil and place them in a zip-top bag to prevent freezer burn. Signs of spoilage include unpleasant scents or a change in texture. When reheating, aim for an internal temperature of 165°F to ensure safety. To thaw, simply place in the fridge overnight for best results.

Make Ahead Strategies

To prepare in advance, you can assemble the rolls and refrigerate them before baking. This allows for flavors to meld beautifully while retaining freshness. Consider having all your ingredients prepped a day in advance, making assembly even quicker. If freezing, prepare the sausage rolls, then flash freeze on a baking sheet before transferring them to a container. Be sure to note that prepped rolls will need slightly longer baking time from frozen compared to defrosted. Allow for quality retention by adding fresh herbs or a dipping sauce right before serving.

Scaling Instructions

Scaling the meaty sausage rolls is a breeze with simple adjustments. To halve the recipe, use half the quantity of all ingredients, keeping cooking times similar. Doubling or tripling the recipe is useful for gatherings—ensure you have ample baking trays and oven space. Adjust cooking time as necessary, especially if baking multiple trays simultaneously. When increasing quantities, consider the logistics of storage; ensure you have room in your refrigerator or freezer for excess uncooked batches.

Nutritional Deep Dive

Meaty sausage rolls pack a punch when it comes to nutrition, primarily due to their protein content, derived from various meats. Looking at the macro breakdown, typical sausage rolls are high in protein, moderate in fats, and contain carbohydrates from the pastry. Micronutrient analysis reveals good amounts of iron and zinc essential for energy and immune support. For those watching their diets, adjusting the type of meat and pastry can lead to healthier options while still satisfying cravings. Portion control remains critical to align with dietary goals, ensuring healthy indulgence.

Dietary Adaptations

For gluten-free enthusiasts, consider using a gluten-free pastry option for the wrapping. Dairy-free versions can be made using plant-based sausage alternatives and dairy-free pastry. For vegans, tofu or lentils can replace meat fillings, providing an alternative protein source. If you follow a low-carb diet, try wrapping fillings in zucchini or eggplant instead of pastry. Paleo followers may enjoy using almond flour and cashew cream in place of traditional ingredients to create a compliant version, while low-FODMAP enthusiasts can select compliant spices and additives for flavor.

Troubleshooting Guide

If your sausage rolls turn out dry, consider adding moist ingredients like onions or fats to the filling. Unbalanced flavors can be fixed by adding salt or acid; a squeeze of lemon juice often helps bring out other flavors. Temperature problems may arise if your oven is not accurately preheated; always trust an oven thermometer for better reliability. For those using ingredient substitutions, remember that cooking times may vary, so check for doneness frequently. If you overbake, consider lowering the roasting temperature next time and using an oven timer to prevent this.

Recipe Success Stories

Readers often share their inspiring experiences of making meaty sausage rolls, including adaptations that led to even greater happiness. Many recount discovering unique combinations of spices to create memorable flavors, while others found joy in sharing the rolls at gatherings and receiving rave reviews. Photography tips from the community highlight the appeal of capturing the golden-brown pastry and succulent meat, showing how appealing presentation can enhance perceptions of taste.

Frequently Asked Questions

Q1: Can I bake the rolls from frozen?

A1: Yes, you can bake frozen sausage rolls! Just add an extra 5-10 minutes to the cooking time and ensure they reach 165°F internally.

Q2: What can I serve with sausage rolls?

A2: Pair your sausage rolls with a tangy dipping sauce like mustard or chili sauce for added flavor. They also work well with fresh salads or coleslaw.

Q3: How do I know when my sausage rolls are done?

A3: Look for a golden-brown crust and an internal temperature of 165°F for safety. The pastry should be crisp, and the filling should be hot.

Q4: Can I use turkey instead of pork?

A4: Absolutely! Ground turkey makes a healthy and equally delicious substitute. Season it well to enhance its flavor.

Q5: How long can I keep leftover sausage rolls?

A5: Leftover sausage rolls can be stored in the fridge for up to three days, and you can freeze them for up to three months for longer storage.

Q6: What spice blends work well in the filling?

A6: Try blends like Italian herb seasoning, chili powder, or even curry for a twist. Fresh herbs can also elevate the flavor significantly.

Q7: Are these rolls suitable for kids?

A7: Yes, meaty sausage rolls are kid-friendly! Their bite-sized nature and flavors make them appealing to children, and you can adjust the spices to suit their tastes.

Q8: Can I make these rolls ahead of time?

A8: Certainly! You can assemble the rolls and refrigerate them until you’re ready to bake or freeze them for future use.

Q9: What if I don’t have pastry on hand?

A9: In a pinch, consider using phyllo dough or even crescent roll dough for a unique take on sausage rolls.

Q10: Can I make mini sausage rolls?

A10: Yes! Just cut the pastry into smaller rectangles and adjust the filling quantity for bite-sized versions; they make great appetizers!

Q11: How should I reheat sausage rolls?

A11: To reheat, place them in a preheated oven at 350°F for about 10-15 minutes or until heated through. This helps retain crispiness.

Q12: Is it possible to make these rolls vegan?

A12: Definitely! Substitute with plant-based sausage or lentils, and ensure your pastry is dairy-free for a delicious vegan option.

Additional Resources

Explore related recipes like our Chili Cheese Dogs or Homemade Meat Pies to expand your snack repertoire. For kitchen novices, check out our technique guides on pastry-making to improve your skills. For those interested in ingredient details, we offer extensive resources on sourcing high-quality meats and herbs to elevate your dishes. Don’t forget about kitchen equipment recommendations, ensuring you have the right tools for success when baking.

Join the Conversation

We want to hear from you! Engage with our community on social media by sharing your recipe experiments and successes. Snap a photo of your meaty sausage rolls and tag us for a chance to be featured. Recipe reviews and suggestions help us grow, and we encourage sharing variations that make this dish your own—let’s explore together!

The Recipe

Meaty Sausage Rolls

Serves: 4

Prep Time: 20 mins

Cook Time: 25 mins

Total Time: 45 mins

Kitchen Equipment Needed

  • Baking Tray
  • Parchment Paper
  • Mixing Bowl
  • Rolling Pin

Ingredients

  • 500g sausage meat
  • 1 tbsp Worcestershire sauce
  • 1 small onion, finely chopped
  • 1 tsp dried thyme
  • 1 egg, beaten (for egg wash)
  • 250g puff pastry (thawed if frozen)
  • Salt and pepper to taste

Directions

  1. Preheat the oven to 200°C (392°F). Line a baking tray with parchment paper.
  2. In a bowl, combine sausage meat, Worcestershire sauce, onion, thyme, salt, and pepper. Mix well.
  3. Roll out the puff pastry on a floured surface until about 3mm thick and cut into rectangles.
  4. Place a generous line of the sausage mixture down the center of each rectangle.
  5. Brush the edges of the pastry with beaten egg to help seal them.
  6. Fold the pastry over the filling and press the edges to seal. Crimp with a fork if desired.
  7. Place the rolls seam-side down on the prepared tray and brush the tops with the remaining beaten egg.
  8. Bake for 25-30 minutes or until golden brown and cooked through.
  9. Let them cool slightly before serving.

Recipe Notes

  • For a spicy kick, add a pinch of chili flakes to the meat mixture.
  • Feel free to use store-bought sausage if preferred.
  • These rolls can be made ahead of time and frozen before baking.

Delicious Apple Butter Cookies: A Perfect Fall Treat Recipe

Delicious Apple Butter Cookies: A Sweet Treat for Every Occasion

⚖️
Difficulty
Easy

⏲️
Prep Time
15 mins

🕒
Cook Time
12 mins

⏱️
Total Time
27 mins

🍽️
Servings
24 cookies

Apple butter cookies are a delightful treat that will warm your heart and home. These sweet, tender cookies incorporate the rich, spiced flavor of apple butter, bringing a unique twist to a classic dessert. Perfect for fall gatherings, family celebrations, or simply indulging yourself, these cookies are soft and flavorful, reminiscent of cozy autumn days. The aroma of cinnamon and apples permeates your kitchen, inviting everyone to come and enjoy a taste of this seasonal delight.

With their sweet and spiced flavor combination, these cookies are not just good; they’re incredibly versatile. They can stand alone as a sweet snack or be paired with a cup of tea or coffee for a cozy afternoon treat. Each bite offers a soft, chewy texture that practically melts in your mouth, making them irresistible. Whether you’re sharing them at a potluck or enjoying them with family, these apple butter cookies are sure to be a hit.

Quick Recipe Highlights

  • Flavor Profile: The flavor of these apple butter cookies is a blend of sweet and spicy, bringing the essence of autumn to your palate.
  • Texture: Each cookie is soft and chewy with a slightly crispy edge that gives it a satisfying bite.
  • Aroma: The inviting fragrance of cinnamon and baked apples fills your kitchen, creating a warm atmosphere.
  • Visual Appeal: Golden brown in color, these cookies will look perfect on any dessert platter, especially when dusted with powdered sugar.
  • Skill Level Needed: Easy, making it accessible for bakers of all skill levels.
  • Special Equipment: Standard baking tools such as mixing bowls, baking sheets, and an oven are all you need.

Recipe Overview

  • Difficulty Level: These cookies are easy to prepare, making them ideal for beginner bakers or those looking for a quick and satisfying recipe.
  • Category: Perfect for desserts or snacks, these cookies can also be enjoyed with breakfast or as a treat anytime during the day.
  • Cuisine: Drawing from traditional American baking, these cookies embody a quintessential fall flavor profile, reflective of harvest traditions.
  • Cost: Utilizing simple pantry staples, these cookies are economical to make, costing under $10 for a full batch.
  • Season: Best enjoyed in the fall when apples are in season, their flavors can also bring a touch of warmth during winter.
  • Occasion: Wonderful for gatherings, cozy evenings, or as homemade gifts for friends and family.

Why You’ll Love This Recipe

These apple butter cookies are a true delight, striking a perfect balance between sweet and subtly spiced. The apple butter not only enhances the flavor but also keeps the cookies tender and moist. As you bite into one, you’ll savor the warm notes of cinnamon and nutmeg, making them a quintessential fall treat. Each cookie offers a heavenly experience, reminiscent of bites taken on brisk evenings while watching the leaves fall.

In addition to their delightful taste, these cookies are incredibly easy to prepare. With just a handful of ingredients that you likely already have on hand, you can whip up a fresh batch in less than thirty minutes. This convenience allows you to satisfy your sweet tooth without the hassle of complex baking techniques, making them perfect for unexpected guests or last-minute cravings.

Nutritionally, apple butter is a good source of dietary fiber and vitamins, making these cookies a slightly healthier indulgence compared to others. By using apple butter, you also reduce the need for additional sugars, as it naturally sweetens the cookies while adding depth to their flavor. This makes them a great option for those looking to enjoy something delicious without compromising on health.

Socially, sharing these cookies can be a heartwarming experience, inviting connection and conversation. Imagine gathering with friends or family around a warm batch of cookies, sharing stories and laughter. These cookies are more than just a treat; they’re a catalyst for joy and togetherness.

Cost-wise, these cookies are very accessible. Most ingredients are staples found in your pantry, reducing the need for expensive or hard-to-find items. This affordability allows anyone to enjoy homemade treats without breaking the bank, making it easy to bake a gift for a neighbor or a sweet surprise for your loved ones.

Historical Background and Cultural Significance

Apple butter cookies have roots in American culinary traditions, where apples are widely regarded as a staple fruit in many households. This recipe reflects the spirit of resourcefulness found in many homes, using apple butter, a delicious byproduct of making applesauce, to create something festive and comforting. Originating during the colonial period, apple butter was a practical way to preserve apples for the winter months, and its use in baked goods showcases the ingenuity of early American cooks.

In terms of cultural importance, apples represent comfort and nostalgia in many American families, particularly during the fall harvest season. Apple butter, in particular, holds significance as a symbol of home and warmth, often associated with family gatherings and traditional celebrations. These cookies carry that legacy forward, from family kitchens to festive celebrations.

The recipe for apple butter cookies has evolved over time, from traditional versions that may have used lard or other fats to today’s more health-conscious adaptations that often incorporate alternatives like coconut oil or apple sauce. This evolution showcases the adaptability of the recipe through changing culinary practices and preferences.

Regional variations of apple butter cookies can be found across the United States, from the spiced versions prevalent in the Northeast to sweeter, more indulgent interpretations in the South. Each variation tells a story of local apples and regional tastes, showcasing the diverse ways this beloved treat is enjoyed.

Ingredient Deep Dive

Apple Butter: Apple butter is rich in history, dating back to early colonists in America who sought to preserve the harvest for winter. This thick spread not only adds flavor but also nutrients, including fiber and antioxidants. When selecting apple butter, opt for brands that are sugar-free or low in added sugars to keep your cookies healthier. Store it in the refrigerator after opening to maintain freshness, and if you’re out, unsweetened applesauce can serve as a suitable substitute.

Flour: Flour acts as the backbone of this recipe, providing structure to the cookies. It’s fascinating to note that different flours can impact the texture significantly—cake flour will yield softer cookies while all-purpose flour offers a more balanced chew. Look for organic options if available. Store flour in a cool, dry place, and consider keeping it in an airtight container. In case you need to substitute, almond flour can add a nutty flavor and is also gluten-free.

Common Mistakes to Avoid

  • Overmixing the dough can lead to tough cookies; mix just until combined to maintain a tender texture.
  • Using cold butter can prevent proper creaming, leading to dense cookies; always allow butter to soften at room temperature.
  • Not measuring flour correctly can result in dry cookies; spoon flour into the measuring cup and level it off with a knife.
  • Baking at too high a temperature can scorch the cookies; always check your oven temperature with an oven thermometer.
  • Not preheating the oven may lead to uneven baking; always preheat for even cooking.
  • Using expired ingredients, such as baking powder or soda, can affect the cookie’s rise; check the expiration dates before use.
  • Skipping the chilling step can cause cookies to spread too much during baking; allow dough to chill for at least 30 minutes.
  • Ignoring the baking time can lead to overbaking; keep an eye on them as they approach the end of cooking.
  • Using too much apple butter can change the texture and cause the cookies to be too soft; stick with the recipe’s measurements for the best results.
  • Storing cookies improperly can lead to them becoming stale; use airtight containers for storage to keep them fresh.

Essential Techniques

Creaming Butter and Sugar: This technique is key to achieving light and fluffy cookies. To cream, beat softened butter and sugar together until the mixture is light in color and texture. This incorporates air, which helps cookies rise and creates a desirable texture. Avoid using chilled butter, as it may not incorporate smoothly. Visual cues include a pale color and a fluffy consistency.

Proper Measuring of Ingredients: Accuracy in measuring ingredients can be the difference between a cookie’s success or failure. Always use the appropriate measuring tools: dry measuring cups for flour and sugar, and liquid measuring cups for liquids. Additionally, consider spooning flour into the measuring cup and leveling it off to avoid overpacking, which could lead to dense cookies.

Pro Tips for Perfect Apple Butter Cookies

1. Use homemade apple butter for a fresher, more robust flavor. It’s surprisingly easy to make and can be adjusted to your taste.
2. Incorporate a pinch of salt to enhance the sweetness of the cookies, creating a perfect balance.
3. Experiment with adding nuts or chocolate chips for added texture and flavor complexity.
4. Allow the dough to chill in the refrigerator for at least an hour to help prevent spreading during baking.
5. Use parchment paper on your baking sheets to ensure easy removal and prevent sticking.
6. Consider dusting with powdered sugar right before serving for a lovely presentation.
7. Bake a single test cookie to assess your baking time; adjust as necessary for your oven.
8. Store any leftovers in an airtight container or freeze for later indulgence.

Variations and Adaptations

Enhancing your apple butter cookie experience can be as simple as trying regional variations. For instance, adding a dash of maple syrup can offer a lovely New England twist. Additionally, you can prepare them with seasonal adaptations by incorporating pumpkin spice during the fall months for a festive flair.

For dietary modifications, consider making them gluten-free by using a blend of almond flour and coconut flour. For a vegan version, substitute butter with coconut oil and replace the egg with a flax egg or a commercial egg substitute. If you want to explore different flavors, try incorporating dried fruits like cranberries or raisins to complement the apple butter.

Texture modifications can bring a fun twist to traditional cookies. By using coarse sea salt on top just before baking, you can create a delightful contrast to the sweet cookie. Lastly, presentation can be diversified by shaping the cookies into different sizes or using cookie cutters for festive shapes.

Serving and Presentation Guide

For an appealing presentation, consider stacking the cookies on a cake stand or placing them in a decorative tin with colorful parchment paper. Enhancing with garnishes such as a light dusting of powdered sugar or a drizzle of caramel sauce can elevate their visual appeal.

Traditional accompaniments like spiced tea or apple cider can beautifully complement the flavors of the cookie, making them perfect for autumn gatherings. For a more modern touch, serve alongside a scoop of vanilla ice cream or crème fraîche for a comforting dessert. Serving at room temperature is ideal, as it ensures optimal flavor and texture accessibility. Portion control can be achieved by cutting larger cookies in half for sharing, encouraging a more casual, inviting atmosphere.

Wine and Beverage Pairing

Pairing your apple butter cookies with a glass of sweet white wine, such as Gewürztraminer, can enhance the sweet and spiced notes of the cookies. Alternatively, a rich cider would pair wonderfully, harmonizing with the apple flavor while complementing the spices.

For non-alcoholic beverages, consider a warm chai tea or spiced apple cider to echo the cookie’s flavors while providing a warming experience suitable for the fall. If opting for coffee, a lightly flavored latte, perhaps with pumpkin or vanilla, will provide a delightful balance to the sweetness of the cookies.

Serving suggestions include presenting beverages in cozy mugs alongside a plate of cookies, creating a warm and inviting setting. Ensure beverages are at the right temperature; warm drinks should be freshly brewed, while cooler drinks need chilling beforehand.

Storage and Shelf Life

To keep your apple butter cookies fresh, store them in an airtight container at room temperature. They maintain good quality for up to a week; for longer storage, a freezer-safe bag can be utilized to freeze them for up to three months.

Temperature requirements should be cool to avoid any moisture which could lead to soggy cookies. For the best results, look for containers with tight seals to lock in freshness. Signs of spoilage would include a hard texture or unusual smell, indicating it’s time to discard.

Reheating instructions can bring them back to their fresh-baked glory: a quick 10 seconds in the microwave should do the trick. If frozen, let them thaw at room temperature for a few hours or overnight in the refrigerator.

Make Ahead Strategies

To save time, prepare the dough ahead of time and store it in the refrigerator. Chilling the dough not only improves the flavor but also allows for easier shaping when you’re ready to bake.

Consider assembling the cookies in advance but baking them just before serving for optimal freshness. This strategy ensures a delightful aroma fills your home, enhancing the enjoyment of your gathering.

Quality impact assessment indicates that cookies can lose texture if held for too long before baking; therefore, planning to bake shortly after preparing is optimal. Additionally, for fresh element additions, consider incorporating warm spices or sea salt just before baking for heightened flavor complexity.

Cramming too many tasks can lead to rushed baking, so take the time to mentally prepare by breaking tasks into steps, ensuring each element is properly attended to.

Scaling Instructions

To halve the recipe, simply divide each ingredient measurement by two. Note that the baking time may be slightly less, so keep an eye on the cookies as they bake.

If doubling or tripling, a larger mixing bowl is essential to accommodate the increased volume. Also, bake in multiple batches if necessary, as overcrowding the baking sheet can result in uneven baking.

Timing modifications may be necessary; monitor the cookies closely as larger batches can affect baking times due to changes in oven temperature and airflow. Lastly, consider freezing excess dough if you don’t plan to bake all at once, allowing you to enjoy these delightful treats fresh at a later date.

Nutritional Deep Dive

In a serving of apple butter cookies, you can typically expect a macro breakdown of around 150 calories per cookie, with fats, carbohydrates, and a modest amount of protein. The apple butter contributes to fiber content, benefiting digestive health and keeping you satisfied longer.

Micronutrient analysis reveals essential vitamins such as vitamin C and several B vitamins present in apples, encouraging energy metabolism. Nutritionally, the apple butter provides antioxidants, promoting overall health and reducing inflammation.

For those watching their diets, here’s a portion analysis: Understanding serving sizes leads to more mindful eating. If making smaller cookies, consider two cookies per serving instead of one, adjusting the caloric intake accordingly.

Extra health benefits can be achieved by integrating whole grain flour for a fiber boost or substituting some of the sugar for a natural sweetener, ensuring that these cookies can accommodate various dietary needs while remaining flavorful.

Dietary Adaptations

For gluten-free individuals, substituting regular flour with almond flour or a gluten-free blend can create equally delicious apple butter cookies. Similarly, using oat flour will offer a nutty flavor while still being gluten-free.

Dairy-free adaptations can be achieved through the use of plant-based butter or coconut oil, making the recipe accessible to those with lactose intolerance. For vegan versions, replace the egg with a flaxseed egg or equivalent egg substitute, ensuring the cookies maintain their structure.

Low-carb and keto dieters can utilize almond flour in place of traditional flour, while sweetening with erythritol or monk fruit. Those following paleo diets should consider substituting standard sugar with honey or maple syrup for a more nutrient-dense alternative.

Low-FODMAP adaptations can also be made by simply ensuring that all included ingredients are within acceptable limits for sensitive individuals, allowing a wider audience to enjoy these cookies.

Troubleshooting Guide

If you face texture issues, such as cookies being too dry, this could be due to over-measuring the flour. Ensure you use the correct measuring technique to prevent this. If cookies have spread too much, chilling the dough before baking will help maintain their shape.

Flavor balance is crucial; if cookies taste bland, consider adding more spices or a pinch of salt to enhance flavor. Temperature problems can often arise from an oven being too hot or too cold — investing in an oven thermometer can help to avoid this error.

If equipment challenges arise, ensure that all baking sheets are properly greased or lined with parchment to avoid sticking. Ingredient substitutions can also lead to inconsistencies; always replace components with similar textures or moisture levels.

Timing concerns can lead to undercooked or overbaked cookies; using a timer and checking a minute or two earlier than the recommended baking time can help mitigate this risk.

Recipe Success Stories

Many bakers have shared their positive experiences with apple butter cookies, often noting how simple adaptation allows them to cater to personal tastes. Recipes have been tested by families who praised the cookies’ versatility from dessert to breakfast treat.

Variations have led to delightful results; some have reported excellent feedback from trying nutty add-ins like pecans, showcasing how adaptable this recipe can be. Readers often suggest that photography tips, such as staging cookies on rustic wooden platters or with fall-themed backdrops, enhance their appeal for social media sharing.

Community engagement highlights enthusiasm around seasonal baking, with many bakers sharing their adaptations and personal twists on the original recipe. Sharing experiences can also inspire others to try out baking as a fun, rewarding hobby, highlighting the ongoing love for apple butter cookies.

Frequently Asked Questions

Can I use store-bought apple butter for this recipe? Absolutely! Store-bought apple butter is a convenient option and will yield delicious cookies. Just ensure it’s of good quality for the best flavor.

Can I freeze these cookies? Yes! These cookies freeze exceptionally well. After baking, allow them to cool completely, then store them in an airtight container or freezer-safe bag.

What is the best way to store leftover cookies? Store the cookies in an airtight container at room temperature for up to a week, or in the freezer for a longer shelf life.

Can I make these cookies vegan? Yes! Replace the butter with a plant-based alternative and use a flax egg as a substitute for the egg to create a vegan version.

How do I make these cookies gluten-free? Use a gluten-free flour blend or almond flour instead of regular flour for a gluten-free apple butter cookie.

What can I add to the dough for extra flavor? Feel free to add nuts like walnuts or pecans, chocolate chips, or crushed spices like ginger for an extra flavor dimension.

Will the cookies hold their shape during baking? Yes, as long as the dough is chilled before baking, the cookies should maintain their shape.

What if my dough is too sticky? If the dough is too sticky, consider adding a little more flour, but be careful not to overdo it as this could make the cookies dry.

Can I use other fruit preserves instead of apple butter? Yes! Other fruit preserves such as peach or apricot can create an interesting flavor profile, just keep in mind it will alter the cookie taste.

Is there a way to make these cookies lower in sugar? You can reduce the sugar in the recipe or use a natural sweetener alternative like stevia or monk fruit sweetener.

Additional Resources

If you’re looking for more delightful cookie recipes, consider trying oatmeal raisin cookies or pumpkin spice cookies for a seasonal twist. Beyond recipes, explore technique guides on cookie baking tips or ingredient information focusing on apple varieties.

Investing in quality equipment, such as non-stick baking sheets or silicone baking mats, can greatly enhance your baking experience. Finally, engaging in seasonal baking variations keeps your recipe repertoire exciting and fresh throughout the year.

Join the Conversation

We’d love to hear about your experiences with apple butter cookies! Share your personal stories, photos of your creations, and any adaptations you’ve made that enhance this tasty treat. Engaging with fellow baking enthusiasts not only encourages creativity but can inspire new ideas and techniques that every cook can benefit from.

Stay connected through social media platforms and don’t hesitate to leave your recipe reviews or feedback below. Your variations could motivate others to try their hand at baking or introduce them to new flavors in apple butter cookies!

The Recipe

Apple Butter Cookies

Serves: 24 cookies

Prep Time: 15 mins

Cook Time: 12 mins

Total Time: 27 mins

Kitchen Equipment Needed

  • Mixing bowls
  • Baking sheets
  • Parchment paper
  • Measuring cups
  • Mixing spoon or electric mixer
  • Cookie scoop or tablespoon

Ingredients

  • 1 cup apple butter
  • 1 cup unsalted butter, softened
  • 1 cup brown sugar
  • 2 cups all-purpose flour
  • 1 tsp baking soda
  • 1 tsp cinnamon
  • 1/2 tsp nutmeg
  • 1/4 tsp salt
  • 1 egg

Directions

  1. Preheat your oven to 350°F (175°C) and line baking sheets with parchment paper.
  2. In a large bowl, cream together the softened butter and brown sugar until smooth.
  3. Add the apple butter and egg, and mix until fully combined.
  4. In a separate bowl, whisk together the flour, baking soda, cinnamon, nutmeg, and salt.
  5. Gradually incorporate the dry ingredients into the wet mixture, stirring until just combined.
  6. Use a cookie scoop to drop spoonfuls of dough onto the prepared baking sheets, spacing them about 2 inches apart.
  7. Bake for 12-14 minutes or until the edges are lightly golden. Remove from the oven and allow to cool on the sheet for a few minutes before transferring to a wire rack to cool completely.

Recipe Notes

  • Store cookies in an airtight container at room temperature for up to a week.
  • Freeze unused dough if not baking all at once.
  • Feel free to add your favorite mix-ins like chocolate chips or nuts.

Delicious Club Sandwich Pasta Salad Recipe for a Perfect Picnic

Club Sandwich Pasta Salad: A Delicious Twist on a Classic

⚖️
Difficulty
Easy

⏲️
Prep Time
15 mins

🕒
Cook Time
10 mins

⏱️
Total Time
25 mins

🍽️
Servings
4 servings

Pasta salad is a quintessential summer dish, but this Club Sandwich Pasta Salad brings an exciting and innovative twist to the classic appetizer. Imagine the familiar flavors of a club sandwich – crisp bacon, tender turkey, and creamy dressing – intermingling with pasta for a delightful and satisfying meal. This vibrant, colorful dish is perfect for picnics, barbecues, and casual gatherings or even enjoyed as a light lunch. The combination of textures and flavors will not only appeal to your taste buds but also offer a feast for the eyes.

The beauty of this Club Sandwich Pasta Salad lies in its versatility. You can mix and match ingredients based on your preference, making it an excellent option for using up leftover ingredients. This recipe invites creativity, allowing you to experiment with various dressings, proteins, and vegetables, which keeps each version unique. Perfectly served chilled, this pasta salad is refreshing on a warm day, making it a go-to recipe in your summer cooking arsenal.

Quick Recipe Highlights

  • Flavor Profile: This pasta salad is savory with a delightful umami from the bacon and turkey, perfectly balanced by the creaminess of the dressing and a hint of tang from the vegetables.
  • Texture: The al dente pasta provides a firm yet tender bite, while the crispy bacon and crunchy vegetables create a combination of textures that keeps each bite interesting.
  • Aroma: Expect aromatic notes of smoky bacon and fresh herbs to fill your kitchen as you prepare this mouthwatering dish.
  • Visual Appeal: The vibrant colors of bell peppers, green onions, and salad dressing come together beautifully against the neutral pasta, creating an inviting presentation.
  • Skill Level Needed: This recipe is beginner-friendly, making it accessible to cooks of all levels. Simple steps guarantee success.
  • Special Equipment: No specialized kitchen tools are required, just basic cooking utensils and a large mixing bowl.

Recipe Overview

  • Difficulty Level: The difficulty level is easy, perfect for novice cooks or anyone looking for a quick and satisfying meal solution.
  • Category: This dish falls within salad and side categories but can easily be served as a main dish, especially on warm summer days.
  • Cuisine: It draws inspiration from classic American cuisine, brilliantly combining traditional flavors in a novel format.
  • Cost: This recipe is budget-friendly, with ingredients commonly found in your kitchen or at your local grocery store.
  • Season: Ideal for summer gatherings, but equally enjoyable year-round, thanks to the availability of fresh ingredients.
  • Occasion: Perfect for picnics, potlucks, or casual family gatherings, offering a hearty yet light option that can feed a crowd.

Why You’ll Love This Recipe

The combination of taste and texture in this Club Sandwich Pasta Salad is simply irresistible, making it a standout dish for any meal. The savory bacon elevates it to a flavor experience that mimics your favorite club sandwich. You’ll love the crunch of fresh vegetables paired with the smoothness of the dressing, creating a refreshing mouthfeel that satisfies every craving.

Convenience is another reason to adore this pasta salad. Quick to prepare, it lends itself well to meal prepping, ensuring you have a ready-to-eat meal that doesn’t compromise on flavor. Pack it for lunch, serve it for dinner, or enjoy it as a snack – it fits seamlessly into your busy lifestyle while maintaining a homemade touch.

Nutritional benefits abound in this recipe, thanks to the inclusion of wholesome ingredients. The pasta provides carbohydrates for energy, while the vegetables contribute vitamins and minerals essential for overall health. The protein from turkey and bacon adds satiety, making this dish not just tasty but also nourishing.

Socially, preparing and serving this pasta salad is a conversation starter. It offers a fun twist on a classic favorite, inviting guests to reminisce about their favorite club sandwiches while enjoying a new culinary creation. Share the recipe with friends, and it may just become a beloved staple at your gatherings.

Lastly, the cost-effectiveness of this dish is a significant plus. Utilizing simple, readily available ingredients, you can make a large batch without breaking the bank. This Pasta Salad is not only delightful but also an economical choice for feeding a crowd.

Historical Background and Cultural Significance

The club sandwich, a renowned American classic, traces its origins back to the late 19th century. Generally believed to have emerged in clubs frequented by men, its construction of layers with turkey, bacon, lettuce, and tomato gave a visual treat that was beloved across different social circles. Its transition to a pasta salad reflects the evolution of culinary practices to meet modern dining preferences.

In culinary terms, the club sandwich has become a staple not only in American diners but also in various cuisines around the world that have adopted and adapted it. The pasta salad version embodies the spirit of innovation in contemporary cooking, allowing for personalization and a unique addition to potluck and picnic menus.

Over the years, the recipe for the club sandwich has seen many variations, paving the way for this pasta salad. Many families have their own secret ingredient or method for stacking the ingredients high, enhancing the recipe’s legacy and significance. The incorporation of pasta into the mix gives this classic a refreshing twist while still honoring the original flavor profile.

Regional variations also abound in this dish. Whether you’re Southern with a touch of pimento cheese or adding an Italian flair with pesto, the essence of the club sandwich remains at the core. This adaptability speaks to the cultural significance of the dish, as families continually mold it according to their tastes and traditions.

Ingredient Deep Dive

Bacon: A classic staple in many kitchens, bacon adds a rich, smoky flavor to dishes. It’s a key component of the club sandwich, and it’s high in protein, which aids in muscle and tissue repair. When selecting bacon, look for fresh slices with a good meat-to-fat ratio. Store unused bacon in the refrigerator where it can last for up to a week, or freeze it for longer storage. If you’re looking for a healthier option, turkey bacon or veggie bacon are great alternatives.

Turkey. Turkey serves as a lean source of protein, making it popular in many diets. Filled with vitamins such as B6 and niacin, it’s beneficial for managing metabolic processes in the body. When choosing turkey, opt for fresh, organic cuts when possible. It can be stored in the fridge for up to three days and frozen for up to six months if not cooked. For a twist, try using chicken or even tofu for a vegetarian variant.

Pasta: The heart of this dish, pasta, is a flexible base that pairs well with many flavors. Whole-grain or gluten-free options can elevate the nutritional profile. When purchasing pasta, select varieties made from whole grains for higher fiber content. Store dry pasta in a cool, dry place and try to keep cooked pasta in airtight containers to prevent spoilage. For a gluten-free alternative, zoodles or quinoa pasta work just as well.

Common Mistakes to Avoid

  • Overcooking the pasta: One of the most common mistakes is cooking the pasta too long. Overcooked pasta becomes mushy and won’t hold up in the salad. Aim for al dente pasta to maintain a pleasant texture.
  • Skipping the cooling process: Not letting the pasta cool before mixing with the other ingredients can lead to soggy salad. Allow pasta to cool completely to retain its texture.
  • Not seasoning: A common error is forgetting to season the pasta itself. Salt added to boiling water not only enhances the flavor but also elevates the entire dish.
  • Using too much dressing: While dressing adds flavor, using excessive amounts can overwhelm the salad and make it soggy. Start with a little and adjust as necessary.
  • Neglecting to chop ingredients uniformly: A lack of consistency in cutting ingredients can result in uneven bites. Aim for similar sizes for a visually appealing dish and balanced flavor in every mouthful.
  • Assembling too early: Preparing the pasta salad too far in advance can lead to loss of freshness. Assemble your salad close to serving time for the best taste.
  • Not tasting before serving: Failing to taste the salad before serving can mean missing the opportunity to adjust flavors. Always give it a taste and tweak accordingly.
  • Leaving out the veggies: Skipping fresh vegetables can lead to a lack of variety in texture and flavor. Including colorful vegetables not only enhances taste but also boosts the nutritional profile.
  • Using high-fat dressings: Opting for heavy dressings can counteract the freshness of the salad. Choose lighter dressings or make a homemade vinaigrette for a healthier option.
  • Neglecting storage tips: Improper storage can lead to spoilage. Always keep the pasta salad in an airtight container in the refrigerator to maintain freshness.

Essential Techniques

Cooking Pasta Perfectly: Cooking pasta to the right texture is crucial for achieving the desired mouthfeel in your salad. Always check the cooking time on the package and test for doneness by sampling a piece. For optimal results, remember to salt your boiling water and avoid rinsing after cooking, as this washes away the starch that helps dressings cling to the pasta.

Layering Flavors: Building layers of flavor is a vital technique. Start with a solid base, like pasta, followed by proteins and veggies. Incorporate dressings gradually to avoid overpowering the main ingredients. A mix of fresh herbs and spices can also enhance the overall taste. To master this, taste frequently as you assemble, ensuring each addition contributes positively to the final product.

Pro Tips for Perfect Club Sandwich Pasta Salad

1. **Use fresh ingredients:** Fresh veggies and quality proteins will enhance the overall flavor of your pasta salad, making it more enjoyable.
2. **Experiment with dressings:** Try different dressings, such as ranch, Caesar, or vinaigrette, to find your perfect flavor combination. Don’t hesitate to create your own blend for a truly unique twist!
3. **Incorporate herbs:** Fresh herbs like parsley, dill, or basil can elevate your pasta salad significantly, adding depth and freshness to every bite.
4. **Let it marinate:** Allow the pasta salad to sit for at least 30 minutes before serving. This helps all the flavors meld together beautifully.
5. **Serve chilled:** For the best experience, serve your pasta salad cold. Keep it in the refrigerator until you’re ready to dig in to enhance the refreshing element.
6. **Add crunch:** Incorporating nuts or seeds can add a delightful crunch that contrasts nicely with the softness of the pasta and dressing.
7. **Make it colorful:** Include a variety of colorful vegetables for visual appeal and to ensure a variety of nutrients.
8. **Pack it for lunch:** This salad makes for an excellent lunch option; it holds up well in the fridge and stays tasty throughout the day.

Variations and Adaptations

You can personalize your Club Sandwich Pasta Salad in numerous ways. For regional twists, consider adding ingredients specific to your area such as roasted red peppers or avocado for a California flavor. For seasonal adaptations, include fresh summer produce like zucchini or cherry tomatoes during their peak season.

Vegetarians can swap turkey or bacon for chickpeas or roasted nuts, providing protein without meat. For those following specific diets, opt for gluten-free pasta and dairy-free dressings to create a satisfying dish that meets various dietary needs. If you desire extra flavor, try infusing spices like smoked paprika or Italian herbs to create different taste profiles.

Texture modifications can also be made by using alternatives like spiralized vegetables instead of pasta for a lower-carb option. Finally, consider presentation alternatives such as serving the salad in a mason jar for picnics, ensuring a chic and fun element to your gathering.

Serving and Presentation Guide

Plating techniques can significantly affect the perception of your dish. For an appealing presentation, consider layering the pasta salad in a clear bowl, showcasing the vibrant colors of the ingredients. Garnishing with freshly chopped herbs or a sprinkle of feta cheese can add aesthetic value and extra flavor.

Traditional accompaniments like garlic bread or a fresh green salad can complement your Club Sandwich Pasta Salad beautifully, enriching the meal experience. Modern serving suggestions include individual servings in smaller dishes or mason jars, making it more suitable for gatherings and parties.

Temperature considerations are essential; serve the dish chilled for the best flavor. Consider preparing it a couple of hours before serving to allow it to cool and marinate. Portion control is vital for potlucks or gatherings; choose medium-sized servings for guests to encourage multiple helpings without excessive waste.

Wine and Beverage Pairing

Pairing wine with your Club Sandwich Pasta Salad can enhance the overall dining experience. A crisp white wine, such as Sauvignon Blanc or Pinot Grigio, meshes well with the dish’s savory components. These wines’ acidity complements the creamy dressing beautifully, balancing out the flavors.

For those seeking non-alcoholic options, refreshing iced tea with lemon can serve as an ideal companion. It cleanses the palate between bites, ensuring a delightful experience. Additionally, sparkling water with lime provides a light and invigorating pairing that enhances the fresh flavors found in the pasta salad.

If coffee or tea is your preference, opt for an herbal or citrus blend to match the vibrant elements of the salad. For serving suggestions, ensure drinks are chilled to maintain refreshment levels and contrast against the savory elements of the dish.

Storage and Shelf Life

Storing your Club Sandwich Pasta Salad correctly ensures longevity and freshness. Keep the salad in an airtight container in the refrigerator, where it can last for up to three days. Consume it within this time frame to enjoy optimal texture and flavor.

Temperature requirements dictate that your salad should be served cold. If you have leftovers, ensure the salad is refrigerated promptly after serving to prevent spoilage. For storage containers, glass or BPA-free plastic options work well, ensuring no unwanted flavors seep into the pasta salad.

Be aware of signs of spoilage, such as off smells or changes in texture. Avoid consuming if any of these signs are present. Reheating should not be necessary, but if desired, serve in a chilled bowl or let it sit at room temperature for a short time before enjoying.

Freezing is not recommended for this salad due to the texture changes that may occur when thawed. Fresh vegetables and creamy dressings typically do not freeze well, diminishing the quality of your dish.

Make Ahead Strategies

If you’re planning to make your Club Sandwich Pasta Salad ahead of time, begin by prepping ingredients up to a day in advance. Cook the pasta, chop the vegetables, and prepare proteins, store everything in separate containers to maintain freshness. This makes assembly quick when it’s time to combine the ingredients.

Quality impact can be minimized by adding dressings just before serving. This will ensure that the pasta and proteins don’t become soggy and maintain their integrity. Assembly tips include mixing the pasta gently with sourced ingredients to avoid breaking pasta.

Reheating isn’t necessary for this dish; however, you can let it sit at room temperature for about 15 minutes before serving if coming straight from the fridge. Fresh elements like herbs or a drizzle of additional dressing can be added at the last minute to pack a punch of flavor and freshness when serving.

Scaling Instructions

If you desire to serve more people, halving or doubling the recipe is simple. For halving, maintain the ingredient proportions as precisely as possible to retain taste and texture balance. Doubling requires careful attention to serving sizes and may necessitate larger mixing bowls or pots.

Equipment adjustments may involve an increased size for boiling pasta or a larger bowl for mixing the salad. Timing modifications will depend on the quantity cooked; larger batches may take additional time to chill. Always taste as you go to ensure quality is consistent regardless of the portion size.

Storage considerations when scaling up involve accounting for space in your refrigerator. Making smaller portions may be easier for beginners but also gives you the chance to adjust flavors before finalizing a larger batch.

Nutritional Deep Dive

Focusing on a macro breakdown, this Club Sandwich Pasta Salad offers a balance of carbohydrates from the pasta, protein from turkey and bacon, and healthy fats from your dressing choice. Each serving provides necessary fuel, ensuring energy levels remain steady throughout your busy day.

Micronutrient analysis indicates that the fresh vegetables contribute essential vitamins such as vitamin A from bell peppers and vitamin K from leafy greens. Adding colorful vegetables not only enhances flavor but also significantly boosts the dish’s nutritional value.

The health benefits include high protein content, aiding in repairing and building muscle, while the whole grain pasta offers fiber, supporting digestive health. Dietary considerations may arise with calorie counting; managing portions can ensure balanced meals without excess.

Portion analysis suggests that individual servings should maintain a balance of ingredients without overshadowing any component. This ensures that flavors complement each other while supporting weight management objectives.

Dietary Adaptations

Creating a gluten-free version of this Club Sandwich Pasta Salad is simply a matter of switching to gluten-free pasta. This change maintains the enjoyable taste without compromising health for those with dietary restrictions.

For a dairy-free option, use plant-based dressings or skip creamy components altogether in favor of an olive oil vinaigrette. Vegan alternatives work well too; substitute turkey and bacon with protein-rich chickpeas or tempeh for a satisfying meal without animal products.

Low-carb adaptations can include spiralized vegetables or cauliflower instead of pasta for those seeking to reduce carbohydrate intake. A keto-friendly version may include high-fat toppings like avocado or seeds, while remaining delicious and filling.

Paleo enthusiasts can tailor this dish with permitted ingredients, such as using lettuce wraps instead of pasta. Ensuring flavor remains intact while meeting dietary needs is a key aspect of enjoying this dish with various health goals in mind.

Troubleshooting Guide

Texture issues can arise from overcooked pasta or additions that release excess moisture. Should you find your salad too soggy, try adding additional fresh vegetables or nuts to absorb moisture while restoring crunch.

Flavor balance may falter if ingredients overshadow one another. If your salad seems flat, a splash of vinegar or lemon juice can brighten flavors and enhance the overall dish. Tasting and seasoning gradually can help avoid overpowering specific flavors.

Temperature problems can lead to an unpleasant eating experience. If the pasta salad is too warm, chilling in the refrigerator before serving will improve taste and texture significantly. Conversely, if it’s too cold, allowing it to come to room temperature briefly will enhance flavors before serving.

Equipment challenges might arise with not having the right sized bowl. Ensuring you have ample room for tossing the salad without spilling can create a pleasant cooking experience. Investing in larger mixing bowls can save time and hassle.

Ingredient substitutions may require careful planning. For example, using a different type of pasta can change cooking times and textures. When adapting recipes, consider similar ingredient profiles to retain integrity.

Timing concerns can lead to dinner party stress. Making as much ahead as possible will ease that pressure. Trying to prep fresh elements the night before allows smoother assembly and a more enjoyable cooking experience.

Recipe Success Stories

Community feedback around the Club Sandwich Pasta Salad has been overwhelmingly positive. Many readers report that their families love the unique twist on a classic dish, which has bolstered its popularity at summer gatherings.

Variation successes, such as the introduction of spicy elements like jalapeños or alternative dressings, have allowed cooks to customize their experience, according to individual tastes. Readers consistently share their family adaptations, inspiring creativity and experimentation.

Adaptation stories highlight how different cultural influences can be integrated seamlessly into the recipe. From Mediterranean flavors to Asian-inspired components, the possibilities are extensive, encouraging a sense of culinary adventure.

Reader suggestions remain invaluable. Cooks have emphasized the benefit of preparing it the day before, allowing the flavors to meld, making the dish even more appealing. Photo submissions also reveal beautiful presentations, encouraging others to elevate their dishes visually.

Photography tips from the community focus on capturing the vibrant colors and textures of the salad. Using natural light and avoiding busy backgrounds helps highlight this dish’s beautiful aspects in social media sharing.

Frequently Asked Questions

Can I make this salad ahead of time?

Yes, you can prepare the salad ahead. However, to keep it fresh, store the dressing separately and mix it just before serving.

What types of pasta work best for this recipe?

Any small pasta shapes work well, such as bow ties, rotini, or elbows. You can also use whole wheat or gluten-free pasta based on dietary needs.

Can I use leftover meats in this salad?

Absolutely! This salad is a great way to use up leftover meats like chicken, ham, or roast beef.

How long can I store the pasta salad?

The salad can be stored in an airtight container in the refrigerator for up to three days without losing quality.

Is it necessary to cool the pasta before mixing?

Yes, allowing the pasta to cool before mixing prevents the other ingredients from wilting and ensures a better texture.

What can I use as a substitute for bacon?

You can use turkey bacon, pancetta, or even crispy tofu for a vegetarian option without sacrificing flavor.

Can I add other vegetables?

Feel free to include any veggies you like, such as cucumbers, cherry tomatoes, or radishes to enhance color and nutrition.

What dressing pairs best with this pasta salad?

A homemade ranch or a light vinaigrette works nicely, though you can experiment with other dressings based on your taste preference.

Can this recipe be made vegan?

Yes! Substitute animal-based proteins with chickpeas or tempeh, and use a vegan dressing option to keep it entirely plant-based.

Is it safe to freeze pasta salad?

Freezing is generally not recommended due to texture changes. It’s best enjoyed fresh or stored in the refrigerator.

Additional Resources

To enrich your cooking experience, check out related recipes for summer salads or light dishes that complement your Club Sandwich Pasta Salad. These options often utilize seasonal produce and easy techniques to enhance your kitchen repertoire.

Technique guides focusing on pasta cooking and dressing preparation can elevate your skills, ensuring your dishes are always savory and satisfying. Investing time in learning these techniques helps build culinary confidence.

Ingredient information delves into the benefits and uses of various pantry staples, so you can understand what goes into your food. Knowing your ingredients elevates your meal and inspires creativity in the kitchen.

Equipment recommendations outline essential utensils needed for successful salad preparation, allowing you to streamline your cooking process. Understanding what tools work best guarantees less hassle and increased enjoyment.

Seasonal variations can inspire dish creativity, highlighting what’s currently in season and how to incorporate those flavors in unique ways. Adapt your pasta salad to reflect seasonal changes and celebrate the bounty of fresh ingredients.

Join the Conversation

Get involved by sharing your own twists on this recipe through social media. Use designated hashtags or tags to foster community engagement and bring awareness to the deliciousness of this Club Sandwich Pasta Salad.

Photography tips can also help improve how others share their dishes, accurately capturing the vibrancy and freshness this salad offers. Encourage others to share their plating ideas and unique adaptations.

Recipe reviews can help new cooks learn more about expectations and experiences. Share your experience cooking this dish, including any adjustments you made and how it turned out.

Participating in community engagement allows you to see different viewpoints and methods while inspiring creativity. Invite friends and family to join in the discussion, fostering interactive cooking experiences.

The Recipe

Club Sandwich Pasta Salad

Serves: 4

Prep Time: 15 mins

Cook Time: 10 mins

Total Time: 25 mins

Kitchen Equipment Needed

  • Large pot for boiling pasta
  • Colander for draining
  • Mixing bowl
  • Measuring cups and spoons
  • Knife and chopping board

Ingredients

  • 8 oz of pasta (your choice)
  • 6 slices of bacon, cooked and crumbled
  • 1 cup of cooked turkey or chicken, diced
  • 1 cup of cherry tomatoes, halved
  • 1/2 cup of bell pepper, diced
  • 1/4 cup of green onions, sliced
  • 1/2 cup of mayonnaise
  • 1 tbsp of dijon mustard
  • Salt and pepper to taste

Directions

  1. Cook pasta according to package instructions. Drain and let cool.
  2. In a large mixing bowl, combine cooled pasta, bacon, turkey, tomatoes, bell pepper, and green onions.
  3. In a separate bowl, whisk together mayonnaise, dijon mustard, salt, and pepper.
  4. Pour dressing over pasta mixture and toss until well combined.
  5. Refrigerate for at least 30 minutes before serving to allow flavors to meld.
  6. Garnish with additional vegetables or herbs if desired before serving.

Recipe Notes

  • Feel free to customize the vegetables based on your preference or what you have on hand.
  • Adding fresh herbs such as parsley or dill can enhance the overall flavors.
  • This salad can be made a day in advance; just mix in the dressing right before serving.
  • For a lighter version, use Greek yogurt or a low-fat dressing instead of mayonnaise.