The Coziest Cheesy Garlic Breadsticks You’ll Ever Make
There’s something magical about the scent of garlic and butter wafting through the kitchen, isn’t there? I remember rainy afternoons as a child, curled up with a book while my mom pulled golden, cheesy breadsticks from the oven. The warmth, the comfort, the sheer joy of tearing into that first buttery piece—it’s a feeling I’ve carried with me into my own kitchen. Today, I’m sharing my foolproof recipe for homemade cheesy garlic breadsticks, because everyone deserves that little moment of happiness.
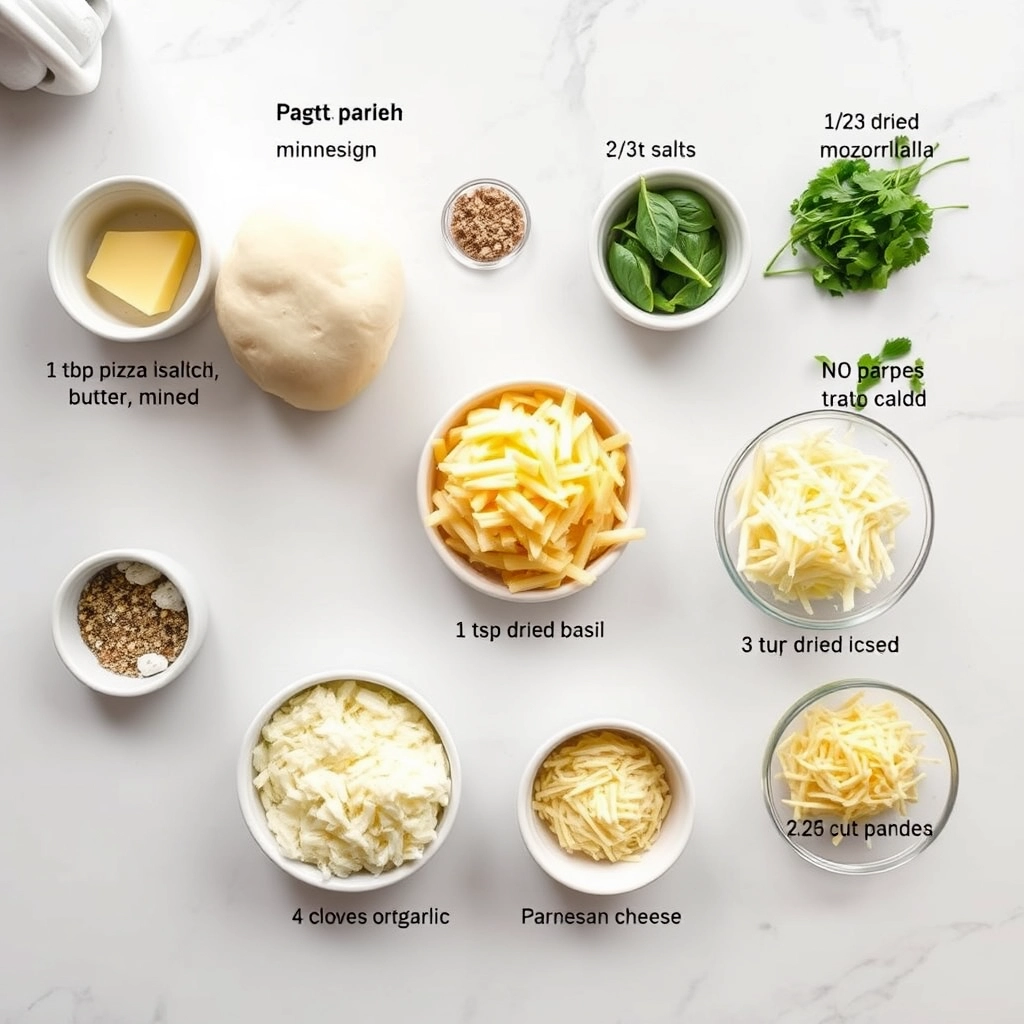
Ingredients You’ll Need
- 1 lb pizza dough (store-bought or homemade) – A shortcut I love! Fresh dough from the bakery section works beautifully.
- 4 tbsp unsalted butter, melted – The richer, the better. I sometimes add a splash of olive oil for depth.
- 4 garlic cloves, minced – Fresh is key here—no jarred garlic for this cozy moment!
- 1 tsp dried oregano – That little earthy note makes all the difference.
- ½ tsp red pepper flakes (optional) – For those who like a gentle kick, like my husband always insists.
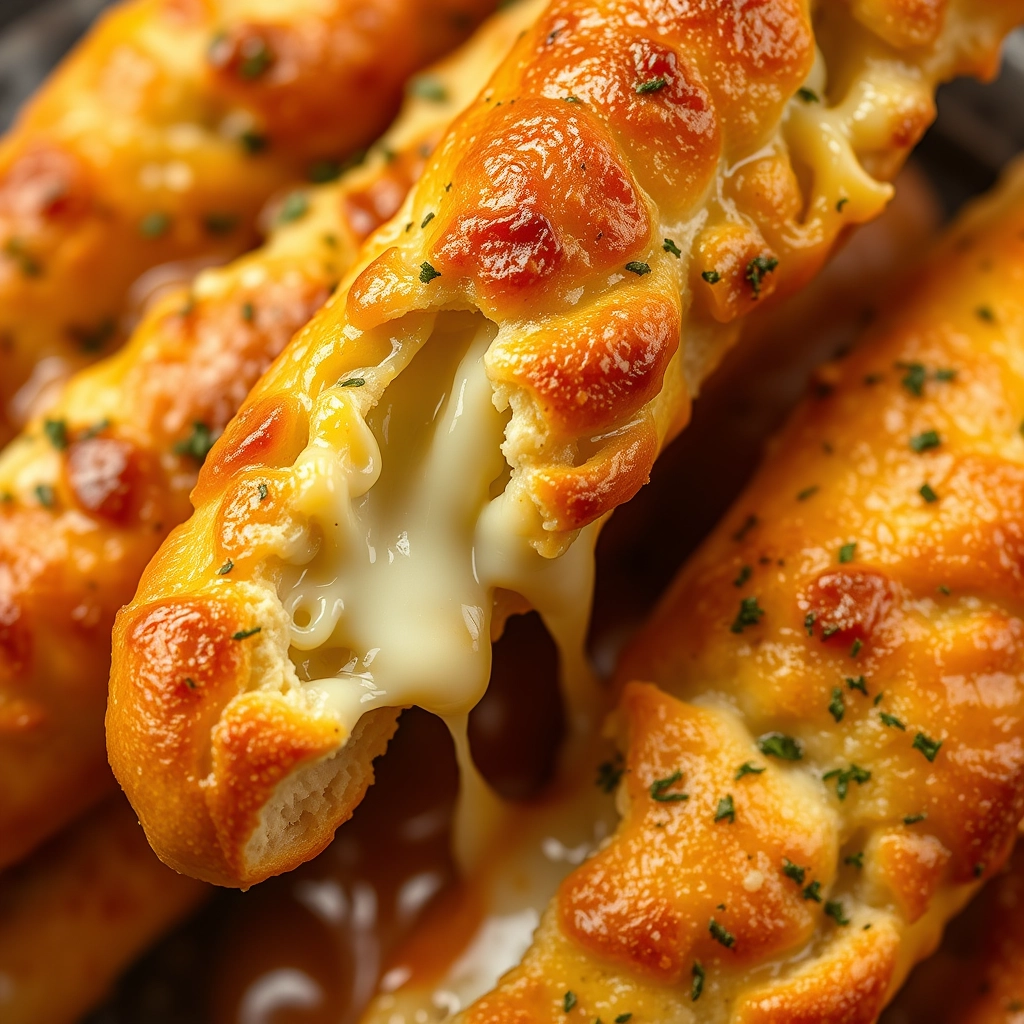
- 1 cup shredded mozzarella – The gooey, stretchy star of the show.
- ¼ cup grated Parmesan – Because everything’s better with a salty, nutty finish.
- 1 tbsp chopped fresh parsley – A pop of color and freshness to balance the richness.
- Salt to taste – A pinch to make the flavors sing.
Let’s Make Some Magic
Step 1: Preheat your oven to 425°F (220°C). While it warms, let your pizza dough rest on the counter—it’s easier to stretch when it’s not ice-cold. Trust me, I’ve learned this the hard way!
Step 2: In a small bowl, mix the melted butter, minced garlic, oregano, red pepper flakes (if using), and a pinch of salt. Take a deep breath—this aroma is half the joy of cooking.
Step 3: On a lightly floured surface, gently stretch or roll your dough into a rectangle about ½-inch thick. No need for perfection here; rustic edges mean extra crispy bits!
Step 4: Transfer the dough to a parchment-lined baking sheet. Using a pastry brush (or the back of a spoon), generously coat the surface with that glorious garlic butter. Don’t skimp—this is where the flavor lives.
Step 5: Sprinkle the mozzarella evenly over the dough, then follow with the Parmesan. I like to leave a few bare spots for contrast—those crispy, buttery edges are my favorite part.
Pro Tips for Perfect Cheesy Garlic Breadsticks
Want to take your breadsticks from good to great? Here are my secret weapons:
- Fresh garlic is key – That pre-minced jarred stuff just doesn’t deliver the same punch of flavor
- Butter temperature matters – Softened (not melted) butter spreads evenly without making the dough soggy
- Don’t skip the resting time – Letting the dough rest for 10 minutes after shaping makes for fluffier breadsticks
- Broil for the last minute – This gives that gorgeous golden-brown cheese crust we all crave
Delicious Variations to Try
This recipe is wonderfully adaptable! Here are some tasty twists:
- Herb Lover’s: Add 1 tsp dried Italian seasoning to the butter mixture
- Spicy Kick: Sprinkle with red pepper flakes before baking
- Everything Bagel: Top with everything bagel seasoning after buttering
- Pizza Style: Add a thin layer of marinara sauce under the cheese
What to Serve With Your Breadsticks
These cheesy delights pair perfectly with:
- A cozy bowl of tomato soup or creamy broccoli cheddar
- Your favorite pasta dishes (they’re amazing with lasagna!)
- A fresh garden salad for dipping
- As an appetizer with marinara or ranch for dipping
Storing and Reheating Your Breadsticks
While best fresh, here’s how to keep leftovers tasty:
- Room temperature: Store in an airtight container for up to 2 days
- Freezing: Wrap tightly in foil and freeze for up to 1 month
- Reheating: Warm in a 350°F oven for 5-7 minutes until crisp
- Microwave hack: 10-15 seconds if you’re in a hurry, but they won’t be as crispy
Frequently Asked Questions
Can I use pre-made pizza dough?
Absolutely! Store-bought dough works beautifully – just skip to the shaping step.
What cheese works best?
I love a mix of mozzarella for stretchiness and Parmesan for flavor, but any melty cheese will do.
Why are my breadsticks tough?
This usually means the dough was overworked. Next time, knead just until smooth and let it rest properly.
Can I make these ahead?
Yes! Prepare through shaping, then refrigerate covered for up to 12 hours before baking.
Warm, Cheesy Goodness Awaits
There’s something truly magical about pulling a tray of golden, garlicky, cheese-pull breadsticks from the oven. Whether it’s for family movie night, a potluck with friends, or just because you deserve a treat, this recipe is guaranteed to bring smiles. That first bite through the crisp exterior into the fluffy center, with all that melty cheese and garlic butter… pure comfort food magic. Don’t be surprised if these become your new go-to recipe – they’ve certainly earned a permanent spot in my kitchen rotation!
Print
Homemade Cheesy Garlic Breadsticks
Description
Deliciously soft and cheesy garlic breadsticks with a buttery garlic topping, perfect as an appetizer or side dish.
Ingredients
For the Crust:
- 1 lb pizza dough
- 4 tbsp unsalted butter, melted
- 3 cloves garlic, minced
- 1/2 tsp dried oregano
- 1/2 tsp dried basil
- 1/4 tsp salt
- 1 1/2 cups shredded mozzarella cheese
- 1/4 cup grated Parmesan cheese
- 2 tbsp chopped fresh parsley
Instructions
1. Prepare the Crust:
- Preheat oven to 425°F (220°C). Line a baking sheet with parchment paper.
- Roll out the pizza dough into a rectangle about 1/2-inch thick on a lightly floured surface.
- In a small bowl, mix melted butter, minced garlic, oregano, basil, and salt.
- Brush the garlic butter mixture evenly over the rolled-out dough.
- Sprinkle mozzarella and Parmesan cheese over the dough, covering it completely.
- Bake for 12-15 minutes or until the cheese is bubbly and golden brown.
- Remove from oven and sprinkle with chopped parsley. Slice into breadsticks and serve warm.
Notes
You can customize the seasonings to taste.