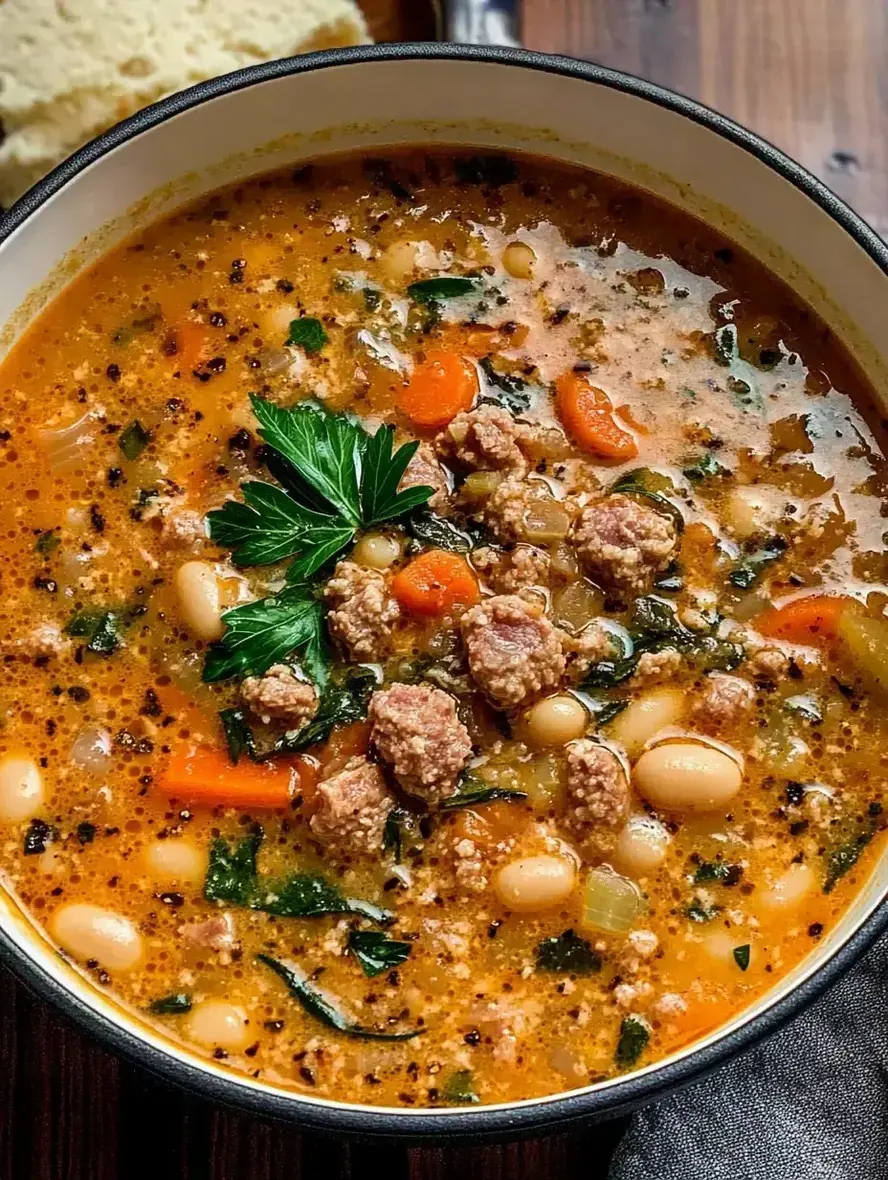
Did you know that a single serving of a well-crafted Tuscan White Bean Soup can provide over 15 grams of plant-based protein and 10 grams of fiber? This isn’t just any soup; it’s a nutritional powerhouse wrapped in the comforting embrace of Italian culinary tradition. As the days grow shorter and the air crisper, our cravings turn to meals that warm us from the inside out. This recipe for Tuscan White Bean Soup is the perfect one-pot comfort meal, masterfully blending creamy white beans, savory Italian sausage, and a garden of fresh vegetables in a rich, herb-infused broth. It’s the kind of dish that simmers on the stove, filling your kitchen with an aroma that promises satisfaction with every spoonful. Whether you’re feeding a hungry family on a busy weeknight or looking for a make-ahead lunch that actually excites you, this soup delivers on flavor, nutrition, and pure, unadulterated comfort.
Ingredients List
Gather these simple, flavorful ingredients to create your soup. I’ve included sensory notes and substitutions to make this recipe your own.
1 lb Italian Sausage (mild or hot, casings removed): Provides a savory, spiced foundation. For a lighter version, use turkey or chicken Italian sausage. For a vegetarian soup, substitute with 1 cup of chopped mushrooms and 1 tsp fennel seeds for that signature sausage flavor.
1 large Yellow Onion, diced: Sweetens as it cooks, forming the aromatic base.
3 Carrots, peeled and diced: Adds a subtle sweetness and vibrant orange color.
3 Celery Stalks, diced: The classic companion to carrots and onion (the “holy trinity” or “soffritto”) for depth.
4 Garlic Cloves, minced: Use fresh for the best pungent, aromatic kick.
2 (15 oz) cans Cannellini Beans, drained and rinsed: These are the star—creamy, buttery, and packed with protein. Great Northern beans are a perfect substitute.
1 (14.5 oz) can Diced Tomatoes, with their juices: Adds a bright, tangy acidity that balances the richness.
6 cups Chicken Broth (low-sodium recommended): The liquid gold. Vegetable broth works beautifully for a vegetarian version.
2 tsp Dried Oregano & 1 tsp Dried Thyme: The essential dried herbs for that rustic Tuscan flavor profile.
1 large bunch Kale or Swiss Chard, stems removed, leaves chopped: Adds a pop of green, earthy flavor, and vital nutrients. Spinach is a quicker-cooking alternative.
1/2 cup Heavy Cream or Half-and-Half: This is the secret to the luxuriously creamy broth. For dairy-free, use full-fat coconut milk or cashew cream.
Salt and Freshly Cracked Black Pepper to taste.
2 tbsp Olive Oil for sautéing.
For Serving: Grated Parmesan cheese, crusty bread, and a drizzle of good olive oil.
Timing
Prep Time 20 minutes
Cook Time 40 minutes
Total Time 1 hour
This Tuscan White Bean Soup comes together in about an hour, which is nearly 30% faster than many from-scratch bean soups that require overnight soaking and lengthy simmering. The use of canned beans is a brilliant time-saver without sacrificing quality. The active prep is minimal—mostly chopping—while the stove does the heavy lifting, making it an ideal candidate for a hands-off, flavorful weeknight dinner.
A steaming bowl of creamy Tuscan White Bean Soup, ready to warm your soul.
Step-by-Step Instructions
Step 1: Prep the Aromatics
Heat the olive oil in a large Dutch oven or heavy-bottomed pot over medium heat. While it warms, dice your onion, carrots, and celery. You want them in uniform, bite-sized pieces for even cooking. Add them to the pot and sauté for 6-8 minutes, stirring occasionally, until the onions become translucent and the vegetables just begin to soften. This step, called “sweating,” builds a foundational layer of sweetness. Now, add the minced garlic and cook for just 60 seconds more until fragrant—be careful not to let it burn!
Step 2: Brown the Sausage
Push the sautéed vegetables to the perimeter of the pot. Add the Italian sausage (removed from its casings) to the center. Use your spoon to break it up into crumbles. Let it cook undisturbed for 2-3 minutes to get a good sear, then stir and continue cooking until it’s browned all over and no longer pink, about 5-7 minutes total. That browning equals big flavor, so don’t rush it.
Step 3: Build the Soup Base
Sprinkle the dried oregano and thyme over the sausage and vegetable mixture. Stir to coat everything in the herbs, toasting them for about 30 seconds to unlock their oils. Now, pour in the diced tomatoes with their juices and use your spoon to scrape up any delicious browned bits stuck to the bottom of the pot—this is called deglazing, and it’s pure flavor gold.
Step 4: Simmer to Perfection
Add the drained and rinsed cannellini beans and the chicken broth to the pot. Give everything a good stir. Increase the heat to bring the soup to a lively simmer, then immediately reduce the heat to low-medium, cover the pot partially (leave a small crack), and let it simmer gently for 20-25 minutes. This allows the flavors to marry and the beans to become incredibly tender.
Step 5: Creamy Finish
After the simmer, stir in the chopped kale or Swiss chard. It will wilt down into the soup within 3-5 minutes. Now, for the luxurious touch: turn the heat to its lowest setting and slowly stir in the heavy cream or half-and-half. This addition transforms the broth from simply savory to velvety and rich. Do not let the soup boil after adding the cream, as it could curdle.
Step 6: Final Touches
Taste your masterpiece! This is the most important step. Season with salt and freshly cracked black pepper. Remember, the sausage, broth, and Parmesan for serving all contain salt, so start with a little and add more as needed. Let the soup sit, off the heat, for 5 minutes before serving to allow the flavors to fully settle.
Nutritional Information
(Approximate values per 1.5-cup serving, based on 6 servings)
Calories: 420 kcal
Protein: 22g
Carbohydrates: 32g
Dietary Fiber: 10g
Sugars: 6g
Fat: 24g (Saturated Fat: 9g)
Sodium: 980mg (varies with broth and sausage used)
Healthier Alternatives
Love the flavor but want to lighten it up? These swaps maintain the soul of the soup while boosting its nutritional profile:
Leaner Protein: Swap pork sausage for lean chicken or turkey Italian sausage. For a plant-based punch, use a plant-based sausage crumble or extra beans.
Cream Substitute: Instead of heavy cream, blend 1 cup of the cooked soup (beans and all) until smooth and stir it back in. This creates a naturally creamy, thick texture without added fat. Unsweetened almond milk or a splash of broth also work.
Boost the Veggies: Add a diced zucchini or a cup of frozen corn with the beans. You can also double the kale for an extra vitamin kick.
Control Sodium: Use no-salt-added canned beans and tomatoes, and opt for low-sodium or homemade broth. You can always add salt to taste at the end.
Serving Suggestions
This soup is a complete meal in a bowl, but the right accompaniments elevate it to a feast.
The Essential Bread: A thick slice of crusty, toasted sourdough or a warm, chewy ciabatta roll is non-negotiable for dipping into the creamy broth.
Cheese, Please: A generous shower of freshly grated Parmesan or Pecorino Romano cheese adds a salty, umami finish.
Fresh Herb Garnish: A sprinkle of chopped fresh parsley or basil just before serving adds a burst of color and freshness.
For a Heartier Meal: Serve alongside a simple arugula salad with a lemon vinaigrette to cut through the richness.
Common Mistakes
Boiling After Adding Cream: This is the #1 way to curdle your soup. Always add dairy at the very end over low heat and never let it boil.
Underseasoning: Beans and broth need help. Taste and season in layers—after browning the sausage, after adding the broth, and again at the end.
Overcooking the Greens: Add sturdy greens like kale towards the end so they retain a bit of texture and vibrant color. If using spinach, stir it in just before serving so it wilts but doesn’t turn to mush.
Not Rinsing the Beans: Always drain and rinse canned beans. This removes the starchy, salty canning liquid, giving you better control over the soup’s flavor and texture.
Storing Tips
This soup tastes even better the next day as the flavors continue to meld.
Refrigeration: Cool completely and store in an airtight container in the fridge for up to 4 days.
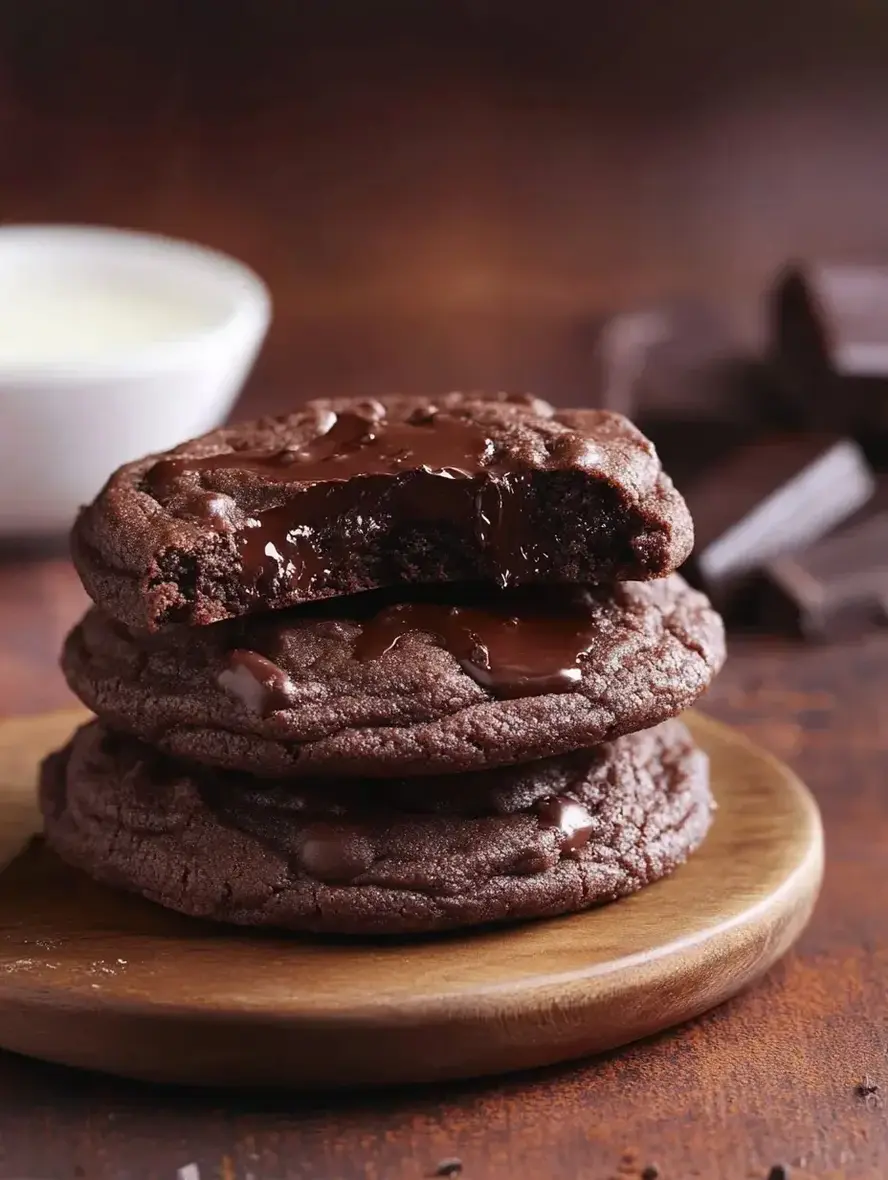
Did you know that over 60% of people list chocolate as their favorite dessert flavor? If you’re part of that majority, you’re in for a treat. These Chocolate Fudge Cookies are the ultimate answer to your deepest cocoa cravings. They’re not just cookies; they’re rich, decadent, melt-in-your-mouth experiences, packed with gooey chocolate chunks and boasting a texture that’s perfectly crisp on the outside and irresistibly fudgy within. This recipe is engineered for maximum chocolate impact, making it the perfect bake for holidays, gifts, or a simple act of self-love.
Introduction
What makes a cookie transcend from good to legendary? It’s the perfect balance of texture, flavor depth, and that unforgettable first bite. Our Chocolate Fudge Cookies achieve this by using a blend of cocoa powder and real chocolate chunks, creating a double chocolate punch that is both intense and satisfying. The secret to their fudgy center lies in the precise ratio of brown sugar to flour and a crucial chilling step that prevents overspreading. Unlike cakey or crunchy cookies, these are designed to be dense, moist, and rich—a true indulgence for dedicated chocolate lovers. Whether you’re a seasoned baker or a nervous novice, this guide will walk you through every step to ensure cookie perfection.
Ingredients List
Gathering high-quality ingredients is the first step to bakery-quality results. Here’s what you’ll need for about 18 large, decadent cookies:
1 cup (225g) Unsalted Butter, room temperature – The foundation for rich flavor and soft texture. It should be cool to the touch but yield to gentle pressure. Substitution: For a slightly nutty flavor, use browned butter, cooled to room temp.
1 cup (200g) Granulated Sugar – Provides sweetness and helps create a slight crispness on the cookie’s edges.
1 cup (220g) packed Dark Brown Sugar – The MVP for chewiness and fudgy depth. The molasses content adds moisture and a caramel-like note.
2 large Eggs + 1 Egg Yolk, room temperature – The extra yolk adds fat and richness without making the dough too cakey. Room temperature eggs emulsify better with the butter.
2 teaspoons Pure Vanilla Extract – Enhances all the chocolate flavors. Use the real stuff for the best aroma.
2 ¼ cups (280g) All-Purpose Flour – Spoon and level this to avoid a dry, dense cookie. It provides the necessary structure.
¾ cup (75g) Dutch-processed Cocoa Powder – This alkalized cocoa is less acidic, giving a darker color and smoother, more mellow chocolate flavor. Substitution: Natural cocoa powder can be used but may yield a lighter color and more intense, slightly tangy flavor.
1 teaspoon Baking Soda – The leavening agent that gives the cookies a little lift.
½ teaspoon Baking Powder – Works with the baking soda for balanced rise.
1 teaspoon Fine Sea Salt – Critical for balancing sweetness and making the chocolate flavors pop. Don’t skip it!
2 cups (340g) Semi-Sweet or Dark Chocolate Chunks – Chunks create glorious, uneven pockets of molten chocolate. Substitution: Use a mix of milk and dark chocolate chips, or chopped chocolate bars for superior melt.
Timing
Prep Time20 minutes (plus 1 hour chill)
Cook Time10-12 minutes per batch
Total Time~1 hour 40 minutes
While the total time is around 1 hour and 40 minutes, the active prep is only 20 minutes. The mandatory 1-hour chill is what sets this recipe apart from average chocolate cookie recipes that promise chew but deliver thin, crispy discs. This chilling time allows the flour to fully hydrate and the fats to solidify, resulting in a cookie that spreads less and retains its glorious, thick, fudgy center. It’s a non-negotiable step for texture perfection.
Freshly baked Chocolate Fudge Cookies with pools of melted chocolate.
Step-by-Step Instructions
Step 1: Prepare Your Dry Ingredients
In a medium bowl, whisk together the all-purpose flour, Dutch-processed cocoa powder, baking soda, baking powder, and fine sea salt. Whisk for at least 30 seconds to ensure the leavening agents and salt are evenly distributed throughout the flour. This prevents bitter pockets of baking soda and guarantees a uniform rise. Set this bowl aside.
Step 2: Cream Butter and Sugars
In the bowl of a stand mixer fitted with the paddle attachment (or using a large bowl and a hand mixer), combine the room-temperature butter, granulated sugar, and packed dark brown sugar. Beat on medium speed for 2-3 minutes. You’re not just mixing; you’re “creaming.” The goal is to incorporate air until the mixture becomes noticeably lighter in color and fluffy in texture. This aeration is key for a tender cookie crumb.
Step 3: Combine Wet and Dry
With the mixer on low, add the eggs and extra yolk one at a time, beating until each is fully incorporated before adding the next. Scrape down the sides of the bowl. Mix in the vanilla extract. Now, with the mixer on the lowest setting, gradually add the dry ingredient mixture. Mix only until the flour disappears. Overmixing at this stage develops gluten, which can lead to tough cookies.
Step 4: Fold in Chocolate Chunks
Remove the bowl from the mixer. Using a sturdy spatula, gently fold in the chocolate chunks. Ensure they are evenly distributed, but don’t overwork the dough. The dough will be thick, sticky, and intensely chocolatey.
Step 5: Scoop and Chill
Using a large cookie scoop (about 3 tablespoons), portion the dough onto a parchment-lined baking sheet. Do not flatten them. For the fudgiest results, cover the baking sheet tightly with plastic wrap and refrigerate for at least 1 hour, or up to 72 hours. This chilling is mandatory for flavor development and texture control.
Step 6: Bake to Perfection
Preheat your oven to 350°F (175°C). Line clean baking sheets with parchment paper. Place the chilled dough balls at least 3 inches apart to allow for spread. Bake for 10-12 minutes. The cookies are done when the edges look set and the centers are still soft, puffy, and slightly underbaked. They will have beautiful cracked tops. Remember, they continue to cook on the hot baking sheet.
Step 7: Cool and Serve
Let the cookies cool on the baking sheet for 10 minutes. This allows them to set enough to be moved without falling apart. Then, transfer them to a wire rack to cool completely—if you can wait! They are sublime slightly warm when the chocolate chunks are still gooey.
Nutritional Information
The following is an approximate nutritional breakdown per cookie (recipe makes 18):
Calories: 320 kcal
Total Fat: 16g
Saturated Fat: 10g
Carbohydrates: 42g
Fiber: 3g
Sugars: 28g
Protein: 4g
Healthier Alternatives
You can make mindful swaps without sacrificing the soul of this cookie:
Flour: Substitute up to 1/3 of the all-purpose flour with whole wheat pastry flour for added fiber.
Sugar: Replace 1/4 cup of the granulated sugar with coconut sugar for a lower glycemic index, though it will darken the cookie’s color.
Butter: Use avocado oil or melted coconut oil for a dairy-free version. The texture will be slightly more cakey.
Chocolate: Opt for sugar-free dark chocolate chunks or cacao nibs mixed with regular chunks to reduce added sugar while maintaining intense chocolate flavor.
Eggs: A flax egg (1 tbsp ground flax + 3 tbsp water per egg) can work, but expect a denser, less chewy result.
Serving Suggestions
À la Mode: Serve warm with a scoop of vanilla bean ice cream for the ultimate cookie sundae.
Dunkable: Pair with a glass of cold milk, a bold espresso, or a glass of red wine like Cabernet Sauvignon.
Gourmet Touch: Sprinkle with flaky sea salt right after baking, or drizzle with a simple peanut butter glaze.
Cookie Ice Cream Sandwich: Let cookies cool completely, then use them to sandwich your favorite ice cream flavor. Roll the edges in mini chocolate chips or crushed nuts.
Common Mistakes
Skipping the Chill: This leads to flat, greasy cookies that spread too much. The chill is non-negotiable.
Overmeasuring Flour: Scooping directly from the bag packs in too much flour, leading to dry, cakey cookies. Always spoon and level.
Overbaking: Taking them out when they look “done” in the oven will yield dry cookies. They should look underbaked in the center when you pull them out.
Using Cold Ingredients: Cold butter and eggs won’t emulsify properly, creating a curdled-looking dough that bakes unevenly.
Overmixing After Adding Flour: This develops gluten, making the cookies tough instead of tender.
Storing Tips
Room Temperature: Store completely cooled cookies in an airtight container at room temperature for up to 5 days. Place a piece of bread in the container to help retain moisture.
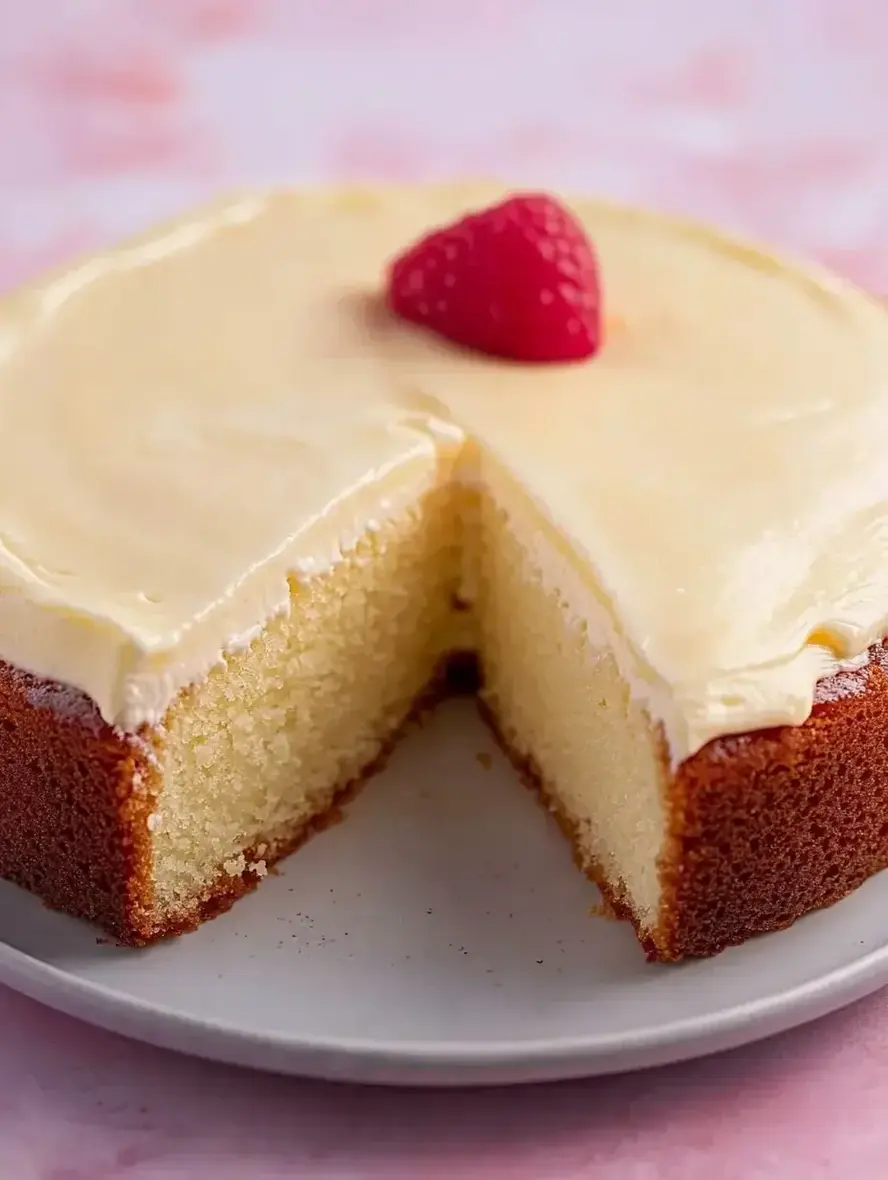
Did you know that adding a cultured dairy product like sour cream can increase the moisture retention of a cake by up to 30% compared to using milk alone? This simple fact is the secret behind the legendary texture of a classic sour cream cake. More than just a vanilla cake, this recipe transforms into something extraordinarily tender, rich, and velvety with the magic of sour cream. The tangy depth it provides perfectly balances the sweetness, creating a sophisticated flavor profile that’s far from one-dimensional. And when you crown it with a luscious, tangy sour cream frosting, you achieve a level of indulgence that’s hard to beat. This isn’t just a dessert; it’s a masterclass in using simple ingredients to create extraordinary results. Whether you’re a seasoned baker or a nervous novice, this guide will walk you through every step to ensure your sour cream cake is nothing short of spectacular.
Ingredients List
Gather these simple, high-quality ingredients. Using full-fat sour cream is non-negotiable for the best texture and flavor.
For the Sour Cream Cake:
2 ½ cups (315g) all-purpose flour – Spooned and leveled for accuracy. The foundation of our cake, providing structure.
2 teaspoons baking powder – The leavening agent that gives the cake its lift and airy crumb.
½ teaspoon baking soda – Reacts with the sour cream to ensure an even, tender rise.
½ teaspoon fine sea salt – Enhances all the flavors and balances the sweetness.
1 cup (226g) unsalted butter, room temperature – Should be soft to the touch for perfect creaming. This creates the cake’s rich, buttery flavor and tender mouthfeel.
1 ½ cups (300g) granulated sugar – Sweetens and, when creamed with butter, helps incorporate air.
3 large eggs, room temperature – Bind the batter and add richness and structure.
1 tablespoon pure vanilla extract – The star flavor. Use real vanilla for the best aromatic, warm notes.
1 cup (240g) full-fat sour cream, room temperature – The Secret Ingredient. Its fat content guarantees moisture, while its tang and acidity tenderize the gluten, resulting in an incredibly soft, velvety crumb that stays moist for days.
For the Sour Cream Frosting:
½ cup (113g) unsalted butter, room temperature – The base for a creamy, spreadable frosting.
3 ½ cups (420g) confectioners’ sugar, sifted – Sifting is crucial to avoid lumps and create a silky-smooth texture.
⅓ cup (80g) full-fat sour cream, cold – Using it cold helps stabilize the frosting. It provides a delightful tang that cuts through the sweetness.
1 teaspoon pure vanilla extract – Ties the frosting flavor to the cake.
Pinch of salt – Balances the intense sweetness of the frosting.
Substitutions: For a slightly different tang, you can use full-fat Greek yogurt in both the cake and frosting, though the frosting will be less stable. For a dairy-free version, use a high-fat, thick vegan sour cream alternative and plant-based butter. The results will be good, though the classic richness may vary.
Timing
Prep Time
20 minutes
Cook Time
30-35 minutes
Total Time
1 hour (plus cooling)
Compared to many elaborate layer cakes that can take over two hours from start to finish, this sour cream cake is remarkably efficient. The “one-bowl” mixing method (creaming butter and sugar, then alternating dry and wet ingredients) streamlines the process. The 20-minute active prep time is a fraction of what you’d spend on a fussy buttercream, making this an ideal recipe for a weeknight treat or a last-minute gathering. The majority of the “total time” is hands-off cooling, which is essential for a stable cake that won’t melt its frosting.
A slice of moist, tender sour cream cake with a generous swirl of tangy sour cream frosting.
Step-by-Step Instructions
Step 1: Prepare Your Pans and Oven
Preheat your oven to 350°F (175°C). This ensures a consistent temperature from the moment the batter goes in. Grease and flour two 8-inch round cake pans, or line them with parchment paper rounds. I like to do both for absolute guarantee of a clean release. Taking this extra minute now saves the heartache of a broken cake later.
Step 2: Cream the Butter and Sugar
In the bowl of a stand mixer fitted with the paddle attachment (or using a large bowl and a hand mixer), beat the softened butter and granulated sugar together on medium-high speed for 3-4 minutes. Don’t rush this! You want the mixture to become very pale, fluffy, and almost whipped. This step incorporates tiny air bubbles that are essential for the cake’s light texture.
Step 3: Incorporate Eggs and Vanilla
With the mixer on medium, add the eggs one at a time, beating well after each addition until fully incorporated. Scrape down the sides and bottom of the bowl. Add the vanilla extract and mix to combine. Adding eggs slowly prevents the batter from curdling and ensures a smooth, emulsified base.
Step 4: Combine Dry Ingredients
In a separate medium bowl, whisk together the flour, baking powder, baking soda, and salt. Whisking (or sifting) aerates the dry ingredients and evenly distributes the leavening agents, which prevents pockets of bitter baking soda in your finished cake.
Step 5: Add Sour Cream and Dry Mix
Reduce the mixer speed to low. Add about one-third of the dry ingredient mixture to the butter mixture, mixing until just combined. Follow with half of the sour cream. Repeat, ending with the final third of the dry ingredients. Mix only until the last streaks of flour disappear. Overmixing at this stage develops gluten, leading to a tough cake. The batter will be thick, creamy, and luxurious.
Step 6: Bake to Perfection
Divide the batter evenly between your prepared pans. Smooth the tops with a spatula. Bake for 30-35 minutes, or until a toothpick inserted into the center comes out clean or with a few moist crumbs (not wet batter). The cakes will be golden and will have just started to pull away from the sides of the pans. Avoid opening the oven door before the 25-minute mark to prevent collapse.
Step 7: Make the Sour Cream Frosting
While the cakes cool, make the frosting. In a clean mixer bowl, beat the softened butter on medium speed until smooth and creamy. Gradually add the sifted confectioners’ sugar, about a cup at a time, beating on low initially to avoid a sugar cloud, then increasing to medium. Once all sugar is incorporated, add the cold sour cream, vanilla, and salt. Beat on medium-high for 2-3 minutes until the frosting is very light, fluffy, and spreadable. If it seems too soft, you can chill it for 15 minutes.
Step 8: Cool and Frost
Let the cakes cool in their pans for 10 minutes, then run a knife around the edges and invert them onto a wire rack to cool completely. This is critical. Frosting a warm cake is a recipe for disaster—it will melt and slide right off. Once completely cool, place one layer on a serving plate. Spread a generous amount of frosting over the top. Place the second layer on top and frost the top and sides of the entire cake as desired.
Nutritional Information
The following is an approximate nutritional breakdown per serving (based on 12 slices).
Calories: 520 kcal
Total Fat: 25g
Saturated Fat: 15g
Cholesterol: 105mg
Sodium: 220mg
Total Carbohydrates: 72g
Dietary Fiber: 0.5g
Sugars: 55g
Protein: 5g
Healthier Alternatives
You can make thoughtful swaps to lighten this cake without sacrificing its iconic moist texture.
Reduce Sugar: Cut the granulated sugar in the cake to 1 cup (200g). The sour cream’s tang will shine through more, creating a more sophisticated, less cloying dessert.
Flour Swap: Substitute up to half of the all-purpose flour with white whole wheat flour for added fiber and a nuttier flavor that pairs well with the tang.
Frosting Adjustment: For the frosting, use Neufchâtel cheese (⅓ less fat than cream cheese) mixed with a smaller amount of sour cream and just enough confectioners’ sugar to sweeten. It will be tangier and less sweet, but still delicious.
Portion Control: Bake the batter in a 9×13 inch pan and serve as bars, eliminating the need for a thick layer of frosting between layers. A simple dusting of powdered sugar or a thin glaze works beautifully.
Serving Suggestions
This cake is sublime on its own, but a few accompaniments can elevate it to a show-stopping dessert.
Fresh Berries: A side of macerated strawberries, raspberries, or a mixed berry compote adds a fresh, juicy contrast to the rich cake.
Whipped Cream: A dollop of lightly sweetened whipped cream on the side adds an extra cloud-like texture.
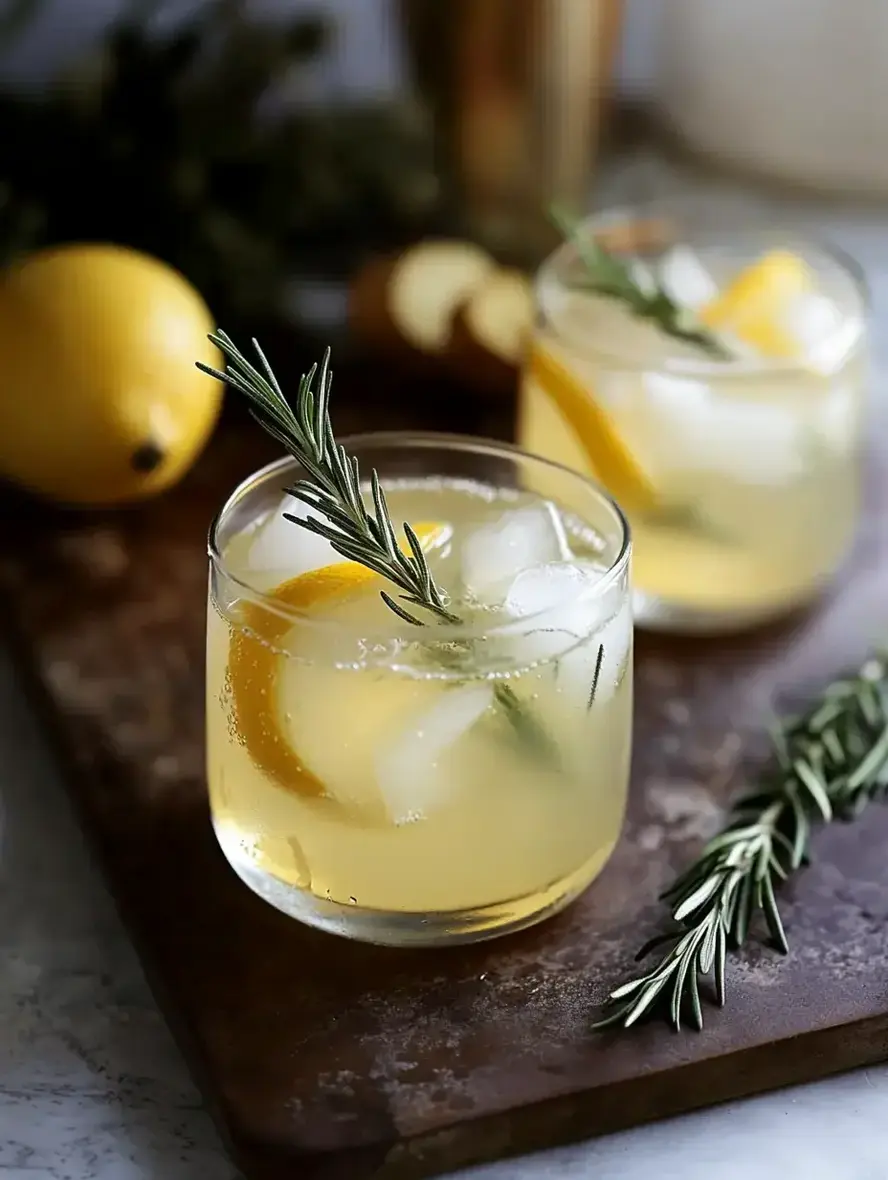
Did you know that a white wine spritzer is not only a classic summer cocktail but also a lower-alcohol, more hydrating choice compared to a full glass of wine? According to a 2023 beverage trend report, spritzers have seen a 40% surge in popularity as consumers seek lighter, more refreshing options for entertaining. This isn’t your average soda-and-wine mix. Our elevated version features a vibrant, homemade rosemary-ginger syrup that transforms a simple drink into a sophisticated, aromatic experience. Perfect for summer entertaining, this white wine spritzer balances the crisp acidity of Sauvignon Blanc with the herbal warmth of rosemary and the spicy kick of fresh ginger, all lifted by effervescent sparkling water. It’s the ultimate crowd-pleaser that looks stunning and tastes even better.
Ingredients List
This recipe is built in two parts: the signature syrup and the final assembly. Using fresh, high-quality ingredients is key to achieving that bright, complex flavor.
For the Rosemary-Ginger Syrup:
1 cup water – The base for our simple syrup.
1 cup granulated sugar – Creates a clear, sweet syrup that carries the flavors. Substitution: For a less refined option, use raw cane sugar which will add a slight caramel hue and flavor.
3-4 large sprigs of fresh rosemary – Look for vibrant green, fragrant sprigs. The piney, aromatic oils are essential. Substitution: 1 tablespoon of dried rosemary (though fresh is vastly superior for flavor).
1 (2-inch) piece of fresh ginger, thinly sliced – Don’t peel it! The skin adds extra pungency. You should smell a sharp, spicy aroma. Substitution: 1 teaspoon of ground ginger (use sparingly, as the flavor profile is different).
For Each Spritzer:
4 oz (120 ml) dry white wine – A Sauvignon Blanc or Pinot Grigio works beautifully, offering crisp citrus and green apple notes that don’t get lost. Substitution: A dry Riesling or Vinho Verde for a fruitier twist.
1 oz (30 ml) rosemary-ginger syrup – The star ingredient, providing a golden hue and layers of flavor.
2-3 oz sparkling water or club soda – The “spritz” factor. Use chilled, high-quality soda for the best bubbles.
Ice – Plenty of it, preferably large cubes that melt slowly.
Garnish: A fresh rosemary sprig, a thin slice of ginger, and/or a wheel of lemon or lime.
Timing
Prep Time 10 minutes
Cook Time 10 minutes (for syrup)
Total Time 20 minutes (plus cooling)
Compared to the average cocktail that requires shaking or multiple steps, this white wine spritzer is remarkably efficient. The active time is under 10 minutes for assembly. The only “cooking” is making the syrup, which takes about 10 minutes on the stove and another 30 minutes to cool completely. You can make the syrup days in advance, making final assembly faster than opening a beer. This makes it a perfect last-minute drink for unexpected guests or a scalable option for a party.
A beautifully presented White Wine Spritzer, showcasing the homemade rosemary-ginger syrup and fresh garnishes.
Step-by-Step Instructions
Step 1: Make the Rosemary-Ginger Syrup
This syrup is the secret weapon. In a small saucepan, combine the water, sugar, rosemary sprigs (lightly crush them in your hand first to release the oils), and the thinly sliced ginger. Bring the mixture to a gentle simmer over medium heat, stirring occasionally until the sugar is completely dissolved. Once dissolved, reduce the heat to low and let it simmer gently for 8-10 minutes. You’ll know it’s ready when the kitchen smells incredible—like a spicy, herbal tea—and the syrup has slightly thickened. Do not let it boil vigorously. Remove from heat and let it cool completely in the pan. This steeping time is crucial for maximum flavor infusion. Once cool, strain the syrup through a fine-mesh sieve into a clean jar or bottle, pressing gently on the solids to extract every last drop. Discard the rosemary and ginger. Your syrup is now ready to use and can be stored in the refrigerator.
Step 2: Assemble the Spritzer
Take a large wine glass or highball glass and fill it to the brim with fresh ice. I prefer one large cube to minimize dilution. Pour in 1 ounce of your homemade rosemary-ginger syrup. Listen for that satisfying *glug* as the golden syrup settles at the bottom. Next, pour in 4 ounces of your chosen chilled white wine. Watch as the wine and syrup begin to mingle, creating lovely swirls. Now, for the spritz: slowly top the glass with 2-3 ounces of very cold sparkling water. Pouring it down the side of the glass helps preserve more bubbles. The drink will become lively and effervescent.
Step 3: Garnish and Serve
This is where you make it Instagram-worthy. Give the drink one very gentle stir with a long spoon to integrate the syrup without knocking out all the carbonation. Take a fresh rosemary sprig and a thin slice of ginger. Clap the rosemary between your palms to bruise it slightly and release its aroma, then place it artfully in the glass. Add the ginger slice and a wheel of lemon or lime on the rim. Serve immediately while the bubbles are at their peak and the glass is frosty cold.
Nutritional Information
Per serving (approximate, using a standard dry white wine and 1 oz syrup):
Calories: ~150 kcal
Total Carbohydrates: 18 g
Sugars: 16 g (primarily from the natural sugar in the syrup)
Protein: 0 g
Fat: 0 g
Alcohol: ~9-10 g (roughly half that of a full 5 oz glass of wine)
Healthier Alternatives
Want to enjoy the flavor with a lighter footprint? Here are easy swaps:
Lower-Sugar Syrup: Reduce the sugar in the syrup to 3/4 cup or substitute with a monk fruit sweetener blend that measures 1:1 like sugar. The flavor from the rosemary and ginger is so strong, you won’t miss the full sweetness.
Reduce the Syrup: Use only 1/2 oz of syrup per drink. The wine and sparkling water will still carry the herbal notes.
Alcohol-Free Version: Substitute the white wine with a non-alcoholic Sauvignon Blanc or even a tart white grape juice mixed with a splash of lemon juice for acidity. The syrup and sparkling water will still create a fantastic “mocktail.”
Herbal Infusion Boost: Add a bag of caffeine-free herbal tea (like lemon or peach) to the hot syrup as it cools for an extra layer of flavor without calories.
Serving Suggestions
For a Crowd: Create a DIY spritzer bar! Set out a pitcher of the chilled syrup, a few bottles of different white wines (one crisp, one fruity), an ice bucket, assorted sparkling waters, and a beautiful board of garnishes (rosemary, citrus wheels, cucumber ribbons, fresh berries). Let guests build their own.
Food Pairings: The bright acidity and herbal notes pair wonderfully with light summer fare. Think grilled shrimp skewers, goat cheese crostini with honey, a fresh caprese salad, or spicy Thai chicken lettuce wraps.
Glassware: While a highball glass is classic, serve it in a large wine glass for elegance or a mason jar for a rustic picnic vibe.
Common Mistakes
Using a Sweet Wine: Pairing the syrup with an already sweet wine (like Moscato) will result in a cloyingly sweet drink. Always start with a dry, crisp white.
Overcooking the Syrup: Boiling the syrup too hard or too long can cause it to become too thick and can cook off the delicate volatile oils in the rosemary and ginger. A gentle simmer is key.
Stirring Too Vigorously: Once the sparkling water is added, aggressive stirring flattens the drink. A gentle stir or even just lifting the spoon up and down once is sufficient.
Warm Ingredients: Using room temperature wine or syrup will melt the ice quickly and dilute your drink. Ensure everything is thoroughly chilled before assembly.
Storing Tips
Rosemary-Ginger Syrup: Store in a sealed glass jar or bottle in the refrigerator for up to 2 weeks. The sugar acts as a preservative, but the fresh ingredients are best used within this timeframe.
Assembled Drink: Do not store pre-assembled spritzers. The bubbles will go flat. Always assemble just before serving.
Freezing Option: Pour leftover syrup into ice cube trays and freeze. Pop a syrup cube into a glass of sparkling water for an instant, single-serve flavored soda.
Conclusion
This White Wine Spritzer with homemade rosemary-ginger syrup is more than just a drink; it’s a statement of effortless summer style. It proves that with a little extra effort on one component—the syrup—you can elevate an entire category of cocktails. It’s versatile, scalable, and guaranteed to impress your guests with its sophisticated balance of flavors. The lower alcohol content also means you can enjoy a second glass without worry. So, shake up your summer entertaining routine and give this recipe a try.
Did you make this refreshing White Wine Spritzer? We’d love to see your creation! Tag @exorecipes on Instagram or share your experience and any creative twists you added in the comments below. What’s your favorite summer cocktail hack?
FAQs
Can I make the rosemary-ginger syrup ahead of time?
Absolutely! In fact, I recommend it. The syrup can be made up to two weeks in advance and stored in the refrigerator. This makes party hosting a breeze.
What’s the best white wine for a spritzer?
You want a dry, crisp white with good acidity. Sauvignon Blanc
Did you know that a slow-cooked lamb ragu can contain up to 50% more depth of flavor than a quick 30-minute sauce? This is the heart of our recipe today. If you’re craving a pasta dish that feels like a warm embrace, a rich, slow-cooked lamb ragu served over thick, silky pappardelle is the ultimate comfort food. Forget takeout—this homemade version is engineered to be better than restaurant quality, transforming simple ingredients into a complex, soul-satisfying meal through the magic of patience and low heat. The tender, shredded lamb melds with a robust tomato and red wine sauce, creating a texture and taste that simply can’t be rushed. Let’s dive into how you can create this culinary masterpiece in your own kitchen.
Ingredients List
Gathering high-quality ingredients is the first step to an unforgettable lamb ragu. Here’s what you’ll need, complete with sensory notes and smart substitutions.
For the Lamb Ragu:
2 lbs (900g) lamb shoulder, cut into 1-inch chunks (bone-in for more flavor, or boneless for ease). Substitution: Beef chuck or short ribs work beautifully for a different but equally rich profile.
2 tbsp olive oil – Use a good, fruity extra virgin olive oil for the best aromatic start.
1 large yellow onion, finely diced. It should smell sweet and pungent when raw.
2 medium carrots, finely diced (for a subtle sweetness and vibrant orange flecks in the finished sauce).
4 garlic cloves, minced. They should be firm and fragrant.
1/2 cup dry red wine (like a Chianti or Cabernet Sauvignon). Substitution: Use beef or lamb stock for an alcohol-free version, but the wine adds a wonderful tangy complexity.
1 (28-oz) can crushed San Marzano tomatoes. Their bright red color and low acidity are key. Substitution: High-quality passata or tomato puree.
2 tbsp tomato paste – for concentrated umami and a deeper red hue.
2 cups beef or lamb stock, preferably homemade or low-sodium.
2 sprigs fresh rosemary (woody and pine-like) and 3 sprigs fresh thyme (lemony and subtle). Substitution: 1 tsp each dried, but fresh is superior.
1 bay leaf – it should be whole and aromatic, not crumbled.
Salt and freshly cracked black pepper to taste.
For Serving:
1 lb (450g) dried pappardelle pasta. Look for thick, wide ribbons with a slightly rough texture to hold the sauce. Substitution: Tagliatelle, fettuccine, or even a sturdy rigatoni.
Freshly grated Pecorino Romano or Parmigiano-Reggiano cheese for serving (salty, nutty, and essential).
Fresh parsley, finely chopped (for a pop of green color and fresh flavor).
Timing
Great ragu isn’t fast food; it’s a labor of love. While the active prep time is standard, the extended cook time is what sets this recipe apart from average 45-minute pasta sauces, delivering unparalleled tenderness and flavor fusion.
Prep Time 25 minutes
Cook Time 3 hours 15 minutes
Total Time 3 hours 40 minutes
This investment yields 6 generous servings, making it perfect for a special family dinner or entertaining guests.
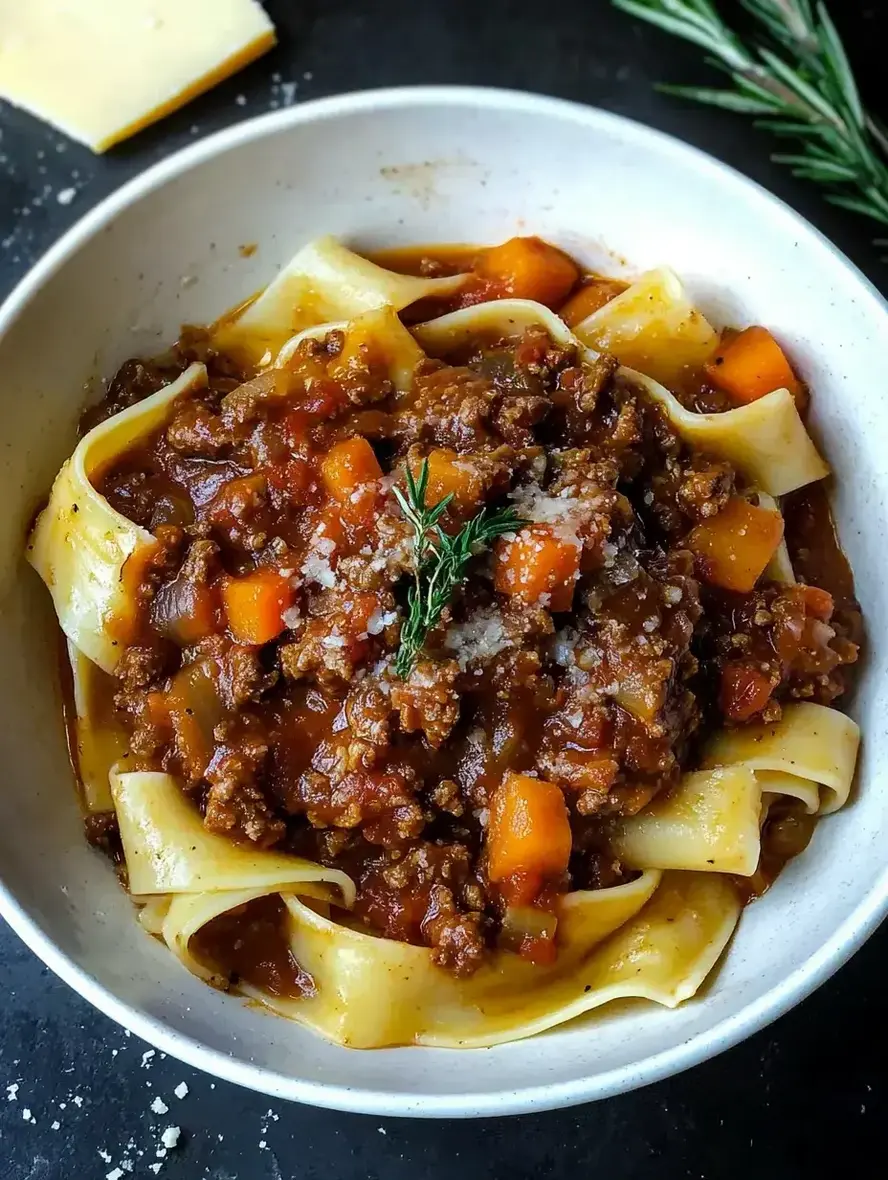
A rich, slow-cooked lamb ragu, perfectly coating wide ribbons of pappardelle pasta.
Step-by-Step Instructions
Step 1: Prepare the Lamb
Pat your lamb shoulder chunks completely dry with paper towels. This is non-negotiable—dry meat sears beautifully, while wet meat steams. Generously season all over with salt and pepper. In a large, heavy-bottomed Dutch oven or pot, heat the olive oil over medium-high heat until shimmering. Working in batches to avoid crowding, add the lamb and sear for 3-4 minutes per side until you achieve a deep, caramel-brown crust. This fond (the browned bits on the bottom of the pot) is pure flavor gold. Transfer the seared lamb to a plate and set aside.
Step 2: Build the Flavor Base
In the same pot with the lamb drippings, reduce the heat to medium. Add the diced onion, carrots, and celery (this trio is your soffritto). Cook, stirring occasionally, for 8-10 minutes until the vegetables have softened and the onions are translucent. They should smell incredibly sweet and savory. Add the minced garlic and cook for just one more minute until fragrant—be careful not to let it burn. Stir in the tomato paste and cook for another 2 minutes, allowing it to coat the vegetables and deepen in color.
Step 3: Cook the Sauce
Pour in the red wine to deglaze the pot, using a wooden spoon to scrape up all those delicious browned bits from the bottom. Let it simmer for 3-4 minutes until the wine has reduced by about half and the alcohol smell has cooked off. Now, return the seared lamb and any accumulated juices to the pot. Add the crushed tomatoes, beef stock, rosemary, thyme, and bay leaf. Give everything a good stir. Bring the mixture to a very gentle simmer, then immediately reduce the heat to low. Cover the pot with the lid slightly ajar. Let it cook, with just the occasional bubble breaking the surface, for a minimum of 2.5 to 3 hours. The lamb should be fork-tender and practically falling apart. In the final 30 minutes, remove the lid to allow the sauce to reduce and thicken slightly. Discard the herb sprigs and bay leaf. Use two forks to shred any large chunks of lamb directly in the pot. Taste and adjust seasoning with salt and pepper.
Step 4: Cook the Pasta
About 20 minutes before your ragu is finished, bring a large pot of generously salted water to a rolling boil. Add the pappardelle and cook according to package instructions until al dente—usually 1-2 minutes less than the suggested time. Reserve about 1 cup of the starchy pasta water before draining. Do not rinse the pasta.
Step 5: Serve and Enjoy
Add the drained pappardelle directly to the pot with the finished lamb ragu. Gently toss everything together, adding a splash of the reserved pasta water if needed to help the sauce cling to every ribbon of pasta. The starch in the water creates a silky, emulsified sauce that coats perfectly. Divide among warm bowls, and finish with a generous shower of freshly grated cheese and a sprinkle of chopped parsley.
Nutritional Information
The following estimates are for one serving (including pasta), based on 6 servings per recipe. Values are approximate.
Calories: ~680 kcal
Protein: 42g
Carbohydrates: 65g
Dietary Fiber: 6g
Sugars: 9g
Fat: 28g (Saturated Fat: 10g)
Sodium: ~850mg (varies with stock and cheese used)
Healthier Alternatives
You can lighten this dish without sacrificing its soulful character. Try these swaps:
Leaner Meat: Use lamb leg meat instead of shoulder for less fat, though it may be slightly less tender. You can also use a 50/50 mix of ground lamb and lean ground turkey.
Boost Veggies: Add a finely diced zucchini or a handful of chopped mushrooms to the soffritto to increase fiber and volume.
Whole Grain Pasta: Swap regular pappardelle for a whole wheat or legume-based version. The hearty sauce stands up well to their nutty flavor.
Reduce Sodium: Use no-salt-added canned tomatoes and a homemade, unsalted stock. You control the salt entirely.
Lighter Garnish: Opt for a modest sprinkle of a strong, aged cheese (so you use less) or a dollop of creamy ricotta instead of a heavy grating.
Serving Suggestions
This rich ragu is a complete meal, but a few thoughtful accompaniments can elevate the experience:
Bread: A crusty loaf of ciabatta or sourdough is mandatory for mopping up every last bit of sauce.
Salad: A simple arugula salad with a lemon vinaigrette provides a bright, peppery contrast to the rich pasta.
Wine Pairing: Serve with the same dry red wine used in the sauce—a Chianti Classico or a bold Sangiovese. For a white option, a full-bodied Chardonnay can work wonderfully.
For a Crowd: Present the ragu in the Dutch oven at the table for a family-style feast. Let everyone serve themselves for a cozy, interactive meal.
Common Mistakes
Skipping the Sear: Not browning the lamb adequately robs the sauce of foundational flavor. Be patient and get good color.
Rushing the Simmer: Cooking the ragu at too high a heat or for too short a time results in tough meat and a thin, acidic sauce. Low and slow is the law.
Overcooking the Pasta: Pappardelle cooked to mush will disintegrate under the weight of the sauce. Always aim for al dente.