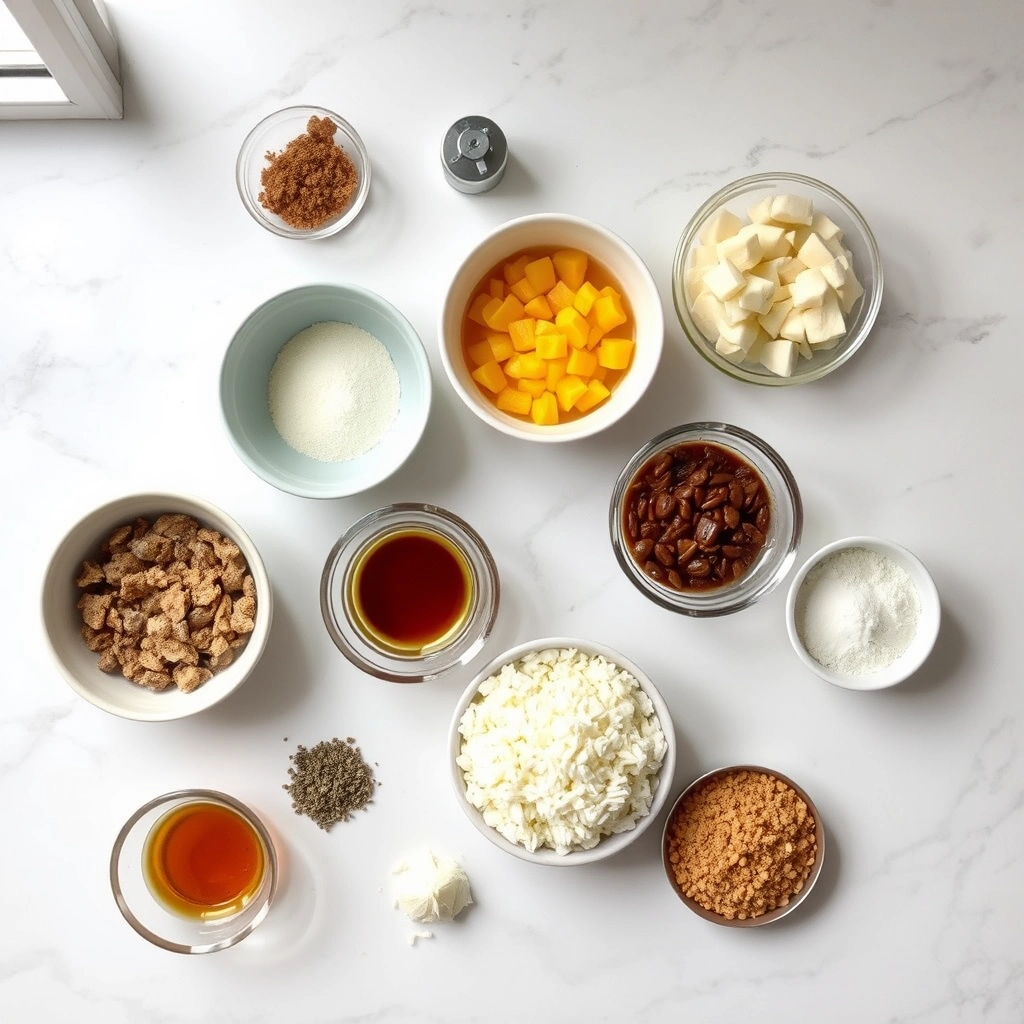
Picture this: a chilly evening, the crackle of a fireplace, and a glass of something warm, sweet, and just a little bit bold in your hand. That’s the magic of a Maple Bourbon Smash. Whether you’re winding down after a long day or hosting friends for a cozy gathering, this cocktail wraps you in comfort with its rich, autumnal flavors. Best of all, it’s simple enough to whip up in minutes but impressive enough to feel like a special treat. If you love cocktails that balance sweetness and depth, this one’s for you.
The Maple Bourbon Smash is a modern twist on classic whiskey cocktails, blending the smoky warmth of bourbon with the earthy sweetness of maple syrup. Unlike overly sugary mixed drinks, it lets the quality of the ingredients shine, making it a favorite among both casual sippers and cocktail enthusiasts. The addition of fresh citrus and herbs brightens the drink, creating a harmonious balance that’s perfect for fall and winter. Plus, it pairs beautifully with hearty dishes like our garlic herb roasted chicken or a simple apple pecan salad for a full seasonal experience.
What makes the Maple Bourbon Smash stand out is its versatility. You can tweak the maple-to-bourbon ratio to suit your taste, swap in different herbs, or even add a spicy kick with a dash of ginger. It’s a recipe that invites creativity while staying reliably delicious. For a blog like ours, which celebrates approachable yet elevated home cooking, this cocktail fits right in—offering big flavor without complicated techniques. Whether you’re a bourbon novice or a seasoned mixer, the Maple Bourbon Smash is a must-try.
Why I Love This Recipe
I’ll never forget the first time I tried a Maple Bourbon Smash at a rustic Vermont inn during peak foliage season. The drink captured the essence of fall in a glass, and I knew I had to recreate it at home. Now, it’s my go-to for holiday parties and quiet nights alike. There’s something deeply satisfying about the way the maple syrup melds with the bourbon, creating a drink that feels both indulgent and wholesome. Every sip brings back memories of crisp air, golden leaves, and good company—proof that the best recipes aren’t just about taste, but the moments they inspire.
Health and Nutrition
Why it’s good for your body
Maple Bourbon Smash packs a flavorful punch while offering surprising health perks. First, the natural sweetness of maple syrup provides antioxidants that help combat inflammation. Unlike refined sugar, maple syrup also delivers minerals like zinc and manganese, which support immunity and metabolism. Meanwhile, bourbon, when enjoyed in moderation, may promote heart health by improving circulation.
Additionally, the citrus in Maple Bourbon Smash adds a dose of vitamin C, boosting collagen production and skin health. Fresh lemon or orange juice also aids digestion and alkalizes the body. Furthermore, the herbs often used in this cocktail, like mint or thyme, contain essential oils that reduce bloating and freshen breath.
Finally, Maple Bourbon Smash strikes a balanced profile. The maple syrup’s slow-releasing energy prevents sugar crashes, while the bourbon’s warmth relaxes muscles. Together, these ingredients create a drink that satisfies cravings without derailing wellness goals. Whether you sip it socially or unwind with it after a long day, Maple Bourbon Smash brings both flavor and function.
How it fits in a healthy lifestyle
Maple Bourbon Smash fits seamlessly into a mindful eating plan. For gluten-free diets, it’s a safe choice since bourbon distilled from corn or rye contains no gluten. If you’re watching sugar intake, opt for a lighter pour of maple syrup or try a low-sugar cocktail alternative for similar vibes.
This drink also pairs well with heart-healthy habits. The antioxidants in maple syrup and citrus support cardiovascular wellness, especially when balanced with nutrient-rich meals. For a satisfying evening treat, enjoy it alongside protein-packed snacks to keep energy steady. Remember, moderation is key—savor Maple Bourbon Smash as part of a varied diet, and it becomes a delightful way to toast to your health.
A refreshing and slightly sweet bourbon cocktail with maple syrup and citrus flavors.
Ingredients
Scale
For the Crust:
2 oz bourbon
1 oz fresh lemon juice
1/2 oz pure maple syrup
3–4 fresh mint leaves
Club soda
Ice cubes
Lemon wheel and mint sprig for garnish
Instructions
1. Prepare the Crust:
In a cocktail shaker, muddle the mint leaves with the maple syrup.
Add bourbon, lemon juice, and ice to the shaker. Shake well until chilled.
Strain into a glass filled with ice.
Top with a splash of club soda.
Garnish with a lemon wheel and mint sprig.
Notes
You can customize the seasonings to taste.
How to Prepare This Dish
Steps and time-saving tips
Start by gathering all your ingredients for the Maple Bourbon Smash to streamline the process. First, fill a cocktail shaker halfway with ice, then pour in two ounces of bourbon. Add one ounce of pure maple syrup for that rich, autumnal sweetness. Squeeze in half a lemon for brightness, and if you want a deeper citrus note, toss in a few dashes of orange bitters. Shake vigorously for about 15 seconds—this not only chills the drink but also ensures everything blends perfectly. Meanwhile, take a chilled glass and fill it with fresh ice. Strain the mixture into the glass, then top it off with a splash of club soda for a refreshing fizz. Garnish with a lemon wheel or a cinnamon stick for an elegant touch. To save time, prep your maple syrup and lemon juice ahead of time and store them in the fridge. If you’re hosting, batch the bourbon, maple syrup, and lemon juice in a pitcher, then add club soda just before serving to keep the bubbles lively.
Mistakes I’ve made and learned from
When I first made the Maple Bourbon Smash, I underestimated the importance of using pure maple syrup. The artificial stuff left a weird aftertaste and didn’t meld well with the bourbon. After switching to the real deal, the drink transformed—smooth, balanced, and utterly sippable. Another hiccup? Over-shaking. I once got overzealous and ended up with a watery cocktail. Now, I stick to 15 seconds max. If you’re new to bourbon cocktails, check out my guide on bourbon basics to pick the right bottle. And if you love this recipe, you’ll adore my fall cocktail roundup for more seasonal sips. Trust me, learning these lessons the hard way means you don’t have to!
The Maple Bourbon Smash whispers stories of cozy autumn evenings and winter gatherings, blending the warmth of bourbon with the earthy sweetness of maple. Originally inspired by classic whiskey smashes, this drink evolved in North America, where maple syrup became a natural pairing for bourbon’s rich caramel notes. In the South, bartenders might add a splash of peach liqueur, while New Englanders often lean into cranberry for a tart twist. Meanwhile, my family’s version always includes a cinnamon stick—because nothing says “holiday cheer” like that spicy aroma mingling with the Maple Bourbon Smash.
Across the pond, you’ll find British variations swapping maple for honey or black treacle, creating a deeper, molasses-like flavor. In Japan, some mixologists infuse the drink with yuzu for a citrusy kick. No matter where it’s served, the Maple Bourbon Smash adapts beautifully, reflecting local tastes while keeping its comforting soul. Whether you’re sipping it fireside or toasting at a summer BBQ, this drink carries a little piece of wherever—and whoever—made it.
ays-cooking">How it fits in today’s cooking
Today, the Maple Bourbon Smash shines as a versatile star, equally at home in holiday spreads and weeknight wind-downs. Modern cooks love it for its simplicity—just a few ingredients, yet endlessly customizable. Some swap bourbon for smoky mezcal, while others riff on the maple syrup with infused versions like vanilla or chili. It’s also a hit at brunch, especially when paired with fluffy pancakes or drizzled over cinnamon roll bakes.
Seasonal trends keep it fresh, too. In fall, apple cider joins the mix, and come summer, muddled berries steal the spotlight. Whether you’re hosting a party or just craving a nightcap, the Maple Bourbon Smash fits right in—proof that some classics only get better with time.
Taste and Texture
What makes it delicious
The Maple Bourbon Smash delights with a rich, smoky sweetness that lingers on the palate. First, the bourbon brings a warm, caramel-like depth, while real maple syrup adds a velvety smoothness. Fresh citrus juice brightens each sip, balancing the drink with a zesty tang. Meanwhile, muddled mint leaves release a cool, fragrant aroma that elevates every sip. The texture? Perfectly crisp yet slightly syrupy, making the Maple Bourbon Smash irresistibly refreshing. Whether served over ice or shaken, it’s a cocktail that feels as luxurious as it tastes.
r">Boosting the flavor
For an extra layer of complexity, try swapping maple syrup with a spiced version or adding a dash of cinnamon. A smoky salt rim enhances the bourbon’s depth, while a splash of ginger beer introduces a fizzy kick. If you love bold flavors, pair your Maple Bourbon Smash with smoked paprika honey glaze drizzled over appetizers. For a fruity twist, muddle in blackberries or top with a vanilla balsamic reduction. Small tweaks can transform this cocktail into a personalized masterpiece.
Tips for Success
Best practices for results
Always use fresh citrus for your Maple Bourbon Smash to ensure bright, vibrant flavors. Meanwhile, chill your glass beforehand to keep the drink refreshingly cold. For the best balance, measure the bourbon and maple syrup precisely—too much sweetness can overpower the cocktail. Additionally, gently muddle the mint leaves to release their aroma without bruising them too harshly. Finally, use large, clear ice cubes to slow dilution and maintain the Maple Bourbon Smash’s bold flavor.
>Mistakes to avoid
Avoid over-packing the mint when muddling, as this can make the Maple Bourbon Smash bitter. Instead, lightly press the leaves to extract just the right amount of flavor. Another common mistake is skipping the simple syrup—maple syrup alone may not blend smoothly, so check out our homemade simple syrup guide for a foolproof solution. Also, never use stale ice, as it can add freezer odors to your drink. For more cocktail-making essentials, explore our bar tools for beginners to elevate your mixing game.
Serving and Pairing Suggestions
How to serve this dish
Serve the Maple Bourbon Smash in a chilled copper mug or a rocks glass to keep it refreshingly cool. For a festive touch, rim the glass with maple sugar and garnish with a cinnamon stick or a twist of orange peel. Meanwhile, this cocktail shines at holiday gatherings, but it also makes a delightful brunch companion when paired with sweet or savory dishes. If you want to impress guests, layer the ingredients carefully to create a beautiful gradient effect before stirring.
What goes well with it
Pair the Maple Bourbon Smash with spiced nuts or a charcuterie board for a balanced mix of sweet and savory flavors. The smoky notes in the bourbon also complement our Smoked Gouda Mac and Cheese, creating a cozy, indulgent meal. For dessert, try it alongside our Cinnamon Roll Bundt Cake, as the warm spices echo the cocktail’s maple-cinnamon undertones. Finally, a crisp apple cider or cold brew coffee makes a great non-alcoholic alternative.
A Maple Bourbon Smash is a refreshing cocktail made with bourbon, fresh lemon juice, maple syrup, and muddled mint. It’s a sweet and tangy drink with a hint of herbal freshness, perfect for sipping year-round. The maple syrup adds a rich depth that pairs beautifully with the bourbon.
How do you make a Maple Bourbon Smash?
To make a Maple Bourbon Smash, muddle fresh mint and lemon slices in a shaker, then add bourbon, maple syrup, and ice. Shake well, strain into a glass over crushed ice, and garnish with a mint sprig. Adjust the maple syrup to taste for your preferred sweetness level.
ank-math-faq-item">
What type of bourbon works best for a Maple Bourbon Smash?
A mid-range bourbon with caramel or vanilla notes complements the Maple Bourbon Smash well. Brands like Buffalo Trace or Maker’s Mark work great, but avoid overly smoky or high-proof bourbons that might overpower the maple and citrus flavors. The goal is a balanced cocktail where all ingredients shine.
Can I make a non-alcoholic version of a Maple Bourbon Smash?
Yes! For a mocktail version, replace the bourbon with apple cider or a bourbon-flavored non-alcoholic spirit. Keep the maple syrup, lemon, and mint for that signature Maple Bourbon Smash flavor profile. You’ll still get the refreshing sweetness without the alcohol.
Best Hearty Vegan Stew – Comforting & Flavorful
Introduction
There’s something deeply comforting about a bowl of Hearty Vegan Stew—especially when the weather turns chilly or you simply crave a nourishing meal that hugs your soul. Whether you’re a longtime plant-based eater or just dipping your toes into vegan cooking, this stew delivers rich flavors, wholesome ingredients, and that unmistakable feeling of home. Plus, it’s incredibly forgiving, so you can tweak it to your taste without missing a beat. Let’s dive into why this dish deserves a spot in your recipe rotation.
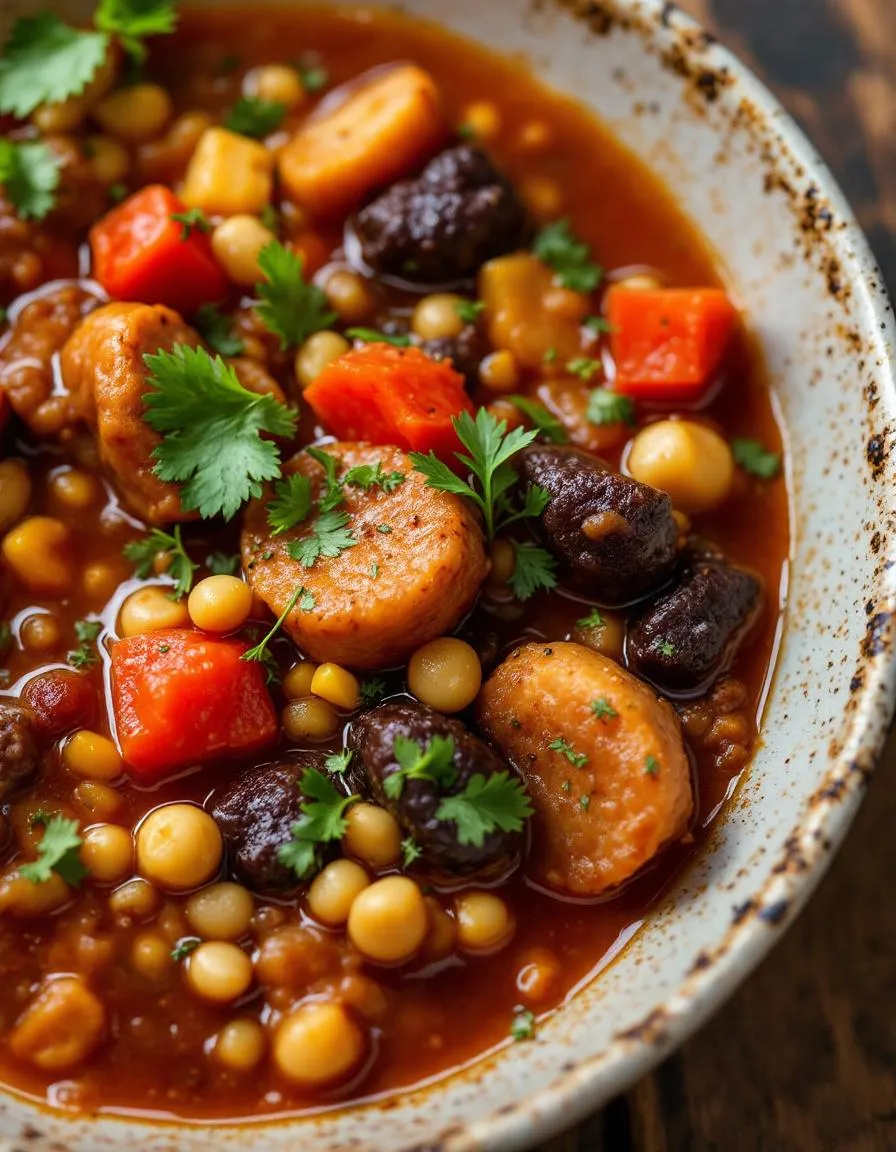
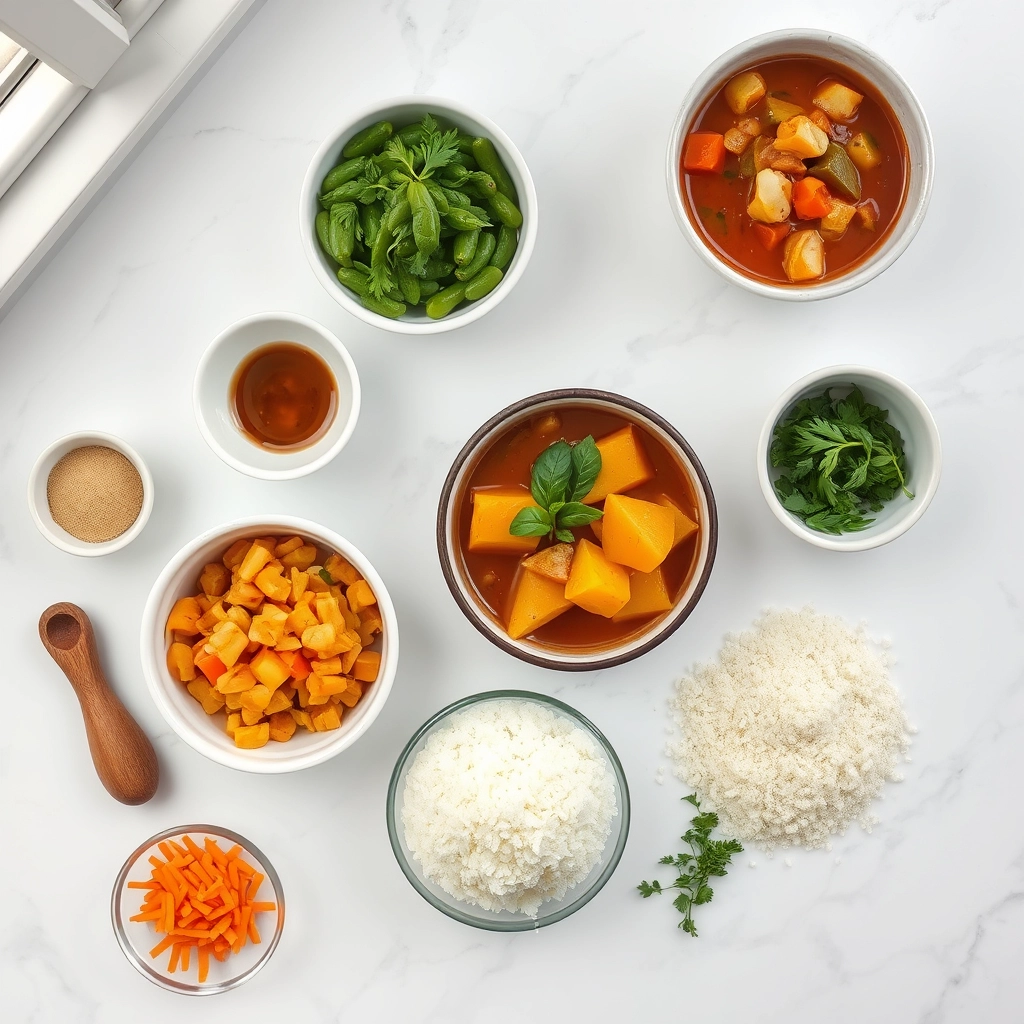
Hearty Vegan Stew is a robust, vegetable-packed dish that simmers tender chunks of potatoes, carrots, and legumes in a savory, herb-infused broth. Unlike many vegan recipes that rely on processed substitutes, this stew celebrates whole foods, making it both nutritious and satisfying. For busy weeknights or meal prep, it’s a lifesaver—just toss everything into one pot and let the flavors meld. If you love cozy meals, you’ll appreciate how it pairs perfectly with crusty bread or fluffy quinoa, like our Garlic Herb Quinoa. What sets it apart? It’s not just about skipping meat; it’s about building layers of taste with smoky paprika, umami-rich tomatoes, and hearty beans. Whether you’re cooking for a family or prepping lunches, this stew fits seamlessly into any plan. And if you’re exploring more plant-based comfort food, our Creamy Vegan Mushroom Soup is another must-try.
Why I Love This Recipe
This Hearty Vegan Stew holds a special place in my kitchen because it’s the dish that won over my skeptical carnivore friends. Years ago, I served it at a winter gathering, and no one even missed the meat—they just asked for seconds. The way the spices bloom in the pot, the tenderness of the veggies, and the sheer simplicity of it all remind me why cooking should be joyful, not complicated. Every time I make it, I tweak something new—a splash of balsamic, extra kale—but the soul of the stew always stays the same: warm, welcoming, and utterly delicious.
Health and Nutrition
Why it’s good for your body
Hearty Vegan Stew packs a nutritious punch with every spoonful. First, it’s loaded with fiber-rich vegetables like carrots, celery, and potatoes, which support digestion and keep you full longer. Additionally, the legumes in this stew provide plant-based protein, helping to maintain muscle health without relying on animal products. Because it’s vegan, Hearty Vegan Stew also naturally avoids cholesterol, making it a heart-smart choice.
Moreover, the tomatoes and leafy greens in this dish deliver a boost of antioxidants, which fight inflammation and protect your cells. Transitioning to a meal like Hearty Vegan Stew can also help you reduce saturated fat intake while still enjoying deep, satisfying flavors. Furthermore, the spices and herbs not only enhance taste but also offer anti-inflammatory benefits, like turmeric or garlic.
Finally, this stew is a fantastic source of vitamins and minerals, including iron from the lentils and vitamin C from the tomatoes. Whether you’re looking to improve your energy levels or simply eat more whole foods, Hearty Vegan Stew makes it easy. With its balanced ingredients, it’s a meal that truly nourishes from the inside out.
How it fits in a healthy lifestyle
Hearty Vegan Stew fits seamlessly into a balanced diet, whether you’re plant-based or just aiming to eat more veggies. It’s naturally gluten-free, making it a great option for those with sensitivities, and its low sodium content supports heart health. If you’re meal prepping, this stew stores well and reheats beautifully, so you can enjoy it throughout the week without sacrificing nutrition.
For anyone focusing on weight management, the high fiber and protein content help curb cravings and stabilize blood sugar. Pair it with a slice of gluten-free bread for a complete meal, or serve it alongside a fresh salad for extra crunch. If you’re exploring more plant-based recipes, check out our guide to vegan meal prep for easy ways to incorporate dishes like this into your routine. Hearty Vegan Stew proves that eating well doesn’t mean skipping flavor or satisfaction.
A rich and flavorful vegan stew packed with vegetables and plant-based protein.
Ingredients
Scale
For the Crust:
2 tbsp olive oil
1 large onion, diced
3 cloves garlic, minced
2 carrots, chopped
2 celery stalks, chopped
1 bell pepper, diced
1 cup mushrooms, sliced
1 can (15 oz) diced tomatoes
4 cups vegetable broth
1 can (15 oz) chickpeas, drained and rinsed
1 cup green lentils, rinsed
1 tsp smoked paprika
1 tsp dried thyme
Salt and pepper to taste
Instructions
1. Prepare the Crust:
Heat olive oil in a large pot over medium heat. Add onion and garlic, sauté until fragrant.
Add carrots, celery, bell pepper, and mushrooms. Cook until vegetables begin to soften.
Stir in diced tomatoes, vegetable broth, chickpeas, lentils, smoked paprika, and thyme.
Bring to a boil, then reduce heat to low. Cover and simmer for 25-30 minutes until lentils are tender.
Season with salt and pepper to taste before serving.
Notes
You can customize the seasonings to taste.
How to Prepare This Dish
Steps and time-saving tips
Start by heating a large pot over medium heat and drizzling in a tablespoon of olive oil. Once the oil shimmers, toss in diced onions, carrots, and celery, stirring frequently until they soften—about 5 minutes. Next, add minced garlic and cook for another minute until fragrant. Sprinkle in your favorite herbs, like thyme and rosemary, to layer flavor early. Then, pour in vegetable broth and toss in cubed potatoes, chopped tomatoes, and rinsed lentils. Bring everything to a gentle boil before reducing the heat to a simmer. Cover the pot and let the Hearty Vegan Stew cook for 25-30 minutes, stirring occasionally to prevent sticking. Meanwhile, whisk together a quick cornstarch slurry if you prefer a thicker broth, then stir it in during the last 5 minutes. For a time-saving hack, prep your veggies the night before or use pre-cut options from the store. Finally, taste and adjust the seasoning with salt and pepper before serving hot with crusty bread.
Mistakes I’ve made and learned from
I once rushed the sautéing step, thinking skipping a few minutes wouldn’t matter—big mistake! The onions and carrots didn’t caramelize properly, leaving the Hearty Vegan Stew lacking depth. Now, I patiently let them soften and brown slightly for richer flavor. Another blunder? Overcrowding the pot with lentils, which turned mushy. I’ve since learned to measure them precisely and rinse well to avoid excess starch. If you’re new to plant-based cooking, my guide on vegan pantry staples helps avoid last-minute scrambles. And if your stew turns out too thin, don’t panic! My thickening soups naturally post has easy fixes. Trust me, a little patience and prep go a long way.
Hearty Vegan Stew carries the warmth of generations, blending humble ingredients into a dish that feels like home. Originally, it drew inspiration from rustic European peasant cooking, where root vegetables and legumes stretched scarce resources into nourishing meals. Over time, cultures worldwide adapted it—think Moroccan tagines with chickpeas and apricots or West African peanut stews bursting with bold spices. Even in my family, we tweak the recipe depending on the season, adding smoky paprika in winter or fresh summer squash when the garden overflows.
What makes Hearty Vegan Stew so special is its flexibility. In the Mediterranean, cooks might stir in olives and sun-dried tomatoes, while in Japan, miso and seaweed add umami depth. Some versions keep it chunky and thick, while others simmer it longer for a silky, brothier consistency. No matter the variation, the soul of the dish remains the same: comfort in a bowl, meant to be shared.
ays-cooking">How it fits in today’s cooking
Today, Hearty Vegan Stew fits perfectly into modern kitchens, whether you’re meal-prepping for the week or hosting a cozy dinner party. It’s a star during fall and winter, but lightened-up versions with spring peas or zucchini make it year-round friendly. Busy cooks love that it’s freezer-friendly, and many adapt it for Instant Pots or slow cookers. Plus, it’s a hit at potlucks—pair it with fluffy vegan cornbread for the ultimate comfort combo.
Beyond practicality, this stew connects us to mindful eating. It’s a gateway for exploring plant-based cooking, much like our guide on easy vegan substitutes helps beginners transition smoothly. Whether you’re honoring tradition or experimenting with global flavors, Hearty Vegan Stew proves that simple ingredients can tell a delicious story.
Taste and Texture
What makes it delicious
Hearty Vegan Stew wraps you in warmth with its rich, savory depth and earthy aroma. Each spoonful bursts with umami from mushrooms, sweetness from caramelized onions, and a hint of smokiness from paprika. Tender chunks of potatoes and carrots melt in your mouth, while lentils add a satisfying, slightly chewy texture. Meanwhile, fresh herbs like thyme and rosemary infuse every bite with fragrant, garden-fresh notes. Hearty Vegan Stew isn’t just filling—it’s a cozy, flavor-packed hug in a bowl.
r">Boosting the flavor
Elevate your Hearty Vegan Stew by stirring in a spoonful of miso paste for extra umami or a splash of balsamic vinegar for tangy brightness. For a creamy twist, swirl in coconut milk or top with crunchy garlic croutons. If you love heat, add a pinch of red pepper flakes or serve with a drizzle of spicy cashew dressing. Experiment with smoked sea salt or a squeeze of lemon to wake up the flavors—every tweak makes this stew even more irresistible.
Tips for Success
Best practices for results
Always sauté your onions and garlic first to build flavor for your Hearty Vegan Stew. Use a heavy-bottomed pot to distribute heat evenly and prevent burning. Stir occasionally while simmering to ensure the ingredients cook uniformly. For the best texture, chop your vegetables into similar-sized pieces so they finish cooking at the same time. Finally, let the stew rest for 10 minutes before serving to allow the flavors to meld.
>Mistakes to avoid
Avoid rushing the cooking process by cranking up the heat, as this can make your Hearty Vegan Stew too watery or cause sticking. Instead, simmer it gently for the best consistency. Also, don’t skip deglazing the pot after sautéing—this step adds depth to the broth. For more on balancing flavors, check out our guide to vegan seasoning tips. Lastly, resist overloading the pot with ingredients, as overcrowding can lead to uneven cooking. Learn how to adjust portions properly with our vegan meal prep strategies.
Serving and Pairing Suggestions
How to serve this dish
For a cozy family dinner, ladle Hearty Vegan Stew into deep bowls and top it with fresh parsley or a sprinkle of smoked paprika. Meanwhile, if you’re hosting a casual gathering, serve it in rustic bread bowls for a fun, edible presentation. During colder months, this stew shines as the star of holiday potlucks or Sunday meal prep. To elevate its visual appeal, garnish with a swirl of coconut yogurt or a handful of toasted pumpkin seeds for extra texture.
What goes well with it
Pair Hearty Vegan Stew with crusty sourdough bread or fluffy vegan dinner rolls to soak up every last drop of its rich broth. For a refreshing contrast, serve it alongside a crisp green salad with lemon-tahini dressing. Additionally, a glass of earthy red wine or spiced apple cider enhances the stew’s warm flavors. If you love dipping sauces, try our creamy avocado dip for a cool, tangy twist.
What are the best vegetables to use in a hearty vegan stew?
Root vegetables like carrots, potatoes, and parsnips work wonderfully in a hearty vegan stew, as they hold their shape and add texture. For extra depth, include mushrooms, celery, and onions—they create a rich umami flavor that complements the stew’s heartiness.
Can I make a hearty vegan stew in a slow cooker?
Absolutely! A slow cooker is perfect for a hearty vegan stew—just add all ingredients and cook on low for 6-8 hours. The long simmering time helps meld flavors and tenderize vegetables, resulting in a deeply satisfying dish.
ank-math-faq-item">
How do I thicken my hearty vegan stew without flour?
For a gluten-free option, mash some of the cooked potatoes or blend a portion of the stew to create natural thickness. Alternatively, add lentils or a spoonful of tomato paste to enhance the hearty vegan stew’s texture.
Is hearty vegan stew freezer-friendly?
Yes! Hearty vegan stew freezes exceptionally well—just cool it completely before transferring to airtight containers. It keeps for up to 3 months, making it a great meal-prep option for busy weeks.
Easy Protein Banana Pudding – Quick & Healthy Dessert
Introduction
Craving a dessert that’s both indulgent and nourishing? Easy Protein Banana Pudding delivers the creamy, dreamy sweetness you love with a protein-packed twist. Whether you’re refueling after a workout or simply treating yourself to a guilt-free delight, this recipe proves that healthy eating doesn’t mean sacrificing flavor. Plus, it comes together in minutes—no baking required! If you’re as obsessed with effortless, wholesome desserts as I am, you’ll adore this spin on a classic.
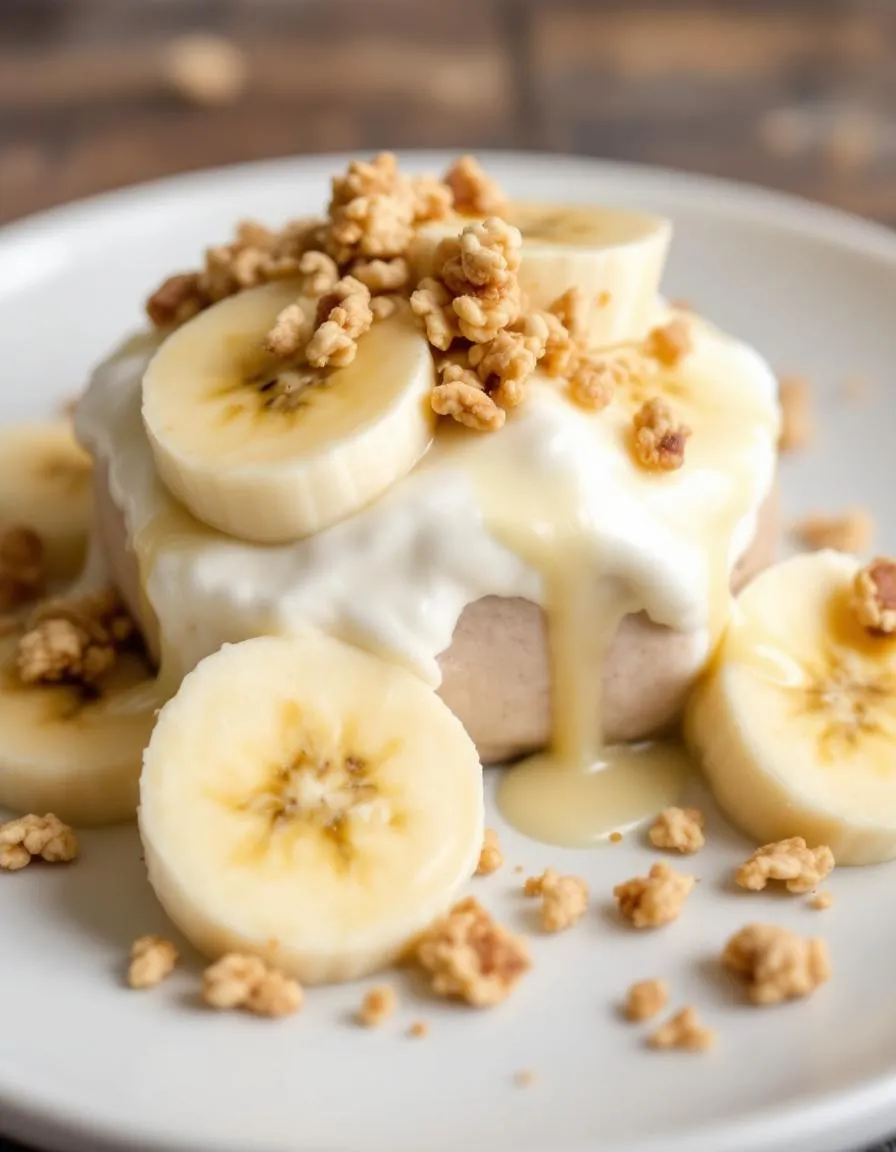
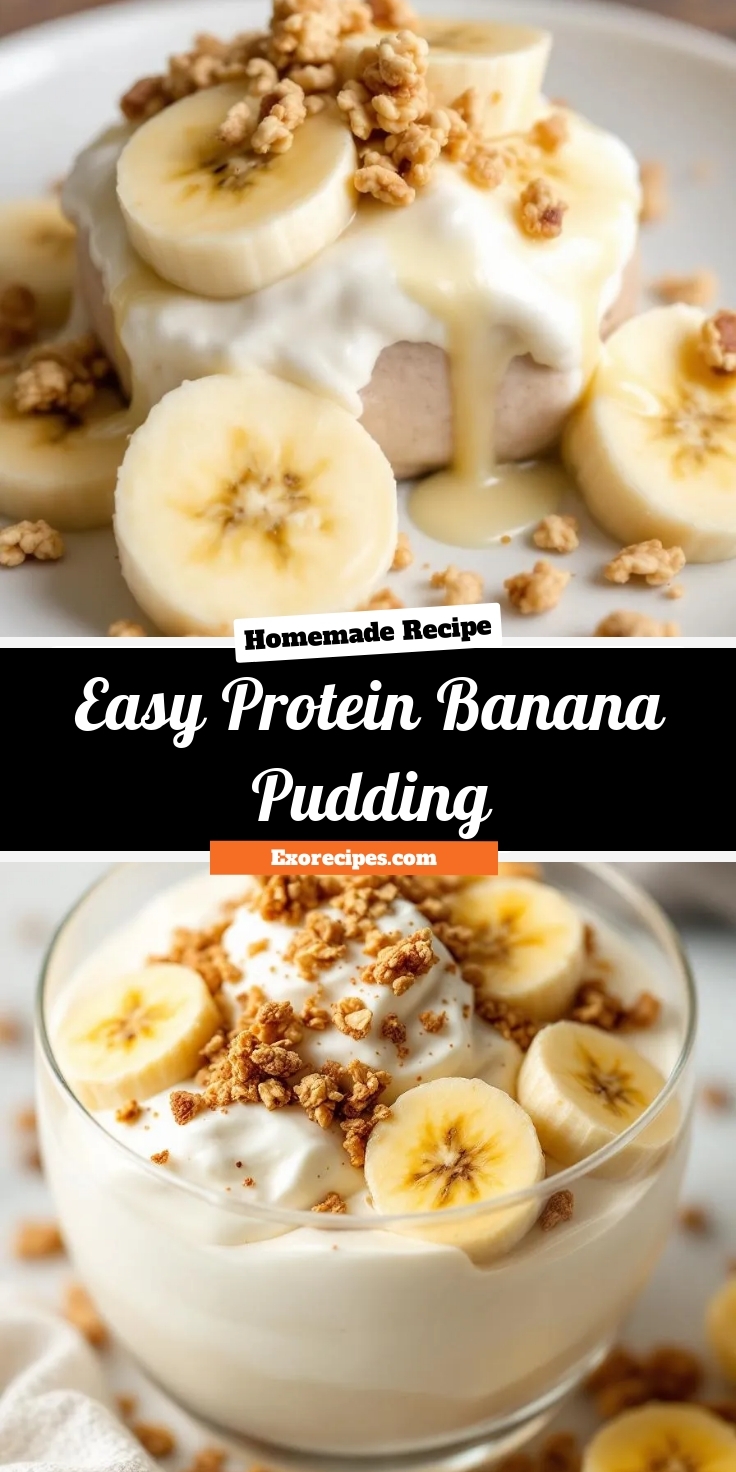
Easy Protein Banana Pudding reimagines the Southern staple with a fitness-friendly upgrade. By blending ripe bananas, protein-rich Greek yogurt, and a touch of vanilla, we create a luscious, satisfying treat that fuels your body instead of weighing it down. Unlike traditional versions loaded with sugar and heavy cream, this recipe leans on natural sweetness and wholesome ingredients. It’s perfect for meal prep, post-workout recovery, or even a midnight snack that won’t derail your goals. For more high-protein dessert inspiration, check out our Protein Chocolate Mousse or these Peanut Butter Energy Balls.
What makes Easy Protein Banana Pudding special? It’s versatile enough for breakfast or dessert, and it caters to busy lifestyles without compromising on nutrition. The recipe aligns perfectly with our blog’s mission: showing that healthy food can be simple, delicious, and accessible. Whether you’re a fitness enthusiast, a parent sneaking nutrients into snacks, or just someone with a sweet tooth, this pudding hits all the right notes. Best of all, it’s customizable—swap in your favorite protein powder or top it with crunchy granola for extra texture.
Why I Love This Recipe
Easy Protein Banana Pudding holds a special place in my kitchen because it’s my go-to when I need a quick, satisfying pick-me-up. As someone who juggles work and workouts, I appreciate recipes that taste decadent but keep me energized. The first time I whipped this up, I couldn’t believe how something so simple could feel so indulgent. Now, I make it weekly—sometimes layering it with almond butter or fresh berries for extra flair. It’s proof that eating well doesn’t have to be complicated, and that’s a lesson I’ll always cherish.
Health and Nutrition
Why it’s good for your body
Easy Protein Banana Pudding packs a nutritious punch while satisfying your sweet tooth. First, bananas deliver potassium, which helps regulate blood pressure and supports muscle function. Additionally, the protein in this recipe keeps you full longer and aids in muscle recovery, making it a smart choice after workouts. Since it uses natural sweeteners like ripe bananas, you avoid the blood sugar spikes that come with refined sugars.
Moreover, Easy Protein Banana Pudding includes ingredients like Greek yogurt or protein powder, boosting its calcium and protein content. These nutrients strengthen bones and promote lean muscle growth. The dish also provides fiber from bananas, which supports digestion and gut health. Unlike traditional desserts, this version cuts unnecessary fats and sugars without sacrificing flavor.
Finally, Easy Protein Banana Pudding offers a quick energy boost thanks to its balanced macronutrients. Whether you need a post-workout snack or a midday pick-me-up, it fuels your body efficiently. With wholesome ingredients and no artificial additives, it’s a dessert you can feel good about enjoying.
How it fits in a healthy lifestyle
Easy Protein Banana Pudding fits seamlessly into a balanced diet. If you follow a high-protein meal plan, it helps you hit your daily targets without relying on processed snacks. For gluten-free eaters, this recipe naturally avoids wheat-based thickeners, aligning with dietary restrictions. Even if you prioritize heart health, its low saturated fat content makes it a guilt-free treat.
You can easily incorporate Easy Protein Banana Pudding into your routine. Pair it with a nutritious breakfast for added protein or enjoy it as a post-dinner dessert that won’t derail your goals. For more ways to balance indulgences with healthy eating, explore our guide to smart meal prep. This pudding proves that delicious and nutritious can go hand in hand.
A creamy and protein-packed banana pudding that’s quick to make and perfect for a healthy dessert or snack.
Ingredients
Scale
For the Crust:
2 ripe bananas, sliced
1 cup Greek yogurt
1 scoop vanilla protein powder
1/2 cup almond milk
1/2 teaspoon vanilla extract
1/4 teaspoon cinnamon
1/4 cup granola (optional)
Instructions
1. Prepare the Crust:
In a blender, combine Greek yogurt, protein powder, almond milk, vanilla extract, and cinnamon. Blend until smooth.
Layer the banana slices in serving bowls or glasses.
Pour the blended yogurt mixture over the bananas.
Top with granola if desired.
Chill in the refrigerator for at least 30 minutes before serving.
Notes
You can customize the seasonings to taste.
How to Prepare This Dish
Steps and time-saving tips
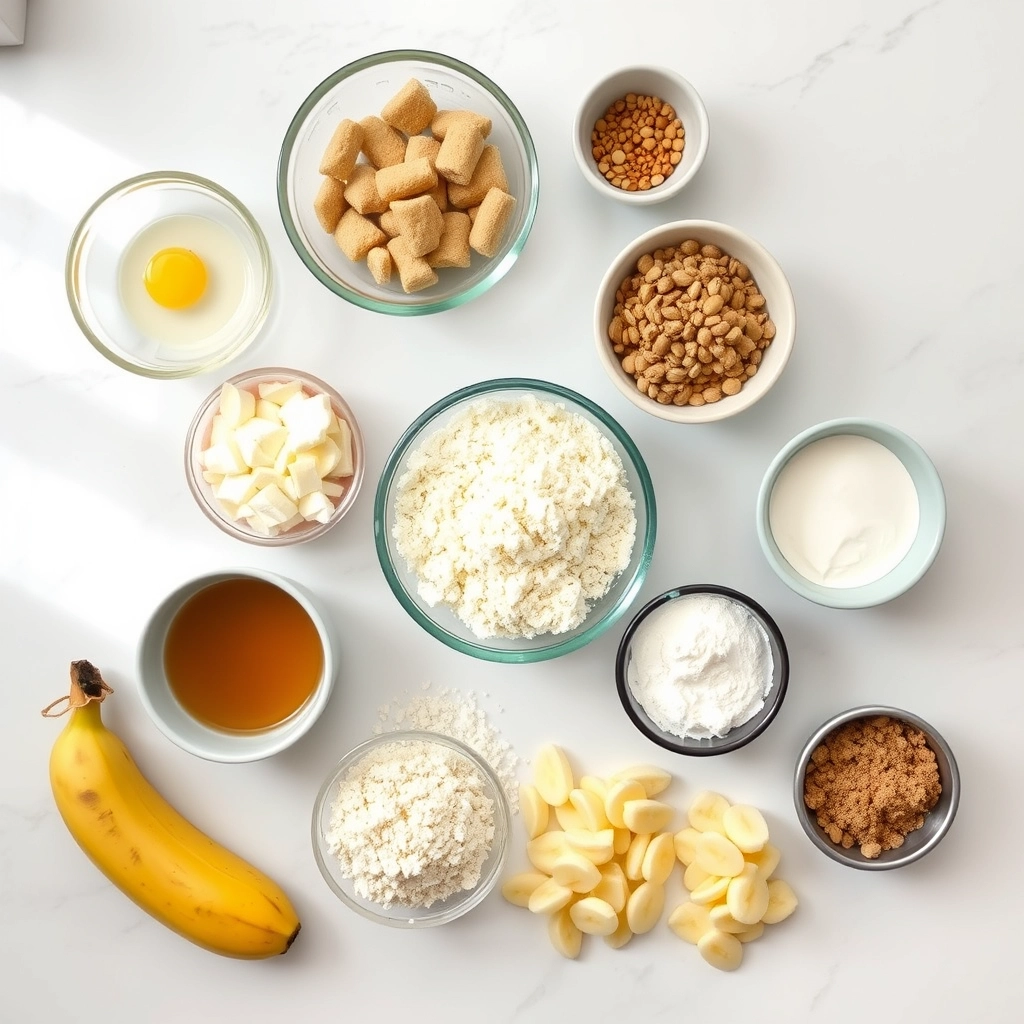
Start by gathering all your ingredients for Easy Protein Banana Pudding so everything is within reach. First, slice three ripe bananas into thin rounds and set them aside. Next, whisk together the vanilla protein powder, Greek yogurt, and almond milk in a large bowl until smooth. Meanwhile, crush the graham crackers into fine crumbs using a rolling pin or food processor for a quicker texture. Now, layer the ingredients in a trifle dish or individual cups—begin with a spoonful of the protein mixture, add banana slices, then sprinkle graham cracker crumbs. Repeat the layers until you’ve used all the ingredients, finishing with a dusting of crumbs on top. For extra flavor, drizzle a touch of honey or sprinkle cinnamon before chilling. To save time, prep the pudding the night before and let it set in the fridge overnight. The flavors meld beautifully, and you’ll have a ready-to-eat breakfast or dessert. If you’re in a rush, swap homemade whipped cream for a light coconut cream alternative.
Mistakes I’ve made and learned from
When I first made Easy Protein Banana Pudding, I used unripe bananas, and the flavor fell flat. Now, I always wait until they’re speckled and sweet. Another blunder? Overmixing the protein layer—it turned dense instead of creamy. A gentle fold keeps it light, just like my protein pancakes batter. I also learned the hard way that skipping the chilling step makes the pudding too runny. Patience pays off, just as it does with my overnight oats. If your pudding seems thin, a tablespoon of chia seeds thickens it perfectly. Trust me, these small tweaks make all the difference.
Easy Protein Banana Pudding has roots in classic Southern comfort food, but with a modern twist that makes it a favorite for health-conscious cooks. Traditionally, banana pudding evokes memories of potlucks and family gatherings, where creamy layers of vanilla wafers, bananas, and custard stole the show. However, this version swaps sugary custard for protein-packed ingredients, giving it a nutritious edge without sacrificing flavor.
Around the world, people put their own spin on banana-based desserts. In the Caribbean, for example, cooks might add coconut milk or rum for a tropical flair. Meanwhile, in Australia, pavlova-inspired versions with meringue crumbs sometimes replace the classic wafer layers. Even within the U.S., families tweak Easy Protein Banana Pudding to suit their tastes—some blend in peanut butter for extra richness, while others top it with Greek yogurt instead of whipped cream.
Personally, I love how
this dish bridges generations. My grandma used to make the original version for Sunday dinners, but now I prep the protein-boosted one as a post-workout treat. Whether you enjoy it as a nostalgic dessert or a fitness-friendly snack, Easy Protein Banana Pudding adapts beautifully to any table.
How it fits in today’s cooking
Today, Easy Protein Banana Pudding fits perfectly into our fast-paced, health-focused lifestyles. Busy home cooks appreciate how quickly it comes together, and gym-goers love that it satisfies sweet cravings without derailing their macros. Plus, it’s versatile enough for meal prep—layer it in jars for grab-and-go breakfasts or pack it as a high-protein dessert after dinner.
Modern twists keep the recipe fresh, like swapping traditional wafers for almond flour cookies or adding a scoop of vanilla protein powder to amp up the nutrition. Some even turn it into a smoothie bowl by blending the ingredients and topping with granola. For more creative ways to use protein-packed ingredients, check out this guide to healthy baking swaps.
Whether you serve it at
a summer BBQ or enjoy it as a cozy winter treat, Easy Protein Banana Pudding proves that comfort food can be both delicious and nourishing. It’s a timeless dish with a modern makeover, and that’s why it’s here to stay.
Taste and Texture
What makes it delicious
Easy Protein Banana Pudding delivers a lusciously creamy texture that melts in your mouth, balanced by the natural sweetness of ripe bananas. Each spoonful blends velvety vanilla pudding with soft, protein-packed layers, creating a dessert that feels indulgent yet light. The subtle warmth of cinnamon or nutmeg enhances the fragrance, while chunks of fresh banana add a satisfying, slightly firm bite. Meanwhile, the optional crumbled cookies or granola on top introduce a delightful crunch, making every bite of Easy Protein Banana Pudding a harmonious mix of smooth and crisp.
Boosting the flavor
Elevate your Easy Protein Banana Pudding by swapping vanilla pudding for chocolate or butterscotch for a richer twist. For extra depth, drizzle homemade caramel sauce over the top or sprinkle toasted coconut flakes for tropical flair. If you love a hint of spice, stir in a pinch of cardamom or top with crushed cinnamon graham crackers. Finally, a dollop of whipped cream or a handful of dark chocolate chips adds both texture and decadence without overpowering the pudding’s delicate banana flavor.
Always use ripe bananas for the best natural sweetness in your Easy Protein Banana Pudding. Additionally, chill the pudding for at least two hours before serving to let the flavors meld perfectly. For a smoother texture, whisk the protein powder thoroughly into the milk before adding other ingredients. Meanwhile, layer the pudding with fresh banana slices and cookies while it’s still soft to prevent sogginess. Finally, top with a light whipped cream for a balanced finish every time.
Mistakes to avoid
Avoid overmixing the pudding, as this can make it dense instead of light and creamy. Instead, gently fold the ingredients until just combined. Another common mistake is using unripe bananas, which lack sweetness and texture. For more tips on selecting the best fruit, check out our guide on choosing ingredients. Also, don’t skip the chilling step—this ensures your Easy Protein Banana Pudding sets properly. If you’re short on time, learn how to speed up chilling without sacrificing quality.
g-suggestions">Serving and Pairing Suggestions
How to serve this dish
For a stunning presentation, layer Easy Protein Banana Pudding in clear glass jars or dessert cups to showcase its creamy texture. Alternatively, top it with fresh banana slices, a drizzle of honey, or a sprinkle of crushed nuts for extra crunch. Since this dish is both nutritious and indulgent, it works perfectly for brunch gatherings, post-workout snacks, or even holiday dessert spreads. If you want to impress guests, serve it chilled with a dollop of whipped cream or a dusting of cinnamon for a cozy touch.
What goes well with it
Pair Easy Protein Banana Pudding with a steaming cup of protein coffee for a balanced breakfast or afternoon pick-me-up. The rich coffee flavor enhances the sweetness of the bananas while adding an energy boost. For a heartier option, try it alongside our almond flour pancakes, creating a satisfying meal that’s packed with protein. Finally, a glass of cold almond milk or a fruity smoothie makes a refreshing companion, especially on warm days.
math-faq-block">
Can I make Easy Protein Banana Pudding without protein powder?
Yes! You can substitute protein powder with Greek yogurt or cottage cheese for a protein boost. Easy Protein Banana Pudding will still be creamy and delicious while keeping its high-protein benefits.
How long does Easy Protein Banana Pudding last in the fridge?
Easy Protein Banana Pudding stays fresh for up to 3 days when stored in an airtight container. For best texture, add fresh banana slices just before serving.
What’s the best protein powder for Easy Protein Banana Pudding?
Vanilla or unflavored whey protein blends perfectly with the banana flavor. Plant-based powders like pea protein also work well in Easy Protein Banana Pudding if you prefer vegan options.
ank-math-faq-item">
Can I freeze Easy Protein Banana Pudding for later?
Freezing isn’t recommended as the texture becomes grainy when thawed. Easy Protein Banana Pudding tastes best fresh, but you can prep dry ingredients ahead and mix with wet ingredients when ready.
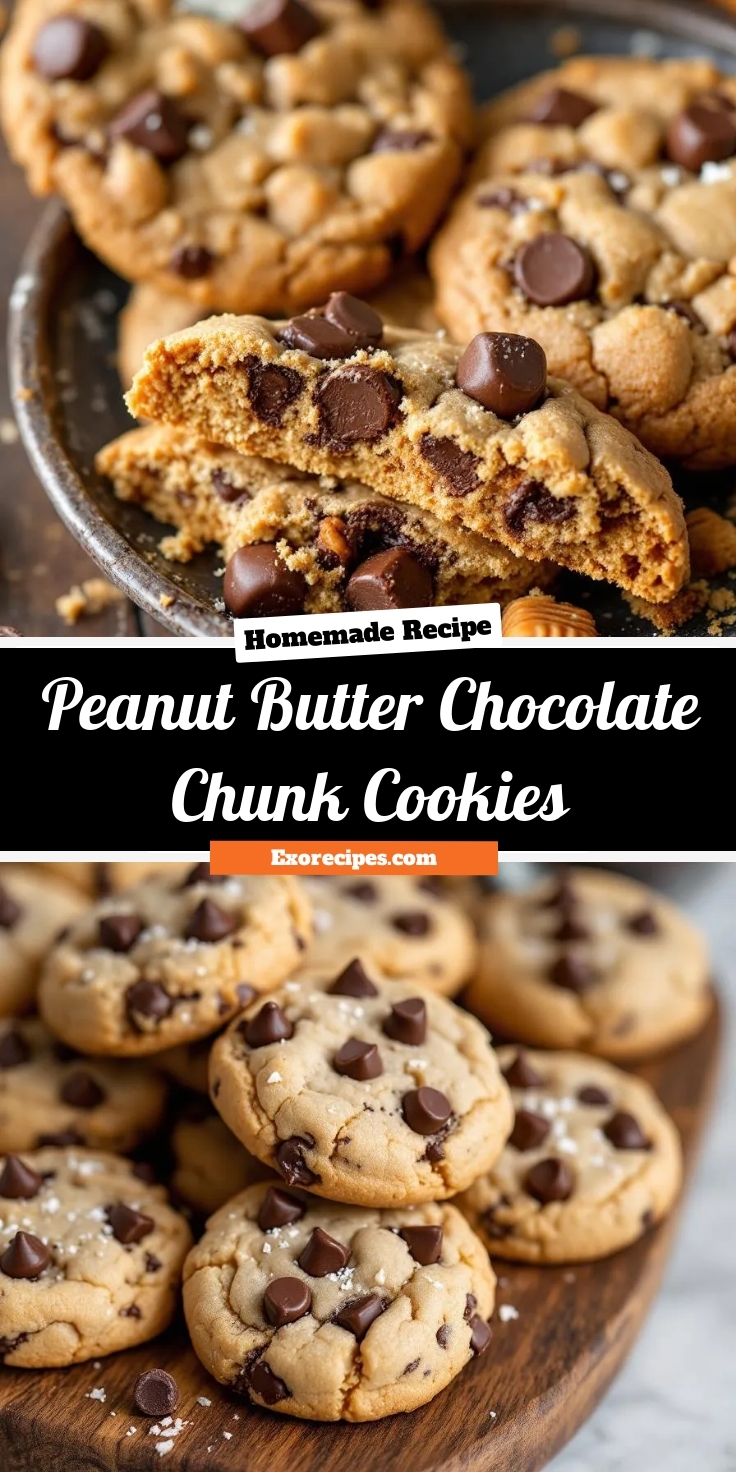
Best Peanut Butter Chocolate Chunk Cookies Recipe
Introduction
There’s something magical about biting into a warm, chewy Peanut Butter Chocolate Chunk Cookie—the way the rich peanut butter melds with gooey chocolate chunks creates a moment of pure comfort. Whether you’re baking for a crowd or treating yourself, these cookies deliver nostalgia and joy in every bite. Plus, they’re surprisingly easy to make, even if you’re not a seasoned baker. Let’s dive into why this recipe deserves a spot in your kitchen rotation.
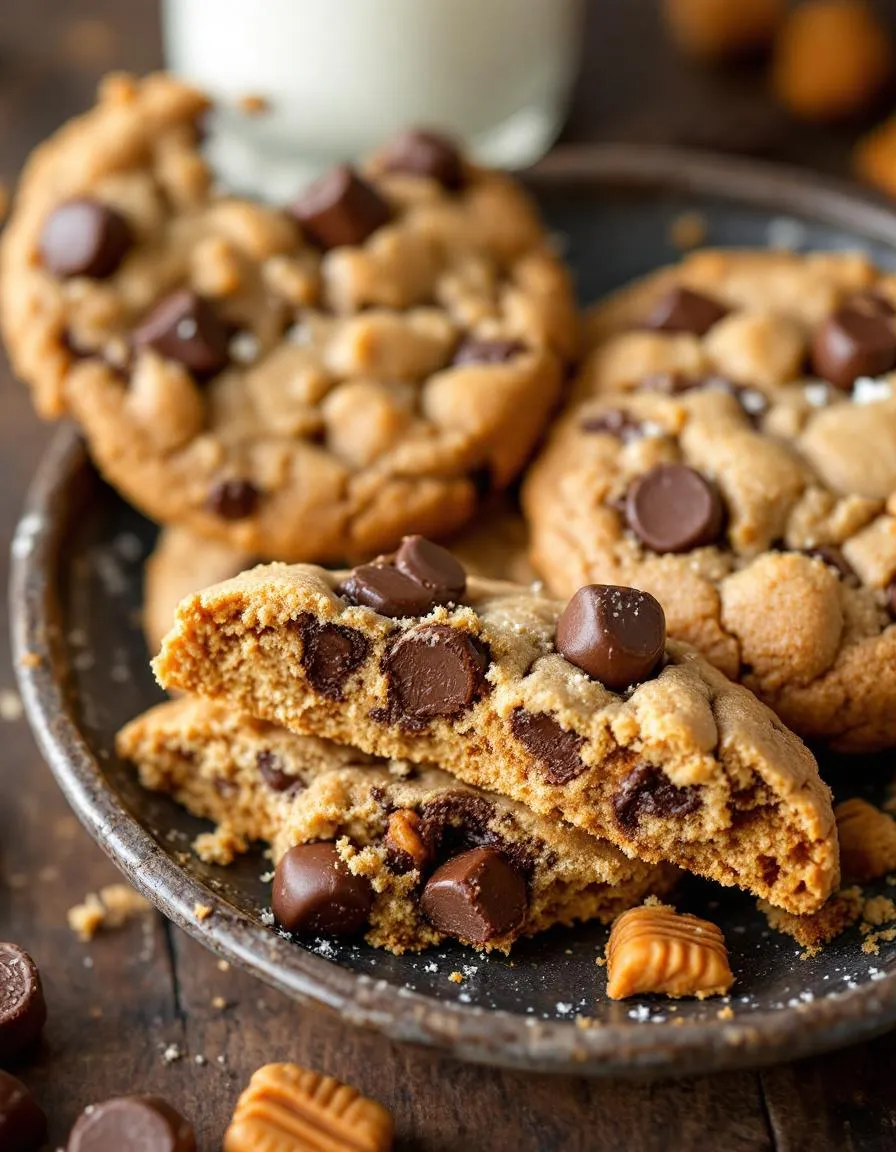
Peanut Butter Chocolate Chunk Cookies combine two beloved flavors into one irresistible treat. Unlike traditional chocolate chip cookies, these pack a nutty depth from creamy peanut butter, while generous chunks of dark or milk chocolate add a luxurious texture. This recipe matters because it strikes the perfect balance between simplicity and indulgence. Whether you’re whipping up a batch for a party or a cozy night in, these cookies fit any occasion. They also align perfectly with our blog’s mission to share approachable yet elevated recipes, like our Classic Chocolate Chip Cookies, but with a twist. For those who love peanut butter desserts, you’ll find these cookies pair wonderfully with our Peanut Butter Banana Smoothie for a decadent snack combo.
Why I Love This Recipe
Peanut Butter Chocolate Chunk Cookies hold a special place in my heart because they remind me of baking with my grandma. She always added extra chocolate chunks and let me sneak bites of dough, claiming it was our little secret. Now, whenever I make these cookies, the smell of peanut butter and melted chocolate transports me back to her kitchen. Beyond the nostalgia, I love how forgiving this recipe is—even if you overbake them slightly, they stay deliciously soft. It’s the kind of recipe that turns anyone into a baker, one gooey bite at a time.
Health and Nutrition
Why it’s good for your body
Peanut Butter Chocolate Chunk Cookies pack a surprising nutritional punch while satisfying your sweet tooth. First, peanut butter delivers plant-based protein, which helps keep you full and supports muscle repair. Additionally, dark chocolate chunks provide antioxidants that combat inflammation and promote heart health. Together, these ingredients make Peanut Butter Chocolate Chunk Cookies a smarter indulgence than typical desserts.
Moreover, peanut butter contains healthy fats that support brain function and steady energy levels. Meanwhile, the fiber in whole-grain flour or oats (if used) aids digestion and balances blood sugar. Because of this, Peanut Butter Chocolate Chunk Cookies offer a more balanced treat compared to sugar-heavy alternatives. Finally, the natural richness of peanut butter means you can enjoy deep flavor without excessive added sugars.
Of course, moderation is key, but when you crave something sweet, Peanut Butter Chocolate Chunk Cookies provide nutrients alongside satisfaction. The combination of protein, healthy fats, and antioxidants makes them a better-for-you choice for an occasional treat.
How it fits in a healthy lifestyle
Peanut Butter Chocolate Chunk Cookies can fit seamlessly into a balanced diet when enjoyed mindfully. For those focusing on protein intake, these cookies offer a tasty way to sneak in extra grams between meals. If you prefer gluten-free options, simply swap regular flour for almond or oat flour, as suggested in our gluten-free baking guide.
For heart-healthy eating, opt for natural peanut butter without added sugars and dark chocolate with at least 70% cocoa. These small tweaks align with the principles in our balanced dessert choices article. Whether you need a post-workout snack or a lunchbox treat, Peanut Butter Chocolate Chunk Cookies deliver flavor without derailing your goals. Just pair them with nutrient-dense meals and stay mindful of portions to keep your diet on track.
Soft and chewy peanut butter cookies loaded with rich chocolate chunks for a delightful treat.
Ingredients
Scale
For the Crust:
1 cup creamy peanut butter
1 cup granulated sugar
1 large egg
1 tsp vanilla extract
1/2 tsp baking soda
1/4 tsp salt
1 cup chocolate chunks
Instructions
1. Prepare the Crust:
Preheat oven to 350°F (175°C) and line a baking sheet with parchment paper.
In a large bowl, mix peanut butter, sugar, egg, and vanilla extract until smooth.
Stir in baking soda, salt, and chocolate chunks until well combined.
Scoop tablespoon-sized portions of dough onto the baking sheet, spacing them 2 inches apart.
Bake for 10-12 minutes or until edges are lightly golden. Let cool on the baking sheet for 5 minutes before transferring to a wire rack.
Notes
You can customize the seasonings to taste.
s-dish">How to Prepare This Dish
Steps and time-saving tips
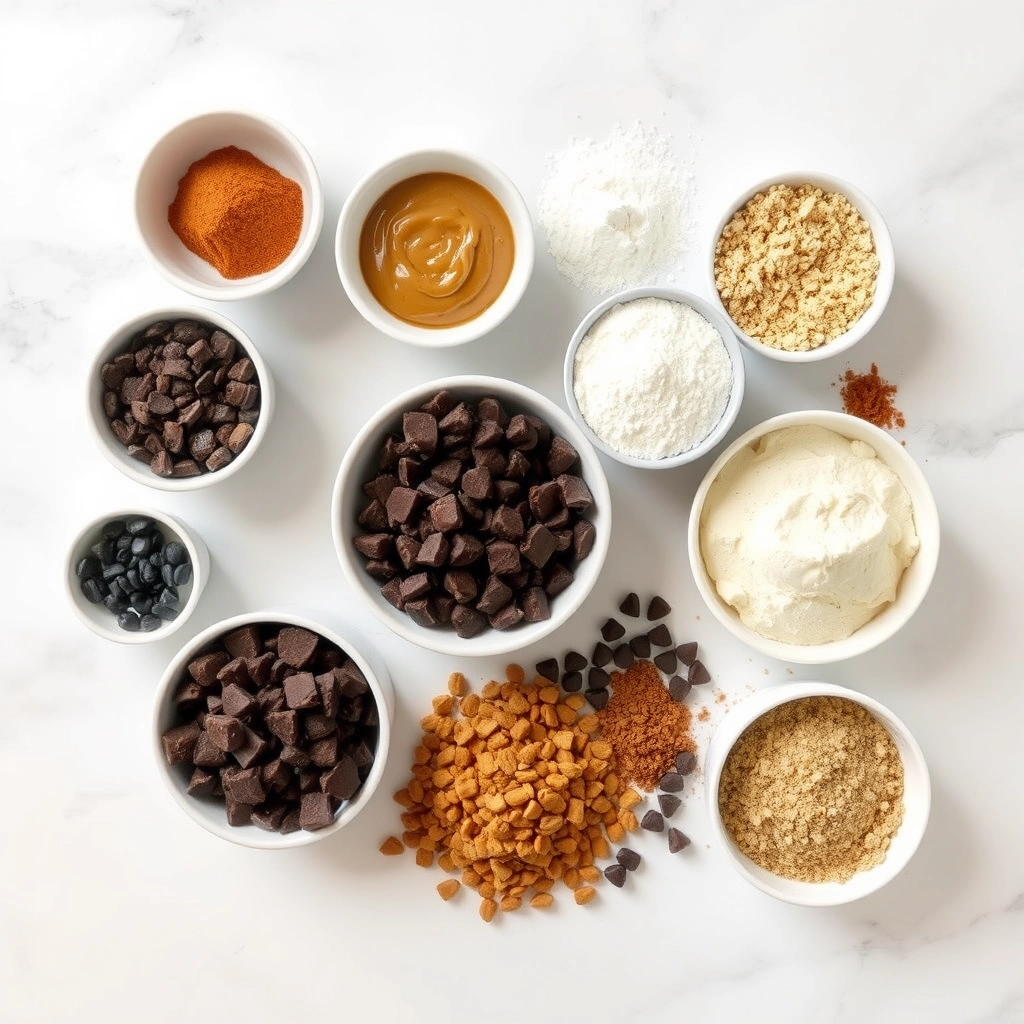
Start by preheating your oven to 350°F and lining two baking sheets with parchment paper. In a large bowl, whisk together the flour, baking soda, and salt until well combined. Next, cream the softened butter, peanut butter, and both sugars in a stand mixer until fluffy—about 2 minutes. Beat in the eggs one at a time, followed by the vanilla. Gradually mix the dry ingredients into the wet until just combined, then fold in the chocolate chunks. Scoop tablespoon-sized dough balls onto the prepared sheets, spacing them 2 inches apart. For extra flavor, press a few extra chocolate chunks on top before baking. Bake for 10-12 minutes until the edges turn golden but the centers stay soft. Let the Peanut Butter Chocolate Chunk Cookies cool on the sheets for 5 minutes before transferring them to a wire rack. To save time, chill the dough for 30 minutes beforehand to prevent spreading, or freeze portions for quick future batches.
Mistakes I’ve made and learned from
I once rushed the creaming step and ended up with dense Peanut Butter Chocolate Chunk Cookies—lesson learned! Creaming the butter and sugars properly adds air, so don’t cut corners. Another mishap? Overbaking. These cookies firm up as they cool, so pull them when they look slightly underdone. If your cookies spread too thin, check your butter temperature (too soft) or try my baking tips for perfect texture. And if you’re out of chocolate chunks, chop a bar roughly—uniform pieces melt differently, as I explain in my guide to choosing the right chocolate. Now, I always keep extra chunks handy!
n-and-variations">Cultural Connection and Variations
Where this recipe comes from
Peanut Butter Chocolate Chunk Cookies carry a deliciously American legacy, blending two beloved flavors into one irresistible treat. Many trace their roots back to early 20th-century home kitchens, where bakers experimented with peanut butter—a pantry staple—and chunks of chocolate for extra richness. Interestingly, Southern cooks often add a pinch of sea salt to balance the sweetness, while Midwestern versions might swap in oats for a heartier texture. Meanwhile, in Australia, they sometimes use Vegemite for a savory twist (though that’s not for everyone!).
In my family, Peanut Butter Chocolate Chunk Cookies were a holiday must-have, baked in big batches and tucked into care packages. My grandma insisted on hand-chopping dark chocolate instead of using chips, claiming it melted better. Across the globe, variations pop up—like using almond butter in France or coconut sugar in Thailand for a caramelized depth. No matter the tweaks, though, the soul of this cookie stays the same: comforting, indulgent, and impossible to eat just one.
How it fits in today’s cooking
Today, Peanut Butter Chocolate Chunk Cookies still steal the spotlight, whether as a lunchbox surprise or a cozy weekend project. Modern bakers love adapting them—think gluten-free flour blends or vegan butter for dietary needs. They’re also a star at bake sales, pairing perfectly with other classics like vanilla cupcakes for a crowd-pleasing spread. During the holidays, they’re a nostalgic favorite, often stacked alongside spiced pumpkin bread on dessert tables.
What keeps them relevan
t? Their versatility. Busy parents appreciate one-bowl simplicity, while food bloggers elevate them with artisanal chocolate or flaky salt garnishes. Whether you’re baking for a party or stress-relief, Peanut Butter Chocolate Chunk Cookies bridge tradition and modern cravings effortlessly. After all, some flavors never go out of style.
Taste and Texture
What makes it delicious
Peanut Butter Chocolate Chunk Cookies deliver a rich, indulgent experience with every bite. The creamy peanut butter melts into the dough, creating a soft, chewy texture that contrasts perfectly with the crisp edges. Meanwhile, the generous chocolate chunks add pockets of gooey sweetness, while a hint of salt balances the flavors. As they bake, your kitchen fills with the warm, nutty aroma of roasted peanuts and melted chocolate. These cookies strike the ideal balance—slightly crumbly yet tender, with a deep, satisfying richness that keeps you reaching for another. Whether enjoyed warm or at room temperature, Peanut Butter Chocolate Chunk Cookies never fail to delight.
Boosting the flavor
Elevate your Peanut Butter Chocolate Chunk Cookies with a few easy tweaks. First, swap regular chocolate chunks for dark chocolate to add a sophisticated bitterness that complements the peanut butter. For extra crunch, sprinkle flaky sea salt on top before baking. If you love bold flavors, try folding in chopped peanut butter cups for a double dose of nutty goodness. Alternatively, drizzle melted chocolate over the cooled cookies for a bakery-worthy finish. For more inspiration, explore our guide to cookie variations to customize your batch. A little creativity goes a long way in making these treats unforgettable.
Always chill the dough for at least 30 minutes before baking your Peanut Butter Chocolate Chunk Cookies. This step prevents spreading and ensures thick, chewy cookies. Use parchment paper on your baking sheets for even heat distribution and easy cleanup. For the best texture, slightly underbake the cookies and let them cool on the sheet for 5 minutes. Additionally, measure your flour correctly by spooning it into the cup and leveling it off—this avoids dry, crumbly results. Finally, use high-quality chocolate chunks for rich flavor in every bite of your Peanut Butter Chocolate Chunk Cookies.
Mistakes to avoid
Avoid overmixing the dough, as this can make your Peanut Butter Chocolate Chunk Cookies tough. Instead, mix just until the ingredients combine. Many bakers also skip the chilling step, but this leads to flat cookies—plan ahead for the best results. If your cookies spread too much, check your butter temperature; softened butter should indent slightly when pressed. For more baking tips, explore our guide on perfect cookie textures. Also, don’t substitute natural peanut butter, as its oil content can alter the dough. Learn more about ingredient swaps in our baking substitutions article.
g-suggestions">Serving and Pairing Suggestions
How to serve this dish
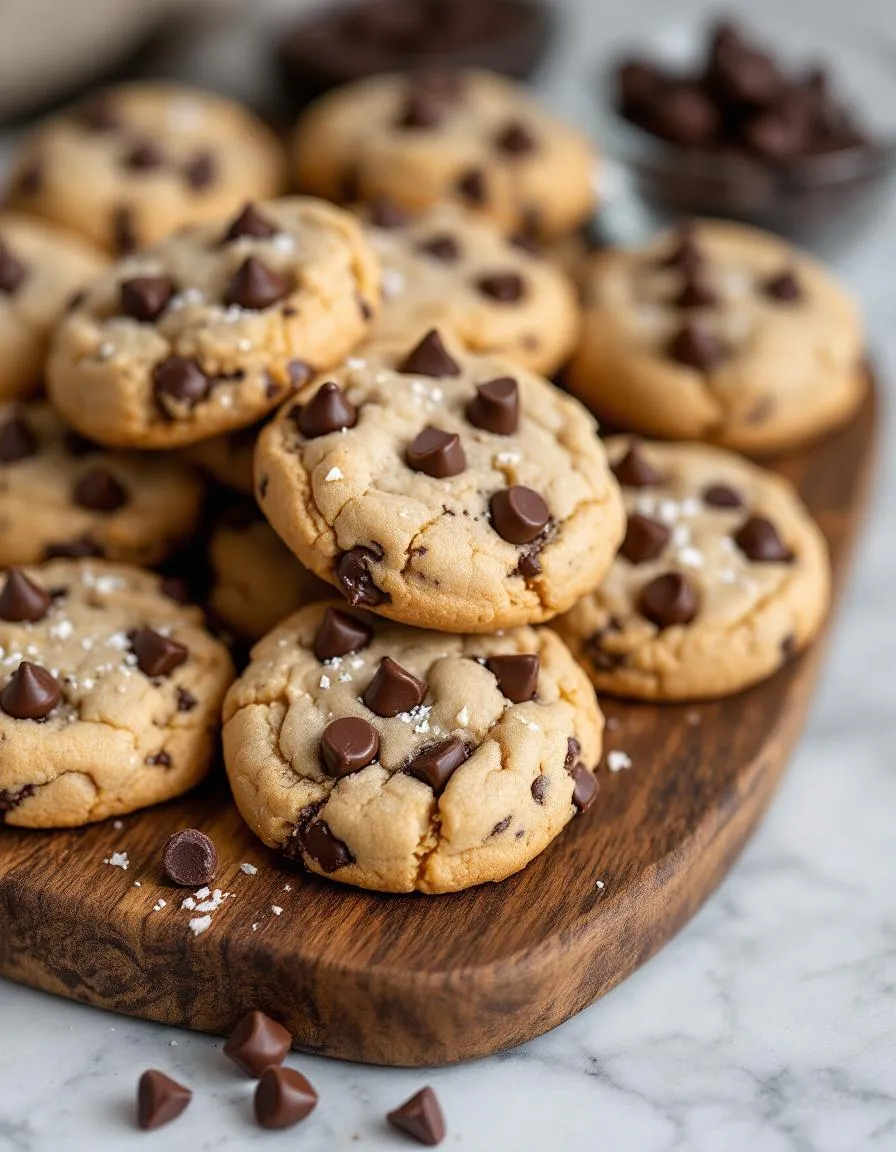
For a picture-perfect presentation, stack Peanut Butter Chocolate Chunk Cookies on a rustic wooden board or a vintage cake stand. Meanwhile, drizzle melted chocolate over the top for extra flair. These cookies shine at holiday cookie swaps, but they also make a delightful after-school treat when served warm with a glass of milk. If you’re hosting a brunch, arrange them alongside mini desserts for a sweet finale.
What goes well with it
A cold glass of milk perfectly balances the rich flavors of Peanut Butter Chocolate Chunk Cookies, creating a classic combo everyone loves. Alternatively, pair them with a creamy salted caramel latte for a cozy afternoon pick-me-up. For a fun twist, serve them with a scoop of vanilla ice cream or our banana pudding to highlight the peanut butter’s nutty sweetness.
math-faq-block">
What makes Peanut Butter Chocolate Chunk Cookies so chewy?
The chewiness in Peanut Butter Chocolate Chunk Cookies comes from the combination of brown sugar, peanut butter, and slightly underbaking them. Using melted butter instead of creamed butter also helps create a denser, chewier texture. For extra chew, chill the dough for at least 30 minutes before baking.
Can I use natural peanut butter in Peanut Butter Chocolate Chunk Cookies?
Yes, but natural peanut butter may make your Peanut Butter Chocolate Chunk Cookies spread more due to its oil content. For best results, stir the natural peanut butter well and consider reducing other liquids in the recipe slightly. The flavor will still be delicious, though the texture might differ slightly from cookies made with conventional peanut butter.
How do you keep chocolate chunks from sinking in peanut butter cookies?
To prevent chocolate chunks from sinking in Peanut Butter Chocolate Chunk Cookies, toss them lightly in flour before mixing into the dough. This helps them stay suspended throughout the cookie. Also, make sure your dough isn’t too soft – chilling it before baking creates a thicker base that supports the chunks better.
ank-math-faq-item">
Why did my Peanut Butter Chocolate Chunk Cookies come out dry?
Dry Peanut Butter Chocolate Chunk Cookies usually result from overbaking or using too much flour. Measure flour carefully (spoon and level method) and bake just until edges are set but centers still look slightly underdone. The cookies will continue to firm up as they cool. Adding an extra tablespoon of peanut butter can also help maintain moisture.
Easy No Bake Lemon Cheesecake – Creamy & Refreshing
Introduction
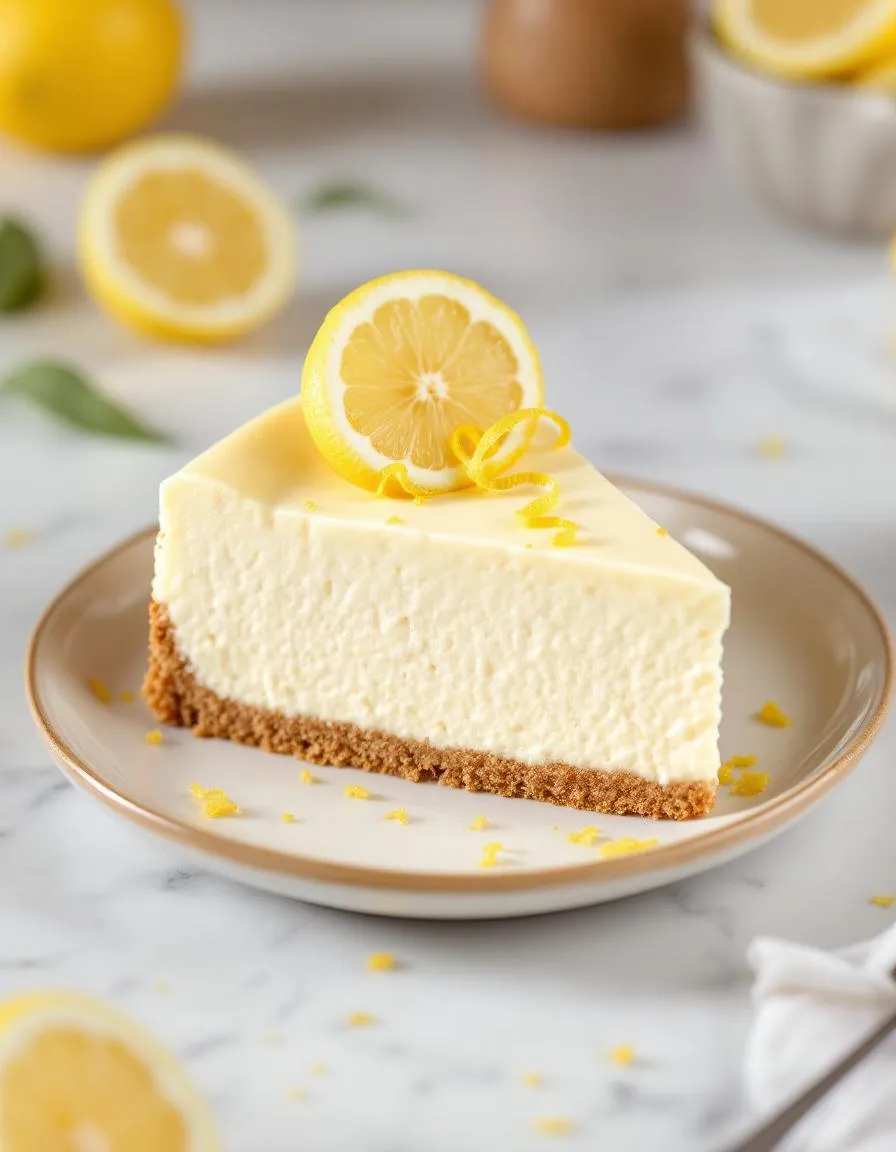
Imagine a dessert that delivers the bright, tangy flavor of lemon and the creamy richness of cheesecake without ever turning on your oven. That’s exactly what this No Bake Lemon Cheesecake offers—a refreshing, fuss-free treat perfect for warm days, last-minute gatherings, or anytime you crave something sweet without the hassle. Whether you’re a beginner or a seasoned baker, this recipe promises simplicity and satisfaction in every bite.
No Bake Lemon Cheesecake is a creamy, citrus-infused dessert that skips the oven entirely, relying on a buttery graham cracker crust and a velvety filling made with cream cheese, lemon juice, and zest. Unlike traditional cheesecakes, this version sets in the fridge, making it ideal for hot summers or busy schedules. The tangy lemon cuts through the sweetness, creating a balanced flavor that appeals to both kids and adults. Plus, it pairs wonderfully with fresh berries or a dollop of whipped cream, just like our Easy Berry Compote or a drizzle of Homemade Caramel Sauce for a decadent twist.
This recipe fits perfectly with our blog’s mission to deliver approachable, crowd-pleasing dishes that don’t sacrifice flavor for convenience. It’s a dessert that feels special yet requires minimal effort, aligning with the needs of home cooks who want impressive results without complicated steps. The No Bake Lemon Cheesecake also adapts easily—swap the lemon for lime or orange, or even add a layer of chocolate ganache for extra indulgence. No matter how you customize it, this dessert guarantees a refreshing finish to any meal.
Why I Love This Recipe
This No Bake Lemon Cheesecake holds a special place in my heart because it reminds me of summers at my grandmother’s house. She always had a chilled dessert ready, and her lemon version was my favorite. Now, I make it for my own family, especially on busy weeknights when we need a quick pick-me-up. The simplicity of the recipe lets the flavors shine, and the no-bake method means I can focus on spending time with loved ones instead of hovering over the oven. Every bite brings back those warm memories while creating new ones.
Health and Nutrition
Why it’s good for your body
No Bake Lemon Cheesecake packs a surprising nutritional punch while satisfying your sweet tooth. First, the lemon juice delivers a dose of vitamin C, which supports immune health and brightens your skin. Additionally, the creamy filling often includes Greek yogurt or cottage cheese, adding protein and probiotics for gut health. Unlike traditional cheesecakes, this version skips the oven, preserving more nutrients in the fresh ingredients.
Moreover, No Bake Lemon Cheesecake typically uses natural sweeteners like honey or maple syrup instead of refined sugar. These alternatives offer antioxidants and a slower energy release, preventing sugar crashes. The graham cracker crust, when made with whole-grain options, provides fiber to keep you full longer. Together, these elements make each slice a smarter indulgence.
Finally, the zesty lemon flavor doesn’t just taste refreshing—it also aids digestion and hydration. Since No Bake Lemon Cheesecake requires no heavy baking, it retains the bright, vibrant qualities of its ingredients. Whether you enjoy it as a treat or a post-meal delight, it’s a dessert that loves you back.
How it fits in a healthy lifestyle
No Bake Lemon Cheesecake fits seamlessly into a balanced diet when enjoyed mindfully. For gluten-free eaters, simply swap the graham crackers for almond flour or gluten-free oats. If you’re watching your heart health, opt for low-fat cream cheese and a nut-based crust, like the one in our Almond Crust Cheesecake recipe.
This dessert also works well for meal preppers. Make it ahead and portion it into smaller servings to avoid overindulging. Pair it with a protein-rich snack, like our Greek Yogurt Parfait, for a satisfying balance. With simple swaps and smart habits, No Bake Lemon Cheesecake becomes a guilt-free part of your routine.
A creamy and tangy lemon cheesecake that requires no baking, perfect for a refreshing dessert.
Ingredients
Scale
For the Crust:
1 1/2 cups graham cracker crumbs
1/4 cup melted butter
2 tablespoons sugar
16 oz cream cheese, softened
1/2 cup granulated sugar
1 tablespoon lemon zest
1/4 cup fresh lemon juice
1 teaspoon vanilla extract
1 cup heavy whipping cream
Instructions
1. Prepare the Crust:
In a bowl, mix graham cracker crumbs, melted butter, and 2 tablespoons sugar until combined.
Press the mixture firmly into the bottom of a 9-inch springform pan to form the crust. Chill in the refrigerator for 15 minutes.
In a large bowl, beat the softened cream cheese and 1/2 cup sugar until smooth and creamy.
Add lemon zest, lemon juice, and vanilla extract. Mix until well combined.
In a separate bowl, whip the heavy cream until stiff peaks form.
Gently fold the whipped cream into the cream cheese mixture until fully incorporated.
Pour the filling over the chilled crust and smooth the top with a spatula.
Refrigerate for at least 4 hours or overnight before serving.
Notes
You can customize the seasonings to taste.
s-dish">How to Prepare This Dish
Steps and time-saving tips
Start by crushing graham crackers into fine crumbs for the crust, then mix them with melted butter and a pinch of sugar. Press this mixture firmly into the bottom of a springform pan, using the back of a spoon to create an even layer. Chill the crust in the fridge while you prepare the filling. For the No Bake Lemon Cheesecake filling, beat softened cream cheese until smooth, then whisk in powdered sugar, vanilla extract, and fresh lemon juice for that bright, tangy flavor. Gently fold in whipped cream to keep the texture light and airy. Spread the filling over the chilled crust, smoothing the top with a spatula. Cover the pan and refrigerate for at least four hours, though overnight is even better for the perfect set. Before serving, garnish with lemon zest or a drizzle of homemade lemon curd for an extra burst of citrus. If you’re short on time, use store-bought lemon curd or pre-crushed graham crackers to speed things up without sacrificing taste.
Mistakes I’ve made and learned from
One of my biggest mistakes with No Bake Lemon Cheesecake was rushing the chilling time—I once served it too soon, and the filling was disappointingly soft. Now, I always plan ahead and let it set overnight. Another lesson? Overmixing the whipped cream can turn it grainy, so I fold it in gently at the end. If you’re new to no-bake desserts, check out my guide to no-bake desserts for more foolproof tricks. Also, if your cheesecake cracks (yes, it happens even without baking!), don’t panic. A swirl of whipped cream or fresh berries covers it beautifully. For more troubleshooting, my cheesecake fixes post has saved me more than once. Trust me, every mishap is just a chance to make it even better next time.
n-and-variations">Cultural Connection and Variations
Where this recipe comes from
No Bake Lemon Cheesecake carries a bright, refreshing legacy that spans continents. While cheesecake itself traces back to ancient Greece, the no-bake version with lemon likely emerged in mid-20th century America, when home cooks embraced convenience without sacrificing flavor. The tangy citrus twist, however, feels distinctly Mediterranean, where lemons grow abundantly and often star in desserts.
In Italy, you might find a similar dessert with ricotta instead of cream cheese, while in France, a lighter mousse version takes center stage. Some families, like mine, add a splash of limoncello for an extra zing. Meanwhile, in the American South, No Bake Lemon Cheesecake often features a buttery graham cracker crust and a dollop of whipped cream on top. No matter the variation, the dish always brings a burst of sunshine to the table.
Seasonally, this dessert shines in spring and summer, when lemons peak and no one wants to turn on the oven. Yet, its versatility keeps it relevant year-round. Whether served at a picnic, potluck, or holiday gathering, No Bake Lemon Cheesecake bridges traditions and tastes with every creamy bite.
ays-cooking">How it fits in today’s cooking
Today, No Bake Lemon Cheesecake thrives as a go-to dessert for busy cooks and health-conscious eaters alike. Modern adaptations include dairy-free cream cheese, gluten-free crusts, or even a vegan twist for dietary preferences. Its simplicity makes it perfect for last-minute guests, while its vibrant flavor elevates it to special-occasion status.
Social media has also given this classic a fresh life, with home bakers experimenting with layers, swirls, and garnishes like edible flowers. For those craving more citrusy inspiration, our citrus dessert roundup offers plenty of ideas. Whether you stick to the traditional recipe or put your own spin on it, No Bake Lemon Cheesecake remains a timeless crowd-pleaser—proof that some flavors never go out of style.
Taste and Texture
What makes it delicious
No Bake Lemon Cheesecake delivers a bright, refreshing burst of citrus balanced by rich, velvety creaminess. The tangy lemon zest cuts through the smooth, luscious filling, while the buttery graham cracker crust adds a satisfying crunch. Each bite melts in your mouth, leaving behind a hint of vanilla and a whisper of tartness. The aroma alone—fresh lemon and sweet cream—will make your kitchen smell like a sunny afternoon. No Bake Lemon Cheesecake is the perfect harmony of zesty and sweet, with a texture so light it practically floats on your tongue.
r">Boosting the flavor
For an extra flavor boost, try folding in a handful of blueberry compote between layers or swirling it into the filling. The berries add a juicy, slightly tart contrast that pairs beautifully with the lemon. Alternatively, a drizzle of honey vanilla sauce enhances the cheesecake’s sweetness while adding a warm, floral note. A pinch of cardamom or a sprinkle of toasted coconut can also elevate the dessert, giving it a subtle spice or tropical twist. Experiment with these easy tweaks to make your No Bake Lemon Cheesecake even more irresistible.
Tips for Success
Best practices for results
For the smoothest No Bake Lemon Cheesecake, always use room-temperature cream cheese to prevent lumps. Additionally, chill the crust for at least 15 minutes before adding the filling to help it set properly. If you want a stronger lemon flavor, zest the fruit before juicing it and fold both into the batter. Finally, let the cheesecake firm up in the fridge for at least 4 hours, though overnight yields the best texture.
>Mistakes to avoid
Avoid overmixing the filling, as this can incorporate too much air and cause cracks. Instead, blend just until smooth. Many bakers also skip lining the pan, but parchment paper makes removal effortless. For more crust tips, check out our No Bake Dessert Basics guide. Lastly, don’t rush the chilling time—slice too soon, and the layers may separate. For troubleshooting, our Cheesecake Fixes post covers quick solutions.
Serving and Pairing Suggestions
How to serve this dish
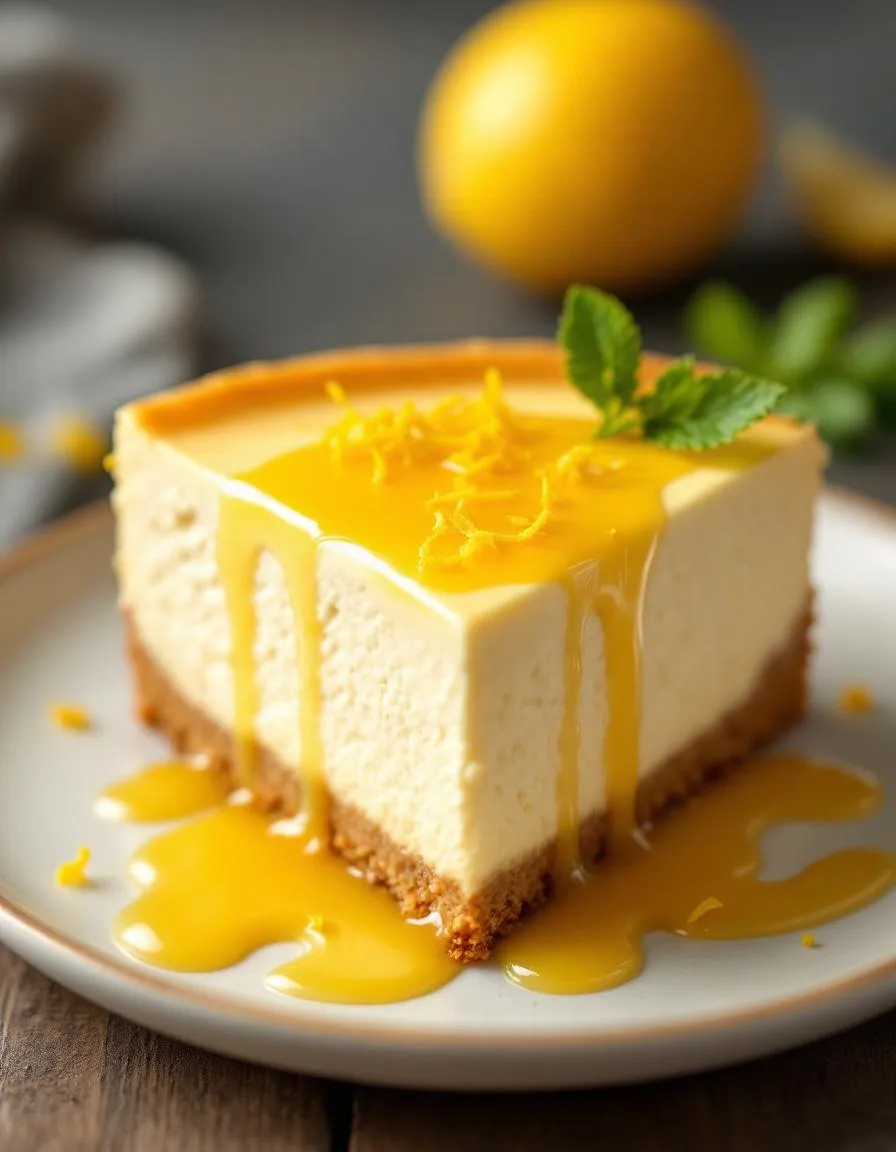
No Bake Lemon Cheesecake shines when you present it with a little flair. For a stunning look, top each slice with fresh berries, a dollop of whipped cream, or a sprinkle of lemon zest. Alternatively, drizzle a thin layer of blueberry sauce over the top for a pop of color. Since this dessert requires no baking, it’s perfect for warm-weather gatherings like picnics or backyard barbecues. Meanwhile, for special occasions, serve it on a decorative cake stand to elevate its charm. Whether you’re hosting a summer brunch or a holiday dinner, No Bake Lemon Cheesecake always impresses with its creamy texture and bright flavor.
What goes well with it
Pair No Bake Lemon Cheesecake with a light, fizzy drink like sparkling lemonade or prosecco to enhance its citrusy notes. The effervescence cuts through the richness, creating a refreshing balance. If you prefer something warmer, try a cup of herbal tea—earl grey or chamomile complements the dessert’s tangy sweetness. For a fuller spread, serve it alongside other crowd-pleasers like Classic Vanilla Cupcakes or Berry Chia Pudding. These pairings add variety while keeping the meal light and satisfying. No matter how you serve it, No Bake Lemon Cheesecake always delights.
How long does no bake lemon cheesecake need to set?
A no bake lemon cheesecake typically needs at least 4-6 hours in the refrigerator to set properly. For best results, let it chill overnight to ensure a firm, sliceable texture. The filling will thicken as it cools, giving your no bake lemon cheesecake the perfect consistency.
Can I use bottled lemon juice for no bake lemon cheesecake?
While fresh lemon juice is ideal for the brightest flavor, bottled lemon juice works in a pinch for no bake lemon cheesecake. Just be sure to taste the mixture before chilling, as bottled juice can vary in tartness. For the best results, use at least half fresh lemon juice if possible.
ank-math-faq-item">
Why is my no bake lemon cheesecake runny?
A runny no bake lemon cheesecake usually means it hasn’t chilled long enough or the cream cheese wasn’t fully softened before mixing. Make sure to whip the filling until completely smooth and give it ample time to set. If needed, add a bit more powdered sugar or a teaspoon of gelatin to help thicken the mixture.
Can I freeze no bake lemon cheesecake?
Yes, you can freeze no bake lemon cheesecake for up to 1 month. Wrap it tightly in plastic wrap and aluminum foil to prevent freezer burn. Thaw in the refrigerator overnight before serving for the best texture and flavor.