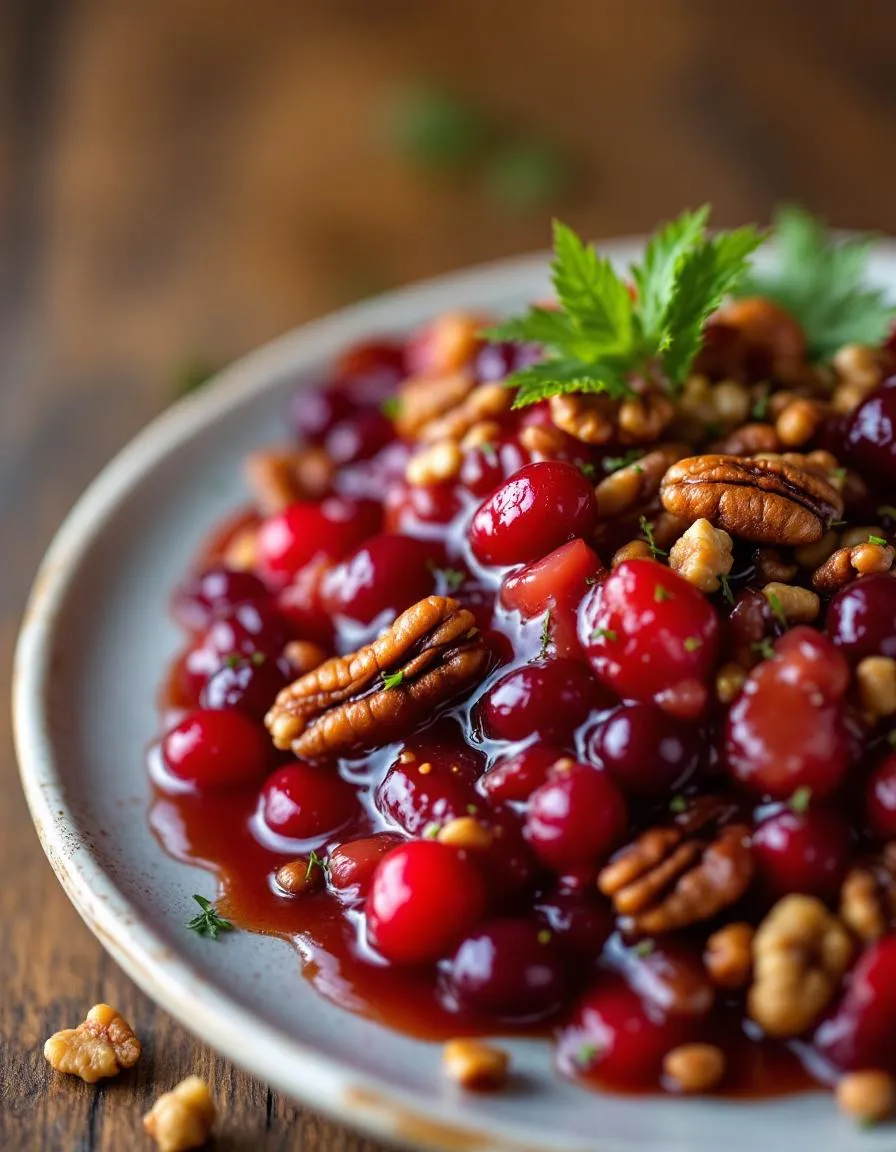
There’s something magical about a dish that balances sweet, tangy, and crunchy in every bite. If you’re craving a burst of flavor to elevate your holiday table or weeknight meals, this Tangy Cranberry Pecan Relish Recipe delivers. Whether you’re a seasoned cook or a kitchen newbie, this relish brings joy to every spoonful. Plus, it’s incredibly versatile—pair it with roasted meats, spread it on sandwiches, or even enjoy it straight from the jar. Let’s dive into why this recipe deserves a spot in your culinary lineup.
Tangy Cranberry Pecan Relish Recipe is a vibrant, no-cook condiment that combines tart cranberries, toasted pecans, and a hint of citrus for a refreshing twist. Unlike traditional cranberry sauce, this relish skips the stove, saving you time while delivering bold texture and flavor. It’s perfect for busy hosts who want to impress without stress. Beyond holidays, it brightens up everyday meals, like our Herb-Roasted Turkey Breast, or adds a festive touch to cheese boards. The blog’s focus on approachable, crowd-pleasing recipes aligns perfectly with this dish—simple ingredients, big impact. For more creative twists on classics, check out our Spiced Apple Chutney, another condiment that proves simplicity shines.
Why I Love This Recipe
This Tangy Cranberry Pecan Relish Recipe holds a special place in my heart because it reminds me of my grandmother’s kitchen. She always had a jar of something homemade tucked away, ready to surprise guests. The first time I made this relish, the crunch of pecans and the zing of cranberries transported me back to her holiday gatherings. Now, I love how it bridges nostalgia and convenience—quick to whip up yet unforgettable. Every time I serve it, someone asks for the recipe, and that’s the best compliment a home cook can get.
Health and Nutrition
Why it’s good for your body
Tangy Cranberry Pecan Relish Recipe packs a powerful punch of nutrients while delighting your taste buds. First, cranberries bring a hefty dose of antioxidants, which help fight inflammation and support immune health. Additionally, they offer natural tartness without added sugars, making this relish a smarter choice for balancing flavors. Meanwhile, pecans contribute heart-healthy fats and protein, keeping you satisfied longer.
Moreover, this relish delivers fiber from both cranberries and pecans, aiding digestion and promoting gut health. The combination also provides essential vitamins like vitamin C and E, which protect your cells from damage. Furthermore, the absence of processed ingredients ensures you enjoy pure, wholesome goodness in every bite. Tangy Cranberry Pecan Relish Recipe even includes a hint of citrus, boosting both flavor and vitamin content.
Finally, the relish fits seamlessly into various diets, from plant-based to gluten-free. Its natural sweetness comes from whole foods, avoiding refined sugars. Whether you serve it as a side or a topping, Tangy Cranberry Pecan Relish Recipe elevates meals with nutrition and flavor. Truly, it’s a dish that nourishes as much as it satisfies.
How it fits in a healthy lifestyle
Tangy Cranberry Pecan Relish Recipe effortlessly complements a balanced diet. If you follow a gluten-free or plant-based lifestyle, this relish fits right in, offering vibrant flavors without compromise. It also pairs well with lean proteins or whole grains, making it a versatile addition to meals. For heart-healthy eaters, the pecans provide monounsaturated fats, known to support cholesterol levels.
Busy weeknights call for simple, nutritious options, and this relish delivers. You can prepare it ahead and use it throughout the week. Try it as a topping for gluten-free overnight oats or alongside roasted chicken for a quick, wholesome dinner. If you love meal prepping, it stores beautifully in the fridge, saving you time without sacrificing quality.
For those mindful of sugar intake, the natural tartness of cranberries means you won’t need excess sweeteners. It’s a smarter alternative to store-bought condiments packed with additives. Craving more healthy recipe ideas? Explore our vegan meal prep bowls for more inspiration. Tangy Cranberry Pecan Relish Recipe proves that eating well can be delicious and effortless.
A sweet and tangy relish with a delightful crunch from pecans, perfect for holiday meals or as a condiment.
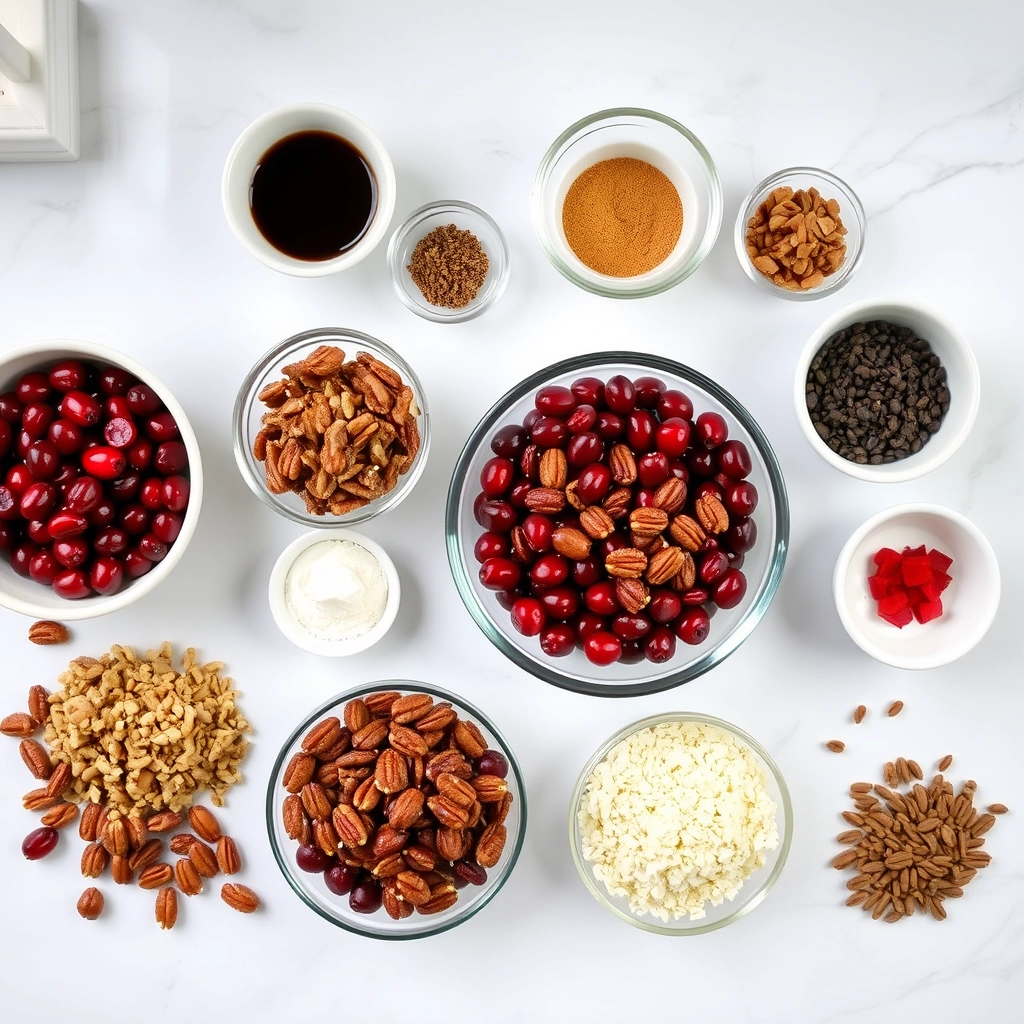
Ingredients
Scale
For the Crust:
12 oz fresh cranberries
1 cup granulated sugar
1/2 cup orange juice
1/2 cup chopped pecans
1 tsp orange zest
1/4 tsp ground cinnamon
Instructions
1. Prepare the Crust:
In a medium saucepan, combine cranberries, sugar, and orange juice. Bring to a boil over medium heat.
Reduce heat to low and simmer for 10-12 minutes, stirring occasionally, until cranberries burst and mixture thickens.
Remove from heat and stir in chopped pecans, orange zest, and cinnamon. Let cool before serving.
Notes
You can customize the seasonings to taste.
How to Prepare This Dish
Steps and time-saving tips
Start by rinsing the cranberries under cold water and patting them dry. Next, roughly chop the pecans for a satisfying crunch in every bite. Then, grab a large mixing bowl and combine the cranberries, pecans, orange zest, and a pinch of salt. Meanwhile, whisk together orange juice, honey, and a splash of apple cider vinegar in a small saucepan over medium heat. Let the mixture simmer for about 5 minutes until it thickens slightly. Once ready, drizzle the warm syrup over the cranberry-pecan mixture and gently fold everything together. For the best flavor, cover the bowl and refrigerate the relish for at least an hour before serving. If you’re short on time, pop it in the freezer for 20 minutes instead. The tangy sweetness pairs perfectly with roasted turkey or a creamy cheese board. For an extra festive touch, garnish with fresh rosemary or a sprinkle of cinnamon just before serving.
Mistakes I’ve made and learned from
Early on, I learned the hard way that overcooking the syrup ruins the texture of this Tangy Cranberry Pecan Relish Recipe. Once, I let it reduce too long, and it turned into a sticky mess that clumped the cranberries together. Now, I set a timer for 5 minutes and stir constantly. Another mistake? Skipping the chill time. I served it immediately once, and the flavors hadn’t melded yet—it tasted unbalanced. For deeper flavor, I now always let it rest, just like I do with my Spiced Apple Chutney. Also, if your pecans taste bland, toast them first! It’s a game-changer, just like with my Candied Pecan Cookies. Trust me, these small tweaks make all the difference.
Tangy Cranberry Pecan Relish Recipe has deep roots in American holiday traditions, especially Thanksgiving. Families often pass down their own versions, tweaking the balance of sweet and tart to suit their tastes. Some add orange zest for brightness, while others toss in a splash of bourbon for warmth. In the South, you might find pecans toasted extra dark, giving the relish a smoky depth. Meanwhile, up North, cooks sometimes swap pecans for walnuts or skip nuts altogether.
Beyond the U.S., cranberry relishes take on different personalities. In Scandinavia, lingonberries often stand in for cranberries, paired with almonds instead of pecans. British cooks might simmer theirs with port wine, creating a richer, jam-like texture. No matter the variation, Tangy Cranberry Pecan Relish Recipe always brings people together. It’s the kind of dish that sparks conversations—whether about grandma’s secret ingredient or the year someone forgot the sugar and created a legendary pucker-inducing batch.
ays-cooking">How it fits in today’s cooking
Today, Tangy Cranberry Pecan Relish Recipe remains a holiday staple, but it’s also breaking free from tradition. Modern cooks stir it into yogurt bowls, layer it on gluten-free pancakes, or even pair it with roasted vegetables for a sweet-and-savory twist. Meal preppers love how it keeps for weeks, making it a versatile fridge staple. Plus, its vibrant color and fresh flavors brighten up winter meals when produce options feel limited.
Health-conscious eaters appreciate that it’s naturally vegan and packed with antioxidants. Some blend it into smoothies or swirl it into overnight oats for a nutrient boost. Whether you serve it straight from the bowl or reinvent it in new ways, this relish proves that classic flavors never go out of style.
Taste and Texture
What makes it delicious
Tangy Cranberry Pecan Relish Recipe bursts with vibrant flavors and contrasting textures that make every bite exciting. The tart cranberries mingle with sweet orange zest, creating a bright, fruity punch that dances on your tongue. Meanwhile, the toasted pecans add a rich, buttery crunch, balancing the relish’s juicy tenderness. A hint of warm cinnamon and a splash of maple syrup deepen the flavor, turning each spoonful into a cozy yet refreshing experience. Whether you serve it chilled or at room temperature, Tangy Cranberry Pecan Relish Recipe delivers a festive harmony of sweet, tangy, and nutty notes that elevate any dish.
r">Boosting the flavor
For an extra flavor boost, try swapping maple syrup with honey or adding a pinch of cayenne pepper to introduce a subtle heat. Toasted coconut flakes or a sprinkle of orange zest can also amplify the relish’s tropical undertones. Pair it with creamy dishes like herb-roasted turkey or spread it over classic brie bites for a delightful contrast. A dash of fresh rosemary or thyme can add an earthy depth, making Tangy Cranberry Pecan Relish Recipe even more irresistible.
Tips for Success
Best practices for results
Always use fresh cranberries for the Tangy Cranberry Pecan Relish Recipe, as they provide the best texture and flavor. Meanwhile, toast the pecans lightly before adding them to enhance their nutty richness. Additionally, let the relish chill for at least two hours before serving so the flavors meld perfectly. For a balanced taste, adjust the sweetness with honey or maple syrup after tasting the mixture. Finally, store leftovers in an airtight container to keep the Tangy Cranberry Pecan Relish Recipe fresh for up to a week.
>Mistakes to avoid
Avoid overcooking the cranberries, or they’ll turn mushy instead of retaining a pleasant bite. Instead, simmer them just until they pop, then remove the pan from heat immediately. Also, don’t skip toasting the pecans, as raw nuts can taste bland and lack crunch. If you’re unsure about proper toasting techniques, check out our guide on how to toast nuts perfectly. Furthermore, resist serving the relish right away—letting it rest makes all the difference. For more tips on balancing flavors, explore our sweet and savory balancing guide to perfect your Tangy Cranberry Pecan Relish Recipe every time.
Serving and Pairing Suggestions
How to serve this dish
Brighten up your holiday table by serving Tangy Cranberry Pecan Relish Recipe in a festive glass bowl or a rustic wooden dish. For a pop of color, garnish with fresh mint leaves or orange zest. Meanwhile, this relish shines at brunch when paired with creamy cheeses or spread over warm biscuits. If you want to impress guests, layer it over a wheel of brie and bake until gooey for an irresistible appetizer. No matter the occasion, the vibrant flavors and textures make it a standout dish.
What goes well with it
Elevate your meal by pairing Tangy Cranberry Pecan Relish Recipe with savory roasted turkey or glazed ham—the sweet-tart contrast cuts through rich meats perfectly. Alternatively, try it alongside our Herb Roasted Potatoes for a balanced side dish duo. For drinks, a crisp white wine like Riesling complements the relish’s zesty profile, while our Spiced Apple Cider adds cozy warmth to holiday gatherings. Each pairing enhances the relish’s bold flavors while keeping the meal cohesive.
What ingredients do I need for Tangy Cranberry Pecan Relish?
You’ll need fresh cranberries, pecans, orange zest, orange juice, sugar, and a pinch of cinnamon. This Tangy Cranberry Pecan Relish Recipe balances sweet and tart flavors perfectly, with pecans adding a delightful crunch.
How long does Tangy Cranberry Pecan Relish last in the fridge?
Stored in an airtight container, this Tangy Cranberry Pecan Relish Recipe stays fresh for up to 2 weeks. The acidity from the cranberries and citrus acts as a natural preservative, keeping it flavorful.
ank-math-faq-item">
Can I make Tangy Cranberry Pecan Relish ahead of time?
Yes! This relish actually tastes better after chilling for 24 hours, as the flavors meld together. Prepare your Tangy Cranberry Pecan Relish Recipe a day before serving for optimal taste.
What dishes pair well with Tangy Cranberry Pecan Relish?
This versatile relish complements turkey, ham, roasted chicken, or even cheese boards. The Tangy Cranberry Pecan Relish Recipe adds a bright, festive touch to both holiday meals and everyday dishes.
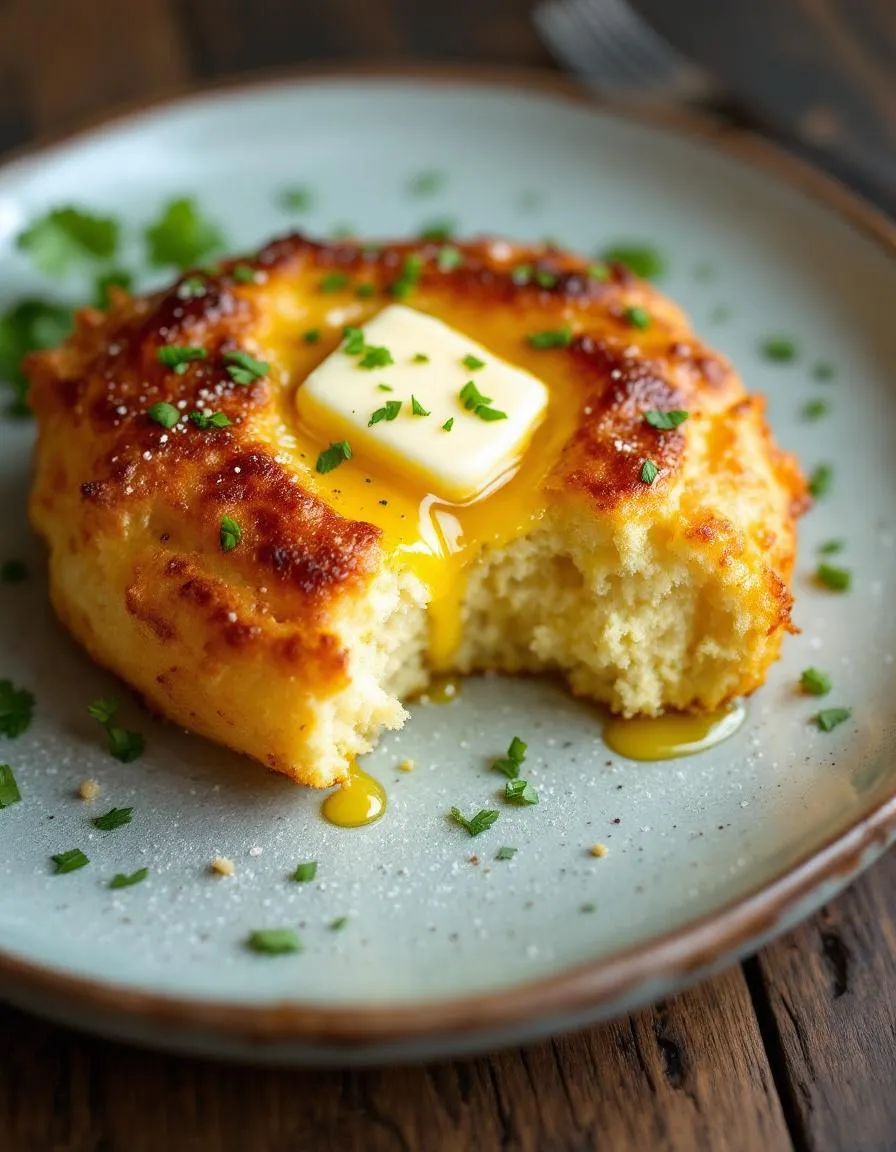
There’s something undeniably comforting about a warm, buttery slice of Southern Spoon Bread Recipe fresh from the oven. Whether you grew up with it or are discovering it for the first time, this dish wraps you in the cozy embrace of Southern hospitality. It’s the kind of recipe that turns a simple meal into a memory, and today, I’m sharing my favorite version—one that balances tradition with just the right touch of modern ease. If you love soul-soothing comfort food, you’re in the right place.
Southern Spoon Bread Recipe is a classic Southern dish that sits somewhere between cornbread and a soufflé. Unlike traditional cornbread, it’s soft, creamy, and almost pudding-like, making it perfect for scooping straight from the baking dish. Originating from Native American cuisine and later embraced by Southern cooks, this recipe carries generations of history in every bite. What makes it special is its versatility. Serve it alongside smoky barbecue, a hearty stew, or even as a standalone treat with a drizzle of honey. For more Southern-inspired sides, check out our Classic Collard Greens or Creamy Macaroni and Cheese to complete your meal.
This blog celebrates food that feels like home, and Southern Spoon Bread Recipe fits that perfectly. It’s unpretentious yet deeply flavorful, the kind of dish that invites everyone to the table. Whether you’re a seasoned cook or a beginner, this recipe guides you with clear steps and tips for success. Plus, it’s a fantastic way to introduce friends and family to a lesser-known Southern gem. After all, good food isn’t just about taste—it’s about connection.
Why I Love This Recipe
My love for Southern Spoon Bread Recipe started in my grandmother’s kitchen, where she’d pull it from the oven just as the family gathered for Sunday supper. The golden top cracked slightly under the spoon, revealing a cloud-like interior that melted in your mouth. Even now, the smell of butter and cornmeal takes me back to those moments—laughter around the table, stories shared, and seconds always encouraged. This recipe isn’t just food to me. It’s a reminder of how the simplest dishes can hold the biggest heart.
Health and Nutrition
Why it’s good for your body
Southern Spoon Bread Recipe delivers a comforting yet nutritious twist on classic comfort food. First, it packs a hearty dose of fiber thanks to its cornmeal base, which supports digestion and keeps you feeling full longer. Additionally, the eggs and milk in the recipe provide high-quality protein, helping to maintain muscle health and energy levels throughout the day.
Moreover, Southern Spoon Bread Recipe offers essential vitamins and minerals. For instance, cornmeal contains iron and B vitamins, which play key roles in energy production and red blood cell formation. Meanwhile, the dairy ingredients contribute calcium and vitamin D, promoting strong bones and immune function. Because the recipe relies on simple, whole ingredients, you avoid unnecessary additives often found in processed foods.
Furthermore, Southern Spoon Bread Recipe balances indulgence with nourishment. While it satisfies cravings for something warm and comforting, it also provides steady energy without excessive sugar or unhealthy fats. Whether you enjoy it as a side or a standalone dish, this recipe proves that wholesome eating can still be delicious.
How it fits in a healthy lifestyle
Southern Spoon Bread Recipe fits seamlessly into a balanced diet, especially if you prioritize whole, minimally processed foods. For those managing gluten sensitivities, swapping traditional flour for cornmeal makes it a naturally gluten-free option. Pair it with a protein-rich main like grilled chicken or a hearty vegetable stew for a well-rounded meal.
If you focus on heart health, the moderate fat content in Southern Spoon Bread Recipe comes primarily from wholesome sources like milk and eggs. These ingredients provide healthy fats that support brain function and satiety. For a lighter twist, try using low-fat milk or a plant-based alternative. You can also explore our balanced meal prep ideas to incorporate this dish into your weekly routine without compromising nutrition goals.
Ultimately, Southern Spoon Bread Recipe adapts to various dietary needs while keeping flavor and satisfaction front and center. Enjoy it mindfully as part of a diverse, nutrient-rich eating plan.
A classic Southern side dish that’s a cross between cornbread and a soufflé, perfect for soaking up gravy or enjoying with butter.
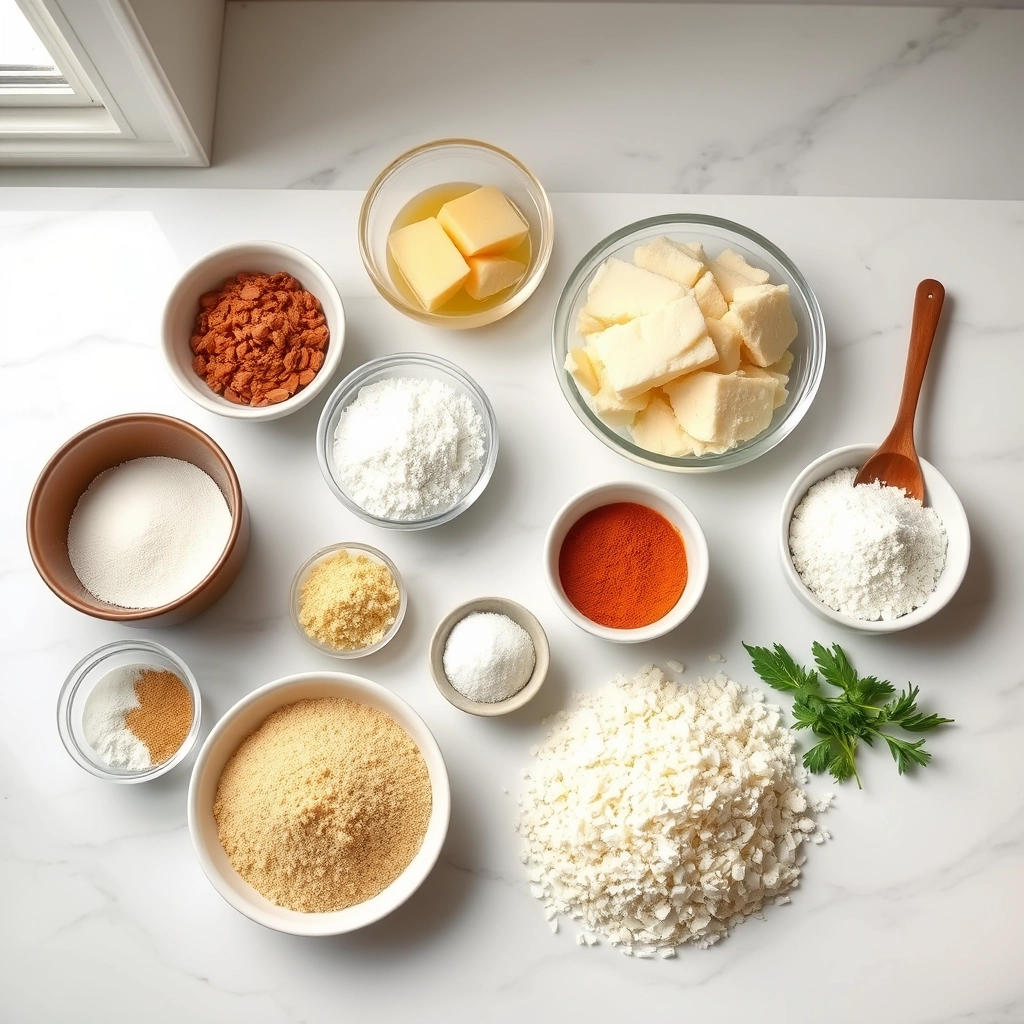
Ingredients
Scale
For the Crust:
1 cup yellow cornmeal
1 teaspoon salt
2 cups boiling water
2 tablespoons butter
3 eggs, separated
1 cup milk
1 teaspoon baking powder
Instructions
1. Prepare the Crust:
Preheat oven to 375°F (190°C). Grease a 2-quart baking dish.
In a large bowl, mix cornmeal and salt. Pour in boiling water and stir until smooth. Add butter and let stand for 5 minutes.
Beat egg yolks and milk together, then stir into the cornmeal mixture. Stir in baking powder.
In a separate bowl, beat egg whites until stiff peaks form. Gently fold into the cornmeal mixture.
Pour batter into prepared baking dish. Bake for 30-35 minutes until golden and set. Serve warm with a spoon.
Notes
You can customize the seasonings to taste.
“`html
s-dish">How to Prepare This Dish
Steps and time-saving tips
Start by preheating your oven to 375°F and generously buttering a 2-quart baking dish. Meanwhile, whisk together the cornmeal, flour, sugar, baking powder, and salt in a large bowl. In a separate bowl, beat the eggs until frothy, then blend in the milk and melted butter. Gradually pour the wet ingredients into the dry mixture, stirring just until combined—don’t overmix. For extra flavor, fold in a handful of shredded cheddar or a dash of cayenne pepper. Transfer the batter to the prepared dish and smooth the top. Bake for 35-40 minutes until golden and set at the edges but still slightly jiggly in the center. Let it rest for 10 minutes before serving warm with honey or extra butter. To save time, measure your dry ingredients the night before or use a stand mixer for the batter. If you prefer a crispier top, broil for the last 2 minutes.
Mistakes I’ve made and learned from
My first attempt at Southern Spoon Bread Recipe turned out dense because I overmixed the batter—turns out, gentle folding is key. Another time, I skipped resting the dish after baking, and it collapsed like a sad soufflé. Now I always set a timer for that crucial 10-minute wait. If your spoon bread cracks, don’t panic; it’s still delicious (and easily covered with a drizzle of hot honey). For more troubleshooting, check out my guide on fixing dense baked goods. Also, if you’re new to cornmeal-based dishes, my cornmeal baking tips explain how to adjust moisture levels for perfect texture every time.
Southern Spoon Bread Recipe carries the heartwarming legacy of Southern comfort food. Born in the American South, this dish blends Native American cornmeal traditions with European baking techniques. Families often passed down their versions like heirlooms, tweaking the recipe with local ingredients. Some cooks add cheese or bacon for richness, while others keep it simple with just buttermilk and butter. In Appalachia, you might find a denser, more custard-like version, whereas coastal regions sometimes lighten it with extra eggs.
Interestingly, similar dishes pop up worldwide. Mexicans enjoy their own corn-based “sopa de elote,” and Italians whip up polenta-inspired bakes. Even within the South, no two spoon breads taste exactly alike. My grandma swore by a pinch of sugar to balance the cornmeal, while her neighbor added jalapeños for heat. The Southern Spoon Bread Recipe adapts effortlessly, making it a true chameleon of the kitchen. Whether served at Sunday supper or a holiday feast, it always feels like home.
ays-cooking">How it fits in today’s cooking
Today, the Southern Spoon Bread Recipe thrives as both a nostalgic favorite and a modern staple. Busy cooks love its versatility—it pairs perfectly with slow-cooker pulled pork for weeknight dinners or shines as the star of a Thanksgiving spread. Health-conscious bakers swap in almond milk or gluten-free cornmeal without losing that creamy texture. Meal preppers even bake it in muffin tins for portion-controlled comfort.
Social media fuels new twists, too. Food bloggers layer it with roasted veggies or top it with spicy honey. Yet no matter how we adapt it, the soul of Southern Spoon Bread Recipe remains. It bridges generations, turning simple ingredients into something extraordinary. From cast-iron skillets to silicone molds, this dish proves that tradition always finds a way to stay deliciously relevant.
Taste and Texture
What makes it delicious
Southern Spoon Bread Recipe delivers a uniquely comforting experience with its soft, custard-like texture that melts in your mouth. Each bite offers a delicate balance of sweet cornmeal and rich, buttery undertones, while the edges bake to a golden, slightly crisp finish. The aroma alone—warm, buttery, and faintly sweet—will draw everyone to the table. Thanks to ingredients like whole milk and eggs, this dish stays luxuriously creamy, yet light enough to pair perfectly with savory mains. Whether served warm or at room temperature, Southern Spoon Bread Recipe feels like a cozy hug from the South.
r">Boosting the flavor
For an extra flavor kick, try stirring sharp cheddar or smoked gouda into the batter before baking—it adds a savory depth that contrasts beautifully with the natural sweetness. Alternatively, drizzle warm honey or a pat of herb-infused butter over the top for a fragrant finish. If you love a touch of heat, a sprinkle of cayenne or a side of creamy jalapeño sauce elevates the dish without overpowering its delicate texture. Small tweaks like these let you customize Southern Spoon Bread Recipe to match any meal or craving.
Tips for Success
Best practices for results
First, always preheat your oven thoroughly before baking Southern Spoon Bread Recipe to ensure even cooking. Next, use fresh cornmeal for the best texture and flavor, as stale cornmeal can make the dish gritty. Additionally, gently fold the egg whites into the batter last to keep the spoon bread light and airy. For extra richness, substitute buttermilk for regular milk, which adds a subtle tang. Finally, serve Southern Spoon Bread Recipe immediately after baking while it’s still warm and fluffy.
>Mistakes to avoid
Avoid overmixing the batter, as this can make Southern Spoon Bread Recipe dense instead of tender. Instead, stir just until the ingredients combine. Also, don’t skip greasing the baking dish well, or the spoon bread may stick. If you’re unsure about oven temperature accuracy, use an oven thermometer to prevent underbaking. Lastly, resist opening the oven door too early, as this can cause the spoon bread to collapse. For more troubleshooting tips, check out our guide on common baking mistakes.
Serving and Pairing Suggestions
How to serve this dish
Southern Spoon Bread Recipe shines when served warm straight from the oven, with its golden top and fluffy interior. For a rustic touch, present it in a cast-iron skillet or a decorative ceramic dish. Meanwhile, garnish with a pat of butter melting into the center or a drizzle of honey for extra sweetness. This dish makes a perfect addition to holiday feasts, Sunday brunches, or cozy family dinners. To elevate the presentation, sprinkle fresh herbs like chives or thyme on top for a pop of color.
What goes well with it
Pair Southern Spoon Bread Recipe with smoky collard greens for a classic Southern combo that balances creamy and savory flavors. Alternatively, serve it alongside a tangy tomato bisque for a comforting meal. For drinks, sweet tea or a crisp Chardonnay complement the dish beautifully. If you love hearty sides, try our Southern Collard Greens or Creamy Tomato Bisque to complete the spread. Each pairing enhances the spoon bread’s rich texture and subtle cornmeal sweetness.
What is the difference between Southern spoon bread and cornbread?
Southern Spoon Bread Recipe is a creamy, pudding-like dish with a lighter texture than traditional cornbread. While both use cornmeal, spoon bread includes eggs and milk or buttermilk for a custard-like consistency, making it softer and more spoonable.
Can I make Southern spoon bread without buttermilk?
Yes, you can substitute buttermilk with regular milk mixed with a tablespoon of vinegar or lemon juice in your Southern Spoon Bread Recipe. The acidity helps activate the baking soda, but the final result will still be deliciously moist and tender.
ank-math-faq-item">
How do you know when Southern spoon bread is done?
Southern Spoon Bread Recipe is ready when the edges are golden brown and the center is set but still slightly jiggly. A toothpick inserted near the center should come out clean, similar to testing a custard or soufflé.
What do you serve with Southern spoon bread?
Southern Spoon Bread Recipe pairs perfectly with hearty dishes like fried chicken, collard greens, or barbecue. It also makes a great side for holiday meals, especially when topped with butter, honey, or maple syrup for extra richness.
Best Shrimp Saganaki – Authentic Greek Delight
Introduction
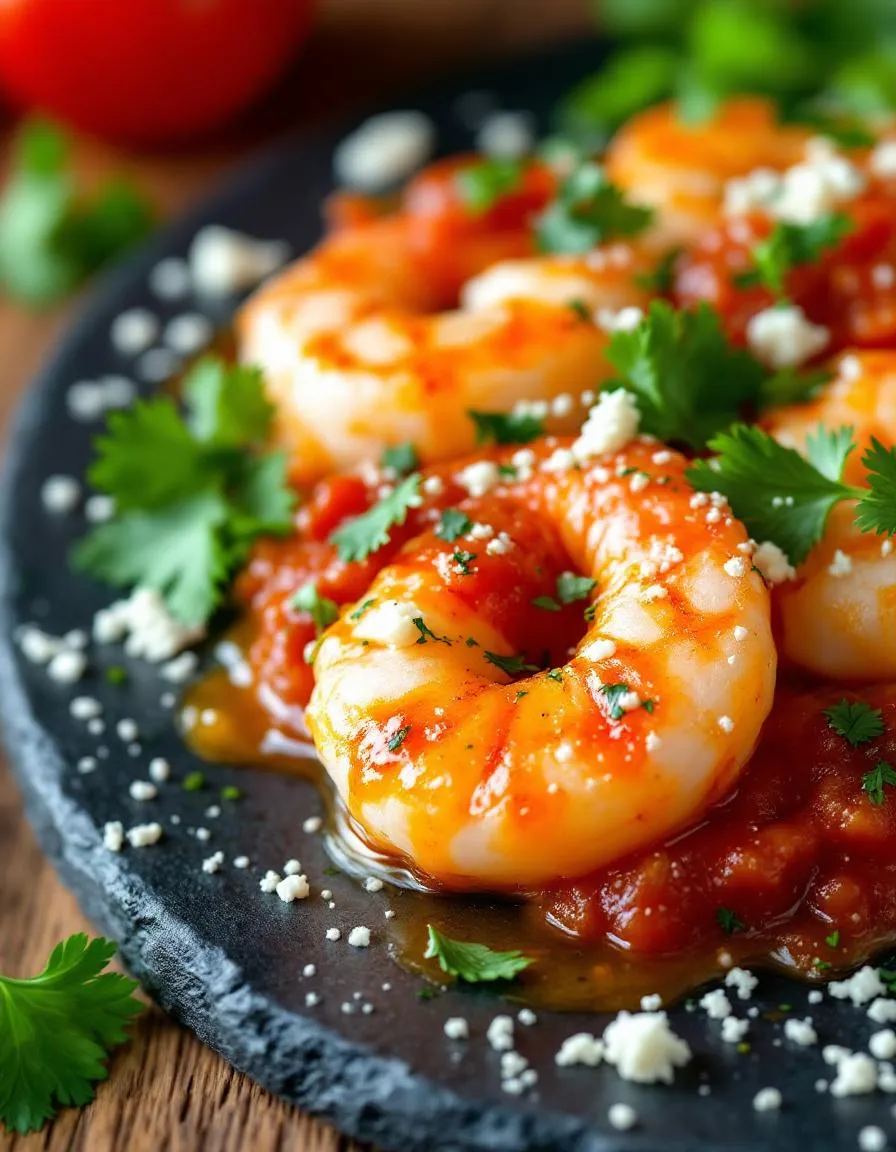
There’s something magical about a dish that brings warmth, flavor, and a touch of nostalgia to the table. If you’re craving a meal that feels like a cozy hug with every bite, this Flavorful Shrimp Saganaki Delight is your answer. Picture plump shrimp simmered in a rich tomato sauce, kissed with herbs and feta, creating a symphony of Mediterranean flavors. Whether you’re cooking for a special occasion or just treating yourself, this recipe promises to deliver joy in every spoonful.
Flavorful Shrimp Saganaki Delight is a vibrant Greek-inspired dish that combines succulent shrimp with a tangy tomato and feta sauce. Traditionally baked in a skillet, it’s a showstopper that’s surprisingly simple to make. What makes it special? The balance of briny shrimp, sweet tomatoes, and creamy feta creates a harmony of tastes that feels both rustic and refined. This dish isn’t just food—it’s an experience. It’s perfect for sharing with loved ones or savoring solo, and it pairs beautifully with crusty bread or a light salad. If you love bold flavors, you’ll adore how this recipe elevates weeknight dinners or impresses guests without fuss. Plus, it aligns perfectly with our blog’s mission to bring approachable yet exciting recipes to your kitchen. For more Mediterranean inspiration, check out our classic Greek salad or explore our garlic butter shrimp for another seafood favorite.
Why I Love This Recipe
Flavorful Shrimp Saganaki Delight holds a special place in my heart because it reminds me of summers spent by the Aegean Sea. The first time I tried it, the burst of tomatoes and the salty feta instantly transported me to a seaside taverna. Now, every time I make it, I relive those sunny memories. What I love most is how adaptable it is—you can tweak the herbs or add a splash of ouzo for extra depth. It’s a dish that feels luxurious yet comforting, and I hope it becomes a staple in your kitchen too.
Health and Nutrition
Why it’s good for your body
Flavorful Shrimp Saganaki Delight packs a nutritious punch while satisfying your taste buds. First, shrimp delivers lean protein, which helps build muscle and keeps you full longer. Additionally, this dish includes tomatoes, a rich source of antioxidants like lycopene that support heart health. The olive oil in Flavorful Shrimp Saganaki Delight also provides healthy fats, which reduce inflammation and promote brain function.
Moreover, the feta cheese adds calcium and probiotics for stronger bones and gut health. Since shrimp contains omega-3 fatty acids, this meal supports cognitive function and reduces the risk of chronic diseases. The herbs and spices, such as oregano and garlic, not only enhance flavor but also offer antimicrobial and anti-inflammatory benefits. With every bite of Flavorful Shrimp Saganaki Delight, you nourish your body without sacrificing taste.
Finally, the balanced macronutrients make it a smart choice for energy and satiety. Whether you’re fueling up for the day or winding down at night, this dish fits seamlessly into a wholesome diet. The combination of fresh ingredients ensures you get vitamins, minerals, and flavor in every serving.
How it fits in a healthy lifestyle
Flavorful Shrimp Saganaki Delight aligns perfectly with a balanced diet. If you’re following a Mediterranean-inspired eating plan, this dish checks all the boxes with its emphasis on seafood, olive oil, and fresh produce. It’s also naturally gluten-free, making it ideal for those with dietary restrictions.
For protein-focused goals, the shrimp provides a high-quality source without excess calories. Pair it with a light salad or whole grains for a complete meal. If you’re exploring heart-healthy options, the omega-3s and monounsaturated fats in this recipe support cardiovascular wellness. For more inspiration, check out our guide to Mediterranean diet benefits.
Busy weeknights? Flavorful Shrimp Saganaki Delight comes together quickly, proving that healthy eating doesn’t have to be complicated. It’s also versatile enough for meal prep or entertaining. For more easy, nutrient-packed ideas, browse our quick healthy dinners collection. No matter your lifestyle, this dish helps you eat well without compromise.
A delicious Greek-inspired dish featuring succulent shrimp cooked in a rich tomato and feta sauce.
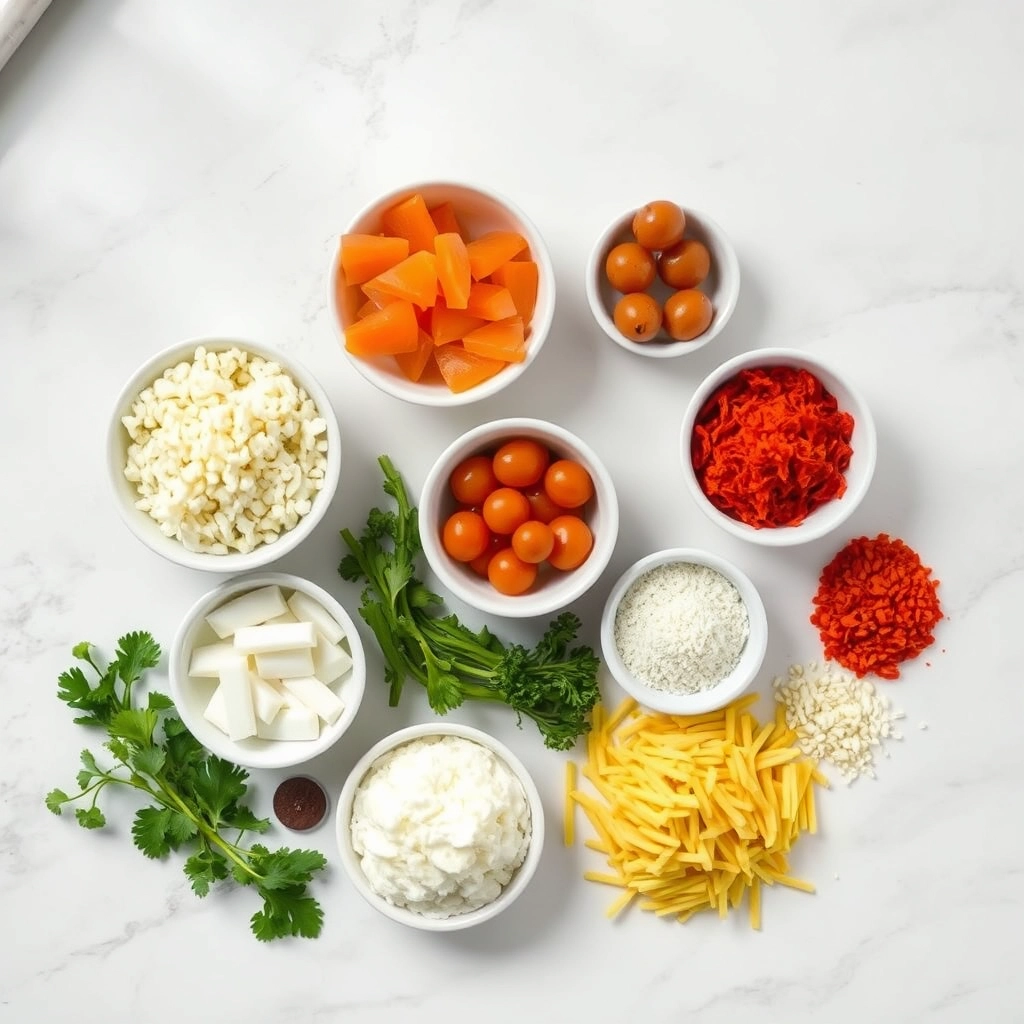
Ingredients
Scale
For the Crust:
1 lb large shrimp, peeled and deveined
2 tbsp olive oil
1 small onion, finely chopped
3 garlic cloves, minced
1 can (14 oz) diced tomatoes
1/2 cup white wine
1 tsp dried oregano
1/2 tsp red pepper flakes
1/2 cup crumbled feta cheese
2 tbsp fresh parsley, chopped
Salt and pepper to taste
Instructions
1. Prepare the Crust:
Heat olive oil in a large skillet over medium heat. Add onion and sauté until translucent, about 3 minutes.
Add garlic and cook for another 30 seconds until fragrant. Stir in diced tomatoes, white wine, oregano, and red pepper flakes. Simmer for 10 minutes.
Add shrimp to the skillet and cook for 3-4 minutes until pink and cooked through. Sprinkle with feta cheese and cover for 1-2 minutes until cheese softens.
Garnish with fresh parsley and serve hot with crusty bread or over rice.
Notes
You can customize the seasonings to taste.
How to Prepare This Dish
Steps and time-saving tips
Start by preheating your oven to 375°F so it’s ready when you finish prepping. Meanwhile, heat a large skillet over medium heat and drizzle in olive oil. Sauté minced garlic and diced onions until they turn fragrant and translucent, about 3 minutes. Next, add peeled and deveined shrimp, cooking them just until they turn pink—this takes roughly 2 minutes per side. Stir in crushed tomatoes, a splash of white wine, and a pinch of oregano for that classic Flavorful Shrimp Saganaki Delight taste. Let the mixture simmer for 5 minutes to meld the flavors. Transfer everything to an oven-safe dish and crumble feta cheese on top. Bake for 10-12 minutes until the cheese softens and the edges bubble. For a time-saving hack, prep the garlic and onions ahead or use pre-cooked shrimp to cut down on active cooking time. Garnish with fresh parsley and serve warm with crusty bread for dipping.
Mistakes I’ve made and learned from
One mistake I made early on was overcooking the shrimp before baking, leaving them rubbery. Now, I pull them off the heat as soon as they turn opaque—they’ll finish cooking in the oven. Another blunder? Skipping the wine, which adds depth. If you’re out of white wine, a squeeze of lemon works in a pinch. I also learned the hard way that cheap feta doesn’t melt well; splurge on a block for creamier results. For more tips on balancing flavors, check out my guide on balancing savory and sweet. And if you’re new to seafood dishes, my seafood basics post breaks down prep techniques to save you trial and error.
Flavorful Shrimp Saganaki Delight traces its roots to the sun-drenched coasts of Greece, where seafood and fresh tomatoes shine in every bite. Traditionally, fishermen prepared this dish with the day’s catch, simmering shrimp in a tangy tomato sauce with feta and herbs. Over time, families added their own twists—some splash in ouzo for a licorice kick, while others toss in bell peppers for extra sweetness. My grandmother, for instance, always stirred in a pinch of cinnamon, claiming it brought warmth to the table.
Beyond Greece, variations pop up worldwide. In Turkey, cooks might swap feta for kasseri cheese, and in Italy, they often garnish with basil instead of oregano. Even in the Caribbean, chefs reinvent Flavorful Shrimp Saganaki Delight with coconut milk and Scotch bonnet peppers. No matter the version, the dish always feels like a celebration—of flavor, community, and shared stories.
ays-cooking">How it fits in today’s cooking
Today, Flavorful Shrimp Saganaki Delight fits perfectly into modern kitchens. Busy cooks love it for quick weeknight dinners, while foodies showcase it at dinner parties with crusty bread for dipping. Many now lighten it up by using coconut oil or skipping the cheese, proving how adaptable this classic remains. For a cozy twist, pair it with a simple Greek salad or serve it over zucchini noodles.
Seasonally, it’s a summer star but works year-round with frozen shrimp and canned tomatoes. Some even make it a holiday appetizer, echoing the communal spirit of Mediterranean feasts. If you’re craving more comfort food ideas, try our Mediterranean diet favorites to keep the flavors flowing. Whether you stick to tradition or experiment, this dish always delivers warmth and connection.
Taste and Texture
What makes it delicious
Flavorful Shrimp Saganaki Delight bursts with rich, tangy flavors and a luxurious texture that keeps you coming back for more. Juicy shrimp soak up a vibrant tomato sauce, infused with garlic, oregano, and a splash of ouzo for a subtle anise aroma. The dish finishes with creamy, melted feta that adds a salty, velvety contrast to the tender seafood. Each bite delivers a harmony of briny, sweet, and herbal notes, while the sauce clings perfectly to crusty bread for dipping. Flavorful Shrimp Saganaki Delight isn’t just a meal—it’s a sensory celebration.
r">Boosting the flavor
For an extra flavor kick, try swapping feta for sharp kefalotyri cheese or adding a pinch of red pepper flakes to amplify the heat. A drizzle of bright chimichurri sauce balances the dish’s richness, while a side of lemon herb quinoa adds a refreshing, zesty contrast. Toasting the shrimp shells before simmering them in the sauce deepens the umami notes, and a squeeze of fresh lemon just before serving brightens every layer. With these tweaks, Flavorful Shrimp Saganaki Delight becomes even more irresistible.
Tips for Success
Best practices for results
Always pat the shrimp dry before cooking to ensure they sear properly in your Flavorful Shrimp Saganaki Delight. Meanwhile, use fresh feta cheese for the best creamy texture and tangy flavor. For even cooking, simmer the tomato sauce on medium-low heat until it thickens slightly. Additionally, finish the dish with a sprinkle of fresh parsley to brighten the flavors. Finally, serve the Flavorful Shrimp Saganaki Delight immediately for the perfect balance of warmth and freshness.
>Mistakes to avoid
Overcooking the shrimp can make them rubbery, so remove them from the heat as soon as they turn pink. Similarly, avoid using canned tomatoes with added salt, as they can make the dish too salty—opt for no-salt-added varieties instead. If your sauce seems too thin, let it reduce a bit longer, but stir frequently to prevent sticking. For more tips on balancing flavors, check out our guide on seasoning secrets. Also, if you’re new to cooking seafood, our seafood basics article will help you master the basics.
Serving and Pairing Suggestions
How to serve this dish
Bring out the vibrant colors and rich flavors of Flavorful Shrimp Saganaki Delight by serving it in a rustic ceramic dish or a shallow bowl. For a stunning presentation, sprinkle fresh chopped parsley or dill on top and add a few lemon wedges on the side. This dish shines as a centerpiece for weekend brunches or elegant dinner parties. Alternatively, serve it family-style with crusty bread for dipping, letting everyone gather around the table to enjoy the communal experience.
What goes well with it
Pair Flavorful Shrimp Saganaki Delight with a crisp Greek salad for a refreshing contrast to its rich tomato sauce. The tangy feta and crisp cucumbers balance the dish perfectly. For a heartier meal, try it alongside our Garlic Herb Roasted Potatoes, which soak up the sauce beautifully. To elevate the experience, pour a glass of chilled Assyrtiko wine or a citrusy craft beer. If you prefer non-alcoholic options, our Homemade Lemonade adds a bright, zesty note that cuts through the dish’s richness.
Flavorful Shrimp Saganaki Delight is a Greek-inspired dish featuring succulent shrimp cooked in a rich tomato and feta cheese sauce. It combines fresh herbs, garlic, and a splash of ouzo for an authentic Mediterranean taste. This dish is perfect as an appetizer or main course, offering a burst of flavor in every bite.
How do I make Flavorful Shrimp Saganaki Delight at home?
To make Flavorful Shrimp Saganaki Delight, sauté shrimp with garlic and onions, then simmer in a tomato sauce with herbs and spices. Finish by topping it with crumbled feta cheese and baking until bubbly. Serve with crusty bread to soak up the delicious sauce for a complete meal.
ank-math-faq-item">
What sides pair well with Flavorful Shrimp Saganaki Delight?
Flavorful Shrimp Saganaki Delight pairs beautifully with warm pita bread, a crisp Greek salad, or lemon-infused rice. For a heartier meal, try serving it over orzo pasta or alongside roasted vegetables to complement the dish’s bold flavors.
Can I use frozen shrimp for Flavorful Shrimp Saganaki Delight?
Yes, frozen shrimp work well for Flavorful Shrimp Saganaki Delight—just thaw and pat them dry before cooking. Fresh shrimp are ideal, but frozen shrimp are a convenient alternative that still deliver great taste and texture when prepared properly.
Best Crunchy Brussels Sprout Salad with Apples & Walnuts
Introduction
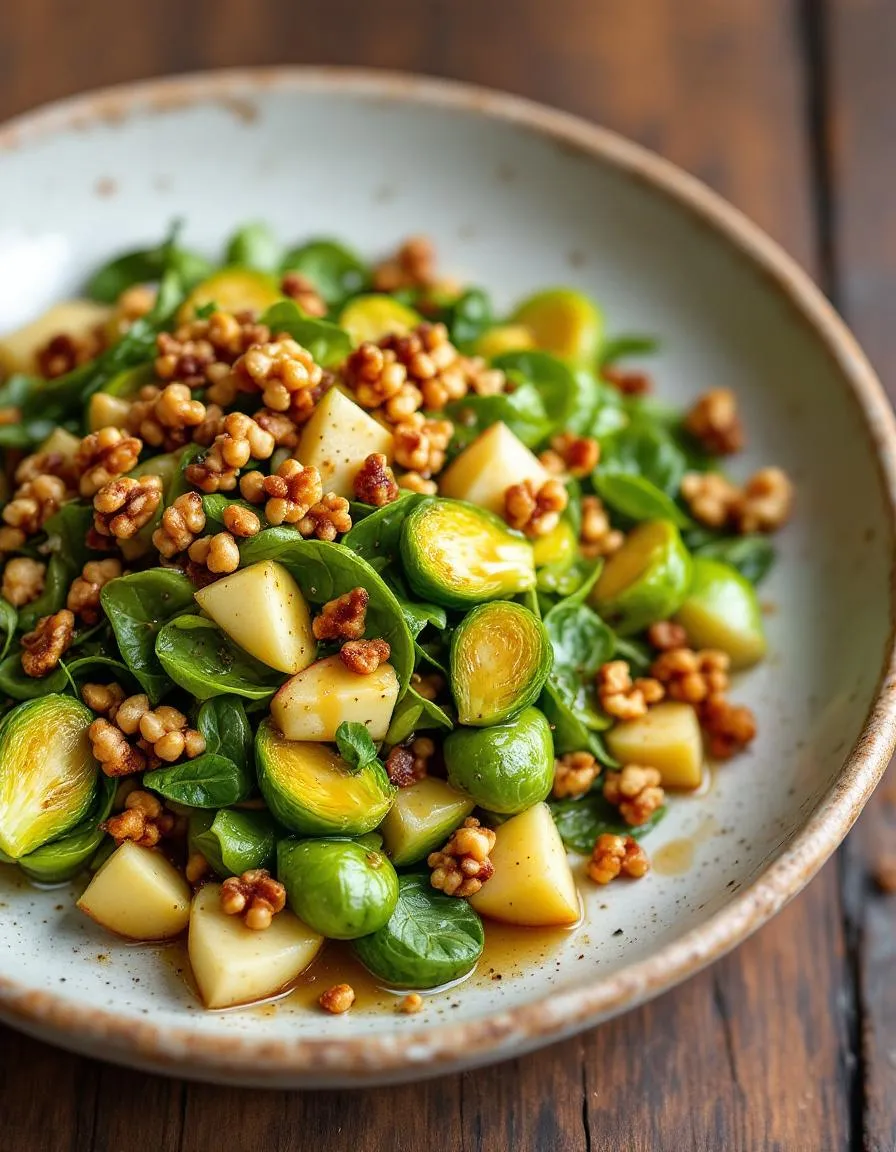
If you crave a salad that’s anything but boring, you’re in the right place. Crunchy Brussels Sprout Salad with Apples & Walnuts delivers bold flavors and satisfying textures in every bite. Whether you need a vibrant side dish for dinner or a meal-prep hero that stays crisp for days, this recipe turns humble ingredients into something extraordinary. Best of all, it’s as easy to make as it is delicious—no fancy skills required.
Crunchy Brussels Sprout Salad with Apples & Walnuts combines shredded Brussels sprouts, crisp apples, toasted walnuts, and a tangy-sweet dressing for a dish that’s both refreshing and hearty. Unlike leafy greens that wilt quickly, Brussels sprouts hold their crunch, making this salad perfect for picnics, potlucks, or packed lunches. The sweetness of the apples balances the sprouts’ earthy notes, while the walnuts add a rich, buttery depth. Plus, this recipe fits seamlessly into our blog’s focus on wholesome, flavor-packed meals that don’t sacrifice convenience. For more make-ahead inspiration, try our easy meal-prep ideas, or if you love seasonal produce, explore our favorite fall recipes.
Why I Love This Recipe
This salad holds a special place in my kitchen because it’s the ultimate crowd-pleaser. I first made it for a family gathering where picky eaters and foodies alike raved about it. The crunch of the Brussels sprouts reminds me of autumn farmers’ markets, and the walnuts add just enough richness to feel indulgent. Most importantly, it’s a recipe that adapts—swap in pears or pecans, add cheese or protein, and it still shines. Every time I serve it, someone asks for the recipe, and that’s the best kind of kitchen win.
Health and Nutrition
Why it’s good for your body
Crunchy Brussels Sprout Salad with Apples & Walnuts packs a powerful nutritional punch. First, Brussels sprouts deliver fiber and vitamin C, which support digestion and immunity. Meanwhile, apples add natural sweetness and antioxidants, helping fight inflammation. Additionally, walnuts contribute heart-healthy omega-3s and plant-based protein.
Because this salad combines raw Brussels sprouts with crisp apples, it retains maximum nutrients. Unlike overcooked vegetables, the crunchy texture ensures you get all the vitamins intact. Furthermore, the walnuts provide healthy fats that keep you full longer, making this dish both satisfying and nourishing.
Another benefit of Crunchy Brussels Sprout Salad with Apples & Walnuts is its versatility. Whether you need a light lunch or a vibrant side, it fits seamlessly into any meal. The ingredients work together to balance flavors and textures while delivering essential nutrients. Ultimately, this salad proves that healthy eating can be delicious and effortless.
How it fits in a healthy lifestyle
Crunchy Brussels Sprout Salad with Apples & Walnuts aligns perfectly with a balanced diet. If you follow a gluten-free or plant-based lifestyle, this dish naturally fits your needs. It also works well for heart-healthy eating, thanks to the omega-3s from walnuts and fiber from Brussels sprouts.
For meal preppers, this salad stays fresh for days, making it a smart choice for busy weeks. Pair it with a lean protein like grilled chicken or tofu for a complete meal. If you love wholesome recipes, explore our gluten-free meal prep ideas for more inspiration.
Even if you’re new to healthy eating, Crunchy Brussels Sprout Salad with Apples & Walnuts is an easy win. Its simple ingredients and quick prep time remove common barriers. For more tips on incorporating nutrient-rich meals, check out our guide to building a balanced diet. No matter your goals, this salad helps you eat well without sacrificing flavor.
A fresh and crunchy salad featuring shredded Brussels sprouts, crisp apples, and toasted walnuts for a delightful mix of textures and flavors.
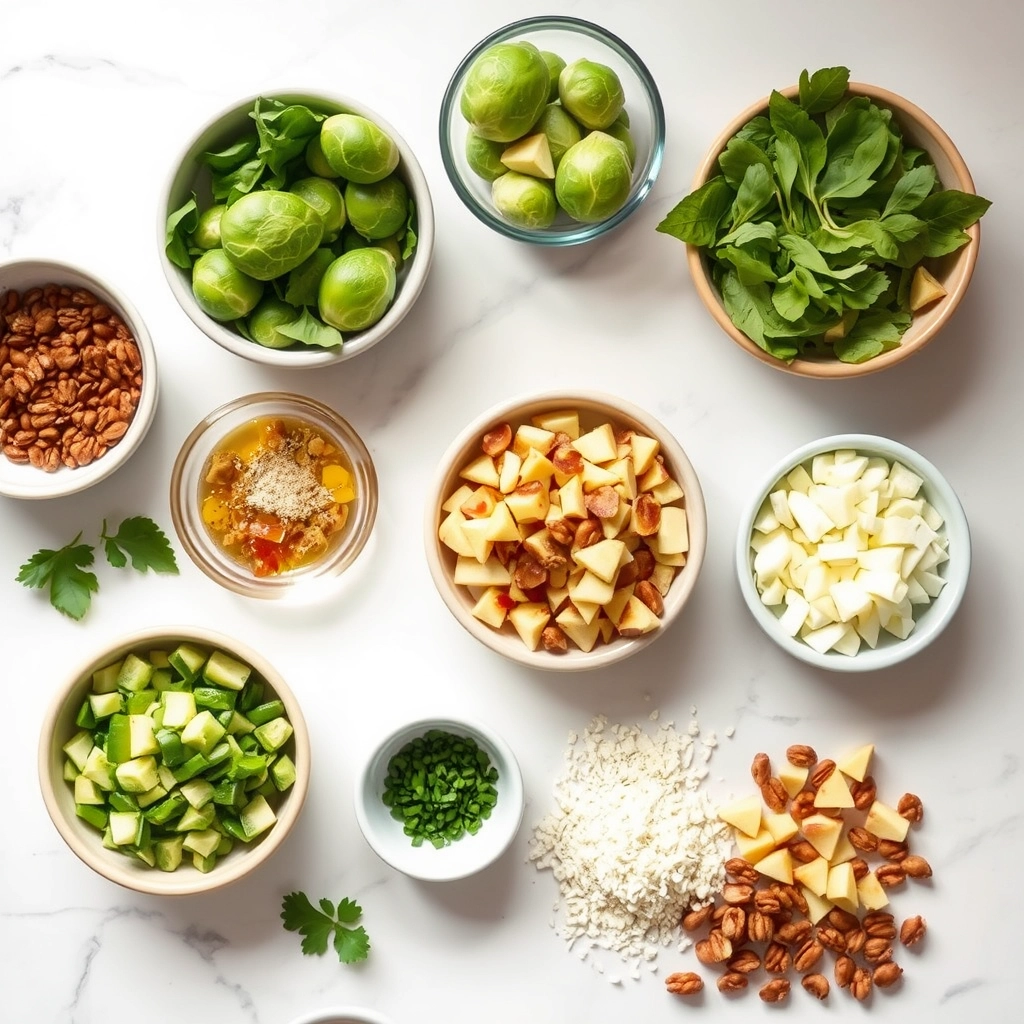
Ingredients
Scale
For the Crust:
1 lb Brussels sprouts, trimmed and thinly sliced
1 large apple, thinly sliced or julienned
1/2 cup walnuts, toasted and roughly chopped
1/4 cup dried cranberries
1/4 cup grated Parmesan cheese
2 tbsp olive oil
1 tbsp apple cider vinegar
1 tsp Dijon mustard
1 tsp honey
Salt and pepper to taste
Instructions
1. Prepare the Crust:
In a large bowl, combine the sliced Brussels sprouts, apple, toasted walnuts, dried cranberries, and Parmesan cheese.
In a small bowl, whisk together the olive oil, apple cider vinegar, Dijon mustard, honey, salt, and pepper to make the dressing.
Pour the dressing over the salad and toss well to combine. Let sit for 10 minutes before serving to allow flavors to meld.
Notes
You can customize the seasonings to taste.
“`html
s-dish">How to Prepare This Dish
Steps and time-saving tips
Start by washing and drying your Brussels sprouts thoroughly to ensure they stay crisp. Next, trim the stems and slice them thinly with a sharp knife or use a food processor for quicker results. Meanwhile, toast the walnuts in a dry skillet over medium heat for about 3 minutes, stirring often to prevent burning. Let them cool slightly before adding them to your Crunchy Brussels Sprout Salad with Apples & Walnuts. Core and dice the apples into small, bite-sized pieces, then toss them with a squeeze of lemon juice to keep them from browning. In a large bowl, whisk together the dressing ingredients—olive oil, apple cider vinegar, honey, and a pinch of salt—until smooth. Add the shredded Brussels sprouts, apples, and toasted walnuts to the bowl, then drizzle the dressing over everything. Gently fold the ingredients together until evenly coated. For the best flavor, let the salad chill in the fridge for at least 15 minutes before serving. If you’re short on time, skip the chilling step and serve immediately for a brighter, crunchier texture.
Mistakes I’ve made and learned from
Early on, I made the mistake of not drying my Brussels sprouts well enough, which left my Crunchy Brussels Sprout Salad with Apples & Walnuts soggy. Now, I pat them dry or use a salad spinner to remove excess moisture. Another lesson? Toasting walnuts too quickly on high heat can turn them bitter—low and slow is the way to go. If you’re new to working with Brussels sprouts, check out my guide on prepping Brussels sprouts for more tips. Also, I once over-dressed the salad, making it heavy instead of light and refreshing. A little dressing goes a long way, so start with half and add more as needed. For more dressing tricks, my post on perfect salad dressing ratios has you covered.
Crunchy Brussels Sprout Salad with Apples & Walnuts feels like a love letter to autumn, blending earthy flavors with crisp sweetness. Originally, Brussels sprouts hail from Belgium, where farmers perfected their cultivation centuries ago. Meanwhile, apples and walnuts bring their own rich histories, often starring in European and North American harvest dishes. Together, they create a salad that bridges tradition and modern tastes.
In my family, we tweak this recipe every Thanksgiving, swapping walnuts for pecans or adding dried cranberries for extra tartness. Some Mediterranean versions skip the apples entirely, opting for pomegranate seeds and a lemon-olive oil dressing. Across the Midwest, you might find it with a creamy blue cheese twist, proving how versatile Crunchy Brussels Sprout Salad with Apples & Walnuts can be. No matter the variation, it always feels like a celebration of seasonal abundance.
ays-cooking">How it fits in today’s cooking
Today, Crunchy Brussels Sprout Salad with Apples & Walnuts fits perfectly into healthy, fast-paced lifestyles. Meal preppers adore it because the flavors deepen overnight, making it ideal for easy weekday lunches. Meanwhile, holiday hosts rely on its vibrant colors to brighten winter tables. Modern cooks often lighten the dressing with Greek yogurt or add a sprinkle of chili flakes for heat.
It’s also a star in plant-based diets, offering crunch and protein without meat. For busy families, pairing it with quick dinner recipes turns an ordinary meal into something special. Whether served at a picnic or a formal dinner, this salad proves that fresh, simple ingredients never go out of style.
Taste and Texture
What makes it delicious
Crunchy Brussels Sprout Salad with Apples & Walnuts delivers a vibrant mix of textures and flavors that excite the palate. Shredded Brussels sprouts offer a crisp, earthy base, while juicy apple slices add a sweet-tart contrast. Toasted walnuts bring a buttery crunch, and a tangy vinaigrette ties everything together with a bright, zesty finish. Every bite feels fresh and lively, with the fragrant aroma of lemon and herbs teasing your senses. The salad’s balance of creamy, crunchy, and chewy elements makes Crunchy Brussels Sprout Salad with Apples & Walnuts irresistibly satisfying.
r">Boosting the flavor
Elevate your Crunchy Brussels Sprout Salad with Apples & Walnuts by tossing in crumbled feta or goat cheese for a salty, creamy twist. For extra depth, drizzle with a honey mustard dressing or sprinkle with smoked paprika. If you love heat, add a pinch of red pepper flakes or top with spicy roasted chickpeas. Pair it with a garlicky herb bread to round out the meal. Small tweaks can transform this salad into a showstopper!
Tips for Success
Best practices for results
For the best Crunchy Brussels Sprout Salad with Apples & Walnuts, always slice the Brussels sprouts thinly so they blend well with the other ingredients. Additionally, toast the walnuts lightly to enhance their nutty flavor and add extra crunch. Meanwhile, toss the apples in lemon juice right after chopping to keep them fresh and prevent browning. Finally, let the salad sit for 10 minutes before serving so the flavors meld perfectly.
>Mistakes to avoid
Avoid overdressing the salad, as too much dressing can make the Brussels sprouts soggy. Instead, start with half the dressing and add more as needed. Similarly, skip pre-shredded Brussels sprouts since they often lack freshness and texture. For more tips on balancing flavors, check out our guide on perfect dressing ratios. Also, don’t forget to store leftovers properly—learn how in our salad storage tips to keep your Crunchy Brussels Sprout Salad with Apples & Walnuts crisp for days.
Serving and Pairing Suggestions
How to serve this dish
For a stunning presentation, serve your Crunchy Brussels Sprout Salad with Apples & Walnuts in a large wooden bowl or on a colorful platter. Meanwhile, sprinkle extra toasted walnuts and thin apple slices on top for a gourmet touch. This salad shines at holiday gatherings, but it also makes a refreshing addition to brunch spreads or potlucks. If you want to impress guests, layer the ingredients in a clear glass trifle dish to showcase the vibrant colors. Finally, keep it chilled until serving to maintain the perfect crisp texture.
What goes well with it
Pair your Crunchy Brussels Sprout Salad with Apples & Walnuts with a crisp white wine like Sauvignon Blanc, which highlights the tangy dressing and sweet apples. Alternatively, try it alongside our Herb-Roasted Chicken for a hearty, balanced meal. For a lighter option, serve it with a warm bowl of Creamy Butternut Soup, as the creamy texture contrasts beautifully with the salad’s crunch. Each pairing enhances the flavors while keeping the meal fresh and satisfying.
To keep your Crunchy Brussels Sprout Salad with Apples & Walnuts crisp, slice the Brussels sprouts thinly and toss them with the dressing just before serving. Storing the salad undressed in an airtight container with a paper towel also helps absorb excess moisture.
Can I make this salad ahead of time?
Yes! Prep the ingredients for Crunchy Brussels Sprout Salad with Apples & Walnuts separately and store them in the fridge. Combine everything with the dressing 15-30 minutes before serving to maintain the perfect texture.
ank-math-faq-item">
What dressing pairs best with this salad?
A tangy maple-Dijon vinaigrette or creamy lemon tahini dressing complements the flavors of Crunchy Brussels Sprout Salad with Apples & Walnuts beautifully. The sweetness of apples and richness of walnuts balance well with bright, acidic dressings.
Can I substitute walnuts in this recipe?
Absolutely—try pecans, almonds, or pepitas for a different crunch in your Brussels sprout salad. Just toast them lightly to enhance their flavor, similar to how walnuts elevate the dish.
Best Harvest Grape & Olive Oil Cake Recipe
Introduction
There’s something magical about desserts that capture the essence of the season, and this Harvest Grape & Olive Oil Cake does just that. Imagine biting into a tender, moist crumb infused with the fruity richness of olive oil, punctuated by bursts of juicy grapes—each bite feels like a celebration of autumn. Whether you’re hosting a cozy gathering or simply treating yourself, this cake brings warmth and sophistication to any table. Plus, it’s effortlessly elegant, proving that simple ingredients can create unforgettable flavors.
The Harvest Grape & Olive Oil Cake is a rustic yet refined dessert that highlights the natural sweetness of grapes paired with the earthy depth of extra virgin olive oil. Unlike traditional butter-based cakes, this recipe leans into the Mediterranean tradition of using olive oil, which not only adds a unique flavor but also keeps the texture incredibly moist. The grapes caramelize slightly as they bake, creating pockets of jammy goodness that contrast beautifully with the cake’s delicate crumb. This dessert matters because it bridges the gap between everyday baking and something special—no fancy techniques required, just honest, wholesome ingredients. It perfectly fits our blog’s tone of approachable yet elevated recipes, like our Rustic Pear Tart or Honey Fig Bread, where simplicity meets sophistication. Whether you’re a seasoned baker or a beginner, this cake invites you to slow down and savor the process as much as the result.
Why I Love This Recipe
This Harvest Grape & Olive Oil Cake holds a special place in my heart because it reminds me of family gatherings at my grandmother’s house. She always had a way of turning humble ingredients into something extraordinary, and this cake captures that spirit. The first time I made it, the aroma of olive oil and grapes baking together transported me back to her kitchen. Now, it’s my go-to recipe when I want to share a taste of nostalgia with friends or simply enjoy a quiet moment with a cup of tea. It’s more than a dessert—it’s a little piece of home.
Health and Nutrition
Why it’s good for your body
Harvest Grape & Olive Oil Cake packs a nutritious punch while satisfying your sweet tooth. First, olive oil replaces butter, offering heart-healthy monounsaturated fats that support cardiovascular health. Additionally, the natural sweetness from grapes reduces the need for excessive refined sugar, keeping blood sugar levels more stable. Moreover, grapes deliver antioxidants like resveratrol, which combat inflammation and promote cellular health.
Beyond its ingredients, Harvest Grape & Olive Oil Cake provides a balanced energy boost. Unlike overly processed desserts, it combines complex carbs from flour with the slow-burning fats of olive oil, keeping you fuller longer. Furthermore, the cake’s fiber content from grapes aids digestion, while the absence of artificial additives ensures a cleaner treat. Whether you enjoy it as an afternoon snack or a light dessert, Harvest Grape & Olive Oil Cake nourishes your body without compromising flavor.
How it fits in a healthy lifestyle
Harvest Grape & Olive Oil Cake fits seamlessly into a balanced diet. If you follow a Mediterranean-inspired eating plan, this cake aligns perfectly with its emphasis on olive oil and whole ingredients. For those managing gluten sensitivities, simply swap in a gluten-free flour blend—our guide to gluten-free baking makes it easy. Even better, the cake’s portion-friendly nature encourages mindful eating, so you can indulge without overdoing it.
Pair a slice with a protein-rich snack like Greek yogurt or nuts for a satisfying, well-rounded treat. If you’re curious about other heart-healthy desserts, explore our healthy dessert recipes for more inspiration. Whether you prioritize moderation, nutrient density, or simple homemade goodness, Harvest Grape & Olive Oil Cake supports your goals without sacrificing taste.
A moist and fragrant cake infused with the natural sweetness of grapes and the rich flavor of olive oil.
Ingredients
Scale
For the Crust:
1 1/2 cups all-purpose flour
1/2 cup granulated sugar
1/4 cup extra virgin olive oil
2 large eggs
1/2 cup milk
1 tsp baking powder
1/2 tsp vanilla extract
1/4 tsp salt
1 cup seedless red grapes, halved
Instructions
1. Prepare the Crust:
Preheat oven to 350°F (175°C). Grease a 9-inch round cake pan.
In a large bowl, whisk together flour, sugar, baking powder, and salt.
In another bowl, beat eggs, then add olive oil, milk, and vanilla extract. Mix well.
Gradually add the wet ingredients to the dry ingredients, stirring until just combined.
Gently fold in the halved grapes.
Pour batter into the prepared pan and bake for 30 minutes or until a toothpick inserted comes out clean.
Let cool before serving.
Notes
You can customize the seasonings to taste.
s-dish">How to Prepare This Dish
Steps and time-saving tips
Start by preheating your oven to 350°F and lightly greasing a 9-inch cake pan with olive oil. Meanwhile, whisk together the flour, baking powder, and salt in a large bowl. In another bowl, beat the eggs and sugar until pale and fluffy, then slowly drizzle in the olive oil while mixing. Gradually fold the dry ingredients into the wet mixture, stirring just until combined to avoid overworking the batter. Gently fold in the halved grapes, saving a handful for the top. Pour the batter into the prepared pan and scatter the remaining grapes over the surface. Bake for 40-45 minutes, or until a toothpick comes out clean. Let the Harvest Grape & Olive Oil Cake cool slightly before slicing. For a time-saving tip, prep your grapes and measure dry ingredients the night before. If the top browns too quickly, loosely tent it with foil.
Mistakes I’ve made and learned from
I once rushed the olive oil drizzle, adding it all at once, which made my Harvest Grape & Olive Oil Cake dense. Now I stream it in slowly while whisking for a lighter crumb. Another time, I overmixed the batter after adding the grapes, turning them into mush. A gentle fold preserves their texture—learn from my common baking mistakes. If your cake sticks, try lining the pan with parchment like I do now, a trick from my perfect cake release guide. Trust me, these small tweaks make all the difference.
n-and-variations">Cultural Connection and Variations
Where this recipe comes from
Harvest Grape & Olive Oil Cake traces its roots to the sun-drenched vineyards of the Mediterranean, where farmers celebrated the autumn grape harvest by baking simple, rustic cakes. In Italy, they call it “torta all’uva,” often using local olive oil for richness and fresh grapes for bursts of sweetness. Meanwhile, in Greece, cooks might add a splash of citrus or a sprinkle of thyme to highlight regional flavors. Even within families, you’ll find twists—some swear by folding in crushed almonds, while others drizzle honey over the top for extra indulgence.
My grandmother’s version of Harvest Grape & Olive Oil Cake always included a handful of wild grapes from her backyard, their tartness balancing the cake’s earthy depth. Over time, I’ve seen friends adapt it too—swapping in figs or pears when grapes aren’t in season. No matter the variation, this cake carries the warmth of shared tables and the joy of turning humble ingredients into something unforgettable.
How it fits in today’s cooking
Today, Harvest Grape & Olive Oil Cake feels both timeless and trendy. Home bakers love it for its effortless elegance, whether served at a fall brunch or as a cozy dessert. Many modern cooks lighten it up with whole wheat flour or swap in coconut sugar, proving how adaptable this recipe truly is. For those exploring gluten-free options, our gluten-free baking guide offers smart tweaks to keep the cake just as tender.
It’s also a star
during holidays, especially when paired with seasonal flavors like cinnamon or rosemary. And if you’re looking for more ways to celebrate autumn baking, our fall dessert ideas showcase how Harvest Grape & Olive Oil Cake fits right in. Whether you’re baking it for tradition or a quick weeknight treat, this cake always feels like a little celebration.
Taste and Texture
What makes it delicious
The Harvest Grape & Olive Oil Cake delights with a tender, moist crumb and a subtle fruity sweetness. Each bite bursts with juicy grapes, while the olive oil adds a rich, velvety depth. The cake’s golden edges offer a delicate crispness, contrasting beautifully with the soft interior. Fragrant vanilla and citrus zest brighten the flavor, making every slice feel indulgent yet balanced. Whether served warm or at room temperature, Harvest Grape & Olive Oil Cake delivers a comforting, rustic charm that lingers on the palate.
Boosting the flavor
Elevate your Harvest Grape & Olive Oil Cake with a drizzle of honey or a dusting of powdered sugar for extra sweetness. For a tangy twist, pair it with a dollop of whipped mascarpone or a scoop of vanilla bean ice cream. If you love bold flavors, try folding in a handful of toasted walnuts or a pinch of cinnamon. Craving more inspiration? Explore our guide to baking with olive oil or discover how to enhance desserts with fresh fruit. With these simple tweaks, you can customize the cake to match any craving.
Always measure your olive oil accurately for the Harvest Grape & Olive Oil Cake, as too much can make the texture greasy. Meanwhile, gently fold the grapes into the batter to prevent crushing them and creating uneven moisture. For even baking, rotate the pan halfway through, and let the cake cool completely before slicing to ensure clean cuts. Finally, dust with powdered sugar just before serving to enhance both flavor and presentation.
Mistakes to avoid
Avoid overmixing the batter, as this can make the Harvest Grape & Olive Oil Cake dense instead of light and tender. Instead, mix just until the ingredients combine. Additionally, don’t skip lining your pan with parchment paper, or the cake may stick. For more baking essentials, check out our guide on essential baking tools. Also, resist the urge to open the oven door too early, as sudden temperature drops can cause sinking. Learn more about troubleshooting cakes in our common baking mistakes post.
g-suggestions">Serving and Pairing Suggestions
How to serve this dish
For a stunning presentation, slice the Harvest Grape & Olive Oil Cake into thick wedges and arrange them on a rustic wooden board. Meanwhile, drizzle a touch of honey over each piece and scatter fresh grape clusters or edible flowers around the plate for a pop of color. Alternatively, serve it warm with a dusting of powdered sugar for a cozy brunch or holiday gathering. Since this cake boasts a moist texture and fruity aroma, it also makes an elegant dessert for dinner parties when paired with a scoop of vanilla bean ice cream.
What goes well with it
Elevate your Harvest Grape & Olive Oil Cake experience by pairing it with a cup of spiced chai tea. The warm spices in the tea highlight the cake’s natural sweetness. For a refreshing contrast, try serving it alongside our Lemon Herb Whipped Cream, which adds a tangy twist. Finally, if you’re hosting a wine night, a glass of crisp Prosecco or our Berry Mint Spritzer balances the cake’s rich olive oil notes perfectly.
math-faq-block">
What makes Harvest Grape & Olive Oil Cake moist?
Harvest Grape & Olive Oil Cake stays moist thanks to the natural fats in olive oil, which create a tender crumb. The addition of fresh grapes also adds juiciness, while a balanced sugar-to-flour ratio prevents dryness.
Can I substitute another oil for olive oil in Harvest Grape & Olive Oil Cake?
While you can use neutral oils like vegetable oil, olive oil gives Harvest Grape & Olive Oil Cake its distinctive rich flavor. For best results, stick with mild extra virgin olive oil to avoid overpowering the grapes.
What type of grapes work best for Harvest Grape & Olive Oil Cake?
Seedless red or black grapes are ideal for Harvest Grape & Olive Oil Cake because they provide sweetness and color. Smaller varieties like champagne grapes also work well, distributing evenly throughout the batter.
ank-math-faq-item">
How should I store Harvest Grape & Olive Oil Cake?
Store Harvest Grape & Olive Oil Cake in an airtight container at room temperature for up to 3 days. The olive oil helps preserve freshness, but refrigerate if keeping longer—just bring to room temperature before serving.