There’s something undeniably comforting about biting into a golden, crunchy piece of chicken with a savory, cheesy crust. If you’re craving a dish that feels indulgent yet simple enough for a weeknight dinner, Crispy Parmesan Crusted Chicken delivers on every level. Whether you’re cooking for picky eaters or impressing guests, this recipe turns basic ingredients into something extraordinary. Best of all, it’s ready in under 30 minutes, proving that delicious meals don’t need to be complicated.
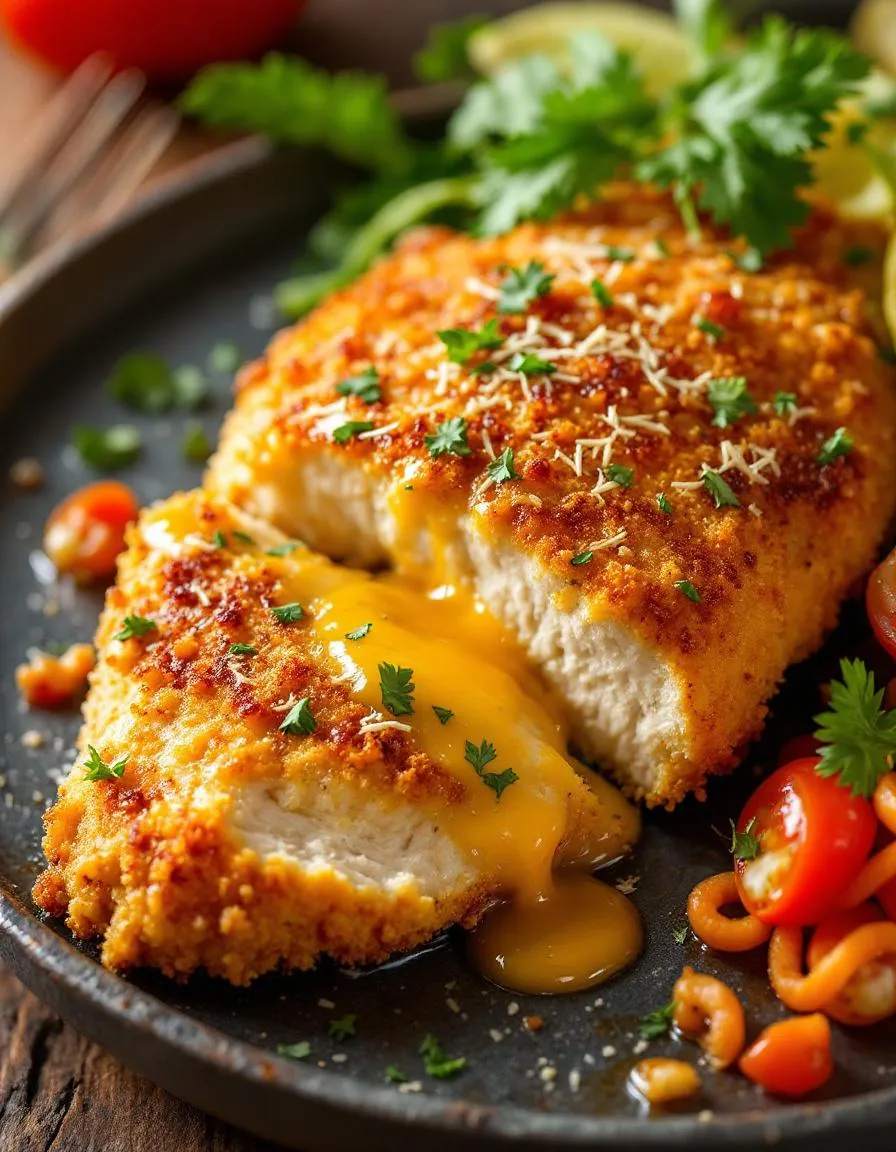
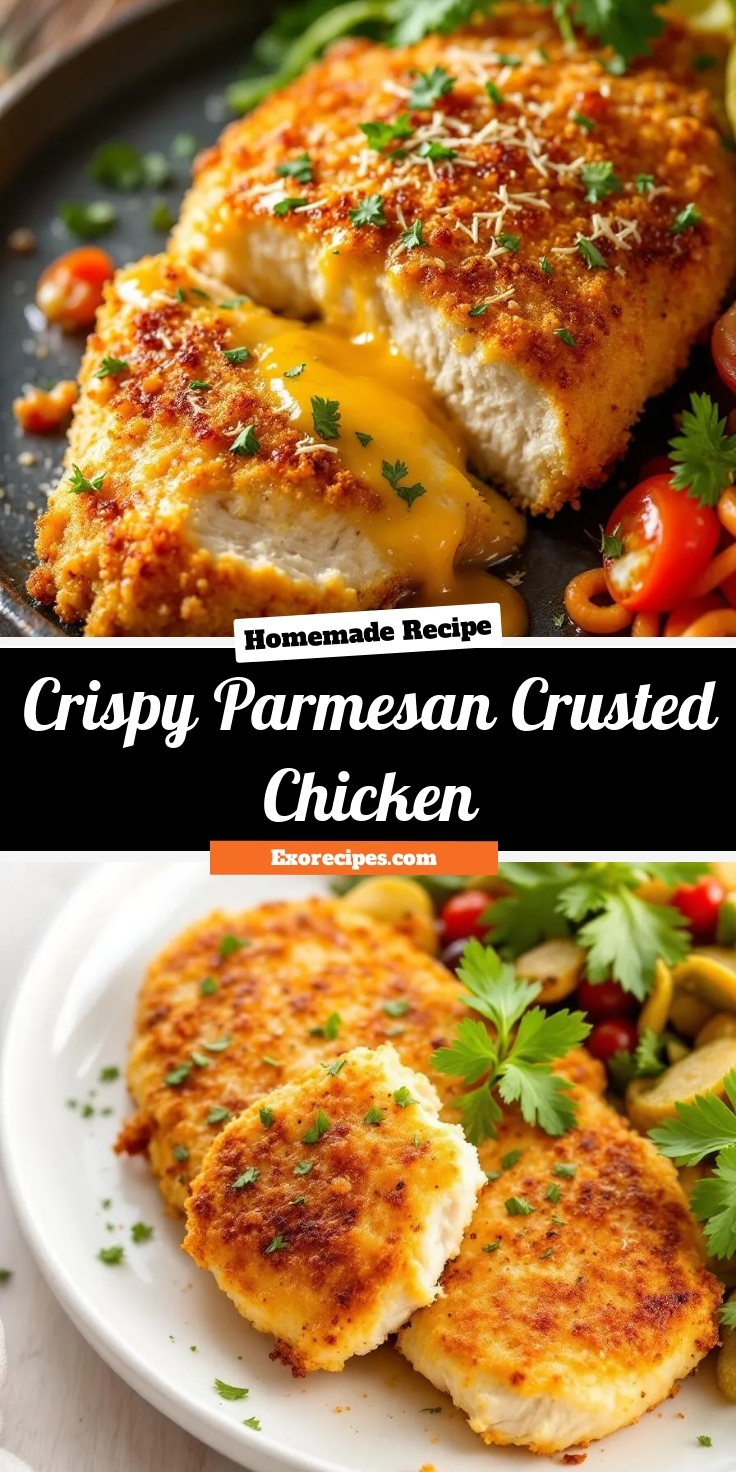
Crispy Parmesan Crusted Chicken is a crowd-pleasing dish that combines tender chicken breasts with a crispy, golden coating of Parmesan cheese, breadcrumbs, and herbs. The magic happens when the cheese melts into the crust, creating a rich, umami-packed crunch with every bite. Unlike fried chicken, this version bakes to perfection, offering the same satisfying texture without the extra grease. It’s a versatile recipe too—pair it with a fresh salad for a light meal or serve it alongside creamy mashed potatoes for ultimate comfort. If you love easy, flavorful dinners, you’ll appreciate how this dish fits seamlessly into busy schedules while feeling special enough for weekends.
At Exorecipes, we specialize in recipes that balance simplicity and bold flavors, and Crispy Parmesan Crusted Chicken is no exception. It’s a perfect example of how a few quality ingredients can transform everyday cooking. For more weeknight inspiration, check out our easy dinner ideas or explore our guide to crispy chicken techniques to master this method for other dishes.
Why I Love This Recipe
This recipe holds a special place in my kitchen because it’s the dish that made my kids actually cheer for dinner. The first time I made Crispy Parmesan Crusted Chicken, the smell alone had everyone hovering around the oven. Watching their faces light up after that first crunchy bite reminded me why I love cooking—it’s not just about feeding people, but creating moments of joy. Even now, it’s my go-to when I need a guaranteed win, whether for family nights or last-minute gatherings. Simple, reliable, and always delicious—that’s what makes it a forever favorite.
Health and Nutrition
Why it’s good for your body
Crispy Parmesan Crusted Chicken packs a nutritious punch while delivering irresistible flavor. First, it offers a high-quality protein boost from the chicken, which helps build and repair muscles. Additionally, the Parmesan cheese adds calcium for strong bones and teeth. Since the dish uses minimal oil for crispiness, it keeps fat content in check without sacrificing texture.
Moreover, Crispy Parmesan Crusted Chicken includes essential vitamins like B6 and B12 from the chicken, which support energy levels and brain function. The Parmesan crust also provides a dose of probiotics, promoting gut health. Unlike heavily breaded alternatives, this recipe skips excessive carbs, making it a smarter choice for those watching their intake.
Finally, the dish balances indulgence with nutrition. The golden crust satisfies cravings, while the lean chicken keeps it wholesome. Whether you serve it with a side of veggies or a light salad, Crispy Parmesan Crusted Chicken makes it easy to enjoy a meal that’s both delicious and nourishing.
How it fits in a healthy lifestyle
Crispy Parmesan Crusted Chicken fits seamlessly into a balanced diet. For protein-focused eaters, it delivers a satisfying portion to support muscle growth or recovery. If you follow a gluten-free lifestyle, simply swap regular breadcrumbs for a gluten-free alternative—this dish adapts effortlessly.
Heart-conscious diners will appreciate that the recipe uses minimal oil and relies on Parmesan for richness instead of heavy sauces. Pair it with fiber-rich sides like roasted vegetables or a quinoa salad for a complete, nutrient-dense meal. For more high-protein meal ideas, check out our lean dinner recipes.
Busy weeknights call for simple, wholesome options, and Crispy Parmesan Crusted Chicken delivers. Prep it ahead for meal prep, or pair it with quick sides for a stress-free dinner. Looking for more ways to balance flavor and nutrition? Explore our healthy comfort foods roundup for inspiration.
Juicy chicken breasts coated in a crispy parmesan and breadcrumb crust, perfect for a quick and delicious dinner.
Ingredients
Scale
For the Crust:
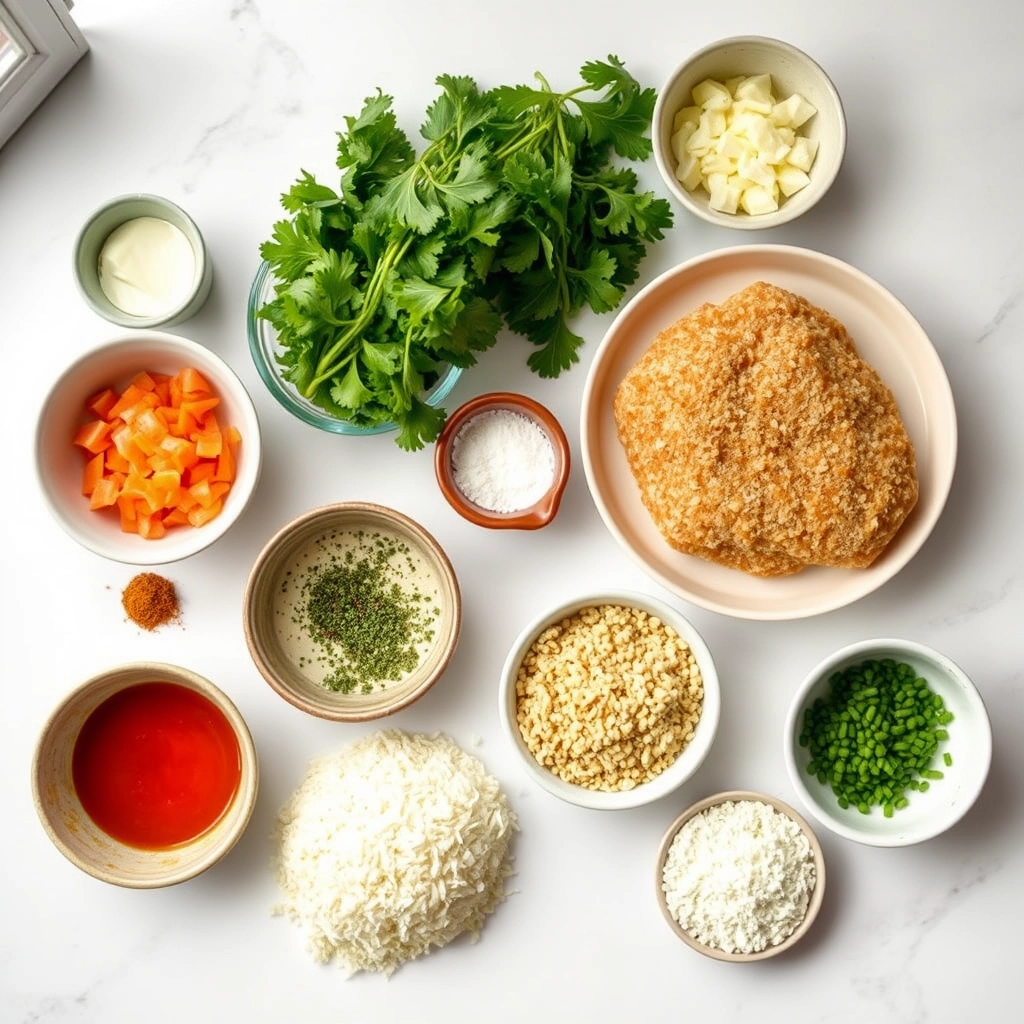
4 boneless, skinless chicken breasts
1 cup grated parmesan cheese
1 cup breadcrumbs
1 teaspoon garlic powder
1 teaspoon paprika
1/2 teaspoon salt
1/2 teaspoon black pepper
2 large eggs
2 tablespoons olive oil
Instructions
1. Prepare the Crust:
Preheat oven to 400°F (200°C).
In a shallow bowl, mix parmesan cheese, breadcrumbs, garlic powder, paprika, salt, and black pepper.
In another bowl, beat the eggs.
Dip each chicken breast into the beaten eggs, then coat evenly with the parmesan mixture.
Heat olive oil in a large oven-safe skillet over medium-high heat.
Add the coated chicken breasts and cook for 3-4 minutes per side until golden brown.
Transfer the skillet to the oven and bake for 15-20 minutes until the chicken is cooked through.
Notes
You can customize the seasonings to taste.
“`html
="how-to-prepare-this-dish">How to Prepare This Dish
Steps and time-saving tips
Start by preheating your oven to 400°F and lining a baking sheet with parchment paper for easy cleanup. While the oven heats, whisk together grated Parmesan, breadcrumbs, garlic powder, and a pinch of salt in a shallow bowl. In another bowl, beat two eggs until smooth. Next, pat four chicken breasts dry with paper towels—this helps the coating stick better. Dip each piece first in the egg mixture, then press it firmly into the Parmesan mix, coating both sides evenly. Place the Crispy Parmesan Crusted Chicken on the baking sheet and drizzle lightly with olive oil for extra crispiness. Bake for 20-25 minutes until golden brown and the internal temperature reaches 165°F. For a time-saving trick, prep the coating mix ahead and store it in an airtight container. If you’re short on time, use pre-grated Parmesan, but freshly grated will give you the best texture. Let the chicken rest for five minutes before slicing to keep it juicy. Serve with a squeeze of lemon or a side of marinara for dipping.
Mistakes I’ve made and learned from
I’ve definitely learned the hard way that skipping the parchment paper leads to a stubbornly stuck-on mess—now I never bake without it. Another rookie mistake? Overcrowding the baking sheet, which steams the chicken instead of crisping it. Spacing the pieces evenly makes all the difference, as I discovered after a few soggy attempts. If you’re new to breading proteins, my guide on perfect breading techniques breaks down the steps for flawless results every time. And if your Parmesan crust isn’t browning evenly, try moving the tray to the top rack for the last five minutes—this little tweak saved my Crispy Parmesan Crusted Chicken from pale disappointment. For more troubleshooting tips, check out my post on fixing soggy breading, which covers everything from oil temperature to proper resting time.
Crispy Parmesan Crusted Chicken feels like a love letter to Italian-American kitchens, where simple ingredients transform into something extraordinary. While its roots trace back to Italian cotoletta, a breaded cutlet dish, the American twist with Parmesan cheese gives it that irresistible crunch and depth of flavor. In Italy, you might find a similar dish topped with fresh arugula and cherry tomatoes, but here, we lean into the cheesy, golden perfection that makes Crispy Parmesan Crusted Chicken a weeknight hero.
Families often put thei
r own spin on it too. Some add a dash of garlic powder for extra kick, while others mix herbs like oregano or thyme into the breadcrumbs. In my house, we serve it with a squeeze of lemon to cut through the richness. Meanwhile, in the Midwest, you might spot it smothered in marinara and melted mozzarella, almost like a chicken Parm hybrid. No matter the variation, Crispy Parmesan Crusted Chicken always brings people together—whether it’s a quick dinner or a festive gathering.
How it fits in today’s cooking
Today, Crispy Parmesan Crusted Chicken holds its own as a versatile favorite. Busy cooks adore it because it’s faster than takeout but feels special enough for date nights. Plus, it’s a great way to use pantry staples, like the Parmesan you might have leftover from pasta night. With air fryers gaining popularity, many now skip the pan-frying and opt for a lighter, crispier version in minutes.
It also shines in seasonal menus. In summer, pair it with a fresh citrus salad for balance. Come winter, it’s hearty enough to anchor a comfort-food plate with roasted veggies. Whether you’re meal-prepping or hosting friends, this dish adapts without losing its crowd-pleasing charm. After all, who can resist that golden, cheesy crust?
>Taste and Texture
What makes it delicious
Crispy Parmesan Crusted Chicken delivers a mouthwatering contrast of textures and flavors. The golden crust shatters with every bite, revealing tender, juicy chicken underneath. Nutty Parmesan cheese mingles with savory garlic and herbs, creating a rich, umami-packed coating. Meanwhile, the aroma of toasted breadcrumbs and melted cheese fills the air, making it irresistible even before the first taste. Each forkful of Crispy Parmesan Crusted Chicken balances crunch and succulence, leaving you craving another piece.
Boosting the flavor
Elevate your Crispy Parmesan Crusted Chicken with a few easy tweaks. For extra zest, swap regular breadcrumbs for garlic-herb seasoned crumbs or add a pinch of smoked paprika to the coating. Drizzle with a bright lemon aioli or serve alongside creamy balsamic dressing for a tangy twist. Fresh herbs like basil or parsley sprinkled on top add a pop of color and freshness. With these small changes, you can turn an already delicious dish into something extraordinary.
Tips for Success
Best practices for results
First, always pat the chicken dry before coating it to help the crust stick better. Next, press the parmesan mixture firmly onto the chicken to create an even, crispy layer. For extra crunch, let the coated chicken sit for 5 minutes before cooking. Additionally, use a hot skillet to sear the Crispy Parmesan Crusted Chicken, then finish it in the oven for perfect doneness. Finally, let it rest for a few minutes after baking to lock in juiciness.
Mistakes to avoid
Avoid overcrowding the pan, as this steams the chicken instead of crisping it. Instead, cook in batches if needed. Also, skip pre-shredded parmesan, which often contains anti-caking agents that affect texture. For best results, freshly grate the cheese as shown in our cheese grating guide. Lastly, don’t skip the resting step—cutting too soon releases juices and softens the crust. For more on timing, check our resting times guide.
Serving and Pairing Suggestions
How to serve this dish
Elevate your Crispy Parmesan Crusted Chicken by plating it over a bed of vibrant greens or alongside roasted vegetables for a pop of color. For a casual dinner, stack the chicken pieces on a wooden board with lemon wedges and fresh herbs like parsley or thyme. Meanwhile, if you’re hosting a special occasion, arrange each piece atop a drizzle of garlic aioli for an elegant touch. Whether you serve it at a weeknight family meal or a holiday gathering, the golden crust and savory aroma will instantly impress your guests.
h-it">What goes well with it
Pair your Crispy Parmesan Crusted Chicken with a crisp, citrusy salad like our Lemon Herb Quinoa Salad to balance the rich flavors. Alternatively, roasted garlic mashed potatoes or buttery asparagus make hearty, comforting sides. For drinks, a chilled glass of Sauvignon Blanc or sparkling water with lemon enhances the dish’s crispiness. If you love dipping sauces, try our Creamy Dill Sauce for a refreshing contrast to the savory Parmesan crust.
What is the best way to get Crispy Parmesan Crusted Chicken to stick together?
To ensure the coating sticks, pat the chicken dry before dipping it in flour, then egg, and finally the Parmesan breadcrumb mixture. Press the crumbs firmly onto the chicken and let it rest for 5 minutes before cooking. This helps the Crispy Parmesan Crusted Chicken stay intact while frying or baking.
ank-math-faq-item">
Can I bake Crispy Parmesan Crusted Chicken instead of frying it?
Yes! For a healthier version, bake Crispy Parmesan Crusted Chicken at 400°F (200°C) for 20–25 minutes, flipping halfway. Spraying the chicken lightly with oil before baking helps achieve a golden, crispy texture similar to frying.
What sides go well with Crispy Parmesan Crusted Chicken?
Classic pairings include garlic mashed potatoes, roasted vegetables, or a fresh Caesar salad. For a lighter option, try steamed asparagus or a tangy coleslaw to complement the rich flavor of Crispy Parmesan Crusted Chicken.
How do I store and reheat leftover Crispy Parmesan Crusted Chicken?
Store leftovers in an airtight container in the fridge for up to 3 days. Reheat in a 350°F (175°C) oven or air fryer for 5–10 minutes to restore crispiness. Avoid microwaving, as it can make the Crispy Parmesan Crusted Chicken soggy.
div>
Best Baked Crab Rangoons – Easy Homemade Recipe
“`html
Introduction
There’s something magical about biting into a crispy, creamy appetizer that makes every gathering feel special. If you’ve ever craved the perfect blend of savory crab and creamy cheese without the guilt of deep-frying, these Irresistible Baked Crab Rangoons will become your new go-to. Whether you’re hosting a party or just treating yourself, this recipe delivers all the flavor with none of the fuss. Plus, baking instead of frying means you can enjoy every bite without hesitation.
Irresistible Baked Crab Rangoons are a lighter twist on the classic takeout favorite, featuring a golden, flaky wrapper filled with a rich mixture of crab meat, cream cheese, and just the right amount of seasoning. Unlike traditional fried versions, baking these rangoons cuts down on oil while keeping that satisfying crunch. This dish matters because it proves you don’t have to sacrifice flavor for healthiness. Perfect for appetizer spreads or even a fun weeknight snack, these rangoons fit right into our blog’s mission of making delicious food accessible and approachable. If you love easy yet impressive recipes, you’ll also adore our Creamy Garlic Parmesan Mushrooms or our Spicy Honey Glazed Shrimp for more crowd-pleasing ideas.
Why I Love This Recipe
I first made Irresistible Baked Crab Rangoons for a family potluck, and they disappeared within minutes. What I love most is how effortlessly they come together—no special skills or equipment needed. The combination of tender crab and creamy cheese feels indulgent, yet the baked method keeps it light enough to enjoy guilt-free. Every time I serve them, I’m reminded why simple, flavorful recipes like this one deserve a permanent spot in my kitchen. They’re proof that great food doesn’t have to be complicated to be unforgettable.
“`
Health and Nutrition
Why it’s good for your body
Irresistible Baked Crab Rangoons pack a nutritious punch while satisfying your cravings. First, crab meat delivers high-quality protein, which helps build muscle and keeps you full longer. Additionally, baking instead of frying reduces unnecessary fats, making these rangoons a lighter yet still indulgent choice. Moreover, crab provides essential nutrients like vitamin B12 and zinc, supporting energy levels and immune function.
Beyond protein, Irresistible Baked Crab Rangoons contain heart-healthy ingredients. For instance, using whole-grain or low-carb wrappers can boost fiber content, aiding digestion. Furthermore, crab offers omega-3 fatty acids, which promote brain health and reduce inflammation. Pairing them with a light dipping sauce, like Greek yogurt-based options, enhances their nutritional profile without excess calories.
Finally, these rangoons balance flavor and nutrition effortlessly. By incorporating fresh herbs and spices, you elevate antioxidants while keeping sodium in check. Whether as an appetizer or a snack, Irresistible Baked Crab Rangoons prove that tasty and wholesome can go hand in hand.
How it fits in a healthy lifestyle
Irresistible Baked Crab Rangoons fit seamlessly into balanced eating habits. For protein-focused diets, they offer a lean alternative to heavy fried apps. If you follow gluten-free eating, simply swap in almond flour wrappers for a celiac-friendly version. Even meal preppers can enjoy them—bake a batch ahead and reheat for quick, satisfying bites.
These rangoons also complement heart-conscious choices. Since crab is naturally low in saturated fat, they align with cholesterol-friendly meals. Pair them with a crisp salad or roasted veggies for a well-rounded plate. For more ideas on balancing indulgence and nutrition, explore our guide to healthy snack swaps or discover gluten-free cooking tips to customize recipes to your needs.
Ultimately, Irresistible Baked Crab Rangoons prove that mindful eating doesn’t mean sacrificing flavor. With smart ingredient swaps and portion control, they’re a delicious way to stay on track.
Crispy baked wonton wrappers filled with a creamy crab and cheese mixture, perfect for appetizers or snacks.
Ingredients
Scale
For the Crust:
8 oz cream cheese, softened
1/2 cup imitation crab meat, finely chopped
2 green onions, thinly sliced
1 clove garlic, minced
1 tsp soy sauce
1/2 tsp Worcestershire sauce
24 wonton wrappers
1 tbsp water
1 tsp sesame oil (optional)
Instructions
1. Prepare the Crust:
Preheat oven to 375°F (190°C) and line a baking sheet with parchment paper.
In a bowl, mix cream cheese, crab meat, green onions, garlic, soy sauce, and Worcestershire sauce until well combined.
Place 1 tsp of the filling in the center of each wonton wrapper. Brush edges with water, then fold into triangles or desired shape, pressing edges to seal.
Arrange rangoons on the baking sheet and lightly brush with sesame oil (if using).
Bake for 12-15 minutes until golden brown and crispy. Serve warm with sweet chili sauce or soy sauce for dipping.
Notes
You can customize the seasonings to taste.
How to Prepare This Dish
Steps and time-saving tips
Start by preheating your oven to 375°F and lining a baking sheet with parchment paper. While the oven heats, mix softened cream cheese, crab meat, green onions, garlic powder, and a dash of Worcestershire sauce in a bowl. Stir everything until smooth and well combined. Next, lay out wonton wrappers on a clean surface and spoon a teaspoon of filling into the center of each. Lightly brush the edges with water, then fold the corners together to form a neat pouch. Press the edges firmly to seal—this prevents leaks while baking. Arrange the rangoons on the baking sheet, lightly spray them with cooking oil, and bake for 12-15 minutes until golden and crisp. For a time-saving trick, prep the filling a day ahead and store it covered in the fridge. If you’re short on time, skip homemade wonton wrappers and use store-bought ones—they work just as well. Let the baked crab rangoons cool for a few minutes before serving with sweet chili sauce or soy sauce for dipping.
and-learned-from">Mistakes I’ve made and learned from
My first batch of Irresistible Baked Crab Rangoons turned out soggy because I overcrowded the baking sheet. Now, I space them at least an inch apart for even crisping. Another blunder? Overfilling the wrappers. Too much filling causes leaks, so I stick to a modest teaspoon per rangoon. If you struggle with sealing, try this trick from my perfect wonton folding guide. Also, don’t skip the oil spray—it’s the secret to that golden crunch. Once, I substituted imitation crab for fresh, and the flavor fell flat. For the best results, use real crab meat or high-quality surimi, like the kind I recommend in my seafood substitutes roundup. Trust me, these small tweaks make all the difference.
Cultural Connection and Variations
Where this recipe comes from
Irresistible Baked Crab Rangoons trace their roots back to American-Chinese cuisine, where chefs creatively blended creamy fillings with crispy wonton wrappers. While traditional crab rangoons often fry to golden perfection, this baked version offers a lighter twist without sacrificing crunch. Across Asia, similar dishes like Filipino lumpia or Indonesian pangsit showcase how cultures adapt stuffed wrappers with local flavors. In my family, we swap crab for lump meat and add a dash of sriracha for heat, proving how versatile Irresistible Baked Crab Rangoons can be.
Seasonally, these rango
ons shine during Lunar New Year celebrations, symbolizing wealth with their golden pockets. Some coastal regions fold in fresh Dungeness crab, while Midwest versions might use imitation crab for accessibility. Whether served as game-day snacks or elegant appetizers, Irresistible Baked Crab Rangoons bridge comfort food and cultural fusion. My aunt even bakes them with gochujang for a Korean-inspired kick, reminding us that recipes evolve with every kitchen they enter.
How it fits in today’s cooking
Today, Irresistible Baked Crab Rangoons fit perfectly into modern meal prep routines. Health-conscious cooks love that baking cuts oil without losing texture, while air fryer adaptations make them weeknight-friendly. They’re a hit at holiday parties, pairing beautifully with sweet chili sauce or even ginger-miso glazed salmon for a surf-and-turf twist. Meal planners often freeze unbaked rangoons for quick entertaining, proving their timeless appeal.
Social media has also revived this classic, with food bloggers adding everything from jalapeños to plant-based cream cheese. For busy families, they’re a nostalgic yet easy dish—like one-pot chicken alfredo, but with a crispy payoff. Whether you’re hosting a crowd or craving a solo treat, these rangoons adapt to any table, proving comfort food never goes out of style.
>Taste and Texture
What makes it delicious
Irresistible Baked Crab Rangoons deliver a mouthwatering blend of creamy, savory, and slightly sweet flavors. The filling bursts with rich crab meat and smooth cream cheese, while a hint of garlic and green onion adds depth. Each bite offers a satisfying contrast—crispy golden edges give way to a tender, melt-in-your-mouth center. The aroma alone, fragrant with toasted wonton wrappers and warm spices, will have everyone hovering near the oven. Best of all, Irresistible Baked Crab Rangoons avoid greasiness, thanks to their light baking method, so you enjoy pure flavor without heaviness.
Boosting the flavor
For extra zing, swap regular cream cheese with a whipped jalapeño-infused version or sprinkle Old Bay seasoning into the filling. A drizzle of sweet chili sauce adds tangy heat, while a side of ginger soy dipping sauce balances the richness. If you love crunch, top freshly baked rangoons with toasted sesame seeds or chopped water chestnuts. Experiment with fresh herbs like cilantro or chives for a bright finish. The possibilities are endless, so have fun making these rangoons your own!
Tips for Success
Best practices for results
Always chill the dough for at least 30 minutes before shaping your Irresistible Baked Crab Rangoons, as this prevents sticking and ensures crisp edges. Meanwhile, use fresh crab meat for the best flavor, and drain it well to avoid soggy filling. Additionally, brush the wrappers lightly with oil before baking to achieve a golden, crispy texture. For even cooking, space the rangoons at least an inch apart on the baking sheet. Finally, serve them immediately after baking to maintain their irresistible crunch.
Mistakes to avoid
Avoid overfilling the wrappers, as this can cause your Irresistible Baked Crab Rangoons to burst open during baking. Instead, use a measured teaspoon of filling for each one. Also, don’t skip the oil brushing step, or the rangoons may turn out dry. If you’re new to working with wonton wrappers, check out our guide to handling wonton wrappers for foolproof folding techniques. Lastly, resist the urge to overcrowd the baking sheet, as proper airflow ensures even browning. For more baking tips, explore our essential baking hacks to elevate your results.
Serving and Pairing Suggestions
How to serve this dish
Serve Irresistible Baked Crab Rangoons warm for the best texture and flavor. Arrange them on a bamboo platter with a side of dipping sauce for an elegant appetizer spread. For parties, pair them with small napkins or skewers to make grabbing easy. Alternatively, layer them over a bed of crisp greens for a light lunch. Garnish with thinly sliced scallions or a sprinkle of sesame seeds to add color and crunch. These rangoons shine at game-day gatherings, holiday parties, or even as a fun weekend snack.
h-it">What goes well with it
Pair Irresistible Baked Crab Rangoons with a tangy sweet chili sauce or a creamy sriracha mayo for a flavor boost. For drinks, a crisp white wine like Sauvignon Blanc balances the richness, while a chilled ginger beer adds a refreshing kick. If you want a heartier meal, serve them alongside a light Asian cucumber salad for contrast. For dessert, try a slice of matcha cheesecake to keep the theme vibrant and satisfying.
Can I make Irresistible Baked Crab Rangoons ahead of time?
Yes! You can assemble Irresistible Baked Crab Rangoons up to a day in advance and store them covered in the fridge. For best results, bake them just before serving to maintain that perfect crispy texture.
ank-math-faq-item">
What dipping sauce pairs best with Irresistible Baked Crab Rangoons?
Sweet chili sauce or a creamy sriracha mayo are perfect complements to Irresistible Baked Crab Rangoons. For a lighter option, try a simple soy-ginger dipping sauce to enhance the crab flavor.
Can I use imitation crab in Irresistible Baked Crab Rangoons?
Absolutely! Imitation crab works well in Irresistible Baked Crab Rangoons and makes them more budget-friendly. For richer flavor, mix it with real crab meat or add extra seasonings like Old Bay.
How do I prevent my baked crab rangoons from getting soggy?
To keep Irresistible Baked Crab Rangoons crispy, pat your filling ingredients dry before assembling and avoid overfilling the wrappers. Bake on a wire rack instead of directly on the sheet pan for better air circulation.
div>
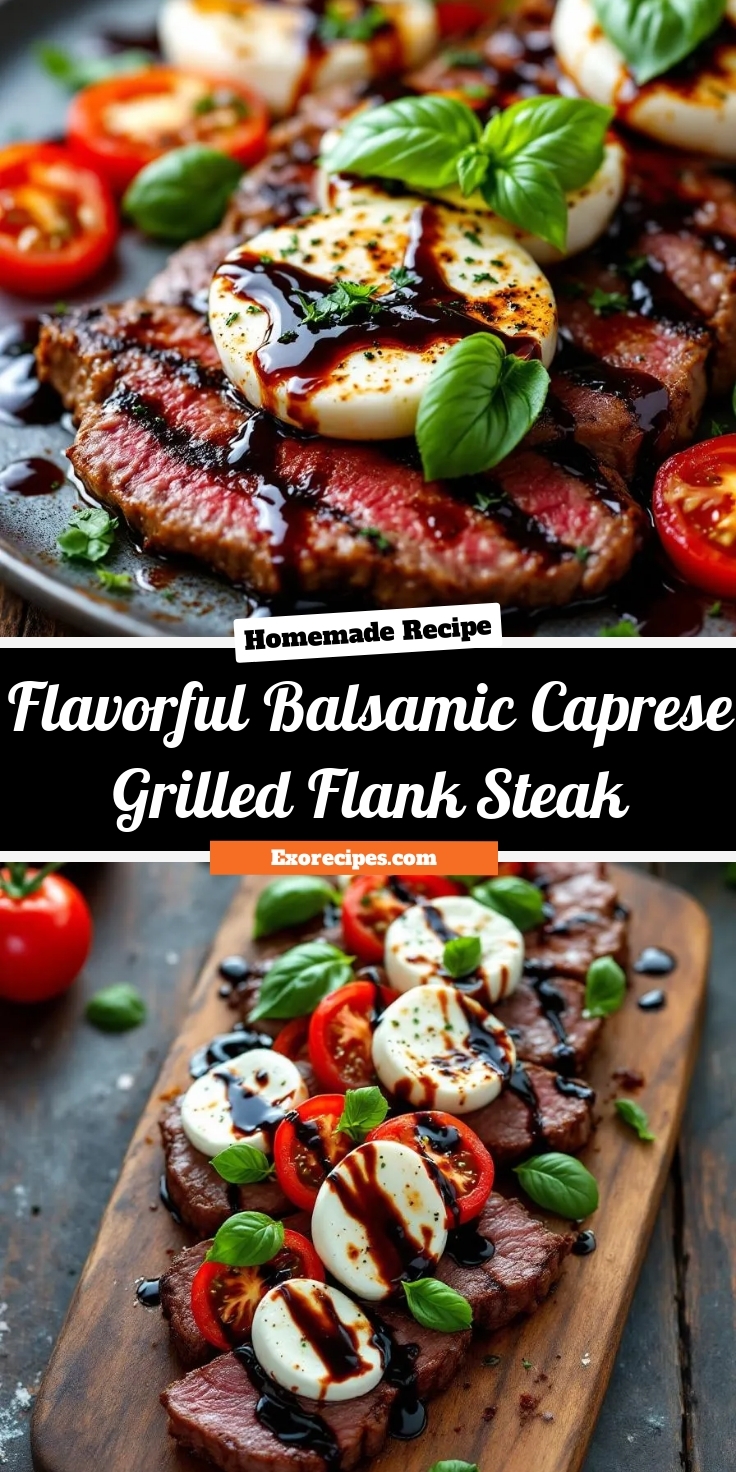
Best Balsamic Caprese Grilled Flank Steak Recipe
Introduction
There’s something magical about the sizzle of steak on the grill, especially when it’s paired with bright, fresh flavors that make every bite unforgettable. If you’re craving a dish that balances rich, savory depth with vibrant summer freshness, this Flavorful Balsamic Caprese Grilled Flank Steak delivers exactly that. Whether you’re hosting a backyard barbecue or simply treating yourself to a gourmet weeknight meal, this recipe transforms humble ingredients into something extraordinary. Trust me, one taste and you’ll understand why it’s a standout.
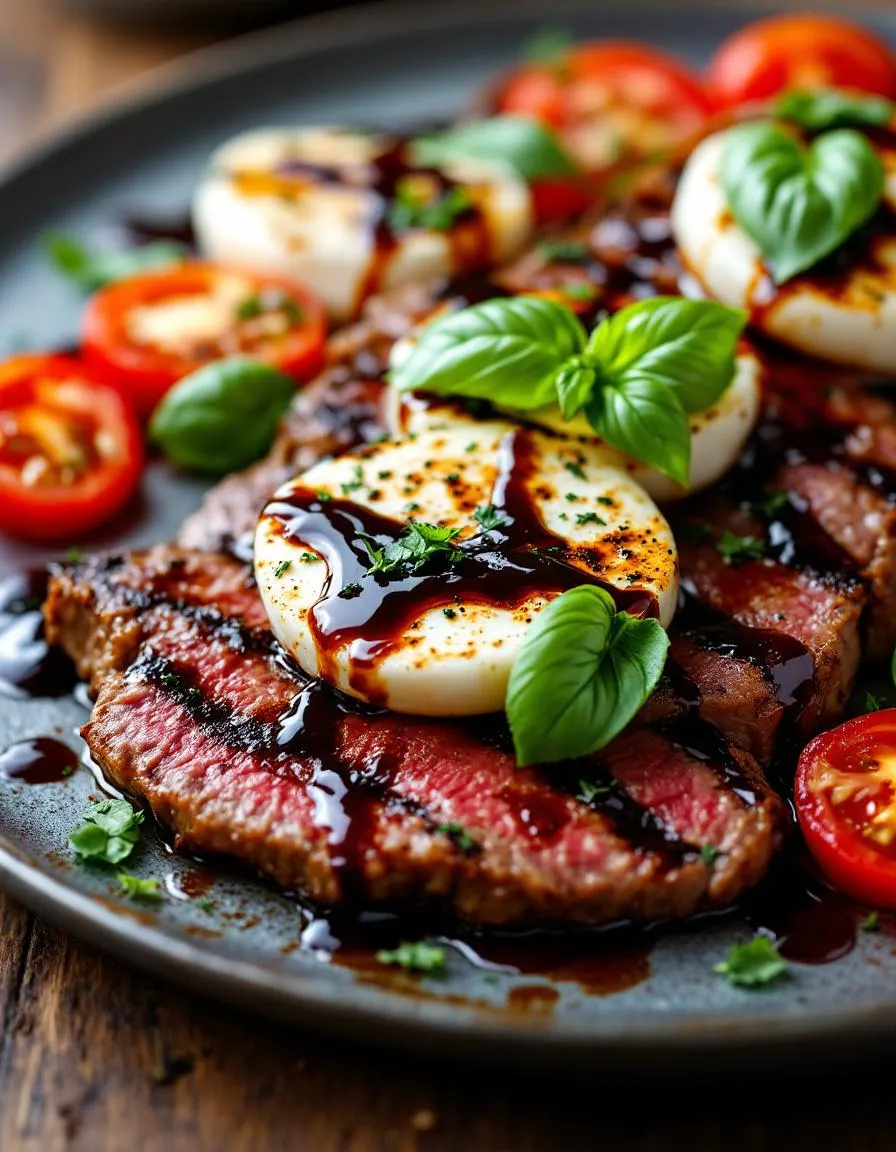
Flavorful Balsamic Caprese Grilled Flank Steak combines tender, marinated flank steak with the classic Caprese trio of juicy tomatoes, creamy mozzarella, and aromatic basil—all drizzled with a tangy balsamic glaze. The result? A dish that’s as visually stunning as it is delicious. Flank steak, known for its bold beefy flavor, soaks up a garlic-herb marinade before hitting the grill, while the balsamic reduction adds a sweet-tart finish that ties everything together. This recipe matters because it’s versatile enough for casual dinners yet impressive enough for entertaining. Plus, it aligns perfectly with our blog’s mission to share approachable, flavor-packed meals that inspire creativity in the kitchen. If you love grilling techniques that elevate simple cuts or crave fresh summer salads as sides, this dish bridges the gap between hearty and refreshing.
Why I Love This Recipe
This Flavorful Balsamic Caprese Grilled Flank Steak holds a special place in my heart because it reminds me of summer evenings spent with family, gathered around the grill. The first time I made it, the combination of smoky steak and bright, tangy toppings surprised everyone—even the picky eaters. Now, it’s my go-to when I want to impress without stressing. The marinade does most of the work, and the Caprese topping feels like a celebration of seasonal produce. Every time I serve it, I’m reminded why cooking is about more than just food—it’s about creating moments worth savoring.
Health and Nutrition
Why it’s good for your body
Flavorful Balsamic Caprese Grilled Flank Steak packs a powerful nutritional punch while delighting your taste buds. First, flank steak delivers a lean yet protein-rich base, helping you build muscle and stay full longer. Additionally, the balsamic glaze adds antioxidants, which combat inflammation and support heart health. Meanwhile, fresh mozzarella and tomatoes provide calcium and lycopene, promoting strong bones and healthy skin.
Moreover, this dish balances indulgence with wholesome ingredients. The olive oil in the marinade offers healthy fats, which boost brain function and keep your heart in top shape. Furthermore, the herbs like basil not only enhance flavor but also supply vitamins A and K. Because Flavorful Balsamic Caprese Grilled Flank Steak combines these elements, it’s a meal that fuels your body without sacrificing taste.
Finally, the dish keeps things light yet satisfying. Unlike heavy comfort foods, it avoids excessive carbs or processed ingredients. Instead, it relies on fresh, vibrant components. Whether you’re fueling up post-workout or enjoying a family dinner, Flavorful Balsamic Caprese Grilled Flank Steak makes nutrition effortless.
How it fits in a healthy lifestyle
Flavorful Balsamic Caprese Grilled Flank Steak fits seamlessly into balanced eating habits. If you’re following a high-protein diet, the flank steak alone provides nearly 30 grams of protein per serving. For those watching gluten, the recipe naturally skips grains, making it a safe choice. Even better, the healthy fats from olive oil and cheese align with Mediterranean-style eating, which supports long-term wellness.
You can easily pair this dish with a crisp salad or roasted veggies for a complete meal. If you’re meal prepping, it reheats well for lunches throughout the week. For more high-protein ideas, check out our protein-packed dinners roundup. Or, if you love heart-healthy recipes, explore our Mediterranean diet tips to keep your meals both nutritious and exciting.
A juicy grilled flank steak topped with fresh tomatoes, mozzarella, and a balsamic glaze for a delicious Caprese twist.
Ingredients
Scale
For the Crust:
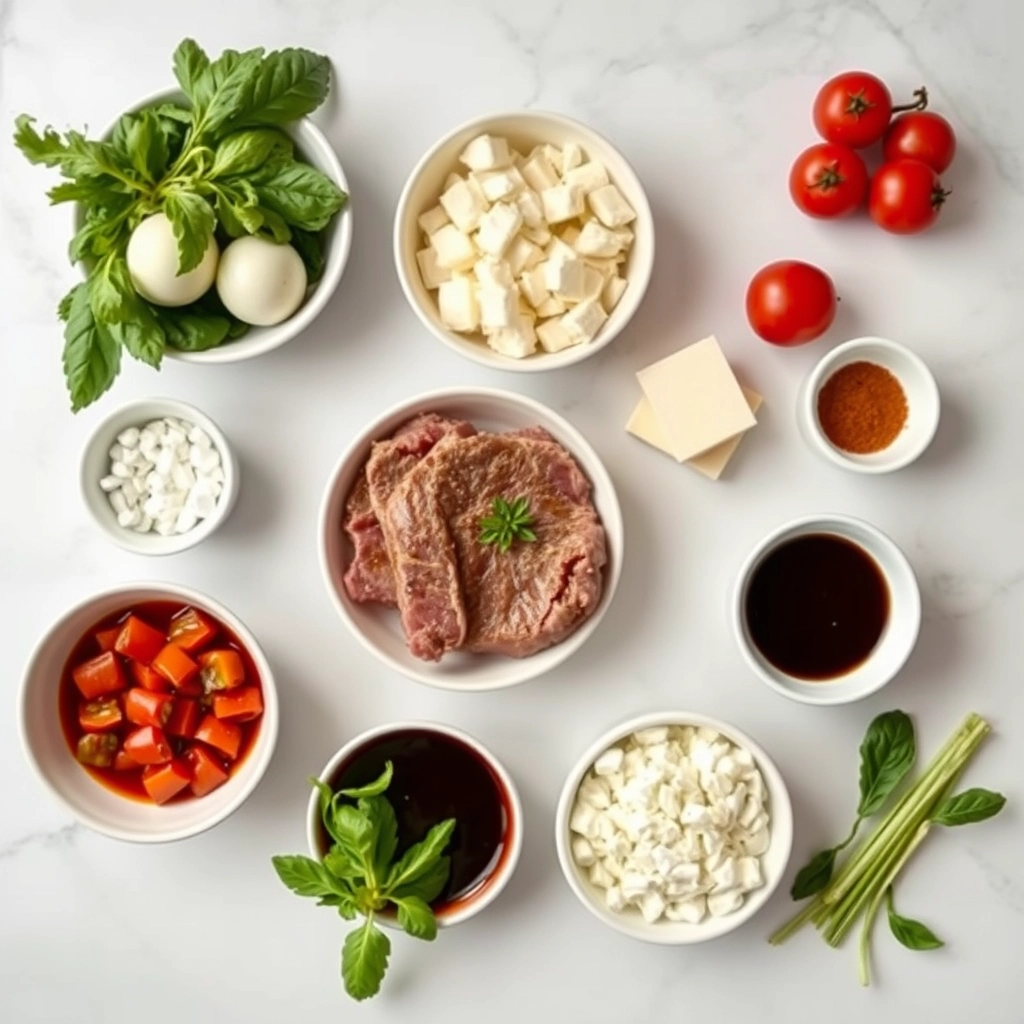
1.5 lbs flank steak
2 tbsp olive oil
2 cloves garlic, minced
1 tsp salt
1 tsp black pepper
1 tsp dried oregano
2 large tomatoes, sliced
8 oz fresh mozzarella, sliced
1/4 cup fresh basil leaves
1/4 cup balsamic glaze
Instructions
1. Prepare the Crust:
Preheat grill to medium-high heat.
Rub flank steak with olive oil, minced garlic, salt, pepper, and oregano.
Grill steak for 5-7 minutes per side, or until desired doneness. Let rest for 5 minutes.
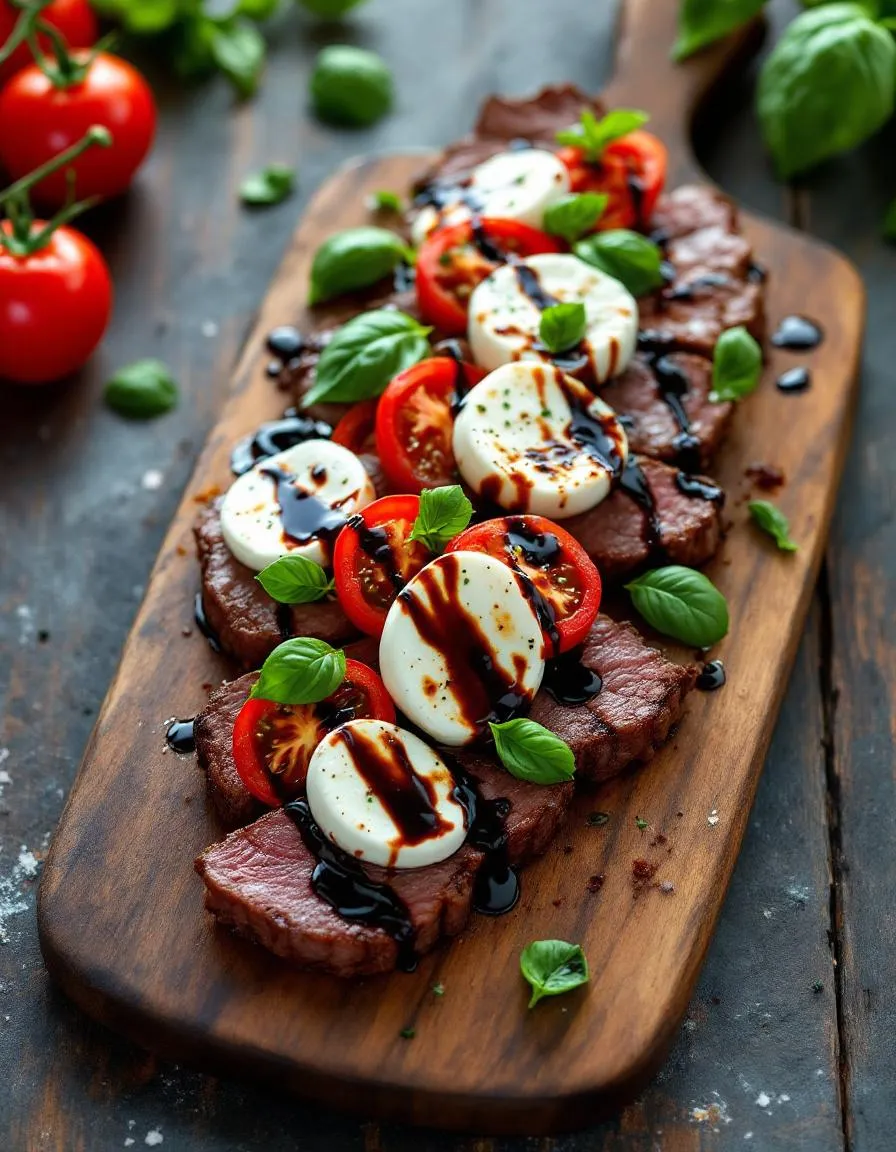
Slice steak against the grain and arrange on a platter.
Top with tomato and mozzarella slices, then garnish with fresh basil.
Drizzle with balsamic glaze before serving.
Notes
You can customize the seasonings to taste.
“`html
How to Prepare This Dish
Steps and time-saving tips
Start by marinating the Flavorful Balsamic Caprese Grilled Flank Steak to lock in those bold flavors. Whisk together olive oil, balsamic vinegar, minced garlic, and a pinch of salt and pepper in a bowl. Then, place the flank steak in a resealable bag and pour the marinade over it. Seal the bag tightly and let it chill in the fridge for at least 30 minutes, though an hour works even better. Meanwhile, slice fresh mozzarella and tomatoes into even rounds for the Caprese topping. Preheat your grill to medium-high heat while the steak marinates for a seamless transition. Once ready, grill the steak for about 5-7 minutes per side, depending on thickness, until it reaches your preferred doneness. Let it rest for 5 minutes before slicing against the grain. Finally, layer the mozzarella and tomatoes on top, drizzle with balsamic glaze, and sprinkle with fresh basil. For a time-saving hack, use store-bought balsamic glaze or prep the marinade the night before.
and-learned-from">Mistakes I’ve made and learned from
I’ve learned the hard way that skipping the resting time for Flavorful Balsamic Caprese Grilled Flank Steak leads to dry, tough meat. Once, I sliced it right off the grill, and all those juicy flavors escaped. Now, I always set a timer to ensure it rests properly. Another blunder? Over-marinating. Left it overnight once, and the acidity broke down the steak too much, making it mushy. Stick to 1-2 hours max for perfect texture. If you’re new to grilling, check out my grilling tips for beginners to avoid common pitfalls. Also, uneven tomato slices made my Caprese topping slide right off—lesson learned! A sharp knife and a steady hand make all the difference. For more on knife skills, my essential kitchen tools guide has you covered.
“`
n-and-variations">Cultural Connection and Variations
Where this recipe comes from
The Flavorful Balsamic Caprese Grilled Flank Steak marries Italian tradition with American backyard grilling. Caprese salad, with its fresh mozzarella, tomatoes, and basil, hails from the sunny coasts of southern Italy. Meanwhile, flank steak became a staple in American kitchens thanks to its affordability and versatility. Combine the two, and you get a dish that bridges continents.
In Italy, cooks might skip the grill and instead sear the steak in a pan, topping it with a simpler balsamic reduction. Families in Argentina, known for their love of beef, might swap flank steak for skirt cut and add chimichurri for a tangy twist. Even at home, my aunt adds roasted garlic to the marinade, claiming it “wakes up the flavors.” No matter the variation, the Flavorful Balsamic Caprese Grilled Flank Steak always brings people together.
Seasonally, this dish shines in summer when tomatoes and basil peak. But in colder months, some chefs roast cherry tomatoes or use aged balsamic for deeper flavor. Whether served at a weeknight dinner or a festive gathering, it carries the warmth of shared meals across cultures.
ays-cooking">How it fits in today’s cooking
Today, the Flavorful Balsamic Caprese Grilled Flank Steak fits perfectly into fast, flavorful cooking. Busy home cooks love it because it delivers restaurant-quality taste with minimal effort. Plus, it’s a hit at summer BBQs or even as a protein-packed salad topper for meal prep.
Modern twists include swapping mozzarella for burrata or adding a drizzle of spicy honey. Some even serve it sliced over a bed of arugula, turning it into a hearty yet light meal. For sides, try pairing it with garlic herb roasted potatoes or a refreshing cucumber avocado salad.
Ultimately, this dish stays relevant because it adapts. Whether you’re feeding a crowd or craving a cozy dinner, the Flavorful Balsamic Caprese Grilled Flank Steak delivers every time.
>Taste and Texture
What makes it delicious
Flavorful Balsamic Caprese Grilled Flank Steak delivers a mouthwatering balance of bold and fresh flavors. The juicy, charred flank steak melts in your mouth, while the rich balsamic glaze adds a tangy sweetness that lingers. Fresh mozzarella brings a creamy contrast, and ripe tomatoes burst with bright acidity. Fragrant basil ties everything together with its peppery aroma. Every bite of Flavorful Balsamic Caprese Grilled Flank Steak feels indulgent yet light, thanks to the vibrant Caprese elements.
Boosting the flavor
For an extra flavor kick, try marinating the steak in garlic-infused olive oil before grilling. A sprinkle of red pepper flakes adds subtle heat, while a drizzle of homemade balsamic reduction deepens the sweetness. Top with avocado slices for buttery richness or serve alongside garlic herb roasted potatoes for a hearty pairing. Experiment with fresh herbs like thyme or oregano to elevate the aroma even further.
Tips for Success
Best practices for results
Always marinate the flank steak for at least 4 hours to let the balsamic flavors fully penetrate the meat. Meanwhile, preheat your grill to high heat for a perfect sear on your Flavorful Balsamic Caprese Grilled Flank Steak. Additionally, slice the tomatoes and mozzarella evenly so they layer beautifully on top. Finally, let the steak rest for 5 minutes before slicing to keep the juices locked in.
Mistakes to avoid
Avoid overcooking the flank steak, as it can become tough—aim for medium-rare or medium doneness for the best texture. If you’re unsure about grill temperatures, check our guide on grilling temperatures for precise heat control. Another common mistake is skipping the resting step, which causes the juices to spill out. For more tips on keeping meats juicy, explore our meat resting guide.
Serving and Pairing Suggestions
How to serve this dish
For a stunning presentation, slice the Flavorful Balsamic Caprese Grilled Flank Steake against the grain and fan it out on a platter. Meanwhile, drizzle extra balsamic glaze over the top and sprinkle fresh basil leaves for a pop of color. Alternatively, serve it family-style with the Caprese toppings arranged artfully over the steak. This dish shines at summer cookouts, but it also makes an elegant centerpiece for holiday dinners or date nights. To elevate the experience, pair it with warm crusty bread for soaking up the juices.
h-it">What goes well with it
A crisp arugula salad with shaved Parmesan balances the richness of Flavorful Balsamic Caprese Grilled Flank Steak perfectly. For heartier sides, try roasted garlic mashed potatoes or our favorite Herb-Roasted Potatoes, which add earthy depth. Meanwhile, a chilled glass of Pinot Noir or sparkling lemonade complements the tangy balsamic notes. If you love bold flavors, our Creamy Horseradish Sauce adds a spicy kick that pairs wonderfully with the steak.
What cut of steak is best for Flavorful Balsamic Caprese Grilled Flank Steak?
Flank steak is the ideal cut for this recipe because it absorbs marinades well and grills quickly. The lean, fibrous texture of flank steak pairs perfectly with the bold flavors of balsamic and Caprese toppings. For the most tender results, slice Flavorful Balsamic Caprese Grilled Flank Steak against the grain after cooking.
ank-math-faq-item">
How long should you marinate flank steak for Caprese grilled steak?
Marinate your flank steak for at least 2 hours, but no more than 12 hours, for optimal flavor penetration. The balsamic vinegar in Flavorful Balsamic Caprese Grilled Flank Steak acts as a tenderizer, so longer marinating times can make the meat mushy. For best results, refrigerate while marinating and bring to room temperature before grilling.
What temperature should flank steak be grilled to for Caprese steak?
Cook Flavorful Balsamic Caprese Grilled Flank Steak to 130-135°F (medium-rare) for the most tender results, as flank steak can become tough if overcooked. Use a meat thermometer to check the internal temperature, remembering the steak will continue cooking slightly after removal from heat. For well-done preferences, don’t exceed 145°F to maintain juiciness.
Can I make Flavorful Balsamic Caprese Grilled Flank Steak ahead of time?
You can marinate the steak up to 12 hours in advance, but grill it fresh for best texture. The Caprese toppings (tomatoes, mozzarella, and basil) should be added just before serving to maintain their freshness. Leftover Flavorful Balsamic Caprese Grilled Flank Steak makes excellent sandwiches or salads when chilled.
div>
Best Creamy Crockpot Olive Garden Chicken Pasta
Introduction
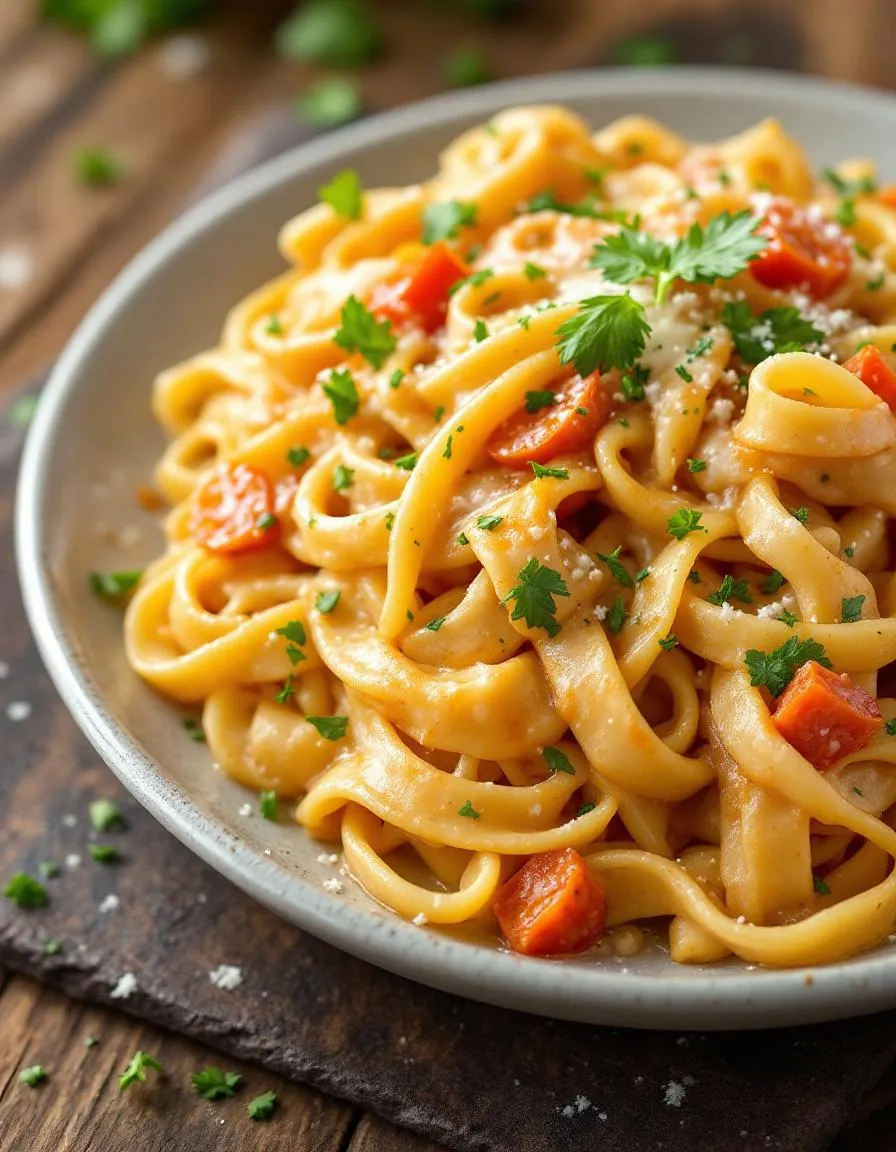
There’s something magical about walking into Olive Garden and being greeted by the rich aroma of creamy pasta dishes. Now, imagine bringing that same comforting flavor home with minimal effort. That’s exactly what this Creamy Crockpot Olive Garden Chicken Pasta delivers—a luscious, restaurant-quality meal that simmers effortlessly in your slow cooker while you tackle your day. Whether you’re craving a cozy weeknight dinner or need a crowd-pleasing dish for gatherings, this recipe wraps you in warmth with every bite.
This Creamy Crockpot Olive Garden Chicken Pasta combines tender chicken, al dente pasta, and a velvety sauce infused with Italian herbs and Parmesan. Unlike fussy recipes, the slow cooker does most of the work, melding flavors into a dish that tastes like it took hours of stirring—but didn’t. It’s perfect for busy home cooks who want indulgence without the hassle, and it pairs beautifully with a crisp salad or garlic bread. If you love easy, flavorful meals, you’ll adore our Crockpot Creamy Tuscan Chicken, which shares the same effortless appeal. Plus, it’s a fantastic way to repurpose leftover chicken, making it as practical as it is delicious. Our blog celebrates approachable, family-friendly recipes, and this dish fits right in—offering comfort, convenience, and a touch of restaurant flair.
Why I Love This Recipe
This recipe holds a special place in my heart because it reminds me of Sunday dinners with my family. My mom would layer ingredients into the crockpot before church, and we’d return to a kitchen smelling like our favorite Italian spot. Now, I make this Creamy Crockpot Olive Garden Chicken Pasta for my own kids, and it’s become our go-to for busy nights and potlucks alike. For more slow cooker inspiration, try our Slow Cooker Honey Garlic Chicken—it’s another weeknight hero that never disappoints.
Health and Nutrition
Why it’s good for your body
Creamy Crockpot Olive Garden Chicken Pasta delivers a satisfying meal packed with nutrients. First, the lean chicken breast provides high-quality protein to support muscle growth and repair. Additionally, the slow-cooking process locks in moisture, ensuring tender bites without excess fat. Moreover, the creamy sauce, when made with Greek yogurt or light cream, adds richness while keeping calories in check.
Beyond protein, this dish includes wholesome ingredients like garlic and herbs, which offer immune-boosting and anti-inflammatory benefits. Furthermore, the pasta supplies complex carbohydrates for steady energy, especially if you opt for whole-grain varieties. Meanwhile, the olive oil in the recipe contributes heart-healthy monounsaturated fats. As a result, Creamy Crockpot Olive Garden Chicken Pasta balances macronutrients while delivering deep, comforting flavors.
Finally, the convenience of a crockpot means you can prep this meal ahead for busy days. Since it simmers slowly, the flavors meld beautifully without needing heavy creams or excessive salt. Therefore, Creamy Crockpot Olive Garden Chicken Pasta becomes a smart choice for both taste and nutrition. Whether you need a post-workout refuel or a family-friendly dinner, this dish covers all the bases.
How it fits in a healthy lifestyle
Creamy Crockpot Olive Garden Chicken Pasta easily adapts to various dietary needs. For a gluten-free version, swap regular pasta for chickpea or brown rice noodles. If you prioritize heart health, use olive oil and lean chicken to keep saturated fats low. High-protein seekers can double the chicken portion or add white beans for extra plant-based protein.
This meal also fits into meal prep routines, saving time without sacrificing nutrition. Pair it with a side salad or steamed veggies for added fiber, like these easy meal prep ideas. For those watching portions, divide leftovers into containers for balanced lunches. And if you love flavorful yet light dinners, explore our quick healthy dinners for more inspiration. Creamy Crockpot Olive Garden Chicken Pasta proves that comfort food can align with your wellness goals.
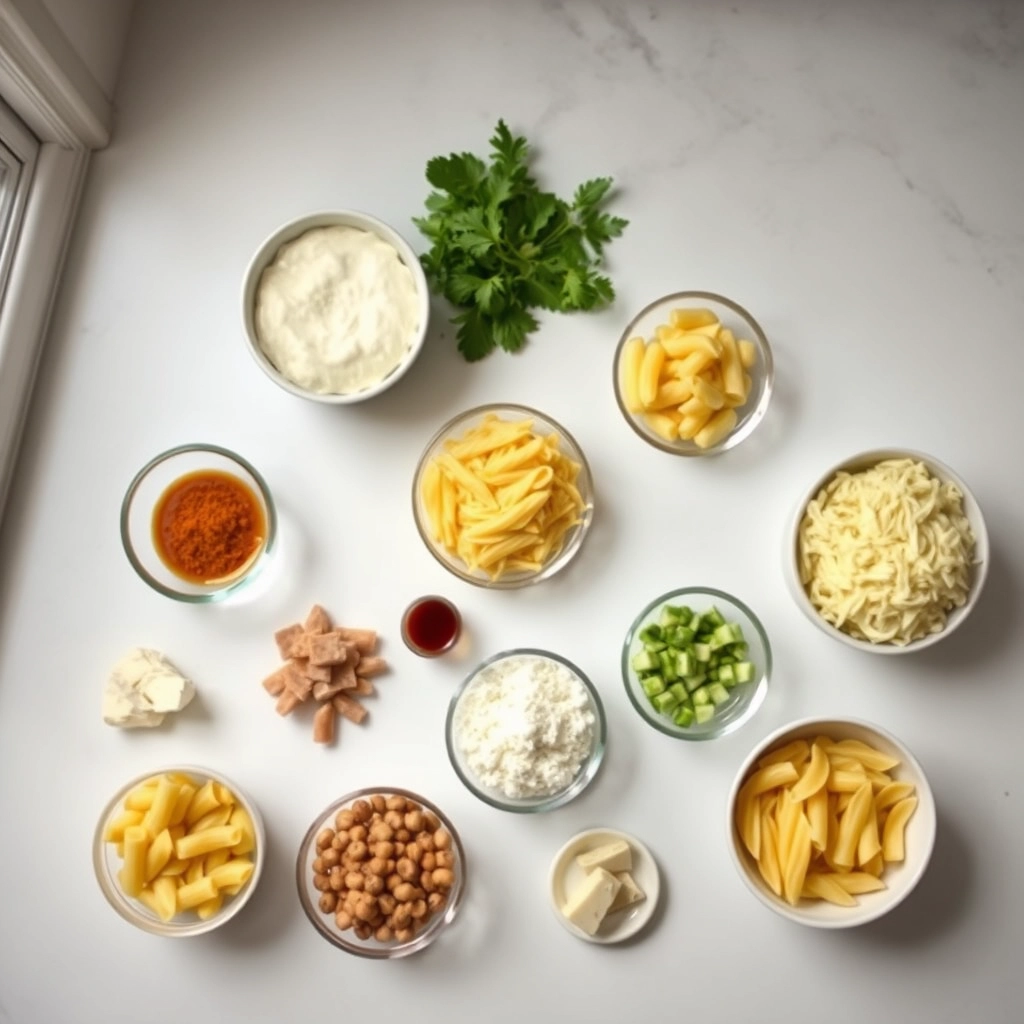
A rich and creamy pasta dish inspired by Olive Garden, made effortlessly in a crockpot with tender chicken and a decadent sauce.
Ingredients
Scale
For the Crust:
2 lbs boneless, skinless chicken breasts
1 (16 oz) jar Alfredo sauce
1 (24 oz) jar marinara sauce
1 cup heavy cream
1 tsp garlic powder
1 tsp Italian seasoning
1/2 tsp salt
1/2 tsp black pepper
1 lb penne pasta
1 cup shredded mozzarella cheese
1/4 cup grated Parmesan cheese
Instructions
1. Prepare the Crust:
Place chicken breasts in the crockpot.
In a bowl, mix Alfredo sauce, marinara sauce, heavy cream, garlic powder, Italian seasoning, salt, and pepper. Pour over chicken.
Cover and cook on low for 6 hours or high for 3 hours, until chicken is tender.
Shred chicken with two forks and stir into the sauce.
Cook pasta according to package instructions, then drain and add to the crockpot. Stir to combine.
Sprinkle mozzarella and Parmesan cheese on top, cover until cheese melts (about 5 minutes).
Notes
You can customize the seasonings to taste.
How to Prepare This Dish
Steps and time-saving tips
Start by seasoning your chicken breasts with salt, pepper, and Italian seasoning for that signature Olive Garden flavor. Then, layer them at the bottom of your crockpot. Next, pour in the chicken broth and Alfredo sauce, making sure the chicken is fully submerged. Cover and cook on low for 4-5 hours or until the chicken shreds easily with a fork. Meanwhile, boil your pasta separately until al dente, then drain and set aside. Once the chicken is tender, shred it directly in the crockpot and stir in the cooked pasta, sun-dried tomatoes, and spinach. Let everything simmer for 10 more minutes so the flavors meld. For a creamier texture, fold in a splash of heavy cream or grated Parmesan right before serving. Garnish with fresh basil and a sprinkle of red pepper flakes if you like a little heat. To save time, use pre-shredded chicken or a store-bought rotisserie chicken, but adjust cooking time since it won’t need as long to tenderize.
and-learned-from">Mistakes I’ve made and learned from
I once overcooked the chicken by leaving it in the crockpot too long, which turned it dry and stringy. Now I set a timer and check for doneness at the 4-hour mark. Another mistake? Skipping the pasta cooking step and tossing uncooked noodles into the crockpot—they absorbed too much liquid and turned mushy. Lesson learned: always cook pasta separately for the perfect texture. If you’re new to crockpot meals, my guide on crockpot basics covers these pitfalls in detail. And if you love creamy dishes, my Alfredo sauce hacks will help you nail the consistency every time.
Cultural Connection and Variations
Where this recipe comes from
Imagine walking into an Olive Garden on a chilly evening, greeted by the aroma of garlic, herbs, and simmering sauces. That’s the vibe Creamy Crockpot Olive Garden Chicken Pasta captures—a cozy, Italian-American classic with a slow-cooked twist. While Olive Garden popularized this dish in the U.S., its roots stretch back to Italy’s love for rich, creamy pasta sauces like Alfredo. Families in Rome might use fresh fettuccine and hand-whisked sauce, but our crockpot version brings the same comfort with minimal effort.
Across the globe, simil
ar dishes take on local flavors. In Sweden, they might add dill and sour cream for a Nordic twist. Meanwhile, in Mexico, cooks often toss in roasted poblano peppers for a smoky kick. My grandma, however, swore by adding a splash of white wine and extra Parmesan—her “secret” touch. Whether you stick to the classic or tweak it, Creamy Crockpot Olive Garden Chicken Pasta always feels like a hug in a bowl.
How it fits in today’s cooking
Today, this dish thrives as a weeknight hero. Busy parents love dumping ingredients into a crockpot and coming home to a ready-to-serve meal. It’s also a star at potlucks, especially during the holidays when creamy pasta dishes steal the show. Modern cooks often lighten it up with Greek yogurt or gluten-free pasta, proving its versatility.
For those craving more easy comfort food, try pairing it with garlic butter steak bites for a hearty feast. Or, if you’re meal prepping, pair it with air fryer roasted veggies for balance. Creamy Crockpot Olive Garden Chicken Pasta isn’t just a recipe—it’s a timeless tradition that adapts to every kitchen and season.
>Taste and Texture
What makes it delicious
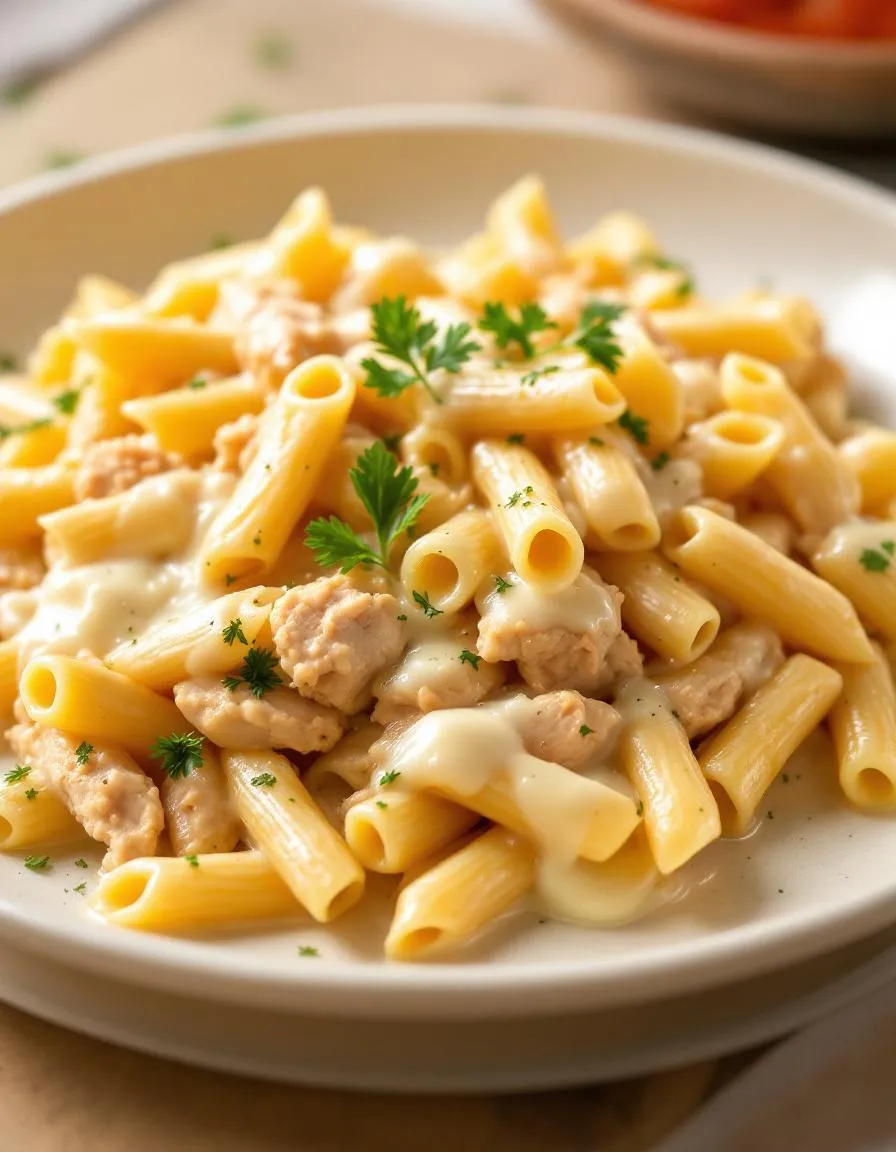
Creamy Crockpot Olive Garden Chicken Pasta wraps you in rich, velvety comfort from the first bite. The tender chicken melts in your mouth, while the al dente pasta holds just enough bite to balance the luscious sauce. Garlic and Parmesan infuse every forkful with a savory, umami depth, and sun-dried tomatoes add a sweet-tangy pop. Meanwhile, the creamy Alfredo sauce coats everything in a silky, indulgent finish. As it simmers, the dish fills your kitchen with an irresistible aroma of herbs and roasted garlic. Whether you crave hearty comfort or restaurant-quality flavor, Creamy Crockpot Olive Garden Chicken Pasta delivers both effortlessly.
Boosting the flavor
For an extra flavor kick, try stirring in a handful of fresh spinach or artichoke hearts during the last 30 minutes of cooking—they’ll add brightness and texture. If you love heat, a pinch of red pepper flakes or a drizzle of homemade chili oil will elevate the dish with a spicy contrast. Crumbled bacon or toasted pine nuts also make fantastic crunchy toppings. For a tangy twist, swap half the Alfredo sauce with sun-dried tomato pesto, blending creamy and zesty flavors. With these tweaks, Creamy Crockpot Olive Garden Chicken Pasta becomes even more unforgettable.
Tips for Success
Best practices for results
Always sear the chicken before adding it to the crockpot for deeper flavor in your Creamy Crockpot Olive Garden Chicken Pasta. Additionally, stir the pasta sauce occasionally during cooking to prevent sticking. For the creamiest texture, use full-fat heavy cream and freshly grated Parmesan. Finally, add the uncooked pasta during the last 30 minutes to avoid overcooking.
Mistakes to avoid
Avoid overfilling the crockpot, as this can lead to uneven cooking. Instead, leave at least an inch of space at the top. Many cooks also forget to season the dish properly, so taste and adjust the salt and pepper before serving. For more crockpot tips, check out our guide on crockpot basics. Another common mistake is using pre-shredded cheese, which often contains anti-caking agents that affect creaminess. For better results, follow our cheese selection guide.
Serving and Pairing Suggestions
How to serve this dish
Bring out the comfort-food charm of Creamy Crockpot Olive Garden Chicken Pasta by serving it family-style in a warm, shallow bowl. For a restaurant-worthy touch, garnish with freshly grated Parmesan, a sprinkle of chopped parsley, and a crack of black pepper. Meanwhile, if you’re hosting a cozy dinner party, layer individual portions over garlic-rubbed crostini for a playful twist. This dish shines at potlucks, weeknight dinners, or even holiday gatherings—just pair it with crusty bread to soak up every bit of the creamy sauce.
h-it">What goes well with it
Balance the richness of Creamy Crockpot Olive Garden Chicken Pasta with a crisp, tangy side like our Easy Mediterranean Salad, which adds refreshing contrast. For a heartier meal, try roasted garlic green beans or a warm loaf of Homemade Focaccia Bread. Meanwhile, a chilled glass of Pinot Grigio or sparkling lemonade cuts through the creaminess beautifully, making each bite even more satisfying.
Can I make Creamy Crockpot Olive Garden Chicken Pasta without heavy cream?
Yes! You can substitute heavy cream with half-and-half, whole milk, or even coconut milk for a lighter version of Creamy Crockpot Olive Garden Chicken Pasta. The sauce may be slightly thinner, but it will still deliver rich flavor.
ank-math-faq-item">
How long should I cook Creamy Crockpot Olive Garden Chicken Pasta on low?
For best results, cook Creamy Crockpot Olive Garden Chicken Pasta on low for 4-6 hours. This ensures the chicken becomes tender and the flavors meld perfectly without overcooking the pasta.
What type of pasta works best for Creamy Crockpot Olive Garden Chicken Pasta?
Short pasta like penne, rotini, or farfalle holds up well in Creamy Crockpot Olive Garden Chicken Pasta. Avoid delicate noodles like angel hair, as they may become mushy during slow cooking.
Can I freeze leftovers of Creamy Crockpot Olive Garden Chicken Pasta?
Yes, Creamy Crockpot Olive Garden Chicken Pasta freezes well for up to 3 months. Store in airtight containers and reheat gently on the stove with a splash of milk to restore the creamy texture.
div>
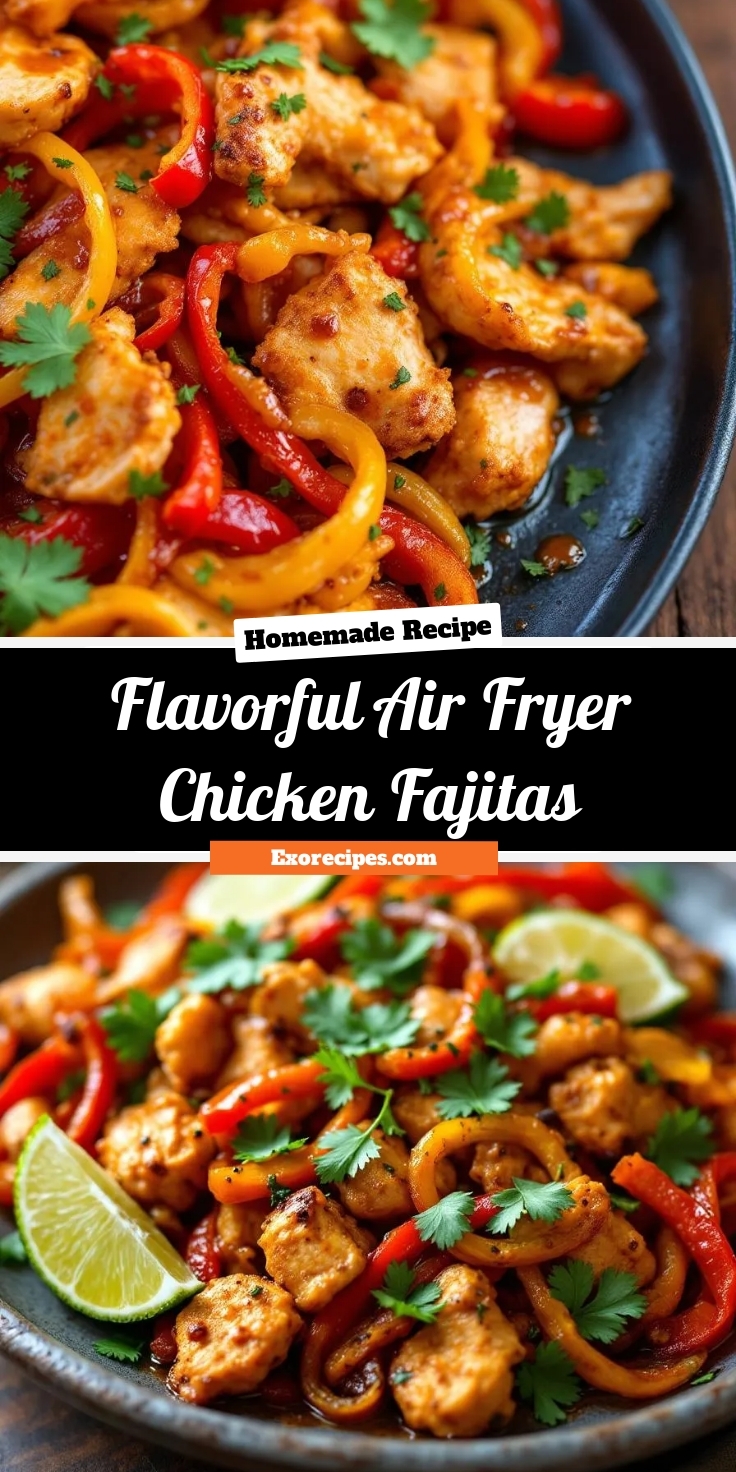
Easy Air Fryer Chicken Fajitas – Quick & Flavorful
Introduction
Craving restaurant-quality fajitas without the hassle? Flavorful Air Fryer Chicken Fajitas bring sizzling Tex-Mex flavors to your kitchen in minutes. Whether you’re juggling a busy schedule or simply want a healthier twist on a classic, this recipe delivers juicy chicken, crisp peppers, and bold spices—all with minimal cleanup. Best of all, your air fryer does the heavy lifting, so you can enjoy a vibrant, satisfying meal any night of the week.
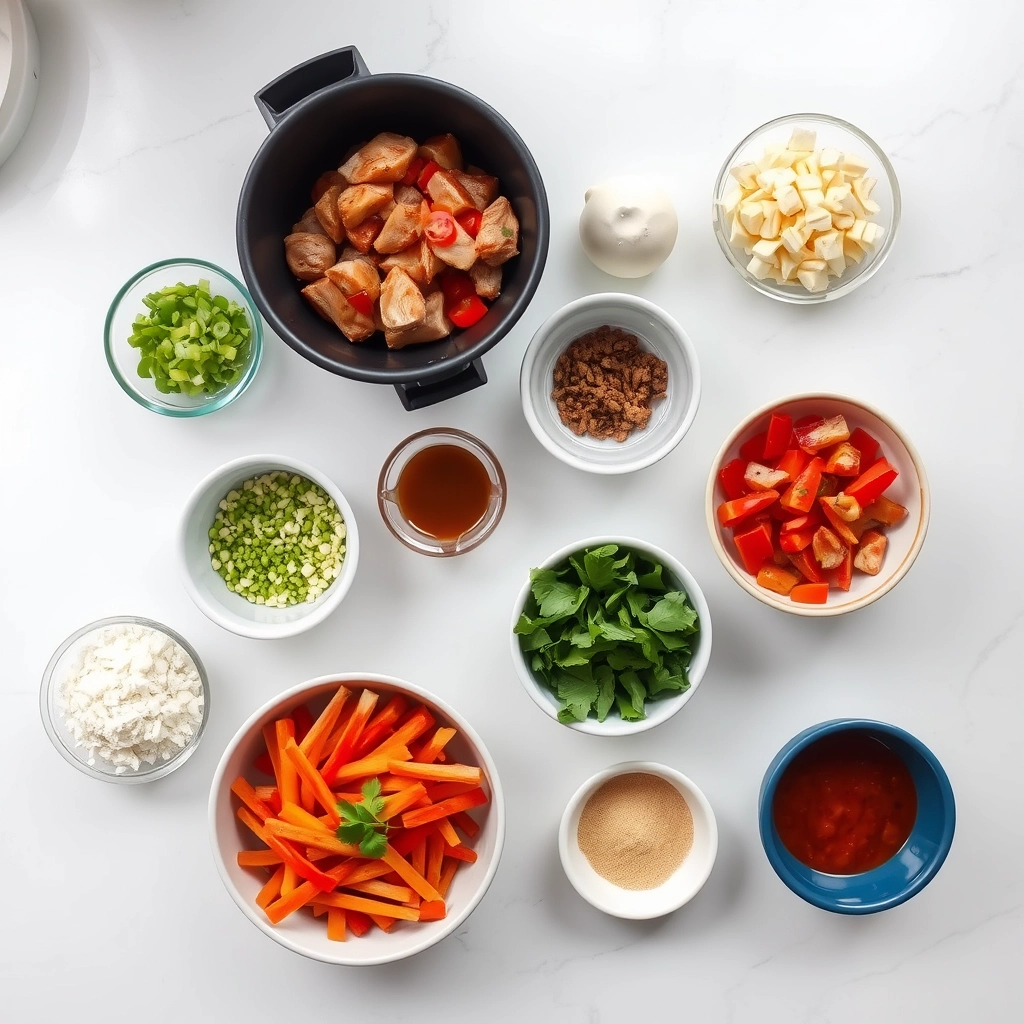
Flavorful Air Fryer Chicken Fajitas reinvent a weeknight staple by combining convenience with irresistible taste. Unlike traditional skillet fajitas, this version locks in moisture and caramelizes the veggies perfectly, thanks to the air fryer’s rapid circulation. The marinade—a zesty blend of lime, cumin, and smoked paprika—infuses every bite with depth, while the cooking method slashes oil without sacrificing texture. For families or solo cooks, this dish adapts effortlessly: pile the filling into warm tortillas, or serve it over rice for a low-carb twist. Plus, it aligns with our blog’s mission to simplify gourmet-inspired meals, much like our Mexican-inspired dinner ideas and healthy air fryer favorites. With prep under 15 minutes, it’s a game-changer for anyone seeking flavor-packed simplicity.
Why I Love This Recipe
Flavorful Air Fryer Chicken Fajitas remind me of lazy weekend dinners with friends—minus the effort. I first tested this recipe during a hectic workweek, and the way the spices filled my kitchen instantly lifted my mood. Now, it’s my go-to when I need a meal that feels special but cooks like clockwork. The air fryer’s crisp edges on the peppers and onions? Absolutely magical. Every time I make it, I’m amazed how such simple ingredients create something so vibrant and satisfying.
Health and Nutrition
Why it’s good for your body
Flavorful Air Fryer Chicken Fajitas pack a nutritious punch while keeping meals exciting. First, the lean chicken breast delivers high-quality protein to support muscle growth and repair. Additionally, the colorful bell peppers and onions provide a hefty dose of antioxidants and fiber, which help digestion and reduce inflammation. Since you cook them in an air fryer, you also cut down on excess oil without sacrificing crispness or flavor.
Moreover, Flavorful Air Fryer Chicken Fajitas balance macros and micronutrients effortlessly. The dish includes healthy fats from a drizzle of olive oil, which promotes heart health. Meanwhile, the spices like cumin and paprika not only enhance taste but also offer metabolism-boosting benefits. Because the air fryer locks in moisture, the chicken stays tender without needing heavy sauces or additives.
Finally, this meal fits seamlessly into various dietary preferences. Whether you focus on high-protein eating or simply want a lighter twist on Tex-Mex classics, Flavorful Air Fryer Chicken Fajitas deliver. The combination of fresh ingredients and smart cooking methods makes it a standout choice for anyone prioritizing both health and flavor.
How it fits in a healthy lifestyle
Flavorful Air Fryer Chicken Fajitas align perfectly with balanced eating habits. For gluten-free diets, swapping traditional tortillas for lettuce wraps keeps the meal light and compliant. If you follow a heart-healthy plan, the lean protein and veggie-heavy mix support cardiovascular wellness. Plus, the air fryer method slashes unnecessary calories, making it easier to stay on track with weight management goals.
Busy weeknights don’t have to derail nutrition goals. This dish comes together quickly, proving that healthy eating can be simple and satisfying. Pair it with a side of quinoa salad for extra fiber or enjoy it as a standalone high-protein option. For more meal prep inspiration, check out these easy meal prep strategies to keep your routine stress-free. Flavorful Air Fryer Chicken Fajitas prove that wholesome meals don’t require compromise—just smart choices and great flavor.
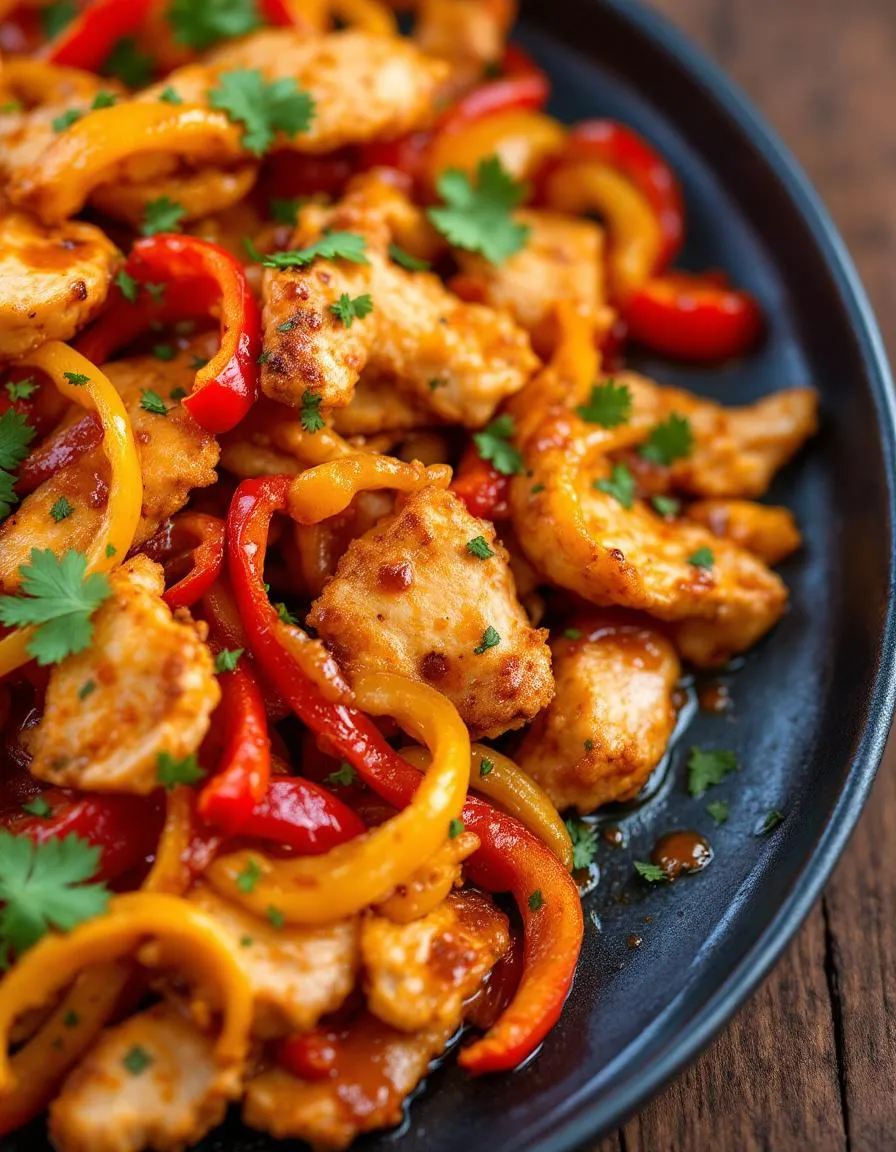
Quick and delicious chicken fajitas made in the air fryer with tender chicken, bell peppers, and onions, seasoned to perfection.
Ingredients
Scale
For the Crust:
1 lb boneless, skinless chicken breasts, sliced into strips
1 red bell pepper, sliced
1 green bell pepper, sliced
1 yellow onion, sliced
2 tbsp olive oil
1 tbsp fajita seasoning
1 tsp garlic powder
1 tsp cumin
1/2 tsp salt
1/2 tsp black pepper
8 small flour tortillas
Fresh cilantro, for garnish (optional)
Lime wedges, for serving (optional)
Instructions
1. Prepare the Crust:
Preheat the air fryer to 375°F (190°C) for 5 minutes.
In a large bowl, toss the chicken strips, bell peppers, and onion with olive oil, fajita seasoning, garlic powder, cumin, salt, and black pepper until evenly coated.
Place the seasoned chicken and vegetables in the air fryer basket in a single layer. Cook for 12-15 minutes, shaking the basket halfway through, until the chicken is cooked through and the vegetables are tender.
While the fajitas cook, warm the tortillas in a dry skillet or microwave.
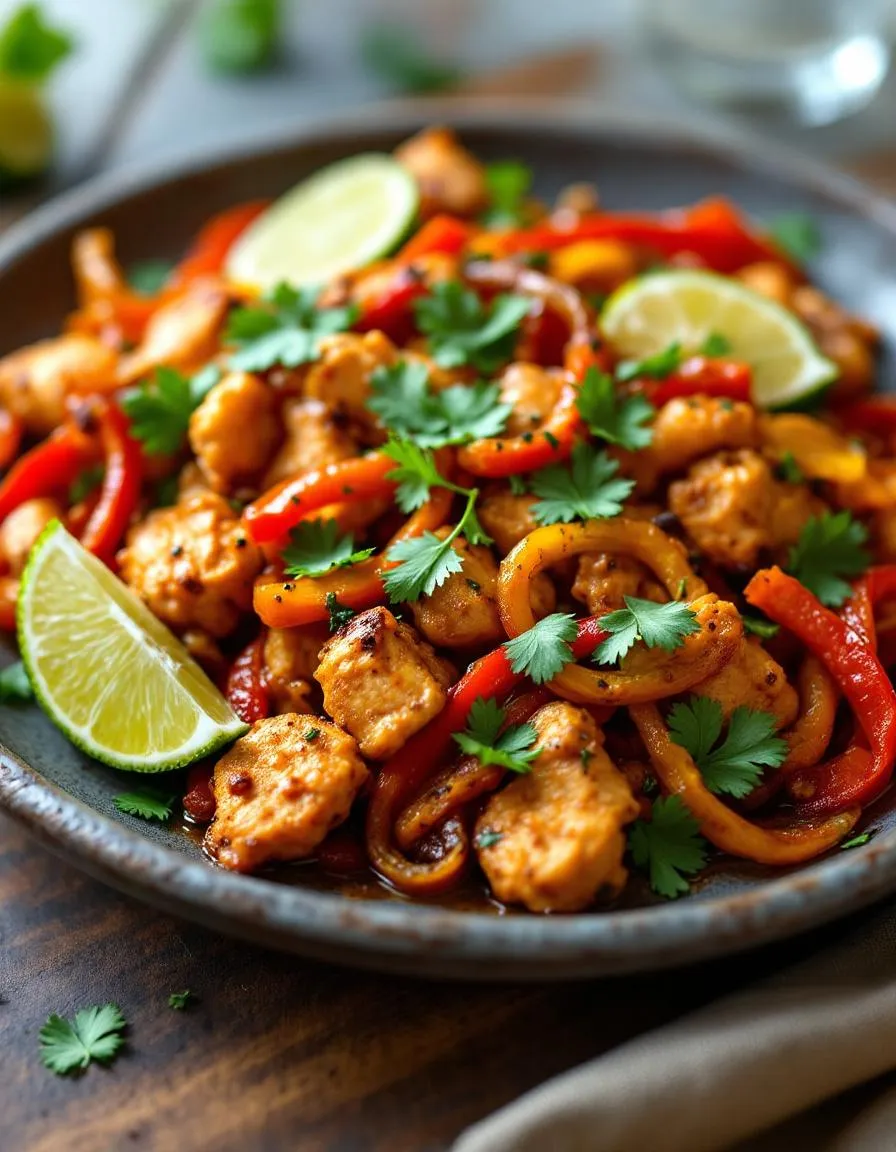
Serve the fajita mixture on warm tortillas. Garnish with fresh cilantro and a squeeze of lime if desired.
Notes
You can customize the seasonings to taste.
s-dish">How to Prepare This Dish
Steps and time-saving tips
Start by slicing your chicken breasts into thin strips for even cooking. Toss them in a bowl with olive oil, lime juice, and a blend of fajita spices like cumin, paprika, and chili powder. Meanwhile, slice bell peppers and onions into uniform strips so they cook evenly in the air fryer. Preheat your air fryer to 375°F for about 3 minutes—this helps lock in the juices. Layer the chicken and veggies in the air fryer basket, making sure not to overcrowd it. Cook for 12 minutes, shaking the basket halfway through to ensure everything gets crispy and caramelized. While the fajitas cook, warm your tortillas in a dry skillet or microwave for 30 seconds. Serve the chicken and veggies hot with fresh toppings like avocado, sour cream, and cilantro. For a time-saving hack, prep your veggies the night before and store them in an airtight container. If you’re short on time, use pre-sliced chicken or frozen pepper strips—just pat them dry to avoid excess moisture.
Mistakes I’ve made and learned from
I once overcrowded the air fryer basket, and the Flavorful Air Fryer Chicken Fajitas turned out soggy instead of crispy. Now I cook in batches, even if it takes a few extra minutes. Another mistake? Skipping the preheat—it makes a huge difference in texture. If your chicken sticks to the basket, try lightly spraying it with oil or using parchment paper designed for air fryers. I also learned the hard way that overcooking the veggies turns them mushy, so I keep a close eye after the 10-minute mark. For more air fryer tips, check out my guide on air fryer basics. And if you’re new to meal prepping, my meal prep ideas can help you save time without sacrificing flavor.
n-and-variations">Cultural Connection and Variations
Where this recipe comes from
Flavorful Air Fryer Chicken Fajitas carry the vibrant spirit of Mexican street food, where sizzling meats and peppers fill the air with irresistible aromas. Traditionally, cooks prepare fajitas over an open flame or cast iron, but the air fryer gives this classic a modern twist without losing its bold flavors. In northern Mexico, you might find them served with extra lime and smoky chipotle, while coastal regions often add fresh seafood alongside the chicken.
My family puts its own spin on Flavorful Air Fryer Chicken Fajitas by tossing in pineapple chunks for a sweet kick. Meanwhile, Tex-Mex versions pile on melted cheese and sour cream, turning them into hearty, shareable platters. No matter the variation, the dish always brings people together. Whether it’s a weeknight dinner or a festive gathering, these fajitas deliver both comfort and excitement in every bite.
How it fits in today’s cooking
Today, Flavorful Air Fryer Chicken Fajitas fit perfectly into busy lives. They’re quick, healthy, and packed with flavor, making them ideal for meal prep or last-minute dinners. Many home cooks pair them with easy weeknight sides like cilantro rice or black beans for a complete meal. Plus, the air fryer cuts down on oil without sacrificing that signature char.
Beyond convenience, the
se fajitas shine at gatherings. They’re a hit at game-day parties or summer cookouts, especially when served with crowd-pleasing dips. Modern twists, like using plant-based chicken or extra-spicy seasonings, keep the recipe fresh and adaptable. Whether you stick to tradition or experiment, Flavorful Air Fryer Chicken Fajitas remain a timeless favorite.
Taste and Texture
What makes it delicious
Flavorful Air Fryer Chicken Fajitas deliver a mouthwatering mix of smoky, zesty, and savory notes. The chicken turns juicy and tender, while the peppers and onions caramelize into sweet, crisp perfection. A bold blend of cumin, chili powder, and garlic infuses every bite with warmth, while a splash of lime brightens the dish. The aroma alone—fragrant and slightly spicy—will make your kitchen smell irresistible. Plus, the air fryer locks in moisture, ensuring each piece of chicken stays succulent. Whether wrapped in a warm tortilla or piled high on a plate, Flavorful Air Fryer Chicken Fajitas offer a satisfying crunch and melt-in-your-mouth tenderness in every forkful.
Boosting the flavor
Elevate your Flavorful Air Fryer Chicken Fajitas with a few easy tweaks. For extra heat, toss in diced jalapeños or a sprinkle of cayenne. Creamy toppings like avocado crema or tangy Greek yogurt balance the spices beautifully. If you love depth, try marinating the chicken in a smoky chipotle sauce or a splash of citrusy mojo marinade. Fresh cilantro, crumbled queso fresco, or pickled red onions add vibrant texture and brightness. Experiment with different tortillas, too—charred corn or garlic-infused flour wraps take the meal to the next level. With these simple upgrades, every bite becomes even more unforgettable.
First, always slice your chicken and vegetables evenly so they cook uniformly in the air fryer. Next, preheat your air fryer for 3-5 minutes to ensure crispy, Flavorful Air Fryer Chicken Fajitas every time. Additionally, shake the basket halfway through cooking to prevent sticking and promote even browning. Finally, let the fajitas rest for a minute before serving to lock in juices and enhance flavor.
Mistakes to avoid
Avoid overcrowding the air fryer basket, as this leads to steaming instead of crisping. Instead, cook in batches if needed for the best texture. Also, don’t skip marinating the chicken—it’s key for maximizing flavor. For more on perfect marinades, check out our guide to air fryer marinades. Lastly, remember to check your chicken’s internal temperature with a meat thermometer to avoid undercooking. For more air fryer safety tips, see our air fryer troubleshooting post.
g-suggestions">Serving and Pairing Suggestions
How to serve this dish
Flavorful Air Fryer Chicken Fajitas shine when served fresh and sizzling straight from the air fryer. For a vibrant presentation, arrange the chicken and peppers on a warm tortilla and top with fresh cilantro, avocado slices, and a squeeze of lime. Alternatively, serve them family-style on a large platter with colorful toppings like pico de gallo, shredded cheese, and sour cream for a DIY fajita bar. These fajitas make a fantastic weeknight dinner, but they also work well for casual gatherings or game day spreads. To elevate the experience, warm your tortillas briefly in the oven or on a skillet for extra texture.
What goes well with it
Pair Flavorful Air Fryer Chicken Fajitas with a refreshing mango margarita or a crisp Mexican lager to balance the smoky spices. For sides, try a light and tangy Mexican street corn salad, which adds a creamy contrast to the dish. If you prefer something heartier, a bowl of Instant Pot black beans delivers protein-rich flavor that complements the fajitas perfectly. Finally, don’t forget a dollop of cool guacamole or a drizzle of spicy chipotle sauce for an extra kick.
math-faq-block">
How long do you cook chicken fajitas in an air fryer?
For Flavorful Air Fryer Chicken Fajitas, cook at 375°F for 12–15 minutes, shaking the basket halfway. The chicken should reach 165°F internally, and the veggies should be tender-crisp. Adjust time slightly based on your air fryer model.
What’s the best seasoning for air fryer chicken fajitas?
A mix of chili powder, cumin, smoked paprika, garlic powder, and lime juice creates the perfect flavor for Flavorful Air Fryer Chicken Fajitas. For extra kick, add a pinch of cayenne or use a pre-made fajita seasoning blend.
Can you use frozen chicken for air fryer fajitas?
Yes, but thaw it first for even cooking. Frozen chicken won’t brown properly in the air fryer and may leave excess moisture. For best results with Flavorful Air Fryer Chicken Fajitas, use fresh or fully thawed chicken breasts or thighs.
ank-math-faq-item">
What vegetables go well with air fryer chicken fajitas?
Classic bell peppers and onions are perfect, but you can add zucchini, mushrooms, or jalapeños for variety. Cut veggies uniformly so they cook evenly with the chicken in your Flavorful Air Fryer Chicken Fajitas.