Here’s an easy summer breakfast if you’re wondering what to do with fresh peaches! It’s also a great snack idea to enjoy midday. Moist and packed with flavor, this southern peach bread recipe will become your new favorite!
Print
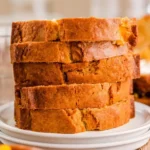
Southern Peach Bread
Description
This Southern Peach Bread comes together using only ingredients you may already have on hand! Packed with flavor and no yeast required, this will be a new favorite!
Ingredients
Scale
- 1 cup peaches, peeled/diced
- ½ cup vegetable oil
- ½ cup sugar
- 2 eggs
- ½ cup sour cream
- 1 teaspoon vanilla extract
- 1 ½ cups flour
- 1 teaspoon baking soda
- ½ teaspoon salt
Instructions
- Preheat oven to 350 degrees and spray 3 mini loaf pans *or 1 large loaf pan
- In a medium bowl, combine the peaches, oil, sugar, eggs, sour cream, and vanilla extract.
- Stir in the flour, baking soda, and salt.mixing until just combined.
- Pour batter evenly into prepared pans.
- Place pans in preheated oven and bake for 25-30 minutes if mini loaves, 50-55 minutes if large loaf.
- Remove from oven and allow to cool slightly before slicing and enjoying!
Nutrition
- Calories: 304kcal
- Sugar: 15g
- Protein: 4g