“`html
Table of Contents
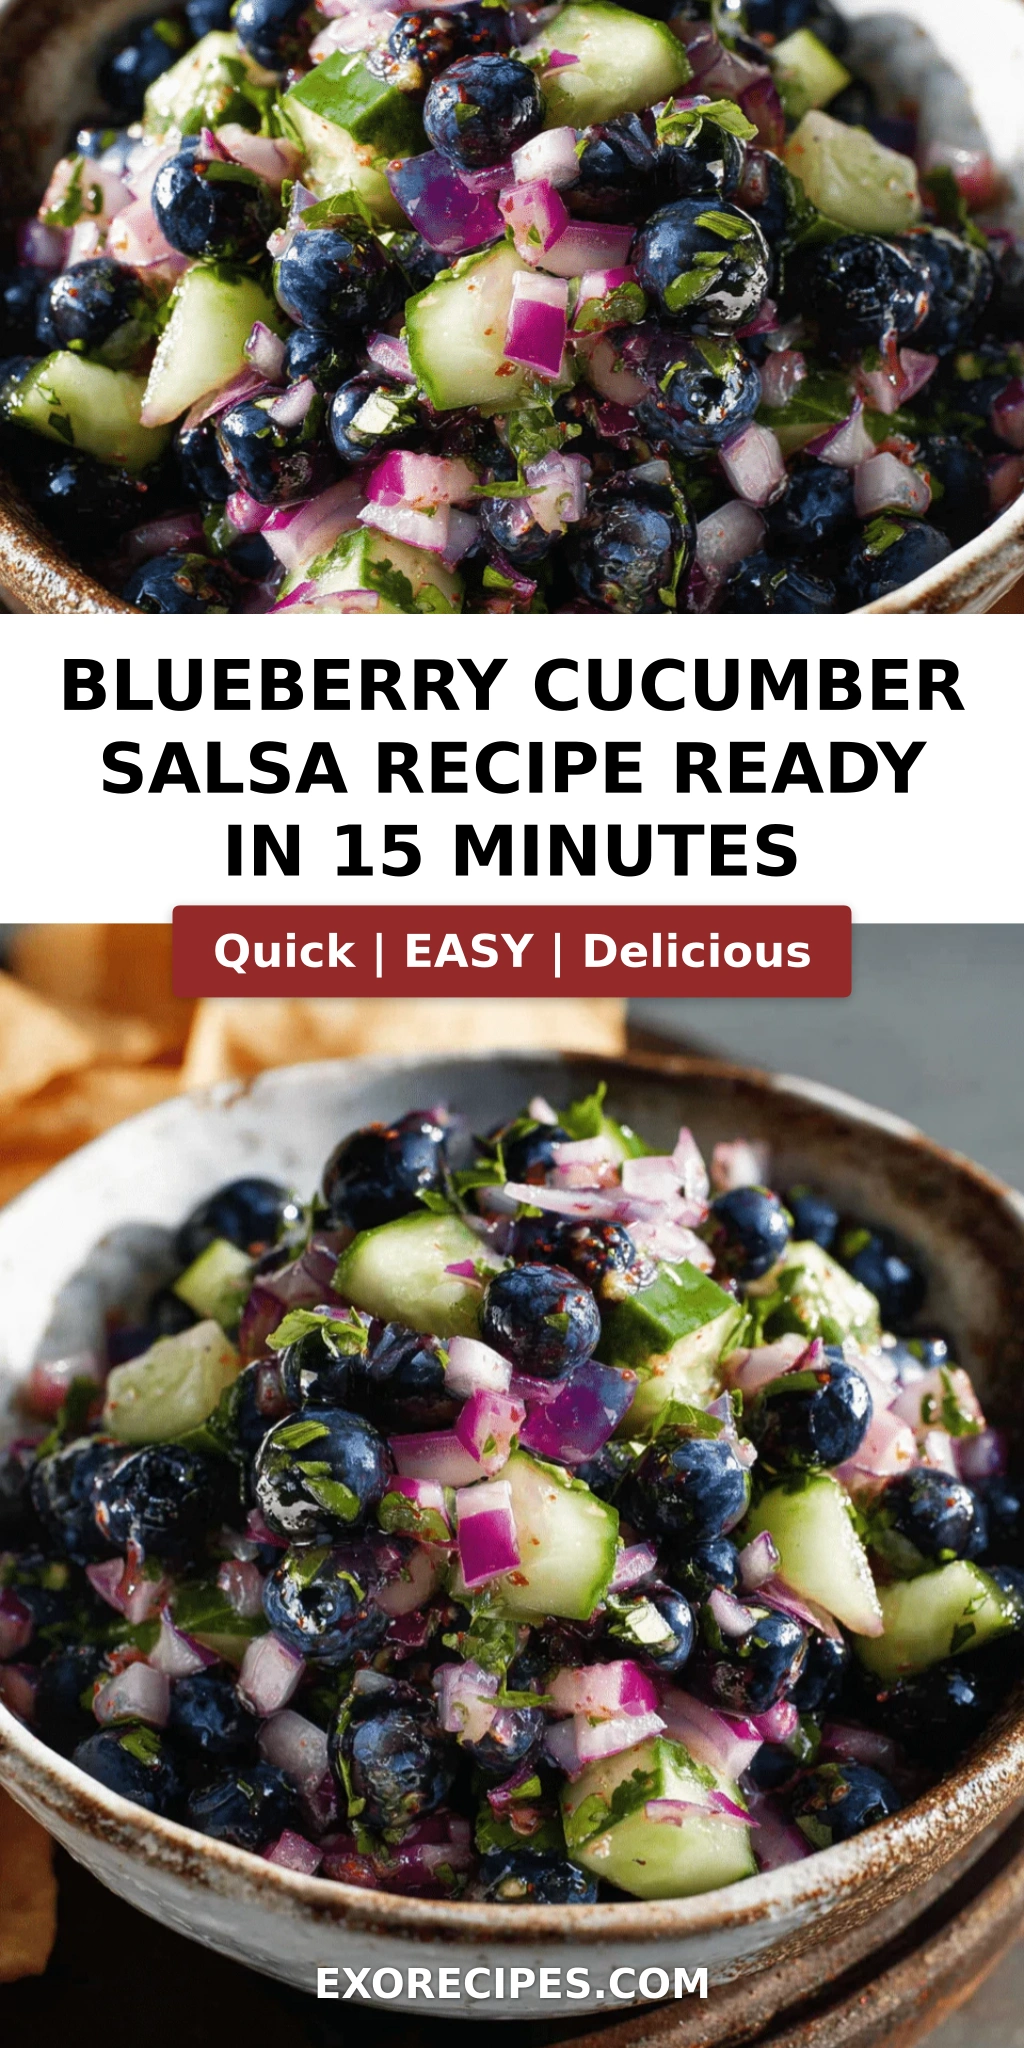
Blueberry Cucumber Salsa That Brightens Every Summer Table – A Refreshing Fruit Salsa with a Moroccan-French Touch
I still remember the first time I made a fruit salsa that truly felt like mine. It was a sweltering July afternoon in my tiny Manhattan apartment — the kind of day where the humidity wraps around you like a blanket and the last thing you want is to turn on the stove. I had just returned from the Union Square Greenmarket with a basket of sun-warmed blueberries and a perfectly cool cucumber, and something clicked. Back in my mother’s kitchen in Marrakech, we always balanced sweet with savory — think dried apricots with lamb, or dates with tangy preserved lemons. That same instinct guided me here: this blueberry cucumber salsa is my love letter to summer, inspired by Moroccan markets and finished with French precision. It’s the freshest summer salsa recipe I know, and it comes together in just 15 minutes.
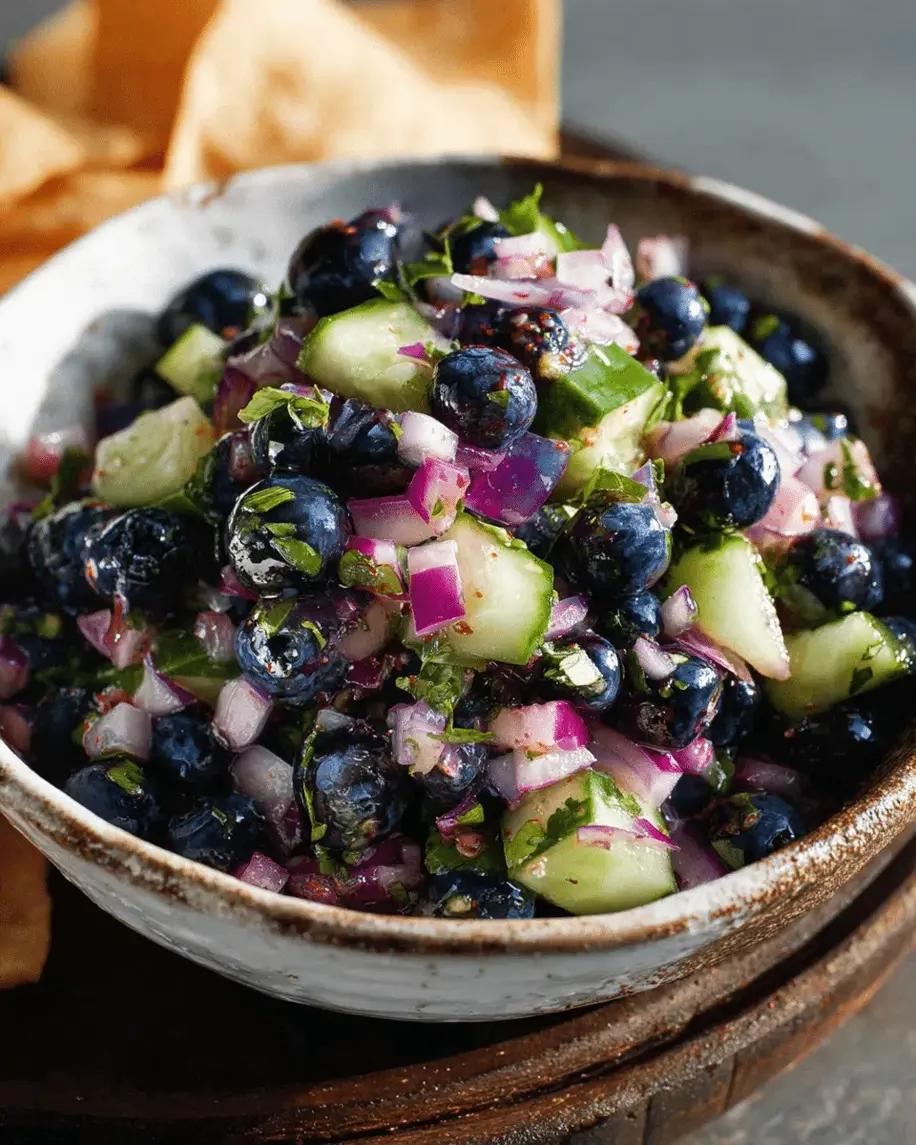
Let me describe the experience of this fruit salsa. The first bite hits you with the pop of a juicy blueberry — sweet but not cloying — followed immediately by the cool, clean crunch of cucumber. Then comes the subtle heat from the jalapeño, the sharp bite of red onion, and the bright citrus zing of fresh lime. A whisper of honey ties everything together, and the cilantro adds an herby freshness that makes each spoonful taste like sunshine. The colors alone are a celebration: deep indigo blueberries, pale green cucumber, ruby flecks of onion, and emerald cilantro. It’s a salsa that doesn’t just taste good — it looks like a party on a platter.
What sets my version apart is the technique I learned during my pastry training in Paris: macerating the blueberries briefly in lime juice and honey before adding the vegetables. This gentle step draws out just a touch of the blueberries’ natural syrup without turning them mushy, creating a dressing that coats every cube of cucumber perfectly. It’s a small detail, but it makes all the difference. In this post, I’ll walk you through every step, share my best pro tip for keeping the salsa crisp, and point out the most common mistake I see home cooks make. Whether you’re bringing this to a backyard barbecue or serving it alongside grilled fish for a weeknight dinner, this fresh salsa for summer is guaranteed to brighten your table.
Why This Blueberry Cucumber Salsa Recipe Is the Best
The Flavor Secret. Most fruit salsas lean too sweet or too acidic, but this blueberry salsa with cucumber achieves a perfect balance. My secret? A quick 2-minute maceration. Tossing the blueberries with lime juice, honey, and a pinch of salt before adding the rest of the ingredients allows the berries to release a little juice, creating a natural syrup that clings to every piece of cucumber and onion. This is a technique I borrowed from French maceration — the same gentle treatment we used for berries in pastry school — and it transforms a simple salsa into something deeply layered. The blueberries stay mostly whole, but every bite carries that sweet-tart essence.
Perfected Texture. The biggest challenge with any cucumber-based salsa is sogginess. Cucumbers are mostly water, and if you’re not careful, your beautiful fruit salsa will turn into a sad puddle. My fix is a chef’s trick I learned in Paris: after dicing the cucumber, I salt it lightly and let it rest on a paper towel for 5 minutes. This draws out excess moisture while keeping the cucumber perfectly crunchy. You get all the refreshing crispness without the watery aftermath. Combined with the firm-but-tender blueberries, every spoonful has a satisfying contrast of textures that keeps you coming back for more.
Foolproof & Fast. This summer salsa recipe requires zero cooking, zero complicated techniques, and zero special equipment. If you can chop a cucumber and squeeze a lime, you can make this salsa. It’s forgiving, adaptable, and nearly impossible to mess up. The hardest part is waiting 15 minutes for the flavors to meld — and trust me, that wait is worth it. Whether you’re a seasoned cook or someone who’s never made salsa from scratch, this recipe will make you look like a pro. It’s the kind of dish that disappears first at every gathering, and people always ask for the recipe.
Blueberry Cucumber Salsa Ingredients
I love sourcing ingredients for this fresh salsa for summer. On Saturdays, I walk down to the Greenmarket in Union Square and pick up blueberries from a farm in New Jersey and cucumbers from a grower in upstate New York. It reminds me of the souks in Marrakech, where every vendor takes pride in their produce. The beauty of this recipe is that every ingredient is a summer staple you can find at any grocery store — no specialty items required. Here’s what you’ll need.
Ingredients List
- 1 cup fresh blueberries
- 1 cup diced cucumber (seeds removed) — about 1 small English cucumber
- 1/4 cup finely chopped red onion
- 1 jalapeño pepper, seeded and minced (leave seeds in for extra heat)
- 1/4 cup chopped fresh cilantro
- 2 tablespoons fresh lime juice (from about 1 lime)
- 1 tablespoon honey
- Salt to taste
Ingredient Spotlight
Blueberries. Fresh blueberries are the heart of this fruit salsa. Look for berries that are firm, plump, and have a silvery bloom — that natural dusting is a sign of freshness. Avoid any that are shriveled or leaking juice. If fresh blueberries aren’t available, you can use frozen (more on that in the FAQ), but fresh really does give the best texture. In a pinch, diced mango or halved blackberries make excellent substitutes, though the flavor profile will shift slightly.
Cucumber. English (or hothouse) cucumbers are ideal because they have thin skins and fewer seeds. If you use a regular garden cucumber, peel it and scoop out the seeds with a spoon before dicing. The cucumber provides the cool, hydrating crunch that balances the sweetness of the blueberries. I never skip the step of salting the diced cucumber lightly — it’s a non-negotiable chef’s trick that keeps your blueberry salsa with cucumber from turning watery.
Jalapeño. This is where you control the heat. For a mild salsa that everyone can enjoy, remove the seeds and white membranes. For a spicier kick, leave some or all of the seeds in. If you want a smoky depth, try using a chipotle pepper in adobo sauce instead — just use 1 teaspoon minced, and reduce the salt slightly. The jalapeño doesn’t overpower; it just adds a gentle warmth that makes the salsa more complex.
Lime juice and honey. These two ingredients work together as the dressing. Fresh lime juice is non-negotiable — bottled juice lacks the bright, floral acidity that makes this salsa sing. The honey tempers the acidity and draws out the blueberries’ natural sweetness. If you’re vegan, agave nectar or maple syrup works beautifully. The ratio of 2 tablespoons lime to 1 tablespoon honey is my sweet spot, but feel free to adjust to your taste.
| Original Ingredient | Best Substitution | Flavor / Texture Impact |
|---|---|---|
| Fresh blueberries | Diced mango or halved blackberries | Sweeter, less tart; blackberries add more seeds and a deeper color |
| English cucumber | Zucchini (seeded and salted) | Similar crunch, slightly earthier flavor |
| Jalapeño | Serrano pepper or 1 tsp chipotle in adobo | Serrano is hotter; chipotle adds smoky depth |
| Cilantro | Fresh mint or flat-leaf parsley | Mint adds cooling sweetness; parsley is more neutral |
| Honey | Agave nectar or maple syrup | Agave is milder; maple adds a subtle woodsy sweetness |
How to Make Blueberry Cucumber Salsa — Step-by-Step
This is the easiest summer salsa recipe you’ll ever make. Follow these steps, and you’ll have a bowl of vibrant, crowd-pleasing salsa in under 20 minutes. I’ve included my best pro tips and the most common mistakes to avoid so you nail it on the first try.
Step 1: Prep the Cucumber
Wash the cucumber and pat it dry. If you’re using an English cucumber, you can leave the skin on — it’s tender and adds color. Dice it into 1/4-inch cubes, removing the seeds first by running a spoon down the center. Place the diced cucumber on a plate lined with a paper towel, sprinkle with a pinch of salt, and let it rest for 5 minutes. This draws out excess moisture and ensures your salsa stays crisp, not watery.
💡 mia’s Pro Tip: After 5 minutes, blot the cucumber cubes gently with the paper towel. You’ll be amazed at how much water releases. This one step transforms your blueberry salsa with cucumber from good to extraordinary.
Step 2: Macerate the Blueberries
In a medium bowl, combine the fresh blueberries with 2 tablespoons of fresh lime juice, 1 tablespoon of honey, and a pinch of salt. Stir gently with a rubber spatula until the honey dissolves and the blueberries are evenly coated. Let this sit for 2–3 minutes while you prep the remaining ingredients. The blueberries will release just a touch of juice, creating a light syrup that becomes the dressing.
⚠️ Common Mistake to Avoid: Don’t over-stir the blueberries! They’re delicate, and aggressive mixing can break them apart. Use a gentle folding motion, and handle the berries as little as possible. You want most of them to stay whole for the best texture.
Step 3: Combine the Vegetables
To the bowl with the macerated blueberries, add the diced cucumber, 1/4 cup finely chopped red onion, 1 minced jalapeño (seeded for mild heat), and 1/4 cup chopped fresh cilantro. Fold everything together gently with a spatula, making sure the dressing coats every ingredient evenly. The colors at this point are absolutely gorgeous — deep blue, pale green, white, and flecks of green and red.
💡 mia’s Pro Tip: For the most uniform dice, cut your cucumber and onion into consistent 1/4-inch pieces. This ensures every bite has a balanced mix of textures and flavors. I learned this precision in Paris — it makes a real difference in how the salsa reads on the palate.
Step 4: Let It Rest
Cover the bowl with plastic wrap or a clean kitchen towel and let the salsa sit at room temperature for at least 15 minutes. This resting time is crucial — it allows the flavors to meld and the blueberries to absorb the lime-honey dressing. During this time, the salt draws out a tiny bit more moisture from the vegetables, which combines with the blueberry syrup to create a light, flavorful liquid that coats everything beautifully.
⚠️ Common Mistake to Avoid: Don’t skip the rest time! I know it’s tempting to serve immediately, but the salsa needs those 15 minutes to develop its full flavor profile. Served right away, the ingredients taste separate. After resting, they taste like they were made for each other.
Step 5: Serve
Give the salsa a gentle stir, taste, and adjust with a pinch more salt or a squeeze of extra lime if needed. Transfer to a serving bowl and enjoy chilled or at room temperature. This fresh salsa for summer is incredibly versatile — serve it with sturdy tortilla chips, spoon it over grilled fish or chicken, or use it as a topping for tacos.
💡 mia’s Pro Tip: If you’re serving this at a party, make the salsa up to 4 hours in advance and keep it refrigerated. The flavors continue to develop, and it stays beautifully fresh. Just give it a quick stir and a taste before serving — you may want to add a tiny squeeze of lime to brighten it back up.
| Step | Action | Duration | Key Visual Cue |
|---|---|---|---|
| 1 | Prep cucumber — dice, salt, rest, blot | 5 minutes | Cucumber cubes look dry and feel firm |
| 2 | Macerate blueberries with lime, honey, salt | 2–3 minutes | Blueberries glisten with a light syrup |
| 3 | Combine all ingredients — fold gently | 2 minutes | Evenly coated, vibrant colors throughout |
| 4 | Rest at room temperature | 15 minutes | Slight liquid pooling at bottom — flavor is melded |
| 5 | Stir, taste, adjust, and serve | 1 minute | Bright, balanced flavor — sweet, tart, savory, fresh |
Serving & Presentation
This blueberry cucumber salsa is one of the most versatile dishes I make. In my NYC kitchen, I serve it three ways depending on the occasion. For casual gatherings, I pile it into a wide, shallow bowl with a stack of sturdy tortilla chips — the kind that won’t break when you scoop. The contrast of the sweet-savory salsa with the salty crunch of the chips is absolute perfection. For summer dinners, I spoon it generously over grilled swordfish or chicken thighs that have been marinated in olive oil, lime, and cumin. The salsa acts as a bright, fresh relish that cuts through the richness of the grilled protein.
When I want to impress guests, I serve this fruit salsa in a way that reminds me of my mother’s table in Morocco: in a beautiful ceramic bowl, garnished with extra cilantro sprigs and a few whole blueberries arranged on top, with lime wedges on the side for an extra squeeze. I sometimes add a drizzle of good extra-virgin olive oil right before serving — a touch I learned in Paris that adds a silky richness without overwhelming the freshness. It’s also wonderful spooned over creamy avocado toast or as a topping for grilled corn on the cob slathered with cotija cheese and lime.
For beverages, this summer salsa recipe pairs beautifully with a crisp Sauvignon Blanc or a cold Mexican lager. If you’re keeping it mocktail, try a sparkling limeade with fresh mint. The salsa’s brightness complements both casual and elegant settings, making it equally at home at a July 4th barbecue or a quiet dinner on a Brooklyn rooftop.
| Pairing Type | Suggestions | Why It Works |
|---|---|---|
| Side Dish | Tortilla chips, grilled fish, chicken tacos, avocado toast | The salsa’s sweet-tart freshness balances rich, savory, or salty elements |
| Sauce / Dip | Spooned over grilled shrimp, drizzled on tacos, as a relish for burgers | Adds brightness and moisture without overpowering the main dish |
| Beverage | Sauvignon Blanc, Mexican lager, sparkling limeade with mint | High acidity and citrus notes mirror the salsa’s bright, zesty profile |
| Garnish | Extra cilantro sprigs, lime wedges, whole blueberries, drizzle of olive oil | Enhances visual appeal and adds a final pop of flavor or richness |
Make-Ahead, Storage & Reheating
One of the things I love about this fresh salsa for summer is how well it works for meal prep. Living in NYC means my schedule is always full — between developing recipes, testing in the kitchen, and exploring new food spots, I need dishes that work ahead. This blueberry cucumber salsa is a dream for that. You can prep all the components in advance and assemble when you’re ready, or make the full salsa up to 4 hours ahead. The key is knowing how to store it properly so it stays crisp and vibrant.
| Method | Container | Duration | Reheating Tip |
|---|---|---|---|
| Refrigerator | Airtight glass or plastic container | Up to 24 hours | Serve cold — no reheating needed. Stir gently and add a squeeze of lime before serving. |
| Freezer | Freezer-safe zip-top bag or container | Up to 1 month | Thaw overnight in the fridge. Texture will be softer — best used in cooked dishes. |
| Make-Ahead | Store components separately | Up to 2 days in advance | Prep cucumber, onion, jalapeño, and dressing — combine with berries and cilantro just before serving. |
My favorite make-ahead method is to prep the cucumber, onion, and jalapeño up to two days in advance and store them separately in airtight containers in the fridge. I also mix the lime juice and honey together so the dressing is ready to go. Just before serving, I macerate the blueberries, then combine everything with the cilantro. This way, the salsa tastes freshly made every time. If you do make the full salsa ahead, remember that the cucumber will continue to release moisture over time. That’s why I recommend serving it within 4 hours of assembling for the best texture. If you have leftovers the next day, they’re still delicious — just a bit softer. Use them as a topping for nachos or mixed into a grain bowl.
Variations & Easy Swaps
One of the things I love most about this summer salsa recipe is how adaptable it is. Over the years, I’ve developed several variations that reflect different moods and seasons. Whether you’re feeding a crowd, avoiding certain ingredients, or just looking to try something new, there’s a version of this blueberry cucumber salsa for you.
| Variation | Key Change | Best For | Difficulty Impact |
|---|---|---|---|
| Moroccan Spiced | Add 1/2 tsp cumin, 1/4 tsp cinnamon, and a pinch of cayenne | Pairing with lamb or roasted vegetables | Easy — just add spices |
| Tropical Mango-Blueberry | Replace half the blueberries with diced mango; use mint instead of cilantro | Summer parties, taco night with fish | Easy — swap fruit and herb |
| Creamy Avocado | Add 1 diced ripe avocado just before serving; reduce honey to 2 tsp | As a dip or topping for burgers and tacos | Easy — fold in gently to avoid mashing |
Moroccan Spiced Salsa
This variation is closest to my heart. Growing up in Morocco, my mother would add warm spices to everything from tagines to salads. Here, I add 1/2 teaspoon of ground cumin, 1/4 teaspoon of cinnamon, and a pinch of cayenne to the lime-honey dressing. The cumin adds an earthy warmth, the cinnamon a subtle sweetness, and the cayenne a gentle heat that lingers. The blueberries and cucumber still shine, but the spices wrap them in a cozy, aromatic blanket. This version is incredible with grilled lamb chops or spooned over roasted sweet potatoes. It’s a taste of my childhood, adapted for the American summer table.
Tropical Mango-Blueberry Salsa
When I find gorgeous mangoes at the farmers market, I love this bright, tropical twist. Swap half the blueberries for 1/2 cup of diced ripe mango, and replace the cilantro with 1/4 cup of fresh mint. The mango adds a creamy, floral sweetness that pairs beautifully with the blueberries, and the mint keeps everything cool and fresh. This variation is a showstopper on fish tacos — especially with grilled mahi-mahi or cod. A squeeze of extra lime and a sprinkle of flaky sea salt right before serving takes it over the top.
Creamy Avocado Salsa
For those days when I want a richer, more decadent salsa, I add a diced ripe avocado. The key is to fold it in very gently at the very end so you get creamy chunks rather than mushy guacamole. I reduce the honey to 2 teaspoons since the avocado adds its own mild sweetness. The creaminess of the avocado balances the acidity of the lime and the crunch of the cucumber beautifully. This version is perfect as a dip for chips — it’s like a cross between guacamole and salsa — or as a topping for grilled burgers. I love it on a warm summer evening with a cold beer and good company.
What is the best way to keep blueberry cucumber salsa from getting watery?
The number one trick is to salt the diced cucumber before adding it to the salsa. After dicing the cucumber, toss it with a small pinch of salt and let it rest on a paper towel-lined plate for 5 minutes. The salt draws out excess moisture through osmosis. After 5 minutes, blot the cucumber cubes gently with the paper towel to remove the released water. This simple step, which I learned during my French culinary training, keeps your blueberry salsa with cucumber perfectly crisp and prevents that dreaded pool of liquid from forming at the bottom of the bowl. Also, always serve the salsa within 4 hours of making it for the best texture.
Can you substitute frozen blueberries for fresh in this salsa recipe?
Yes, you can use frozen blueberries, but there are a few important adjustments to make. First, do not thaw them before adding — add them to the bowl while still frozen to minimize bleeding and mushiness. Second, reduce the resting time to 5 minutes instead of 15, because the frozen berries will release more liquid as they thaw. Third, expect a slightly softer texture and more purple color in the salsa, as frozen blueberries break down more easily. The flavor will still be excellent, but the visual presentation won’t be as pristine. If you’re making this fresh salsa for summer for a party where appearance matters, I recommend using fresh blueberries for the best results.
How long should you let blueberry cucumber salsa sit before serving for the best flavor?
I recommend letting the salsa sit at room temperature for at least 15 minutes before serving, and up to 4 hours if refrigerated. That 15-minute rest is the sweet spot — it gives the blueberries time to absorb the lime-honey dressing, allows the salt to season everything evenly, and lets the flavors meld together. Served immediately, the ingredients taste separate and the honey hasn’t fully dispersed. After 15 minutes, the salsa transforms: the blueberries plump slightly, the cucumber absorbs the dressing, and every spoonful tastes cohesive. If you’re making it ahead, keep it chilled and give it a gentle stir and a fresh squeeze of lime before serving.
What savory dishes pair well with blueberry cucumber salsa?
This fruit salsa pairs beautifully with a wide range of savory dishes. I love it spooned over grilled fish — especially swordfish, mahi-mahi, or salmon — where the sweet-tart salsa cuts through the richness of the fish. It’s also fantastic on grilled chicken thighs, fish tacos, or as a topping for black bean burgers. For something unexpected, try it on grilled corn on the cob with cotija cheese, or as a fresh relish on pulled pork sandwiches. The salsa also works wonderfully as a dip for plantain chips or as a topping for avocado toast. The key is to pair it with dishes that have some richness or savoriness to balance the bright, fruity flavors.
Can I make this salsa ahead of time for a party?
Absolutely, and I do it all the time for summer gatherings. The best approach is to prep the components separately up to 2 days in advance. Dice the cucumber, chop the onion and jalapeño, and mix the lime juice and honey — store everything in separate airtight containers in the fridge. About 15 minutes before your guests arrive, macerate the blueberries, then combine all the ingredients with the fresh cilantro. This way, the salsa tastes just-made and the cucumber stays perfectly crisp. If you need to make the fully assembled salsa ahead, you can do so up to 4 hours in advance — just keep it refrigerated and give it a gentle stir before serving.
Is this blueberry cucumber salsa spicy? How can I adjust the heat level?
The heat level is very mild if you remove the seeds and membranes from the jalapeño, which is what I recommend for most people. With the seeds removed, you get a gentle warmth that adds complexity without overpowering the blueberries and cucumber. If you want a spicier salsa, leave some or all of the seeds in, or use a serrano pepper instead of jalapeño. For a completely mild version that kids will love, omit the jalapeño entirely and add 1/4 cup of diced bell pepper for crunch. You can also add a pinch of cayenne or a dash of hot sauce to individual servings so everyone can customize their own heat level.
What type of cucumber works best for this fruit salsa?
English cucumbers, also called hothouse or seedless cucumbers, are my top choice for this blueberry salsa with cucumber. They have thin, tender skins that don’t need to be peeled, and very few small, edible seeds. This means less prep work and a cleaner texture. If you use a regular garden cucumber, I recommend peeling it and cutting it in half lengthwise to scoop out the watery seeds with a spoon before dicing. Kirby cucumbers are another good option — they’re firm and crunchy with small seeds. Whichever cucumber you choose, the most important step is salting and blotting it to remove excess moisture before adding it to the salsa.
Can I use this salsa as a topping for grilled meat or fish?
Yes, this summer salsa recipe is absolutely spectacular as a topping for grilled meats and fish. The sweet-tart freshness of the blueberries and lime cuts through the richness of grilled proteins beautifully. I especially love it on grilled swordfish, salmon, or chicken thighs that have been seasoned simply with salt, pepper, and a little cumin. It also works wonderfully on grilled pork chops or as a relish for burgers. For a complete summer meal, try serving the salsa over grilled fish with a side of coconut rice or a simple green salad. The salsa adds brightness, moisture, and a pop of color that makes any plate look restaurant-worthy.
How do I store leftovers and how long do they last?
Store any leftover blueberry cucumber salsa in an airtight container in the refrigerator for up to 24 hours. The texture will soften as the cucumber continues to release moisture, but the flavor will still be delicious. I don’t recommend freezing the assembled salsa, as the cucumber becomes mushy upon thawing. However, if you have a large batch, you can freeze it and use it in cooked applications like mixing into grain bowls, topping nachos (then baking), or stirring into cooked rice for a quick side dish. For the best texture and flavor, I always recommend making a fresh batch within 4 hours of serving — it’s so quick and easy that it’s worth the 15 minutes of prep.
What can I substitute for cilantro if I don’t like it?
If cilantro isn’t your thing, you have several excellent alternatives that work beautifully in this fresh salsa for summer. Fresh mint is my top substitution — it adds a cool, sweet, refreshing note that pairs perfectly with blueberries and cucumber. Use about the same amount, finely chopped. Flat-leaf parsley is another great option, offering a clean, slightly peppery flavor that’s more neutral. For a different twist, try fresh basil — it adds a subtle anise-like sweetness that’s lovely with the blueberries. Each herb changes the character of the salsa slightly, so choose based on what you’re serving it with. Mint is wonderful with fish, basil with grilled chicken, and parsley with tacos.
Share Your Version!
I absolutely love hearing how this blueberry cucumber salsa turns out in your kitchen. Every time someone tells me they made it for a family barbecue or a summer dinner party and it was the first thing to disappear, it makes my day. This summer salsa recipe is meant to be shared, adapted, and made your own — whether you add extra jalapeño for heat, swap in mint for a cooler vibe, or serve it over grilled fish on a warm evening. I want to see your beautiful creations!
Leave a star rating and a comment below to let me know how it went — your feedback helps other home cooks discover the recipe and gives me ideas for new variations. Share a photo on Instagram or Pinterest and tag @exorecipes so I can feature your version. And here’s a question for you: what’s one unexpected dish you’ve paired this fruit salsa with? I’m always looking for new ideas, and your creativity inspires me every single day. From my NYC kitchen to yours — I hope this recipe brings as much warmth to your table as it does to mine. — mia 🧡
Love This Recipe? Save It to Pinterest!
If you enjoyed this Blueberry Cucumber Salsa recipe, don’t let it get lost in your browser tabs! 😄 Pin it now so you can find it again anytime — and explore hundreds more tried-and-tested recipes waiting for you on my Pinterest boards.
👉 Follow mia on Pinterest @exorecipe
📌 Pin this recipe · 🔁 Re-pin your favorites · 💬 Tag me when you make it — I love seeing your creations!
💬 What’s your go-to summer salsa? Drop a comment below — I read every single one!
Tag @exorecipes on Instagram so I can share your creations with our community!
“`
Print

Blueberry Cucumber Salsa That Brightens Every Summer Table
- Prep Time: 15 minutes
- Cook Time: 0 minutes
- Total Time: 15 minutes
- Yield: 4 servings 1x
- Method: Appetizer
- Cuisine: American
Description
A refreshing summer salsa with sweet blueberries, crisp cucumber, and a zesty lime dressing. Perfect for picnics and barbecues.
Ingredients
- 1 cup fresh blueberries
- 1 cup diced cucumber (seeds removed)
- 1/4 cup finely chopped red onion
- 1 jalapeño pepper, seeded and minced
- 1/4 cup chopped fresh cilantro
- 2 tablespoons fresh lime juice
- 1 tablespoon honey
- Salt to taste
Instructions
- In a medium bowl, combine the blueberries, cucumber, red onion, jalapeño, and cilantro.
- In a small bowl, whisk together the lime juice, honey, and a pinch of salt until honey dissolves.
- Pour the dressing over the blueberry mixture and toss gently to combine.
- Let the salsa sit for at least 15 minutes to allow flavors to meld.
- Serve chilled or at room temperature with tortilla chips or over grilled fish.
Notes
For extra heat, leave the seeds in the jalapeño. Can be made up to 4 hours in advance; keep refrigerated.
Nutrition
- Calories: 80
- Sugar: 12g
- Fat: 0.5g
- Carbohydrates: 18g
- Protein: 1g
Tried This Recipe? Leave a Comment!
Did you make this recipe? I’d love to hear how it turned out! Please leave a comment and a rating below. Your feedback helps other home cooks and supports cheerychop.com!