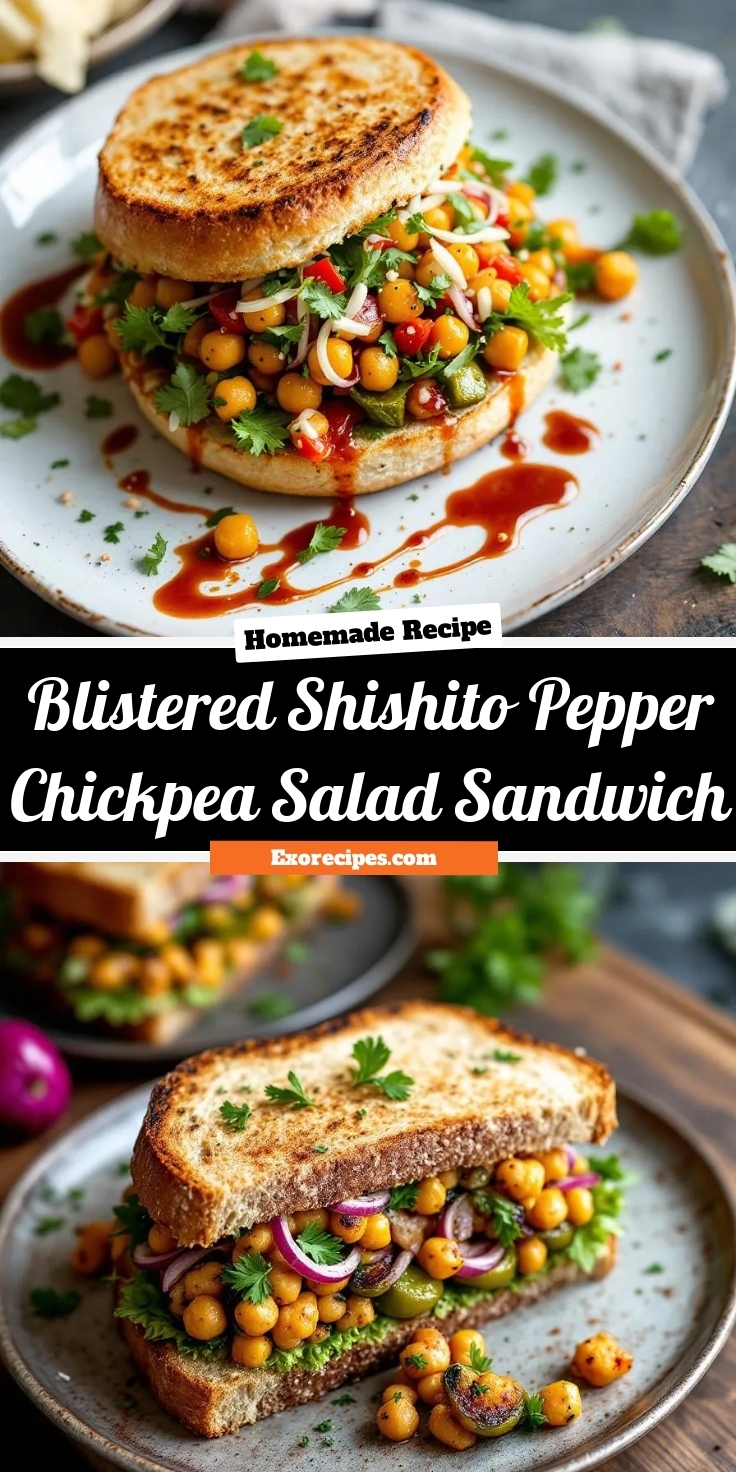
Best Blistered Shishito Pepper Chickpea Salad Sandwich
Introduction
Craving a sandwich that’s bold, fresh, and packed with flavor? Look no further than this Blistered Shishito Pepper Chickpea Salad Sandwich. Whether you need a quick lunch or a satisfying plant-based meal, this recipe delivers a punch of smoky, creamy, and slightly spicy goodness. Best of all, it comes together in minutes, making it perfect for busy days when you want something delicious without the fuss.
The Blistered Shishito Pepper Chickpea Salad Sandwich is a vibrant twist on classic chickpea salad. Instead of relying on mayo-heavy dressings, we char shishito peppers for a smoky depth, then mash them with chickpeas, lemon, and herbs for a bright, textured filling. This sandwich matters because it proves plant-based eating doesn’t have to be bland or complicated. Moreover, it fits our blog’s mission of sharing easy, flavor-packed recipes that inspire creativity in the kitchen. If you love bold flavors, you’ll adore how the peppers add just the right kick. For more ways to use shishito peppers, check out our Grilled Shishito Peppers guide. And if you’re new to chickpea salads, our Classic Chickpea Salad is a great starting point.
Why I Love This Recipe
This Blistered Shishito Pepper Chickpea Salad Sandwich holds a special place in my heart because it reminds me of summer picnics with friends. The first time I made it, I loved how the smoky peppers balanced the creamy chickpeas, creating a harmony of textures and tastes. It’s become my go-to for potlucks because it always surprises people—no one expects such big flavor from such simple ingredients. Every bite feels like a celebration of fresh, vibrant food, and that’s exactly what cooking should be.
Health and Nutrition
Why it’s good for your body
Blistered Shishito Pepper Chickpea Salad Sandwich packs a powerful nutritional punch while delighting your taste buds. First, chickpeas deliver plant-based protein and fiber, keeping you full and energized for hours. Additionally, shishito peppers bring a mild, smoky flavor along with vitamins A and C, which support immune health and glowing skin. Moreover, the blistered peppers add a satisfying charred texture without excess oil.
Furthermore, this sandwich balances healthy fats from ingredients like tahini or avocado, promoting heart health and nutrient absorption. Unlike heavy deli sandwiches, Blistered Shishito Pepper Chickpea Salad Sandwich skips processed meats, reducing sodium and saturated fat. Instead, it relies on whole-food ingredients that nourish your body without sacrificing flavor. The fiber-rich chickpeas also aid digestion, while the peppers provide antioxidants to combat inflammation.
Finally, this recipe adapts easily to boost nutrition even further. For instance, you can load it with leafy greens for extra vitamins or use whole-grain bread for added fiber. Whether you enjoy it for lunch or a light dinner, Blistered Shishito Pepper Chickpea Salad Sandwich proves that healthy eating never has to feel boring.
How it fits in a healthy lifestyle
Blistered Shishito Pepper Chickpea Salad Sandwich fits seamlessly into a balanced diet, whether you’re meal-prepping for the week or need a quick, nutrient-dense lunch. Its plant-based protein makes it ideal for vegetarians or anyone aiming to reduce meat consumption. Plus, it’s naturally gluten-free if you pair it with gluten-free bread, aligning with dietary needs without extra effort.
For heart-healthy eaters, the sandwich avoids processed ingredients and focuses on wholesome fats and fiber. If you’re exploring more plant-powered meals, check out our guide to easy vegan meal prep for additional inspiration. The recipe also suits active lifestyles, offering sustained energy from complex carbs and protein. And if you love batch cooking, you can prep the chickpea salad ahead—just like our tips in meal-prep salads—so healthy eating stays effortless all week.
Ultimately, Blistered Shishito Pepper Chickpea Salad Sandwich proves that vibrant, nourishing food can be simple and satisfying. It’s a delicious way to prioritize health without compromising on flavor or convenience.
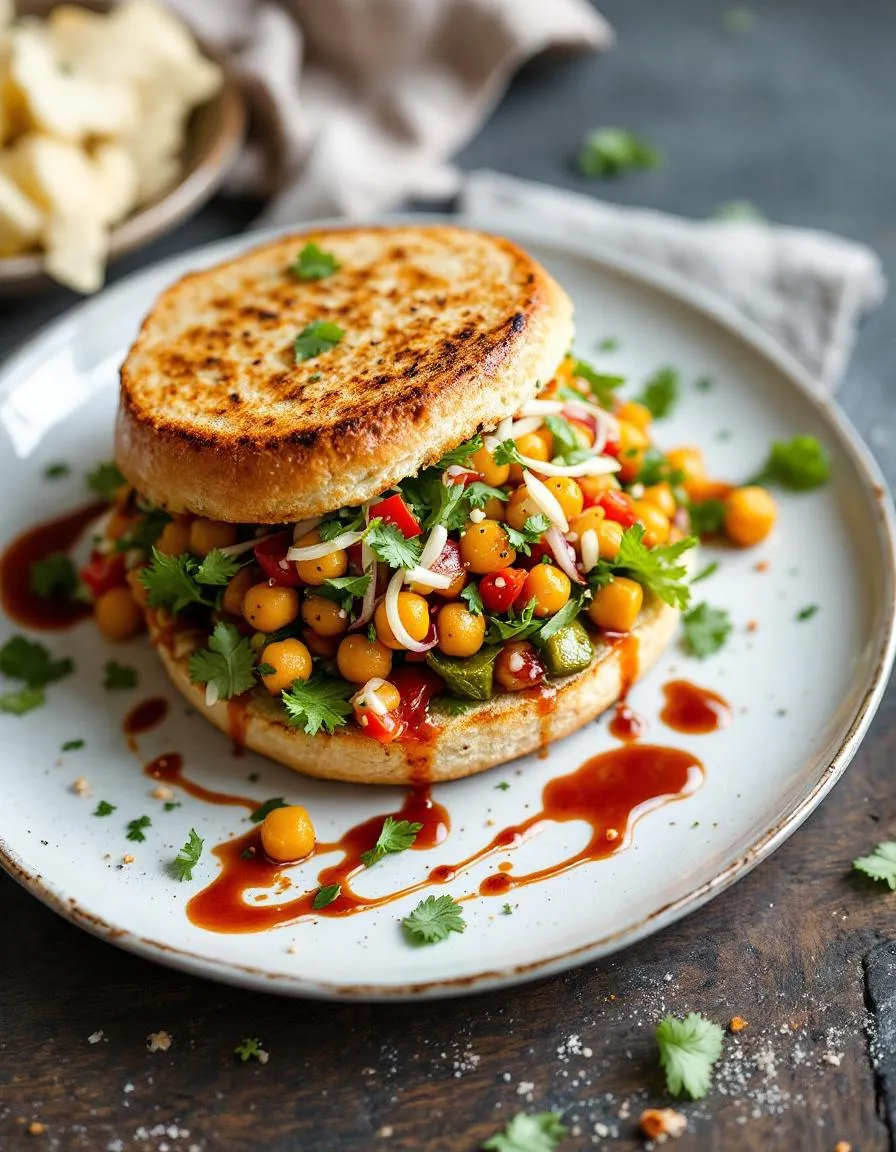
A flavorful and spicy twist on the classic chickpea salad sandwich with blistered shishito peppers for a smoky kick.
Ingredients
Scale
For the Crust:
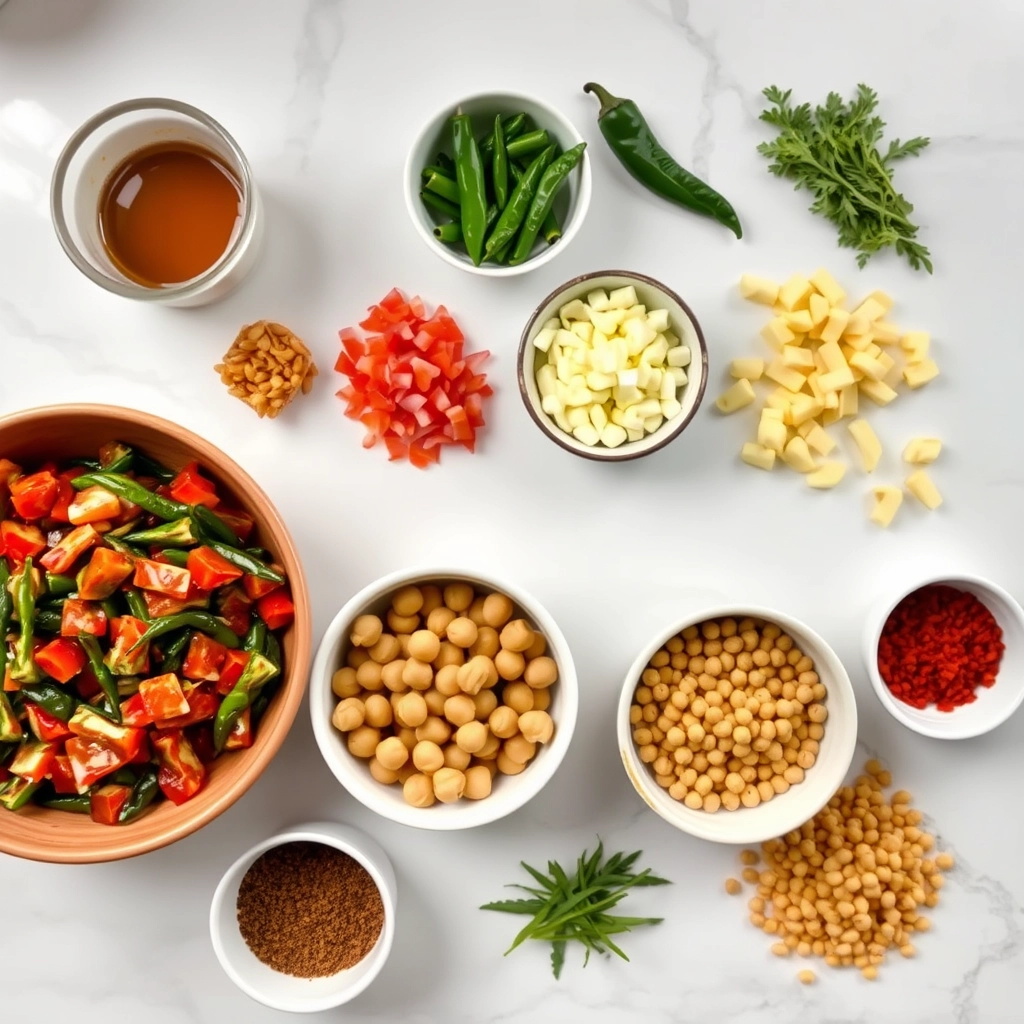
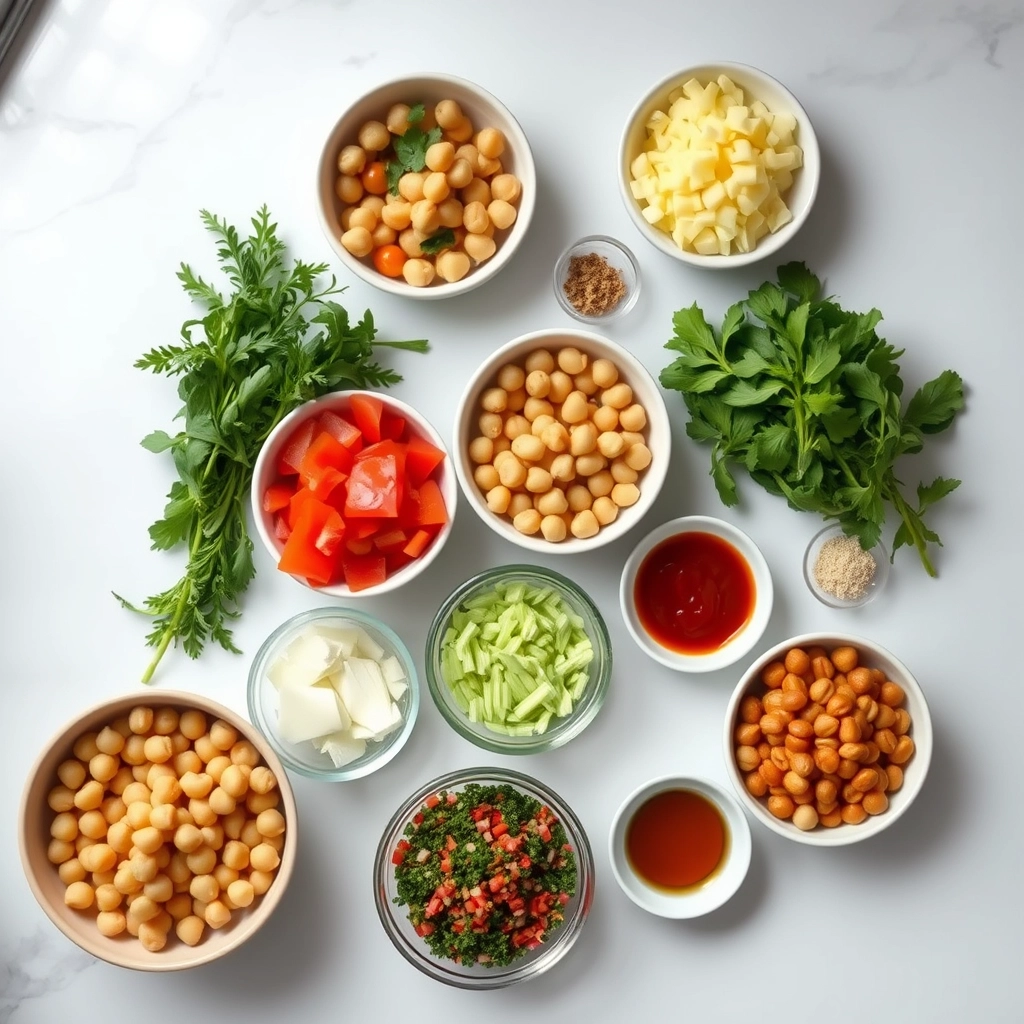
1 can (15 oz) chickpeas, drained and rinsed
1 cup shishito peppers
1/4 cup vegan mayonnaise
1 tbsp Dijon mustard
1/2 tsp smoked paprika
1/4 tsp salt
1/4 tsp black pepper
1/4 cup diced red onion
1/4 cup chopped fresh parsley
4 slices whole grain bread
1 tbsp olive oil
Instructions
1. Prepare the Crust:
Heat olive oil in a skillet over medium-high heat. Add shishito peppers and cook, turning occasionally, until blistered and charred in spots (about 5-7 minutes). Remove from heat and let cool slightly.
In a large bowl, mash chickpeas with a fork or potato masher until mostly broken down but still slightly chunky.
Chop the blistered shishito peppers and add them to the chickpeas along with vegan mayonnaise, Dijon mustard, smoked paprika, salt, black pepper, red onion, and parsley. Mix well.
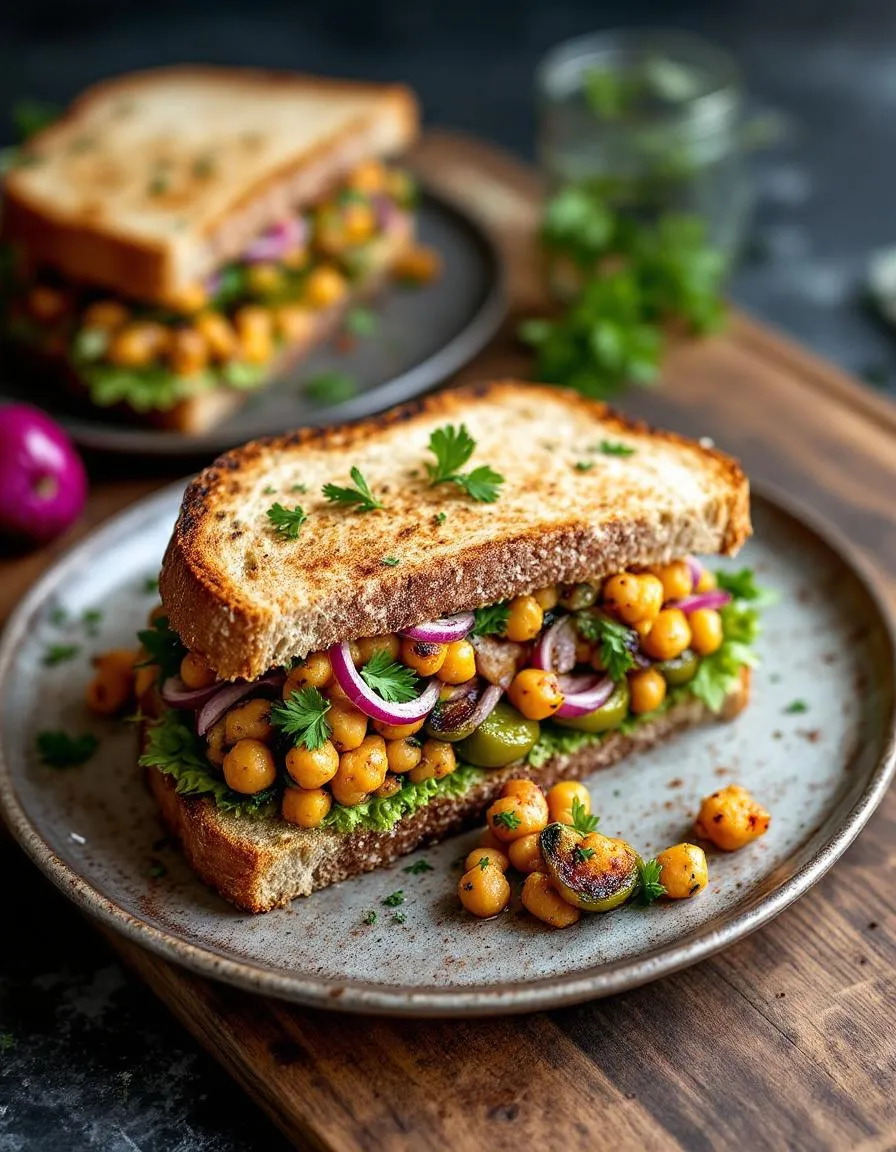
Toast the bread slices if desired. Divide the chickpea salad mixture between two slices of bread and top with the remaining slices to form sandwiches.
Serve immediately or wrap for later.
Notes
You can customize the seasonings to taste.
How to Prepare This Dish
Steps and time-saving tips
Start by heating a skillet over medium-high heat and drizzle a touch of olive oil. Toss in the shishito peppers and let them blister for about 5 minutes, shaking the pan occasionally for even charring. Meanwhile, drain and rinse the chickpeas before mashing them lightly with a fork—leave some texture for a satisfying bite. In a large bowl, whisk together vegan mayo, lemon juice, smoked paprika, and a pinch of salt until smooth. Fold in the mashed chickpeas, diced celery, and chopped red onion for crunch. Toast your favorite bread slices while you layer the chickpea salad with the blistered peppers. For a time-saving hack, roast the peppers in advance or use pre-chopped veggies to cut prep time in half. If you’re meal prepping, store the salad and peppers separately to keep the texture fresh. Serve your Blistered Shishito Pepper Chickpea Salad Sandwich with a side of pickles or a simple green salad for a complete meal.
and-learned-from">Mistakes I’ve made and learned from
Early on, I overcrowded the skillet with shishito peppers, which steamed them instead of creating that perfect blister. Now I cook them in batches for even results. Another blunder? Over-mashing the chickpeas until the salad turned mushy—I’ve since learned a light hand keeps it hearty. If your mixture feels too dry, add a splash of aquafaba or extra mayo, a trick I picked up from my vegan mayo guide. For pepper lovers, don’t skip deseeding (like I did once), or the heat can overwhelm the dish. If you’re new to shishitos, check out my pepper prep tips to avoid surprises. Trust me, these small tweaks make all the difference.
Cultural Connection and Variations
Where this recipe comes from
The Blistered Shishito Pepper Chickpea Salad Sandwich carries a vibrant mix of influences, blending Japanese and Mediterranean flavors with a modern plant-based twist. Shishito peppers, originally from East Asia, bring a smoky, slightly sweet heat when blistered, while chickpeas—a staple in Middle Eastern and Indian cuisines—add hearty texture. Together, they create a sandwich that feels both familiar and excitingly new.
In Japan, chefs often s
erve shishito peppers simply charred with a sprinkle of salt, letting their natural flavor shine. Meanwhile, in Spain, you might find them paired with garlic and olive oil for a tapas-style bite. The Blistered Shishito Pepper Chickpea Salad Sandwich takes these global inspirations and layers them into a satisfying meal. Some home cooks even add a dash of smoked paprika or tahini for extra depth, proving how versatile this dish can be.
My family loves making this sandwich during summer picnics, swapping in local peppers when shishitos aren’t available. Whether you stick to tradition or experiment, the Blistered Shishito Pepper Chickpea Salad Sandwich adapts beautifully to any kitchen.
How it fits in today’s cooking
Today, the Blistered Shishito Pepper Chickpea Salad Sandwich fits perfectly into fast, flavorful cooking. Busy weeknights call for recipes like this—quick to assemble yet packed with bold tastes. Plus, it’s a hit with plant-based eaters and flexitarians alike, making it a go-to for mixed-diet gatherings.
Modern cooks often twea
k the recipe, maybe adding avocado for creaminess or tossing in pickled onions for tang. Some even serve it open-faced on toasted sourdough, turning it into a brunch star. If you’re looking for more easy, veggie-forward ideas, check out our vegan meal prep guide or explore speedy lunch recipes. Whether you’re meal-prepping or hosting friends, this sandwich keeps things fresh, delicious, and effortlessly cool.
Taste and Texture
What makes it delicious
The Blistered Shishito Pepper Chickpea Salad Sandwich delivers a bold, satisfying bite with every mouthful. Creamy mashed chickpeas blend perfectly with smoky, slightly charred shishito peppers, creating a rich umami depth. Meanwhile, crisp red onions and fresh herbs add a bright, peppery crunch that contrasts the velvety texture. A hint of lemon zest lifts the flavors, making each bite refreshing yet hearty. The Blistered Shishito Pepper Chickpea Salad Sandwich also carries a subtle heat from the peppers, which lingers just enough to keep you reaching for more. Toasted whole-grain bread wraps it all up, adding a nutty aroma and satisfying chew.
Boosting the flavor
For an extra flavor kick, try swapping the lemon zest with a splash of tangy yuzu dressing to amplify the citrus notes. Alternatively, layer on creamy avocado slices or a smear of spicy sriracha mayo for added richness. If you love heat, toss in a few extra blistered shishito peppers or a sprinkle of smoked paprika. For a fresh twist, top your Blistered Shishito Pepper Chickpea Salad Sandwich with pickled jalapeños or a drizzle of garlic tahini sauce to balance the smokiness. Small tweaks can transform this sandwich into a whole new experience.
Always dry the shishito peppers thoroughly before blistering them to prevent steaming instead of charring. Meanwhile, mash the chickpeas just enough to create texture without turning them into paste. For the best flavor, toss the Blistered Shishito Pepper Chickpea Salad Sandwich filling while it’s still warm so the spices absorb fully. Additionally, lightly toast your bread to prevent sogginess and add crunch. Finally, let the salad rest for 10 minutes before assembling to let the flavors meld.
Mistakes to avoid
Avoid overcrowding the pan when blistering shishitos, as this leads to uneven cooking. Instead, work in batches for consistent charring. Also, don’t skip salting the peppers right after blistering—it enhances their natural sweetness. If your chickpea mixture feels dry, gradually add more dressing instead of drenching it all at once. For more dressing tips, check out our guide to perfect salad dressings. Lastly, resist overpacking the sandwich, which can make it messy to eat. For balanced assembly ideas, explore our sandwich layering techniques.
g-suggestions">Serving and Pairing Suggestions
How to serve this dish
For a vibrant presentation, pile the Blistered Shishito Pepper Chickpea Salad Sandwich high on toasted sourdough or a crusty ciabatta roll. Meanwhile, drizzle a touch of extra virgin olive oil over the top and sprinkle with fresh herbs like cilantro or parsley for a pop of color. Serve it open-faced for a rustic look or slice it neatly for easy handling at picnics or brunch gatherings. If you’re hosting a summer BBQ, consider offering mini slider versions for a fun, shareable twist. The smoky, slightly spicy flavors of the Blistered Shishito Pepper Chickpea Salad Sandwich also make it a standout choice for holiday potlucks or light weekday lunches.
What goes well with it
Pair your Blistered Shishito Pepper Chickpea Salad Sandwich with a crisp, chilled glass of lemonade or iced green tea for a refreshing contrast to its smoky heat. For sides, try a tangy cucumber salad or a handful of salt-and-vinegar kettle chips to balance the richness. If you’re craving something heartier, this sandwich pairs wonderfully with a bowl of roasted tomato soup or a simple arugula salad. For more pairing inspiration, check out our guide to summer picnic recipes or explore our favorite quick vegan sides to round out your meal.
math-faq-block">
What makes Blistered Shishito Pepper Chickpea Salad Sandwich healthy?
The Blistered Shishito Pepper Chickpea Salad Sandwich packs plant-based protein from chickpeas, fiber, and vitamins from fresh veggies. Shishito peppers add a mild, smoky flavor without excessive calories, making it a nutritious and satisfying meal option.
How do you blister shishito peppers for this sandwich?
Toss shishito peppers in a little oil and cook them in a hot skillet until charred and blistered, about 5–7 minutes. This technique enhances their natural sweetness and adds a smoky depth to the Blistered Shishito Pepper Chickpea Salad Sandwich.
Can I make Blistered Shishito Pepper Chickpea Salad Sandwich ahead of time?
Yes! Prepare the chickpea salad and blistered peppers up to 2 days in advance, but assemble the sandwich just before serving to keep the bread from getting soggy. The flavors meld beautifully, making it a great meal-prep option.
ank-math-faq-item">
What bread works best for this sandwich?
A sturdy whole-grain or sourdough bread holds up well to the hearty Blistered Shishito Pepper Chickpea Salad Sandwich. For a lighter option, try toasted ciabatta or a whole-wheat wrap for easy portability.
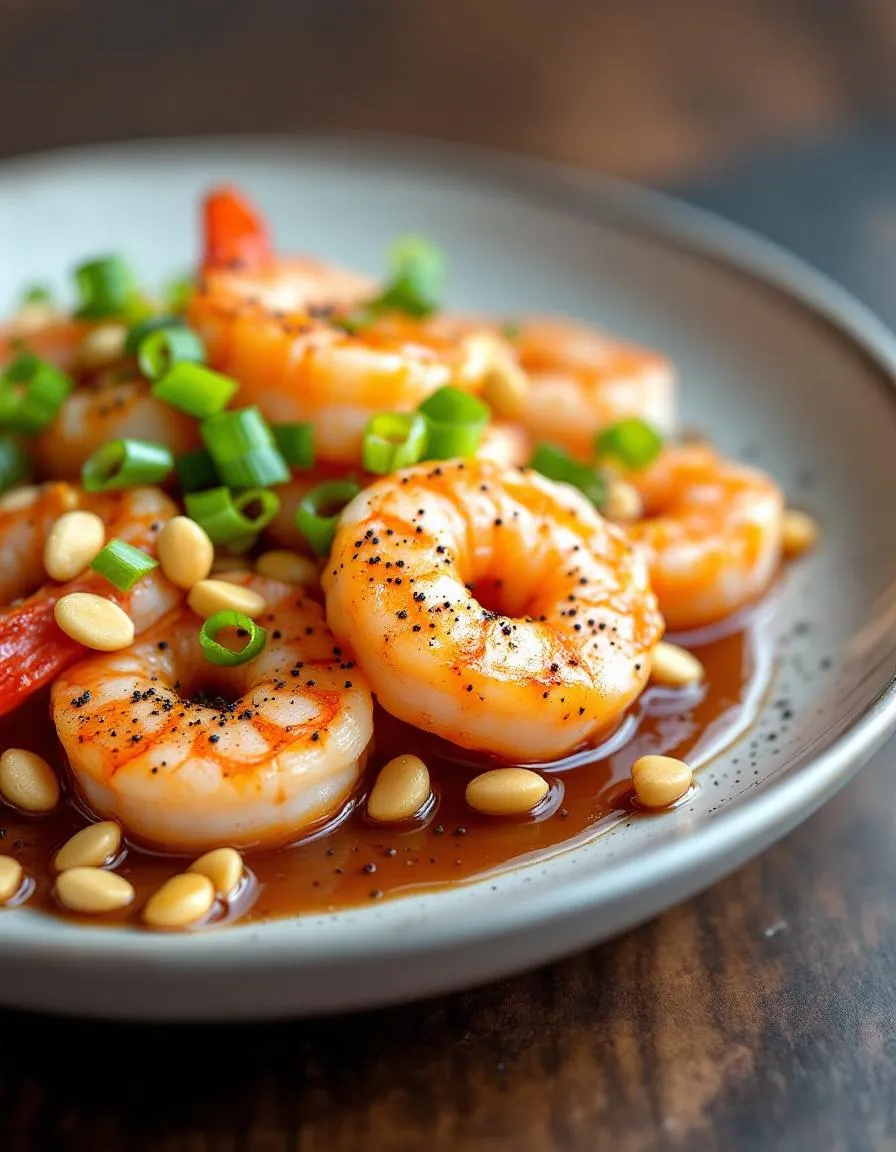
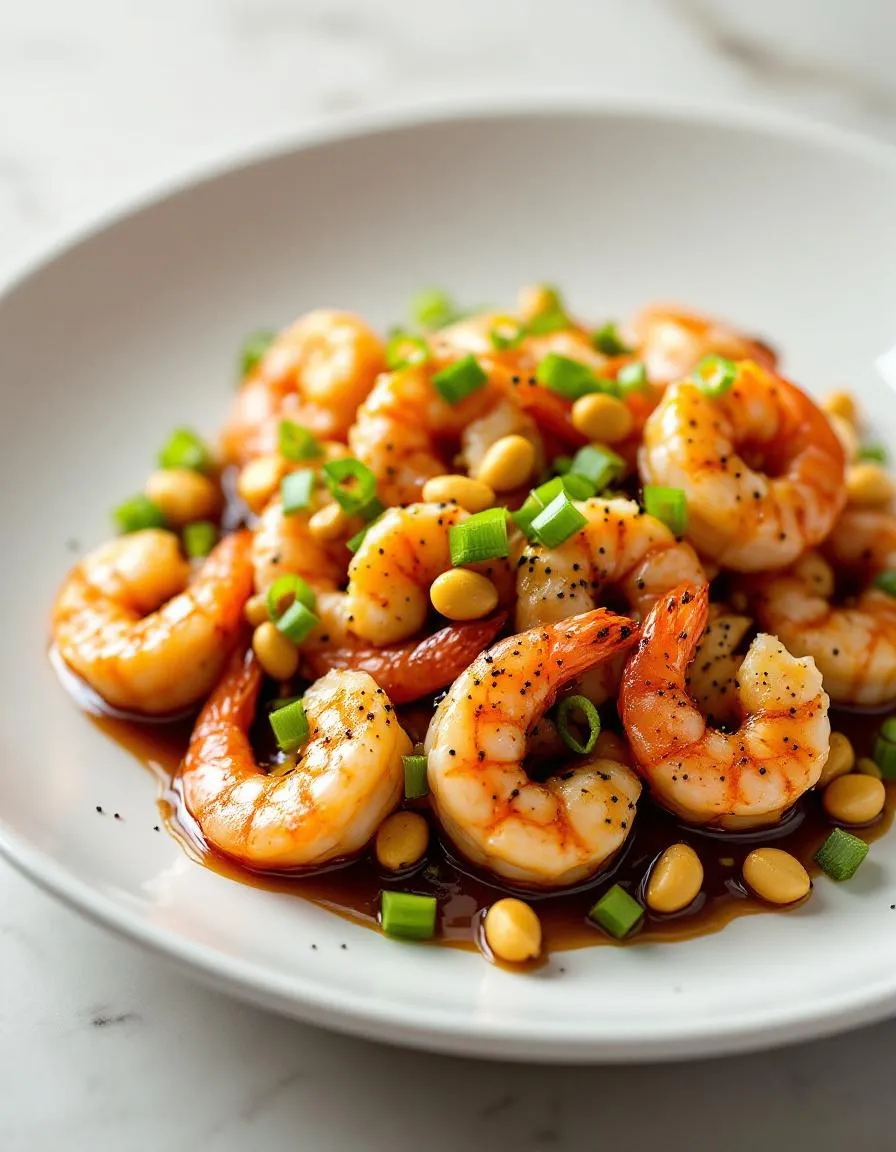
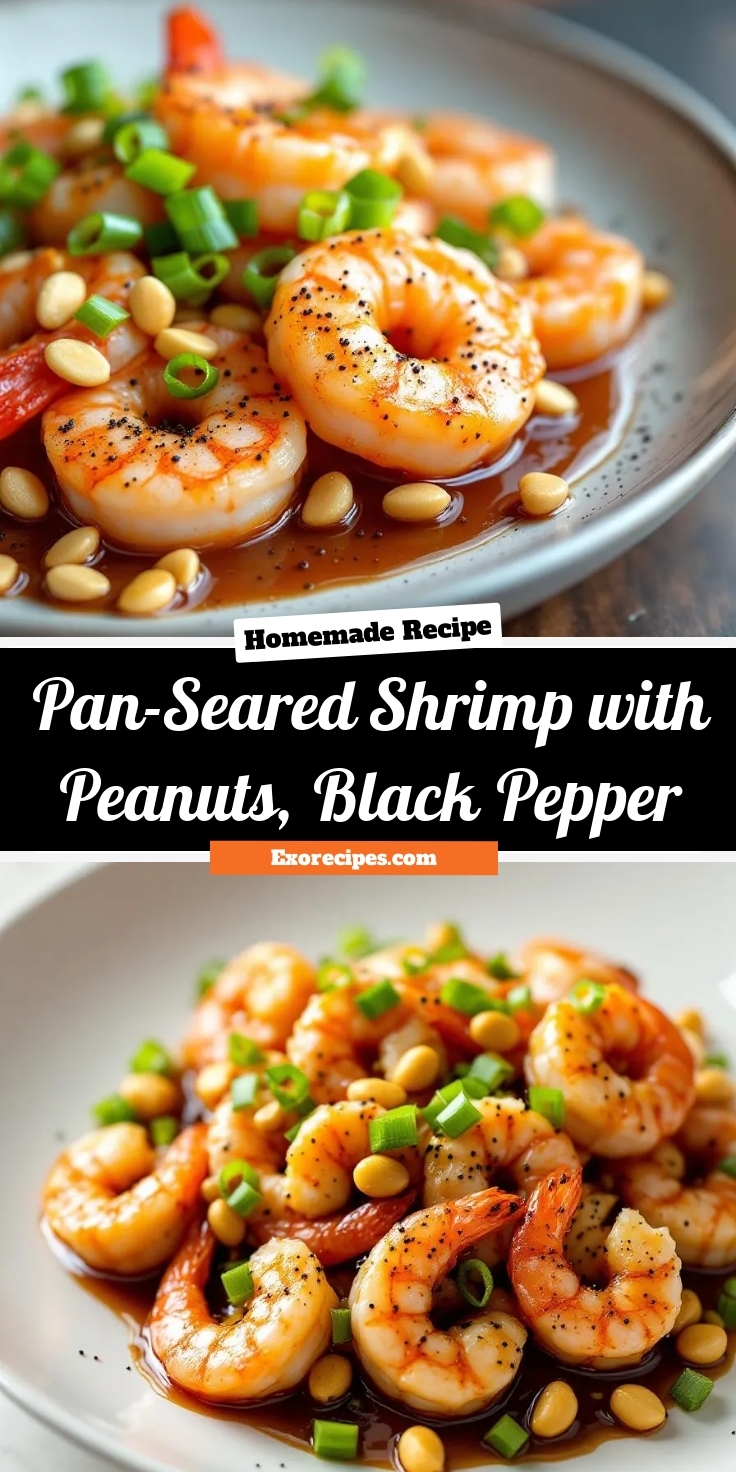
Easy Pan-Seared Shrimp with Peanuts and Black Pepper
Introduction
There’s something magical about the sizzle of shrimp hitting a hot pan—the aroma, the promise of a quick yet impressive meal. If you’re craving a dish that balances bold flavors with effortless elegance, Pan-Seared Shrimp with Peanuts, Black Pepper delivers. This recipe turns simple ingredients into a restaurant-worthy experience, perfect for busy weeknights or last-minute entertaining. Best of all, it comes together in minutes, leaving you with more time to savor every bite.
Pan-Seared Shrimp with Peanuts, Black Pepper is a vibrant fusion of succulent shrimp, crunchy peanuts, and a punch of freshly cracked black pepper. The dish draws inspiration from global flavors while keeping prep straightforward. Unlike fussy recipes, this one relies on pantry staples and a few fresh ingredients, making it accessible yet exciting. Whether you’re a seafood lover or just looking to spice up your dinner rotation, this recipe fits the bill. It’s also versatile—serve it over rice for a hearty meal or toss it with greens for a lighter option. For more shrimp inspiration, check out our Garlic Butter Shrimp, another crowd-pleaser. The blog celebrates approachable, flavor-packed dishes like this, so you’ll always find something to love. Plus, if you’re exploring nutty textures, our Thai Peanut Noodles offer a delicious complement.
Why I Love This Recipe
This dish holds a special place in my heart because it reminds me of spontaneous dinners with friends. One evening, I threw together Pan-Seared Shrimp with Peanuts, Black Pepper using whatever I had on hand, and it became an instant hit. The combination of juicy shrimp, nutty crunch, and peppery heat feels indulgent yet wholesome. It’s the kind of recipe that never fails to impress, whether I’m cooking for myself or a group. Every time I make it, I’m reminded that great food doesn’t need to be complicated—just full of flavor and heart.
Health and Nutrition
Why it’s good for your body
Pan-Seared Shrimp with Peanuts, Black Pepper packs a powerful nutritional punch while delighting your taste buds. First, shrimp delivers lean protein, which helps build and repair muscles. Additionally, it contains omega-3 fatty acids, which support heart health and reduce inflammation. Meanwhile, peanuts add healthy fats and plant-based protein, keeping you full longer.
Black pepper doesn’t just enhance flavor—it also boosts nutrient absorption. For instance, it helps your body take in more antioxidants from the dish. Furthermore, Pan-Seared Shrimp with Peanuts, Black Pepper includes minimal added oils, making it a lighter option compared to fried alternatives. The dish also provides essential minerals like zinc and selenium, which strengthen immunity.
Finally, this meal balances macronutrients smartly. The shrimp offers low-calorie protein, while peanuts contribute fiber for digestion. Together, they create a satisfying yet nutrient-dense dish. Whether you’re fueling up post-workout or enjoying a wholesome dinner, Pan-Seared Shrimp with Peanuts, Black Pepper nourishes your body efficiently.
How it fits in a healthy lifestyle
Pan-Seared Shrimp with Peanuts, Black Pepper fits seamlessly into various dietary plans. If you follow a high-protein diet, the shrimp and peanuts provide a double dose of protein without excessive carbs. For gluten-free eaters, this dish naturally avoids grains, making it a safe and flavorful choice.
Heart-healthy eaters will appreciate the omega-3s from shrimp and monounsaturated fats from peanuts. These nutrients help maintain cholesterol levels. Plus, the simple preparation means you can enjoy it regularly without derailing your goals. If you’re looking for more gluten-free inspiration, check out our gluten-free dinner ideas.
Busy weeknights? This recipe comes together quickly, proving that healthy eating doesn’t require hours in the kitchen. Pair it with a side of steamed veggies or quinoa for a complete meal. For more high-protein options, explore our high-protein recipes to keep your energy levels steady all day.
A quick and flavorful dish featuring juicy shrimp, crunchy peanuts, and bold black pepper.
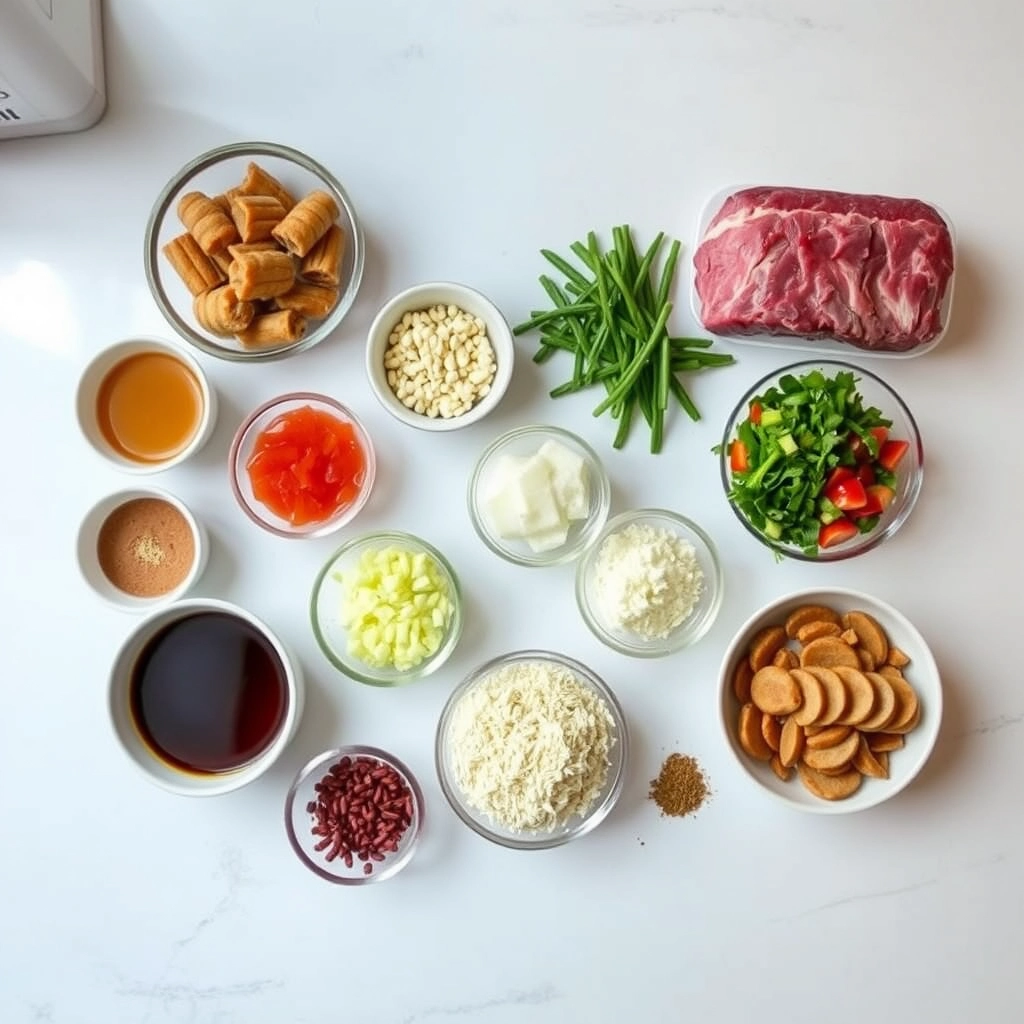
Ingredients
Scale
For the Crust:
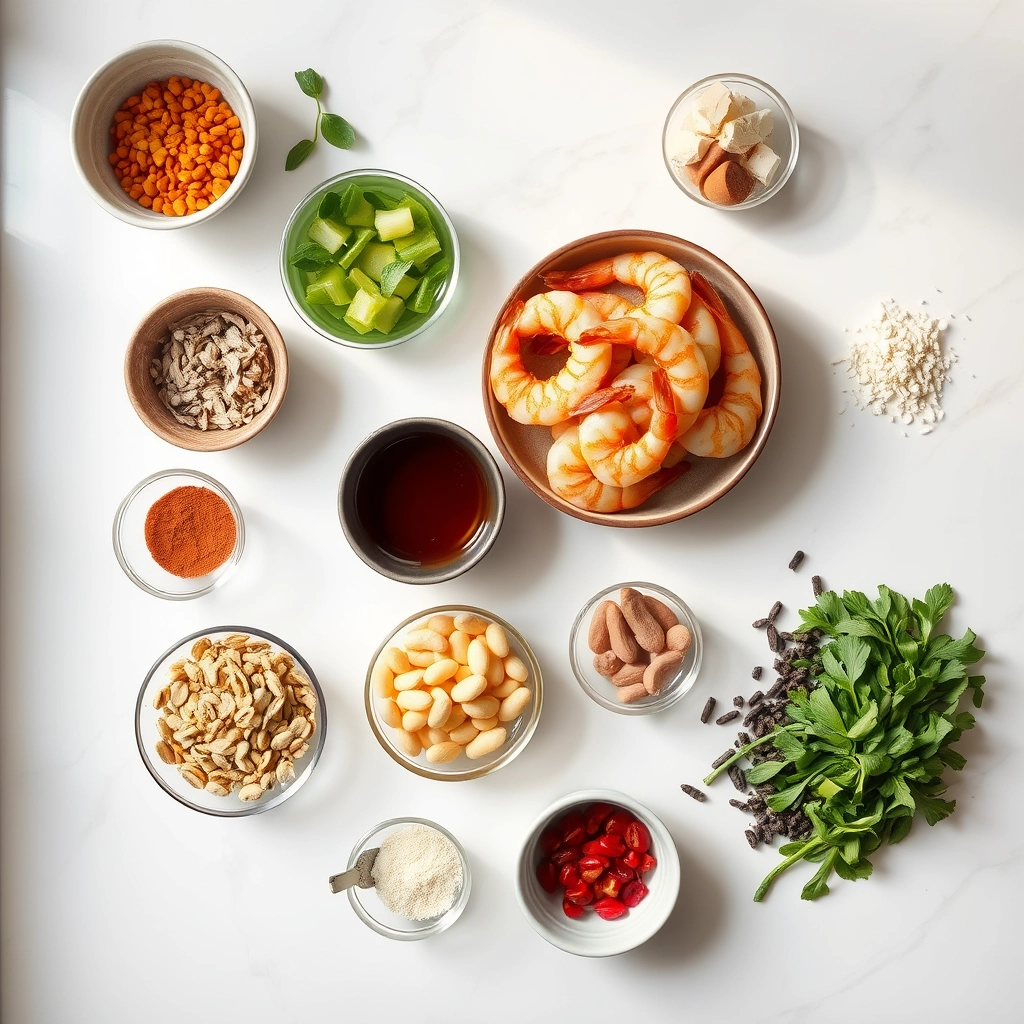
1 lb large shrimp, peeled and deveined
2 tbsp vegetable oil
1/2 cup roasted peanuts
1 tbsp freshly ground black pepper
2 cloves garlic, minced
1 tbsp soy sauce
1 tsp sugar
1/2 tsp salt
2 green onions, sliced
Instructions
1. Prepare the Crust:
Heat oil in a large skillet over medium-high heat.
Add shrimp and sear for 2 minutes per side until pink and cooked through. Remove from pan.
In the same pan, add garlic and peanuts. Cook for 1 minute until fragrant.
Return shrimp to pan. Add black pepper, soy sauce, sugar, and salt. Toss to coat.
Garnish with green onions and serve immediately.
Notes
You can customize the seasonings to taste.
s-dish">How to Prepare This Dish
Steps and time-saving tips
Start by patting the shrimp dry with paper towels to ensure a perfect sear. Heat a large skillet over medium-high heat and add a drizzle of oil. Once the oil shimmers, toss in the shrimp in a single layer, making sure they don’t overcrowd. Sear them for about 2 minutes per side until they turn pink and slightly crispy. Meanwhile, toast the peanuts in a dry pan for a minute or two, shaking frequently to avoid burning. Remove the shrimp and set them aside. In the same skillet, toss in minced garlic, a pinch of red pepper flakes, and freshly cracked black pepper, stirring for just 30 seconds to release their aroma. Return the shrimp to the pan, add the peanuts, and give everything a quick toss to combine. Finish with a squeeze of lemon juice and a sprinkle of chopped cilantro. For a time-saving hack, use pre-peeled shrimp or toast the peanuts ahead of time. If you’re doubling the recipe, work in batches to keep the shrimp from steaming instead of searing.
Mistakes I’ve made and learned from
I used to overcrowd the skillet, thinking I could save time, but the shrimp ended up steaming instead of searing. Now I cook them in batches, and the difference is night and day—crispy edges every time. Another blunder? Skipping the peanut toasting step. Raw peanuts lack that deep, nutty flavor, so take the extra minute to toast them. If you’re new to cooking shrimp, check out my guide on how to cook shrimp perfectly to avoid rubbery results. And if you love bold flavors like black pepper, you’ll adore these spicy peanut noodles—they pair wonderfully with this dish. Trust me, a little patience with the prep work pays off big time in flavor.
n-and-variations">Cultural Connection and Variations
Where this recipe comes from
Pan-Seared Shrimp with Peanuts, Black Pepper carries a rich history rooted in coastal and Southeast Asian flavors. Many trace its origins to Thai and Vietnamese kitchens, where street vendors often toss plump shrimp with crushed peanuts and fiery black pepper for a quick, satisfying bite. However, the dish also pops up in Southern U.S. cuisine, where cooks might add a splash of bourbon or swap peanuts for pecans for a local twist.
In my family, we prepare Pan-Seared Shrimp with Peanuts, Black Pepper during summer gatherings, pairing it with chilled salads and crusty bread. My aunt insists on toasting the peanuts twice for extra crunch, while my cousin skips the pepper for a milder version. Across the globe, some versions include coconut milk for creaminess or tamarind for tang. No matter the variation, the dish always brings people together.
How it fits in today’s cooking
Today, Pan-Seared Shrimp with Peanuts, Black Pepper shines as a versatile weeknight hero or a star appetizer for dinner parties. Busy cooks love it because it comes together in under 20 minutes, yet feels special enough for date nights. Many modern twists include air-frying the shrimp or using pre-marinated blends for even faster prep. For a lighter take, some serve it over zucchini noodles, like the ones in our healthy zucchini recipes roundup.
It also fits perfectly
into seasonal menus. During holidays, I’ve seen it dressed up with pomegranate seeds or served alongside our festive cocktail ideas for a colorful spread. Whether you stick to tradition or experiment with new flavors, this dish adapts effortlessly to today’s kitchens.
Taste and Texture
What makes it delicious
Pan-Seared Shrimp with Peanuts, Black Pepper delivers a bold, satisfying experience with every bite. The shrimp sear to a perfect golden crisp, locking in their natural sweetness while the edges caramelize for a smoky depth. Crunchy peanuts add a nutty richness, and the black pepper brings a warm, peppery kick that lingers pleasantly. Meanwhile, the dish smells irresistible—fragrant garlic and toasted peanuts mingle with the briny aroma of fresh shrimp. Each mouthful balances tender, juicy shrimp with the satisfying crunch of peanuts, creating a texture contrast that keeps you coming back for more. Pan-Seared Shrimp with Peanuts, Black Pepper is a harmony of savory, spicy, and nutty flavors that feels both comforting and exciting.
Boosting the flavor
Elevate your Pan-Seared Shrimp with Peanuts, Black Pepper by tossing in a splash of lime juice for bright acidity or a drizzle of honey sriracha sauce for sweet heat. For extra depth, toast the peanuts lightly before adding them to the pan—this intensifies their nutty flavor. If you love herbs, sprinkle fresh cilantro or Thai basil on top for a refreshing finish. Pair the dish with a side of coconut rice to balance the bold spices with creamy sweetness. Small tweaks like these transform an already delicious meal into something unforgettable.
Pat the shrimp dry before cooking to ensure a perfect sear, and always use a high-smoke-point oil like avocado or grapeseed for even browning. Meanwhile, toast the peanuts lightly in a dry pan beforehand to deepen their flavor in the Pan-Seared Shrimp with Peanuts, Black Pepper. Furthermore, season the shrimp generously just before they hit the pan, as salt draws out moisture if applied too early. Finally, let the shrimp rest for a minute after cooking so the juices redistribute for maximum tenderness.
Mistakes to avoid
Avoid overcrowding the pan, as this steams the shrimp instead of searing them—cook in batches if needed. Additionally, don’t skip toasting the peanuts; raw peanuts lack the nutty crunch that elevates Pan-Seared Shrimp with Peanuts, Black Pepper. For more on balancing textures, check out our guide to perfectly crispy ingredients. Also, resist the urge to stir the shrimp constantly; let them develop a golden crust for full flavor. If you’re unsure about heat control, our stovetop temperature tips will help you nail the sear every time.
g-suggestions">Serving and Pairing Suggestions
How to serve this dish
For a stunning presentation, arrange Pan-Seared Shrimp with Peanuts, Black Pepper on a large platter with a sprinkle of fresh cilantro and lime wedges. Alternatively, serve it in individual bowls over a bed of jasmine rice to soak up the flavorful sauce. This dish shines at casual gatherings, but you can also elevate it for special occasions by pairing it with elegant tableware and a side of crusty bread. To make it extra inviting, garnish with extra crushed peanuts for added texture and a pop of color.
What goes well with it
A crisp, citrusy white wine like Sauvignon Blanc balances the bold flavors of Pan-Seared Shrimp with Peanuts, Black Pepper perfectly. If you prefer non-alcoholic options, try a chilled lemongrass iced tea for a refreshing contrast. For sides, a light cucumber salad or steamed bok choy keeps the meal balanced. If you love bold flavors, pair it with our Spicy Mango Salsa for a sweet and spicy kick. For a heartier option, serve alongside our Garlic Noodles to round out the meal.
math-faq-block">
What type of shrimp works best for Pan-Seared Shrimp with Peanuts, Black Pepper?
Medium or large shrimp (21/25 or 16/20 count) work best for Pan-Seared Shrimp with Peanuts, Black Pepper because they hold up well to high heat. Opt for fresh or thawed wild-caught shrimp for the best flavor and texture.
Can I substitute peanuts in Pan-Seared Shrimp with Peanuts, Black Pepper?
Yes, cashews or almonds make good substitutes if you have a peanut allergy, though the flavor profile will change slightly. The crunch of peanuts pairs especially well with the black pepper in this dish, so try to use them if possible.
How spicy is Pan-Seared Shrimp with Peanuts, Black Pepper?
The dish gets mild heat from black pepper rather than intense spice. Adjust the amount of pepper to taste—start with 1 teaspoon and add more if you prefer a stronger kick. The peanuts help balance the warmth.
ank-math-faq-item">
What sides go well with Pan-Seared Shrimp with Peanuts, Black Pepper?
Serve it over jasmine rice or noodles to soak up the flavors, or pair with stir-fried vegetables like bok choy. The simplicity of Pan-Seared Shrimp with Peanuts, Black Pepper lets it work with both Asian-inspired and lighter sides.
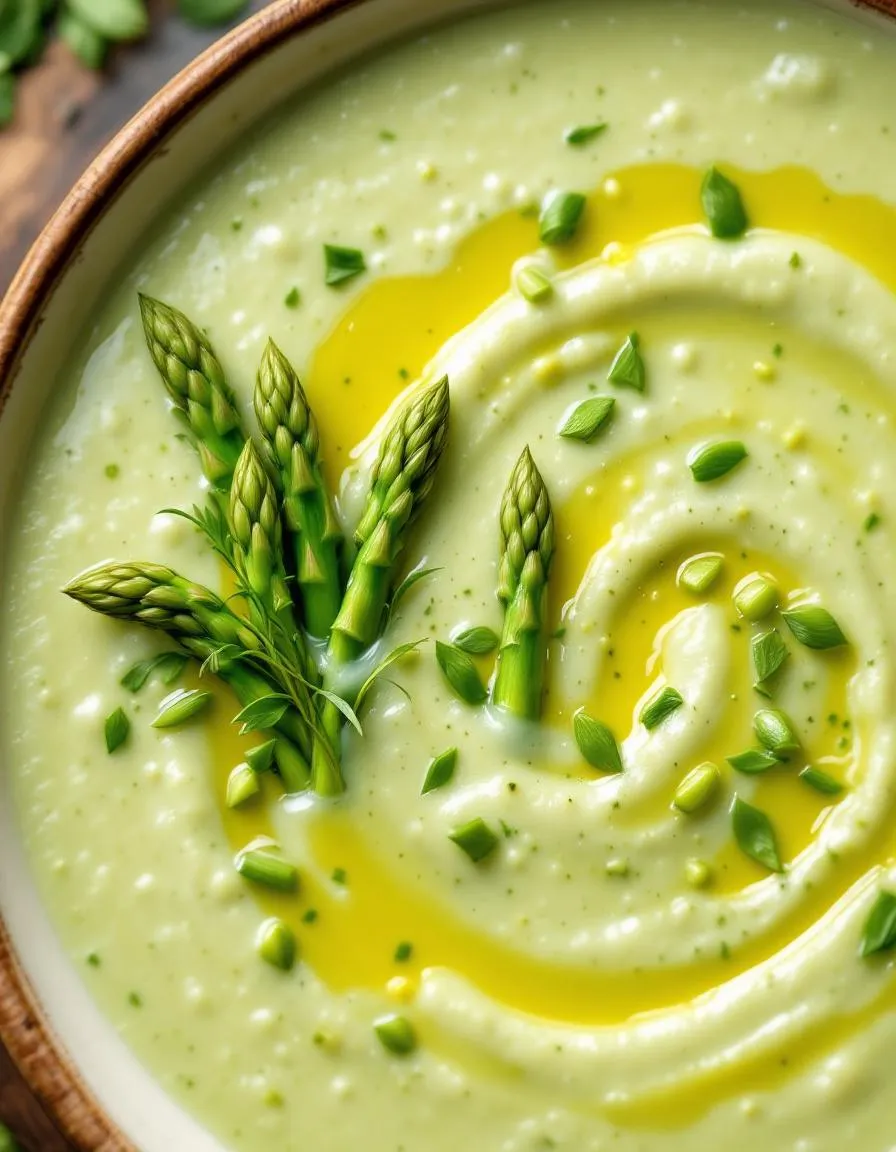
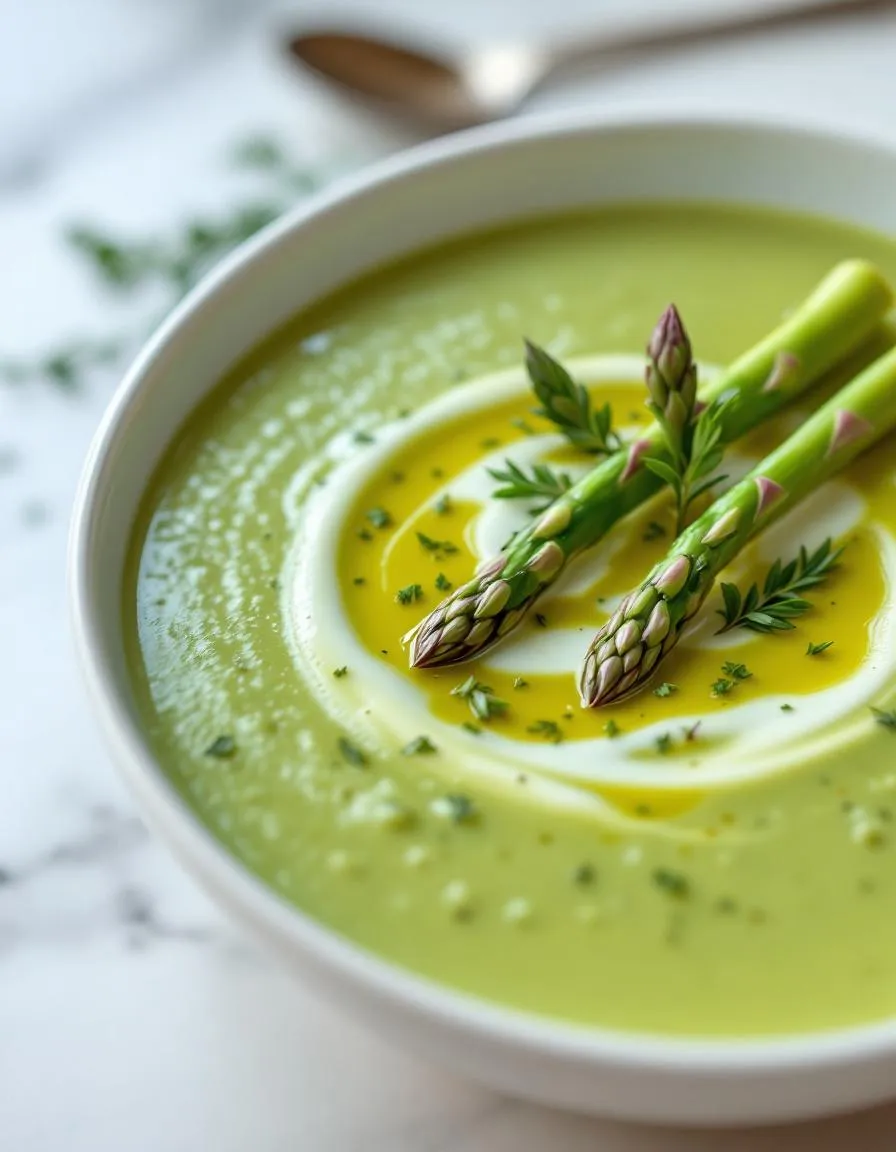
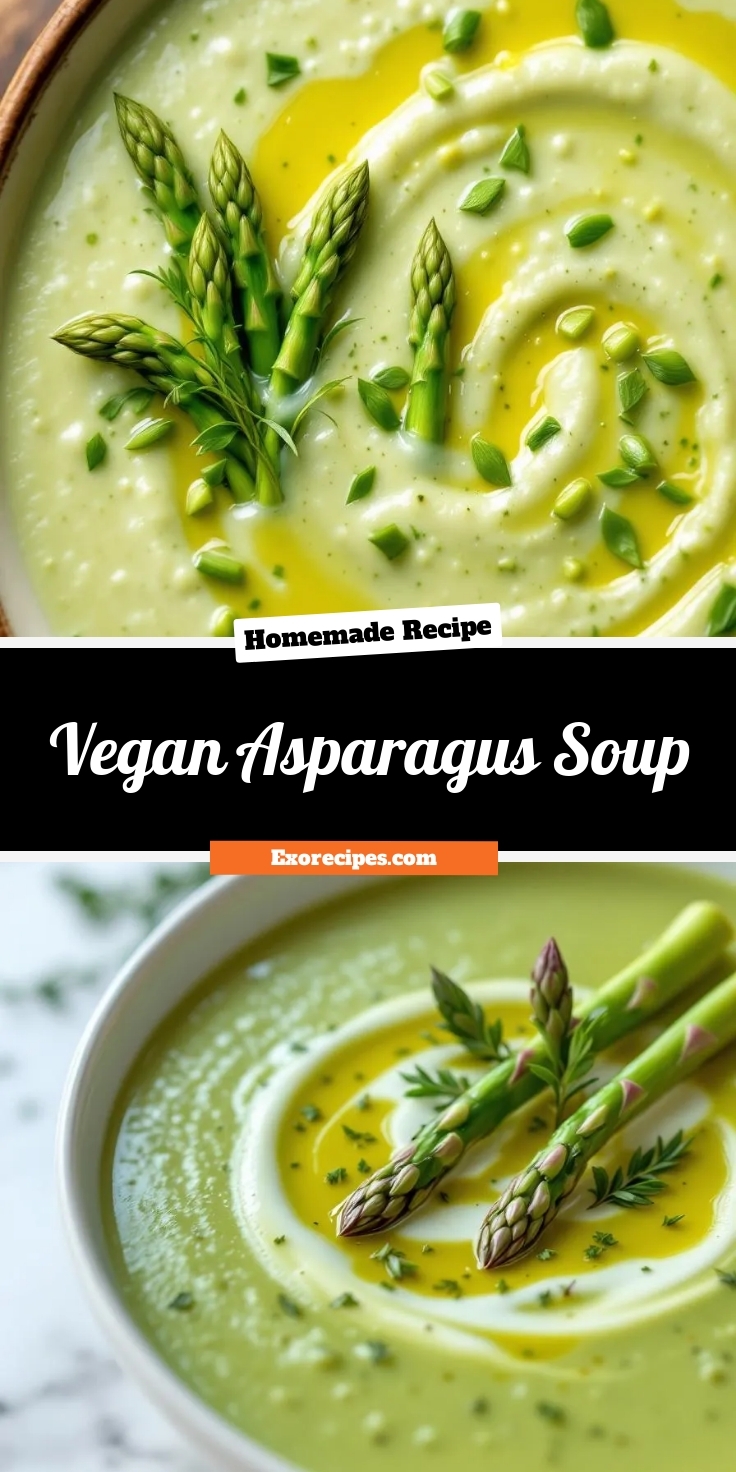
Best Vegan Asparagus Soup – Easy & Creamy Recipe
Introduction
There’s something deeply comforting about a warm bowl of soup, especially when it’s as vibrant and nourishing as Vegan Asparagus Soup. Whether you’re craving a light lunch, a cozy dinner, or simply a dish that celebrates seasonal produce, this recipe delivers. With its creamy texture and fresh, earthy flavors, it’s the kind of meal that feels indulgent yet wholesome. Plus, it’s entirely plant-based, making it a perfect choice for anyone looking to enjoy a delicious, guilt-free comfort food.
Vegan Asparagus Soup is a celebration of simplicity and flavor. Unlike heavy cream-based soups, this version relies on ingredients like blended cashews or coconut milk for richness, letting the natural sweetness of asparagus shine. Asparagus, packed with vitamins A, C, and K, brings both nutrition and a bright, springtime essence to the table. Moreover, this soup fits seamlessly into a variety of diets, from vegan to gluten-free, without sacrificing taste. If you love easy, adaptable recipes, you’ll appreciate how this one comes together in under 30 minutes. For more quick plant-based meals, check out our 30-minute vegan recipes.
This recipe also aligns perfectly with the ethos of modern, health-conscious cooking. It’s a great way to reduce food waste, as you can use asparagus stalks that might otherwise go unused. Additionally, it pairs beautifully with crusty bread or a crisp salad, making it versatile for any occasion. If you’re new to vegan soups, don’t worry—this dish is as forgiving as it is flavorful. For more beginner-friendly options, explore our guide to vegan soups.
Why I Love This Recipe
Vegan Asparagus Soup holds a special place in my heart because it reminds me of early spring dinners with my family. My mom used to make a similar version when asparagus was in season, and the aroma alone would bring everyone to the table. What I love most is how effortlessly it transforms humble ingredients into something elegant and satisfying. Even now, whenever I make it, I feel that same warmth and connection. It’s proof that plant-based cooking can be just as comforting—and memorable—as any traditional dish.
Health and Nutrition
Why it’s good for your body
Vegan Asparagus Soup packs a powerful nutritional punch while keeping calories light. First, asparagus delivers a hefty dose of fiber, which supports digestion and keeps you feeling full longer. Additionally, this vibrant veggie brims with folate, a key nutrient for cell repair and energy production.
Moreover, Vegan Asparagus Soup shines as a low-fat, plant-based meal. Unlike creamy soups loaded with dairy, this version relies on wholesome ingredients like vegetable broth and blended asparagus for richness. As a result, you get a satisfying dish without unnecessary saturated fats.
Beyond that, asparagus boasts antioxidants like vitamins A and C. These compounds help combat inflammation and strengthen your immune system. Since Vegan Asparagus Soup preserves these nutrients through gentle cooking, you reap maximum benefits with every spoonful.
Finally, this soup offers a hydrating boost thanks to its high water content. Pair it with a slice of whole-grain bread, and you have a balanced meal that fuels your body efficiently. Whether you seek gut health, immune support, or simply a nourishing dish, Vegan Asparagus Soup delivers.
How it fits in a healthy lifestyle
Vegan Asparagus Soup fits seamlessly into a variety of dietary goals. If you follow a gluten-free or dairy-free lifestyle, this recipe naturally aligns with your needs. Its plant-based ingredients also make it ideal for heart-healthy eating, as it supports lower cholesterol levels.
For those tracking macros, this soup offers a light yet nutrient-dense option. Pair it with a protein-rich side like our Vegan Lentil Salad to create a well-rounded meal. The combination keeps energy steady without overloading calories.
Busy weeknights call for simple, wholesome meals, and Vegan Asparagus Soup delivers. Prep it ahead and reheat for a quick lunch or dinner. For more easy plant-based ideas, explore our Meal Prep Guide. With its versatility and health perks, this soup effortlessly elevates your everyday eating habits.
A creamy and flavorful vegan asparagus soup that is perfect for a light lunch or dinner.
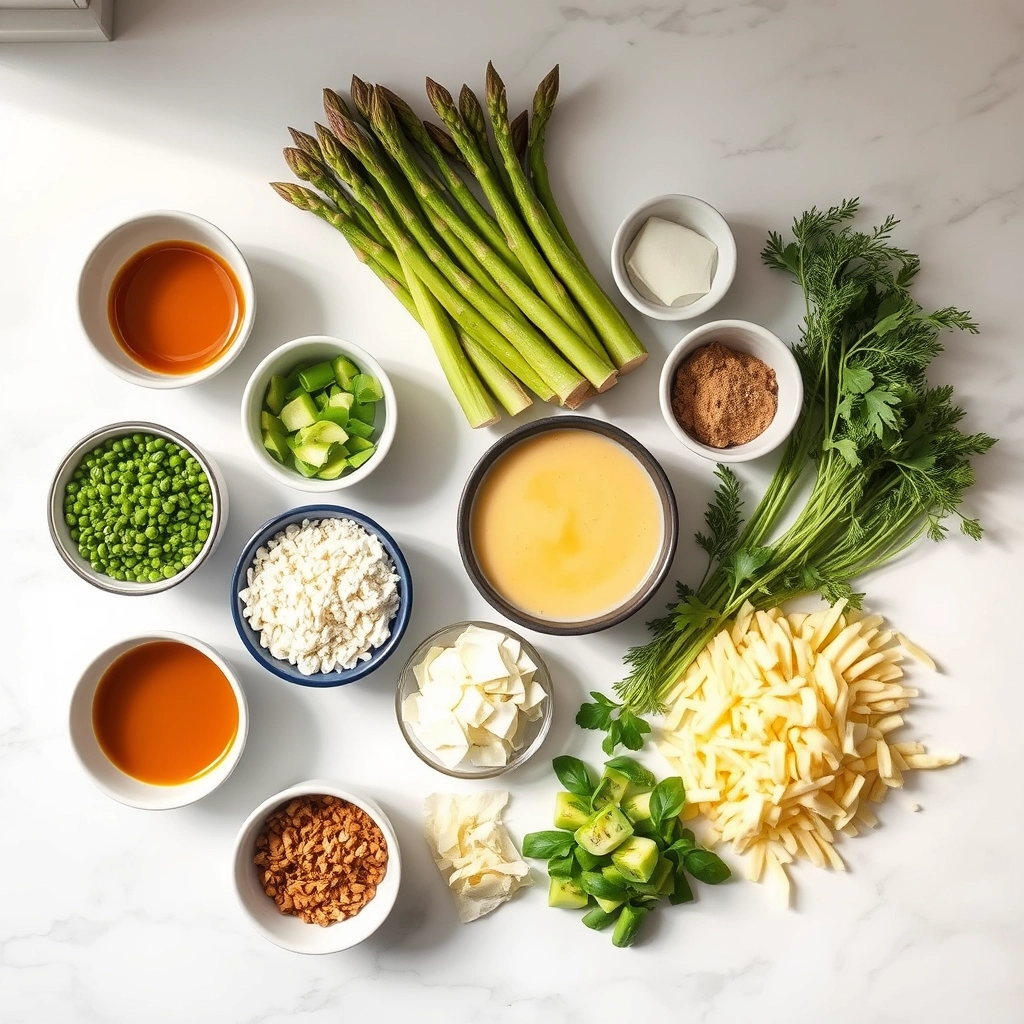
Ingredients
Scale
For the Crust:
1 lb fresh asparagus, trimmed and chopped
1 medium onion, diced
2 cloves garlic, minced
4 cups vegetable broth
1 cup unsweetened almond milk
2 tbsp olive oil
1 tsp salt
1/2 tsp black pepper
1/2 tsp dried thyme
Instructions
1. Prepare the Crust:
Heat olive oil in a large pot over medium heat. Add onion and garlic, sauté until softened, about 5 minutes.
Add chopped asparagus, salt, pepper, and thyme. Cook for another 5 minutes, stirring occasionally.
Pour in vegetable broth and bring to a boil. Reduce heat and simmer for 15 minutes or until asparagus is tender.
Use an immersion blender to puree the soup until smooth. Stir in almond milk and heat through for 2-3 minutes.
Adjust seasoning if needed and serve warm.
Notes
You can customize the seasonings to taste.
How to Prepare This Dish
Steps and time-saving tips
Start by rinsing and trimming the asparagus, then chop it into 1-inch pieces. Meanwhile, heat olive oil in a large pot over medium heat and sauté diced onions until translucent. Next, add minced garlic and stir for about 30 seconds until fragrant. Toss in the asparagus and cook for 3-4 minutes, stirring occasionally. Pour in vegetable broth and bring the mixture to a gentle boil. Reduce the heat, cover the pot, and let it simmer for 15 minutes until the asparagus softens. For a creamy texture, carefully blend the soup with an immersion blender until smooth. Stir in coconut milk, lemon juice, salt, and pepper, then simmer for another 2 minutes. To save time, prep all your ingredients before cooking and use pre-cut asparagus if available. Finally, garnish with fresh herbs or a drizzle of coconut cream for an elegant touch.
and-learned-from">Mistakes I’ve made and learned from
I once overcooked the asparagus, turning it mushy and dulling its vibrant green color. Now, I set a timer and check for tenderness at the 12-minute mark. Another blunder was skipping the lemon juice, which left the soup tasting flat. A squeeze of citrus brightens the flavors perfectly, as I learned from my vegan soup hacks post. I also used to blend the soup too soon, risking splatters. Letting it cool slightly first makes blending safer and smoother. For more tips on avoiding kitchen mishaps, check out my guide on common cooking mistakes. Trust me, these small adjustments make all the difference!
Cultural Connection and Variations
Where this recipe comes from
Vegan Asparagus Soup carries a rich history, blending humble roots with modern creativity. Originally, asparagus thrived in Mediterranean climates, where ancient Greeks and Romans prized it for its delicate flavor and health benefits. Over time, cooks across Europe adapted it into creamy soups, often using dairy. Today, plant-based versions like Vegan Asparagus Soup honor tradition while embracing contemporary values.
In France, chefs might
enrich the soup with a splash of white wine or fresh tarragon. Meanwhile, German home cooks sometimes pair it with crispy potatoes or a drizzle of nutty browned butter (though we skip the butter here). My family’s twist? A squeeze of lemon at the end for brightness. No matter the variation, Vegan Asparagus Soup remains a celebration of spring’s first harvest.
How it fits in today’s cooking
Vegan Asparagus Soup fits perfectly into today’s kitchens, where quick, nourishing meals matter. Busy cooks love blending it ahead for weekday lunches, while others serve it as an elegant starter for dinner parties. Since asparagus peaks in spring, the soup also shines at seasonal gatherings, like Easter or Mother’s Day brunches.
Modern twists keep it exciting. Some add cashew cream for extra richness, while others toss in peas or spinach for color. If you’re craving more cozy soups, try pairing it with hearty vegan stews for a full meal. Whether you enjoy it solo or as part of a spread, Vegan Asparagus Soup proves that classic flavors never go out of style.
>Taste and Texture
What makes it delicious
Vegan Asparagus Soup delivers a velvety, luxurious texture that glides smoothly across your tongue. The earthy sweetness of fresh asparagus shines through, balanced by a subtle tang from lemon juice and a hint of garlic warmth. Each spoonful bursts with freshness, while a touch of coconut milk adds a creamy richness without overpowering the vegetables. The aroma alone—fragrant with herbs like thyme and a whisper of black pepper—will draw you in before the first bite. Whether served hot or chilled, Vegan Asparagus Soup feels light yet satisfying, making it a versatile dish for any season.
Boosting the flavor
Elevate your Vegan Asparagus Soup with a drizzle of creamy tahini dressing for nutty depth or a sprinkle of toasted almond slices for crunch. For a spicy kick, stir in a pinch of smoked paprika or a dash of cayenne. If you love bright flavors, swirl in a spoonful of lemon herb cashew cream just before serving. Meanwhile, roasting the asparagus first deepens its natural sweetness, adding another layer of complexity. With these tweaks, your soup transforms from simple to spectacular.
Tips for Success
Best practices for results
Always trim the woody ends of asparagus before blending to ensure a smooth texture in your Vegan Asparagus Soup. Meanwhile, sauté the onions and garlic until translucent for deeper flavor. Additionally, use vegetable broth instead of water to enhance richness, and blend the soup in batches if your blender is small. Finally, taste and adjust seasoning just before serving for the best results.
Mistakes to avoid
Avoid overcooking the asparagus, as it turns mushy and dulls the vibrant green color of your Vegan Asparagus Soup. Instead, simmer just until tender. Furthermore, don’t skip the immersion blender step if you prefer a silky texture—lumpy soup often results from under-blending. For more on perfecting creamy soups, check out our guide to vegan soup techniques. Also, resist the urge to skip the lemon juice garnish, as it brightens the flavors. Learn more about balancing acidity in our vegan flavor tips post.
Serving and Pairing Suggestions
How to serve this dish
Elevate your Vegan Asparagus Soup by serving it in warm, shallow bowls to keep it cozy. For a touch of elegance, drizzle a swirl of coconut cream on top and sprinkle with fresh chives or crispy roasted asparagus tips. Meanwhile, a squeeze of lemon zest brightens the flavors beautifully. This soup shines as a starter for holiday dinners or a light yet satisfying lunch alongside crusty bread. If you’re hosting a spring brunch, pair it with a vibrant salad for a refreshing contrast.
h-it">What goes well with it
For a complete meal, serve Vegan Asparagus Soup with our vegan garlic bread, which adds a satisfying crunch and rich flavor. Alternatively, a crisp white wine like Sauvignon Blanc highlights the soup’s herbal notes. If you prefer a heartier pairing, try our roasted vegetable salad, as the smoky veggies balance the soup’s creamy texture. Finally, a simple green smoothie makes a refreshing side for lighter occasions.
Is vegan asparagus soup healthy?
Yes, vegan asparagus soup is packed with nutrients like fiber, vitamins A and C, and folate. Since it’s dairy-free, it’s also lower in saturated fat while still being creamy and satisfying. The asparagus provides antioxidants, making this soup a nutritious choice.
ank-math-faq-item">
How do you thicken vegan asparagus soup without cream?
For a creamy texture without dairy, blend cooked potatoes, cashews, or white beans into the soup. Another option is to puree part of the asparagus and broth, which thickens vegan asparagus soup naturally while keeping it light and flavorful.
What can I serve with vegan asparagus soup?
Pair vegan asparagus soup with crusty bread, a fresh salad, or roasted vegetables for a balanced meal. For extra protein, add crispy chickpeas or tofu croutons. The mild flavor of the soup complements both light and hearty sides.
Can I freeze vegan asparagus soup?
Yes, vegan asparagus soup freezes well for up to 3 months. Let it cool completely before storing in airtight containers. Reheat gently on the stove, stirring occasionally, as the texture may change slightly after freezing.
div>
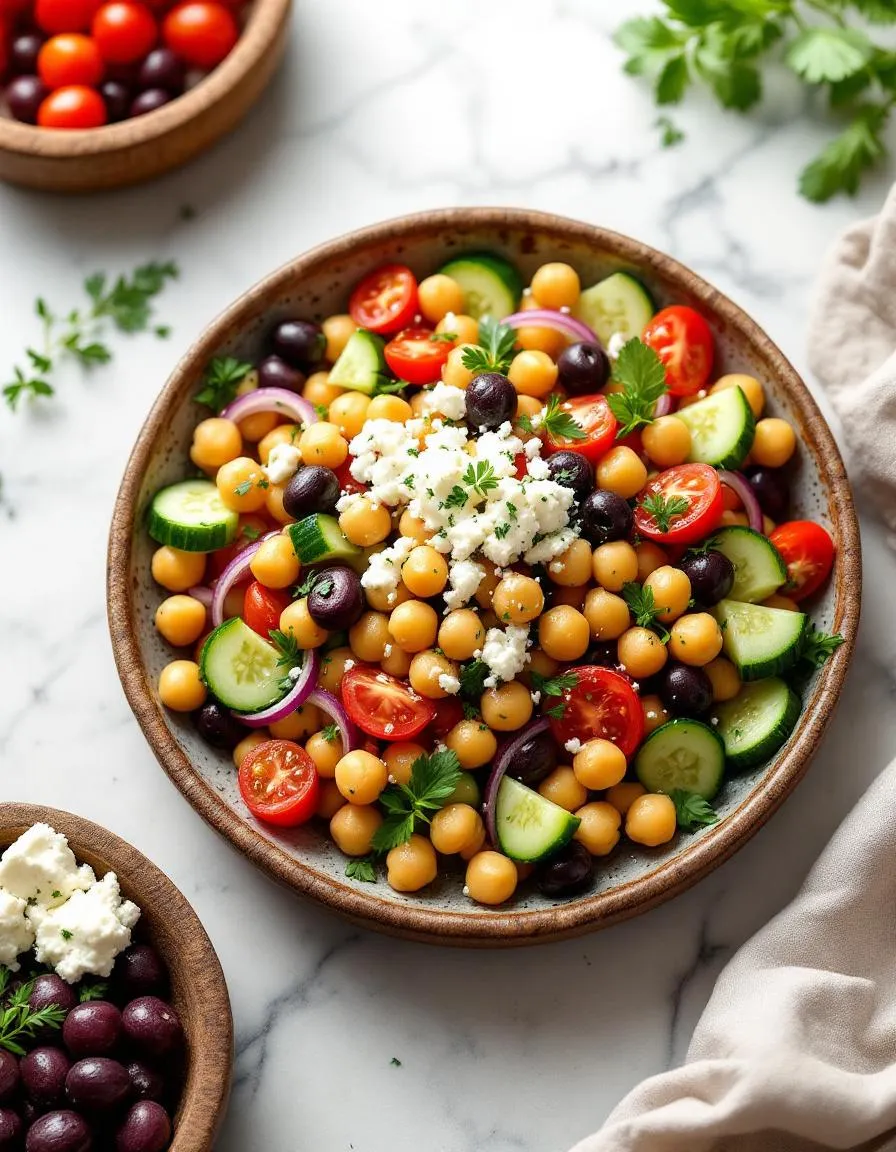
Easy Mediterranean Chickpea Salad Recipe
Introduction
Craving a dish that’s both refreshing and packed with flavor? Look no further than this vibrant Mediterranean Chickpea Salad. Whether you need a quick lunch, a side for dinner, or a meal prep superstar, this recipe delivers. Every bite bursts with crisp veggies, creamy chickpeas, and zesty herbs, making it a celebration of Mediterranean flavors. Plus, it’s as nourishing as it is delicious—perfect for busy weekdays or leisurely picnics. Let’s dive into why this salad deserves a spot in your rotation.
Mediterranean Chickpea Salad is a hearty, plant-based dish inspired by the sun-drenched coasts of Greece and Italy. It combines protein-rich chickpeas with crunchy cucumbers, juicy tomatoes, briny olives, and tangy feta cheese, all tossed in a bright lemon-herb dressing. What sets it apart? For starters, it’s incredibly versatile. You can serve it as a standalone meal, pair it with grilled chicken, or even stuff it into pita bread for a satisfying wrap. Beyond its flexibility, this salad aligns perfectly with the Mediterranean diet, which emphasizes whole foods, healthy fats, and bold flavors. If you’re new to this way of eating, explore our guide to Mediterranean diet basics for more inspiration.
Here at Exo Recipes, we champion dishes that are both simple and sensational. This Mediterranean Chickpea Salad fits the bill, requiring just 15 minutes of prep and no fancy techniques. It’s also a crowd-pleaser, whether you’re cooking for one or hosting a summer gathering. For more easy, flavor-packed ideas, check out our roundup of quick vegan meals. Now, let’s talk about why this recipe holds a special place in my kitchen.
Why I Love This Recipe
This Mediterranean Chickpea Salad reminds me of lazy afternoons spent at my aunt’s house, where she’d whip up huge bowls of it for family gatherings. The aroma of fresh herbs and lemon always signaled something delicious was coming. Even now, making it transports me back to those sunny patio lunches. But beyond nostalgia, I love how effortlessly it comes together. On hectic days, I lean on this salad to keep me energized without sacrificing flavor. It’s proof that eating well doesn’t have to be complicated—just fresh, vibrant, and downright satisfying.
Health and Nutrition
Why it’s good for your body
Mediterranean Chickpea Salad packs a powerhouse of nutrients in every bite. First, chickpeas deliver plant-based protein and fiber, which keep you full and support digestion. Additionally, the fresh vegetables like cucumbers and tomatoes provide antioxidants that fight inflammation. Meanwhile, olives and olive oil add heart-healthy fats linked to lower cholesterol.
Beyond its nutritional profile, Mediterranean Chickpea Salad offers a vibrant mix of flavors without heavy processing. For example, the lemon juice and herbs boost immunity while keeping sodium levels in check. Moreover, the dish naturally aligns with the Mediterranean diet, a pattern proven to promote longevity and reduce disease risk. Whether you enjoy it as a side or main course, this salad fuels your body with clean energy.
Finally, Mediterranean Chickpea Salad adapts easily to dietary needs. Since it’s naturally gluten-free and vegan, it suits diverse eaters. The combination of slow-digesting carbs and healthy fats also stabilizes blood sugar. With each colorful forkful, you’re nourishing your body and satisfying your taste buds.
How it fits in a healthy lifestyle
Mediterranean Chickpea Salad fits seamlessly into a balanced diet. If you’re aiming for more plant-based meals, this dish delivers protein and iron without meat. It also pairs well with whole grains like quinoa or a slice of crusty bread for extra staying power. For meal prep enthusiasts, it stays fresh for days, making healthy eating effortless.
This salad shines for heart-healthy goals too. The olive oil and veggies support cardiovascular health, while the fiber helps manage cholesterol. If you’re exploring gluten-free options, Mediterranean Chickpea Salad is a flavorful choice that won’t leave you missing traditional carbs. For more inspiration, check out our guide to gluten-free meal ideas or tips for quick healthy lunches. Whether you’re fueling a busy day or winding down with a light dinner, this salad keeps your nutrition on track.
A refreshing and protein-packed salad with Mediterranean flavors.
Ingredients
Scale
For the Crust:
1 can chickpeas, drained and rinsed
1 cucumber, diced
1 cup cherry tomatoes, halved
1/2 red onion, finely chopped
1/4 cup Kalamata olives, pitted and sliced
1/4 cup feta cheese, crumbled
2 tbsp olive oil
1 tbsp lemon juice
1 tsp dried oregano
Salt and pepper to taste
Instructions
1. Prepare the Crust:
In a large bowl, combine chickpeas, cucumber, cherry tomatoes, red onion, and olives.
In a small bowl, whisk together olive oil, lemon juice, oregano, salt, and pepper.
Pour the dressing over the salad and toss gently to combine.
Sprinkle feta cheese on top before serving.
Notes
You can customize the seasonings to taste.
s-dish">How to Prepare This Dish
Steps and time-saving tips
Start by rinsing and draining two cans of chickpeas to remove excess sodium. Meanwhile, chop crisp cucumber, juicy cherry tomatoes, and red onion into bite-sized pieces for your Mediterranean Chickpea Salad. Toss them into a large bowl with the chickpeas, then add briny kalamata olives and crumbled feta cheese. For a time-saving shortcut, use pre-chopped veggies from the grocery store salad bar. Whisk together olive oil, lemon juice, minced garlic, dried oregano, salt, and pepper in a small jar. Drizzle the dressing over the salad and gently fold everything together until evenly coated. Let the flavors meld by chilling the Mediterranean Chickpea Salad for at least 30 minutes. If you’re in a hurry, skip the chilling step and serve immediately—it still tastes great. Right before serving, sprinkle fresh parsley on top for a pop of color and brightness. Store leftovers in an airtight container for up to three days, though the veggies stay crisper if you add the dressing just before eating.
Mistakes I’ve made and learned from
Early on, I used to overcook my chickpeas when making them from scratch, turning them mushy in the Mediterranean Chickpea Salad. Now I always test a bean at the 45-minute mark—they should be tender but still hold their shape. Another lesson? Measuring dressing ingredients directly over the bowl leads to accidental oil spills (and sad, soggy salads). These days I mix dressings in a separate container first, like I do for my perfect salad dressing ratios. The biggest game-changer was learning to pat dry the chickpeas thoroughly—any extra moisture waters down the flavors. If you struggle with balancing Mediterranean flavors like I did, check out my Mediterranean spice guide for foolproof seasoning combinations. Trust me, these small tweaks make all the difference between a good salad and an unforgettable one.
n-and-variations">Cultural Connection and Variations
Where this recipe comes from
Mediterranean Chickpea Salad roots itself in the sun-drenched coasts of Greece, Turkey, and Lebanon, where cooks have relied on chickpeas for centuries. Farmers and fishermen tossed them with whatever fresh vegetables they had, creating a dish that’s both hearty and refreshing. In my family, we add extra lemon juice and handfuls of parsley, making it tangier than traditional versions. Meanwhile, in Morocco, they might sprinkle cumin or fold in dried apricots for sweetness. No matter where you go, Mediterranean Chickpea Salad adapts beautifully.
Seasonal twists keep it exciting too. In summer, ripe tomatoes and cucumbers shine, while winter versions might feature roasted squash or preserved lemons. Some regions even swap chickpeas for lentils or fava beans, proving how versatile this dish truly is. Whether served at a bustling street market or a quiet family dinner, Mediterranean Chickpea Salad always feels like a celebration of simple, vibrant flavors.
How it fits in today’s cooking
Today, Mediterranean Chickpea Salad fits perfectly into fast, healthy meals. Busy home cooks love it for meal prep, and plant-based eaters rely on its protein-packed goodness. Plus, it’s a star at potlucks—just like our gluten-free desserts, it’s a crowd-pleaser without the fuss. Modern twists include adding quinoa for extra texture or tossing it with avocado for creaminess.
It’s also a go-t
o for seasonal eating. In spring, we might toss in asparagus, while autumn calls for roasted beets. And if you’re looking for more ways to keep meals fresh, check out our weeknight dinner ideas. Mediterranean Chickpea Salad proves that timeless dishes never go out of style—they just get better with creativity.
Taste and Texture
What makes it delicious
Mediterranean Chickpea Salad bursts with bright, fresh flavors and satisfying textures. Juicy cherry tomatoes pop with sweetness, while crisp cucumbers add a refreshing crunch. Creamy chickpeas give the dish a hearty bite, and briny Kalamata olives deliver a salty tang. Fragrant parsley and mint weave in herbal notes, and a zesty lemon dressing ties everything together with a lively kick. Every forkful of Mediterranean Chickpea Salad feels vibrant and balanced—earthy, tangy, and subtly spicy all at once.
Boosting the flavor
For extra depth, try roasting the chickpeas until crispy or tossing in crumbled feta for a creamy contrast. A drizzle of garlic herb sauce adds richness, while toasted pine nuts lend a buttery crunch. If you love heat, a pinch of smoked paprika or a spoonful of spicy harissa dressing elevates the salad with warmth. Experiment with fresh herbs like dill or basil to keep the flavors dynamic and inviting.
Always rinse canned chickpeas thoroughly to remove excess sodium and improve texture. For the best Mediterranean Chickpea Salad, let it chill for at least 30 minutes before serving so flavors meld beautifully. Use fresh lemon juice rather than bottled for a brighter taste, and gently fold ingredients to keep the chickpeas intact. If you prefer extra crunch, toast the pine nuts lightly before adding them.
Mistakes to avoid
Avoid overdressing the salad, as too much liquid can make it soggy. Instead, start with half the dressing and add more as needed. Many people skip salting the chickpea brine, but a pinch of salt enhances flavor without overpowering. For perfectly balanced meals, pair your Mediterranean Chickpea Salad with our Easy Greek Yogurt Sauce or serve it alongside our Garlic Herb Focaccia for a complete spread. Lastly, don’t skip the fresh herbs—they add a vibrant finish.
g-suggestions">Serving and Pairing Suggestions
How to serve this dish
Serve Mediterranean Chickpea Salad in a large, colorful bowl to highlight its vibrant ingredients. For a festive touch, garnish with fresh parsley, crumbled feta, or a drizzle of olive oil. Alternatively, scoop it into lettuce cups or pita pockets for a handheld option. This dish shines at picnics, potlucks, or as a light lunch. Meanwhile, for dinner parties, pair it with grilled proteins for a balanced spread. The bright colors and fresh flavors make it a standout dish any time of year.
What goes well with it
Complement Mediterranean Chickpea Salad with a crisp white wine like Sauvignon Blanc, which enhances its zesty lemon dressing. For a non-alcoholic option, try mint-infused iced tea to mirror the salad’s refreshing herbs. If you’re serving it as part of a larger meal, add our Garlic Herb Focaccia for a satisfying crunch. Alternatively, pair it with our Grilled Lemon Chicken to create a protein-packed Mediterranean feast. Each pairing balances the salad’s textures and flavors beautifully.
math-faq-block">
What are the main ingredients in Mediterranean Chickpea Salad?
Mediterranean Chickpea Salad typically includes chickpeas, cucumbers, tomatoes, red onions, olives, and feta cheese. Fresh herbs like parsley or mint add brightness, while a lemon-olive oil dressing ties everything together. This salad is packed with protein and Mediterranean flavors.
How long does Mediterranean Chickpea Salad last in the fridge?
Mediterranean Chickpea Salad stays fresh for 3-4 days when stored in an airtight container. The flavors often improve after a few hours as the ingredients marinate. For best texture, add delicate ingredients like fresh herbs just before serving.
Is Mediterranean Chickpea Salad healthy?
Yes! Mediterranean Chickpea Salad is nutrient-dense, featuring fiber-rich chickpeas, heart-healthy olive oil, and antioxidant-packed vegetables. It’s a balanced meal with plant-based protein, healthy fats, and vitamins. This salad fits well into Mediterranean diet guidelines.
ank-math-faq-item">
Can I make Mediterranean Chickpea Salad ahead of time?
Absolutely. Mediterranean Chickpea Salad is perfect for meal prep—just combine all ingredients except fresh herbs and dressing. Add those right before serving for maximum freshness. The chickpeas absorb flavors beautifully when marinated overnight.
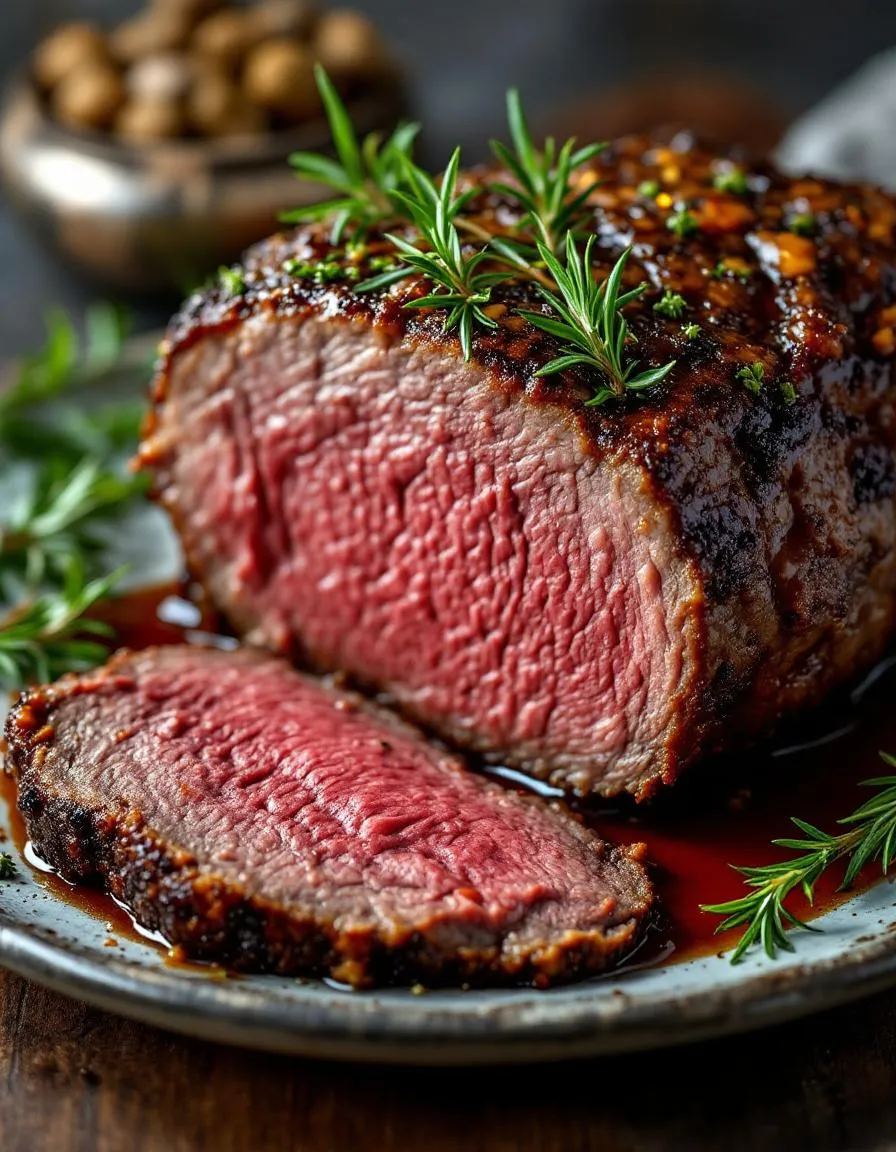
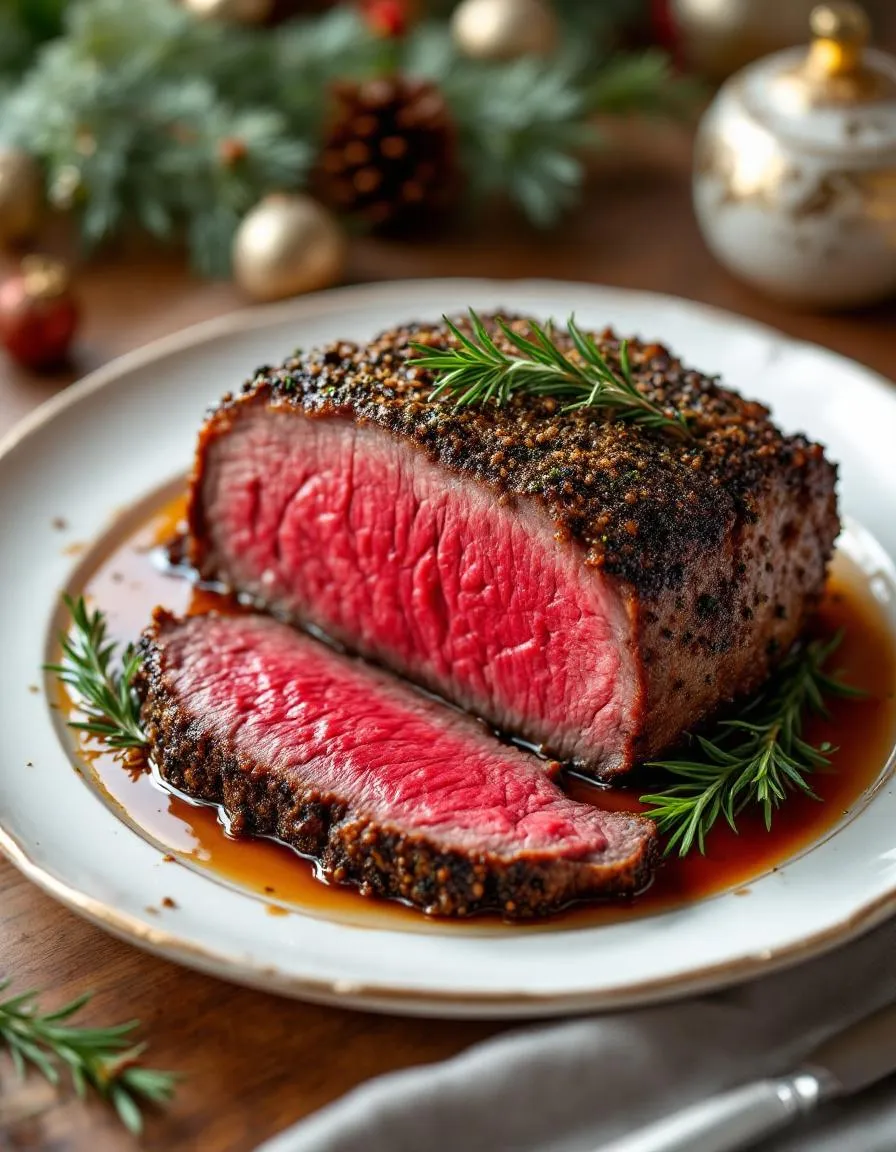
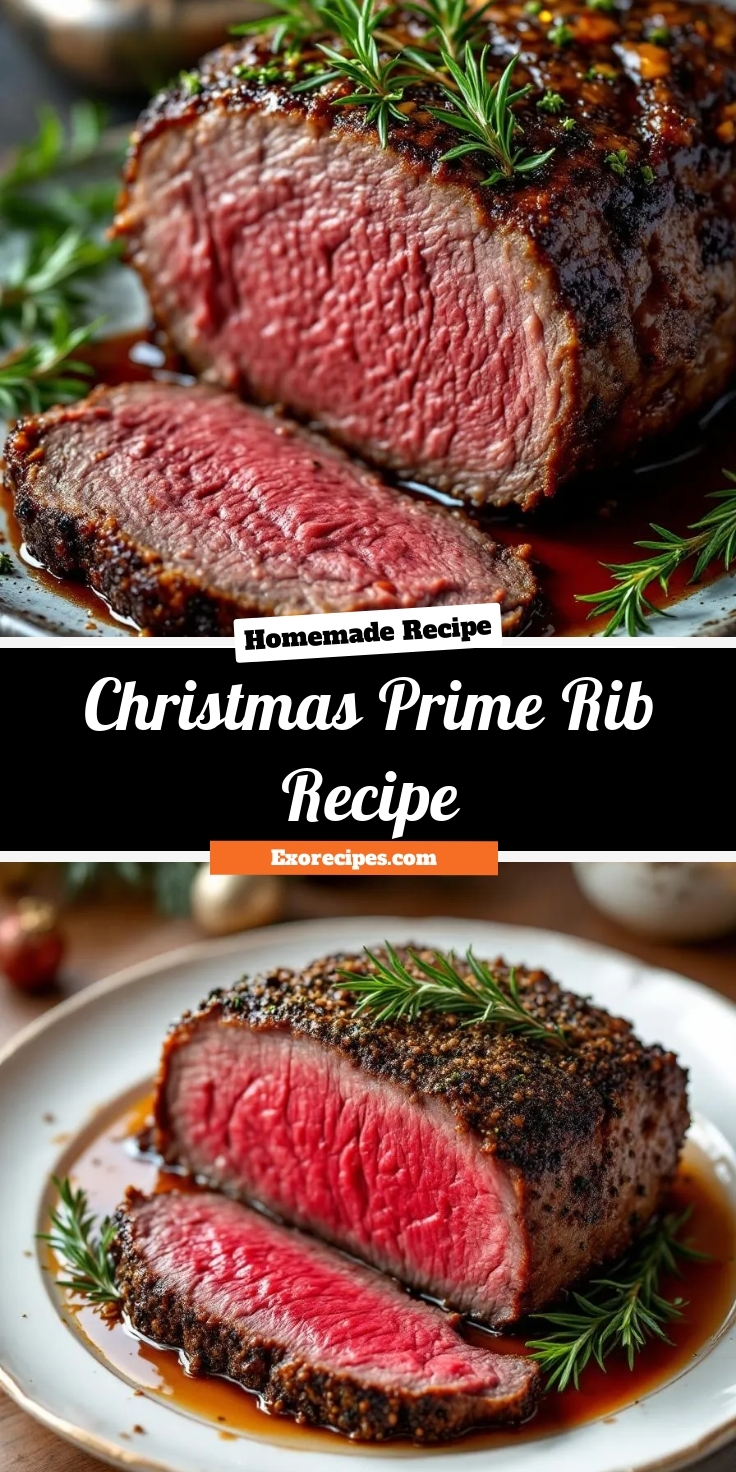
Best Christmas Prime Rib – Juicy & Flavorful Recipe
Introduction
There’s something magical about gathering around the table during the holidays, especially when a perfectly cooked Christmas Prime Rib Recipe takes center stage. Whether you’re hosting family or celebrating with close friends, this dish brings warmth, tradition, and unforgettable flavor to your festive spread. After all, nothing says “merry and bright” like tender, juicy prime rib with a golden crust and rich, savory aroma filling your home.
A Christmas Prime Rib Recipe isn’t just another holiday meal—it’s a showstopper that elevates your celebration. Prime rib, also known as standing rib roast, boasts marbled fat that melts during cooking, creating an incredibly tender and flavorful result. Unlike other cuts, it rewards patience with minimal effort, making it ideal for both seasoned cooks and beginners. Plus, its impressive presentation makes it perfect for special occasions. If you’re looking for more holiday inspiration, check out our Garlic Herb Butter Steak for another crowd-pleasing main dish.
What sets this recipe apart is its simplicity. With just a few quality ingredients—like fresh rosemary, garlic, and a good sear—you’ll achieve restaurant-quality results at home. The key lies in the slow-roasting method, which ensures even cooking and a melt-in-your-mouth texture. Pair it with classic sides like creamy mashed potatoes or roasted vegetables, and you’ve got a feast worthy of the season. For more side dish ideas, our Roasted Garlic Mashed Potatoes complements prime rib beautifully.
This recipe also fits our blog’s tone: approachable, celebratory, and focused on creating memorable moments. Whether you’re a holiday enthusiast or a cooking novice, we break down each step so you can serve a prime rib that’s juicy, flavorful, and downright impressive.
Why I Love This Recipe
Christmas Prime Rib Recipe holds a special place in my heart because it reminds me of my grandmother’s holiday table. She taught me that cooking with love means choosing quality ingredients and letting them shine. Every year, the moment I pull the roast from the oven, the scent of garlic and herbs takes me back to those cherished gatherings. It’s more than a meal—it’s a tradition that brings people together, and that’s why I’m thrilled to share it with you.
Health and Nutrition
Why it’s good for your body
Christmas Prime Rib Recipe delivers a powerhouse of nutrients while satisfying your holiday cravings. First, it packs high-quality protein, which helps build muscle and keeps you full longer. Additionally, the rich marbling in prime rib provides healthy fats that support brain function and energy levels. Moreover, this dish contains essential vitamins like B12, which boosts red blood cell production and combats fatigue.
Beyond protein and fats, Christmas Prime Rib Recipe offers minerals such as iron and zinc. Iron promotes oxygen circulation, while zinc strengthens your immune system—perfect for the festive season. Furthermore, when paired with roasted vegetables or a fresh salad, this meal becomes a balanced feast. The natural juices from the prime rib also enhance flavor without excessive additives, making it a cleaner choice than processed holiday dishes.
Finally, Christmas Prime Rib Recipe fits special occasions without derailing health goals. Though indulgent, it avoids refined sugars and empty carbs common in other holiday treats. By savoring moderate portions, you enjoy a nutrient-dense centerpiece that fuels celebration and well-being.
How it fits in a healthy lifestyle
Christmas Prime Rib Recipe aligns with balanced eating, even during festivities. For protein-focused diets, it serves as a hearty option that supports muscle maintenance and satiety. If you follow a gluten-free lifestyle, this dish naturally fits, especially when paired with sides like garlic mashed cauliflower or roasted Brussels sprouts.
For heart-conscious eaters, trimming excess fat or opting for grass-fed beef can make Christmas Prime Rib Recipe even healthier. Pair it with antioxidant-rich sides, such as a winter kale salad, to boost nutrition. If you’re managing portions, slice thinner pieces and balance your plate with lighter dishes like our herb-roasted carrots.
Ultimately, this recipe proves holiday meals can be both decadent and nourishing. By focusing on quality ingredients and mindful pairings, you celebrate without compromise.
A succulent and flavorful prime rib roast, perfect for Christmas dinner.
Ingredients
Scale
For the Crust:
1 (5-7 lb) prime rib roast
3 tbsp olive oil
4 cloves garlic, minced
2 tbsp fresh rosemary, chopped
2 tbsp fresh thyme, chopped
1 tbsp kosher salt
1 tbsp black pepper
1 tsp onion powder
Instructions
1. Prepare the Crust:
Preheat oven to 450°F (230°C).
In a small bowl, mix olive oil, garlic, rosemary, thyme, salt, pepper, and onion powder to form a paste.
Rub the paste evenly all over the prime rib roast.
Place the roast on a rack in a roasting pan, fat side up.
Roast for 15 minutes, then reduce the oven temperature to 325°F (165°C) and continue roasting for about 15 minutes per pound for medium-rare, or until the internal temperature reaches 135°F (57°C).
Remove from oven, tent with foil, and let rest for 20 minutes before slicing.
Notes
You can customize the seasonings to taste.
How to Prepare This Dish
Steps and time-saving tips
Start by preheating your oven to 450°F to ensure it’s hot enough for the perfect sear on your Christmas Prime Rib Recipe. While the oven heats, pat the prime rib dry with paper towels—this helps the seasoning stick and creates a crisp crust. Generously rub the meat with a mix of salt, pepper, garlic powder, and rosemary, pressing the spices into the surface for maximum flavor. Meanwhile, place the rib bone-side down in a roasting pan fitted with a rack to promote even cooking. For a time-saving tip, prepare the seasoning blend the night before and store it in an airtight container. Once the oven is ready, sear the prime rib for 15 minutes to lock in juices, then reduce the heat to 325°F and continue roasting. Use a meat thermometer to check for doneness; aim for 120°F for rare or 130°F for medium-rare. Let the meat rest for at least 20 minutes before carving—this keeps it juicy. While it rests, whip up a quick horseradish sauce or au jus using the pan drippings. If you’re short on time, skip the homemade sauce and pair it with a store-bought alternative instead.
and-learned-from">Mistakes I’ve made and learned from
One year, I rushed the resting step for my Christmas Prime Rib Recipe and ended up with dry, tough meat—lesson learned! Now, I always set a timer to ensure it rests fully. Another mistake? Skipping the meat thermometer. I used to guess doneness by sight, which led to overcooking. Investing in a reliable thermometer changed everything. For more tips on avoiding kitchen mishaps, check out my guide on common roasting mistakes. Also, I once overcrowded the roasting pan with veggies, which steamed the meat instead of letting it roast. Now, I use a separate tray for sides or follow my holiday side dishes guide for better spacing. Trust me, these small adjustments make a world of difference!
Cultural Connection and Variations
Where this recipe comes from
The Christmas Prime Rib Recipe holds a special place in holiday feasts, especially in Western traditions where it symbolizes abundance and celebration. Families often reserve this luxurious cut of beef for Christmas dinner, pairing it with rich sides like Yorkshire pudding or roasted root vegetables. In some regions, like the American Midwest, cooks might rub the prime rib with a coffee-chili blend for a bold twist, while British versions lean toward classic herb crusts. Meanwhile, in Australia, where Christmas falls in summer, you might find the prime rib grilled outdoors alongside seafood—a festive mash-up of land and sea.
My own family swears by
a garlic-rosemary marinade, letting the meat soak overnight to deepen the flavors. Over time, I’ve learned that the Christmas Prime Rib Recipe isn’t just about the dish itself but the stories around it. Some cultures serve it with horseradish cream for a sharp contrast, while others, like parts of France, might slow-roast it with wine-infused jus. No matter the variation, the centerpiece always brings people together, making it a timeless holiday tradition.
How it fits in today’s cooking
Today, the Christmas Prime Rib Recipe remains a star of holiday tables, but modern cooks are putting creative spins on it. Busy hosts might opt for sous vide methods for foolproof tenderness, while others embrace smoky flavors by finishing the roast on a pellet grill. It’s also easier than ever to find quality cuts online, thanks to specialty butchers and delivery services. For those planning a full holiday spread, pairing the prime rib with a showstopping dessert can elevate the meal from memorable to unforgettable.
Beyond December, this recipe adapts to smaller gatherings or even Sunday dinners. Some families repurpose leftovers into hearty beef sandwiches or stir-fries, proving its versatility. And if you’re looking for side inspiration, a seasonal sides guide can help balance the rich flavors. Whether you stick to tradition or experiment, the Christmas Prime Rib Recipe continues to unite kitchens and cultures with every juicy slice.
>Taste and Texture
What makes it delicious
The Christmas Prime Rib Recipe delivers a rich, savory experience that melts in your mouth. Each bite offers buttery tenderness, thanks to the marbled fat that renders perfectly during roasting. The crusty, herb-studded exterior adds a satisfying crunch, while the interior stays juicy and succulent. Fragrant garlic, rosemary, and cracked black pepper infuse the meat with earthy warmth, making every slice irresistible. Meanwhile, the natural beefy sweetness shines through, especially when paired with a hint of smoky char from the sear. Whether served rare or medium-rare, the Christmas Prime Rib Recipe promises a luxurious centerpiece that feels festive and indulgent.
Boosting the flavor
Elevate your Christmas Prime Rib Recipe by experimenting with bold flavors. For a deeper umami kick, rub the roast with miso paste before seasoning. Alternatively, try a coffee-chili rub to add a subtle bitterness and heat. A drizzle of homemade horseradish sauce cuts through the richness, while a red wine reduction amplifies the meat’s natural depth. If you prefer freshness, serve it with a bright herb gremolata for contrast. Remember, resting the meat properly ensures every slice stays flavorful and tender.
Tips for Success
Best practices for results
Always let your Christmas Prime Rib Recipe rest at room temperature for at least two hours before roasting. This ensures even cooking and a juicier result. Additionally, use a meat thermometer to check for doneness, aiming for 120°F for rare or 130°F for medium-rare. For extra flavor, generously season the prime rib with salt, pepper, and fresh herbs at least an hour before cooking. Finally, let the meat rest for 20 minutes after roasting to lock in those delicious juices.
Mistakes to avoid
One common mistake is skipping the resting phase, which can lead to dry meat. Instead, always allow your Christmas Prime Rib Recipe to rest before slicing. Another error is overcooking the roast, so avoid relying solely on time—use a thermometer for precision. For more tips on perfecting holiday roasts, check out our guide on holiday roasting techniques. Also, don’t forget to trim excess fat properly; too much can cause flare-ups. Learn how to prep your meat like a pro with our butcher’s guide to trimming.
Serving and Pairing Suggestions
How to serve this dish
For a show-stopping presentation, carve your Christmas Prime Rib Recipe tableside to let guests admire the juicy, perfectly cooked slices. Arrange the meat on a large wooden board or elegant platter, then garnish with fresh rosemary sprigs and roasted garlic cloves for a festive touch. Alternatively, serve individual portions on warm plates with a drizzle of the natural au jus for extra richness. Since this dish shines as a holiday centerpiece, pair it with candlelight and seasonal decor for a memorable Christmas dinner. For casual gatherings, slice leftovers thin and pile them on crusty rolls for next-day sandwiches.
h-it">What goes well with it
Rich, savory sides balance the Christmas Prime Rib Recipe beautifully. Try creamy horseradish mashed potatoes for a tangy contrast, or roasted Brussels sprouts with bacon for a crispy, smoky bite. For drinks, a bold Cabernet Sauvignon enhances the beef’s depth, while a sparkling apple cider keeps things festive and family-friendly. Don’t forget to include a fresh, bright salad like our Winter Kale Salad to cut through the richness. Finish the meal with a light dessert, such as our Peppermint Mocha Trifle, to round out the holiday flavors.
How long should I cook a prime rib for Christmas dinner?
For a perfect Christmas Prime Rib Recipe, cook at 325°F for about 15-20 minutes per pound for medium-rare. Use a meat thermometer to ensure the internal temperature reaches 120-125°F before resting. Let it rest for 20-30 minutes to lock in juices before slicing.
ank-math-faq-item">
What’s the best seasoning for a Christmas prime rib?
A classic Christmas Prime Rib Recipe often uses a simple blend of kosher salt, black pepper, garlic, rosemary, and thyme. For extra flavor, create a crust with mustard or horseradish. Let the seasoning sit on the meat for at least an hour before roasting.
Should I sear prime rib before roasting for Christmas?
Searing isn’t necessary for a Christmas Prime Rib Recipe, but it adds a flavorful crust. If you prefer, sear the roast in a hot pan for 2-3 minutes per side before roasting. Alternatively, blast the oven at 500°F for the first 15 minutes to achieve a similar effect.
How do I keep prime rib juicy for Christmas?
To keep your Christmas Prime Rib Recipe juicy, cook it low and slow, and always use a meat thermometer to avoid overcooking. Let the roast rest after cooking—this allows the juices to redistribute. Slice just before serving to retain moisture.