Craving a nostalgic snack that’s quick, cheesy, and downright irresistible? Cheesy Mini Pizza Bagel Bites deliver all the flavor of your favorite childhood treat with minimal effort. Whether you’re hosting a game-day gathering or need a fuss-free after-school snack, these bite-sized delights hit the spot every time. Plus, they’re so easy to customize that even picky eaters will beg for seconds. Let’s dive into why this recipe deserves a permanent spot in your rotation.
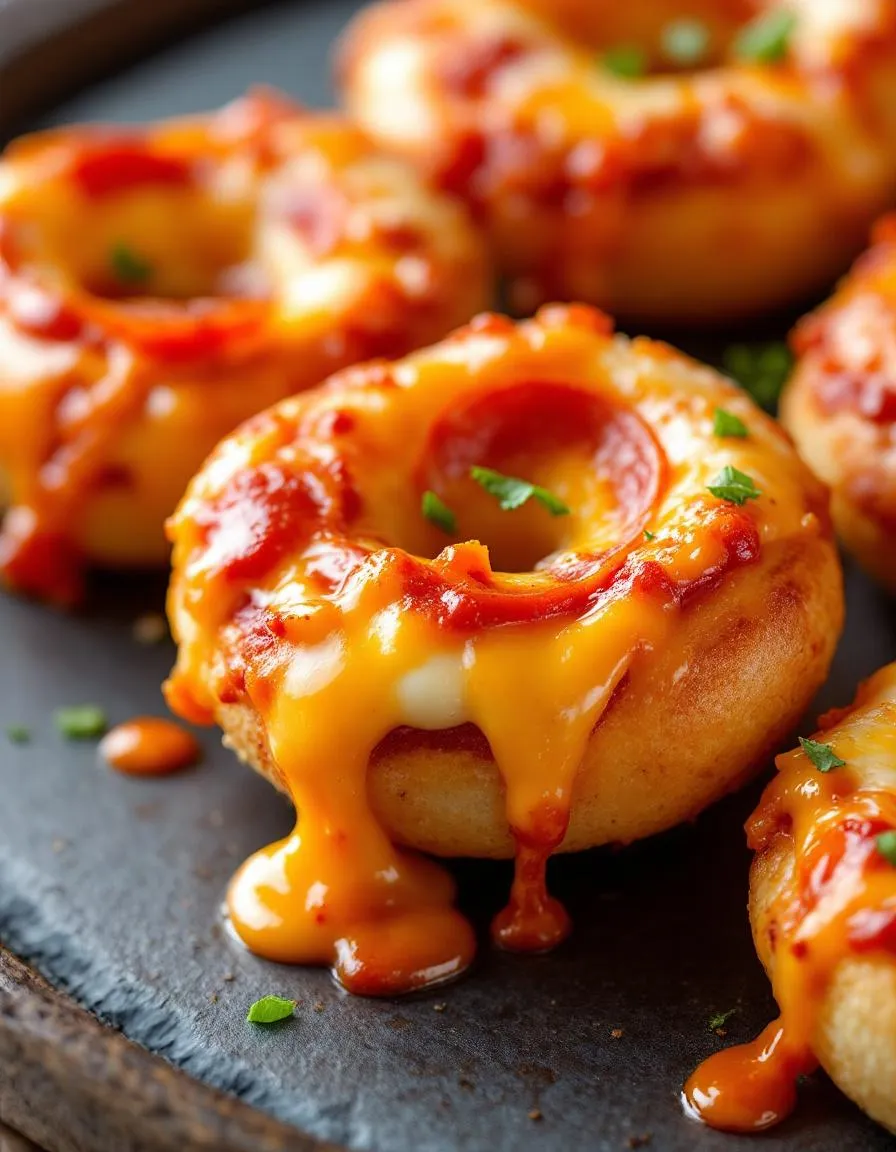
Cheesy Mini Pizza Bagel Bites transform humble bagels into golden, melty masterpieces. Essentially, they’re mini bagel halves topped with zesty marinara, gooey cheese, and your choice of toppings, then baked until bubbly. Unlike frozen store-bought versions, homemade bites let you control the quality of ingredients, from whole-grain bagels to organic cheese. They’re perfect for busy weeknights, last-minute appetizers, or even a fun cooking project with kids. If you love our Easy Homemade Garlic Breadsticks, you’ll adore these for their similar crowd-pleasing appeal. Plus, they align with our blog’s mission to make comfort food accessible, whether you’re a beginner or a seasoned cook. For more snack inspiration, check out our Crispy Baked Chicken Wings—another game-day favorite.
Why I Love This Recipe
Cheesy Mini Pizza Bagel Bites hold a special place in my heart because they remind me of sleepovers with my best friend. We’d sneak into her kitchen late at night, pile bagels with whatever toppings we could find, and giggle as the cheese bubbled under the broiler. Now, I make them with my own kids, and watching their faces light up when they pull the tray from the oven brings back that same joy. It’s more than a recipe—it’s a little bite of connection, one melty piece at a time.
Health and Nutrition
Why it’s good for your body
Cheesy Mini Pizza Bagel Bites pack a surprising nutritional punch while satisfying your cravings. First, they deliver a solid dose of protein from the cheese and bagel base, which helps keep you full and supports muscle repair. Additionally, the tomato sauce provides lycopene, an antioxidant linked to heart health. Because you can customize the toppings, you can easily add veggies like bell peppers or spinach for extra vitamins and fiber.
Moreover, Cheesy Mini Pizza Bagel Bites offer a balanced mix of carbs, fats, and protein, making them a smarter choice than many processed snacks. The bagel base gives you energy-boosting carbohydrates, while the melted cheese adds calcium for strong bones. If you use whole-grain bagels, you’ll also benefit from extra fiber, which aids digestion. Even better, these bites are portion-controlled, so you can enjoy them without overindulging.
Finally, Cheesy Mini Pizza Bagel Bites are a fun way to sneak nutrients into picky eaters’ diets. Kids and adults alike love the cheesy, savory flavor, but you can easily boost the nutrition by adding lean proteins like turkey pepperoni or extra veggies. Whether you serve them as a snack or a light meal, these bites prove that tasty food can also be good for you.
How it fits in a healthy lifestyle
Cheesy Mini Pizza Bagel Bites fit seamlessly into a balanced diet because they’re versatile and easy to customize. For a heart-healthy twist, use low-fat cheese and load them with veggies like mushrooms or olives. If you’re watching your gluten intake, swap regular bagels for a gluten-free bagel option to keep the flavor without the gluten.
These bites also work well for meal prep or quick snacks, helping you avoid less nutritious convenience foods. Pair them with a side salad or fresh fruit to round out your meal. For those focusing on protein, add a sprinkle of grilled chicken or turkey for an extra boost. If you’re looking for more ways to balance indulgent treats with wholesome ingredients, check out our guide to smart snack swaps. With a little creativity, Cheesy Mini Pizza Bagel Bites can be part of a nutritious and satisfying eating plan.
Quick and easy mini pizza bagel bites perfect for snacking or parties.
Ingredients
Scale
For the Crust:
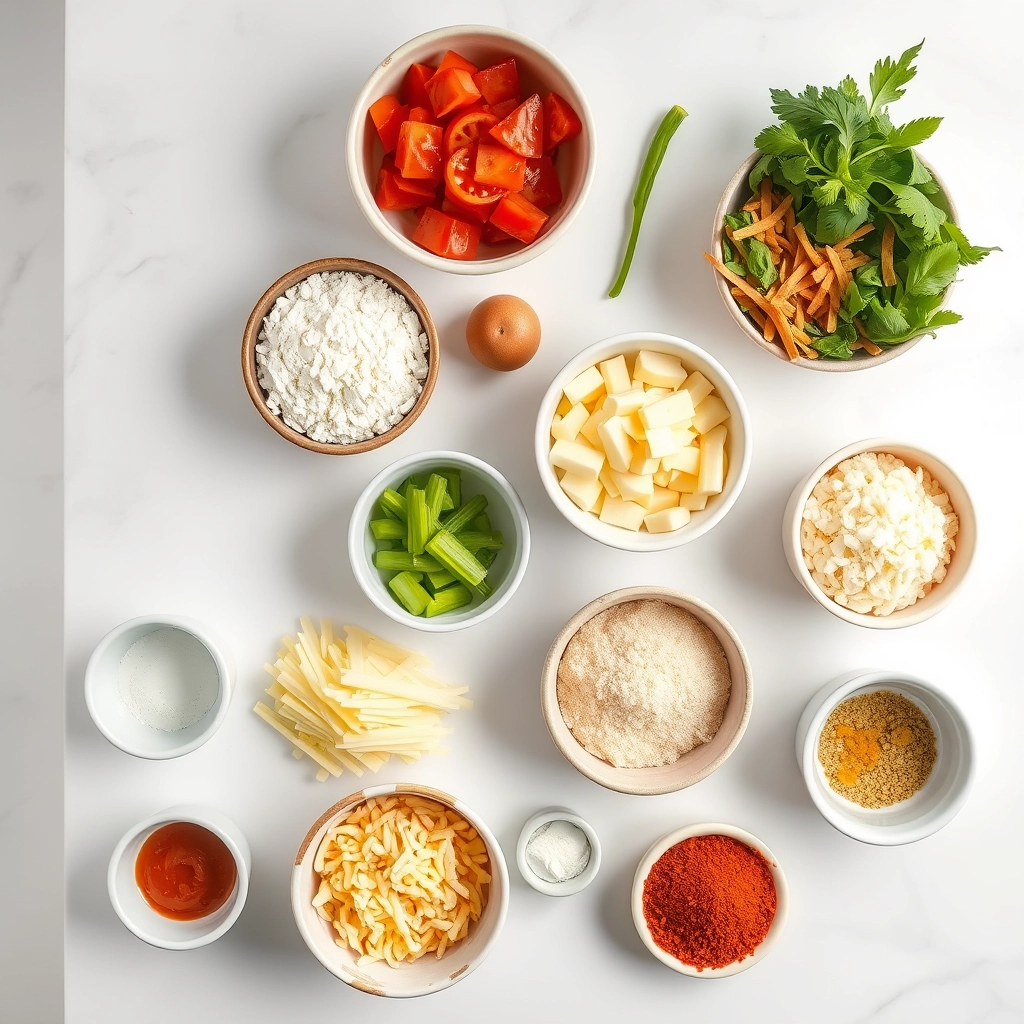
6 mini bagels, sliced in half
1/2 cup marinara sauce
1 cup shredded mozzarella cheese
1/4 cup mini pepperoni slices
1/2 tsp dried oregano
1/2 tsp garlic powder
Instructions
1. Prepare the Crust:
Preheat oven to 375°F (190°C) and line a baking sheet with parchment paper.
Place the bagel halves cut-side up on the baking sheet.
Spread about 1 teaspoon of marinara sauce on each bagel half.
Sprinkle shredded mozzarella cheese evenly over each bagel half.
Top with mini pepperoni slices and sprinkle with oregano and garlic powder.
Bake for 10-12 minutes or until the cheese is melted and bubbly.
Let cool slightly before serving.
Notes
You can customize the seasonings to taste.
How to Prepare This Dish
Steps and time-saving tips
Start by preheating your oven to 375°F to ensure it’s ready when your Cheesy Mini Pizza Bagel Bites are assembled. While the oven heats, slice mini bagels in half and lay them cut-side up on a baking sheet. Next, spread a thin layer of marinara sauce over each bagel half, making sure to cover the surface evenly but not overload it. Sprinkle shredded mozzarella cheese generously on top, then add your favorite toppings like pepperoni, diced bell peppers, or olives. For a golden finish, lightly drizzle olive oil over the cheese before baking. Slide the tray into the oven and bake for 10-12 minutes, or until the cheese melts and bubbles. If you’re short on time, use pre-shredded cheese and store-bought marinara to speed things up. Let the bites cool for a minute before serving—they’ll be piping hot! These Cheesy Mini Pizza Bagel Bites are perfect for parties or quick snacks, and you can even prep them ahead and refrigerate until baking.
Mistakes I’ve made and learned from
I once rushed the baking process and ended up with soggy Cheesy Mini Pizza Bagel Bites because I piled on too much sauce. Now I use a light hand, and if I’m unsure, I blot excess moisture from the marinara with a paper towel first. Another time, I skipped preheating the oven, which led to uneven melting. Lesson learned: always preheat! For more foolproof tips, check out my guide on avoiding soggy pizza bites. Also, if you’re experimenting with toppings, remember that watery veggies like fresh tomatoes can make the bagels mushy—opt for pre-cooked or dried versions instead. For topping inspiration, my best pizza topping combos post has plenty of ideas. Trust me, a little patience and these tweaks make all the difference!
Cheesy Mini Pizza Bagel Bites bring together two beloved comfort foods—bagels and pizza—into one irresistible snack. This dish likely started as a creative kitchen hack, blending the chewy texture of bagels with the gooey goodness of pizza toppings. In New York, where bagels reign supreme, you might find versions topped with everything from classic pepperoni to artisanal cheeses. Meanwhile, in Italy, cooks often skip the bagel base altogether, opting for focaccia or ciabatta instead.
Families across the U.S. have put their own spin on Cheesy Mini Pizza Bagel Bites too. Some add a sprinkle of garlic powder for extra flavor, while others load them up with veggies for a healthier twist. In my house, we make them during movie nights, and the kids love customizing their own toppings. Whether you grew up with them at parties or discovered them as an easy weeknight dinner, these bite-sized treats carry a nostalgic charm.
ays-cooking">How it fits in today’s cooking
Today, Cheesy Mini Pizza Bagel Bites remain a go-to for busy cooks and snack lovers alike. They fit perfectly into modern routines, whether as a quick appetizer for game day or a fun lunchbox addition. Many home chefs now experiment with gluten-free bagels or plant-based cheeses to suit dietary needs. For those hosting gatherings, pairing them with easy party appetizers creates a crowd-pleasing spread without the fuss.
Seasonal twists keep the recipe fresh year-round. Think pumpkin-spiced bagels in fall or fresh basil and tomatoes in summer. Even better, they’re a fantastic way to use up leftovers, like that last bit of marinara or spare veggies. If you’re looking for more inspiration, check out these comfort food recipes to round out your meal. No matter how you serve them, Cheesy Mini Pizza Bagel Bites continue to deliver big flavor in every bite.
Taste and Texture
What makes it delicious
Cheesy Mini Pizza Bagel Bites deliver a burst of savory satisfaction with every bite. The golden, toasted bagel base offers a satisfying crunch, while the melted mozzarella stretches into gooey perfection. Tangy tomato sauce adds a bright, zesty contrast, and fragrant garlic powder infuses each bite with warmth. Meanwhile, the pepperoni crisps slightly at the edges, releasing smoky, salty notes that dance on your tongue. Whether you serve them fresh from the oven or at room temperature, Cheesy Mini Pizza Bagel Bites keep their irresistible chewiness and bold flavors intact.
r">Boosting the flavor
For an extra kick, swap regular mozzarella with smoked gouda or sprinkle red pepper flakes over the top before baking. Fresh basil or a drizzle of garlic aioli right after baking elevates the aroma and richness. If you love bold flavors, try adding caramelized onions or marinated artichokes for a gourmet twist. Pair these bites with a side of spicy marinara to double down on the pizza-inspired goodness. With just a few tweaks, you can customize Cheesy Mini Pizza Bagel Bites to match any craving.
Tips for Success
Best practices for results
For the best Cheesy Mini Pizza Bagel Bites, always preheat your oven fully before baking to ensure even cooking. Additionally, use freshly shredded cheese instead of pre-shredded varieties for optimal meltiness. Meanwhile, lightly brush the bagels with olive oil to help the toppings adhere and crisp up perfectly. Finally, let the bites cool for a minute or two before serving so the cheese sets slightly.
>Mistakes to avoid
Avoid overloading the bagels with toppings, as this can make them soggy. Instead, stick to a light layer of sauce and a moderate amount of cheese. Similarly, don’t skip toasting the bagels first if you want a crispier texture—this step prevents sogginess. For more topping inspiration, check out our guide to perfect pizza toppings. Also, resist the urge to bake at a higher temperature to save time, as this can burn the edges before the cheese melts. For proper oven settings, refer to our baking temperatures guide.
Serving and Pairing Suggestions
How to serve this dish
Cheesy Mini Pizza Bagel Bites shine as a crowd-pleasing appetizer or snack. For a fun twist, arrange them on a wooden board with small bowls of marinara or ranch for dipping. Alternatively, stack them in a mini tower for a playful centerpiece at game-day gatherings. Since they bake quickly, these bites also make a perfect last-minute addition to brunch spreads or holiday parties. Garnish with fresh basil or a sprinkle of red pepper flakes to add color and flavor. Whether you serve them warm or at room temperature, Cheesy Mini Pizza Bagel Bites always disappear fast.
What goes well with it
Pair Cheesy Mini Pizza Bagel Bites with a crisp garden salad for a light yet satisfying meal. The fresh veggies balance the richness of the cheese and bagels. For drinks, try a chilled glass of lemonade or a fizzy soda—their tangy sweetness cuts through the savory flavors. If you love dipping sauces, whip up a batch of garlic aioli or try our Easy Homemade Ranch Dressing for extra creaminess. For heartier options, serve them alongside Loaded Potato Skins to create a full appetizer spread everyone will love.
How do you cook Cheesy Mini Pizza Bagel Bites in the oven?
Preheat your oven to 425°F, place the Cheesy Mini Pizza Bagel Bites on a baking sheet, and bake for 10–12 minutes until the cheese melts and the edges turn golden brown. For crispier bites, broil for an extra 1–2 minutes. Let them cool slightly before serving to avoid burns.
Can you air fry Cheesy Mini Pizza Bagel Bites?
Yes! Air frying Cheesy Mini Pizza Bagel Bites gives them a crispy texture. Cook at 375°F for 6–8 minutes, shaking the basket halfway. They’ll come out perfectly melted and golden, just like oven-baked but faster.
ank-math-faq-item">
Are Cheesy Mini Pizza Bagel Bites vegetarian?
Most varieties of Cheesy Mini Pizza Bagel Bites are vegetarian, but always check the packaging for ingredients like rennet or meat-based additives. The classic cheese and tomato versions typically use vegetarian-friendly cheese and dough.
What dipping sauces go well with Cheesy Mini Pizza Bagel Bites?
Ranch, marinara, or garlic butter are popular choices for dipping Cheesy Mini Pizza Bagel Bites. For a spicy twist, try sriracha mayo or buffalo sauce. The cheesy, bite-sized snacks pair well with almost any creamy or tangy sauce.
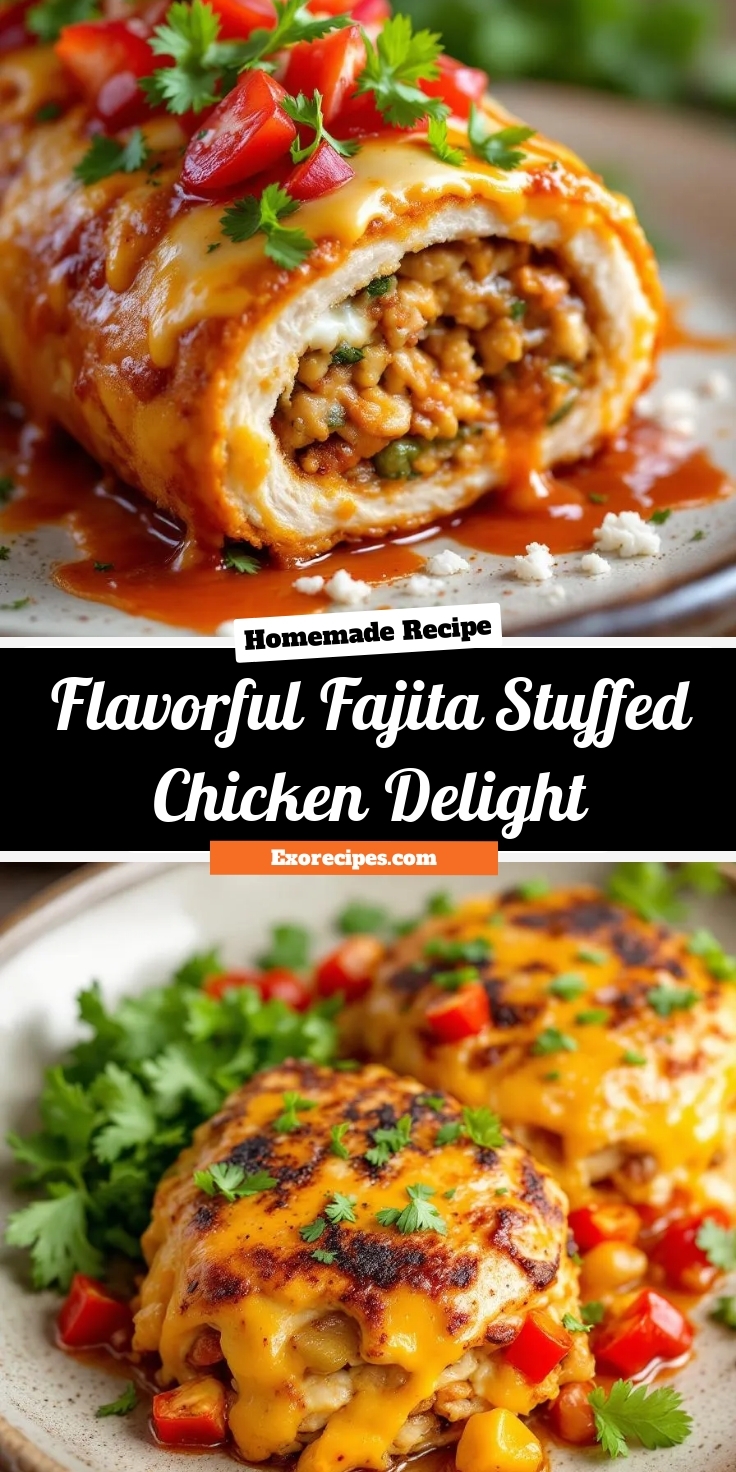
Best Flavorful Fajita Stuffed Chicken Delight Recipe
Introduction
Craving a dish that bursts with bold flavors and feels like a celebration on your plate? Look no further than this Flavorful Fajita Stuffed Chicken Delight. Whether you’re cooking for a weeknight dinner or impressing guests, this recipe transforms simple ingredients into something extraordinary. Imagine tender chicken stuffed with vibrant peppers, onions, and just the right blend of spices—every bite delivers a fiesta of taste. Best of all, it’s easier to make than you might think, proving that gourmet-worthy meals belong in your everyday rotation.
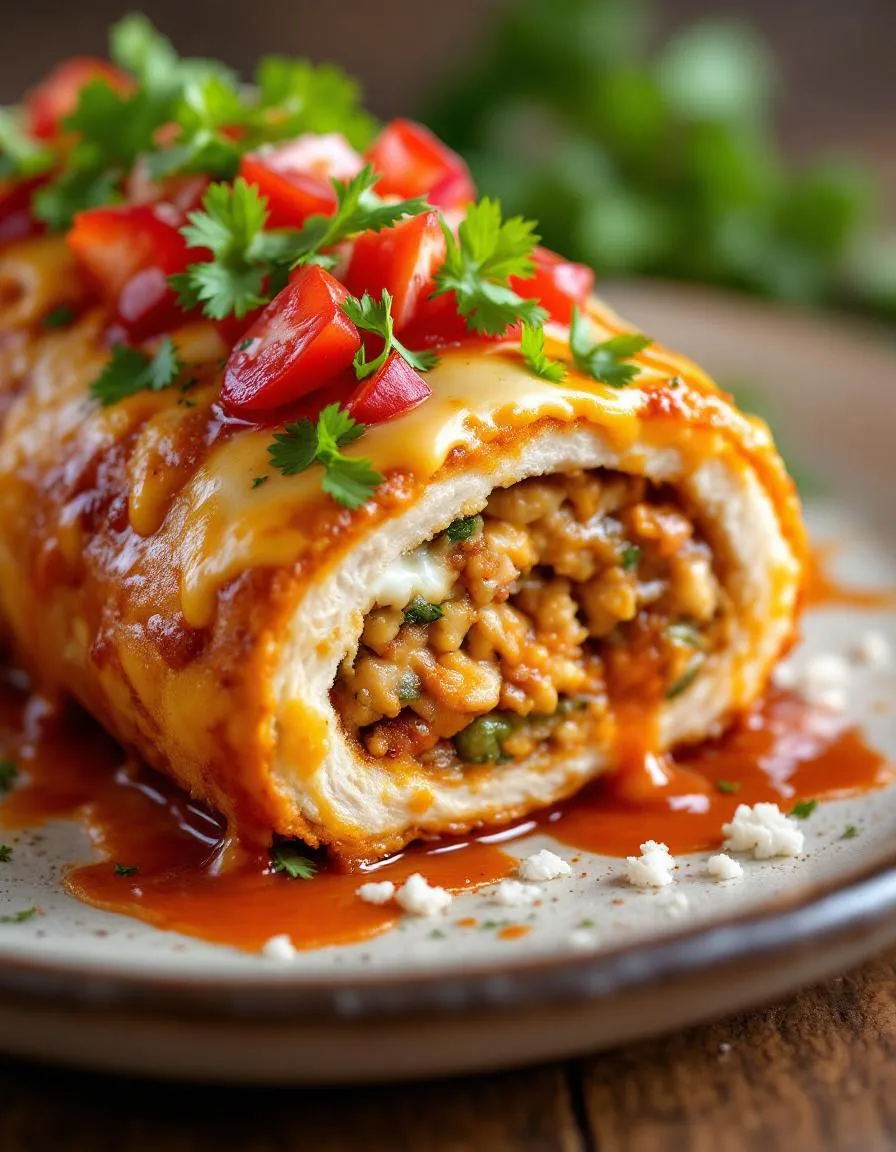
Flavorful Fajita Stuffed Chicken Delight combines the smoky, zesty appeal of fajitas with the comforting richness of juicy chicken. Instead of serving fajita fillings on the side, we stuff them inside chicken breasts, creating a dish that’s as visually stunning as it is delicious. This recipe matters because it solves the eternal question of how to make weeknight dinners exciting without sacrificing simplicity. Plus, it aligns perfectly with our blog’s mission to deliver approachable yet impressive recipes that inspire home cooks. If you love dishes like our Cheesy Chicken Enchiladas or One-Pan Fajita Pasta, you’ll adore this twist on classic flavors. The marinade locks in moisture, while the stuffing ensures every forkful is packed with texture and warmth. Whether you’re a busy parent or a meal-prep enthusiast, this dish adapts to your needs while feeling like a treat.
Why I Love This Recipe
Flavorful Fajita Stuffed Chicken Delight holds a special place in my kitchen because it reminds me of family gatherings where food brought everyone together. The first time I made it, my kids devoured it without a single complaint—a rare victory! Now, it’s my go-to when I want to recreate that lively, communal vibe on ordinary evenings. The aroma alone transports me to my favorite Mexican restaurant, but the joy comes from knowing I made it myself. Simple, satisfying, and endlessly customizable, this recipe never fails to deliver smiles around the table.
Health and Nutrition
Why it’s good for your body
Flavorful Fajita Stuffed Chicken Delight packs a nutritious punch while satisfying your taste buds. First, lean chicken breast serves as the base, delivering high-quality protein to support muscle growth and repair. Additionally, the colorful fajita-style veggies like bell peppers and onions provide antioxidants and fiber, which promote digestion and overall wellness.
Moreover, this dish includes metabolism-boosting spices such as cumin and paprika. These spices not only enhance flavor but also offer anti-inflammatory benefits. Meanwhile, the melted cheese adds calcium for strong bones, making Flavorful Fajita Stuffed Chicken Delight a well-rounded meal. Furthermore, the balanced macronutrient profile keeps you full longer, reducing unnecessary snacking.
Finally, the dish avoids heavy creams or excessive oils, keeping calories in check. Whether you seek a post-workout meal or a family-friendly dinner, Flavorful Fajita Stuffed Chicken Delight delivers both nutrition and flavor. With every bite, you fuel your body with essential vitamins and minerals.
How it fits in a healthy lifestyle
Flavorful Fajita Stuffed Chicken Delight fits seamlessly into a balanced diet. For those focusing on high-protein meals, it offers a satisfying option without excess carbs. If you follow a gluten-free lifestyle, this dish naturally meets your needs, especially when paired with a side of quinoa or roasted vegetables.
Heart-healthy eaters will appreciate the lean protein and veggie-packed filling, which align with recommendations for reducing saturated fats. Planning weekly meals? This recipe stores well, making it a practical choice for meal prep. Plus, it pairs perfectly with lighter sides like a crisp salad or steamed greens.
Busy families or fitness enthusiasts will find this dish adaptable. For more inspiration on balancing flavors and nutrition, explore our guide to healthy dinner swaps. Flavorful Fajita Stuffed Chicken Delight proves that eating well doesn’t mean sacrificing taste or convenience.
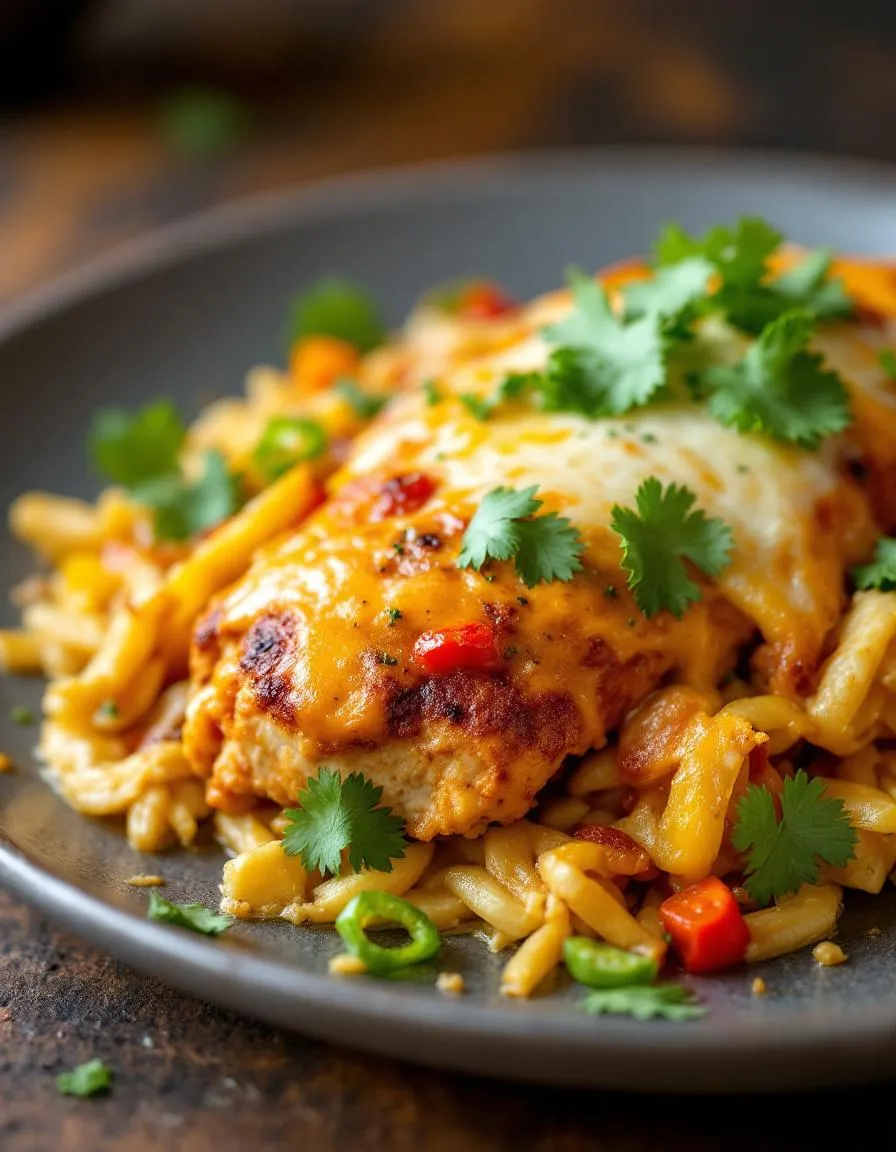
Juicy chicken breasts stuffed with a vibrant fajita-inspired filling, seared to perfection and baked for a delicious meal.
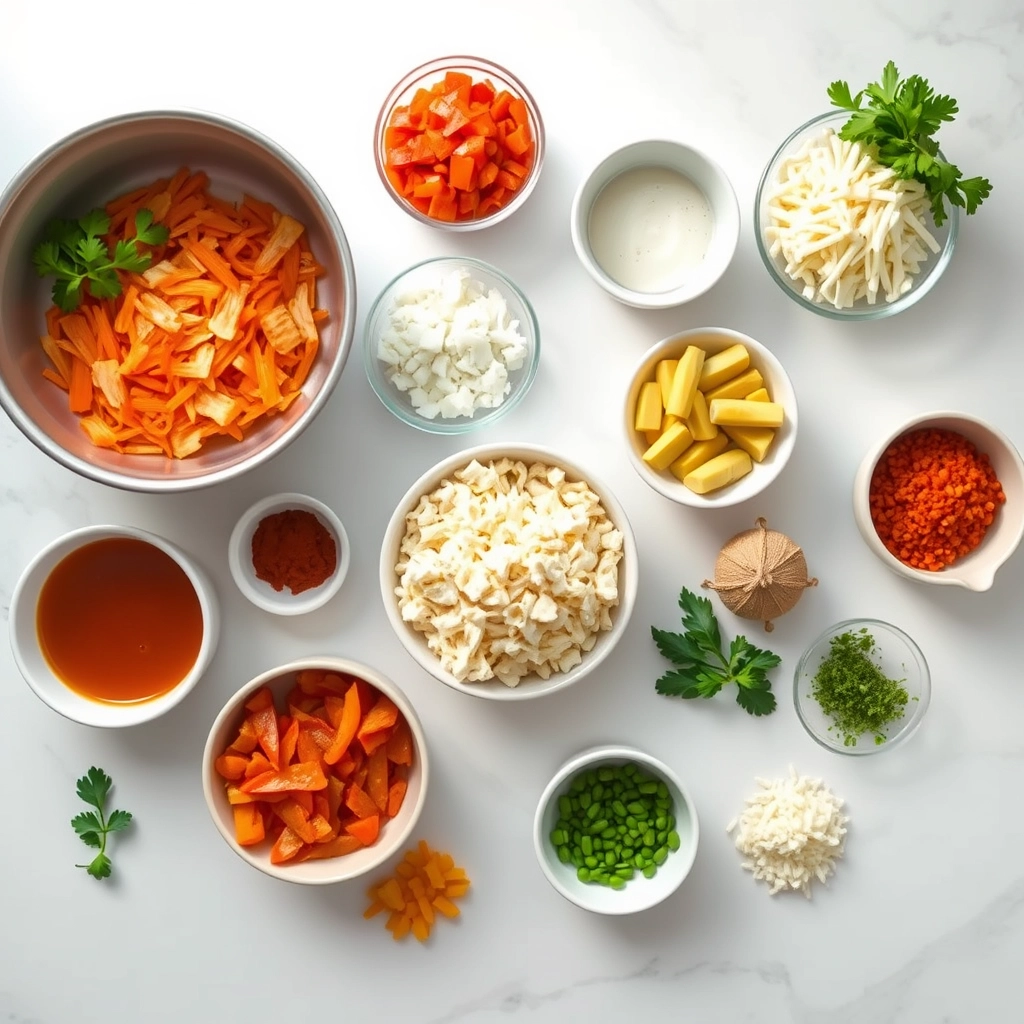
Ingredients
Scale
For the Crust:
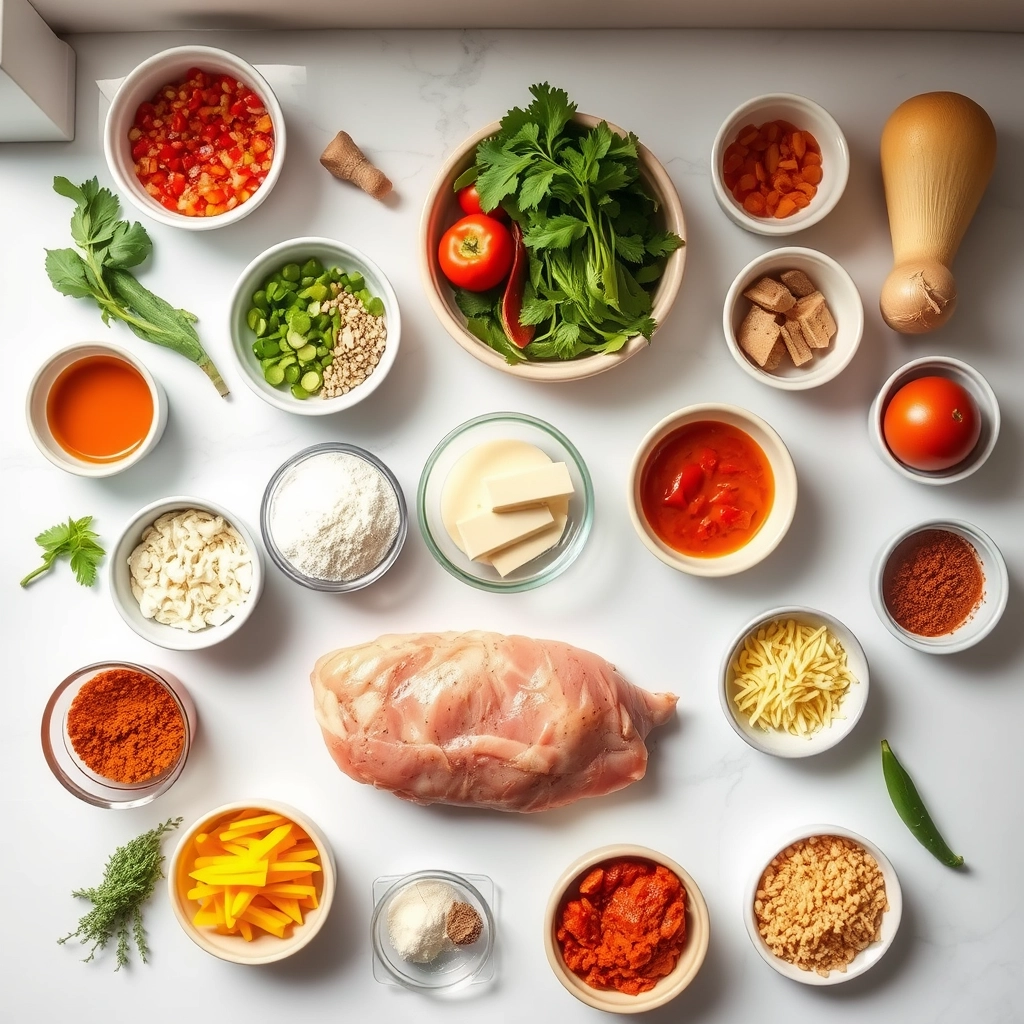
4 boneless, skinless chicken breasts
1 red bell pepper, thinly sliced
1 green bell pepper, thinly sliced
1 small onion, thinly sliced
1 tsp chili powder
1 tsp cumin
1 tsp garlic powder
1/2 tsp paprika
1/2 tsp salt
1/4 tsp black pepper
1 tbsp olive oil
1/2 cup shredded cheddar cheese
Instructions
1. Prepare the Crust:
Preheat oven to 375°F (190°C).
In a skillet, heat olive oil over medium heat. Add bell peppers and onion, sautéing until softened (about 5 minutes). Stir in chili powder, cumin, garlic powder, paprika, salt, and black pepper.
Cut a pocket into each chicken breast, being careful not to cut all the way through. Stuff each breast with the fajita vegetable mixture and cheese.
Sear the stuffed chicken breasts in the same skillet for 2-3 minutes per side until golden brown.
Transfer skillet to the oven and bake for 20-25 minutes until chicken reaches 165°F (74°C) internally.
Notes
You can customize the seasonings to taste.
“`html
="how-to-prepare-this-dish">How to Prepare This Dish
Steps and time-saving tips
Start by preheating your oven to 375°F so it’s ready when you finish prepping the Flavorful Fajita Stuffed Chicken Delight. While it heats, slice a pocket into each chicken breast, but don’t cut all the way through—leave one side intact to hold the filling. Next, whisk together olive oil, lime juice, and fajita seasoning in a small bowl, then brush half of this mixture over the chicken for extra flavor. In another bowl, toss diced bell peppers, onions, and shredded cheese until evenly combined. Stuff this vibrant mix into each chicken pocket, then secure the openings with toothpicks to prevent spills. Drizzle the remaining marinade over the top for a glossy finish. Bake the chicken for 25-30 minutes until the internal temperature hits 165°F. For a time-saving hack, chop the veggies ahead of time or use pre-sliced fajita mix from the store. Let the chicken rest for 5 minutes before slicing to keep the juices locked in. Serve with a side of cilantro lime rice or warm tortillas for a complete meal.
Mistakes I’ve made and learned from
I’ve definitely overstuffed the chicken pockets before, causing the filling to burst out during baking—what a mess! Now I use just enough to fill without overpacking, and toothpicks are my best friends for keeping everything tidy. Another blunder? Skipping the marinade brush on the outside, which left the chicken drier than I wanted. A reader tip from my chicken marinade secrets post saved me: always double-layer the flavor. Oh, and timing is everything—I once pulled the chicken out too early, and it was undercooked in the center. Now I rely on my meat thermometer, a trick I picked up from essential kitchen tools. Trust me, these small fixes make all the difference between good and great.
Flavorful Fajita Stuffed Chicken Delight brings together the bold flavors of Tex-Mex cuisine with the comforting appeal of stuffed chicken. Originally inspired by the sizzling fajitas of Northern Mexico and South Texas, this dish takes a creative twist by rolling those vibrant spices and veggies right into tender chicken breasts. Families along the border often stuff their proteins with local ingredients, but this version adds a modern, fuss-free twist perfect for weeknights.
In Mexico, cooks might
swap bell peppers for roasted poblano chiles or add a sprinkle of queso fresco. Meanwhile, in the American Southwest, you’ll find versions with smoky chipotle mayo or even a splash of lime crema. My grandma, however, always insisted on doubling the garlic and serving it with warm tortillas—because why choose between fajitas and chicken when you can have both? Whether you’re craving a taste of tradition or a quick flavor explosion, Flavorful Fajita Stuffed Chicken Delight bridges the gap.
How it fits in today’s cooking
Today, Flavorful Fajita Stuffed Chicken Delight fits seamlessly into busy lives. Meal preppers love it because it reheats beautifully, while home chefs appreciate how easily it dresses up for dinner parties. Since it’s packed with protein and veggies, it aligns perfectly with modern wellness trends—no sacrifice on flavor needed. For a lighter twist, some swap the cheese for avocado slices or serve it over cilantro-lime cauliflower rice.
This dish also shines during gatherings. Pair it with a refreshing summer berry salad for a bright contrast, or keep it cozy with a side of creamy garlic mashed potatoes. Whether you’re cooking for one or a crowd, Flavorful Fajita Stuffed Chicken Delight proves that vibrant, globally inspired meals belong on any table, any night of the week.
>Taste and Texture
What makes it delicious
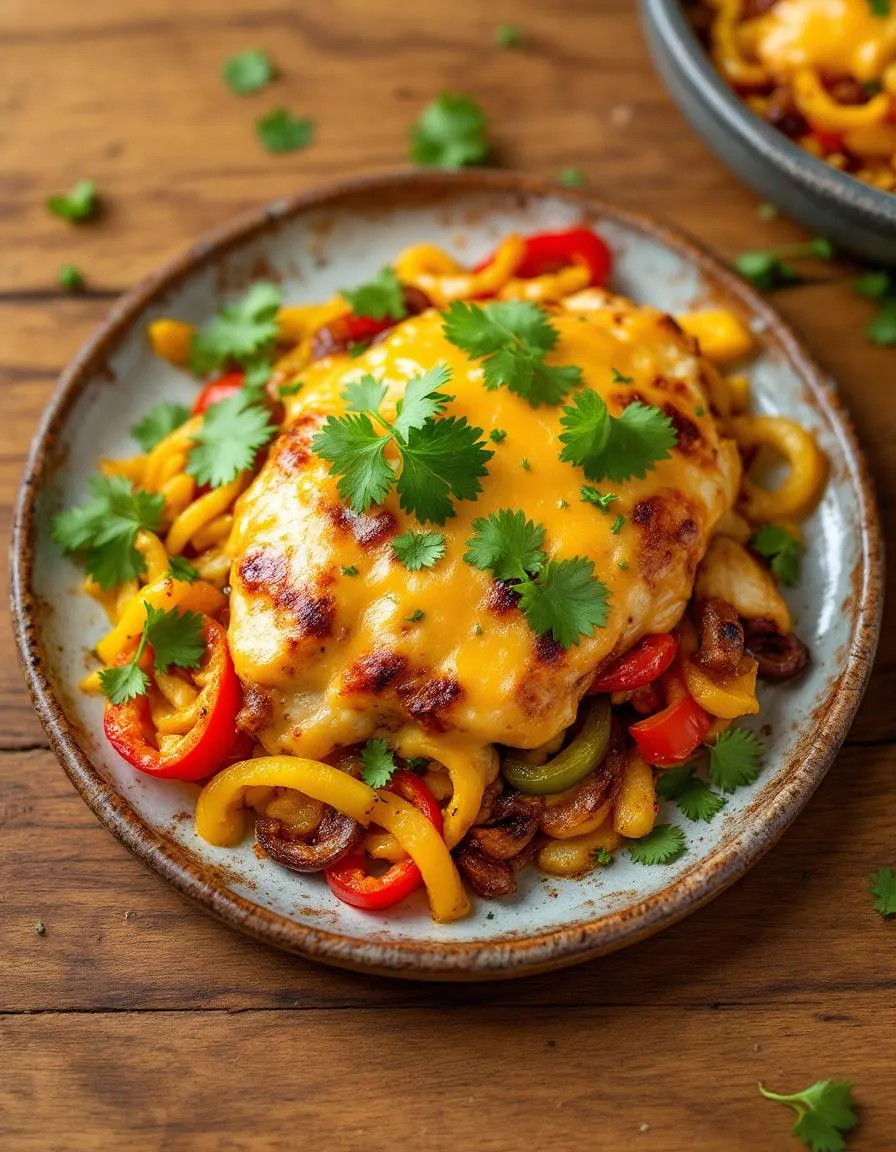
Flavorful Fajita Stuffed Chicken Delight bursts with smoky, savory goodness in every bite. The juicy chicken breast wraps around a vibrant filling of caramelized peppers, onions, and melted cheese, creating a satisfying contrast of tender and crisp textures. Meanwhile, the blend of cumin, paprika, and garlic infuses the dish with a warm, aromatic depth. As you cut into it, the gooey cheese stretches enticingly, while the charred edges add a subtle crunch. Each mouthful delivers a harmony of bold spices, sweet veggies, and rich dairy—making Flavorful Fajita Stuffed Chicken Delight irresistible from the first forkful to the last.
Boosting the flavor
For an extra kick, try swapping the cheese for pepper jack or stirring a dash of chipotle powder into the fajita mix. A drizzle of creamy cilantro lime sauce brightens the dish, while a sprinkle of fresh cilantro adds a pop of color and freshness. If you love heat, top it with pickled jalapeños or serve alongside smoky chipotle mayo for dipping. Whether you tweak the spices or layer on toppings, these small upgrades make the flavors shine even brighter.
Tips for Success
Best practices for results
Always pound the chicken breasts evenly so they cook uniformly and hold the filling securely. For the best flavor, marinate the fajita mixture for at least 20 minutes before stuffing the chicken. Additionally, use toothpicks to seal the edges tightly—this keeps the filling from leaking during baking. Finally, let the Flavorful Fajita Stuffed Chicken Delight rest for 5 minutes after cooking so the juices redistribute perfectly.
Mistakes to avoid
Avoid overstuffing the chicken, as this can cause uneven cooking or bursting. Instead, aim for a thin, even layer of filling so the chicken stays tender. Also, don’t skip searing the chicken before baking—this step locks in moisture and adds a golden crust. For more tips on handling chicken safely, check out our guide on proper chicken prep. If your filling seems too wet, lightly drain excess liquid or pat ingredients dry, as explained in our moisture control guide.
Serving and Pairing Suggestions
How to serve this dish
For a stunning presentation, slice the Flavorful Fajita Stuffed Chicken Delight diagonally to reveal the colorful filling. Arrange the slices on a bed of cilantro-lime rice or a vibrant salad for contrast. Meanwhile, garnish with fresh avocado slices, chopped cilantro, and a drizzle of sour cream to enhance both flavor and visual appeal. This dish shines at casual dinners, yet it also makes a showstopping centerpiece for festive gatherings like Cinco de Mayo or summer barbecues. To elevate the experience, serve it on a warm platter with charred lime wedges for a final zesty touch.
h-it">What goes well with it
Pair the Flavorful Fajita Stuffed Chicken Delight with a crisp mango avocado salad for a refreshing contrast to its bold spices. Alternatively, serve it alongside smoky black beans or cilantro-lime rice to round out the meal. For drinks, a chilled margarita or sparkling agua fresca balances the dish’s richness perfectly. If you’re craving extra heat, try our spicy chipotle sauce for dipping. For dessert, a light Mexican chocolate mousse offers a sweet ending without overpowering the main course.
What ingredients are needed for Flavorful Fajita Stuffed Chicken Delight?
You’ll need boneless chicken breasts, bell peppers, onions, fajita seasoning, cream cheese, shredded cheese, and olive oil. These ingredients combine to create the bold, zesty flavors in Flavorful Fajita Stuffed Chicken Delight. Don’t forget toppings like fresh cilantro or sour cream for serving!
ank-math-faq-item">
How do you keep the chicken moist in Flavorful Fajita Stuffed Chicken Delight?
To ensure juicy chicken, pound the breasts evenly and avoid overcooking—bake at 375°F for 25–30 minutes. The cream cheese and veggie stuffing in Flavorful Fajita Stuffed Chicken Delight also helps lock in moisture. Let it rest for 5 minutes before slicing.
Can I make Flavorful Fajita Stuffed Chicken Delight ahead of time?
Yes! Assemble the stuffed chicken up to 24 hours in advance and refrigerate until ready to bake. For best results, let Flavorful Fajita Stuffed Chicken Delight sit at room temperature for 15 minutes before cooking to ensure even baking.
What sides pair well with Flavorful Fajita Stuffed Chicken Delight?
Serve it with cilantro lime rice, black beans, or a crisp green salad for a complete meal. Flavorful Fajita Stuffed Chicken Delight also pairs perfectly with warm tortillas or roasted veggies for a Tex-Mex twist.
div>
Best Cheesy Baked Fajita Chicken Delight Recipe
Introduction
Craving a meal that’s bursting with flavor yet easy enough for a busy weeknight? Say hello to Cheesy Baked Fajita Chicken Delight, a dish that combines juicy chicken, vibrant peppers, and melty cheese into one irresistible bake. Whether you’re feeding a crowd or just treating yourself, this recipe delivers comfort, excitement, and a touch of Tex-Mex magic in every bite. Plus, it’s a guaranteed way to turn ordinary ingredients into something extraordinary without spending hours in the kitchen.
Cheesy Baked Fajita Chicken Delight is exactly what it sounds like—a hearty, flavor-packed bake that brings together tender chicken breasts, colorful bell peppers, onions, and a generous blanket of gooey cheese. The dish gets its bold personality from classic fajita spices like cumin, chili powder, and paprika, which infuse every layer with warmth and depth. What makes it special? It’s a one-pan wonder that cuts down on cleanup while maximizing taste, making it perfect for both weeknight dinners and weekend gatherings. If you love our Easy Mexican Casseroles, you’ll adore this twist on a familiar favorite.
This recipe fits our blog’s mission: approachable, crowd-pleasing meals that don’t sacrifice flavor for convenience. It’s adaptable, too—swap the protein, adjust the spice level, or pile on extra veggies to make it your own. And if you’re a fan of cheesy, baked dishes, you’ll want to check out our Cheesy Baked Pasta Recipes for more inspiration. Whether you’re a seasoned cook or just starting out, Cheesy Baked Fajita Chicken Delight promises a stress-free cooking experience and a table full of happy eaters.
Why I Love This Recipe
Cheesy Baked Fajita Chicken Delight holds a special place in my kitchen because it’s the ultimate crowd-pleaser. I first made it for a potluck, and within minutes, friends were asking for the recipe. There’s something magical about how the cheese melts into the spiced chicken and veggies, creating a dish that feels indulgent yet balanced. Plus, it reminds me of family taco nights—but with half the effort. Every time I pull it out of the oven, the aroma alone tells me dinner will be a hit. It’s my go-to when I want a meal that feels like a hug on a plate.
Health and Nutrition
Why it’s good for your body
Cheesy Baked Fajita Chicken Delight packs a nutritious punch while satisfying your taste buds. First, the lean chicken breast delivers high-quality protein to support muscle growth and repair. Additionally, the colorful bell peppers provide a hefty dose of vitamin C, which boosts immunity and skin health. Meanwhile, the melted cheese adds calcium for strong bones, making this dish a well-rounded choice.
Moreover, Cheesy Baked Fajita Chicken Delight includes metabolism-friendly spices like cumin and paprika. These not only enhance flavor but also offer anti-inflammatory benefits. Furthermore, the dish avoids heavy frying, so you get all the richness without excess oil. As a result, it’s a lighter yet indulgent option for health-conscious food lovers.
Finally, the fiber from onions and peppers aids digestion and keeps you full longer. Whether you’re fueling up post-workout or enjoying a family dinner, Cheesy Baked Fajita Chicken Delight balances nutrition and comfort. With every bite, you’re treating your body to essential vitamins, minerals, and protein.
How it fits in a healthy lifestyle
Cheesy Baked Fajita Chicken Delight fits seamlessly into a balanced diet. For those focusing on high-protein meals, the chicken and cheese combo helps meet daily goals without unnecessary carbs. If you’re gluten-free, the dish naturally avoids grains, making it a safe and flavorful choice. Even better, the lean proteins and veggies align with heart-healthy eating by keeping saturated fats in check.
Busy weeknights don’t have to derail healthy habits. This recipe comes together quickly, so you can avoid processed takeout. Pair it with a simple salad or roasted veggies for a complete meal. Looking for more high-protein ideas? Check out our protein-packed dinners for inspiration. Or, if you love easy, wholesome recipes, explore our 30-minute meals collection. Cheesy Baked Fajita Chicken Delight proves that eating well doesn’t mean sacrificing flavor or convenience.
A flavorful and cheesy baked chicken dish with fajita-inspired seasonings, perfect for a quick and delicious dinner.
Ingredients
Scale
For the Crust:
4 boneless, skinless chicken breasts
2 tbsp olive oil
1 tbsp fajita seasoning
1 tsp garlic powder
1 tsp onion powder
1 bell pepper, sliced
1 onion, sliced
1 cup shredded cheddar cheese
1/2 cup shredded Monterey Jack cheese
Fresh cilantro for garnish
Instructions
1. Prepare the Crust:
Preheat oven to 375°F (190°C).
In a bowl, mix olive oil, fajita seasoning, garlic powder, and onion powder. Coat chicken breasts with the mixture.
Place chicken in a baking dish and top with sliced bell peppers and onions.
Bake for 25 minutes or until chicken is cooked through.
Remove from oven, sprinkle cheeses on top, and return to bake for 5 more minutes or until cheese is melted.
Garnish with fresh cilantro before serving.
Notes
You can customize the seasonings to taste.
How to Prepare This Dish
Steps and time-saving tips
Start by preheating your oven to 375°F to ensure it’s ready when you need it. While the oven heats, grab a large mixing bowl and whisk together olive oil, lime juice, and fajita seasoning for a zesty marinade. Next, toss your chicken breasts in the marinade, making sure each piece gets fully coated for maximum flavor. Meanwhile, slice bell peppers and onions into thin strips—this not only speeds up cooking but also helps them caramelize beautifully in the oven. Layer the veggies in a baking dish, then place the marinated chicken on top. Cover the dish with foil and bake for 20 minutes to lock in moisture. While the chicken bakes, shred your favorite cheese blend for easy melting later. Remove the foil, sprinkle the cheese over the chicken, and bake uncovered for another 10 minutes until golden and bubbly. For a crispy finish, broil for 2-3 minutes, but watch closely to avoid burning. Let the dish rest for 5 minutes before serving to keep the juices intact. Pair it with warm tortillas or cilantro lime rice for a complete meal. To save time, prep the marinade and chop veggies the night before—your future self will thank you!
and-learned-from">Mistakes I’ve made and learned from
I once rushed the marinating step for Cheesy Baked Fajita Chicken Delight, and the flavor fell flat. Now, I let the chicken soak for at least 30 minutes—or even overnight—for deeper taste. Another blunder? Overcrowding the baking dish, which steamed the veggies instead of roasting them. Spreading everything in a single layer fixed that. If you’ve struggled with dry chicken, try my juicy chicken breast method for foolproof results. And if your cheese browns too fast, tent the dish with foil—it’s a trick I picked up from my cheesy baked dishes guide. Trust me, these small tweaks make all the difference!
Cultural Connection and Variations
Where this recipe comes from
Cheesy Baked Fajita Chicken Delight carries the vibrant spirit of Tex-Mex cuisine, blending bold flavors with comforting textures. While fajitas originally hail from the ranchlands of northern Mexico, this baked version adds a modern twist by layering melty cheese and juicy chicken under a crispy topping. Families in Texas often serve it at gatherings, where the dish becomes a centerpiece for sharing stories and laughter.
Across borders, cooks p
ut their own spin on Cheesy Baked Fajita Chicken Delight. In some Mexican households, they might swap the cheese for queso fresco or add a smoky chipotle kick. Meanwhile, busy parents in the Midwest might simplify the recipe by using pre-cut veggies or store-bought seasoning blends. No matter the variation, the dish always brings people together with its irresistible aroma and crowd-pleasing flavors.
How it fits in today’s cooking
Today, Cheesy Baked Fajita Chicken Delight fits perfectly into our fast-paced lives while still delivering homemade comfort. Meal preppers love it because it reheats beautifully, and busy cooks appreciate how easily it adapts to quick weeknight dinners. Plus, its colorful presentation makes it ideal for festive occasions, from game-day spreads to casual summer potlucks.
Modern twists keep the dish fresh, like using cauliflower rice for a low-carb version or adding a drizzle of homemade sauces for extra flair. Whether you stick to tradition or experiment with new ingredients, Cheesy Baked Fajita Chicken Delight remains a timeless favorite that bridges generations and cuisines.
>Taste and Texture
What makes it delicious
Cheesy Baked Fajita Chicken Delight bursts with bold, smoky flavors and a satisfying mix of textures. First, tender chicken soaks up zesty fajita spices, while melted cheese adds a rich, gooey layer that stretches with every bite. Meanwhile, crisp bell peppers and onions bring a fresh crunch, balancing the dish’s creaminess. The aroma alone—a mix of sizzling garlic, cumin, and bubbling cheese—will make your mouth water. Whether you savor the juicy chicken or the golden, slightly crispy cheese topping, Cheesy Baked Fajita Chicken Delight delivers a fiesta of flavors in every forkful.
Boosting the flavor
For an extra kick, swap Monterey Jack cheese with pepper jack or add a sprinkle of chili powder before baking. A drizzle of creamy cilantro lime sauce brightens the dish, while a side of avocado corn salsa adds refreshing contrast. Alternatively, top with pickled jalapeños for tangy heat or fresh cilantro for a herbal finish. Small tweaks can transform Cheesy Baked Fajita Chicken Delight into your new weeknight favorite.
Tips for Success
Best practices for results
For the best Cheesy Baked Fajita Chicken Delight, always preheat your oven to ensure even cooking. Additionally, slice your chicken and veggies uniformly so everything bakes at the same rate. Use fresh, high-quality cheese for maximum meltiness, and don’t skip the fajita seasoning—it’s key for bold flavor. Finally, let the dish rest for 5 minutes after baking so the cheese sets perfectly.
Mistakes to avoid
One common mistake is overcrowding the baking dish, which leads to steaming instead of browning. Instead, spread the ingredients in a single layer for crisp edges. Another error is under-seasoning—don’t be shy with spices, as they elevate the Cheesy Baked Fajita Chicken Delight. For more seasoning tips, check out our guide on balancing flavors. Also, avoid overbaking the chicken; use a meat thermometer to hit 165°F, as explained in our chicken doneness guide.
Serving and Pairing Suggestions
How to serve this dish
Bring your Cheesy Baked Fajita Chicken Delight to life with vibrant presentation. First, garnish it with fresh cilantro and a squeeze of lime for a pop of color and brightness. For a family-style meal, serve it straight from the skillet with warm tortillas on the side. Alternatively, plate individual portions over cilantro-lime rice for a restaurant-worthy look. This dish shines at casual gatherings, weeknight dinners, or even festive occasions like game day or potlucks. To make it extra inviting, top with sliced avocado or a dollop of cool sour cream just before serving.
h-it">What goes well with it
Pair your Cheesy Baked Fajita Chicken Delight with refreshing sides and drinks for a balanced meal. A crisp, citrusy margarita or an ice-cold Mexican beer cuts through the richness of the cheese beautifully. For sides, try our Avocado Corn Salad, which adds a creamy, crunchy contrast. Alternatively, our Cilantro Lime Rice soaks up the flavorful juices while keeping the meal light. Finally, a smoky chipotle sauce or fresh pico de gallo adds an extra layer of flavor without overpowering the dish.
What ingredients are in Cheesy Baked Fajita Chicken Delight?
Cheesy Baked Fajita Chicken Delight typically includes chicken breasts, bell peppers, onions, fajita seasoning, shredded cheese (like cheddar or Monterey Jack), and a creamy base like sour cream or cream cheese. You can customize it with extras like black beans or jalapeños for extra flavor.
ank-math-faq-item">
How long does it take to bake Cheesy Baked Fajita Chicken Delight?
Cheesy Baked Fajita Chicken Delight usually bakes for 25–30 minutes at 375°F (190°C) until the chicken is cooked through and the cheese is bubbly. For crispier cheese, broil for the last 2–3 minutes.
Can I make Cheesy Baked Fajita Chicken Delight ahead of time?
Yes! Assemble Cheesy Baked Fajita Chicken Delight up to a day in advance, cover, and refrigerate. Add 5–10 minutes to the baking time if cooking straight from the fridge. For best results, add fresh cheese right before baking.
What sides go well with Cheesy Baked Fajita Chicken Delight?
Pair Cheesy Baked Fajita Chicken Delight with cilantro lime rice, warm tortillas, or a fresh avocado salad. For a low-carb option, serve with cauliflower rice or roasted vegetables.
div>
Easy Cheesy Tortilla Quiche Delight Recipe
Introduction
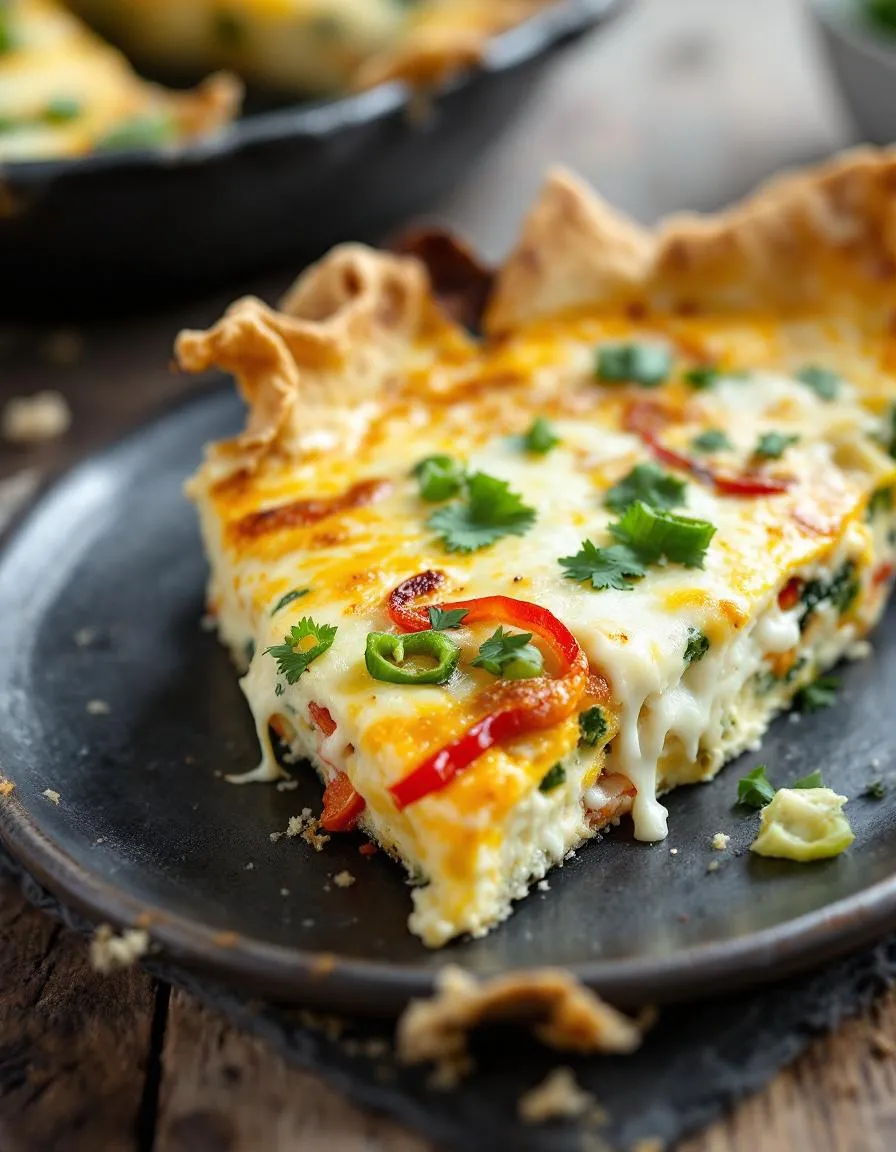
Imagine biting into a warm, golden slice of Cheesy Tortilla Quiche Delight—crunchy tortilla crust, creamy egg filling, and melty cheese all coming together in one irresistible dish. Whether you need a quick breakfast, a satisfying brunch, or a cozy dinner, this recipe delivers comfort and flavor in every bite. Best of all, it’s easy to make and endlessly customizable, so you can whip it up even on your busiest days. Let’s dive into why this dish deserves a spot in your recipe rotation.
Cheesy Tortilla Quiche Delight is a clever twist on classic quiche, swapping the traditional pastry crust for crispy tortillas. Not only does this save time, but it also adds a delightful texture contrast to the velvety egg and cheese filling. This dish matters because it solves a common problem: how to make a hearty, impressive meal without spending hours in the kitchen. Plus, it’s versatile enough to accommodate whatever ingredients you have on hand, from leftover veggies to your favorite cheeses. If you love easy yet crowd-pleasing recipes, you’ll appreciate how this one fits seamlessly into your cooking routine.
Here at Exo Recipes, we celebrate dishes that balance simplicity and flavor, just like our Easy Breakfast Ideas and Comfort Food Favorites. Cheesy Tortilla Quiche Delight embodies that philosophy perfectly. It’s approachable for beginners but delicious enough to impress seasoned cooks. Whether you’re meal prepping for the week or hosting a casual gathering, this recipe adapts to your needs without compromising on taste.
Why I Love This Recipe
Cheesy Tortilla Quiche Delight holds a special place in my heart because it reminds me of lazy Sunday mornings with my family. My mom used to make a similar version when we had leftover tortillas, and the smell of it baking always brought everyone to the table. Now, I love how it brings people together in my own kitchen. It’s the kind of dish that feels like a hug—simple, comforting, and always satisfying. Every time I make it, I’m reminded that the best meals don’t have to be complicated to be memorable.
Health and Nutrition
Why it’s good for your body
Cheesy Tortilla Quiche Delight packs a nutritious punch while satisfying your cravings. First, the eggs provide high-quality protein to keep you full and support muscle repair. Additionally, the cheese delivers calcium for strong bones and a boost of flavor. Moreover, the tortilla adds fiber, which aids digestion and helps stabilize blood sugar.
Beyond its protein and fiber content, Cheesy Tortilla Quiche Delight includes veggies like spinach or bell peppers for extra vitamins. These ingredients contribute antioxidants that fight inflammation. Meanwhile, the dish balances richness with wholesome ingredients, so you enjoy comfort food without guilt. Furthermore, the combination of eggs and dairy offers vitamin D, which supports immunity and mood.
Cheesy Tortilla Quiche Delight also adapts easily to healthier tweaks. For instance, you can use whole-grain tortillas or low-fat cheese for a lighter version. Whether you serve it for breakfast or brunch, this dish fuels your day with lasting energy. Ultimately, it proves that delicious meals can also be nourishing.
How it fits in a healthy lifestyle
Cheesy Tortilla Quiche Delight fits seamlessly into balanced eating habits. If you follow a high-protein diet, the eggs and cheese help you meet your daily goals. For gluten-free needs, simply swap the tortilla for a corn or almond flour alternative. The dish also pairs well with a fresh salad or roasted veggies for added nutrients.
Planning meals ahead? Cheesy Tortilla Quiche Delight stores well in the fridge, making it a smart choice for meal prep. You can even freeze slices for busy mornings. If you love heart-healthy options, try our avocado toast variations to complement this quiche. For more protein-packed ideas, explore our egg muffin recipes. With flexibility and flavor, this dish keeps your diet on track without sacrificing taste.
A delicious and easy-to-make quiche with a tortilla crust, packed with cheese and savory flavors.
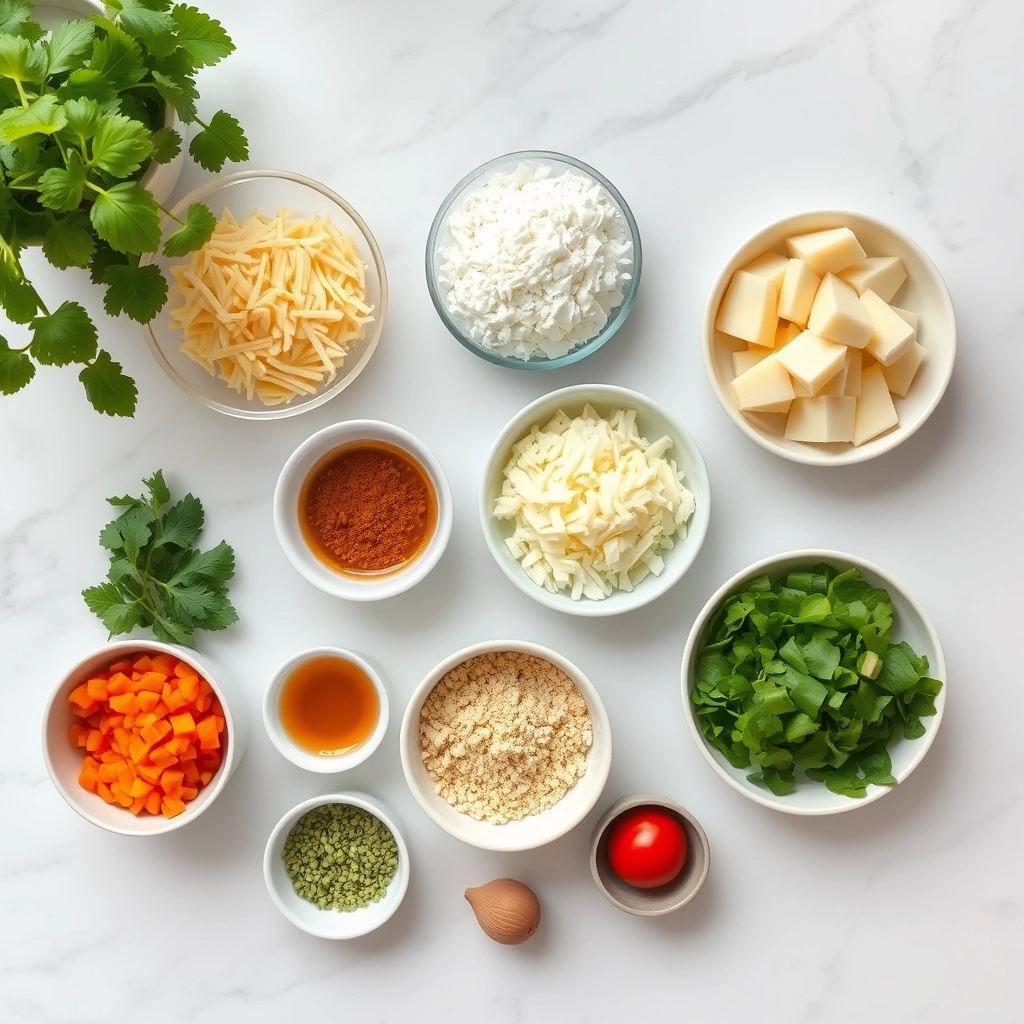
Ingredients
Scale
For the Crust:
2 large flour tortillas
4 large eggs
1 cup shredded cheddar cheese
1/2 cup milk
1/2 cup diced bell peppers
1/4 cup diced onions
1/4 teaspoon salt
1/4 teaspoon black pepper
1/4 teaspoon garlic powder
Instructions
1. Prepare the Crust:
Preheat oven to 375°F (190°C).
Press one tortilla into a greased pie dish to form the crust. Layer half the cheese on top.
In a bowl, whisk eggs, milk, salt, pepper, and garlic powder. Stir in bell peppers and onions.
Pour the egg mixture over the cheese in the pie dish. Top with the remaining cheese.
Place the second tortilla on top, pressing gently to seal the edges.
Bake for 25-30 minutes or until the center is set and the top is golden brown.
Let cool for 5 minutes before slicing and serving.
Notes
You can customize the seasonings to taste.
How to Prepare This Dish
Steps and time-saving tips
Start by preheating your oven to 375°F so it’s ready when you finish prepping the Cheesy Tortilla Quiche Delight. While the oven heats, whisk together the eggs, milk, salt, and pepper in a large bowl until smooth. Then, fold in shredded cheese and diced veggies for extra flavor and texture. Next, layer tortillas in a greased pie dish, slightly overlapping them to create a sturdy crust. Pour the egg mixture over the tortillas, making sure it spreads evenly. For a golden top, sprinkle extra cheese on top before baking. Slide the dish into the oven and bake for 25-30 minutes until the center sets and the edges turn crispy. Meanwhile, chop fresh herbs or prep a simple side salad to serve alongside. To save time, use store-bought shredded cheese and pre-chopped veggies. Let the quiche cool for 5 minutes before slicing—this helps it hold its shape better. Serve warm, and enjoy the creamy, cheesy layers with every bite.
and-learned-from">Mistakes I’ve made and learned from
I’ve learned the hard way that skipping the tortilla pre-bake can lead to a soggy crust. Now, I lightly toast them in the oven for 5 minutes before adding the filling—crispiness guaranteed! Another blunder? Overloading the quiche with too many veggies, which made it watery. After trial and error, I found that sautéing veggies like bell peppers or spinach first removes excess moisture. If you’re new to quiches, check out my guide on perfect quiche crusts for more tips. Also, don’t forget to let it rest before slicing—my first attempt turned into a cheesy scramble because I rushed it. For more on balancing wet and dry ingredients, my egg-based breakfasts post covers the basics. Trust me, these small tweaks make all the difference!
Cultural Connection and Variations
Where this recipe comes from
The Cheesy Tortilla Quiche Delight is a beautiful fusion of Mexican and French culinary traditions. While quiche hails from the Lorraine region of France, the addition of tortillas gives it a Tex-Mex twist. Families in the American Southwest often serve it during brunch gatherings, where it bridges the gap between hearty breakfasts and light lunches. Meanwhile, in Mexico, cooks might swap the traditional pie crust for crispy corn tortillas or layer in extra spices like cumin or chipotle.
In my own kitchen, Chee
sy Tortilla Quiche Delight became a weekend staple after a trip to New Mexico. There, I tasted a version stuffed with roasted green chiles and Monterey Jack cheese. Back home, I tweaked it further, adding a splash of hot sauce for kick. Some European variations skip the tortillas entirely but keep the custardy eggs, proving how adaptable this dish really is. Whether you prefer it spicy or mild, loaded with veggies or extra cheesy, it’s a recipe that invites creativity.
How it fits in today’s cooking
Today, Cheesy Tortilla Quiche Delight fits perfectly into busy lives and modern meal prep routines. Many cooks love it for its make-ahead convenience, just like our easy meal prep ideas suggest. It’s also a star at potlucks and holiday brunches, where its rich flavors and colorful presentation steal the show.
Health-conscious tweaks keep it relevant too. Some bakers use almond flour tortillas or load it with spinach and mushrooms for a lighter twist. Others pair it with fresh salsas or avocado crema, as seen in our healthy brunch swaps. Whether you stick to tradition or experiment, Cheesy Tortilla Quiche Delight remains a crowd-pleaser—proof that comfort food never goes out of style.
>Taste and Texture
What makes it delicious
Cheesy Tortilla Quiche Delight delivers a mouthwatering blend of rich, savory flavors and satisfying textures. The golden, buttery tortilla crust crisps perfectly in the oven, offering a sturdy yet flaky base for the creamy egg filling. Melted cheddar and Monterey Jack cheeses create a gooey, indulgent layer, while diced green chiles add a subtle kick. Each bite balances the fluffy eggs with the slight crunch of caramelized onions and bell peppers. The aroma alone—a mix of toasted tortilla, melted cheese, and smoky paprika—will have everyone gathering around the table. Cheesy Tortilla Quiche Delight is comfort food at its finest, with every ingredient playing a delicious role.
Boosting the flavor
Elevate your Cheesy Tortilla Quiche Delight with a few easy tweaks. For extra heat, mix in pickled jalapeños or a dash of cayenne pepper. Top it with fresh avocado slices or a drizzle of creamy chipotle sauce for a cool contrast. Swap the cheddar for pepper jack cheese to amp up the spice, or fold in crumbled bacon for a smoky twist. Serve it with a side of fresh salsa verde to brighten each bite. Whether you keep it simple or experiment, these small changes make every slice even more irresistible.
Tips for Success
Best practices for results
Always preheat your oven before baking the Cheesy Tortilla Quiche Delight to ensure even cooking. For the best texture, press the tortilla crust firmly into the pan so it crisps up nicely. Additionally, whisk the eggs thoroughly with the cream to create a smooth, fluffy filling. If you want extra flavor, sprinkle fresh herbs like cilantro or chives on top before serving. Finally, let the quiche rest for 5 minutes after baking so it sets perfectly.
Mistakes to avoid
Avoid overfilling the tortilla crust, as this can make the Cheesy Tortilla Quiche Delight soggy. Instead, leave a small border to keep the edges crisp. Also, don’t skip blind baking the crust if you prefer a firmer base—just follow our guide on blind baking perfection for best results. Another common mistake is using cold ingredients straight from the fridge, which can lead to uneven baking. For a smoother process, check out our tips on room temperature ingredients to save time and improve texture.
Serving and Pairing Suggestions
How to serve this dish
Bring out the vibrant flavors of Cheesy Tortilla Quiche Delight by serving it fresh from the oven on a rustic wooden board or colorful ceramic platter. For a brunch crowd, slice it into wedges and garnish with fresh cilantro, diced avocado, or a dollop of sour cream. Meanwhile, holidays call for elegant touches—think edible flowers or a sprinkle of smoked paprika. Since this dish shines at room temperature too, it makes a fantastic addition to potlucks or picnics. Just wrap individual portions in parchment paper for easy handling.
h-it">What goes well with it
Pair Cheesy Tortilla Quiche Delight with a crisp, citrusy salad like our Tangy Mango Avocado Salad to balance the richness. For drinks, a chilled glass of sparkling lemonade or a light Mexican lager enhances the savory notes. If you crave extra heat, try dipping each bite into our Creamy Chipotle Sauce, which adds a smoky kick. Whether you opt for refreshing sides or bold condiments, these pairings elevate every bite.
What makes Cheesy Tortilla Quiche Delight different from regular quiche?
Cheesy Tortilla Quiche Delight stands out because it uses crispy tortillas as the crust instead of traditional pastry, giving it a delicious crunch. The recipe also packs extra cheesy goodness with a blend of melted cheeses, making it a heartier, Tex-Mex-inspired twist on classic quiche.
ank-math-faq-item">
Can I make Cheesy Tortilla Quiche Delight ahead of time?
Yes! Cheesy Tortilla Quiche Delight reheats well—just store it covered in the fridge for up to 3 days. For best results, warm slices in the oven at 350°F for 10-15 minutes to keep the tortilla crust crispy.
What are the best fillings to add to Cheesy Tortilla Quiche Delight?
Popular add-ins for Cheesy Tortilla Quiche Delight include diced bell peppers, sautéed onions, black beans, or cooked chorizo for extra flavor. Stick to about 1 cup of fillings total to avoid making the quiche too dense.
Is Cheesy Tortilla Quiche Delight gluten-free?
Yes, if you use corn tortillas and check that all other ingredients are gluten-free, Cheesy Tortilla Quiche Delight can easily be adapted. Just avoid flour tortillas and ensure any pre-shredded cheeses don’t contain anti-caking agents with gluten.
div>
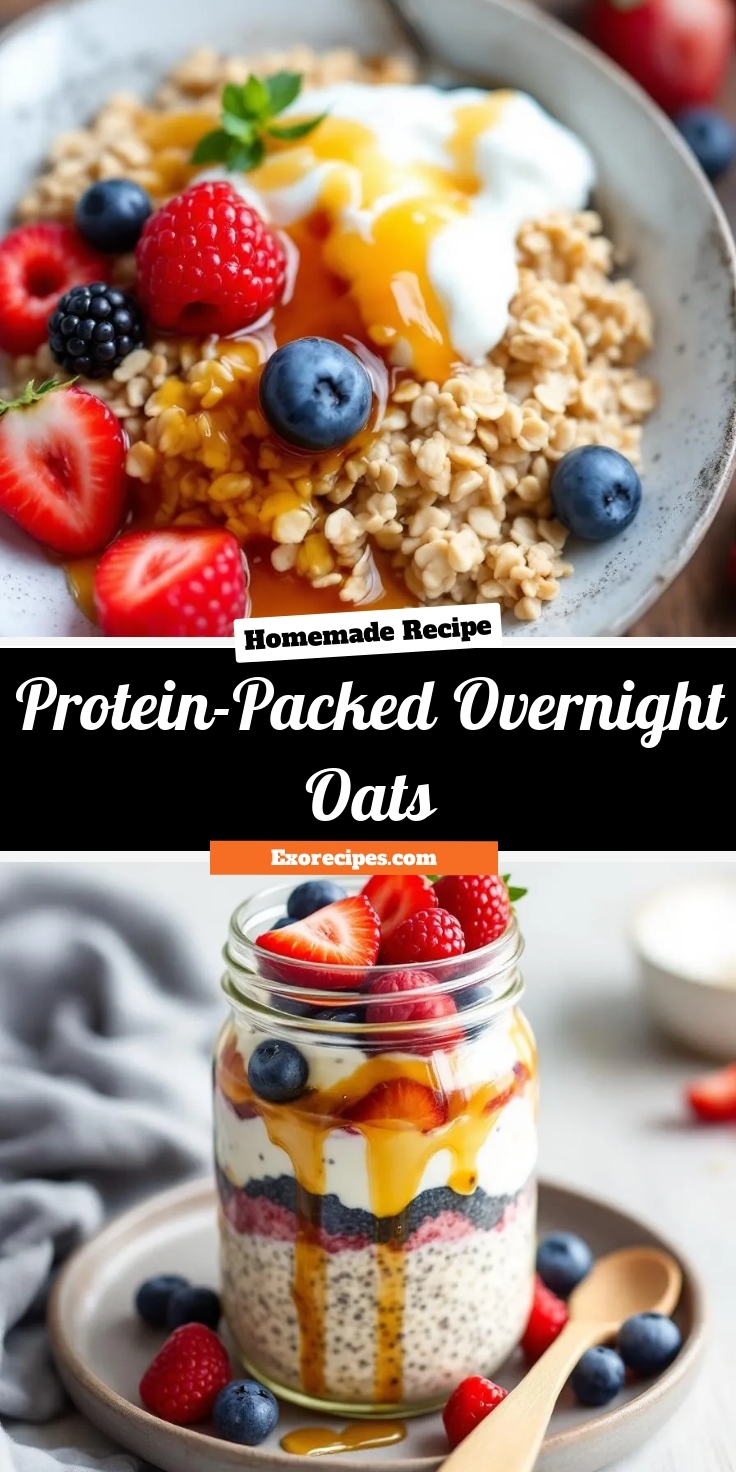
Best Protein-Packed Overnight Oats Recipe
Introduction
Mornings can feel chaotic, but starting your day with a nourishing breakfast doesn’t have to be one more thing to stress about. That’s where Protein-Packed Overnight Oats come in. Imagine waking up to a creamy, satisfying meal that fuels your body and saves you time. Whether you’re a busy parent, a fitness enthusiast, or just someone who loves a no-fuss breakfast, this recipe is a game-changer. Plus, it’s delicious enough to make you look forward to mornings again.
Protein-Packed Overnight Oats combine the convenience of meal prep with the power of high-quality nutrition. Unlike traditional oatmeal, this version sits overnight in your fridge, allowing the oats to soften and absorb flavors while you sleep. What sets it apart is the added protein, often from Greek yogurt, protein powder, or nut butters, making it a balanced meal that keeps you full for hours. For anyone juggling a hectic schedule, this recipe eliminates morning decision fatigue while delivering energy and taste.
At Exo Recipes, we believe food should be both functional and enjoyable. That’s why this recipe aligns perfectly with our mission to share meals that fit real life. If you love easy, nutrient-dense breakfasts, you might also enjoy our Healthy Meal Prep Ideas or our guide to Quick High-Protein Snacks. Protein-Packed Overnight Oats aren’t just a trend—they’re a practical solution for anyone craving a healthier, simpler morning routine.
Why I Love This Recipe
I’ll admit it: I’m not a morning person. But Protein-Packed Overnight Oats changed that for me. The first time I tried them, I was skeptical—could something so simple really taste this good? Now, they’re my go-to breakfast, especially on days when I need sustained energy. I love customizing them with seasonal fruits or a drizzle of honey, and knowing I’m giving my body the fuel it deserves. Most of all, they remind me that taking care of myself doesn’t have to be complicated. Sometimes, the best solutions are the easiest ones.
Health and Nutrition
Why it’s good for your body
Protein-Packed Overnight Oats deliver a powerhouse of nutrients to kickstart your day. First, they provide a steady release of energy thanks to the combination of complex carbs and high-quality protein. This balance helps you stay full longer and avoids mid-morning crashes. Additionally, the oats supply a hearty dose of fiber, which supports digestion and keeps your gut happy.
Moreover, Protein-Packed Overnight Oats often include ingredients like chia seeds or Greek yogurt, boosting their omega-3 and probiotic content. These nutrients promote heart health and strengthen your immune system. Transitioning to a protein-rich breakfast can also aid muscle recovery, especially if you’re active. The antioxidants in oats further fight inflammation, making this meal a smart choice for long-term wellness.
Finally, Protein-Packed Overnight Oats are incredibly versatile. You can customize them with fruits, nuts, or plant-based milk to meet your dietary needs. Whether you’re fueling a workout or simply craving a nutritious meal, this dish delivers both convenience and health benefits in every bite.
How it fits in a healthy lifestyle
Protein-Packed Overnight Oats seamlessly fit into a balanced diet, whether you’re focused on muscle gain, weight management, or clean eating. Their high-protein content makes them ideal for post-workout recovery, while the fiber keeps cravings in check. If you follow a gluten-free diet, simply opt for certified gluten-free oats to enjoy the same benefits without compromise.
For those prioritizing heart health, ingredients like almonds or flaxseeds in Protein-Packed Overnight Oats provide healthy fats that support cholesterol levels. Pair them with our Healthy Breakfast Smoothies for a complete morning routine. Plus, prepping them the night before aligns perfectly with busy schedules, ensuring you never skip a nutritious meal. If you’re exploring more high-protein options, check out our Protein-Packed Snacks for additional ideas to stay energized all day.
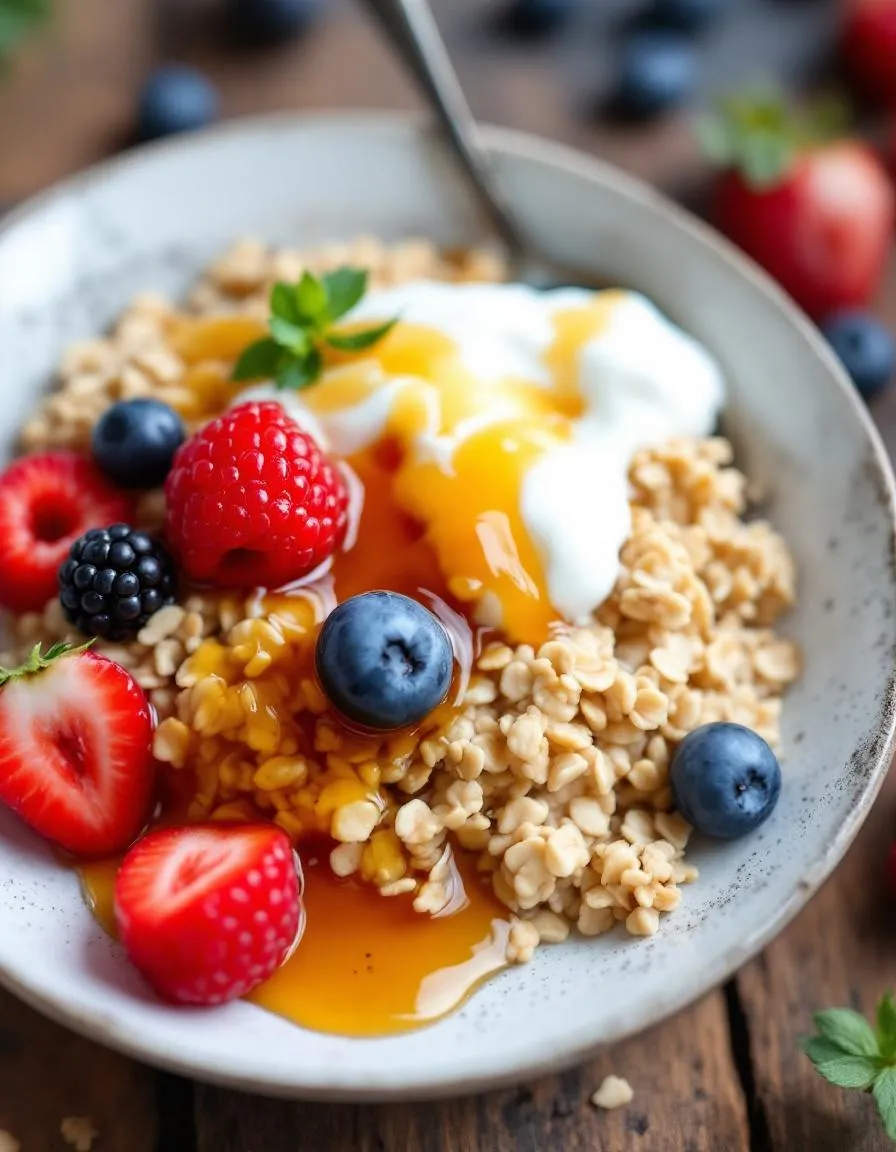
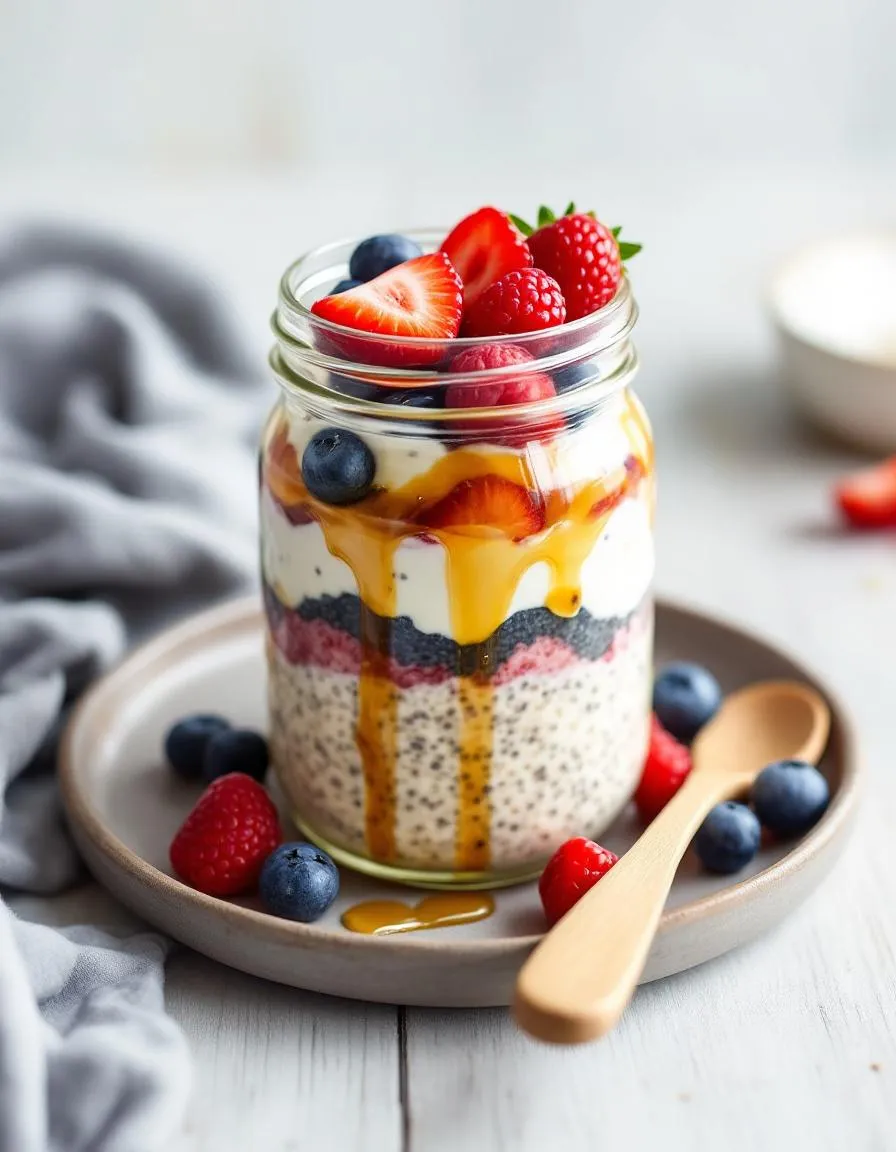
A quick and nutritious breakfast loaded with protein to keep you energized all morning.
Ingredients
Scale
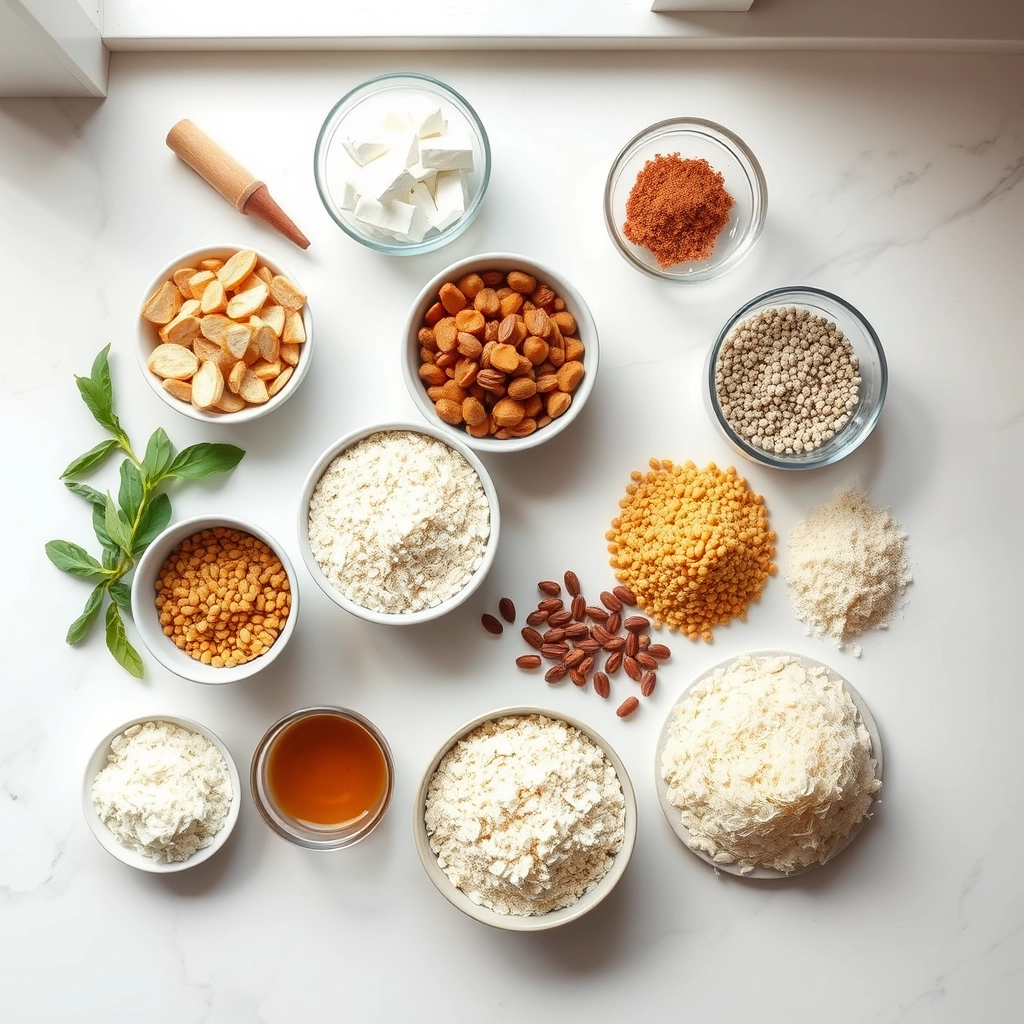
For the Crust:
1/2 cup rolled oats
1 cup almond milk
1 scoop vanilla protein powder
1 tbsp chia seeds
1 tbsp honey
1/4 tsp cinnamon
1/4 cup Greek yogurt
1/4 cup mixed berries
Instructions
1. Prepare the Crust:
In a mason jar or bowl, combine oats, almond milk, protein powder, chia seeds, honey, and cinnamon.
Stir well until all ingredients are fully mixed.
Add Greek yogurt and gently fold into the mixture.
Top with mixed berries.
Cover and refrigerate overnight (or at least 4 hours).
Stir before serving and enjoy cold.
Notes
You can customize the seasonings to taste.
s-dish">How to Prepare This Dish
Steps and time-saving tips
Start by grabbing a large mixing bowl and adding rolled oats, chia seeds, and your favorite protein powder. Whisk these dry ingredients together to ensure even distribution. Next, pour in almond milk or any milk of choice, stirring gently until the mixture thickens slightly. For extra creaminess, fold in Greek yogurt or a dollop of nut butter. Drizzle honey or maple syrup to sweeten, but taste as you go to avoid overdoing it. Once combined, divide the mixture into airtight jars or containers, leaving room for toppings later. Seal the jars and refrigerate overnight—or for at least four hours if you’re short on time. In the morning, give the oats a quick stir and layer on fresh berries, sliced bananas, or crunchy granola. If you prefer a warm version, heat the oats in the microwave for 30 seconds before adding toppings. To save time, prep multiple jars at once for grab-and-go breakfasts all week.
Mistakes I’ve made and learned from
When I first made Protein-Packed Overnight Oats, I used too much protein powder, which left a chalky texture. Now, I measure carefully and blend it with the dry ingredients first. Another blunder? Skipping the chia seeds, which help thicken the mixture. Without them, my oats turned out soupy. If you’re new to overnight oats, check out my guide on perfect overnight oats ratios to avoid these pitfalls. I also learned the hard way that overloading toppings the night before makes them soggy. For crispier textures, add nuts or granola right before eating. For more tips on balancing flavors, my healthy breakfast hacks post covers smart swaps and combos. Trust me, a little trial and error leads to the creamiest, most satisfying results!
n-and-variations">Cultural Connection and Variations
Where this recipe comes from
Protein-Packed Overnight Oats might feel like a modern breakfast trend, but its roots stretch back centuries. People in Northern Europe, especially Scandinavia, have enjoyed soaked oats for generations, often calling it “bircher muesli” or simply “overnight porridge.” Back then, they soaked oats in water or milk to soften them overnight, saving time in the morning. Today, we’ve leveled up this tradition by adding protein-rich ingredients like Greek yogurt, chia seeds, and nut butters.
Meanwhile, in tropical regions like the Caribbean, cooks often blend oats with coconut milk and fresh fruit for a creamier, sweeter twist. Some families in Latin America stir in cinnamon and dulce de leche for a dessert-like version. Even in my own kitchen, Protein-Packed Overnight Oats changes with the seasons—think pumpkin spice in fall or fresh berries in summer. No matter where you go, this dish adapts beautifully to local flavors.
How it fits in today’s cooking
Protein-Packed Overnight Oats fits perfectly into today’s fast-paced, health-conscious lifestyles. Busy parents love it because they can prep it the night before, and fitness enthusiasts rely on its balanced macros. Plus, it’s a fantastic way to use seasonal produce, like the summer peaches or autumn apples you might pick up from a farmers’ market haul.
Modern cooks also get c
reative with swaps, like using almond milk for a dairy-free version or adding collagen peptides for extra protein. Some even turn it into a dessert by layering it with chocolate avocado mousse. Whether you enjoy it as a quick breakfast or a post-workout snack, Protein-Packed Overnight Oats proves that old traditions can stay fresh and exciting.
Taste and Texture
What makes it delicious
Protein-Packed Overnight Oats deliver a lusciously creamy texture that melts in your mouth, thanks to the magic of overnight soaking. The oats soften into a velvety base, while chia seeds add a subtle, satisfying chew. Each bite bursts with rich, nutty flavors from almond butter and a hint of natural sweetness from maple syrup. Meanwhile, vanilla extract and cinnamon weave in warm, fragrant notes that make every spoonful feel like a cozy treat. Protein-Packed Overnight Oats strike the perfect balance between hearty and indulgent, making them a breakfast you’ll crave.
Boosting the flavor
Elevate your Protein-Packed Overnight Oats with easy tweaks that amplify taste and texture. For a tropical twist, swirl in coconut yogurt or top with fresh mango chunks. If you love crunch, sprinkle toasted walnuts or granola for contrast. A dash of cardamom or nutmeg deepens the warmth, while a drizzle of date syrup adds caramel-like richness. Craving something decadent? Stir in dark chocolate chips or a spoonful of almond-cashew butter for extra creaminess. Experiment freely—every addition makes your morning bowl even more irresistible.
Always use rolled oats for Protein-Packed Overnight Oats, as they soften perfectly without turning mushy. Meanwhile, stir your protein powder into the milk first to prevent clumps. For the best texture, chill your mixture for at least six hours, though overnight works even better. Additionally, layer your toppings just before serving to keep them fresh and crunchy. Finally, taste and adjust sweetness after mixing, since protein powders vary in flavor intensity.
Mistakes to avoid
Avoid overpacking your jar, as the oats expand while soaking and need room to absorb liquid. Instead, leave at least an inch of space at the top. Also, skip quick oats—they turn gluey and lack the ideal chew. If your Protein-Packed Overnight Oats taste too thick, simply stir in a splash of milk before eating. For more texture tips, check out our guide on perfecting oat consistency. And if you’re new to protein powders, our protein powder basics explain how to pick the right one.
g-suggestions">Serving and Pairing Suggestions
How to serve this dish
Protein-Packed Overnight Oats shine when you layer them in clear mason jars or elegant glass bowls to showcase their vibrant toppings. For a brunch gathering, arrange individual servings on a wooden tray with fresh berries and a drizzle of honey for a rustic yet polished look. Meanwhile, busy mornings call for grab-and-go containers you can enjoy straight from the fridge. To elevate the visual appeal, sprinkle chia seeds, coconut flakes, or a handful of granola on top just before serving. Whether you’re meal prepping or hosting a holiday brunch, these oats adapt effortlessly to any occasion.
What goes well with it
Pair Protein-Packed Overnight Oats with a creamy vanilla almond milk latte for a balanced breakfast that feels indulgent yet nourishing. The latte’s subtle sweetness complements the oats without overpowering them. Alternatively, serve them alongside a refreshing tropical green smoothie to add a burst of fruity freshness to your meal. For extra protein, top your oats with a spoonful of Greek yogurt or a handful of toasted nuts for crunch. Together, these pairings turn a simple jar of oats into a satisfying, well-rounded feast.
math-faq-block">
How much protein is in protein-packed overnight oats?
Protein-packed overnight oats typically contain 15–25 grams of protein per serving, depending on ingredients like Greek yogurt, protein powder, or nut butter. Adding chia seeds or hemp hearts boosts the protein content further, making it a great breakfast for muscle recovery and energy.
Can I make protein-packed overnight oats without protein powder?
Yes! You can skip protein powder and still create protein-packed overnight oats using Greek yogurt, cottage cheese, or milk alternatives like soy milk. Nut butters, seeds, and even collagen peptides are excellent natural alternatives to increase protein.
Are protein-packed overnight oats good for weight loss?
Protein-packed overnight oats support weight loss by keeping you full longer and stabilizing blood sugar. The high protein and fiber content helps curb cravings, but watch portion sizes and added sugars to keep calories in check.
ank-math-faq-item">
How long do protein-packed overnight oats last in the fridge?
Protein-packed overnight oats stay fresh for up to 5 days when stored in an airtight container. For best texture, give them a stir before eating and add fresh toppings like fruit or nuts just before serving.