The Ultimate Comfort Food: Bacon Ranch Chicken Quesadillas

In the realm of comfort food, there exists a dish that effortlessly bridges the gap between savory indulgence and the simple joy of home cooking: Bacon Ranch Chicken Quesadillas. This culinary delight merges the smoky flavor of bacon, the tender appeal of chicken, and the zesty kick of ranch dressing, all encased in a crisped tortilla with melted cheese. It’s a symphony of flavors that promises satisfaction in every bite.

Origins and Evolution

The quesadilla, at its core, is a testament to culinary simplicity and creativity. Originating from Mexico, it traditionally consists of a tortilla filled with cheese and then grilled. However, the beauty of quesadillas lies in their versatility. Over time, they have evolved beyond their humble beginnings to include a variety of fillings, catering to an array of tastes and preferences.

The Bacon Ranch Chicken Quesadilla is a modern twist on this classic dish, incorporating ingredients beloved in American cuisine. Bacon adds a depth of flavor that is both intense and comforting, while ranch dressing introduces a creamy, tangy element that balances the smokiness of the bacon. Chicken, a staple protein, brings everything together with its mild, versatile taste.

The Ingredients: A Closer Look

The success of this dish hinges on the quality and harmony of its components. Let’s break down the key ingredients:

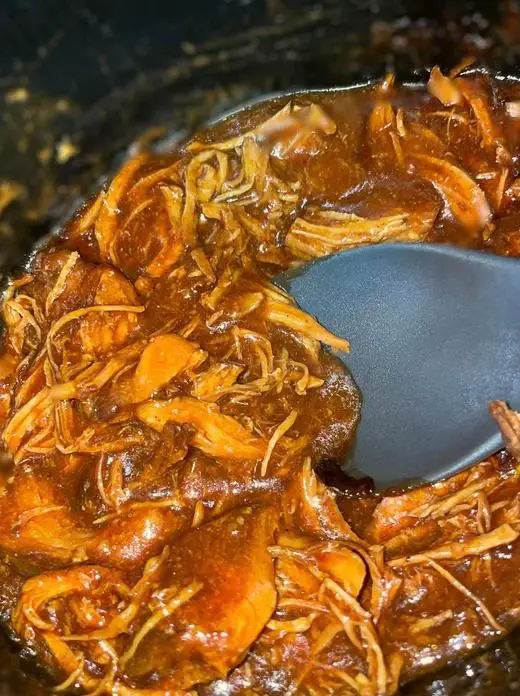
  • Chicken: The choice of chicken is crucial. Breast meat is preferred for its lean texture and ability to absorb the ranch dressing’s flavors. Cooking the chicken to perfection ensures it remains juicy and tender.
  • Bacon: Opt for high-quality bacon that renders down well, providing that essential crispy texture and rich flavor that makes this dish so irresistible.
  • Ranch Dressing: This is the secret sauce, quite literally, that ties all the flavors together. Its creamy consistency and herb-infused taste elevate the quesadilla from good to great.
  • Cheese: A blend of cheddar and Monterey Jack cheeses offers the perfect melt and a balance of sharpness and mildness, complementing the other fillings.
  • Tortillas: Flour tortillas are traditionally used for their soft texture and flexibility, crucial for encasing the generous fillings without breaking.

Cooking Techniques and Tips

Achieving the perfect quesadilla involves more than just assembling ingredients. Here are some tips to elevate your cooking process:

  • Balance Your Fillings: Too much filling can lead to a soggy quesadilla, while too little can be underwhelming. Find the right balance to ensure every bite is harmonious.
  • Cooking Temperature: Medium heat allows the quesadilla to crisp up without burning, giving the cheese inside enough time to melt perfectly.
  • Flipping Technique: Use a wide spatula to flip your quesadilla confidently and securely, ensuring an even cook on both sides.

Serving and Presentation

Presentation plays a significant role in the enjoyment of any dish. Cut your quesadillas into wedges and serve them with a side of ranch dressing for dipping. For a more vibrant plate, accompany your quesadillas with guacamole, salsa, or a fresh salad. The contrast of colors not only makes the dish more appealing but also introduces a variety of textures and flavors.

Customization and Variations

One of the joys of cooking is making a recipe your own. The Bacon Ranch Chicken Quesadilla is no exception. Here are a few ideas for customization:

  • Vegetarian Option: Replace the chicken and bacon with grilled vegetables or a plant-based protein for a vegetarian variant.
  • Spice It Up: Add jalapeños or chili flakes for those who prefer a bit of heat.
  • Different Proteins: Experiment with other proteins like steak or turkey, depending on your preference or dietary needs.

The Cultural Impact of Fusion Cuisine

This dish exemplifies fusion cuisine, where elements from different culinary traditions are combined, often leading to innovative and exciting new dishes. Fusion cuisine breaks down barriers between cultures, fostering a greater appreciation and understanding of diverse culinary traditions. The Bacon Ranch Chicken Quesadilla is a testament to the creativity and ongoing evolution of global cuisine, demonstrating how traditional dishes can be reimagined to reflect contemporary tastes and preferences.

Conclusion

Bacon Ranch Chicken Quesadillas stand as a beloved dish that comforts the soul and delights the palate. Whether served as a quick dinner, a party snack, or a lunchbox favorite, they embody the essence of comfort food with a gourmet twist. This recipe not only offers a delectable eating experience but also invites home cooks to engage in the creative process of cooking, encouraging experimentation and personalization. As we continue to explore and embrace the fusion

FAQs for Bacon Ranch Chicken Quesadillas

1. What type of chicken is best for quesadillas?

For the best texture and flavor, use cooked, shredded chicken breast. It’s lean, easy to prepare, and absorbs the flavors of the bacon and ranch dressing well. You can also use rotisserie chicken as a time-saving alternative.

2. Can I use a different type of cheese?

Absolutely! While a blend of cheddar and Monterey Jack cheese is recommended for its melting qualities and flavor balance, feel free to experiment with other cheeses. Mozzarella, Pepper Jack, or Colby Jack are great options that also melt well and complement the flavors of the dish.

3. How do I prevent my quesadillas from being soggy?

To avoid soggy quesadillas, ensure your fillings, especially the chicken, are not too moist. You can also cook the quesadillas over medium heat to ensure the tortilla gets crispy and the cheese melts without the fillings making the tortilla soggy.

4. Can I add vegetables to my quesadillas?

Yes, adding vegetables can introduce additional flavors and textures. Consider incorporating sautéed bell peppers, onions, or mushrooms. Fresh spinach or diced tomatoes are also excellent choices. Just be sure not to overload the quesadilla to prevent it from falling apart.

5. What are some good sides to serve with quesadillas?

Quesadillas pair well with a variety of sides. For a light option, consider a fresh green salad or a corn salad. For something heartier, try Mexican rice, refried beans, or a simple guacamole and chips.

6. How can I make this recipe healthier?

To make a healthier version of Bacon Ranch Chicken Quesadillas, consider using whole wheat or low-carb tortillas, lean turkey bacon, a lighter cheese blend, and a homemade ranch dressing with Greek yogurt as the base.

7. Can I make these quesadillas ahead of time?

While quesadillas are best enjoyed fresh, you can prepare the fillings ahead of time and store them in the refrigerator. When ready to eat, assemble the quesadillas and cook them to ensure the tortilla is crispy and the cheese is melted.

8. Are these quesadillas freezer-friendly?

Yes, you can freeze the assembled, uncooked quesadillas between sheets of parchment paper and then tightly wrap them in foil. To cook, thaw them in the refrigerator overnight and then follow the cooking instructions. Note that the texture might be slightly different from fresh ones.

9. How do I store leftover quesadillas?

Store any leftovers in an airtight container in the refrigerator for up to 3 days. Reheat in a skillet over medium heat to recrisp the tortilla or briefly in the microwave if you’re in a hurry.

10. Can I make these quesadillas in an oven or air fryer?

Yes, for an oven, place the assembled quesadillas on a baking sheet and bake at 400°F (204°C) for about 10 minutes or until the cheese is melted and the tortilla is crispy. In an air fryer, cook them at 360°F (182°C) for about 5-8 minutes, flipping halfway through, until golden brown and crispy.

Print
clock clock iconcutlery cutlery iconflag flag iconfolder folder iconinstagram instagram iconpinterest pinterest iconfacebook facebook iconprint print iconsquares squares iconheart heart iconheart solid heart solid icon

Bacon ranch chicken quesadillas.

  • Author: Chef Emy

Description

Bacon Ranch Chicken Quesadillas are a delicious and easy-to-make dish perfect for a quick lunch, dinner, or as a savory snack. Here’s how you can prepare them;


Ingredients

  • Cooked chicken breast, shredded or diced
  • Cooked bacon, crumbled
  • Ranch dressing
  • Shredded cheese (a blend of cheddar and Monterey Jack works well)
  • Flour tortillas
  • Optional ingredients for added flavor: diced tomatoes, chopped onions, sliced jalapenos, or any of your favorite quesadilla fillings
  • Butter or oil for cooking

Instructions

  1. Prep the Ingredients:

    • Start by preparing your ingredients. If you haven’t already, cook the chicken breast and shred or dice it into small pieces. Cook the bacon until crispy, then crumble it. You can use leftover chicken and bacon to save time.
  2. Assemble the Quesadillas:

    • Lay out a flour tortilla on a flat surface. On one half of the tortilla, evenly spread a generous amount of shredded cheese.
    • Add the shredded chicken and crumbled bacon on top of the cheese. Drizzle some ranch dressing over the chicken and bacon for that tangy ranch flavor. If using, add your optional ingredients like diced tomatoes or onions for extra crunch and flavor.
    • Sprinkle another layer of cheese over the top to help everything stick together once melted. Fold the tortilla in half, covering the filled side.
  3. Cook the Quesadillas:

    • Heat a skillet or a griddle over medium heat. Add a little butter or oil to prevent sticking.
    • Place the quesadilla in the skillet and cook for about 2-3 minutes on one side, or until golden brown and crispy. Carefully flip it over and cook the other side until the cheese is melted and the tortilla is golden brown.
  4. Serve:

    • Once cooked, remove the quesadilla from the skillet and let it cool for a minute before cutting it into wedges. This short resting time helps the cheese set a bit, making the quesadilla easier to cut and eat.
    • Serve hot with additional ranch dressing on the side for dipping, and if desired, a side of sour cream, guacamole, or salsa.

Notes

Bacon Ranch Chicken Quesadillas offer a satisfying crunch with every bite, combined with the creamy richness of the ranch dressing and the melty cheese. The savory flavors of chicken and bacon make this dish a crowd-pleaser, perfect for any meal or gathering. Enjoy crafting this delightful dish and watch it become a new favorite!

The Heart of Home Cooking: Crockpot Shredded BBQ Chicken

In the realm of comfort food, few dishes resonate as deeply as shredded BBQ chicken. Its rich, smoky flavors and tender texture evoke memories of family gatherings, summer barbecues, and the warmth of sharing a meal. However, traditional barbecue requires time, patience, and often, a grill. Enter the crockpot version of this beloved dish, a modern twist that brings the essence of barbecue into the heart of the home kitchen without the need for constant attention or specialized equipment.

The Slow Cooker Revolution

The invention of the slow cooker was a culinary revolution, offering a set-it-and-forget-it approach to cooking that has since become integral to busy households. This device not only simplifies meal preparation but also enhances the flavors of dishes through hours of low, slow cooking. Crockpot shredded BBQ chicken epitomizes this, as the slow cooking process allows the chicken to become infused with the barbecue sauce, creating a depth of flavor that is both nuanced and robust.

Crafting the Perfect Dish

The beauty of this recipe lies in its simplicity and the quality of its ingredients. Starting with a base of tender chicken, whether breasts or thighs, the recipe builds layers of flavor through a carefully crafted barbecue sauce. This sauce, a blend of tanginess, sweetness, and smokiness, is the soul of the dish. Ingredients like apple cider vinegar and Worcestershire sauce add complexity, while the addition of spices such as garlic and onion powder rounds out the flavor profile.

The slow cooker acts as a cauldron, melding these flavors together as the chicken cooks to perfection. The result is a dish that is not just food, but a story—a narrative of flavors that speak to the tradition of barbecue and the innovation of modern cooking.

Beyond the Recipe: Variations and Serving Suggestions

What sets crockpot shredded BBQ chicken apart is its versatility. This dish can be the star of a casual family dinner, the centerpiece of a gathering, or a delicious filling for sandwiches, tacos, or salads. It invites experimentation, from the choice of barbecue sauce to the addition of ingredients like honey for sweetness or chili for heat.

Serving suggestions for this dish are as varied as its potential variations. It pairs beautifully with classic sides like coleslaw and cornbread or can be a hearty topping for baked potatoes or nachos. Each serving method offers a different experience, allowing the dish to be reinvented time and again.

The Cultural Tapestry of BBQ

Barbecue holds a cherished place in culinary traditions worldwide, a testament to the universal appeal of cooking over fire. Crockpot shredded BBQ chicken taps into this tradition, offering a homage to the communal spirit of barbecue in a form that fits contemporary lifestyles. It’s a dish that brings people together, inviting them to gather around the table and share in the joy of a meal lovingly prepared.

Embracing the Slow Food Movement

In an age where fast food often takes precedence due to convenience, crockpot shredded BBQ chicken stands as a beacon for the slow food movement. This approach to cooking, which emphasizes the use of local ingredients, traditional cooking methods, and the importance of taking time to enjoy food, is embodied in the slow cooker. This dish encourages a return to slower, more mindful cooking, celebrating the process as much as the final product.

Conclusion: A Symphony of Flavors

Crockpot shredded BBQ chicken is more than just a recipe; it’s a culinary journey that celebrates the simplicity of home cooking, the richness of barbecue flavors, and the joy of communal meals. It exemplifies how traditional techniques can be adapted to fit modern life, offering a bridge between the past and present. As this dish continues to delight palates and gather families around the dinner table, it serves as a reminder of the enduring power of good food to comfort, connect, and create lasting memories.

FAQs

1. Can I use frozen chicken in the crockpot for this recipe?

While it’s generally safer to thaw chicken before adding it to the crockpot to ensure even cooking and to maintain a safe cooking temperature, many slow cookers can handle cooking frozen chicken. Just remember it might take a bit longer to cook through. Always check the chicken’s internal temperature with a meat thermometer to ensure it reaches 165°F (74°C) before shredding.

2. How can I thicken the sauce if it’s too runny after cooking?

If you find the sauce too thin after the chicken is cooked, you can remove the chicken and set the crockpot to high. Mix a tablespoon of cornstarch with a little water to create a slurry, then stir it into the sauce. Allow it to cook and thicken for an additional 10-15 minutes before returning the shredded chicken to the pot.

3. What are the best side dishes to serve with shredded BBQ chicken?

Shredded BBQ chicken pairs wonderfully with classic sides such as coleslaw, baked beans, corn on the cob, macaroni and cheese, or a fresh green salad. For a lighter option, serve it over a bed of mixed greens or tucked into lettuce wraps.

4. Can I make this dish ahead of time?

Absolutely! This dish can be made 1-2 days in advance and stored in the refrigerator in an airtight container. In fact, letting the chicken marinate in the BBQ sauce can enhance the flavors. Gently reheat on the stove over low heat or in the microwave before serving.

5. How long can I store leftovers, and how should I reheat them?

Leftover shredded BBQ chicken can be stored in the refrigerator for up to 3-4 days. To reheat, simply warm it on the stove over medium-low heat, adding a splash of water or chicken broth to keep it moist. You can also reheat it in the microwave in 30-second intervals, stirring in between to ensure even heating.

6. Can I use a different type of meat for this recipe?

Yes, this recipe is versatile. While chicken is the most common choice, you can easily substitute it with pork shoulder for pulled pork, or beef brisket for shredded beef. Adjust cooking times accordingly, as these meats may require a longer cooking period to become tender enough to shred.

7. Is it possible to make this recipe with homemade BBQ sauce?

Definitely! Using homemade BBQ sauce not only allows you to customize the flavor to your liking but also to control the ingredients, which is great for those watching their sugar intake or preferring more natural components. Just substitute the store-bought BBQ sauce with your homemade version in equal measure.

8. Can I cook the chicken on high instead of low?

Yes, if you’re short on time, you can cook the chicken on high for 3-4 hours instead of on low for 6-7 hours. However, cooking on low is often recommended for the most tender and flavorful results, as it allows the chicken to slowly absorb all the delicious BBQ flavors.

Print
clock clock iconcutlery cutlery iconflag flag iconfolder folder iconinstagram instagram iconpinterest pinterest iconfacebook facebook iconprint print iconsquares squares iconheart heart iconheart solid heart solid icon

Crockpot shredded bbq chicken

  • Author: Chef Emy

Description

Crockpot shredded BBQ chicken is a versatile and mouthwatering dish that’s incredibly easy to make, perfect for busy weekdays, casual gatherings, or simply when you’re in the mood for a delicious comfort food that requires minimal effort. The slow cooker does most of the work, infusing the chicken with deep barbecue flavors and ensuring it’s tender enough to shred effortlessly. Here’s how you can make it:


Ingredients

Scale
  • 2 to 3 pounds of boneless, skinless chicken breasts or thighs
  • 1 cup barbecue sauce (use your favorite brand or homemade sauce)
  • 1/4 cup apple cider vinegar
  • 1/4 cup brown sugar (optional, depending on the sweetness of your BBQ sauce)
  • 1 tablespoon Worcestershire sauce
  • 1 tablespoon yellow mustard
  • 1/2 teaspoon garlic powder
  • 1/2 teaspoon onion powder
  • Salt and pepper to taste
  • Additional barbecue sauce for serving

Instructions

  1. Prepare the Chicken: Season the chicken breasts or thighs with salt and pepper and place them in the bottom of the crockpot.

  2. Mix the Sauce: In a medium bowl, combine the barbecue sauce, apple cider vinegar, brown sugar (if using), Worcestershire sauce, yellow mustard, garlic powder, and onion powder. Stir until well mixed. Taste the sauce and adjust the seasoning if necessary.

  3. Combine: Pour the sauce mixture over the chicken in the crockpot, ensuring each piece is well coated.

  4. Cook: Cover and cook on low for 6-7 hours or on high for 3-4 hours. The chicken is done when it’s very tender and shreds easily with a fork.

  5. Shred the Chicken: Once the chicken is cooked, remove it from the crockpot and shred it using two forks. This can be done directly in the crockpot if you prefer, but removing it can make the process easier and less messy.

  6. Final Touches: Return the shredded chicken to the crockpot and stir it into the sauce. Let it cook on low for an additional 30 minutes to allow the chicken to soak up the flavors.

  7. Serve: Serve the shredded BBQ chicken on buns for a classic pulled chicken sandwich, over rice, or alongside your favorite sides. You can also offer extra barbecue sauce on the side for those who prefer a saucier dish.


Notes

Tips and Variations:

  • Customize the Sauce: Feel free to tweak the barbecue sauce mixture by adding more vinegar for tanginess, increasing the sugar for sweetness, or incorporating hot sauce for a spicy kick.
  • Adding Vegetables: For a more complex flavor and a complete meal in one pot, add sliced onions or bell peppers on top of the chicken before cooking.
  • Serving Suggestions: Shredded BBQ chicken pairs wonderfully with coleslaw, baked beans, corn on the cob, or potato salad.
  • Storing and Reheating: Leftover shredded BBQ chicken can be stored in an airtight container in the refrigerator for up to 4 days. Reheat gently in the microwave or on the stovetop, adding a little water or additional barbecue sauce to keep it moist.

Reece’s Pieces chocolate chip cookie bars

The Essence of Baking Together

The act of baking with grandchildren opens a gateway to a world where flour dusts the air with promise, and laughter is the sweetest ingredient. In this sacred space, time slows, allowing for the creation of memories that stick longer than the most persistent of cookie doughs. Reece’s Pieces chocolate chip cookie bars, with their uncomplicated preparation and irresistible appeal, serve as a perfect medium for such an experience, offering not just a recipe for cookies but a recipe for connection.

A Recipe Born from Simplicity

At the heart of this baking adventure lies a recipe that marvels with its simplicity. Combining a box of yellow cake mix with melted butter, vanilla, eggs, chocolate chips, and a sprinkle of Reece’s Pieces, this recipe transforms basic pantry staples into a confection that’s both visually appealing and delightfully tasty. The process, devoid of the need for culinary expertise, opens the doors wide to bakers of all ages, making it an ideal choice for an intergenerational baking session.

The Magic of Reece’s Pieces

Reece’s Pieces, with their peanut butter center and candy shell, are not merely an ingredient but a bridge to childhood for many. Their inclusion in the cookie bars brings a touch of nostalgia, reminiscent of movie nights, school lunches, and the simple joys of childhood treats. This element of nostalgia is key, weaving a thread of continuity between generations, as these timeless candies find new life in a modern baking tradition.

Lessons Learned Beyond Baking

The kitchen, with its warmth and alchemy, becomes a classroom of sorts where life lessons are gently imparted. Grandchildren learn the importance of measuring, the patience required for baking, and the joy of seeing ingredients come together to form something new. These lessons extend beyond the culinary, touching on the values of patience, creativity, and the reward of hard work. Baking becomes a metaphor for life, where the right ingredients, when mixed with love and care, can create something wonderful.

The Art of Customization

Encouraging creativity is a crucial component of baking together. This recipe, with its flexibility, invites personal touches and experimentation. Whether it’s adding a different type of candy, incorporating nuts for added texture, or experimenting with various extracts for new flavors, each variation offers an opportunity for grandchildren to express their creativity and make the recipe their own. This act of customization not only enhances the baking experience but also instills a sense of pride and ownership in the young chefs.

Sharing the Fruits of Labor

The culmination of this baking journey is found in the sharing of the cookie bars, a moment that transcends the act of eating. It’s an opportunity to gather, to share stories and laughter, and to enjoy the warmth of family bonds. These cookie bars, rich with the flavors of chocolate, peanut butter, and the sweetness of cake, become a symbol of love, a testament to the joy of shared experiences and the bonds that are strengthened with every bite.

Preserving Traditions and Making New Memories

In this baking experience lies the essence of tradition, the passing down of recipes, techniques, and stories from one generation to the next. Yet, it is also about making new memories, of creating traditions that will be cherished and perhaps passed down to future generations. The act of baking Reece’s Pieces chocolate chip cookie bars becomes a link in the chain of family history, a sweet reminder of the ties that bind.

Conclusion: More Than Just Baking

In conclusion, the process of baking Reece’s Pieces chocolate chip cookie bars with grandchildren is an embodiment of the joys and lessons of life shared across generations. It’s a celebration of simplicity, a journey through flavors and memories, and a testament to the enduring power of family bonds. These cookie bars, delightful in their taste and simplicity, are more than just a treat; they are a medium through which love is expressed, traditions are honored, and memories are made. As these bars cool on the countertop, they stand as a symbol of the warmth and sweetness that life offers, a reminder that sometimes, the simplest recipes yield the richest experiences.

FAQs

1. Can I use a different cake mix flavor?

Absolutely! While yellow cake mix provides a classic, buttery base for these cookie bars, feel free to experiment with other flavors. Chocolate cake mix can double down on the chocolatey goodness, while a white cake mix offers a neutral palette that lets the flavors of the chocolate chips and Reece’s Pieces shine.

2. How do I store these cookie bars?

Reece’s Pieces chocolate chip cookie bars can be stored in an airtight container at room temperature for up to 3-5 days. For longer storage, you can refrigerate them for up to a week. Just make sure they’re brought to room temperature before serving for the best flavor and texture.

3. Can this recipe be made gluten-free?

Yes, to make this recipe gluten-free, simply use a gluten-free cake mix. Many brands offer delicious gluten-free options that work well for baking. Also, ensure that your chocolate chips and Reece’s Pieces are gluten-free, as some brands may contain gluten ingredients or be processed in facilities with gluten.

4. What can I do if I don’t have Reece’s Pieces?

If you don’t have Reece’s Pieces on hand or prefer a different candy, this recipe is versatile enough to accommodate various substitutions. M&M’s, chopped peanut butter cups, or any candy that pairs well with chocolate and peanut butter can be used as a delightful alternative.

5. Is it possible to add nuts to this recipe?

Certainly! Adding chopped nuts like walnuts, pecans, or almonds can introduce an additional layer of texture and flavor to the cookie bars. Just fold in your choice of chopped nuts with the chocolate chips before pressing the batter into the pan.

6. How can I make the cookie bars more moist?

The key to moist cookie bars lies in not overbaking them. Keep a close eye on the bars as they bake and perform a toothpick test a few minutes before the recommended baking time ends. If the toothpick comes out with a few moist crumbs, the bars are done. Additionally, ensure your ingredients, especially the butter, are at room temperature to achieve a more uniform texture.

7. Can these cookie bars be frozen for later use?

Yes, these cookie bars freeze beautifully. Once cooled, cut them into squares and place them in a single layer on a baking sheet to freeze individually. Then, transfer the frozen bars to a freezer-safe bag or container. They can be stored in the freezer for up to 3 months. Thaw at room temperature before serving.

8. How can I ensure the candy stays vibrant and doesn’t melt into the batter?

To keep the Reece’s Pieces vibrant and intact, gently press them onto the top of the batter after it’s already in the pan, rather than mixing them in. The candies will set into the top layer as the bars bake, maintaining their color and shape.

Print
clock clock iconcutlery cutlery iconflag flag iconfolder folder iconinstagram instagram iconpinterest pinterest iconfacebook facebook iconprint print iconsquares squares iconheart heart iconheart solid heart solid icon

Reece’s Pieces chocolate chip cookie bars

  • Author: Chef Emy

Description

Creating special memories with grandchildren is one of life’s most cherished experiences, especially when it involves baking together. Your choice of Reece’s Pieces chocolate chip cookie bars is a delightful treat that combines the ease of preparation with the joy of sharing something sweet and homemade. This recipe is not just about making a dessert; it’s about crafting moments of togetherness and teaching valuable skills and the importance of creativity in the kitchen. Here’s a closer look at how this simple yet indulgent recipe can become a staple for grandparent-grandchild bonding moments.


Ingredients

Scale
  • 1 box of yellow cake mix
  • 1 stick (1/2 cup) melted butter
  • 1 teaspoon vanilla extract
  • 2 large eggs
  • 2 cups chocolate chips
  • 1 small box of Reece’s Pieces

Instructions

  1. Preheat the Oven: Start by preheating your oven to 350°F (175°C), ensuring it’s ready by the time your batter is mixed.

  2. Mix the Batter: In a large mixing bowl, combine the yellow cake mix, melted butter, vanilla extract, and eggs. Stir these ingredients until well blended. The base of your cookie bars will be rich and moist, thanks to the butter and eggs, while the vanilla adds an extra layer of flavor.

  3. Add Chocolate Chips: Fold in the chocolate chips, ensuring they are evenly distributed throughout the batter. The chocolate chips not only add to the sweetness but also create a wonderful texture in every bite.

  4. Prepare the Baking Pan: Grease a 9×13 inch baking pan to prevent sticking. This step is crucial for ensuring your cookie bars come out of the pan easily after baking.

  5. Press the Batter into the Pan: Transfer the batter to your greased pan, spreading and pressing it into an even layer. The consistency will be thicker than a traditional cake batter, more akin to cookie dough.

  6. Add Reece’s Pieces: Sprinkle the Reece’s Pieces over the top of the batter, pressing them in slightly. This not only adds a pop of color but also introduces the iconic peanut butter flavor that pairs so well with chocolate.

  7. Bake: Place the pan in the oven and bake for 20-25 minutes, or until the edges are golden brown. The center should be set but still soft.

  8. Cool and Enjoy: Let the cookie bars cool in the pan before cutting them into squares. This waiting period is essential for the bars to set properly, making them easier to slice.


Notes

Baking with grandchildren offers more than just the end result of a delicious treat. It’s an opportunity to pass down culinary skills, share stories, and instill a love for cooking. Each step of the recipe, from mixing the batter to pressing it into the pan, can be a teaching moment, showing the younger generation the joys of creating something from scratch.

Two-Ingredient Lemon pie filling

Unveiling the Simplicity: Two-Ingredient Lemon Bars

In a world where complexity often garners more attention, there lies a profound beauty in simplicity that can transform the ordinary into the extraordinary. The two-ingredient lemon bars recipe stands as a testament to this principle, showcasing how a minimalist approach can yield delightful results. This dessert, requiring only a can of lemon pie filling and a box of angel food cake mix, invites us into a realm of culinary ease and creativity.

The Genesis of a Minimalist Masterpiece

The origin of the two-ingredient lemon bars is as much about convenience as it is about innovation. In the bustling rhythm of modern life, the quest for quick and easy recipes that don’t compromise on taste has led to the creation of dishes that astonish with their simplicity and flavor. This recipe embodies the essence of minimalist cooking, leveraging the unique properties of angel food cake mix—light, airy, and designed for simplicity—with the zesty, tangy sweetness of lemon pie filling to create a dessert that’s both effortless and elegant.

The Cultural Tapestry of Lemon Desserts

Lemon, with its bright, acidic sharpness, has a long-standing history in culinary traditions around the globe. From the classic French tarte au citron to the traditional British lemon curd, lemon desserts have captivated palates with their perfect balance of sweetness and tartness. The two-ingredient lemon bars fit seamlessly into this rich tapestry, offering a distinctly American take on the beloved flavor profile of lemon desserts. They echo the cultural appreciation for dishes that bring joy and comfort, reminding us of sunny days, picnics in the park, and family gatherings.

A Dive into Culinary Simplicity

The magic of the two-ingredient lemon bars recipe lies in its simplicity. It challenges the conventional wisdom that complexity equals quality in cooking, presenting a counter-narrative that speaks to the power of basic ingredients to create something wonderful. This approach to cooking is not just about ease but also about accessibility, making the joy of baking and dessert-making available to all, regardless of their culinary skill level or experience in the kitchen.

The Art of Making Lemon Bars

Making these lemon bars is an exercise in culinary minimalism. The process begins with the angel food cake mix, a product of culinary ingenuity designed to provide the perfect base with minimal effort. When combined with lemon pie filling, the mix transforms, becoming moist, flavorful, and irresistibly tangy. The resulting bars are a marvel of texture and taste—fluffy yet dense, sweet yet tart, complex yet simple. This alchemy of ingredients highlights the recipe’s appeal, offering a dessert that is both a treat to the senses and a nod to the practicalities of modern cooking.

Beyond the Recipe: Variations and Innovations

While the base recipe for the two-ingredient lemon bars is straightforward, it also serves as a canvas for creativity. Cooks can experiment with additions like a sprinkle of powdered sugar, a dollop of whipped cream, or a garnish of fresh berries to enhance the dessert’s visual appeal and flavor. These variations not only personalize the dish but also encourage culinary experimentation, inviting everyone from novice bakers to seasoned chefs to play and innovate within the framework of simplicity.

The Joy of Sharing

Part of the allure of these lemon bars is their potential for sharing. Food, in its essence, is about community and connection, and these lemon bars, with their crowd-pleasing flavor and ease of preparation, are made to be shared. They embody the joy of cooking for others, of offering a piece of homemade sweetness that can brighten days and bring smiles. Whether served at a casual family dinner, a festive gathering, or given as a thoughtful homemade gift, these lemon bars carry with them the warmth of shared culinary experiences.

Reflections on Simplicity and Satisfaction

In conclusion, the two-ingredient lemon bars are more than just a recipe; they are a reflection on the beauty of simplicity in cooking and the enduring appeal of lemon-flavored desserts. They remind us that great food doesn’t have to be complicated or time-consuming and that the most memorable dishes are often those that speak to the fundamentals of flavor, texture, and joy. As we savor these lemon bars, let us celebrate the simplicity that brings us together, the creativity that inspires us, and the flavors that linger long in our memories, making each bite a testament to the simple pleasures of life.

FAQs

1. Can I use a different type of pie filling?

Yes, you can use different types of pie filling to create variations of this recipe. While lemon pie filling gives these bars their classic tangy flavor, using cherry, blueberry, or apple pie filling can offer a new twist on the original recipe, allowing you to enjoy a different flavor profile with the same ease of preparation.

2. Is it necessary to grease the pan before adding the mixture?

While angel food cake mix typically does not stick much, lightly greasing the pan or using parchment paper can help ensure that the bars come out easily after baking. This step is especially helpful if you’re unsure about the non-stick properties of your baking pan.

3. Can I make these lemon bars gluten-free?

Yes, to make gluten-free lemon bars, use a gluten-free angel food cake mix. These are available at many grocery stores or online. Be sure to also check that your lemon pie filling is gluten-free. This small adjustment can make the recipe suitable for those with gluten sensitivities or celiac disease.

4. How should I store the leftover lemon bars?

Leftover lemon bars should be stored in an airtight container in the refrigerator. They can last up to 5 days when stored properly. For best taste, let them come to room temperature before serving, or enjoy them cold straight from the fridge.

5. Can I add toppings to these lemon bars?

Absolutely! While delicious on their own, these lemon bars can be enhanced with various toppings. Consider dusting them with powdered sugar, spreading a thin layer of whipped cream on top, or garnishing with fresh lemon zest or slices before serving. These additions can add both flavor and visual appeal.

6. Can this recipe be doubled for a larger crowd?

Yes, this recipe can easily be doubled to accommodate more servings. Simply use two cans of lemon pie filling and two boxes of angel food cake mix, and bake in a larger pan or two separate pans. Adjust the baking time slightly if needed, checking for doneness to ensure the bars are cooked through.

7. How do I know when the lemon bars are done baking?

The lemon bars are done when the top is golden brown, and the edges start to pull away slightly from the sides of the pan. You can also insert a toothpick into the center of the bars; if it comes out clean or with a few crumbs, the bars are ready.

8. Can these lemon bars be frozen?

Yes, these lemon bars can be frozen. Place the cooled bars on a baking sheet and freeze until solid. Then, transfer them to a freezer-safe container or bag. They can be frozen for up to 3 months. Thaw in the refrigerator or at room temperature before serving.

Print
clock clock iconcutlery cutlery iconflag flag iconfolder folder iconinstagram instagram iconpinterest pinterest iconfacebook facebook iconprint print iconsquares squares iconheart heart iconheart solid heart solid icon

Lemon pie filling

  • Author: Chef Emy

Description

Two-ingredient lemon bars offer an incredibly simple and delicious dessert option that combines the airy texture of angel food cake with the zesty flavor of lemon pie filling. This recipe is perfect for anyone looking for a quick and easy treat that doesn’t skimp on flavor. Here’s how to make these delightful lemon bars:


Ingredients

Scale
  • 1 can (about 15 to 22 ounces) lemon pie filling
  • 1 box (about 16 ounces) angel food cake mix (ensure it’s the kind that only requires water)

Instructions

  1. Preheat Your Oven: Start by preheating your oven to the temperature specified on the angel food cake mix box, usually around 350°F (175°C). This ensures your oven is ready to go once your batter is mixed.

  2. Prepare the Baking Pan: Lightly grease a 9×13 inch baking pan, or line it with parchment paper for easier removal and cleanup. Angel food cake can stick, so don’t skip this step!

  3. Mix the Ingredients: In a large mixing bowl, combine the dry angel food cake mix and the can of lemon pie filling. Stir the mixture until well blended. The batter will be fluffy and a little sticky due to the nature of the angel food cake mix. There’s no need to add water, eggs, or any other ingredients – the lemon pie filling provides all the moisture and flavor needed.

  4. Bake the Lemon Bars: Pour the batter into your prepared baking pan, smoothing the top with a spatula. Bake in the preheated oven for the time specified on the cake mix box, usually around 20-30 minutes. You’ll know it’s done when the top is golden brown and the edges start to pull away from the sides of the pan.

  5. Cool and Serve: Allow the lemon bars to cool completely in the pan on a wire rack. Once cooled, you can cut them into squares or bars. For a finishing touch, consider sifting powdered sugar over the top for added sweetness and a professional look.

  6. Storage: Store leftover lemon bars in an airtight container at room temperature for up to a few days. For longer storage, you can refrigerate them, especially in warmer climates.


Notes

  • Do Not Overmix: When combining the pie filling and cake mix, mix just until the ingredients are blended. Overmixing can deflate the batter, affecting the texture of your lemon bars.
  • Check for Doneness: Angel food cakes are known for their light, fluffy texture. To ensure your lemon bars are perfectly baked, insert a toothpick into the center. If it comes out clean, they’re ready to come out of the oven.
  • Customize Your Toppings: While these lemon bars are delicious on their own, feel free to add a personal touch with toppings. Fresh berries, whipped cream, or a lemon glaze can add extra flavor and make your dessert even more special.

Boil Tri colored pasta

Creating an engaging and comprehensive article about a tri-colored pasta salad recipe, enhanced with the zest of Olive Garden Italian dressing and a medley of fresh vegetables, presents a wonderful opportunity to explore not just the recipe itself but the broader context in which such a dish comes to life. This vibrant salad, with its blend of colors, textures, and flavors, serves as a perfect canvas to discuss the joy of summer cooking, the art of salad-making, and the cultural tapestry that Italian cuisine weaves into the global culinary landscape.

The Essence of Pasta Salad

At its core, pasta salad is a celebration of simplicity and flavor. It’s a dish that speaks the language of summer: bright, effervescent, and endlessly adaptable. The tri-colored pasta, with its hues of green, red, and yellow, doesn’t just add a visual pop to the dish; it invites us into a world where food is as much about art as it is about sustenance. Each color, derived from natural ingredients like spinach, tomato, and turmeric, carries with it a hint of the flavors and nutrients embedded within.

A Symphony of Ingredients

The true beauty of this pasta salad lies in its symphony of ingredients. Black olives, with their earthy depth, contrast the sweet, juicy burst of cherry tomatoes. The sharp bite of purple onion cuts through the richness, while the fresh, crisp cucumber adds a cool, hydrating crunch. This medley, when combined with the robust, herb-infused Olive Garden Italian dressing, transforms into a dish that is both cohesive and complex, where each bite offers a new flavor profile to savor.

More Than Just a Meal

However, to view this pasta salad merely as a meal would be to overlook its broader significance. It is a testament to the power of cooking to bring people together, to turn a collection of ingredients into a shared experience that transcends cultural and personal boundaries. Whether served at a family reunion, a neighborhood potluck, or a quiet dinner at home, this pasta salad becomes a medium for connection, a way for individuals to express care, creativity, and community.

The Cultural Tapestry of Italian Cuisine

Incorporating Olive Garden Italian dressing into the recipe also opens a window into the fascinating world of Italian cuisine and its global influence. Italian cooking is characterized by its regional diversity, the freshness of its ingredients, and its emphasis on simplicity. By bringing a taste of Italian flavor to the salad through the dressing, the dish becomes a nod to Italy’s culinary heritage, making the global local and the local global.

The Art of Salad-Making

Making this pasta salad is an exercise in balance and intuition. It requires an understanding of how flavors and textures work together, of how the creamy tanginess of the dressing can enhance the natural sweetness of the vegetables without overpowering them. It’s about adjusting and tasting, adding a little more of this or a little less of that, until everything sings in harmony. This process is not just culinary; it’s deeply personal, a reflection of the maker’s tastes, experiences, and the love they pour into their cooking.

A Canvas for Creativity

Moreover, the recipe serves as a canvas for creativity. It invites experimentation, encouraging cooks to add their own twist—be it a sprinkle of feta cheese for saltiness, a handful of arugula for peppery bite, or some grilled chicken for protein. Each variation not only alters the flavor profile but also the story the salad tells, making it a reflection of the individual who prepares it.

FAQs

1. Can I substitute the Olive Garden Italian dressing with another dressing?

Absolutely! While Olive Garden Italian dressing adds a specific flavor profile beloved by many, you can certainly use any Italian dressing of your choice. For a homemade touch, consider making your own vinaigrette with olive oil, vinegar, a pinch of garlic, Dijon mustard, salt, pepper, and Italian herbs.

2. What other pasta shapes can I use for this salad?

Tri-colored rotini is popular for its ability to hold dressing in its spirals, but you’re not limited to this choice. Other great options include farfalle (bowtie pasta), penne, and fusilli. The key is to choose pasta that has nooks and crannies for the dressing and small diced veggies to cling to.

3. How can I make this pasta salad gluten-free?

Easily substitute the tri-colored pasta with your favorite gluten-free pasta. Many brands offer gluten-free options in shapes similar to rotini, which work just as well for this salad. Ensure that the pasta is cooked al dente to maintain its structure in the salad.

4. Can this pasta salad be made vegan?

Yes, to make this pasta salad vegan, simply ensure that the Italian dressing you choose is vegan (many store-bought Italian dressings are). Also, check that your pasta does not contain any egg or other animal products, as some colored pastas might.

5. How long can I store this pasta salad in the refrigerator?

This pasta salad can be stored in an airtight container in the refrigerator for up to 3-5 days. The flavors often meld and improve with a little time, making it a great make-ahead dish for events. However, if you prefer the vegetables to be crisp, consider adding them a few hours before serving.

6. Is it possible to add protein to this salad?

Certainly! Grilled chicken, shrimp, or even chunks of mozzarella cheese can add a protein boost to this salad, making it a more filling meal. If you’re looking for plant-based protein options, chickpeas or white beans are excellent choices.

7. Can I serve this pasta salad as a main dish?

Yes, this pasta salad is versatile enough to be served as a hearty main dish, especially if you choose to add protein. It’s filling, flavorful, and balanced, making it perfect for a light lunch or dinner. Pair it with some crusty bread for a complete meal.

8. How can I keep the pasta from sticking together after cooling?

To prevent the pasta from sticking, ensure you rinse it thoroughly under cold water after cooking. This not only stops the cooking process but also removes the excess starch. Tossing the cooled pasta with a little bit of the dressing before adding the rest of the ingredients can also help keep it from sticking.

9. What are some other vegetables I can add to this salad?

This pasta salad is incredibly adaptable. Consider adding artichoke hearts, bell peppers, spinach, zucchini, or roasted red peppers for additional flavor and texture. The more colorful, the better!

10. Can I make this salad ahead of time for a party?

Absolutely! In fact, making this salad a day ahead can enhance its flavors as the ingredients meld together in the fridge. If you’re preparing it ahead of time, you might want to reserve some dressing to toss with the salad before serving, as the pasta can absorb the dressing as it sits.

Conclusion

In essence, the tri-colored pasta salad with Olive Garden Italian dressing is more than just a dish; it’s a journey through flavors, a celebration of summer, and a homage to the simplicity and richness of Italian cuisine. It underscores the joy of cooking and the pleasure of sharing, reminding us that the best meals are those made with care and savored with loved ones. As this salad graces tables and delights palates, it carries with it the stories, traditions, and connections that make cooking such a profoundly human act.

Print
clock clock iconcutlery cutlery iconflag flag iconfolder folder iconinstagram instagram iconpinterest pinterest iconfacebook facebook iconprint print iconsquares squares iconheart heart iconheart solid heart solid icon

Boil Tri colored pasta

  • Author: Chef Emy

Description

The pasta salad recipe you’ve described is a vibrant and flavorful dish that’s perfect for any occasion, from summer picnics to potluck dinners. It combines the colorful appeal of tri-colored pasta with the fresh tastes of vegetables and the zesty kick of Olive Garden Italian dressing. This easy-to-make salad is not only delicious but also visually appealing, making it a hit at any gathering. Here’s a detailed guide on how to prepare it:


Ingredients

Scale
  • 1 pound tri-colored rotini pasta
  • 1 can sliced black olives, drained
  • 1 cup cherry tomatoes, diced
  • 1/2 purple onion, thinly sliced
  • 1 cucumber, chopped
  • 1/2 bottle of Olive Garden Italian dressing (about 8 ounces)

Instructions

  1. Cook the Pasta:

    • Bring a large pot of salted water to a boil. Add the tri-colored pasta and cook according to the package instructions, until al dente. Avoid overcooking to maintain the pasta’s texture.
  2. Cool the Pasta:

    • Once cooked, drain the pasta in a colander. Rinse the pasta under cold running water to stop the cooking process and cool it down quickly. This step is crucial for maintaining the pasta’s firm texture and ensuring it doesn’t become mushy in the salad.
  3. Prepare the Vegetables:

    • While the pasta is cooling, prepare the vegetables. Drain the sliced black olives, dice the cherry tomatoes, thinly slice the purple onion, and chop the cucumber. The combination of these vegetables not only adds a burst of color to the salad but also introduces a variety of textures and flavors.
  4. Mix the Salad:

    • In a large mixing bowl, combine the cooled pasta, drained black olives, diced cherry tomatoes, sliced purple onion, and chopped cucumber. Pour half a bottle of Olive Garden Italian dressing over the pasta and vegetables. The dressing’s herbs and spices will infuse the salad with a bold, Italian flavor.
  5. Toss Well:

    • Toss the ingredients together until everything is evenly coated with the dressing. This step ensures that each bite of the salad is flavorful.
  6. Chill and Serve:

    • Cover the bowl with plastic wrap and refrigerate the pasta salad for at least 1 hour before serving. This chilling time allows the flavors to meld together and the salad to be served cold, enhancing its refreshing qualities.
  7. Serving Suggestions:

    • Before serving, give the salad a quick stir to redistribute the dressing and ingredients. Taste and adjust the seasoning if necessary, adding more dressing if the salad seems dry. The pasta salad can be served as a side dish or a light main course, perfect for hot summer days.

Notes

This tri-colored pasta salad recipe is not only easy to prepare but also adaptable. Feel free to add other ingredients like crumbled feta cheese, sliced pepperoncini, or grilled chicken strips to tailor the salad to your taste preferences. Its versatility, combined with the convenience of using store-bought dressing, makes this pasta salad a go-to recipe for any home cook looking for a quick, satisfying dish that’s sure to please a crowd.