A moist, tender blueberry bread made in one bowl with simple pantry ingredients. Packed with juicy blueberries and ready for the oven in minutes! Perfect for breakfast, snacking, or dessert.
Ingredients
Scale
¾ cup sugar
½ cup butter
2 eggs
1 cup milk
2 cups flour
2 teaspoon baking powder
1 ½ cups blueberries fresh or frozen
Instructions
In a large bowl, cream together the butter and sugar until smooth.
Add the eggs and milk and mix until combined.
Stir in the flour and baking powder just until combined. Do not overmix.
Gently fold in the blueberries.
Pour batter into greased loaf or mini loaf pans, filling about full.
Bake at 350°F for 70 minutes (large loaf) or 35 minutes (mini loaves), until a toothpick inserted in the center comes out clean.
Let cool slightly before removing from the pan and slicing.
Notes
Notes Frozen blueberries can be added straight from the freezer. Toss with a little flour before folding in to help prevent sinking and color bleeding. Batter will be thick, this helps keep the blueberries evenly distributed.
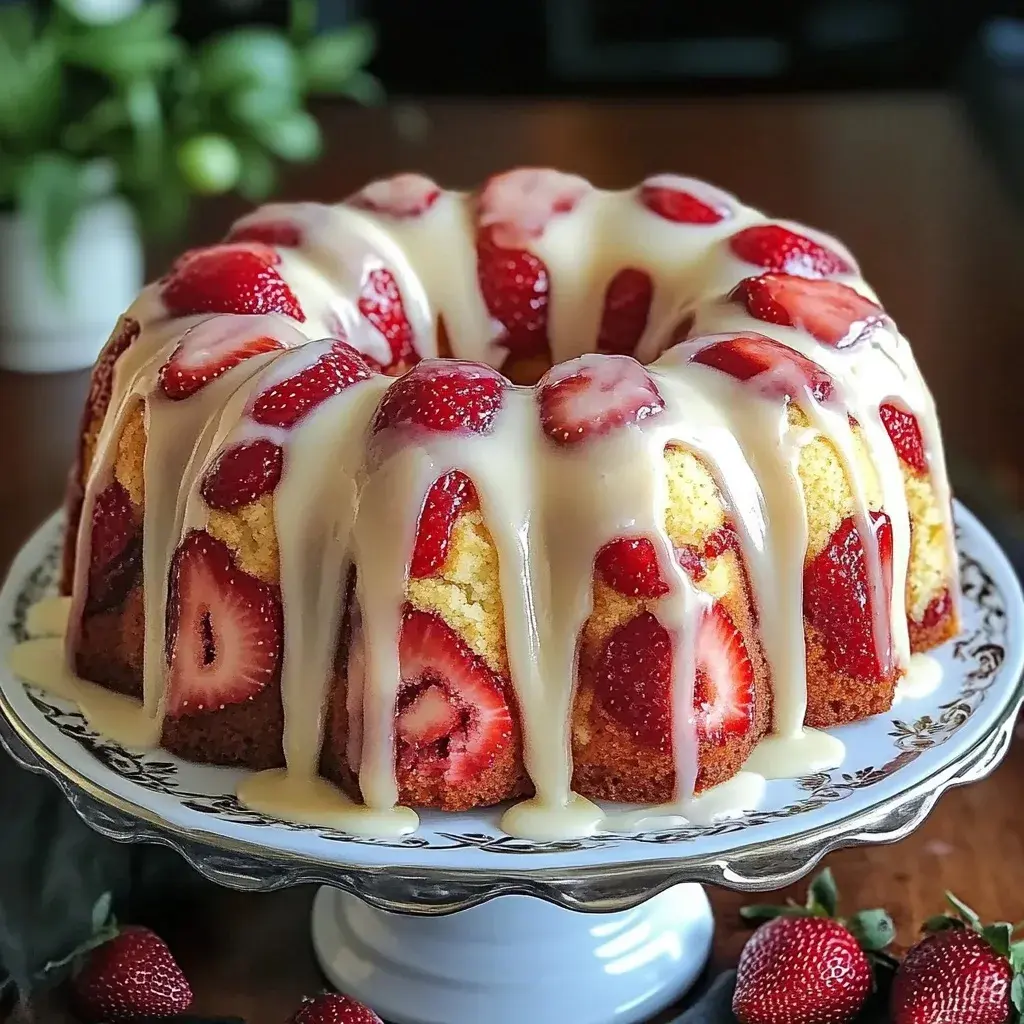
Looking for the perfect dessert? This strawberry cream cheese pound cake blends tangy cream cheese and sweet strawberries into a soft, luscious cake everyone will adore.
A rich, buttery strawberry cream cheese pound cake loaded with fresh strawberries and finished with a fruity vanilla glaze. This luscious dessert is soft, moist, and perfect for brunches, celebrations, or sweet cravings any day of the week.
Ingredients
Scale
For the cake:
1 ½ cups unsalted butter, softened
1 (8 oz) block cream cheese, softened
2 ½ cups granulated sugar
6 large eggs, room temperature
1 tablespoon vanilla extract
3 cups all-purpose flour
½ teaspoon baking powder
½ teaspoon salt
1 ½ cups fresh strawberries, finely chopped and lightly dusted with 1 tablespoon flour
For the glaze (optional):
1 cup powdered sugar
1 to 2 tablespoons milk
½ teaspoon vanilla extract
2 tablespoons strawberry puree (optional, for flavor and color)
Instructions
Notes
Prep Time: 20 minutes
Cook Time: 7585 minutes
Cooling Time: 1 hour
Total Time: About 2 hours
Servings: 12 slices
Storage: Room temp 3 days, fridge 1 week, freezer 2 months
Optional Glaze: Strawberry purée adds extra color and flavor
Pro Tip: Always use room temperature butter and cream cheese for smooth blending
Strawberry rolls are the perfect way to start your morning. Pillowy soft dough, filled with homemade strawberry jam, then drizzled with a tangy lemon cream cheese icing that seeps into every crevice.
Ingredients
Scale
1 cup Whole milk, warmed, 105°-110°
2 1/4 tsp Active dry yeast
1/4 tsp Sugar, to activate the yeast
6 tbsp Unsalted butter, melted
2 large Eggs, room temperature
1/2 cup White granulated sugar
4 cups All purpose flour, spooned and leveled. If too sticky add a couple extra tablespoons at a time
1 tsp Salt
Instructions
In a bowl, stir together warm milk, yeast and 1/4 tsp sugar. Let stand until bubbly, about 10 minutes.
In a bowl of stand mixer, add eggs, melted butter and yeast mixture.
Next, add the flour, sugar and salt to the wet ingredients. Using a dough hook attachment, mix on low speed until dough begins to form. Then, increase speed to medium and knead for 5 minutes.
As the dough is kneading, spray a large bowl with nonstick spray. Place the dough inside the bowl. Then, cover and let rise in a warm place until doubled in size, about 1 hour.
In a saucepan, combine strawberries, sugar and lemon juice. Cook until the mixture begins to simmer. Use a potato masher to help mash the berries as they cook.
Stir together water and cornstarch to create slurry. Pour into the strawberries and cook for 2-3 minutes until the mixture is very thick. Refrigerate until completely cool.
Place the dough onto a lightly floured surface and roll dough into a 14×18 rectangle, about ¼" thick. Make sure the long side (18-inch) is closest to you.
Using an offset spatula, spread an even layer of jam all the way to the edges of the dough.
Using a pizza cutter, cut dough into 12 (1 1/2-inch) strips. Then, take each strip and roll away from you. Carefully place rolls into a lightly greased 9×13 pan.
Loosely cover and let rise in a warm spot until doubled in size.
Preheat oven to 350°. Bake rolls for 25-30 minutes until golden brown.
In a bowl, add cream cheese, butter, powdered sugar and lemon zest. Using a hand held mixer, beat until smooth. Stir in milk and mix until combined.
Then, spoon onto warm rolls and spread with an offset spatula.
Notes
Notes Properly measure your flour. Never use a measuring cup to scoop your flour. Instead, fluff your flour with a spoon and then spoon the flour into your measuring cup. Use the back of a knife to scrape off the excess.
Did you know that over 70% of people crave a sweet treat after dinner, yet nearly half feel guilty about reaching for processed snacks? This is where the magic of homemade Chocolate-Covered Pineapple Bites comes in. These irresistible morsels are the perfect answer to that universal craving, combining the vibrant, sun-ripened tang of fresh pineapple with the luxurious, velvety embrace of smooth chocolate. They are more than just a dessert; they are a bite-sized escape to a tropical paradise, a delightful contrast of textures and flavors that feels both indulgent and surprisingly fresh. Whether you’re looking for a quick party pleaser, a thoughtful homemade gift, or a simple way to satisfy your sweet tooth with a fruit-forward twist, this recipe is your golden ticket. Let’s dive into creating these sweet and tangy treats that are sure to become a new favorite.
Ingredients List
Gathering high-quality ingredients is the first step to ensuring your Chocolate-Covered Pineapple Bites are a spectacular success. Here’s what you’ll need:
1 large, ripe pineapple: The star of the show. Look for one that yields slightly to pressure and smells sweet at the base. The flesh should be a vibrant golden-yellow, juicy, and fragrant.
8 oz (about 225g) high-quality chocolate: You can use dark (70% for intense flavor), semi-sweet, or milk chocolate based on your preference. I recommend using chocolate bars or couverture chocolate for a smoother melt and superior snap. Substitution: Chocolate chips work in a pinch, but they often contain stabilizers that can make the coating less fluid.
1 tablespoon coconut oil or refined coconut oil: This secret ingredient thins the chocolate slightly, making it easier to dip and giving the finished product a beautiful, glossy sheen.
Optional Toppings for Decorating:
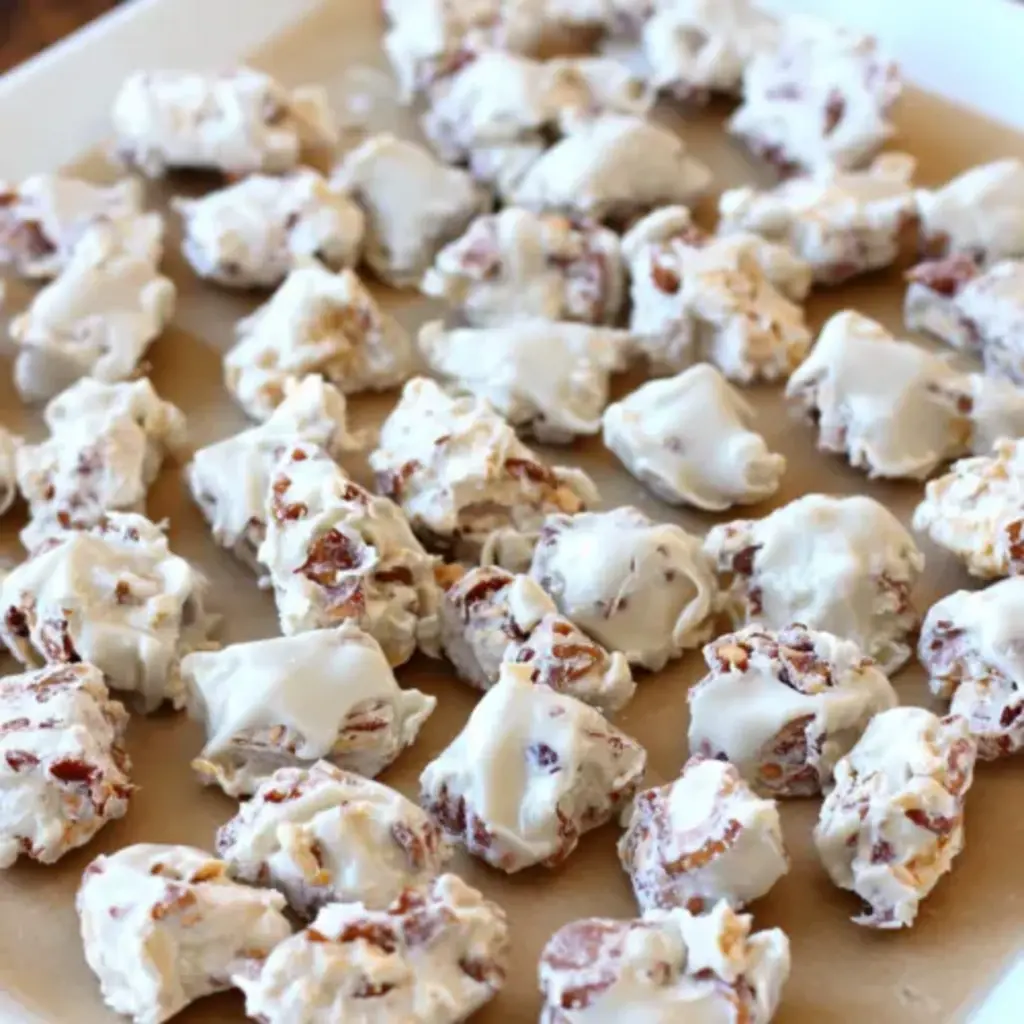
Finely chopped nuts: Toasted almonds, pecans, or pistachios add a wonderful crunch and nutty aroma.
Shredded coconut: Toasted or untoasted, for a classic tropical pairing.
Sea salt flakes: A tiny sprinkle enhances all the flavors and creates a sophisticated sweet-salty profile.
Freeze-dried fruit powder: Raspberry or strawberry powder adds a pop of color and tangy fruitiness.
Sprinkles or cacao nibs: For a fun, colorful, or crunchy finish.
Timing
Prep Time20 minutes
Cook Time5 minutes (melting)
Total Time45 minutes (includes setting)
Servings24-30 bites
Compared to many baked desserts that can take hours, these Chocolate-Covered Pineapple Bites are remarkably quick. The active prep time is under 30 minutes, with most of the “work” being the relaxing, hands-on fun of dipping and decorating. The setting time is passive, allowing you to clean up or prepare other dishes. This efficiency makes it an ideal last-minute dessert that looks and tastes like you spent far more time in the kitchen.
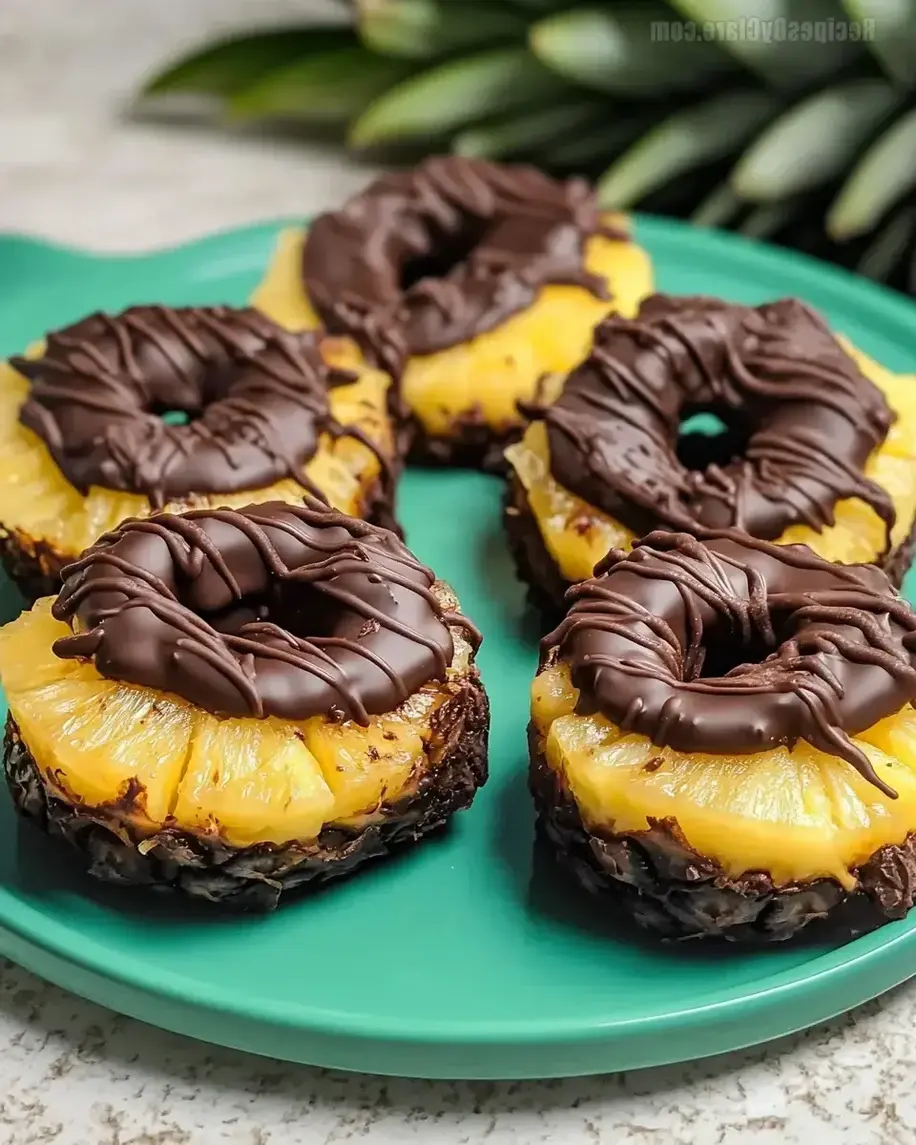
Juicy pineapple pieces dipped in rich, glossy chocolate and decorated with nuts and coconut—a simple yet stunning treat.
Step-by-Step Instructions
Step 1: Prepare the Pineapple
First, let’s tackle the pineapple. Using a sharp chef’s knife, slice off the crown and the base. Stand the pineapple upright and carefully slice away the tough, spiky skin, following the fruit’s curve to minimize waste. Now, look for the small brown “eyes” and remove them with the tip of your knife or a specialized pineapple corer. Slice the peeled pineapple into 1-inch thick rounds. Lay each round flat and cut it into bite-sized chunks, roughly 1-inch cubes. I find this size perfect for a satisfying two-bite experience. Place all the pineapple chunks on a baking sheet lined with several layers of paper towels. Gently pat the tops dry with more paper towels. This step is crucial—excess moisture is the enemy of smooth chocolate coating and will cause it to seize or not adhere properly.
Step 2: Melt the Chocolate
While the pineapple dries, melt your chocolate. Chop your chocolate bar into small, uniform pieces if it’s not already in chip form. This ensures even melting. You can use a double boiler: place the chocolate and coconut oil in a heatproof bowl set over a pot of gently simmering water, making sure the bottom of the bowl doesn’t touch the water. Stir constantly with a silicone spatula until just melted and smooth. Alternatively, microwave in 20-second bursts at 50% power, stirring well between each burst. Be patient and avoid overheating, as chocolate burns easily. Once melted, remove from heat. The mixture should be fluid and glossy.
Step 3: Dip and Decorate
Line a clean baking sheet with parchment or a silicone mat. Have your toppings ready in small bowls. Now for the fun part! Using a fork, a dipping tool, or even toothpicks, spear a dry pineapple chunk. Dip it into the melted chocolate, swirling to coat about two-thirds of the piece. Let the excess chocolate drip back into the bowl for a moment. Then, gently place the dipped piece onto the prepared sheet. Immediately, while the chocolate is still wet, sprinkle with your chosen toppings. Work in small batches to prevent the chocolate from setting before you can add decorations.
Step 4: Set and Serve
Once all your pineapple bites are beautifully coated and decorated, transfer the entire baking sheet to the refrigerator. Let them chill for at least 20-25 minutes, or until the chocolate is completely firm and has a satisfying snap when you gently tap it. This chilling step not only sets the chocolate but also makes the pineapple extra refreshing. Arrange the set bites on a serving platter and enjoy immediately for the best texture contrast between the cool, juicy fruit and the crisp chocolate shell.
Nutritional Information
(Per serving, based on 1 bite using dark chocolate and no extra toppings)
Calories: ~45 kcal
Total Fat: 2.5g
Saturated Fat: 1.5g
Carbohydrates: 6g
Fiber: 1g
Sugar: 4g (natural from pineapple and chocolate)
Protein: 0.5g
These bites offer a source of vitamin C from the pineapple and antioxidants from dark chocolate, making them a more nutrient-dense choice than many traditional candies.
Healthier Alternatives
Want to lighten up this treat without sacrificing flavor? Try these simple swaps:
Chocolate: Use 100% cacao chocolate sweetened with a touch of monk fruit or stevia. Alternatively, opt for a high-quality dark chocolate (85% or higher) for intense flavor with less sugar.
Oil: Skip the coconut oil if you prefer a thicker coating, or use just ½ teaspoon.
Pineapple: For a lower-sugar option, try using slightly less ripe pineapple or mix in other fruits like strawberries or mango for variety.
Toppings: Focus on nutrient-rich toppings like crushed cacao nibs, hemp seeds, or a light dusting of cinnamon instead of sugary sprinkles.
Serving Suggestions
These versatile bites shine in many settings. Serve them as a light dessert after a spicy meal like curry or fajitas—the pineapple helps cleanse the palate. Arrange them on a platter with other chocolate-dipped fruits for a stunning dessert board at your next gathering. They also make a wonderful addition to a brunch spread, paired with coffee or mimosas. For a special touch, package them in small cellophane bags tied with ribbon as edible party favors or gifts.
Common Mistakes
Not Drying the Pineapple: This is the #1 reason for chocolate not sticking. Pat, pat, pat until no moisture remains.
Overheating the Chocolate: Burnt chocolate is grainy and unusable. Melt slowly and gently.
Using Cold Pineapple: If the fruit is too cold from the fridge, it can cause the chocolate to set too quickly and thickly, resulting in a clumpy coating. Use fruit at a cool room temperature.
Skipping the Coconut Oil: While optional, it greatly improves the dipping consistency and final shine.
Storing Tips
Store your Chocolate-Covered Pineapple Bites in a single layer in an airtight container in the refrigerator. They are best enjoyed within 2-3 days. The pineapple will slowly release moisture over time, which can cause the chocolate to soften and lose its snap. For longer storage, you can freeze them on a parchment-lined sheet until solid, then transfer to a freezer bag. They will keep for up to 1 month. Thaw in the refrigerator for about 30 minutes before serving. Do not store at room temperature, as the chocolate will melt and the fruit may spoil.
Conclusion
Creating these Chocolate-Covered Pineapple Bites is a joyful, simple process that yields incredibly delicious results. They perfectly capture the balance of sweet and tangy, creamy and juicy, making them a universally loved treat. I hope this guide empowers you to make them with confidence and creativity. Remember, cooking is an adventure—don’t be afraid to experiment with different chocolates and toppings to make this recipe your own.
Did you try this recipe? What was your favorite topping combination? Share your creations, tips, and photos in the comments below—I love hearing from you! Don’t forget to pin this recipe to your dessert board and share it with a friend who needs a little tropical sweetness in their life.
Frequently Asked Questions (FAQs)
Can I use canned pineapple?
You can, but it’s not ideal. Canned pineapple is often too soft and soaked in syrup, making it very difficult to dry thoroughly. If you must use it, choose pineapple packed in its own juice (not heavy syrup), drain extremely well, and pat dry aggressively. Fresh pineapple is highly recommended for texture and flavor.
Why did my chocolate get thick and clumpy?
This is called “seizing,” and it usually happens if a tiny amount of water or steam gets into the melting chocolate, or if the chocolate is overheated. To fix it, you can try stirring in a teaspoon of warm coconut oil or vegetable oil (not butter, as it contains