There’s something magical about the aroma of a freshly baked Mixed Berry Pie Recipe wafting through the kitchen. Whether it’s a summer gathering or a cozy winter dessert, this pie brings people together with its burst of juicy berries and buttery crust. If you’ve ever craved a dessert that feels like a warm hug, you’re in the right place. Today, we’re diving into a foolproof Mixed Berry Pie Recipe that balances sweetness, tartness, and nostalgia in every bite.
Mixed Berry Pie Recipe is a timeless classic that celebrates the best of seasonal fruits. It combines strawberries, blueberries, raspberries, and blackberries into a vibrant filling, all nestled in a flaky, golden crust. What makes this recipe special is its versatility. You can use fresh or frozen berries, making it a year-round favorite. Moreover, it’s a crowd-pleaser that fits any occasion, from holiday feasts to casual weeknight treats. If you love desserts that are both rustic and elegant, this pie delivers. For more inspiration, check out our guide to baking perfect pies or explore our summer desserts collection.
Why I Love This Recipe
This Mixed Berry Pie Recipe holds a special place in my heart because it reminds me of my grandmother’s kitchen. She taught me how to fold the crust just right, ensuring it stayed tender and crisp. Every time I bake it, I remember her laughter and the way she’d sneak an extra handful of berries into the filling. It’s more than a dessert. It’s a connection to family, tradition, and the simple joy of sharing something made with love.
Health and Nutrition
Why it’s good for your body
Mixed Berry Pie Recipe packs a powerful punch of nutrients while satisfying your sweet tooth. First, berries like blueberries, strawberries, and raspberries deliver antioxidants that fight inflammation and support heart health. Additionally, the fiber in these fruits aids digestion and helps maintain steady blood sugar levels. Since Mixed Berry Pie Recipe combines multiple berries, you get a wider range of vitamins like C and K in every slice.
Moreover, this dessert offers a smarter alternative to overly processed sweets. By using fresh or frozen berries, Mixed Berry Pie Recipe keeps added sugars in check while maximizing natural flavors. The crust, when made with whole grains or nuts, can even boost the fiber and protein content. As a result, you enjoy a treat that fuels your body instead of leaving you sluggish.
Finally, berries contribute to long-term wellness. Studies link regular berry consumption to improved brain function and lower disease risk. Whether you serve it warm or chilled, Mixed Berry Pie Recipe turns indulgence into an opportunity for nourishment. With each bite, you’re treating yourself to both taste and vitality.
How it fits in a healthy lifestyle
Mixed Berry Pie Recipe fits seamlessly into balanced eating habits when enjoyed mindfully. For gluten-free diets, simply swap the traditional crust for an almond flour or oat-based version. If you’re watching sugar intake, reduce sweeteners slightly and let the berries’ natural sweetness shine. Pair a slice with a scoop of protein-rich Greek yogurt for a satisfying breakfast or snack.
This dessert also complements heart-healthy goals, especially if you use ingredients like coconut oil or whole wheat flour. For more ideas on balancing treats with nutrition, explore our guide to healthy dessert swaps. And if you love berry-packed recipes, try our berry smoothie bowl for another antioxidant boost. Mixed Berry Pie Recipe proves that delicious food can align with your wellness journey—no deprivation required.
In a large bowl, mix flour and salt. Cut in butter until mixture resembles coarse crumbs.
Gradually add ice water, 1 tbsp at a time, until dough comes together. Divide into two discs, wrap in plastic, and chill for 30 minutes.
Preheat oven to 375°F (190°C). In another bowl, toss berries with sugar, cornstarch, lemon juice, and vanilla.
Roll out one dough disc to fit a 9-inch pie dish. Add berry filling.
Roll out the second dough disc and place over berries. Crimp edges, cut slits on top, and brush with egg wash. Sprinkle with coarse sugar.
Bake for 45-50 minutes until golden and bubbly. Cool before serving.
Notes
You can customize the seasonings to taste.
How to Prepare This Dish
Steps and time-saving tips
Start by preheating your oven to 375°F to ensure it’s ready when you need it. While the oven heats, whisk together flour, sugar, and a pinch of salt in a large bowl for the crust. Cut cold butter into small cubes and work it into the flour mixture until it resembles coarse crumbs. Gradually drizzle ice water into the bowl and mix just until the dough comes together. Divide the dough in half, shape each into a disk, and chill for 15 minutes to make rolling easier. Meanwhile, toss fresh or frozen mixed berries with cornstarch, lemon juice, and sugar in another bowl. Roll out one dough disk on a floured surface and carefully transfer it to a pie dish. Pour the berry filling into the crust, then roll out the second disk and place it over the top. Crimp the edges, cut a few slits for steam, and brush with an egg wash for a golden finish. Bake for 45-50 minutes until the crust is crisp and the filling bubbles. Let the pie cool slightly before slicing to avoid a runny mess. For a time-saving twist, use store-bought pie crust or prep the filling a day ahead.
and-learned-from">Mistakes I’ve made and learned from
I once rushed the chilling step for the crust, and it shrank dramatically in the oven—now I never skip it! Another time, I overmixed the dough, which made it tough instead of flaky. The fix? Handle it as little as possible. If your berries release too much liquid, try tossing them with a bit more cornstarch or letting them sit for 10 minutes before draining excess juice. For more crust tips, check out my guide on perfect pie crust. And if you’re new to baking with berries, my berry baking basics post covers how to balance sweetness and avoid soggy bottoms. Trust me, a little patience goes a long way with this Mixed Berry Pie Recipe!
Cultural Connection and Variations
Where this recipe comes from
The Mixed Berry Pie Recipe carries the warmth of summer traditions, blending the sweetness of ripe berries with the comfort of homemade pastry. Many cultures celebrate berry pies, but the American version often stars strawberries, blueberries, raspberries, and blackberries—harvested at peak season for the juiciest filling. In the South, bakers might add a splash of bourbon or a crumb topping, while New Englanders favor a flaky, buttery crust. Meanwhile, Scandinavian versions lean on lingonberries or cloudberries, often with a lattice crust that showcases their vibrant colors.
In my family, the Mixed
Berry Pie Recipe became a Fourth of July staple, served alongside grilled classics and fireworks. My grandmother insisted on hand-picking the berries, claiming store-bought ones lacked the same magic. Over time, I’ve seen friends adapt it too—some swapping in gluten-free flour or adding a hint of citrus zest. Whether enjoyed at a picnic or as a winter treat with frozen berries, this pie bridges generations and geographies with every bite.
How it fits in today’s cooking
Today, the Mixed Berry Pie Recipe still shines as a versatile dessert, fitting into everything from holiday feasts to weeknight indulgences. Modern cooks love its adaptability, whether they’re using air-fryer shortcuts or vegan butter for a plant-friendly twist. Seasonal eating trends have also revived its popularity, with farmers’ market berries stealing the spotlight each summer.
It’s not just about nostalgia, though. Busy bakers now prep the filling ahead and freeze it, or pair the pie with homemade ice cream for an instant crowd-pleaser. From rustic potlucks to Instagram-worthy brunches, this recipe proves that some classics only get better with time. And really, who can resist a slice of berry-filled comfort, no matter the occasion?
>Taste and Texture
What makes it delicious
Every bite of this Mixed Berry Pie Recipe bursts with bright, juicy flavors—tart raspberries, sweet blueberries, and tangy blackberries mingle in a luscious filling. The buttery, flaky crust crumbles just right, adding a satisfying contrast to the soft, jammy berries. Warm spices like cinnamon and a hint of lemon zest deepen the aroma, making the kitchen smell irresistible. Whether served warm or chilled, the Mixed Berry Pie Recipe delivers a perfect balance of sweetness and acidity, with a texture that’s both tender and slightly gooey. A scoop of vanilla ice cream melts into the filling, creating creamy pockets that take it to the next level.
Boosting the flavor
For an extra flavor kick, try tossing the berries with a splash of orange liqueur or a drizzle of homemade vanilla sauce before baking. Alternatively, sprinkle a handful of toasted almond slices on top for a nutty crunch. If you love warm spices, a pinch of cardamom or a dash of cinnamon sugar blend in the crust elevates the pie’s cozy vibes. Experiment with different berry combinations—like adding strawberries or cherries—to tailor the Mixed Berry Pie Recipe to your taste. A dollop of whipped cream or a scoop of lemon sorbet also adds a refreshing twist.
Tips for Success
Best practices for results
Always chill your pie dough for at least 30 minutes before rolling it out to prevent shrinking during baking. Meanwhile, toss your berries with sugar and cornstarch right before filling the crust to avoid a soggy bottom. For the best Mixed Berry Pie Recipe results, use a mix of fresh and frozen berries to balance sweetness and texture. Additionally, brush the crust with an egg wash for a golden, glossy finish. Finally, let the pie cool completely before slicing to keep the filling firm and neat.
Mistakes to avoid
Avoid overworking the dough, as this can make it tough instead of flaky. Instead, handle it gently and use cold butter for the perfect crumb. Another common mistake is skipping the lattice or venting the top crust, which traps steam and leads to a watery filling. For more crust tips, check out our guide on perfect pie crust techniques. Also, don’t forget to taste your berry mix before baking—if it’s too tart, adjust the sugar slightly. For more berry-balancing tricks, visit our berry desserts breakdown.
Serving and Pairing Suggestions
How to serve this dish
For a stunning presentation, serve your Mixed Berry Pie Recipe warm with a scoop of vanilla ice cream melting over the top. Alternatively, dust the pie with powdered sugar just before serving for an elegant touch. Whether you’re hosting a summer barbecue or a cozy holiday gathering, this pie shines as the centerpiece. To make it extra special, garnish each slice with fresh mint leaves or a drizzle of honey. Finally, pair it with your favorite dessert plates to let those vibrant berry colors pop.
h-it">What goes well with it
A hot cup of spiced chai latte balances the sweetness of Mixed Berry Pie Recipe perfectly, especially on chilly evenings. If you prefer something cooler, try a glass of sparkling lemonade for a refreshing contrast. For a richer pairing, serve the pie with a dollop of homemade whipped cream, which adds a creamy texture to every bite. Meanwhile, a cheese platter with mild brie or goat cheese creates a delightful savory contrast to the pie’s fruity flavors.
What berries work best for a mixed berry pie?
The best berries for a mixed berry pie recipe are a combination of strawberries, blueberries, raspberries, and blackberries. These berries balance sweetness and tartness while holding their shape during baking. Frozen berries work too, but thaw and drain them first to avoid a soggy crust.
ank-math-faq-item">
How do you thicken a mixed berry pie filling?
Cornstarch or tapioca flour are the best thickeners for mixed berry pie filling—use about 3-4 tablespoons per 5 cups of berries. Mix the thickener with sugar before tossing it with the berries to prevent clumping. The filling will set as the mixed berry pie recipe cools after baking.
Can you make a mixed berry pie ahead of time?
Yes! Assemble the mixed berry pie recipe up to 24 hours ahead and refrigerate it unbaked, or freeze it for up to 3 months. For best results, bake from frozen, adding 15-20 extra minutes. Pre-baked pies keep well at room temperature for 2 days or refrigerated for 4 days.
Should you pre-cook the filling for mixed berry pie?
Pre-cooking isn’t necessary for most mixed berry pie recipes, as the berries soften perfectly during baking. However, if using very juicy berries, simmer them briefly with thickener to reduce excess liquid. This prevents a soggy bottom crust while keeping the mixed berry pie filling vibrant and fresh-tasting.
div>
Best Garlic Chicken Bites & Sun-Dried Tomato Alfredo Pasta
Introduction
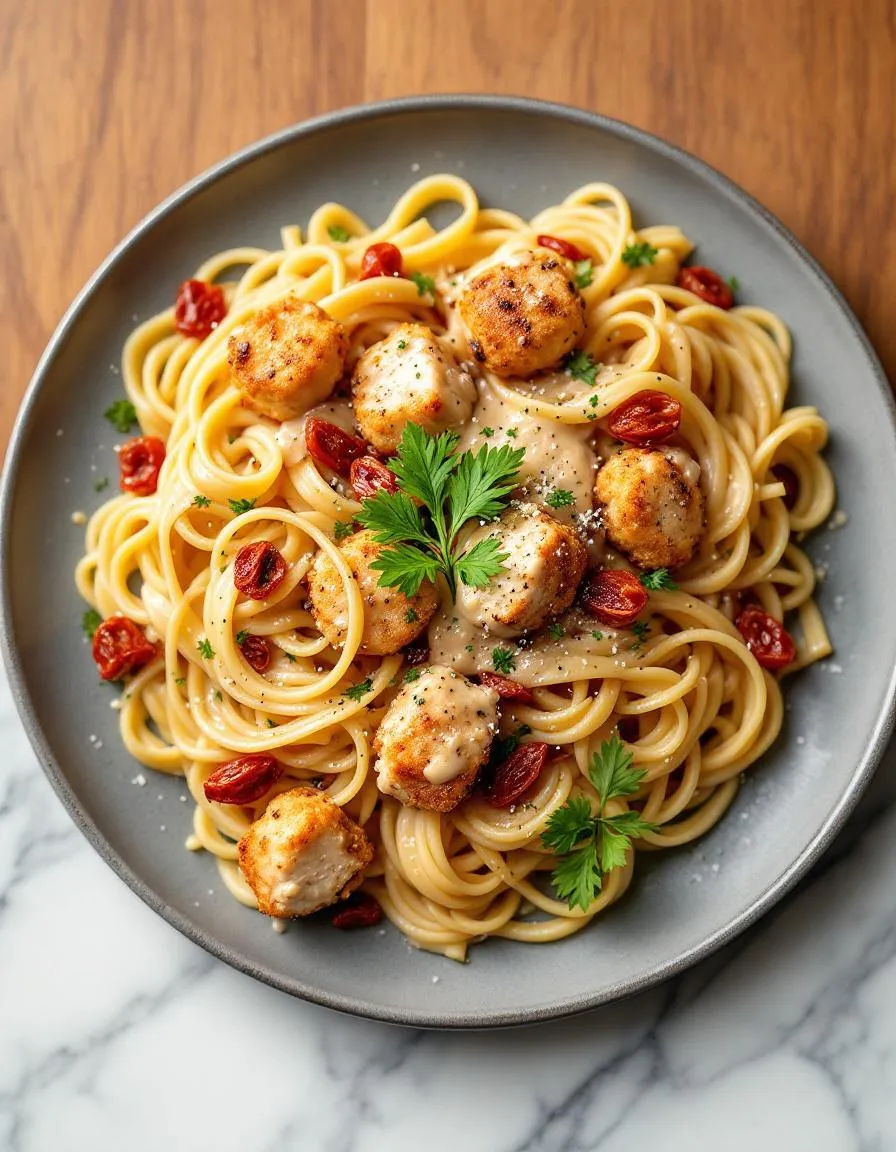
Craving a meal that balances bold flavors and comforting richness? Look no further than this Garlic Chicken Bites and Sun-Dried Tomato Cajun Alfredo Pasta Recipe. Whether you need a quick weeknight dinner or a dish to impress guests, this recipe delivers tender chicken bites, creamy Alfredo sauce, and a smoky Cajun kick—all in one unforgettable bite. Plus, the sun-dried tomatoes add a tangy sweetness that ties everything together perfectly. Trust me, once you try it, you’ll keep coming back for more.
Garlic Chicken Bites and Sun-Dried Tomato Cajun Alfredo Pasta Recipe combines the best of two worlds: juicy, garlicky chicken and a velvety pasta dish with a spicy twist. The Cajun seasoning brings warmth and depth, while the Alfredo sauce keeps it indulgent. Meanwhile, sun-dried tomatoes cut through the richness with their bright, concentrated flavor. This dish works beautifully for busy cooks because it comes together in under 30 minutes, yet it feels gourmet. If you love bold flavors but appreciate simplicity, this recipe fits your style. It’s also versatile—swap the chicken for shrimp or add extra veggies like spinach for a nutrient boost. For more easy weeknight meals, check out our 30-minute dinner ideas or explore creamy pasta recipes for similar crowd-pleasers.
Why I Love This Recipe
This Garlic Chicken Bites and Sun-Dried Tomato Cajun Alfredo Pasta Recipe holds a special place in my heart because it reminds me of family gatherings. My aunt used to make a similar dish for Sunday dinners, and the aroma of garlic and Cajun spices always filled the house. Now, whenever I cook it, I feel that same warmth and nostalgia. Beyond the memories, I adore how effortlessly the flavors come together—each bite feels like a celebration. Whether I’m cooking for myself or sharing it with friends, this recipe never fails to delight.
Health and Nutrition
Why it’s good for your body
Garlic Chicken Bites and Sun-Dried Tomato Cajun Alfredo Pasta Recipe pack a flavorful punch while delivering impressive health benefits. First, garlic in the chicken bites boosts immunity and fights inflammation, thanks to its potent antioxidants. Meanwhile, the lean chicken provides high-quality protein to support muscle growth and repair. Additionally, sun-dried tomatoes in the Cajun Alfredo pasta offer a rich dose of vitamins A and C, which promote healthy skin and vision.
Furthermore, the creamy Alfredo sauce gets a nutritious twist with Cajun spices, which may aid digestion and metabolism. Olive oil, often used in both dishes, contributes heart-healthy monounsaturated fats. Together, Garlic Chicken Bites and Sun-Dried Tomato Cajun Alfredo Pasta Recipe create a balanced meal with protein, healthy fats, and essential vitamins. For an extra nutrient boost, you can easily pair them with a side of roasted vegetables.
Finally, the combination of bold flavors and wholesome ingredients makes these dishes satisfying without excessive calories. Whether you’re fueling up post-workout or enjoying a family dinner, Garlic Chicken Bites and Sun-Dried Tomato Cajun Alfredo Pasta Recipe keep your meals both delicious and nutritious.
How it fits in a healthy lifestyle
Garlic Chicken Bites and Sun-Dried Tomato Cajun Alfredo Pasta Recipe fit seamlessly into a balanced diet. The high-protein chicken bites help maintain energy levels, making them perfect for active lifestyles or post-workout recovery. Meanwhile, the pasta’s complex carbs provide steady fuel, ideal for busy days or meal prepping ahead.
For those watching their gluten intake, swapping regular pasta for a gluten-free version keeps the dish just as tasty. The heart-healthy fats from olive oil and sun-dried tomatoes also align with Mediterranean-inspired eating. Plus, the bold spices mean you can cut back on salt without sacrificing flavor.
Whether you’re cooking for a crowd or prepping solo meals, these recipes adapt to your dietary needs. Pair them with a crisp salad or steamed greens for a well-rounded plate that satisfies cravings and supports your wellness goals.
A flavorful dish featuring tender garlic chicken bites paired with creamy Cajun Alfredo pasta infused with sun-dried tomatoes.
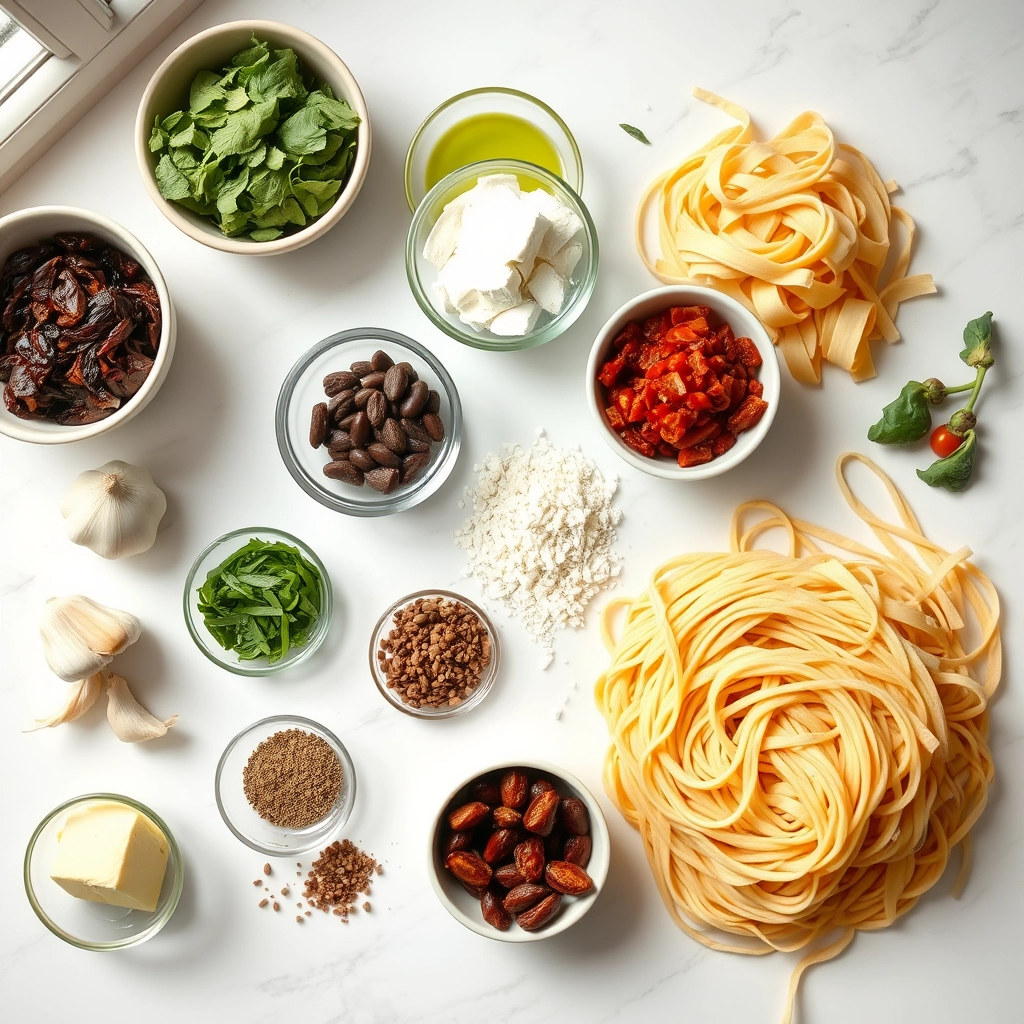
Ingredients
Scale
For the Crust:
1 lb chicken breast, cut into bite-sized pieces
4 cloves garlic, minced
2 tbsp olive oil
8 oz fettuccine pasta
1 cup heavy cream
1/2 cup grated Parmesan cheese
1/4 cup sun-dried tomatoes, chopped
1 tsp Cajun seasoning
Salt and pepper to taste
Fresh parsley for garnish
Instructions
1. Prepare the Crust:
Cook the fettuccine pasta according to package instructions. Drain and set aside.
Heat olive oil in a large skillet over medium heat. Add chicken pieces and cook until golden brown and cooked through, about 6-8 minutes.
Add minced garlic to the skillet and sauté for 1 minute until fragrant.
In the same skillet, lower the heat and pour in the heavy cream. Stir in Parmesan cheese, Cajun seasoning, and sun-dried tomatoes. Simmer for 3-4 minutes until the sauce thickens.
Add the cooked pasta to the skillet and toss to coat evenly with the sauce. Season with salt and pepper to taste.
Garnish with fresh parsley before serving.
Notes
You can customize the seasonings to taste.
How to Prepare This Dish
Steps and time-saving tips
Start by preheating your oven to 400°F for the Garlic Chicken Bites. While it heats, toss bite-sized chicken pieces in olive oil, minced garlic, and a pinch of salt. Spread them on a lined baking sheet and bake for 15 minutes, flipping halfway for even crispiness. Meanwhile, bring a pot of salted water to a boil for the Sun-Dried Tomato Cajun Alfredo Pasta Recipe. Cook the pasta al dente, then drain and set aside. In a skillet, sauté minced garlic and sun-dried tomatoes in butter until fragrant. Whisk in heavy cream, Cajun seasoning, and grated Parmesan until the sauce thickens. Fold in the pasta and toss to coat. For a time-saving hack, use pre-minced garlic and pre-shredded cheese. Finally, plate the Garlic Chicken Bites alongside the creamy pasta, garnishing with fresh parsley. The whole dish comes together in under 30 minutes, making it perfect for weeknights.
and-learned-from">Mistakes I’ve made and learned from
Early on, I overcooked the chicken bites, leaving them dry. Now I set a timer and check them at 12 minutes—they often finish early. Another blunder? Adding raw Cajun seasoning directly to the Alfredo sauce, which clumped. I learned to mix it with a splash of cream first, just like in my spice blends guide. Also, skipping the pasta water reserve was a regret. That starchy liquid is gold for adjusting sauce consistency, a tip I picked up from my pasta secrets post. Trust me, these small tweaks make all the difference between good and restaurant-worthy Garlic Chicken Bites and Sun-Dried Tomato Cajun Alfredo Pasta Recipe.
Cultural Connection and Variations
Where this recipe comes from
The Garlic Chicken Bites and Sun-Dried Tomato Cajun Alfredo Pasta Recipe blends bold flavors from two culinary worlds. Garlic chicken bites trace back to Mediterranean and Middle Eastern kitchens, where garlic and herbs dominate. Meanwhile, Cajun Alfredo pasta marries creamy Italian sauce with Louisiana’s fiery spice blends. Families in New Orleans might swap sun-dried tomatoes for fresh Creole tomatoes in summer, while Italian cooks could fold in pancetta for extra richness.
In my home, this dish b
ecame a weeknight hero after a trip to the Gulf Coast. The garlic chicken bites remind me of Spanish tapas bars, but we crisp them in cast iron for extra crunch. Some Caribbean versions use jerk seasoning instead of Cajun, and in Greece, you’ll find similar chicken skewers with lemon-oregano marinades. No matter the twist, the Garlic Chicken Bites and Sun-Dried Tomato Cajun Alfredo Pasta Recipe always brings people together—whether at a backyard BBQ or a cozy family dinner.
How it fits in today’s cooking
Today, this recipe thrives as a versatile crowd-pleaser. Busy cooks love it for meal prep, while food bloggers riff on it with gluten-free pasta or air-fried chicken. During Mardi Gras, it’s a festive alternative to gumbo, and in winter, the creamy Alfredo comforts like a hug in a bowl. For a lighter take, some toss in spinach or sub coconut milk—just like these healthy dinner swaps suggest.
Modern kitchens also embrace shortcuts. Pre-made Cajun spice blends save time, and sun-dried tomatoes from the jar keep pantry staples stress-free. Whether you serve it as a date-night dish or a potluck star, the Garlic Chicken Bites and Sun-Dried Tomato Cajun Alfredo Pasta Recipe adapts effortlessly. Crave more fusion ideas? Try pairing it with global flavor mashups for a full culinary adventure.
>Taste and Texture
What makes it delicious
The Garlic Chicken Bites and Sun-Dried Tomato Cajun Alfredo Pasta Recipe delivers a symphony of bold, crave-worthy flavors. First, the chicken bites sizzle with a golden crispness outside while staying juicy inside, thanks to a garlicky marinade that infuses every bite. Meanwhile, the pasta boasts a velvety Cajun-spiked Alfredo sauce, rich with cream and Parmesan, balanced by the tangy sweetness of sun-dried tomatoes. Each forkful offers a contrast of textures—tender pasta, chewy tomatoes, and succulent chicken—while the aroma of toasted garlic and smoky paprika fills the air. Together, these elements make the Garlic Chicken Bites and Sun-Dried Tomato Cajun Alfredo Pasta Recipe an unforgettable meal.
Boosting the flavor
To elevate this dish even further, try tossing in a handful of spinach or roasted red peppers for a fresh, colorful twist. A sprinkle of crispy bacon or toasted breadcrumbs adds crunch, while a dash of lemon zest brightens the creamy Alfredo. For heat lovers, extra Cajun seasoning or a drizzle of hot honey glaze amps up the spice. Pair it with a side of garlic Parmesan breadsticks to soak up every last drop of sauce. With these tweaks, the flavors shine even brighter.
Tips for Success
Best practices for results
For the best Garlic Chicken Bites and Sun-Dried Tomato Cajun Alfredo Pasta Recipe, always pat the chicken dry before seasoning to ensure a crispier texture. Meanwhile, toast the sun-dried tomatoes lightly before adding them to the sauce for deeper flavor. Additionally, use fresh garlic and grate it finely to evenly distribute its taste throughout the dish. Finally, simmer the Alfredo sauce on low heat to prevent curdling while stirring frequently for a silky consistency.
Mistakes to avoid
Avoid overcrowding the pan when cooking the Garlic Chicken Bites, as this steams them instead of browning. Instead, work in batches for even crispiness. Also, don’t skip blooming the Cajun spices in oil first, as this step unlocks their full aroma. If your sauce thickens too much, simply thin it with a splash of pasta water, which also adds starch for better cling. For more sauce tips, check out our guide on perfecting creamy sauces, and learn how to balance spice levels with our Cajun seasoning tips.
Serving and Pairing Suggestions
How to serve this dish
For a stunning presentation, arrange the Garlic Chicken Bites and Sun-Dried Tomato Cajun Alfredo Pasta Recipe on a large platter with fresh basil leaves and a sprinkle of grated Parmesan. Alternatively, serve the pasta in shallow bowls topped with chicken bites for an elegant family-style meal. This dish shines at dinner parties, but it also makes a cozy weeknight treat. To elevate the visual appeal, drizzle extra Alfredo sauce in a zigzag pattern and add a few sun-dried tomatoes on top.
h-it">What goes well with it
Pair the bold flavors of Garlic Chicken Bites and Sun-Dried Tomato Cajun Alfredo Pasta Recipe with a crisp Caesar salad or roasted garlic bread for a satisfying meal. The creamy Alfredo sauce balances perfectly with a light, citrusy white wine like Pinot Grigio. For a refreshing contrast, try our Spinach Strawberry Salad, which adds a sweet-tart crunch. If you love dipping sauces, our Creamy Avocado Dip complements the Cajun spices beautifully.
What sides pair well with Garlic Chicken Bites and Sun-Dried Tomato Cajun Alfredo Pasta?
Garlic Chicken Bites and Sun-Dried Tomato Cajun Alfredo Pasta pairs perfectly with a crisp Caesar salad, garlic bread, or roasted vegetables. For a lighter option, try a fresh arugula salad with lemon vinaigrette to balance the rich flavors of the dish.
ank-math-faq-item">
Can I make Garlic Chicken Bites and Sun-Dried Tomato Cajun Alfredo Pasta ahead of time?
Yes! You can prepare the Garlic Chicken Bites and Sun-Dried Tomato Cajun Alfredo Pasta up to a day in advance. Store the components separately and reheat the pasta with a splash of cream to restore its creamy texture before serving.
How spicy is the Cajun seasoning in this recipe?
The Cajun seasoning in Garlic Chicken Bites and Sun-Dried Tomato Cajun Alfredo Pasta offers a mild to medium heat level. Adjust the amount to your preference or use a mild Cajun blend if you prefer less spice while keeping the bold flavor.
Can I substitute the sun-dried tomatoes in this recipe?
If you don’t have sun-dried tomatoes, roasted red peppers or cherry tomatoes work well in Garlic Chicken Bites and Sun-Dried Tomato Cajun Alfredo Pasta. Just note that the flavor profile will shift slightly, so adjust seasoning as needed.
div>
Best Slow Cooker Beef Stroganoff – Easy & Creamy Recipe
Introduction
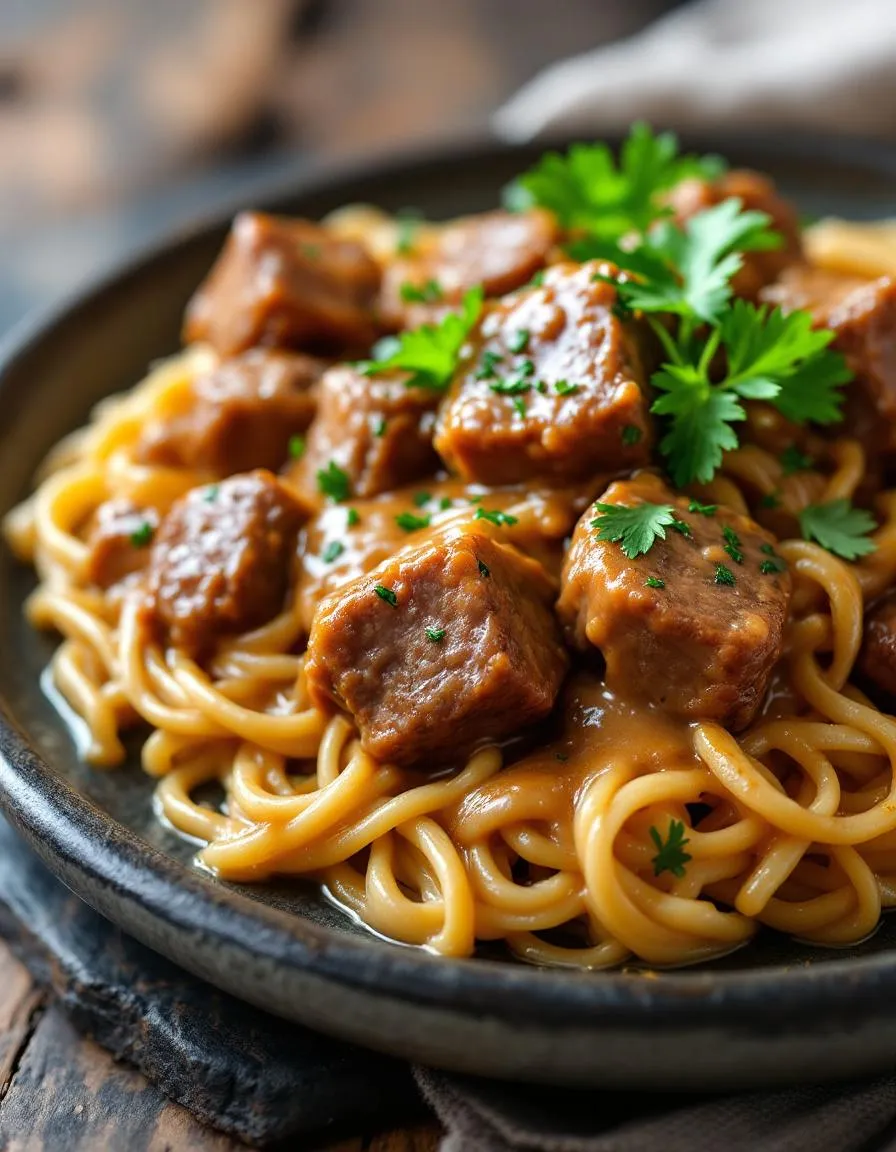
There’s something deeply comforting about coming home to the rich, savory aroma of a slow-cooked meal. If you crave a dish that feels like a warm hug after a long day, this Slow Cooker Beef Stroganoff Recipe delivers. Tender beef, creamy sauce, and hearty mushrooms meld together effortlessly, creating a meal that’s both nostalgic and satisfying. Whether you’re feeding a busy family or simply treating yourself, this recipe transforms simple ingredients into something extraordinary with minimal effort.
Slow Cooker Beef Stroganoff Recipe is a modern twist on a classic comfort dish. Traditionally, Beef Stroganoff requires constant stirring and careful timing, but the slow cooker does all the work for you. The result? Fork-tender beef in a luxuriously creamy sauce, perfect over egg noodles or mashed potatoes. This dish matters because it solves the age-old dilemma of wanting a home-cooked meal without the hassle. Plus, it fits perfectly with our blog’s mission to share easy, flavorful recipes that fit real life. If you love set-it-and-forget-it meals, you’ll appreciate our Slow Cooker Chicken Tikka Masala or Creamy Garlic Parmesan Mashed Potatoes as much as this stroganoff.
Why I Love This Recipe
This Slow Cooker Beef Stroganoff Recipe holds a special place in my heart because it reminds me of snowy evenings growing up. My mom would simmer it all day, and by dinner, the whole house smelled like comfort. Now, as someone who juggles work and family, I love how effortlessly it comes together. The slow cooker not only saves time but also deepens the flavors, making every bite feel like a labor of love—without the labor. It’s the kind of meal that brings people together, and that’s why I keep coming back to it.
Health and Nutrition
Why it’s good for your body
Slow Cooker Beef Stroganoff Recipe delivers a hearty dose of protein, thanks to its tender beef chunks. Protein helps repair muscles and keeps you full longer, making this dish a satisfying choice. Additionally, the slow cooking process preserves nutrients while enhancing flavor, so you get both taste and nourishment in every bite.
Moreover, this recipe includes mushrooms, which pack antioxidants and immune-boosting properties. These fungi also add fiber, supporting digestion and gut health. Meanwhile, the creamy sauce, when made with Greek yogurt or light sour cream, offers probiotics for a balanced microbiome. As a result, Slow Cooker Beef Stroganoff Recipe becomes a nutrient-rich meal without sacrificing comfort.
Furthermore, the dish provides iron from the beef, which helps maintain energy levels and supports red blood cell production. Pair it with whole-grain egg noodles or zucchini noodles for extra fiber and vitamins. Ultimately, Slow Cooker Beef Stroganoff Recipe balances indulgence with wholesome ingredients, proving that comfort food can also fuel your body.
How it fits in a healthy lifestyle
Slow Cooker Beef Stroganoff Recipe adapts easily to various dietary needs. For a gluten-free version, swap traditional noodles for gluten-free pasta or spiralized veggies. If you’re watching your fat intake, opt for lean beef and light sour cream to keep it heart-healthy. The dish also fits high-protein diets, making it a smart pick for fitness enthusiasts.
Planning meals ahead? This recipe freezes well, so you can prep it in batches for busy weeks. Pair it with a simple side salad or roasted vegetables for a balanced plate. For more meal-prep inspiration, check out our easy meal-prep ideas. And if you love hearty, protein-packed meals, explore our high-protein dinner recipes for more delicious options. Slow Cooker Beef Stroganoff Recipe fits seamlessly into a mindful eating routine, offering both convenience and nutrition.
A creamy and comforting beef stroganoff made effortlessly in the slow cooker.
Ingredients
Scale
For the Crust:
1.5 lbs beef stew meat, cubed
1 onion, diced
3 cloves garlic, minced
8 oz mushrooms, sliced
1 cup beef broth
1 tbsp Worcestershire sauce
1 tsp paprika
1/2 tsp salt
1/4 tsp black pepper
1 cup sour cream
2 tbsp all-purpose flour
12 oz egg noodles, cooked
Instructions
1. Prepare the Crust:
In the slow cooker, combine beef, onion, garlic, mushrooms, beef broth, Worcestershire sauce, paprika, salt, and pepper.
Cover and cook on low for 7-8 hours or high for 3-4 hours, until beef is tender.
In a small bowl, whisk together sour cream and flour. Stir into the slow cooker and cook for an additional 15 minutes until thickened.
Serve the stroganoff over cooked egg noodles.
Notes
You can customize the seasonings to taste.
How to Prepare This Dish
Steps and time-saving tips
Start by browning the beef in a skillet over medium-high heat to lock in flavor—this step takes just 5 minutes but makes a huge difference. Meanwhile, layer the onions and mushrooms in your slow cooker. Once the beef is golden, transfer it on top of the veggies. Next, whisk together the broth, Worcestershire sauce, and seasonings, then pour the mixture over the beef. Cover and cook on low for 6-7 hours or high for 3-4 hours. About 30 minutes before serving, stir in the sour cream and cream cheese until smooth. For a time-saving hack, use pre-sliced mushrooms and store-bought beef broth. If you’re short on time, skip the browning step, though the depth of flavor won’t be quite as rich. Serve the Slow Cooker Beef Stroganoff Recipe over egg noodles or mashed potatoes, and garnish with fresh parsley for a pop of color.
Mistakes I’ve made and learned from
Early on, I rushed the browning step and ended up with pale, flavorless beef—now I wait for a deep caramelized crust. Another blunder? Adding the dairy too early, which caused it to curdle. Now I stir in the sour cream and cream cheese at the very end, just until warmed through. If you’ve ever struggled with tough meat, check out my guide on slow cooker tips for foolproof tenderness. And if you’re new to stroganoff, my comfort food classics post breaks down the basics. Trust me, a little patience pays off with this Slow Cooker Beef Stroganoff Recipe.
Slow Cooker Beef Stroganoff Recipe carries a rich history that stretches back to 19th-century Russia. Originally, chefs prepared it with sautéed beef in a sour cream sauce, serving it as a luxurious dish for aristocracy. Over time, home cooks adapted the recipe, making it heartier and more accessible. Today, families worldwide put their own spin on it, from swapping mushrooms for extra onions to using yogurt instead of sour cream.
In my family, Slow Cooker Beef Stroganoff Recipe became a winter staple, simmering all day while snow piled up outside. My grandma added a splash of Worcestershire sauce for depth, a trick she learned from a neighbor. Meanwhile, in Sweden, they might serve it with pickled cucumbers, while Brazilian versions often include a touch of tomato paste. No matter the variation, the dish always brings people together.
ays-cooking">How it fits in today’s cooking
Modern cooks love Slow Cooker Beef Stroganoff Recipe because it fits seamlessly into busy lives. Whether you need a cozy weeknight dinner or a crowd-pleasing potluck dish, the slow cooker does the heavy lifting. Many now use leaner cuts of beef or even ground turkey, proving the recipe adapts to today’s health-conscious trends.
It’s also a star during holidays, especially when paired with easy holiday side dishes. Some families even make it a tradition, serving it after tree-trimming or football Sundays. For meal preppers, it’s a freezer-friendly win, just like these meal prep freezer tips suggest. No wonder this comfort classic never goes out of style.
Taste and Texture
What makes it delicious
Slow Cooker Beef Stroganoff Recipe delivers a rich, comforting experience with every bite. Tender beef melts in your mouth, while the creamy sauce—infused with earthy mushrooms and tangy sour cream—coats your palate in velvety warmth. Fragrant garlic and onions deepen the savory notes, and a hint of Dijon mustard adds a subtle sharpness that balances the dish. Meanwhile, the slow-cooked beef absorbs all those flavors, becoming irresistibly juicy and fork-tender. Whether served over buttery egg noodles or fluffy rice, Slow Cooker Beef Stroganoff Recipe transforms into a hearty, soul-satisfying meal that smells as good as it tastes.
r">Boosting the flavor
Elevate your Slow Cooker Beef Stroganoff Recipe with a few easy tweaks. For extra depth, swap sour cream for crème fraîche or stir in a splash of Worcestershire sauce. Fresh thyme or a pinch of smoked paprika can add aromatic complexity, while a dollop of horseradish cream sauce brings a zesty kick. If you love texture, top each bowl with crispy fried shallots or toasted breadcrumbs. Pair it with a side of garlic herb roasted potatoes for a meal that’s even more memorable. Small changes make a big difference, so don’t hesitate to experiment!
Tips for Success
Best practices for results
Always sear the beef before adding it to the slow cooker for deeper flavor in your Slow Cooker Beef Stroganoff Recipe. Meanwhile, use full-fat sour cream to prevent curdling and stir it in during the last 15 minutes of cooking. Additionally, slice the mushrooms evenly so they cook uniformly, and opt for low-sodium broth to control the saltiness. For extra richness, finish with a splash of Worcestershire sauce right before serving.
>Mistakes to avoid
Avoid overcooking the noodles by adding them too early; instead, cook them separately and combine them just before serving to keep them firm. Similarly, don’t skip deglazing the pan after searing the beef—this step locks in flavor and prevents burnt bits. If your sauce seems too thin, try thickening it with a cornstarch slurry as explained in our guide to thickening sauces. For more slow cooker troubleshooting, check out our slow cooker tips to ensure perfect results every time.
Serving and Pairing Suggestions
How to serve this dish
Slow Cooker Beef Stroganoff Recipe shines when you serve it over a bed of buttery egg noodles or fluffy mashed potatoes. For a rustic touch, garnish each plate with a sprinkle of fresh parsley or chives. Meanwhile, if you want to impress guests, try serving it in a shallow bowl with a swirl of sour cream on top. This dish works beautifully for cozy family dinners, yet it also makes a standout option for holiday gatherings. To elevate the presentation, add a side of crusty bread for dipping into the rich sauce.
What goes well with it
Pair Slow Cooker Beef Stroganoff Recipe with a crisp green salad to balance the creamy richness. Alternatively, roasted garlic green beans add a savory crunch that complements the tender beef. For drinks, a glass of full-bodied red wine or even a tangy homemade lemonade enhances the flavors. If you love hearty sides, try our Garlic Herb Dinner Rolls for soaking up every last bite. And if you want a lighter option, our Fresh Spring Salad brings a refreshing contrast to the meal.
Can I use ground beef for Slow Cooker Beef Stroganoff Recipe?
Yes, you can substitute ground beef in a Slow Cooker Beef Stroganoff Recipe, but the texture will differ from traditional stroganoff. For best results, brown the ground beef first and reduce the cooking time to 4-5 hours on low to prevent overcooking.
How long should I cook Slow Cooker Beef Stroganoff on high?
For a Slow Cooker Beef Stroganoff Recipe, cooking on high typically takes 3-4 hours. Check the beef for tenderness after 3 hours to avoid overcooking. The sauce should thicken slightly, and the meat should shred easily with a fork.
ank-math-faq-item">
What’s the best cut of beef for Slow Cooker Beef Stroganoff?
Chuck roast or stew meat works best for Slow Cooker Beef Stroganoff Recipe because they become tender during slow cooking. Avoid lean cuts like sirloin, as they can dry out. Trim excess fat for a smoother sauce.
Can I make Slow Cooker Beef Stroganoff without sour cream?
Yes, you can substitute Greek yogurt or cream cheese in a Slow Cooker Beef Stroganoff Recipe for a similar creamy texture. Add these at the end of cooking to prevent curdling. The flavor will be slightly tangier than traditional sour cream.
Easy Crockpot Chicken and Gravy Recipe
Introduction
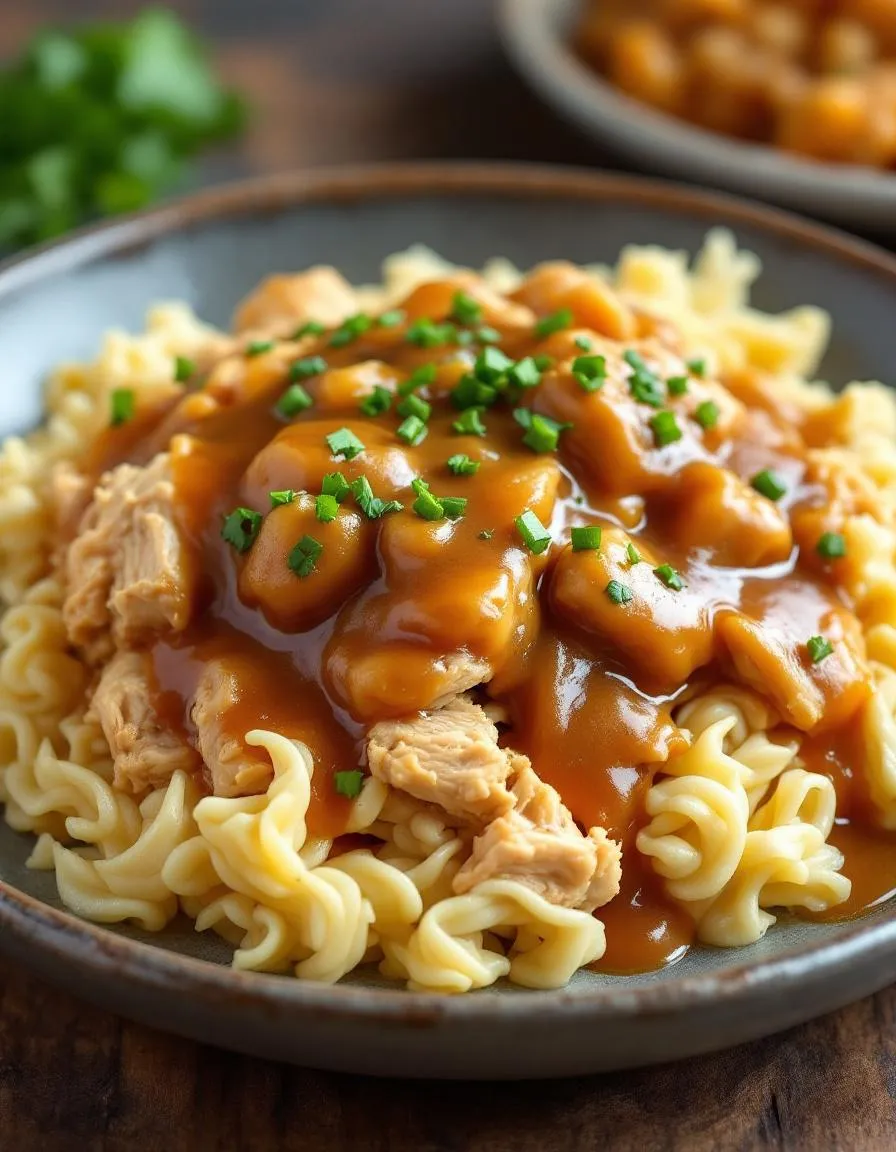
There’s something deeply comforting about coming home to the rich aroma of tender chicken simmering in savory gravy. Whether you’re juggling a busy schedule or simply craving a hearty, no-fuss meal, this Crockpot Chicken and Gravy Recipe delivers warmth and flavor with minimal effort. It’s the kind of dish that feels like a hug in a bowl, perfect for weeknight dinners or lazy Sundays when you want comfort without the hassle. Plus, your slow cooker does most of the work, leaving you free to relax or tackle the day.
The Crockpot Chicken and Gravy Recipe is a classic comfort food that transforms simple ingredients into a satisfying meal. By slow-cooking chicken in a creamy, flavorful gravy, you lock in moisture and depth of flavor that stovetop cooking often misses. This dish matters because it’s versatile—serve it over mashed potatoes, rice, or even biscuits for a crowd-pleasing dinner. It also fits perfectly with our blog’s mission to share easy, reliable recipes that bring people together. If you love fuss-free meals, you’ll appreciate how this recipe aligns with our other slow cooker favorites, like our Creamy Crockpot Pot Roast or Slow Cooker Beef Stew. With just a few pantry staples and minimal prep, you’ll have a dish that feels homemade in the best way.
Why I Love This Recipe
This Crockpot Chicken and Gravy Recipe holds a special place in my heart because it reminds me of family gatherings at my grandma’s house. She always had a slow cooker bubbling with something delicious, and this dish captures that same nostalgic warmth. I love how the gravy thickens into a velvety sauce while the chicken stays juicy, making every bite feel indulgent. It’s also my go-to when friends drop by unexpectedly—everyone leaves happy and asking for the recipe. Simple, comforting, and endlessly adaptable, it’s a recipe I turn to again and again.
Health and Nutrition
Why it’s good for your body
Crockpot Chicken and Gravy Recipe delivers a hearty, nutrient-packed meal with minimal effort. First, chicken provides lean protein, which helps build and repair muscles while keeping you full longer. Additionally, slow cooking preserves the natural juices, ensuring tender meat without excess fat. Moreover, the gravy, when made with wholesome ingredients, adds depth of flavor without relying on artificial thickeners.
Beyond protein, Crockpot Chicken and Gravy Recipe often includes onions, garlic, and herbs. These ingredients offer antioxidants and anti-inflammatory benefits. For instance, garlic supports immune health, while onions promote digestion. Furthermore, using low-sodium broth keeps the dish heart-friendly without sacrificing taste.
Lastly, this recipe adapts easily to dietary needs. You can pair it with steamed veggies for extra fiber or whole grains for sustained energy. Whether you need a post-workout meal or a comforting dinner, Crockpot Chicken and Gravy Recipe balances nutrition and satisfaction.
How it fits in a healthy lifestyle
Crockpot Chicken and Gravy Recipe fits seamlessly into a balanced diet. If you focus on high-protein meals, the chicken delivers a solid portion per serving. For gluten-free eaters, simply swap traditional flour for cornstarch or a gluten-free alternative in the gravy. Plus, the slow cooker method saves time, making it perfect for meal prep.
This dish also complements heart-healthy eating. By controlling sodium and using olive oil instead of butter, you reduce saturated fat without losing flavor. If you love easy, wholesome recipes, explore our Healthy Weeknight Dinners for more ideas. For those tracking macros, pair it with our Meal Prep Guide to stay on track effortlessly.
Whether you’re fueling active days or seeking comfort food with benefits, Crockpot Chicken and Gravy Recipe fits the bill. It’s versatile, nourishing, and designed for real life.
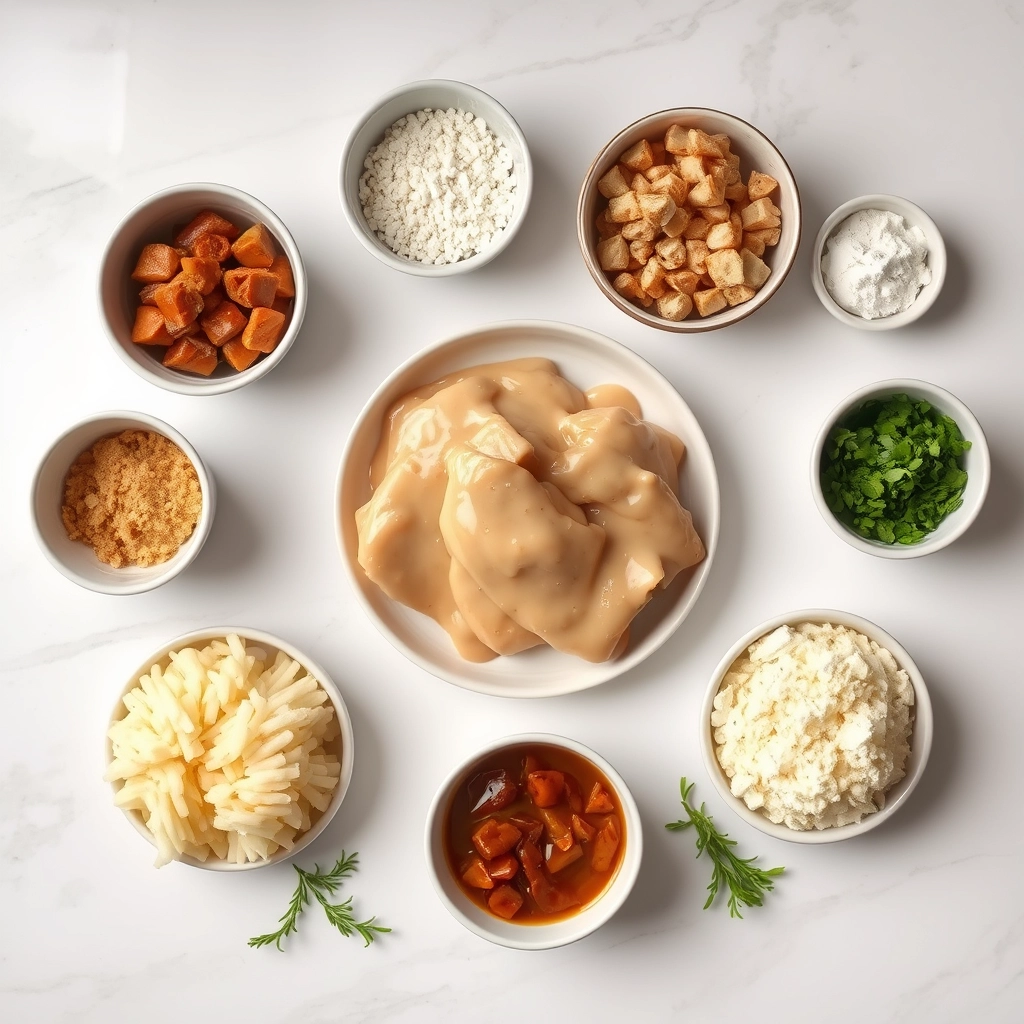
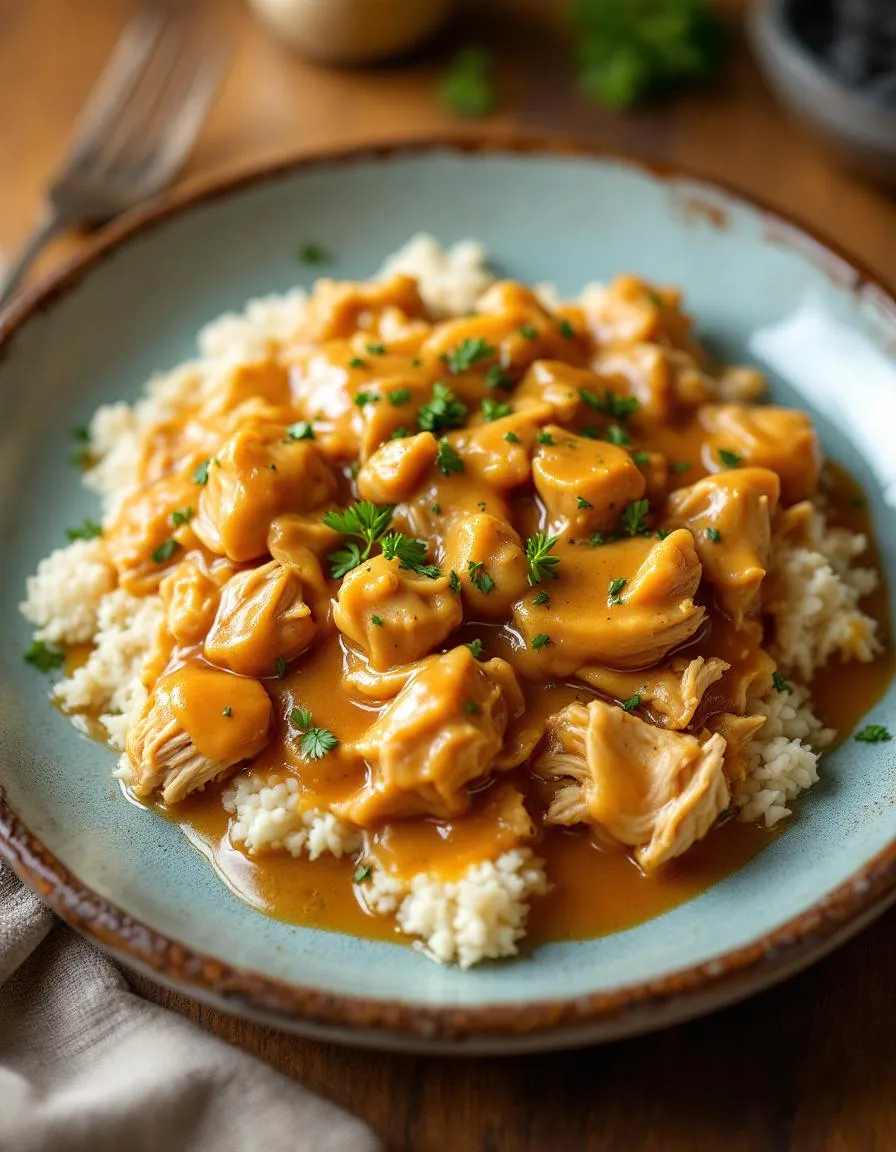
A simple and comforting dish featuring tender chicken smothered in rich gravy, cooked effortlessly in a crockpot.
Ingredients
Scale
For the Crust:
4 boneless, skinless chicken breasts
1 (10.5 oz) can cream of chicken soup
1 (10.5 oz) can cream of mushroom soup
1 packet dry chicken gravy mix
1 cup chicken broth
1/2 teaspoon garlic powder
1/2 teaspoon onion powder
1/4 teaspoon black pepper
Instructions
1. Prepare the Crust:
Place chicken breasts in the bottom of the crockpot.
In a bowl, whisk together cream of chicken soup, cream of mushroom soup, dry gravy mix, chicken broth, garlic powder, onion powder, and black pepper.
Pour the mixture over the chicken breasts.
Cover and cook on low for 6-7 hours or on high for 3-4 hours, until chicken is tender and cooked through.
Shred the chicken slightly with a fork and stir to coat in the gravy before serving.
Notes
You can customize the seasonings to taste.
How to Prepare This Dish
Steps and time-saving tips
Start by seasoning your chicken generously with salt, pepper, and a pinch of garlic powder for extra flavor. Next, heat a skillet over medium-high heat and sear the chicken for 2-3 minutes per side until golden brown. This step locks in juices and adds depth to your Crockpot Chicken and Gravy Recipe. Meanwhile, whisk together cream of chicken soup, chicken broth, and a teaspoon of onion powder in your slow cooker. Once the chicken is seared, transfer it to the crockpot and spoon the gravy mixture over the top. Cover and cook on low for 6-7 hours or high for 3-4 hours until the chicken is tender. For a time-saving hack, use pre-cut chicken thighs or breasts to skip the chopping step. About 30 minutes before serving, stir in a cornstarch slurry to thicken the gravy if needed. Finally, garnish with fresh parsley for a pop of color and serve over mashed potatoes or rice.
and-learned-from">Mistakes I’ve made and learned from
When I first made this Crockpot Chicken and Gravy Recipe, I skipped searing the chicken, thinking it would save time. Big mistake! The dish lacked that rich, caramelized flavor. Now I never skip this step—it’s worth the extra 5 minutes. Another blunder? Overcooking the chicken, which turned it dry. I learned to check for doneness at the 5-hour mark on low. If you’re new to slow cooking, my slow cooker basics guide has more tips to avoid common pitfalls. Oh, and once I forgot to thicken the gravy, leaving it too thin. A quick fix is to mix cornstarch with cold water (never dump it in dry!) and stir well. For more gravy tricks, check out my perfect gravy tutorial. Trust me, these small tweaks make all the difference.
Cultural Connection and Variations
Where this recipe comes from
The Crockpot Chicken and Gravy Recipe whispers comfort from the heart of American home cooking, where slow cookers turn simple ingredients into soul-warming meals. Originally, this dish likely grew from the need to make tough cuts of chicken tender while busy families juggled work and chores. Over time, it became a staple in the Midwest and South, where gravy-smothered dishes reign supreme. Some families add mushrooms or onions for depth, while others swear by a dash of Worcestershire sauce for a tangy kick.
Globally, you’ll
find cousins of this recipe everywhere. In France, they might swap the gravy for a creamy white wine sauce, and in India, aromatic spices like turmeric and garam masala could transform it into a rich curry. Even within the U.S., regional twists pop up—think Pennsylvania Dutch versions with thick, milk-based gravies or Southern renditions with a buttery, peppery finish. The Crockpot Chicken and Gravy Recipe adapts beautifully, proving that comfort food knows no borders.
How it fits in today’s cooking
Today, the Crockpot Chicken and Gravy Recipe still earns its spot as a weeknight hero. Busy parents love it for its hands-off simplicity, while meal preppers stash leftovers for easy lunches. It’s also a star during holidays, often appearing alongside mashed potatoes or flaky buttermilk biscuits for cozy gatherings. Modern cooks tweak it too—some use coconut milk for a dairy-free twist, while others toss in herbs like rosemary or thyme for a fresh lift.
What keeps it relevant? Versatility. Whether you’re serving it over garlic Parmesan pasta or stuffing it into a sandwich, the Crockpot Chicken and Gravy Recipe molds to today’s tastes without losing its nostalgic charm. It’s proof that some classics only get better with time.
>Taste and Texture
What makes it delicious
The Crockpot Chicken and Gravy Recipe delivers a comforting, savory experience with every bite. Tender chicken soaks up the rich, velvety gravy, creating a melt-in-your-mouth texture that feels indulgent yet homely. Fragrant garlic and thyme infuse the dish with earthy warmth, while a hint of butter adds a silky smoothness. Meanwhile, the slow-cooked onions dissolve into the gravy, offering subtle sweetness that balances the deep umami flavors. Whether served over mashed potatoes or rice, the Crockpot Chicken and Gravy Recipe wraps you in cozy, satisfying goodness.
Boosting the flavor
For an extra flavor kick, try stirring in a splash of white wine or a dollop of sour cream to brighten the gravy’s richness. Fresh herbs like rosemary or parsley add a pop of color and freshness, while crispy bacon bits introduce a smoky crunch. If you love bold spices, a pinch of smoked paprika or a dash of Worcestershire sauce deepens the savoriness. Pair this dish with fluffy garlic herb dinner rolls or a crisp avocado salad to balance the hearty flavors. With these tweaks, the Crockpot Chicken and Gravy Recipe becomes even more irresistible.
Tips for Success
Best practices for results
Always pat the chicken dry before adding it to the Crockpot Chicken and Gravy Recipe to ensure the gravy thickens properly. Additionally, use fresh herbs like thyme or rosemary for the best flavor, and stir the gravy occasionally during cooking to prevent clumping. For extra richness, substitute half the broth with heavy cream during the last 30 minutes of cooking. Finally, let the dish rest for 10 minutes before serving so the flavors meld perfectly.
Mistakes to avoid
Avoid overcrowding the Crockpot with too much chicken, as this can lead to uneven cooking. Instead, arrange the pieces in a single layer for consistent results. Also, resist the urge to lift the lid frequently, as this releases heat and slows cooking. For more tips on slow cooker success, check out our guide on slow cooker basics. Another common mistake is skipping the step of deglazing the pan if you brown the chicken first. Otherwise, you’ll miss out on deep flavor. Learn how to master this technique in our deglazing guide.
Serving and Pairing Suggestions
How to serve this dish
For a cozy family dinner, serve Crockpot Chicken and Gravy Recipe over a bed of fluffy mashed potatoes or buttery egg noodles. Alternatively, spoon it into a warm bread bowl for a rustic twist. To elevate the presentation, garnish with fresh thyme or a sprinkle of cracked black pepper. Meanwhile, for holiday gatherings, pair it with elegant side dishes like roasted Brussels sprouts or a crisp green salad. Whether you’re hosting a weeknight meal or a special occasion, this dish always shines.
h-it">What goes well with it
First, try pairing Crockpot Chicken and Gravy Recipe with our garlic herb dinner rolls—their soft texture soaks up the rich gravy perfectly. Next, a bright, tangy side like our creamy cucumber salad balances the dish’s savory flavors. Finally, a glass of chilled white wine or sparkling cider adds a refreshing contrast. Together, these pairings create a meal that’s both comforting and satisfying.
How long does it take to cook Crockpot Chicken and Gravy?
This Crockpot Chicken and Gravy Recipe typically takes 4-6 hours on low heat or 2-3 hours on high heat. The exact time depends on your slow cooker, but the chicken should reach an internal temperature of 165°F. The low-and-slow method ensures tender meat and rich gravy.
ank-math-faq-item">
Can I use frozen chicken for Crockpot Chicken and Gravy?
Yes, but thawed chicken works best for even cooking. If using frozen, extend the cooking time by 1-2 hours and ensure the internal temperature reaches 165°F. For the best Crockpot Chicken and Gravy texture, we recommend thawing first.
What sides go well with Crockpot Chicken and Gravy?
Mashed potatoes, rice, or egg noodles perfectly soak up the delicious gravy from this Crockpot Chicken and Gravy Recipe. For veggies, try steamed green beans, roasted carrots, or a crisp salad. Dinner rolls also make a great addition for sopping up extra sauce.
Can I make Crockpot Chicken and Gravy without cream of chicken soup?
Absolutely! Substitute with a homemade roux (butter, flour, and chicken broth) or use cream of mushroom soup. The Crockpot Chicken and Gravy Recipe still turns out creamy and flavorful with these alternatives. Adjust seasonings to taste if using substitutes.
div>
Best Cold Chicken Macaroni Salad Recipe
Introduction
There’s something undeniably comforting about a bowl of Cold Chicken Macaroni Salad Recipe, especially on a warm day when you crave something light yet satisfying. Whether you’re prepping for a picnic, a potluck, or just a quick lunch, this dish delivers creamy, crunchy, and savory flavors in every bite. Plus, it’s incredibly easy to make, which means you’ll spend less time in the kitchen and more time enjoying it with family and friends. If you’ve been searching for a foolproof recipe that balances simplicity and flavor, you’ve just found your new go-to.
Cold Chicken Macaroni Salad Recipe is a classic dish that combines tender pasta, juicy chicken, crisp vegetables, and a creamy dressing for a refreshing meal. Unlike heavy, mayo-drenched versions, this recipe strikes the perfect balance, making it a crowd-pleaser for all ages. What sets it apart is its versatility. You can serve it as a side dish at barbecues or enjoy it as a main course for a light dinner. Additionally, it’s a fantastic way to use leftover chicken, reducing food waste while creating something delicious. If you love meal prep, this salad stays fresh for days, making it a practical choice for busy weekdays.
At Exorecipes, we focus on recipes that are both approachable and flavorful, and this Cold Chicken Macaroni Salad Recipe fits perfectly. It aligns with our mission to deliver dishes that are easy to make but never compromise on taste. For more inspiration, check out our Easy Pasta Salads collection or explore our Quick Lunch Ideas for more time-saving meals. Whether you’re a seasoned cook or a beginner, this recipe guarantees success with minimal effort.
Why I Love This Recipe
This Cold Chicken Macaroni Salad Recipe holds a special place in my heart because it reminds me of summer gatherings at my grandma’s house. She always made it for family picnics, and the first bite instantly takes me back to those sunny afternoons. What I love most is how adaptable it is. Over the years, I’ve tweaked it with different herbs, spices, and even a splash of lemon juice for extra zest. No matter how I change it, though, it always brings people together—just like it did back then. That’s the magic of a great recipe: it’s not just food, it’s a memory maker.
Health and Nutrition
Why it’s good for your body
Cold Chicken Macaroni Salad Recipe packs a nutritious punch while keeping flavors fresh and satisfying. First, the lean chicken delivers high-quality protein to support muscle repair and keep you full longer. Additionally, the whole-grain macaroni offers complex carbs for steady energy, unlike refined pasta that spikes blood sugar. Moreover, the crisp veggies like celery and bell peppers add fiber, vitamins, and antioxidants to boost digestion and immunity.
Beyond macros, Cold Chicken Macaroni Salad Recipe includes healthy fats from ingredients like olive oil or Greek yogurt dressing. These fats help absorb fat-soluble vitamins and promote heart health. Meanwhile, herbs like parsley or dill provide anti-inflammatory benefits. For example, parsley is rich in vitamin K, which supports bone strength. Finally, because it’s served cold, this dish retains more nutrients than heat-sensitive recipes.
Whether you need a post-workout meal or a light lunch, Cold Chicken Macaroni Salad Recipe balances convenience and nutrition. The combination of protein, fiber, and healthy fats stabilizes hunger and prevents energy crashes. Plus, you can customize it with extra veggies or avocado for even more benefits. Ultimately, it’s a versatile dish that fuels your body without sacrificing taste.
How it fits in a healthy lifestyle
Cold Chicken Macaroni Salad Recipe fits seamlessly into a balanced diet, whether you’re meal-prepping or hosting a gathering. For protein-focused eaters, the chicken and Greek yogurt dressing offer a lean alternative to heavy mayo-based salads. If you’re watching carbs, swap regular pasta for chickpea or lentil noodles to keep it gluten-free and higher in plant-based protein.
This dish also aligns with heart-healthy eating. Olive oil and veggies like red onions contribute monounsaturated fats and flavonoids, which support cardiovascular health. For more ideas on balancing meals, check out our guide to easy meal prep strategies. And if you’re looking for other high-protein lunch options, our protein-packed recipes roundup has plenty of inspiration.
Even on busy days, Cold Chicken Macaroni Salad Recipe simplifies healthy eating. Make it ahead, and it stays fresh for lunches or quick dinners. Pair it with a leafy green salad or whole-grain roll for a complete meal. With its adaptable ingredients, it’s a practical way to enjoy flavor and nutrition without extra effort.
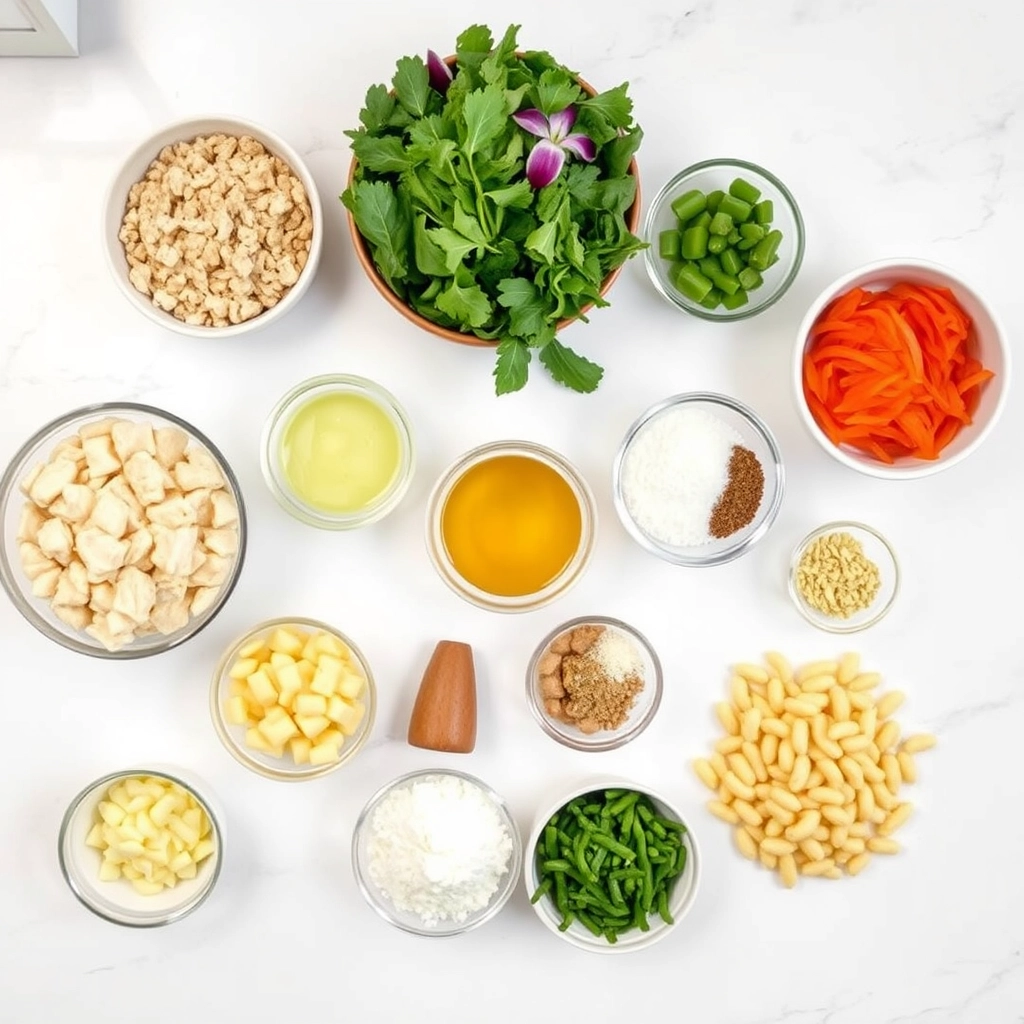
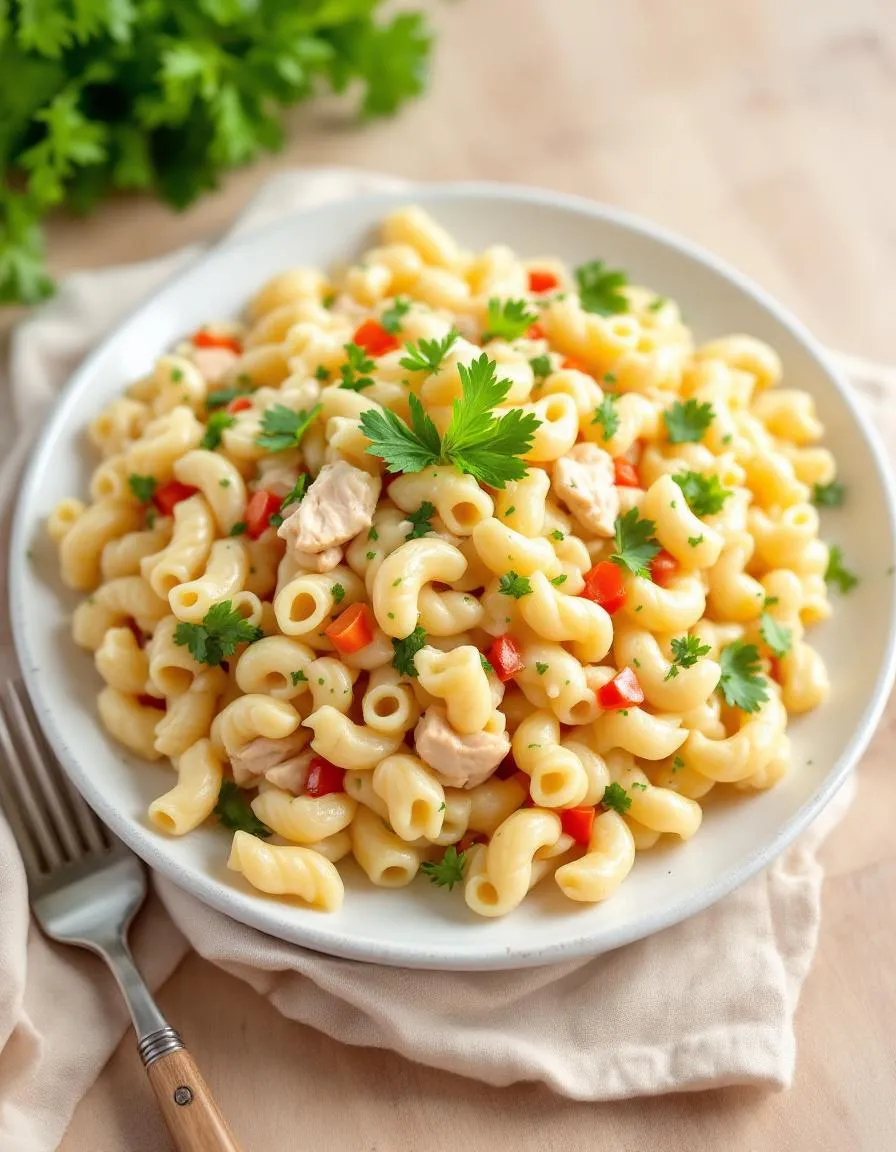
A refreshing and creamy pasta salad with tender chicken, crisp vegetables, and a tangy dressing.
Ingredients
Scale
For the Crust:
2 cups cooked chicken, shredded
2 cups elbow macaroni, cooked and cooled
1/2 cup mayonnaise
1/4 cup sour cream
1 tbsp Dijon mustard
1 celery stalk, diced
1/2 red bell pepper, diced
1/4 cup red onion, finely chopped
1 tbsp fresh parsley, chopped
1 tsp lemon juice
Salt and pepper to taste
Instructions
1. Prepare the Crust:
In a large bowl, combine mayonnaise, sour cream, Dijon mustard, lemon juice, salt, and pepper.
Add cooked macaroni, shredded chicken, celery, red bell pepper, red onion, and parsley to the bowl.
Gently toss all ingredients until evenly coated with the dressing.
Cover and refrigerate for at least 1 hour before serving to allow flavors to meld.
Stir well before serving and adjust seasoning if needed.
Notes
You can customize the seasonings to taste.
s-dish">How to Prepare This Dish
Steps and time-saving tips
Start by boiling the macaroni in salted water until al dente, then drain and rinse it under cold water to stop the cooking process. While the pasta cools, shred or dice cooked chicken into bite-sized pieces—rotisserie chicken works great for saving time. Next, whisk together mayonnaise, a splash of apple cider vinegar, and a pinch of sugar in a large bowl for the dressing. Toss the cooled macaroni, chicken, diced celery, and red onions into the bowl, then gently fold everything until evenly coated. For extra crunch, stir in halved grapes or chopped apples just before serving. If you’re prepping ahead, cover the bowl and chill the Cold Chicken Macaroni Salad Recipe for at least an hour to let the flavors meld. To save even more time, chop veggies the night before or use pre-shredded carrots from the store. Just before serving, sprinkle with paprika or fresh herbs for a pop of color.
Mistakes I’ve made and learned from
I once rushed the cooling step and ended up with a soggy Cold Chicken Macaroni Salad Recipe—tossing warm pasta with mayo creates a greasy mess. Now, I spread the macaroni on a baking sheet to cool faster or rinse it thoroughly with cold water. Another blunder? Overloading the dressing. Too much mayo drowns the textures, so I start with half the amount, then add more as needed. If you’re new to balancing flavors, my guide on perfecting salad dressings breaks it down simply. And if your chicken turns out dry, try the tricks in my juicy chicken secrets post—brining or using thighs makes a huge difference.
n-and-variations">Cultural Connection and Variations
Where this recipe comes from
Cold Chicken Macaroni Salad Recipe has roots in American potluck culture, where creamy, hearty dishes shine at picnics and family gatherings. Many trace its origins to mid-20th-century home cooking, when cooks combined leftover chicken with pantry staples like pasta and mayo. However, variations pop up worldwide. In the Philippines, for example, they add sweet pineapple chunks and raisins for a tropical twist. Meanwhile, Southern U.S. versions often include pickle relish or hard-boiled eggs for extra tang and texture.
In my family, Cold Chicken Macaroni Salad Recipe was a summer staple, always present at backyard barbecues. My grandma swore by a dash of paprika and celery for crunch. Some regions skip the chicken entirely, turning it into a vegetarian side, while others load it with bacon or avocado. No matter the tweaks, the dish remains a crowd-pleaser because it’s flexible, filling, and nostalgic. Whether served at a church picnic or a beachside luau, it bridges cultures through shared comfort food.
How it fits in today’s cooking
Today, Cold Chicken Macaroni Salad Recipe still holds its own as a meal-prep hero and party favorite. Busy cooks love it because it’s make-ahead friendly, and health-conscious versions swap mayo for Greek yogurt or add extra veggies. It’s a star at summer potlucks, but also fits cozy winter spreads alongside dishes like Creamy Tuscan Chicken or holiday roasts.
Modern twists include g
luten-free pasta or spicy Sriracha mayo for a kick. Some even repurpose it as a wrap filling or stuff it into avocados for a low-carb lunch. Whether you stick to tradition or experiment, Cold Chicken Macaroni Salad Recipe adapts effortlessly. For more easy crowd-pleasers, check out this Garlic Butter Steak Bites recipe—perfect for pairing with a chilled pasta salad on hot days.
Taste and Texture
What makes it delicious
This Cold Chicken Macaroni Salad Recipe delivers a symphony of textures and flavors in every bite. Tender chunks of chicken mingle with al dente macaroni, while crisp celery and red onion add a refreshing crunch. The creamy dressing, rich with mayonnaise and a hint of tangy mustard, coats each ingredient perfectly. Fresh herbs like parsley or dill brighten the dish, giving it a fragrant lift. Meanwhile, sweet pops of relish or diced pickles balance the savory notes, making the Cold Chicken Macaroni Salad Recipe irresistibly satisfying. Every forkful is cool, creamy, and packed with layers of flavor.
Boosting the flavor
Elevate your Cold Chicken Macaroni Salad Recipe with a few easy tweaks. For extra depth, swap regular mayonnaise with garlic aioli or stir in a spoonful of Dijon mustard. Crumbled bacon or toasted nuts add a smoky, crunchy contrast. If you love heat, a dash of cayenne or a sprinkle of paprika brings warmth without overpowering. Pair it with a side of grilled vegetable skewers for a fresh, summery meal. Experiment with fresh herbs or citrus zest to keep each bite vibrant and exciting.
Always cook the pasta al dente for your Cold Chicken Macaroni Salad Recipe, as it holds up better when chilled. Furthermore, use freshly shredded chicken instead of canned for the best texture and flavor. Chill the salad for at least two hours before serving to let the flavors meld perfectly. Additionally, toss the ingredients gently to avoid crushing the pasta or vegetables. Finally, taste and adjust the seasoning right before serving for a balanced dish every time.
Mistakes to avoid
Avoid overcooking the pasta, as it turns mushy once mixed with the dressing. Instead, check it a minute before the package instructions suggest. Also, don’t skip rinsing the cooked pasta under cold water to stop the cooking process—this keeps your Cold Chicken Macaroni Salad Recipe from becoming sticky. For more tips on handling pasta, check out our guide on perfect pasta techniques. Another common mistake is adding the dressing too early, which can make the salad soggy. Wait until just before serving or use our creamy dressing tips for the ideal consistency.
g-suggestions">Serving and Pairing Suggestions
How to serve this dish
For a fresh and inviting presentation, serve your Cold Chicken Macaroni Salad Recipe in a large glass bowl to showcase its colorful ingredients. Alternatively, scoop individual portions onto crisp lettuce leaves for an elegant touch at brunch or summer gatherings. Meanwhile, garnish with a sprinkle of fresh herbs like parsley or chives to add vibrancy. This dish shines at picnics, potlucks, or as a light lunch alongside crusty bread. If you’re hosting a barbecue, let the Cold Chicken Macaroni Salad Recipe take center stage by pairing it with grilled favorites.
What goes well with it
Complement the creamy textures of your Cold Chicken Macaroni Salad Recipe with a tangy side like our Classic Coleslaw, which adds a refreshing crunch. For a heartier meal, serve it with grilled corn on the cob or buttery garlic bread. Additionally, a chilled glass of lemonade or iced tea balances the richness perfectly. If you’re planning a full spread, try pairing it with our Grilled Vegetable Skewers for a satisfying contrast of flavors and temperatures.
math-faq-block">
How long does cold chicken macaroni salad last in the fridge?
Cold Chicken Macaroni Salad Recipe stays fresh for 3-5 days when stored in an airtight container in the refrigerator. For best quality, keep it chilled below 40°F and avoid leaving it out for more than 2 hours. The mayo-based dressing may separate slightly over time, so give it a gentle stir before serving.
Can I use Greek yogurt instead of mayo in cold chicken macaroni salad?
Yes, Greek yogurt makes a great healthier substitute for mayo in Cold Chicken Macaroni Salad Recipe. Use plain, unsweetened yogurt and mix it with a bit of lemon juice or vinegar to mimic mayo’s tanginess. The texture will be slightly lighter, but the salad still tastes creamy and delicious.
What vegetables go well in cold chicken macaroni salad?
Classic additions to Cold Chicken Macaroni Salad Recipe include crunchy celery, diced bell peppers, shredded carrots, and red onions. For extra color and flavor, try adding peas, chopped pickles, or cherry tomatoes. Always pat vegetables dry before mixing to prevent a watery salad.
ank-math-faq-item">
How do you keep macaroni salad from drying out?
To prevent dryness in your Cold Chicken Macaroni Salad Recipe, cook pasta al dente and rinse it with cold water to stop overcooking. Use enough dressing to coat all ingredients generously, and store the salad with plastic wrap pressed directly on the surface. If it dries slightly, stir in a tablespoon of milk or mayo before serving.