There’s something magical about the smell of warm, cinnamon-spiced apples filling your kitchen. Whether you crave a cozy dessert or a healthy snack, Air Fryer Apples deliver that nostalgic comfort with minimal effort. This recipe transforms simple ingredients into a caramelized, tender treat that feels like a hug in every bite. Plus, it’s a guilt-free way to satisfy your sweet tooth while keeping things quick and easy. If you’ve ever doubted your air fryer’s potential, this dish will make you fall in love with it all over again.
Air Fryer Apples are exactly what they sound like: juicy apple slices cooked to perfection in your air fryer. Unlike traditional frying, this method uses little to no oil, making it a healthier alternative without sacrificing flavor. The hot circulating air caramelizes the natural sugars in the apples, while spices like cinnamon and nutmeg add warmth and depth. What makes this recipe special is its versatility. You can enjoy these apples as a standalone dessert, pair them with yogurt for breakfast, or even top them on pancakes or oatmeal. For more creative twists, check out our air fryer dessert collection.
This recipe also fits perfectly with our blog’s mission to simplify cooking without compromising taste. Busy home cooks and health-conscious eaters alike will appreciate how Air Fryer Apples come together in under 15 minutes. Moreover, they’re a fantastic way to use up leftover apples before they go bad. If you’re new to air frying, don’t worry. Our air fryer beginner’s guide breaks down everything you need to know. From choosing the right apples to adjusting cook times, we’ve got you covered every step of the way.
Why I Love This Recipe
Air Fryer Apples hold a special place in my heart because they remind me of autumn evenings growing up. My grandmother used to bake apples with cinnamon, and while I loved the flavor, I never had the patience for the oven. Discovering this air fryer version felt like a game-changer. Now, I can whip up that same comforting taste in minutes, whether I’m meal prepping for the week or treating myself after a long day. It’s the kind of recipe that feels indulgent but stays wholesome, and that balance is everything to me.
Health and Nutrition
Why it’s good for your body
Air Fryer Apples pack a nutritious punch while satisfying your sweet tooth. First, they retain more fiber than traditional fried desserts, which helps support digestion and keeps you full longer. Since you cook them with little to no oil, they also cut down on unnecessary fats without sacrificing flavor. Plus, apples naturally contain vitamins like C and potassium, which boost immunity and heart health.
Another benefit of Air Fryer Apples is their lower sugar content compared to many store-bought snacks. By controlling the ingredients, you avoid hidden sugars and preservatives. Furthermore, the air frying process caramelizes the apples’ natural sugars, enhancing their sweetness without added calories. This makes them a smarter choice for anyone watching their sugar intake.
Finally, Air Fryer Apples deliver antioxidants like quercetin, which may reduce inflammation. Whether you enjoy them as a snack or dessert, you’re treating your body to wholesome nutrition. With their combination of fiber, vitamins, and natural sweetness, they’re a guilt-free way to indulge.
How it fits in a healthy lifestyle
Air Fryer Apples fit seamlessly into a balanced diet. They work well as a light dessert after a nutritious dinner or as a midday snack to curb cravings. Because they’re naturally gluten-free and vegan-friendly, they accommodate various dietary needs without extra effort.
If you’re focused on heart health, Air Fryer Apples support your goals by providing potassium and fiber. Pair them with a handful of nuts for added protein, or enjoy them alongside a quick breakfast for a nutrient-packed start to your day. Their simplicity and versatility make them an easy addition to any meal plan.
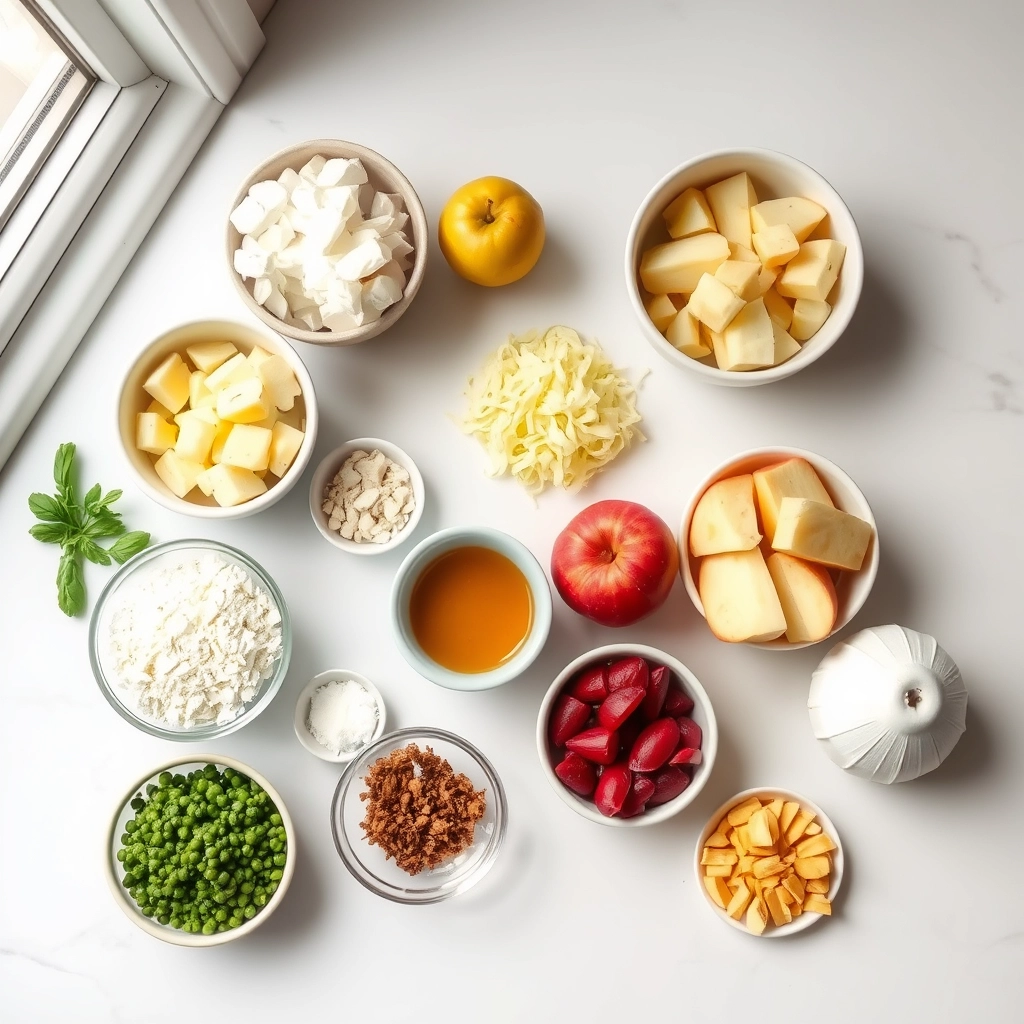
Sweet and tender apples cooked to perfection in the air fryer, perfect for a quick dessert or snack.
Ingredients
Scale
For the Crust:
4 medium apples, cored and sliced
1 tbsp lemon juice
2 tbsp brown sugar
1 tsp ground cinnamon
1/4 tsp ground nutmeg
1 tbsp melted butter
Instructions
1. Prepare the Crust:
Preheat air fryer to 375°F (190°C).
In a bowl, toss apple slices with lemon juice, brown sugar, cinnamon, nutmeg, and melted butter until evenly coated.
Place apples in the air fryer basket in a single layer, working in batches if needed.
Cook for 8-10 minutes, shaking the basket halfway through, until apples are tender and slightly caramelized.
Notes
You can customize the seasonings to taste.
“`html
s-dish">How to Prepare This Dish
Steps and time-saving tips
Start by preheating your air fryer to 350°F so it’s ready when you are. While it heats, peel and core two large apples, then slice them into even half-inch pieces for consistent cooking. Toss the slices in a bowl with a tablespoon of melted butter, a teaspoon of cinnamon, and a sprinkle of brown sugar. Mix everything gently until the apples are evenly coated. For a quicker cleanup, line your air fryer basket with parchment paper, then arrange the apple slices in a single layer. Air fry them for 8-10 minutes, shaking the basket halfway to prevent sticking. If you love extra crunch, broil the apples for a minute at the end. Serve warm with a scoop of vanilla ice cream or a drizzle of caramel for a cozy treat. To save time, prep a double batch and store half in the fridge for quick desserts later in the week.
Mistakes I’ve made and learned from
I once rushed the prep and skipped peeling the apples, which left tough skins that ruined the texture. Now I always peel them first for that perfect tender bite. Another blunder? Overcrowding the air fryer basket, which steamed the apples instead of crisping them. Spreading them in a single layer made all the difference. If you’re new to air frying, check out my guide on air fryer basics to avoid common pitfalls. And if your apples turn out too soft, try adjusting the cook time using tips from my perfect fruit textures post. Trust me, a little patience pays off with this recipe!
Air Fryer Apples carry the cozy charm of old-fashioned baked apples, but with a modern twist. Originally, people slow-baked apples with cinnamon and sugar, a tradition rooted in European and American kitchens. Families often served them during autumn harvests or winter holidays, turning simple ingredients into something special. Today, the air fryer speeds up the process while keeping that nostalgic flavor intact.
Around the world, variations of this dish pop up with local flair. In France, they might add a splash of Calvados or top the apples with crème fraîche. Meanwhile, in the American South, you’ll find them paired with pecans or drizzled with caramel. Some cultures even stuff apples with nuts and dried fruits, creating a heartier version. Whether you grew up enjoying Air Fryer Apples as a quick dessert or a holiday staple, their versatility makes them a universal favorite.
ays-cooking">How it fits in today’s cooking
Air Fryer Apples fit perfectly into today’s fast-paced kitchens. Busy cooks love how the air fryer delivers caramelized goodness in minutes, making it ideal for weeknight treats or last-minute desserts. Plus, they’re a healthier alternative to fried sweets, aligning with modern preferences for lighter indulgences.
Seasonal cooking also keeps this dish relevant. During fall, Air Fryer Apples pair beautifully with pumpkin-spiced treats, while winter holidays call for warm, cinnamon-kissed servings. Some families even incorporate them into breakfast, topping oatmeal or yogurt. For more inspiration, check out how air fryer recipes can transform everyday meals. No matter how you serve them, these apples bridge tradition and convenience effortlessly.
Taste and Texture
What makes it delicious
Air Fryer Apples deliver a warm, comforting bite with a perfect balance of sweet and tangy flavors. The edges caramelize into a lightly crisp texture, while the centers stay tender and juicy. Cinnamon and brown sugar melt into the fruit, creating a fragrant, spiced aroma that fills your kitchen. Each bite offers a satisfying contrast—soft yet slightly chewy, with a hint of buttery richness from a touch of melted butter. Whether you enjoy them alone or as a topping, Air Fryer Apples bring cozy, dessert-like indulgence without the fuss.
r">Boosting the flavor
For an extra flavor boost, try drizzling Air Fryer Apples with warm caramel or a dollop of whipped cream. A sprinkle of nutmeg or cardamom deepens the spice profile, while chopped nuts add a crunchy contrast. If you love pairing fruit with dairy, swirl in a spoonful of homemade vanilla ice cream for a creamy finish. Prefer a tangy twist? A splash of lemon juice brightens the sweetness, or layer them over cinnamon oatmeal for a hearty breakfast upgrade. The possibilities are endless!
Tips for Success
Best practices for results
For perfect Air Fryer Apples every time, always slice your apples evenly so they cook uniformly. Additionally, lightly coat them with oil or butter to enhance crispiness while preventing sticking. Moreover, shake the basket halfway through cooking to ensure even browning. Finally, let them cool slightly before serving to avoid burning your mouth and to let the flavors settle.
>Mistakes to avoid
Avoid overcrowding the air fryer basket, as this leads to unevenly cooked Air Fryer Apples. Instead, cook in batches if needed. Furthermore, don’t skip preheating the air fryer, since a cold start can result in soggy texture. For more air fryer troubleshooting, check out our guide on common air fryer mistakes. Also, remember to use firm apples like Honeycrisp or Granny Smith—softer varieties may turn mushy. Learn more about picking the right ingredients in our fruit selection guide.
Serving and Pairing Suggestions
How to serve this dish
Serve Air Fryer Apples warm for the best flavor and texture. For a cozy brunch, layer them over yogurt or oatmeal with a drizzle of honey. Alternatively, turn them into a stunning dessert by topping vanilla ice cream with a generous scoop of caramelized Air Fryer Apples and a sprinkle of cinnamon. During the holidays, present them in a rustic bowl with a dusting of powdered sugar and fresh mint leaves for a festive touch. No matter the occasion, these apples shine when you plate them with a touch of creativity.
What goes well with it
Pair Air Fryer Apples with a scoop of creamy vanilla ice cream for a classic dessert that highlights their warm spices. If you prefer a breakfast twist, try them alongside fluffy buttermilk pancakes for a sweet and satisfying start to the day. For a refreshing contrast, serve them with a chilled glass of sparkling apple cider or a warm mug of spiced chai tea. You can also elevate your snack game by pairing them with a slice of cinnamon swirl bread, creating a harmony of flavors that feels indulgent yet wholesome.
Air fryer apples typically take 8–12 minutes at 375°F, depending on thickness and desired tenderness. Stir or shake the basket halfway through for even cooking. The apples should be soft but not mushy for the best texture.
Do you need to peel apples for air frying?
Peeling is optional for air fryer apples—the skin softens during cooking and adds fiber. If you prefer a smoother texture, peel the apples first. Either way, air fryer apples will caramelize beautifully with cinnamon and sugar.
ank-math-faq-item">
What are the best apples for air frying?
Firm, slightly tart apples like Granny Smith, Honeycrisp, or Fuji work best for air fryer apples. These varieties hold their shape and balance the sweetness of added spices. Avoid overly soft apples like Red Delicious, which may become too mushy.
Can you make air fryer apples without sugar?
Yes! Air fryer apples develop natural sweetness when caramelized. For a sugar-free version, use cinnamon, nutmeg, or a drizzle of honey. The air fryer’s dry heat intensifies the fruit’s natural flavors without added sweeteners.
Best Eggplant Parmesan Sliders – Easy Baked Recipe
Introduction
If you crave a comforting twist on a classic Italian dish, these Eggplant Parmesan Sliders Recipe will steal your heart. Imagine tender, crispy eggplant layered with gooey cheese and rich marinara, all tucked into soft slider buns. Whether you need a crowd-pleasing appetizer or a cozy weeknight dinner, this recipe delivers big flavors in every bite. Plus, it’s a fantastic way to sneak more veggies into your meals without sacrificing indulgence. Let’s dive into why these sliders deserve a spot in your recipe rotation.
Eggplant Parmesan Sliders Recipe reinvents the traditional Italian favorite into a handheld delight perfect for parties, family dinners, or even meal prep. Unlike the heavier classic version, these sliders keep things light yet satisfying, with golden-breaded eggplant slices, melted mozzarella, and a tangy marinara sauce. What makes them special? They’re versatile. Serve them as appetizers at game-day gatherings or pair them with a crisp salad for a balanced meal. For those who love plant-based options, you can easily adapt this dish by using vegan cheese or gluten-free breadcrumbs. If you enjoy creative twists on classics, you’ll adore our Vegetarian Stuffed Peppers or these Garlic Butter Shrimp Pasta recipes too. The blog’s tone celebrates approachable, flavorful cooking, and this recipe fits right in—simple enough for beginners but impressive enough to wow guests.
Why I Love This Recipe
Eggplant Parmesan Sliders remind me of Sunday dinners at my grandma’s house, where she’d fry up eggplant until it was perfectly crisp. Her version was hearty, but these sliders add a fun, modern twist that my kids devour every time. I love how they bring people together, whether it’s friends grabbing them off a party platter or my family arguing over who gets the last one. They’re also forgiving—swap the cheese, add a spicy kick, or bake instead of fry. No matter how you make them, they always feel like a hug on a plate.
Health and Nutrition
Why it’s good for your body
Eggplant Parmesan Sliders Recipe packs a nutritious punch while delivering bold flavors. First, eggplant serves as a rich source of fiber, which supports digestion and keeps you feeling full longer. Additionally, it contains antioxidants like nasunin, which may help protect your cells from damage. Meanwhile, the tomato sauce provides lycopene, a compound linked to heart health.
Moreover, Eggplant Parmesan Sliders Recipe includes protein from cheese, helping to maintain muscle strength and repair tissues. The dish also offers calcium for strong bones and vitamin C for immune support. Because the recipe bakes rather than fries the eggplant, it cuts down on excess oil without sacrificing crispiness. As a result, you enjoy a lighter yet satisfying meal.
Finally, Eggplant Parmesan Sliders Recipe balances indulgence with nourishment. The combination of veggies, dairy, and whole-grain slider buns (if used) creates a well-rounded dish. Whether you serve it as an appetizer or main course, you get a meal that fuels your body and pleases your taste buds.
How it fits in a healthy lifestyle
Eggplant Parmesan Sliders Recipe fits seamlessly into a balanced diet. For gluten-free eaters, simply swap regular buns for gluten-free alternatives. The dish also works well for vegetarians, offering plant-based protein and essential nutrients. If you’re watching your heart health, the fiber-rich eggplant and lycopene-packed sauce make it a smart choice.
Planning meals ahead? Eggplant Parmesan Sliders Recipe stores well, so you can prep it for quick lunches or dinners. Pair it with a fresh salad or roasted veggies for extra nutrients. For more healthy recipe ideas, check out our vegetarian meal prep guide. If you’re curious about other nutrient-dense dishes, explore our heart-healthy dinner options to keep your meals varied and exciting.
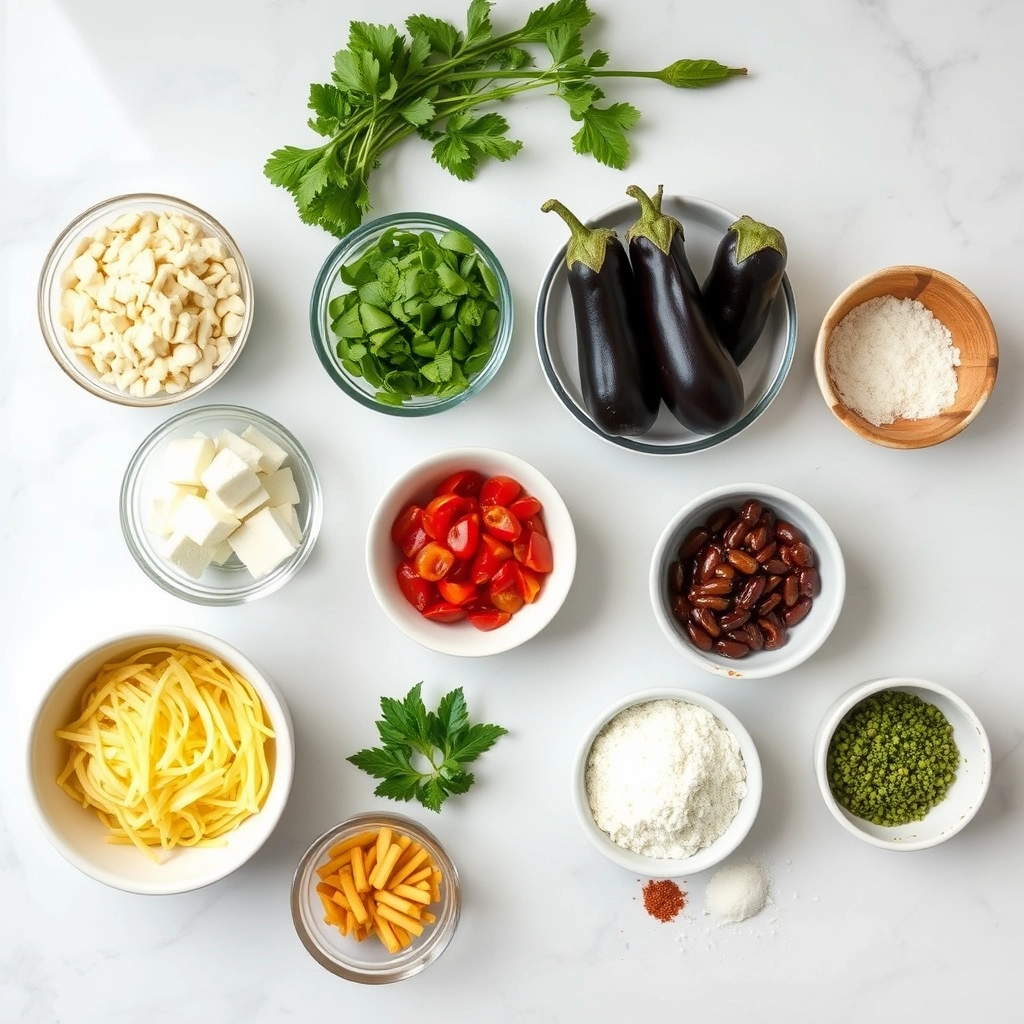
Delicious mini eggplant Parmesan sandwiches perfect for appetizers or a light meal.
Ingredients
Scale
For the Crust:
1 large eggplant, sliced into 1/2-inch rounds
1 cup breadcrumbs
1/2 cup grated Parmesan cheese
1 teaspoon garlic powder
1 teaspoon dried oregano
2 eggs, beaten
1 cup marinara sauce
8 small slider buns
1 cup shredded mozzarella cheese
2 tablespoons olive oil
Salt and pepper to taste
Instructions
1. Prepare the Crust:
Preheat oven to 375°F (190°C). Line a baking sheet with parchment paper.
In a shallow dish, mix breadcrumbs, Parmesan cheese, garlic powder, oregano, salt, and pepper.
Dip each eggplant slice into beaten eggs, then coat with the breadcrumb mixture.
Heat olive oil in a skillet over medium heat. Fry eggplant slices until golden brown, about 2-3 minutes per side. Transfer to the prepared baking sheet.
Top each eggplant slice with marinara sauce and mozzarella cheese. Bake for 10-12 minutes, until cheese is melted.
Toast slider buns lightly if desired. Assemble sliders by placing a cheesy eggplant slice between each bun.
Serve warm and enjoy!
Notes
You can customize the seasonings to taste.
“`html
="how-to-prepare-this-dish">How to Prepare This Dish
Steps and time-saving tips
Start by slicing the eggplant into thin rounds, about 1/4-inch thick, for even cooking. Lightly salt the slices and let them sit for 10 minutes to draw out excess moisture—this prevents sogginess later. Meanwhile, whisk together flour, eggs, and a pinch of salt in separate shallow bowls for dredging. Pat the eggplant dry with paper towels, then dip each slice into the flour, followed by the egg, and finally coat with breadcrumbs mixed with grated Parmesan. Heat olive oil in a skillet over medium heat and fry the breaded eggplant until golden brown on both sides, about 3 minutes per side. Drain on paper towels to remove excess oil. For a time-saving hack, bake the eggplant instead at 400°F for 20 minutes, flipping halfway, though frying delivers extra crispiness. Layer the cooked eggplant slices on slider buns with marinara sauce, fresh basil, and a generous sprinkle of mozzarella. Pop them under the broiler for 2 minutes to melt the cheese, then serve warm. If prepping ahead, store breaded eggplant in the fridge for up to a day before frying.
Mistakes I’ve made and learned from
Early on, I rushed the salting step and ended up with soggy Eggplant Parmesan Sliders—now I never skip it. Another blunder? Overcrowding the skillet, which steamed the slices instead of crisping them. Cooking in batches fixes this, and I reuse the same oil if it’s still clean. For more on oil management, check out my guide on frying tips. I also learned the hard way that skimping on cheese leads to dry sliders. A mix of fresh mozzarella and Parmesan works best, as I detail in my cheese pairings post. Trust me, these tweaks turn good sliders into great ones.
Eggplant Parmesan Sliders Recipe takes inspiration from the classic Italian dish, melanzane alla parmigiana, but with a fun, handheld twist. Traditionally, eggplant parmesan layers fried eggplant with tomato sauce and cheese, baked until bubbly. However, this slider version swaps the casserole dish for soft rolls, making it perfect for gatherings or casual meals. In Southern Italy, families often prepare eggplant parmesan during summer when eggplants peak, while in the U.S., it’s a year-round comfort food.
Interestingly, variatio
ns pop up worldwide. In Greece, they might add feta or oregano for a Mediterranean flair. Some American cooks sneak in spicy marinara or vegan cheese to suit modern tastes. My grandma, for instance, always topped her Eggplant Parmesan Sliders Recipe with fresh basil from her garden, giving it a bright, aromatic finish. Whether served as an appetizer or main course, this dish bridges tradition and creativity.
How it fits in today’s cooking
Today, Eggplant Parmesan Sliders Recipe shines as a versatile crowd-pleaser. Busy home cooks love it for meal prep, while foodies dress it up for parties. Since sliders are inherently shareable, they fit right into game-day spreads or easy weeknight dinners. Plus, with plant-based diets on the rise, swapping in gluten-free buns or dairy-free cheese keeps the dish inclusive.
Seasonally, it’s a summer star when eggplants thrive, but cozy enough for fall comfort food rotations. Some even pair it with healthy side dishes for a balanced meal. Whether you stick to the classic or experiment with global twists, this recipe proves that timeless flavors always find a fresh way to delight.
>Taste and Texture
What makes it delicious
Eggplant Parmesan Sliders Recipe delivers a symphony of flavors and textures in every bite. First, the crispy, golden breadcrumb coating gives way to tender, melt-in-your-mouth eggplant, while the gooey mozzarella and rich marinara sauce add layers of creamy indulgence. Meanwhile, the garlic-infused bread rolls offer a soft yet slightly chewy contrast, tying everything together. Fragrant basil and a hint of Parmesan cheese elevate the dish with earthy, umami notes. Whether you savor it warm or at room temperature, Eggplant Parmesan Sliders Recipe balances hearty comfort with bright, fresh accents.
Boosting the flavor
For an extra flavor punch, try brushing the eggplant slices with a garlic-herb oil before breading—it deepens the savory profile. Alternatively, swap regular mozzarella for smoked cheese to add a subtle, smoky complexity. A drizzle of homemade pesto or a sprinkle of chili flakes can also brighten each slider. If you love bold contrasts, pair them with a tangy balsamic glaze for dipping. Experimenting with fresh herbs or a touch of lemon zest can make your Eggplant Parmesan Sliders Recipe even more irresistible.
Tips for Success
Best practices for results
Slice the eggplant evenly to ensure uniform cooking in your Eggplant Parmesan Sliders Recipe. Additionally, salt the slices and let them sit for 15 minutes to draw out excess moisture—this prevents sogginess. Always use fresh mozzarella for the best melt, and lightly toast the slider buns for extra crunch. Finally, layer the ingredients while the eggplant is still warm so the cheese melts perfectly.
Mistakes to avoid
Avoid overcrowding the pan when frying the eggplant, as this leads to uneven browning. Instead, cook in batches for crispier results. Also, don’t skip the breading step—it adds texture and keeps the eggplant from absorbing too much oil. For more frying tips, check out our guide on perfect frying techniques. Another common mistake is using cold sauce straight from the jar. Warm it slightly first for better flavor infusion, just like we recommend in our sauce secrets article.
Serving and Pairing Suggestions
How to serve this dish
Serve your Eggplant Parmesan Sliders Recipe on a rustic wooden board or a colorful platter for a casual yet inviting presentation. Meanwhile, stack them slightly staggered to show off the layers of crispy eggplant, melted cheese, and marinara. For a festive touch, garnish with fresh basil leaves or a sprinkle of grated Parmesan. These sliders shine at game-day gatherings, summer picnics, or even as a fun twist on holiday appetizers. If you’re hosting a party, consider pairing them with mini skewers or napkins for easy handling.
h-it">What goes well with it
Pair your Eggplant Parmesan Sliders Recipe with a crisp arugula salad tossed in lemon vinaigrette for a refreshing contrast to the rich flavors. Alternatively, try a side of roasted garlic breadsticks to soak up any extra marinara. For drinks, a chilled Pinot Grigio or sparkling lemonade balances the dish’s savory notes. If you’re craving more Italian-inspired bites, our Caprese Skewers or Creamy Tomato Soup make delightful companions. Each pairing enhances the sliders without overpowering them.
Can I make Eggplant Parmesan Sliders ahead of time?
Yes! You can prepare the eggplant slices and assemble the sliders a few hours before serving. Keep them refrigerated and bake just before serving for the best texture. Eggplant Parmesan Sliders taste great fresh but still hold up well when prepped in advance.
ank-math-faq-item">
What’s the best bread for Eggplant Parmesan Sliders?
Soft slider buns or mini ciabatta rolls work best to complement the crispy eggplant. Avoid overly thick bread—you want the focus on the Eggplant Parmesan Sliders filling. Brioche buns add a slight sweetness that pairs well with the savory flavors.
How do you keep eggplant from getting soggy in sliders?
Salt the eggplant slices and let them drain for 30 minutes to remove excess moisture. Bread and bake them until crispy before assembling your Eggplant Parmesan Sliders. This double-layer technique ensures they stay firm and delicious.
Can I air fry the eggplant for these sliders?
Absolutely! Air frying gives the eggplant a perfect crispy texture with less oil. Cook breaded slices at 375°F for 10-12 minutes, flipping halfway. This method works great for lighter Eggplant Parmesan Sliders without sacrificing flavor.
div>
Best Roasted Tomato Basil Soup – Easy Homemade Recipe
Introduction
There’s something undeniably comforting about a bowl of Roasted Tomato Basil Soup. Whether you’re craving warmth on a chilly evening or a taste of summer’s peak flavors, this classic dish delivers every time. The rich, caramelized tomatoes, fragrant basil, and velvety texture make it a timeless favorite. Plus, it’s incredibly versatile—pair it with a grilled cheese sandwich for the ultimate comfort meal or enjoy it solo for a light yet satisfying lunch. Let’s dive into why this recipe deserves a spot in your kitchen rotation.
Roasted Tomato Basil Soup is more than just a meal. It’s a celebration of simple, high-quality ingredients transformed into something extraordinary. Roasting the tomatoes deepens their natural sweetness, while fresh basil adds a bright, herbal note that balances the richness. This soup also fits perfectly with our blog’s focus on approachable, flavorful recipes that anyone can master. Whether you’re a beginner or a seasoned cook, you’ll appreciate how easy it is to make. For more cozy soup ideas, check out our Creamy Butternut Squash Soup or explore our guide to perfecting soup seasonings. The beauty of this dish lies in its simplicity, yet it never fails to impress.
Why I Love This Recipe
Roasted Tomato Basil Soup holds a special place in my heart because it reminds me of family gatherings and lazy Sunday afternoons. My grandmother used to make a similar version, and the smell of roasting tomatoes still takes me back to her kitchen. Over the years, I’ve tweaked the recipe to my taste, but the essence remains the same—a bowl full of warmth and nostalgia. Every time I make it, I’m reminded how food can connect us to memories and people we love. That’s why I’m so excited to share this recipe with you.
Health and Nutrition
Why it’s good for your body
Roasted Tomato Basil Soup packs a powerful nutritional punch while delighting your taste buds. First, tomatoes deliver a hefty dose of lycopene, an antioxidant linked to heart health and reduced inflammation. Since roasting intensifies their natural sweetness, you also get deeper flavor without added sugar. Additionally, fresh basil contributes anti-inflammatory compounds, making this soup a smart choice for overall wellness.
Moreover, Roasted Tomato Basil Soup offers a hydrating base, especially when prepared with low-sodium broth. The combination of fiber-rich tomatoes and healthy fats from olive oil helps stabilize blood sugar levels. Meanwhile, the roasting process enhances nutrient absorption, so your body reaps more benefits from each spoonful. Whether you enjoy it as a light lunch or a cozy dinner, this soup nourishes you without weighing you down.
Finally, Roasted Tomato Basil Soup fits seamlessly into diverse diets. It’s naturally gluten-free and vegan-friendly when made with plant-based ingredients. The simplicity of its components means you avoid processed additives, prioritizing whole-food nutrition. With every serving, you’re treating your body to vitamins A and C, potassium, and immune-boosting properties. Truly, this soup proves that wholesome eating can be both delicious and effortless.
How it fits in a healthy lifestyle
Roasted Tomato Basil Soup effortlessly aligns with balanced eating habits. For those managing weight, its low-calorie yet satisfying profile makes it a perfect starter or main dish. Pair it with a protein like grilled chicken or a scoop of quinoa for a complete meal. If you’re following a heart-healthy diet, the soup’s lycopene and olive oil support cardiovascular wellness, as highlighted in our guide to heart-healthy ingredients.
Busy weeknights call for nourishing shortcuts, and this soup delivers. Batch-cook it ahead for quick lunches, or freeze portions for last-minute dinners. It’s also a fantastic way to sneak more veggies into your day, especially if you blend in extras like spinach or carrots. For gluten-free eaters, it’s a safe and flavorful option—just ensure your broth and toppings comply. Craving more plant-based meal ideas? Explore our roundup of vegan comfort foods to keep your menu fresh and vibrant.
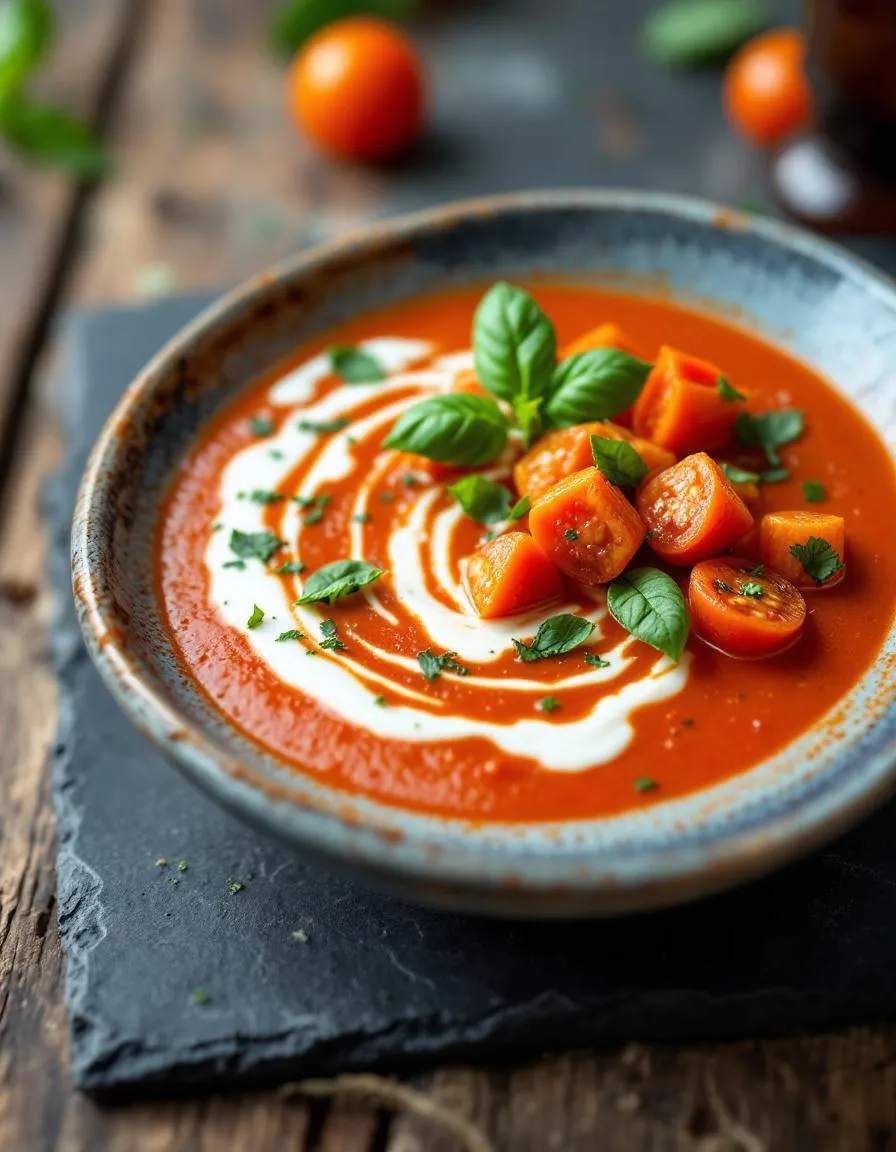
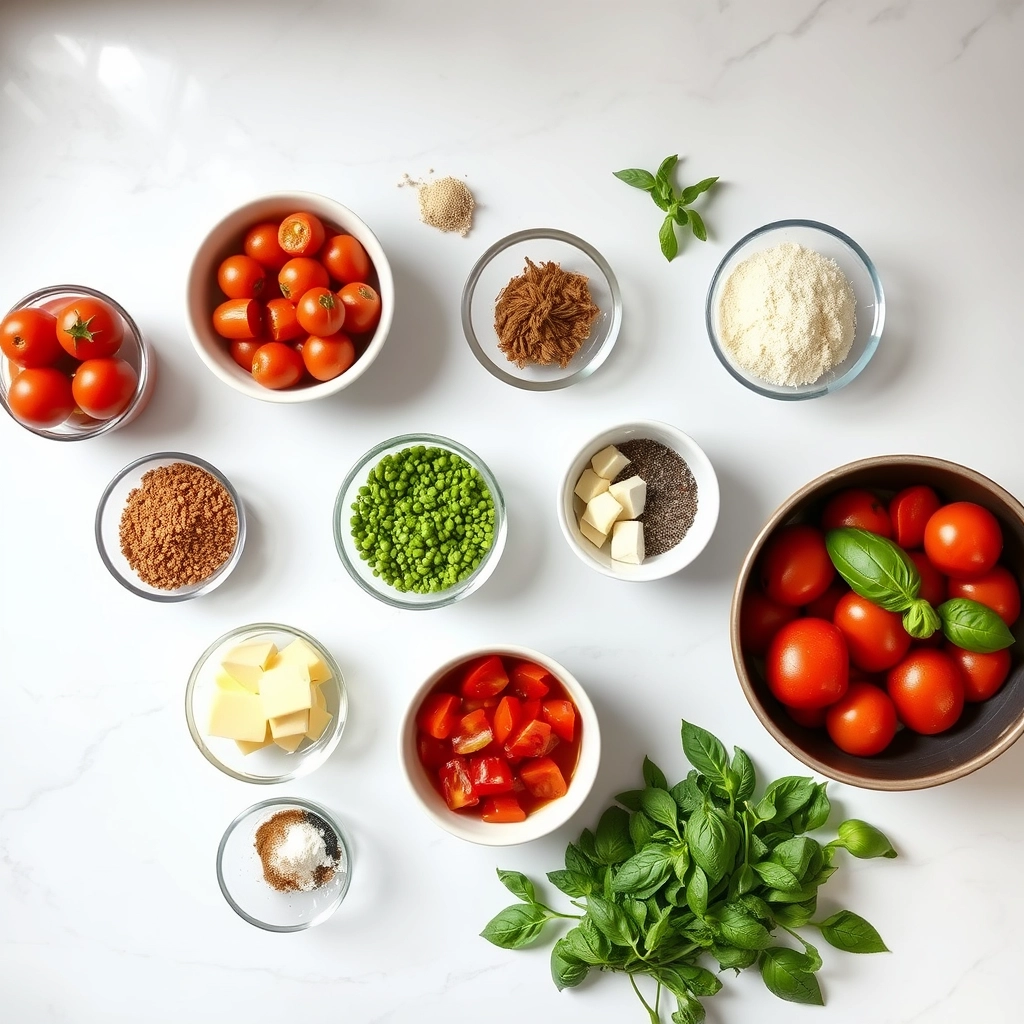
A rich and flavorful soup made with roasted tomatoes and fresh basil.
Ingredients
Scale
For the Crust:
2 lbs ripe tomatoes, halved
1 medium onion, chopped
4 cloves garlic, minced
2 tbsp olive oil
1/4 cup fresh basil leaves, chopped
2 cups vegetable broth
1/2 cup heavy cream
Salt and pepper to taste
Instructions
1. Prepare the Crust:
Preheat oven to 400°F (200°C). Place tomatoes, onion, and garlic on a baking sheet. Drizzle with olive oil and season with salt and pepper.
Roast for 25-30 minutes until tomatoes are soft and slightly caramelized.
Transfer roasted vegetables to a blender. Add vegetable broth and basil. Blend until smooth.
Pour the mixture into a pot and stir in heavy cream. Heat over medium-low until warmed through. Adjust seasoning to taste.
Notes
You can customize the seasonings to taste.
s-dish">How to Prepare This Dish
Steps and time-saving tips
Start by preheating your oven to 400°F to roast the tomatoes, garlic, and onions. Toss them with olive oil, salt, and pepper on a baking sheet, then spread them evenly for even caramelization. Roast for 25-30 minutes until the tomatoes burst and the edges turn slightly charred. Meanwhile, heat a large pot over medium heat and sauté the basil stems with a drizzle of olive oil to build flavor. Once the roasted veggies are ready, transfer them to the pot and pour in vegetable broth. Simmer everything for 15 minutes, then blend until smooth with an immersion blender or in batches using a countertop blender. Stir in fresh basil leaves and a splash of cream for richness. For a time-saving trick, roast the tomatoes ahead and store them in the fridge for up to two days. If the soup feels too thick, simply whisk in extra broth until it reaches your preferred consistency. Serve hot with a drizzle of olive oil and a sprinkle of cracked black pepper.
Mistakes I’ve made and learned from
I once rushed the roasting step and ended up with undercooked tomatoes that made the soup taste bland. Now I wait until they’re deeply caramelized for maximum flavor. Another time, I over-blended the soup, turning it frothy instead of velvety—pulsing in short bursts fixes that. If you’re new to blending hot liquids, check out my guide to kitchen tools for safer techniques. Also, don’t skip straining if you dislike seeds; a fine-mesh sieve makes all the difference. For more soup-making tips, my soup season hacks cover how to balance acidity and sweetness without overcomplicating things.
n-and-variations">Cultural Connection and Variations
Where this recipe comes from
Roasted Tomato Basil Soup feels like a warm hug from the Mediterranean. Originally, this dish draws inspiration from Italian and French cuisines, where sun-ripened tomatoes and fragrant basil thrive. In Italy, cooks often simmer fresh tomatoes with garlic and olive oil, while French versions might add a touch of cream for richness. However, roasting the tomatoes first—a technique popularized in modern kitchens—deepens the flavor, giving the soup a smoky sweetness that sets it apart.
Around the world, variations of Roasted Tomato Basil Soup reflect local tastes. In Spain, chefs might blend in roasted red peppers for a smoky twist. Meanwhile, in some American households, a handful of Parmesan rinds simmers in the pot for extra umami. My grandmother, for instance, always added a pinch of sugar to balance the acidity, a trick she learned from her neighbors in New Jersey. Whether served with crusty bread or a grilled cheese sandwich, this soup adapts beautifully to different traditions.
How it fits in today’s cooking
Today, Roasted Tomato Basil Soup remains a staple for good reason. It’s versatile enough for weeknight dinners yet elegant enough for holiday gatherings. Many home cooks now roast tomatoes in bulk and freeze them, making this soup a year-round option. Others lighten it up with coconut milk or spice it up with chili flakes, proving how easily it fits modern diets.
Busy families love pair
ing it with easy sides like garlic Parmesan croutons for crunch. Meanwhile, meal preppers often stash portions alongside wholesome grain bowls for quick lunches. Whether you stick to the classic recipe or experiment with global flavors, Roasted Tomato Basil Soup continues to bring comfort and creativity to today’s tables.
Taste and Texture
What makes it delicious
Roasted Tomato Basil Soup wraps you in warmth with its rich, velvety texture and deep, caramelized sweetness. The roasted tomatoes bring a smoky depth, while fresh basil adds a bright, herbal kick that lingers on the palate. Each spoonful feels luxuriously smooth, with just a hint of tang from the tomatoes balancing the creamy finish. Meanwhile, garlic and onions melt into the broth, creating layers of savory flavor that make every bite unforgettable. Whether you savor it slowly or dive right in, Roasted Tomato Basil Soup delivers comfort in every bowl.
Boosting the flavor
Elevate your Roasted Tomato Basil Soup with a swirl of pesto for an extra herbal punch or a dollop of crème fraîche for a tangy contrast. For crunch, try topping it with homemade garlic herb croutons or crispy roasted chickpeas. If you love heat, a pinch of red pepper flakes or a drizzle of chili-infused olive oil adds a spicy kick. Experiment with fresh herbs like thyme or oregano to deepen the aroma. With these tweaks, your soup transforms from cozy to extraordinary.
Always roast the tomatoes until they caramelize slightly for the deepest flavor in your Roasted Tomato Basil Soup. Use fresh basil rather than dried for a brighter, more aromatic finish. Meanwhile, blend the soup in batches if your blender is small to ensure a smooth texture. For extra richness, stir in a splash of heavy cream just before serving. Finally, taste and adjust the seasoning at the end since roasting concentrates the flavors.
Mistakes to avoid
Avoid overcrowding the baking sheet when roasting tomatoes, as they will steam instead of caramelize. Instead, spread them in a single layer for even roasting. Also, don’t skip the step of peeling the garlic after roasting—it adds a mellow sweetness to the Roasted Tomato Basil Soup. If you’re new to blending hot soups, check out our guide on kitchen safety tips to prevent accidents. Lastly, resist the urge to over-blend, or the soup may become too thin. For more on achieving the perfect consistency, explore our soup texture secrets.
g-suggestions">Serving and Pairing Suggestions
How to serve this dish
Elevate your Roasted Tomato Basil Soup by serving it in warm, rustic bowls for a cozy feel. For a touch of elegance, drizzle a swirl of cream or olive oil on top and garnish with fresh basil leaves. Meanwhile, toasted bread croutons add a satisfying crunch. This dish shines at casual weeknight dinners yet also fits beautifully into holiday menus or brunch spreads. To make it extra inviting, pair it with a side of crusty bread for dipping.
What goes well with it
Roasted Tomato Basil Soup pairs perfectly with a crisp, buttery garlic parmesan grilled cheese, creating a classic comfort combo. Alternatively, try it alongside a light, refreshing salad like our avocado cucumber salad for a balanced meal. For drinks, a chilled glass of white wine or sparkling lemonade enhances the soup’s rich, tangy flavors. Each pairing brings out the best in this hearty yet vibrant dish.
math-faq-block">
What tomatoes are best for roasted tomato basil soup?
Roma or plum tomatoes work best for roasted tomato basil soup because they have fewer seeds and thicker flesh, which concentrates flavor when roasted. Cherry tomatoes also add sweetness, while vine-ripened tomatoes offer balanced acidity. Roasting any variety deepens the flavor of your tomato basil soup.
Can I make roasted tomato basil soup without cream?
Absolutely! For a dairy-free version, blend roasted tomatoes with vegetable broth and a splash of olive oil for richness. Coconut milk or cashew cream also work well in roasted tomato basil soup while keeping it vegan-friendly.
How do you thicken roasted tomato basil soup?
For a thicker consistency, blend some of the roasted tomatoes longer or add a peeled potato while roasting. A roux (butter and flour mixture) or a handful of breadcrumbs stirred into the soup also helps thicken roasted tomato basil soup naturally.
ank-math-faq-item">
What pairs well with roasted tomato basil soup?
Classic grilled cheese sandwiches or crusty bread complement roasted tomato basil soup perfectly. For lighter options, try a crisp green salad or roasted vegetables. The soup’s rich flavor also pairs well with creamy pasta dishes.
Best Spinach Beef Tacos – Easy Homemade Recipe
Introduction
There’s something magical about biting into a warm, flavorful taco—especially when it’s packed with wholesome ingredients like tender beef and vibrant spinach. If you’re craving a meal that’s both nutritious and indulgent, this Spinach Beef Tacos Recipe delivers. Whether you’re cooking for a busy weeknight or a casual gathering, these tacos bring comfort and excitement to the table. Plus, they’re a fantastic way to sneak in extra greens without sacrificing taste. Let’s dive into why this dish deserves a spot in your recipe rotation.
Spinach Beef Tacos combine the richness of seasoned ground beef with the freshness of spinach, all wrapped in a soft or crispy tortilla. Unlike traditional tacos, this recipe adds a nutritious twist by incorporating leafy greens, making it a balanced option for health-conscious food lovers. The savory beef pairs perfectly with the mild bitterness of spinach, while spices like cumin and paprika tie everything together. Moreover, this dish aligns perfectly with our blog’s mission to share easy, flavorful recipes that don’t skimp on nutrition. If you love hearty meals with a healthy edge, you’ll appreciate our Healthy Weeknight Dinners collection for more inspiration.
What sets this Spinach Beef Tacos Recipe apart is its versatility. You can customize it with toppings like avocado, cheese, or a squeeze of lime to suit your taste. It’s also a great way to use up leftover ingredients, reducing food waste while creating something delicious. For those who enjoy meal prepping, the beef and spinach filling stores well, making future dinners a breeze. If you’re looking for more taco variations, check out our Creative Taco Recipes roundup. No matter how you serve them, these tacos promise a satisfying meal that everyone will love.
Why I Love This Recipe
This Spinach Beef Tacos Recipe holds a special place in my heart because it reminds me of family taco nights growing up. My mom always found ways to make meals healthier without us even noticing, and sneaking spinach into tacos was one of her best tricks. Now, whenever I make this dish, it brings back those cozy memories while giving me the same joy of sharing a delicious, wholesome meal with my own family. The combination of flavors is nostalgic yet fresh, and I love how it effortlessly bridges comfort food and mindful eating.
Health and Nutrition
Why it’s good for your body
Spinach Beef Tacos Recipe packs a powerful nutritional punch while delivering bold flavors. First, lean beef provides high-quality protein to build and repair muscles. Additionally, it offers iron and zinc, which boost energy and immunity. Meanwhile, spinach brings fiber, vitamins A and C, and antioxidants to support digestion and overall health.
Moreover, this dish balances macronutrients perfectly. The beef keeps you full, while the spinach adds volume without excess calories. Together, they create a meal that stabilizes blood sugar levels. Furthermore, the recipe includes healthy fats from ingredients like avocado or olive oil, which promote heart health.
Finally, Spinach Beef Tacos Recipe is versatile enough to fit various dietary needs. You can easily swap tortillas for whole-grain or lettuce wraps. Plus, the dish avoids processed additives, making it a clean, nutrient-dense choice. Whether you need a post-workout meal or a family-friendly dinner, this recipe delivers both taste and nourishment.
How it fits in a healthy lifestyle
Spinach Beef Tacos Recipe fits seamlessly into a balanced diet. If you follow a high-protein plan, the lean beef helps you meet daily goals. For gluten-free eaters, simply choose corn or almond flour tortillas. The dish also works well for meal prep, saving time without sacrificing nutrition.
This recipe supports heart health by using lean protein and fresh vegetables. If you want more ideas for nutritious meals, check out our healthy dinner recipes. For those tracking macros, the beef and spinach combo offers a low-carb, high-protein option. You can even pair it with a side like quinoa for extra fiber.
Spinach Beef Tacos Recipe also encourages mindful eating. The vibrant colors and textures make healthy food exciting. If you need inspiration for balanced meals, explore our meal planning tips. Whether you’re fueling workouts or feeding a family, this dish keeps nutrition simple and delicious.
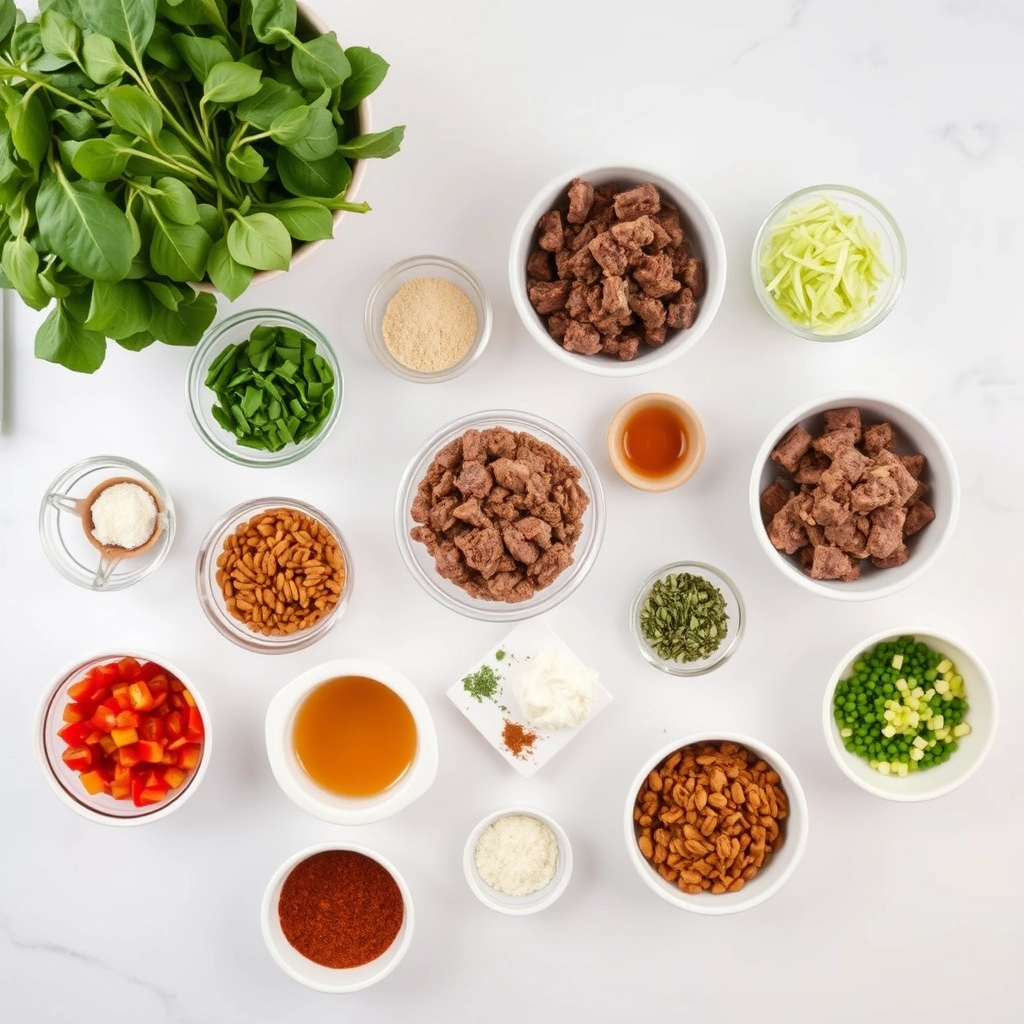
A delicious and healthy twist on classic beef tacos with fresh spinach and savory seasonings.
Ingredients
Scale
For the Crust:
1 lb ground beef
2 cups fresh spinach, chopped
8 small corn tortillas
1/2 cup diced onions
2 cloves garlic, minced
1 tsp cumin
1 tsp chili powder
1/2 tsp salt
1/4 tsp black pepper
1/2 cup shredded cheese
1/4 cup sour cream
1/4 cup salsa
Instructions
1. Prepare the Crust:
In a large skillet, cook the ground beef over medium heat until browned. Drain excess fat.
Add onions and garlic to the skillet and sauté for 2-3 minutes until softened.
Stir in chopped spinach, cumin, chili powder, salt, and black pepper. Cook until spinach wilts, about 3 minutes.
Warm the corn tortillas in a dry skillet or microwave for 30 seconds.
Fill each tortilla with the beef-spinach mixture. Top with shredded cheese, sour cream, and salsa.
Serve immediately and enjoy.
Notes
You can customize the seasonings to taste.
“`html
s-dish">How to Prepare This Dish
Steps and time-saving tips
Start by heating a large skillet over medium-high heat and browning the ground beef until it crumbles easily. Drain any excess fat, then toss in diced onions and minced garlic to build flavor. Stir in fresh spinach and let it wilt slightly—this adds vibrant color and nutrients to your Spinach Beef Tacos Recipe. Sprinkle taco seasoning evenly and mix well, letting the spices bloom for a minute. Meanwhile, warm your tortillas in a dry pan or microwave wrapped in a damp towel to keep them pliable. Layer the beef mixture onto each tortilla, then top with shredded cheese, diced tomatoes, and a dollop of sour cream. For a time-saving twist, prep your toppings ahead or use pre-shredded cheese. If you love extra crunch, toast the tortillas briefly in the oven before assembling. Serve immediately while everything’s warm, and drizzle with lime juice for a bright finish.
Mistakes I’ve made and learned from
I once overcrowded the skillet with spinach, which steamed instead of wilting and turned soggy. Now I add it in batches for better texture. Another blunder? Underseasoning the beef—taco seasoning alone wasn’t enough. I learned to taste and adjust with a pinch of salt or a splash of homemade broth for depth. Overstuffing tacos led to messy breaks, so I keep fillings balanced. If your tortillas crack, try my trick from this flour tortillas guide: warm them properly and fold gently. These small fixes make all the difference in mastering the Spinach Beef Tacos Recipe.
Spinach Beef Tacos Recipe blends the heartiness of Mexican cuisine with a fresh, leafy twist. While tacos trace their roots to Mexico, this version adds spinach for a nutritious punch, creating a fusion that feels both familiar and new. Families in northern Mexico often stuff tacos with rich beef, but the addition of spinach likely comes from modern health-conscious cooks or regions where greens thrive. In my own kitchen, Spinach Beef Tacos Recipe became a weeknight hero after a trip to Oaxaca, where I saw locals pairing earthy greens with bold meats.
Around the world, similar dishes take different forms. In Korea, beef and spinach fill ssam wraps, while in Greece, spanakopita turns greens and meat into flaky pies. Even within Mexico, some cooks swap beef for chorizo or fold in queso fresco. The beauty of Spinach Beef Tacos Recipe lies in its adaptability—whether you crave street-food vibes or a lighter, veggie-packed meal.
ays-cooking">How it fits in today’s cooking
Today, Spinach Beef Tacos Recipe fits perfectly into busy lives and mindful eating trends. Modern cooks love it for meal prep, stuffing tortillas ahead for quick lunches. Others tweak it seasonally, like adding pumpkin seeds in fall or fresh cilantro in summer. It’s also a star at gatherings, especially when paired with crowd-pleasers like easy Mexican desserts for a full fiesta vibe.
Health-conscious eaters appreciate the iron-rich spinach, while keto fans skip the tortillas and serve the filling over greens. For families, it’s a sneaky way to get kids to eat veggies—especially when topped with creamy avocado dressing. Whether you’re craving comfort food or a fresh twist on taco night, this recipe keeps delivering.
Taste and Texture
What makes it delicious
Spinach Beef Tacos Recipe delivers a mouthwatering balance of savory, earthy, and fresh flavors. The juicy, seasoned beef mingles with tender spinach, creating a rich umami depth, while a hint of garlic and cumin adds warmth. Each bite offers a satisfying contrast—soft tortillas cradle the hearty filling, and a sprinkle of crumbled cheese melts into creamy pockets. Fresh toppings like diced tomatoes or a squeeze of lime brighten the dish, cutting through the richness. Plus, the aroma of sizzling beef and toasted spices will make your kitchen smell irresistible. Whether you crave bold or balanced, Spinach Beef Tacos Recipe hits all the right notes.
r">Boosting the flavor
Elevate your Spinach Beef Tacos Recipe with a few easy tweaks. First, swap ground beef for chorizo to infuse smoky, spicy notes. Alternatively, stir in a spoonful of chipotle paste for a touch of heat. For extra freshness, top with avocado crema or pickled onions—their tangy crunch pairs perfectly with the savory filling. If you love bold flavors, try our homemade taco seasoning for a deeper spice profile. Finally, serve with a side of creamy cilantro lime dressing to drizzle over each taco. Small changes make a big difference!
Tips for Success
Best practices for results
For the best Spinach Beef Tacos Recipe, always brown the beef thoroughly before adding spices to deepen the flavor. Meanwhile, wilt the spinach separately to prevent excess moisture in your filling. Additionally, warm your tortillas just before serving so they stay pliable and hold their shape. Finally, taste and adjust seasoning at the end—this ensures a perfectly balanced dish every time.
>Mistakes to avoid
One common mistake is overcrowding the pan when browning the beef, which steams the meat instead of searing it. Instead, cook in batches for a crisp, caramelized texture. Another error is skipping the step of draining excess grease after cooking the beef, which can make your Spinach Beef Tacos Recipe overly greasy. For more tips on managing moisture in taco fillings, check out our guide on perfect taco fillings. Also, avoid overstuffing the tortillas, as they may tear—learn proper assembly techniques in our taco assembly tips.
Serving and Pairing Suggestions
How to serve this dish
Spinach Beef Tacos Recipe shines when served fresh and vibrant. For a festive touch, arrange them on a colorful platter with lime wedges, chopped cilantro, and a sprinkle of crumbled queso fresco. Meanwhile, if you’re hosting a casual gathering, set up a DIY taco bar with warm tortillas, extra toppings, and a side of spicy salsa. Additionally, these tacos make a fantastic weeknight dinner or a standout dish for Taco Tuesday. To elevate the presentation, drizzle a zigzag of chipotle crema across the top just before serving.
What goes well with it
Pair Spinach Beef Tacos Recipe with a refreshing avocado lime crema for a creamy contrast to the savory beef. Alternatively, serve them alongside a crisp Mexican Street Corn Salad to balance the richness with bright, tangy flavors. For drinks, a chilled horchata or a citrusy margarita complements the spices perfectly. If you’re craving something heartier, try pairing the tacos with Black Bean Soup for a satisfying, protein-packed meal. Each pairing enhances the dish while keeping the flavors bold and balanced.
What’s the best way to cook beef for spinach beef tacos?
For tender beef in your Spinach Beef Tacos Recipe, brown ground beef in a skillet over medium-high heat, breaking it into small crumbles. Season with taco spices like cumin, chili powder, and garlic for maximum flavor before adding fresh spinach.
Can I use frozen spinach instead of fresh in spinach beef tacos?
Yes! Thaw and drain frozen spinach thoroughly to remove excess water before adding it to your Spinach Beef Tacos Recipe. Squeeze it in a clean towel to prevent soggy tacos while keeping the nutritional benefits.
ank-math-faq-item">
What toppings go well with spinach beef tacos?
Enhance your Spinach Beef Tacos Recipe with creamy toppings like avocado slices, cotija cheese, or Greek yogurt. Fresh pico de gallo, lime wedges, and pickled jalapeños add bright contrast to the savory beef and spinach filling.
How do I make spinach beef tacos healthier?
Opt for lean ground beef (90/10) and whole-grain tortillas in your Spinach Beef Tacos Recipe. Load up on extra spinach for fiber and skip heavy cheeses—try nutritional yeast for a cheesy flavor boost without the calories.
Best Beef Chowder with Reuben Recipe
Introduction
There’s something deeply comforting about a bowl of rich, hearty chowder—especially when it combines the bold flavors of a classic Reuben sandwich. If you’re craving a twist on tradition, this Beef Chowder with Reuben Recipe delivers warmth, nostalgia, and a satisfying crunch in every bite. Whether you’re feeding a crowd or simply treating yourself, this dish wraps you in cozy familiarity while surprising your taste buds with its creative flair. Let’s dive into why this recipe deserves a spot in your kitchen rotation.
Beef Chowder with Reuben Recipe reimagines the beloved deli favorite as a creamy, savory soup. Packed with tender corned beef, tangy sauerkraut, Swiss cheese, and a hint of rye-inspired seasoning, it’s a bowl of pure comfort. Unlike traditional chowders, this version balances richness with brightness, thanks to the sauerkraut’s acidity and the freshness of caraway seeds. It’s perfect for St. Patrick’s Day, chilly evenings, or anytime you want a meal that feels both indulgent and wholesome. For fans of hearty soups, it’s a must-try alongside our Classic Potato Leek Soup or Creamy Tomato Bisque. The recipe fits our blog’s focus on approachable yet elevated dishes—simple enough for weeknights but special enough to impress guests.
Why I Love This Recipe
This Beef Chowder with Reuben Recipe holds a special place in my heart because it reminds me of family gatherings at my grandma’s house. She always served Reuben sandwiches on game days, and the first time I transformed those flavors into a chowder, it felt like magic. The way the Swiss cheese melts into the broth and the sauerkraut cuts through the richness takes me right back to her kitchen. Plus, it’s a forgiving recipe—you can tweak the ingredients to suit your taste, just like she did. Every spoonful feels like a hug, and that’s why I keep coming back to it.
Health and Nutrition
Why it’s good for your body
Beef Chowder with Reuben Recipe packs a nutritious punch while delivering rich, comforting flavors. First, the lean beef provides high-quality protein, which helps build muscle and keeps you full longer. Additionally, the sauerkraut and Swiss cheese add probiotics and calcium, supporting gut health and strong bones.
Moreover, this dish includes a balanced mix of vegetables like carrots and onions, offering fiber and essential vitamins. These ingredients work together to boost immunity and aid digestion. Because of its hearty yet wholesome profile, Beef Chowder with Reuben Recipe makes a satisfying meal without excessive empty calories.
Furthermore, the broth base keeps the dish hydrating and light compared to cream-heavy chowders. The rye bread croutons add a touch of whole grains, contributing complex carbs for steady energy. Whether you need a post-workout meal or a cozy dinner, Beef Chowder with Reuben Recipe delivers both nourishment and indulgence.
How it fits in a healthy lifestyle
Beef Chowder with Reuben Recipe fits seamlessly into a balanced diet. For protein-focused eaters, the lean beef and cheese supply ample fuel for active lifestyles. If you follow a gluten-free diet, simply swap the rye croutons for a gluten-free alternative like our gluten-free bread options.
This recipe also works well for meal prep, as it reheats beautifully and stays flavorful for days. Pair it with a crisp side salad from our quick healthy salads collection for extra greens. With its adaptable ingredients and nutrient-dense profile, Beef Chowder with Reuben Recipe makes healthy eating both easy and delicious.
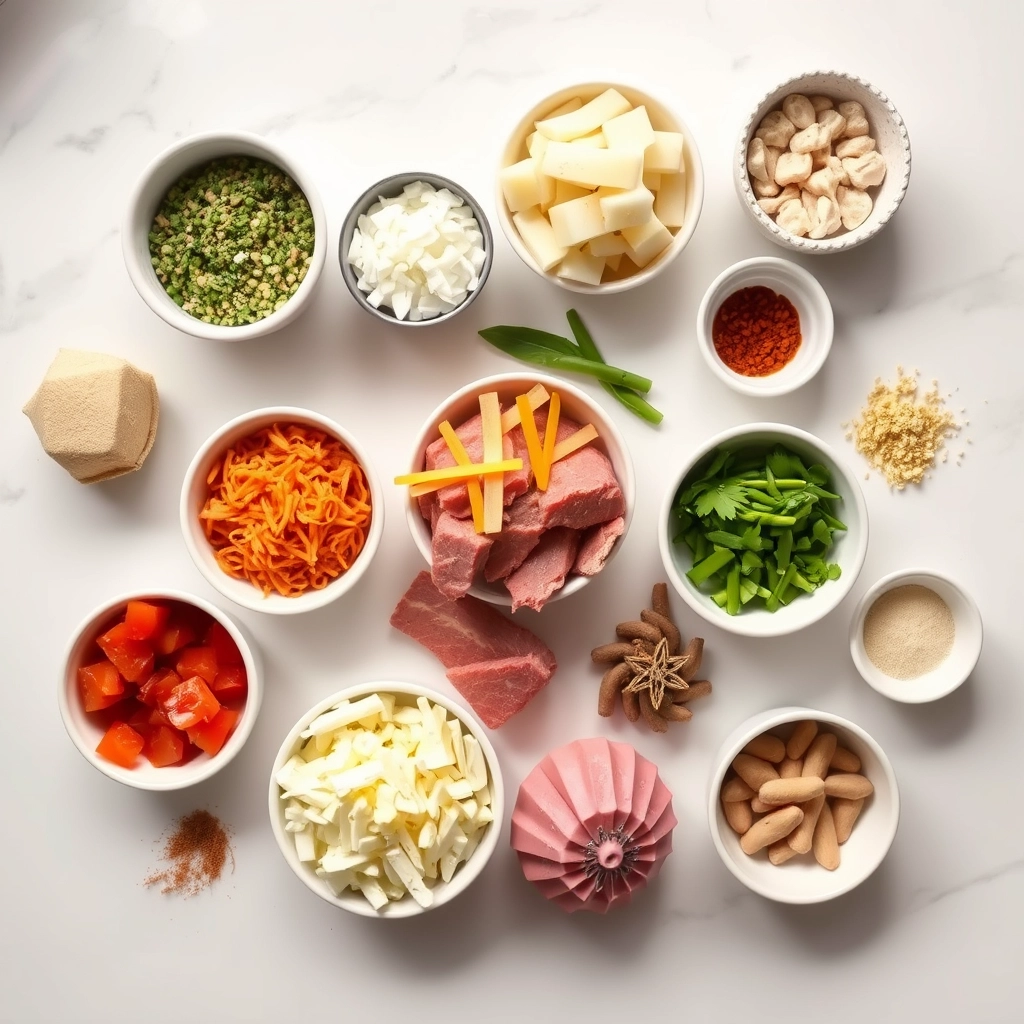
A hearty and flavorful beef chowder inspired by the classic Reuben sandwich, featuring tender beef, sauerkraut, and Swiss cheese.
Ingredients
Scale
For the Crust:
1 lb beef chuck, cubed
1 tbsp olive oil
1 onion, diced
2 cloves garlic, minced
2 cups sauerkraut, drained
4 cups beef broth
2 cups potatoes, diced
1 cup heavy cream
1 cup Swiss cheese, shredded
1 tsp caraway seeds
Salt and pepper to taste
Rye bread croutons (for garnish)
Instructions
1. Prepare the Crust:
Heat olive oil in a large pot over medium heat. Add beef cubes and brown on all sides, then remove and set aside.
In the same pot, sauté onion and garlic until softened, about 3 minutes.
Add sauerkraut, beef broth, potatoes, and caraway seeds. Bring to a boil, then reduce heat and simmer for 20 minutes.
Return the beef to the pot and simmer for another 10 minutes, or until beef is tender.
Stir in heavy cream and Swiss cheese until cheese is melted and soup is creamy.
Season with salt and pepper to taste.
Serve hot, garnished with rye bread croutons.
Notes
You can customize the seasonings to taste.
How to Prepare This Dish
Steps and time-saving tips
Start by heating a large pot over medium heat and browning the beef until it develops a rich, caramelized crust. Meanwhile, chop the onions, carrots, and celery into even pieces so they cook uniformly. Stir the vegetables into the pot with the beef, letting them soften for about five minutes. Next, sprinkle in the flour and whisk it quickly to coat everything—this thickens the chowder later. Pour in the beef broth slowly while stirring to avoid lumps, then add the diced potatoes and bay leaves. Bring the mixture to a gentle simmer, cover the pot, and let it cook until the potatoes turn tender.
While the chowder simmers, prepare the Reuben-inspired toppings. Thinly slice the corned beef and shred the Swiss cheese for easy melting. Toast the rye bread cubes in a skillet with a little butter until they crisp up. Once the potatoes soften, stir in the cream and season the chowder with salt, pepper, and a dash of caraway seeds for that classic Reuben flavor. Ladle the hot chowder into bowls, then layer on the corned beef, cheese, and toasted rye croutons. For a time-saving shortcut, use pre-shredded cheese and store-bought croutons—but homemade adds the best texture.
and-learned-from">Mistakes I’ve made and learned from
I once rushed the browning step for the beef, and the chowder lacked depth. Now I take my time, letting the meat develop a dark crust for maximum flavor. Another blunder? Adding the cheese directly into the pot—it clumped into strings instead of melting smoothly. The fix? Layering it on top of each serving so it melts evenly. If you’re new to thickening soups, check out my guide on perfect soup consistency to avoid gloopy or watery results. And for more Reuben-inspired twists, my Reuben sandwich upgrades post has tricks to elevate the flavors even further.
Cultural Connection and Variations
Where this recipe comes from
Beef Chowder with Reuben Recipe blends the heartiness of traditional chowder with the bold flavors of a Reuben sandwich, creating a dish that feels both familiar and inventive. This recipe draws inspiration from Irish and German-American roots, where chowders and corned beef dishes often take center stage during chilly months. In Ireland, you might find a simpler version with potatoes and salted beef, while in the U.S., cooks often add sauerkraut or Swiss cheese for that signature Reuben twist.
Families put their own
spin on Beef Chowder with Reuben Recipe too. Some swap corned beef for pastrami or skip the rye croutons for a gluten-free version. Others toss in extra veggies like carrots or celery to stretch the meal further. During St. Patrick’s Day, this dish becomes a festive staple, but it’s just as comforting on a random weeknight. Whether served in a bread bowl or alongside a crisp salad, it’s a meal that bridges cultures and cravings.
How it fits in today’s cooking
Beef Chowder with Reuben Recipe hasn’t lost its charm—it’s evolved. Modern cooks love it for its versatility, whether they’re meal prepping or hosting a cozy gathering. Some streamline the process by using a slow cooker, while others elevate it with artisanal cheeses or homemade rye croutons. It’s also a great way to repurpose leftovers, like that extra corned beef from Sunday dinner.
This dish fits perfectly into today’s trend of hearty, flavor-packed comfort food. Pair it with a tangy dill pickle soup for a full deli-inspired spread, or serve it before a slice of chocolate cherry cake for a satisfying finish. Whether you’re cooking for a crowd or just craving something nostalgic, Beef Chowder with Reuben Recipe delivers every time.
>Taste and Texture
What makes it delicious
Beef Chowder with Reuben Recipe delivers a rich, savory experience with layers of bold flavor. The tender chunks of beef melt in your mouth, while the creamy broth—infused with tangy sauerkraut and sharp Swiss cheese—creates a luscious, velvety texture. Each spoonful bursts with smoky corned beef, earthy caraway, and a hint of briny pickle relish, making every bite exciting. Meanwhile, the potatoes add a soft, comforting contrast to the slight crunch of toasted rye croutons. The aroma alone, fragrant with garlic and spices, will have everyone gathering around the table before the first taste. Whether you crave warmth or depth, Beef Chowder with Reuben Recipe satisfies with its hearty, indulgent profile.
Boosting the flavor
For an extra kick, try swapping Swiss cheese for peppery Gruyère or stirring in a spoonful of grainy mustard for a tangy twist. A dollop of sour cream or a sprinkle of crispy bacon bits adds richness, while a dash of smoked paprika deepens the savory notes. If you love bold flavors, pair this chowder with a side of garlic Parmesan crusty bread to soak up every last drop. For a lighter touch, top it with fresh dill or chives—their bright freshness balances the dish perfectly. Craving more inspiration? Check out these slow cooker comfort stews to keep the cozy vibes going strong.
“`html
="tips-for-success">Tips for Success
Best practices for results
For the best Beef Chowder with Reuben Recipe, always brown the beef thoroughly before adding liquids. This step builds deep flavor. Additionally, use fresh rye bread for croutons to enhance the Reuben-inspired taste. Meanwhile, stir the chowder frequently to prevent sticking and ensure even cooking. Finally, let the soup simmer gently for at least 20 minutes to meld the flavors perfectly.
Mistakes to avoid
Avoid overcooking the vegetables, as they can turn mushy in the Beef Chowder with Reuben Recipe. Instead, add them halfway through simmering for ideal texture. Also, don’t skip draining the sauerkraut—excess liquid can make the chowder too acidic. For more tips on balancing flavors, check out our guide on soup seasoning secrets. Lastly, resist using pre-shredded cheese, as it often doesn’t melt smoothly. Learn why fresh grating matters in our cheese melting tips post.
“`
rving-and-pairing-suggestions">Serving and Pairing Suggestions
How to serve this dish
For a cozy family dinner, ladle the Beef Chowder with Reuben Recipe into rustic bread bowls to add a hearty touch. Alternatively, serve it in elegant soup mugs for a more refined presentation. Top each bowl with a sprinkle of fresh parsley or a dollop of sour cream to enhance both flavor and visual appeal. This dish shines at casual gatherings, holiday potlucks, or even as a comforting weeknight meal. If you want to impress guests, pair it with homemade rye croutons for extra crunch.
What goes well with it
A crisp, tangy side like our Classic Dill Pickle Salad balances the rich flavors of Beef Chowder with Reuben Recipe perfectly. For drinks, try a chilled glass of amber ale or a zesty kombucha to cut through the creaminess. If you crave something heartier, serve it alongside our Garlic Herb Focaccia, which soaks up every last drop of the savory broth. Each pairing elevates the dish while keeping the meal satisfying and well-rounded.
What makes Beef Chowder with Reuben Recipe unique?
Beef Chowder with Reuben Recipe combines the creamy comfort of chowder with the bold flavors of a Reuben sandwich, featuring corned beef, sauerkraut, and Swiss cheese. This twist on classic chowder delivers a rich, tangy taste that stands out from traditional recipes.
Can I make Beef Chowder with Reuben Recipe in a slow cooker?
Yes, Beef Chowder with Reuben Recipe adapts well to slow cooking. Simmer the corned beef, potatoes, and sauerkraut on low for 6-8 hours, then stir in the cheese and cream just before serving for the best texture.
ank-math-faq-item">
What sides pair well with Beef Chowder with Reuben Recipe?
Rye bread or pretzel rolls complement Beef Chowder with Reuben Recipe perfectly, echoing the Reuben sandwich theme. A crisp green apple salad or pickled vegetables also balances the chowder’s richness.
How do I store leftover Beef Chowder with Reuben Recipe?
Store Beef Chowder with Reuben Recipe in an airtight container in the fridge for up to 3 days. Reheat gently on the stove, adding a splash of broth or cream to restore the creamy consistency.