Best Pumpkin Cupcakes with Cinnamon Cream Cheese Frosting
Introduction
Is there anything more comforting than the warm, spiced aroma of pumpkin baking? It instantly wraps you in a cozy blanket of autumnal bliss. Now, imagine that feeling transformed into a perfectly portioned, handheld delight. These Pumpkin Cupcakes with Cinnamon Cream Cheese Frosting capture that exact magic. They are your favorite fall sweater in dessert form, promising a moment of pure, spiced joy with every single bite. Ultimately, they are the treat you never knew you needed but will immediately crave.
Pumpkin Cupcakes with Cinnamon Cream Cheese Frosting are a quintessential fall dessert that masterfully balances moist, warmly spiced cake with a luxuriously tangy and sweet frosting. This combination matters because it elevates a simple cupcake into a seasonal event. The pumpkin puree ensures an incredibly tender crumb and adds a depth of flavor that vanilla or chocolate bases simply cannot achieve. Furthermore, the cinnamon-infused cream cheese frosting provides the perfect creamy counterpoint, cutting through the sweetness with its distinctive zip. This recipe fits our blog’s tone perfectly because we champion approachable baking that delivers impressive, crowd-pleasing results. You do not need to be a professional pastry chef to create something extraordinary. In fact, these cupcakes come together quickly, making them ideal for last-minute gatherings, Thanksgiving potlucks, or simply satisfying a weekday baking urge. They are a fantastic entry point into seasonal baking and a guaranteed way to make any occasion feel special. For more inspiration on using seasonal flavors, explore our collection of easy fall desserts. Moreover, understanding the role of each ingredient, like how pumpkin puree adds moisture, can improve all your baking projects. You can learn more about this in our guide to baking with pumpkin puree.
Why I Love This Recipe
This recipe holds a special place in my heart because it truly marks the beginning of my favorite season. I always know fall has officially arrived when my kitchen smells like these Pumpkin Cupcakes with Cinnamon Cream Cheese Frosting. They remind me of crisp air, changing leaves, and gathering with family. Personally, I love how the frosting swirls into soft peaks and how the sprinkle of cinnamon on top makes them look as beautiful as they taste. Most importantly, sharing these cupcakes has created some of my most cherished memories, from school bake sales to cozy nights in with friends.
Health and Nutrition
Why it’s good for your body
These Pumpkin Cupcakes with Cinnamon Cream Cheese Frosting offer more than just incredible flavor; they also provide some surprising nutritional perks. For instance, pumpkin serves as the star ingredient, and it packs a powerful punch of beta-carotene. Your body converts this antioxidant into vitamin A, which actively supports healthy vision and a strong immune system.
Furthermore, pumpkin contributes a hearty dose of dietary fiber. Consequently, this helps promote healthy digestion and can keep you feeling satisfied for longer after you enjoy a treat. Additionally, the warming spices like cinnamon and nutmeg do more than just taste amazing; they also bring their own anti-inflammatory properties to these Pumpkin Cupcakes with Cinnamon Cream Cheese Frosting.
Moreover, the cream cheese frosting, especially when made with a balanced hand, provides a source of calcium and protein. Ultimately, enjoying one of these cupcakes means you are treating yourself to a dessert that thoughtfully combines indulgence with beneficial nutrients. Therefore, you can feel good about serving Pumpkin Cupcakes with Cinnamon Cream Cheese Frosting to your family.
How it fits in a healthy lifestyle
You can absolutely enjoy these pumpkin cupcakes as part of a balanced diet. Think of them as a celebratory treat or a satisfying end to a nutritious meal, not an everyday indulgence. Practicing mindful eating allows you to fully savor the rich flavors and spices, making one cupcake a truly fulfilling experience.
For those with specific dietary needs, you can easily adapt this recipe. You can use a trusted gluten-free flour blend to make it celiac-friendly. You can also explore using sugar substitutes in baking to adjust the sweetness level to your personal preference. Pair your cupcake with a source of protein, like a handful of nuts or a glass of milk, for a more balanced snack that keeps your energy levels steady.
Remember, a healthy lifestyle is all about balance and joy. Baking these at home allows you to control the ingredients, and sharing them with loved ones contributes to your overall well-being. For more ideas on incorporating treats into your plan, check out our tips for building healthy eating habits that last.
Moist and spiced pumpkin cupcakes topped with a creamy cinnamon cream cheese frosting, perfect for autumn gatherings.
Ingredients
Scale
For the Crust:
1 3/4 cups all-purpose flour
1 teaspoon baking soda
1/2 teaspoon salt
1 1/2 teaspoons ground cinnamon
1/2 teaspoon ground nutmeg
1/4 teaspoon ground cloves
1/4 teaspoon ground ginger
1/2 cup unsalted butter, softened
1 cup granulated sugar
2 large eggs
1 cup canned pumpkin puree
1/3 cup milk
8 oz cream cheese, softened
1/4 cup unsalted butter, softened
2 cups powdered sugar
1 teaspoon vanilla extract
1 teaspoon ground cinnamon
Instructions
1. Prepare the Crust:
Preheat oven to 350°F (175°C) and line a muffin tin with cupcake liners.
In a medium bowl, whisk together flour, baking soda, salt, cinnamon, nutmeg, cloves, and ginger.
In a large bowl, cream together 1/2 cup butter and granulated sugar until light and fluffy. Beat in eggs one at a time, then mix in pumpkin puree.
Gradually add dry ingredients to wet ingredients, alternating with milk, beginning and ending with dry ingredients. Mix until just combined.
Fill cupcake liners 2/3 full and bake for 18-22 minutes, or until a toothpick inserted comes out clean. Cool completely before frosting.
For frosting, beat cream cheese and 1/4 cup butter until smooth. Gradually add powdered sugar, then mix in vanilla and cinnamon until creamy. Frost cooled cupcakes.
Notes
You can customize the seasonings to taste.
s-dish">How to Prepare This Dish
Steps and time-saving tips
First, preheat your oven to 350°F and line a muffin tin with your favorite cupcake liners. Meanwhile, whisk your dry ingredients—flour, baking powder, baking soda, and warm spices—in a medium bowl. In a separate, larger bowl, vigorously whisk together the pumpkin puree, oil, eggs, and both sugars until the mixture is completely smooth and beautifully combined. Gradually add your dry ingredients to the wet ingredients, stirring gently just until the flour disappears; overmixing is your enemy here. For a speedy cleanup, use a large ice cream scoop to evenly distribute the batter into the liners, filling each about two-thirds full. Bake your Pumpkin Cupcakes with Cinnamon Cream Cheese Frosting for 18-22 minutes, or until a toothpick inserted into the center comes out clean. Let them cool completely in the pan before you even think about frosting. For the frosting, simply beat room-temperature cream cheese and butter together until fluffy, then gradually mix in the powdered sugar, vanilla, and cinnamon. Finally, swirl that glorious frosting on top of each cooled cupcake for a perfect, bakery-worthy treat.
Mistakes I’ve made and learned from
I have absolutely been there, pulling a tray of sunken Pumpkin Cupcakes with Cinnamon Cream Cheese Frosting from the oven because I got overzealous with the mixer. Overmixing the batter develops too much gluten, leading to a dense, tough crumb instead of that light, fluffy texture we all crave. My solution is to mix by hand once the dry ingredients are added, stopping the very second no flour streaks remain. Another classic blunder of mine was frosting cupcakes that were even slightly warm. The result was a delicious but sadly melted puddle of cinnamon cream cheese frosting sliding right off the dome. Now, I practice patience and let them cool entirely, which is a great time to properly clean my stand mixer for the next step. Learning these small but crucial details transformed my baking results and gave me the confidence to master other baking temperatures and techniques for all my desserts.
n-and-variations">Cultural Connection and Variations
Where this recipe comes from
Pumpkin Cupcakes with Cinnamon Cream Cheese Frosting feel like a warm hug from autumn itself. Their story, however, stretches back much further than modern bakeries. We can trace the pumpkin’s culinary journey to Native American tribes who first cultivated it. They roasted it, stewed it, and even dried it for sustenance. Meanwhile, European settlers brought their love of spices and baking techniques. Eventually, these traditions merged on the colonial table, creating the foundation for the spiced pumpkin treats we adore today.
Families often pass down their own unique twists. For instance, some bakers add a pinch of nutmeg or clove to the batter for extra warmth. Others might fold in chopped pecans or walnuts for a delightful crunch. In different regions, you might even find a maple glaze instead of the classic cream cheese frosting. Personally, my grandmother always used a splash of vanilla extract in her frosting, a simple touch that made them uniquely hers. No matter the variation, the goal remains the same: to capture the cozy, comforting essence of the season in every single bite.
This beautiful evolution shows how a simple ingredient can inspire countless interpretations. Ultimately, baking a batch of Pumpkin Cupcakes with Cinnamon Cream Cheese Frosting connects us to a rich, shared history of harvest and home.
ays-cooking">How it fits in today’s cooking
Today, these cupcakes absolutely dominate fall gatherings. They have become a non-negotiable star at Thanksgiving feasts and Halloween parties alike. Furthermore, modern home cooks constantly find new ways to enjoy them. You might bake a batch for a weekend treat, enjoying one with a hot coffee for the perfect afternoon break.
Many bakers also adapt the recipe to fit dietary needs, easily creating delicious vegan or gluten-free versions that everyone can enjoy. Their portable size makes them ideal for school bake sales or as a thoughtful gift for a neighbor. Moreover, the combination of pumpkin and warming spices like cinnamon feels inherently cozy, offering a much-needed comfort during the busier, colder months.
This timeless dessert seamlessly fits into our modern rhythm. For another fantastic way to use seasonal flavors, consider trying our apple cider doughnuts. They pair wonderfully with these spiced cupcakes for a full autumn-themed spread. Ultimately, this recipe continues to thrive because it delivers both nostalgia and deliciousness in every single bite.
>Taste and Texture
What makes it delicious
These Pumpkin Cupcakes with Cinnamon Cream Cheese Frosting deliver a wonderfully moist and tender crumb that simply melts in your mouth. Each bite bursts with warm, fragrant spices like cinnamon and nutmeg, which perfectly complement the earthy sweetness of the pumpkin puree. Furthermore, the rich and tangy cream cheese frosting, generously swirled on top, provides a luxuriously creamy and cool contrast. Ultimately, the experience is a cozy symphony of autumnal flavors and comforting textures that feels both indulgent and familiar.
Boosting the flavor
For an extra flavor kick, consider toasting your spices in a dry pan before adding them to the batter; this simple step unlocks their essential oils and dramatically deepens their warmth. Alternatively, a sprinkle of crunchy, spiced pecans on top of your Pumpkin Cupcakes with Cinnamon Cream Cheese Frosting introduces a delightful textural contrast. If you adore that creamy element, explore our guide to the best types of frosting for more inspiration. Moreover, a drizzle of salted caramel sauce just before serving beautifully enhances the sweet and savory notes. For another seasonal twist that uses similar warming spices, our pumpkin cinnamon rolls recipe is a fantastic next baking project.
Tips for Success
Best practices for results
First, always bring your cream cheese and butter to room temperature for a perfectly smooth frosting. Furthermore, use a trigger-release scoop to fill your liners evenly for uniform baking. Then, make sure you thoroughly cool your Pumpkin Cupcakes with Cinnamon Cream Cheese Frosting base before applying the frosting. Finally, chill the frosted cupcakes for about 15 minutes to set the frosting beautifully.
Mistakes to avoid
Avoid overmixing your batter after adding the flour, as this can lead to dense cupcakes. Instead, gently fold the ingredients until they are just combined. Additionally, do not use cold cream cheese, otherwise your frosting might become lumpy. For more guidance on getting your frosting silky smooth, read our guide on how to fix frosting consistency. Moreover, ensure your spices are fresh for the most vibrant flavor in your Pumpkin Cupcakes with Cinnamon Cream Cheese Frosting. If your baked goods often turn out dry, our tips for avoiding dry cakes can help you achieve a perfectly moist crumb every time.
Serving and Pairing Suggestions
How to serve this dish
Present your Pumpkin Cupcakes with Cinnamon Cream Cheese Frosting on a beautiful rustic platter for a charming touch. Furthermore, garnish each one with a tiny sprinkle of cinnamon or a single toasted pecan for a simple yet elegant finish. These cupcakes truly shine during autumn gatherings and holiday feasts. Consequently, they make a stunning centerpiece for any dessert table. Always serve them at room temperature to let the rich, spiced flavor of the Pumpkin Cupcakes with Cinnamon Cream Cheese Frosting fully bloom.
h-it">What goes well with it
A hot cup of spiced chai tea makes a perfect partner. Its warm spices beautifully echo the cinnamon and pumpkin notes in these delightful cupcakes. Alternatively, a glass of cold milk provides a classic, creamy contrast that everyone loves. For a truly decadent dessert spread, consider serving these cupcakes alongside a slice of our rich chocolate lava cake. Finally, a scoop of our homemade vanilla bean ice cream on the side creates a wonderful temperature and texture contrast that is simply irresistible.
Can I make pumpkin cupcakes with cinnamon cream cheese frosting ahead of time?
Absolutely! You can bake the pumpkin cupcakes up to two days in advance. Store them unfrosted in an airtight container at room temperature. For the best texture and flavor, prepare the cinnamon cream cheese frosting and frost the cupcakes the day you plan to serve them.
ank-math-faq-item">
How do you keep cream cheese frosting from getting runny?
The key to a stable cinnamon cream cheese frosting is using cold, full-fat cream cheese and room-temperature butter. Ensure your butter is not too soft, and avoid overmixing the frosting. Chilling the frosting for 15-20 minutes before piping can also help it hold its shape perfectly on your Pumpkin Cupcakes with Cinnamon Cream Cheese Frosting.
What is a good substitute for eggs in pumpkin cupcakes?
For each egg, you can use 1/4 cup of unsweetened applesauce, mashed banana, or commercial egg replacer. These substitutes add moisture, which complements the pumpkin puree well. Be aware that the texture might be slightly denser, but your Pumpkin Cupcakes with Cinnamon Cream Cheese Frosting will still be delicious.
Do pumpkin cupcakes need to be refrigerated?
Yes, due to the dairy in the cinnamon cream cheese frosting, these cupcakes must be refrigerated. Place them in an airtight container and store them in the refrigerator for up to 4 days. For the best taste, let them sit at room temperature for about 30 minutes before serving.
div>
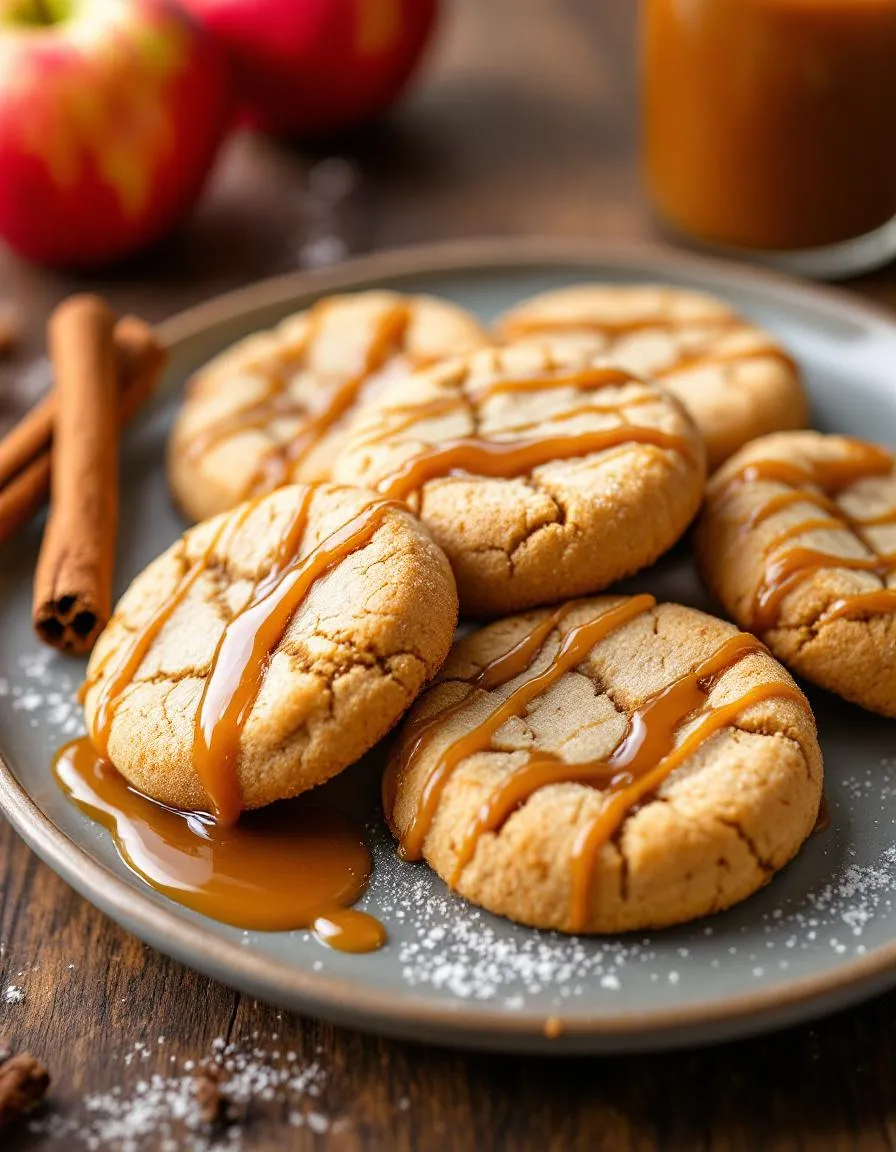
Best Apple Butter Cookies – Soft & Chewy Recipe
Introduction
Is there anything more comforting than the smell of warm spices and baking cookies wafting through your kitchen? Honestly, it feels like a hug from the inside out. Furthermore, if you adore that cozy, autumnal feeling but want a treat that stands out from the usual lineup, you absolutely need to try these Apple Butter Cookies. They offer a uniquely soft and chewy texture with a deep, spiced flavor that truly captures the essence of fall in every single bite. Ultimately, this recipe transforms a simple jar of homemade apple butter into something magically delicious.
So what exactly are Apple Butter Cookies? Essentially, they are a wonderfully soft and cake-like drop cookie that gets its rich flavor and incredible moisture from a generous amount of apple butter. This key ingredient not only lends its name but also provides a complex sweetness that granulated sugar alone cannot achieve. Moreover, the warm spices like cinnamon and nutmeg naturally present in the apple butter mean every cookie tastes like a piece of the season. This recipe matters because it provides a fantastic way to use up any extra apple butter you might have from a big batch, turning it into a crowd-pleasing dessert that everyone will request again and again. Consequently, it fits our blog’s tone perfectly as we always strive to share recipes that are both deeply satisfying and straightforward to create, using ingredients that make sense for home cooks. For instance, if you are looking to make your own apple butter from scratch, we highly recommend our simple Homemade Apple Butter recipe. Additionally, these cookies pair beautifully with a cup of coffee or tea, making them an ideal treat for a chilly afternoon. They are a fantastic addition to any holiday cookie plate, offering a unique alternative to more traditional options. If you enjoy other spiced fall desserts, you will certainly appreciate our classic Pumpkin Bread as well. Ultimately, this recipe delivers a perfect balance of ease and impressive results, which is exactly what we love to offer our readers.
Why I Love This Recipe
I personally love this recipe because it immediately transports me back to my grandmother’s kitchen. She always had a pot of apple butter simmering on the stove during autumn, and the entire house would smell incredible. Consequently, baking these Apple Butter Cookies now fills my own home with those same warm, familiar scents, creating new memories with my family while honoring old ones. Furthermore, I appreciate how the recipe consistently yields perfectly soft and chewy cookies without any fuss, making it my go-to when I need a reliable and deeply comforting treat that always receives rave reviews.
Health and Nutrition
Why it’s good for your body
Apple Butter Cookies offer a surprisingly wholesome twist on a classic treat. Primarily, they provide a more nutritious alternative because apple butter naturally sweetens them. Consequently, you can significantly reduce the amount of refined sugar you normally need. Furthermore, apples contribute pectin, a soluble fiber that supports digestive health and helps you feel fuller longer.
Moreover, this recipe often uses whole grains like oats, which add essential nutrients and fiber. These ingredients work together to create a cookie that delivers sustained energy instead of a sharp sugar crash. Additionally, spices like cinnamon and nutmeg do more than just add warmth; they also bring their own antioxidant properties to every bite.
Ultimately, enjoying these Apple Butter Cookies means you are treating yourself to a dessert with hidden benefits. You get the comforting taste of a cookie while also giving your body useful fiber and nutrients. Therefore, this treat feels indulgent but aligns better with your wellness goals, making every Apple Butter Cookie a smarter choice.
How it fits in a healthy lifestyle
These cookies fit beautifully into a balanced eating plan. You can easily enjoy one as a satisfying afternoon snack with a cup of tea or pack it in a lunchbox for a mindful treat. Since they offer more fiber and less refined sugar, they help curb cravings without derailing your daily nutrition goals.
For anyone exploring specific dietary needs, you can adapt this recipe to be gluten-free by using a certified oat flour. It also complements a heart-healthy focus due to the soluble fiber from the oats and apples. If you are looking for more ideas on incorporating wholesome ingredients into your desserts, explore our guide on healthy baking substitutions.
Remember, healthy living is all about balance and finding joy in what you eat. A delicious Apple Butter Cookie proves that you do not have to sacrifice flavor for nutrition. For more inspiration on creating a well-rounded diet, check out our tips for building a balanced meal prep routine.
Soft, spiced cookies with a rich apple butter flavor, perfect for autumn baking.
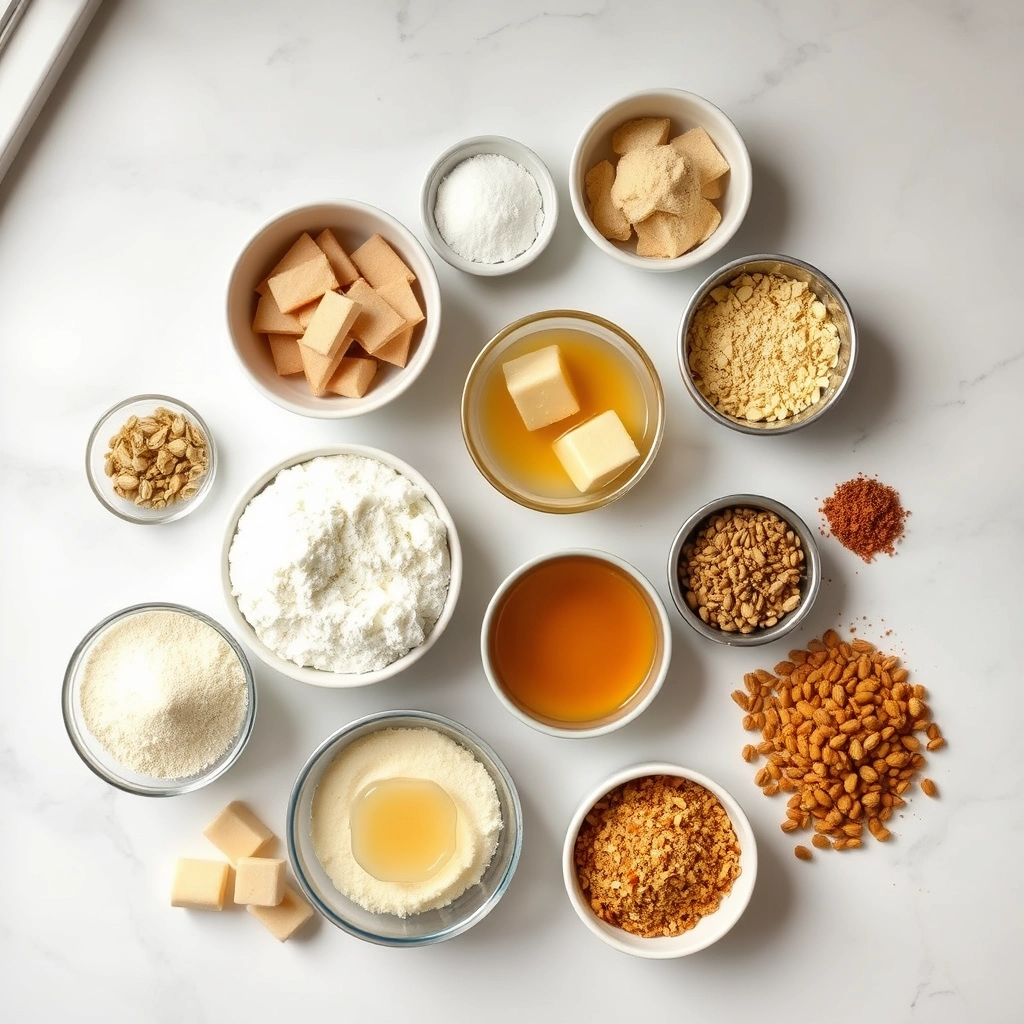
Ingredients
Scale
For the Crust:
1 cup unsalted butter, softened
1 cup granulated sugar
1/2 cup apple butter
1 large egg
2 1/2 cups all-purpose flour
1 tsp baking soda
1/2 tsp salt
1 tsp ground cinnamon
1/2 tsp ground nutmeg
1/4 cup sugar for rolling
Instructions
1. Prepare the Crust:
Preheat oven to 375°F (190°C). Line baking sheets with parchment paper.
Cream together butter and sugar until light and fluffy. Beat in apple butter and egg until well combined.
In a separate bowl, whisk together flour, baking soda, salt, cinnamon, and nutmeg. Gradually add to wet ingredients, mixing until just combined.
Shape dough into 1-inch balls, roll in sugar, and place 2 inches apart on baking sheets. Flatten slightly with the bottom of a glass.
Bake for 8-10 minutes, until edges are lightly golden. Cool on baking sheets for 5 minutes before transferring to wire racks.
Notes
You can customize the seasonings to taste.
How to Prepare This Dish
Steps and time-saving tips
First, preheat your oven to 350°F and line your baking sheets with parchment paper. Meanwhile, cream together the softened butter and sugars until the mixture becomes light and fluffy; this step is crucial for the perfect cookie texture. Next, beat in the egg, vanilla, and your rich apple butter until everything is just combined. In a separate bowl, whisk your dry ingredients together. Gradually add these dry ingredients to your wet mixture, stirring only until you no longer see any flour streaks. For a soft and cake-like cookie, avoid overmixing the dough. Scoop the dough onto your prepared sheets using a small cookie scoop; this ensures uniform size and even baking. Finally, bake for about 10-12 minutes, just until the edges turn a beautiful golden brown. Let the Apple Butter Cookies cool on the sheet for five minutes before you move them to a wire rack. For a quick clean-up, wash your mixing bowl and electric mixer attachments immediately while the cookies bake.
Mistakes I’ve made and learned from
I once rushed the creaming process with cold butter, which resulted in dense, flat cookies that spread way too much. Now, I always ensure my butter is properly softened to room temperature for that ideal airy texture. Another common error was overbaking; I learned the hard way that these cookies continue to set on the hot pan, so pulling them out when they look slightly underdone is key. For more insights on getting textures just right, my guide on baking with apple butter covers all the basics. Furthermore, if your apple butter is particularly potent, it can sometimes throw off the spice balance. I recommend tasting it first, a tip I picked up from my post about making homemade apple butter, to adjust your cinnamon and nutmeg accordingly. Learning these small details truly makes all the difference.
My grandmother always pulled out her big ceramic crock when the autumn apples piled high. She transformed them into a spiced, slow-simmered apple butter that filled her entire house with the most incredible aroma. Consequently, she never wasted a single spoonful. She famously created her Apple Butter Cookies to use up the last bit from the jar. Her recipe, however, is just one version of a beloved tradition.
In many Appalachian communities, people consider these spiced cookies a frugal and delicious way to extend precious preserves. Meanwhile, in Germany, bakers often incorporate apfelkraut, a similar concentrated apple spread, into their lebkuchen for a deeper, fruitier flavor. Some families add a simple powdered sugar glaze, while others might press a single raisin or walnut into the center of each cookie before baking. Ultimately, every family seems to have their own cherished twist on the classic Apple Butter Cookies recipe, passing it down through generations.
ays-cooking">How it fits in today’s cooking
Today, these cookies perfectly bridge the gap between nostalgic tradition and modern convenience. They absolutely shine on a holiday cookie tray, offering a warmly spiced alternative to richer sweets. Furthermore, contemporary bakers enthusiastically adapt the recipe to fit various dietary needs, easily creating vegan Apple Butter Cookies by using a flax egg or gluten-free versions with a 1:1 flour blend.
Beyond the holidays, these cookies fit seamlessly into everyday lunchboxes and afternoon coffee breaks. Their soft, cake-like texture and cozy flavor profile provide a little moment of comfort any time of day. For instance, you can pair one with a scoop of our vegan vanilla bean ice cream for a simple yet stunning dessert. Additionally, if you find yourself with extra apple butter, consider using it in our famous spiced apple cake for a double dose of apple goodness. Ultimately, this humble cookie continues to earn its place in our kitchens and our hearts.
Taste and Texture
What makes it delicious
These Apple Butter Cookies deliver a wonderfully soft and chewy texture that melts in your mouth. Each bite bursts with the warm, spiced flavor of cinnamon and nutmeg, perfectly complemented by the deep, caramelized sweetness of the apple butter. Furthermore, the edges offer a subtle crispness that contrasts beautifully with the tender center. Your kitchen will smell absolutely fragrant with the aroma of baked apples and cozy autumn spices. Ultimately, the rich apple butter not only provides incredible moisture but also creates a uniquely delicious experience you will crave.
r">Boosting the flavor
For an extra flavor boost, consider folding in a handful of toasted pecans or walnuts to introduce a delightful crunch. Alternatively, a simple drizzle of salted caramel sauce over the cooled cookies elevates them into a gourmet treat. You can also experiment with spice variations; a pinch of cardamom or a dash of cloves pairs wonderfully with the apple notes. For another creative twist, sandwich two cookies together with a layer of cream cheese frosting for a decadent handheld dessert. Finally, a light sprinkle of flaky sea salt right before serving always enhances the overall sweetness.
Tips for Success
Best practices for results
Always chill your dough for at least one hour because this crucial step prevents your Apple Butter Cookies from spreading too thin in the oven. Use a cookie scoop for uniformly sized portions that bake evenly. Furthermore, line your baking sheets with parchment paper to guarantee a perfect texture and easy cleanup every single time. For the best flavor, make sure you use a high quality, spiced apple butter in your dough.
>Mistakes to avoid
Avoid overmixing your cookie dough once you add the dry ingredients, as this overdevelops the gluten and leads to a tough texture. Instead, mix just until you see no more flour streaks for a tender Apple Butter Cookies result. Additionally, do not skip the step of creaming your butter and sugar together properly; otherwise, your cookies may turn out denser than desired. If your cookies consistently spread, your butter was likely too soft; learn how to properly cream butter and sugar for a better structure. Remember that oven temperatures can vary, so use an oven thermometer to ensure accurate baking and avoid over or under-baking.
Serving and Pairing Suggestions
How to serve this dish
Present your Apple Butter Cookies on a rustic wooden board for a charming, homespun feel. Alternatively, stack them high on a vintage cake stand to create a stunning centerpiece. For a special touch, lightly dust them with powdered sugar just before your guests arrive.
These cookies truly shine during holiday cookie exchanges and cozy autumn gatherings. Serve them warm from the oven to maximize their comforting aroma. You can also package them in decorative boxes or cellophane bags as a delicious homemade gift.
h-it">What goes well with it
A hot cup of spiced chai tea makes a perfect partner for these treats. The warm spices in the tea beautifully echo the cozy flavors in your Apple Butter Cookies.
For a delightful dessert pairing, try them with a scoop of vanilla bean ice cream. The cool, creamy ice cream creates a wonderful contrast against the soft, spiced cookie. Similarly, a slice of our creamy New York Cheesecake offers a rich and tangy complement.
Finally, consider a glass of cold apple cider. This beverage choice highlights the apple butter’s fruity notes and completes the autumnal experience. For another fantastic seasonal pairing, our Pumpkin Spice Latte Cupcakes would make an excellent addition to your dessert spread.
What is the best way to store apple butter cookies?
Store your apple butter cookies in an airtight container at room temperature for up to one week. For longer storage, you can freeze the baked cookies for up to 3 months; just ensure they are wrapped tightly to prevent freezer burn and preserve their soft, chewy texture.
Can I use homemade apple butter in cookies?
Absolutely! Using homemade apple butter will give your cookies a wonderfully rich and fresh flavor. Just make sure your homemade version has a similar thick, spreadable consistency to store-bought apple butter so the cookie dough doesn’t become too wet.
ank-math-faq-item">
Why are my apple butter cookies cakey?
A cakey texture in apple butter cookies often results from using too much apple butter or overmixing the dough, which incorporates excess air. For a chewier cookie, carefully measure your apple butter and mix the dough just until the ingredients are combined.
Can I substitute apple butter for applesauce in baking?
Yes, you can substitute apple butter for applesauce, but be aware that apple butter is more concentrated and spiced, which will result in a deeper flavor and darker color. This swap works perfectly for recipes like these apple butter cookies, but you may need to slightly reduce any other spices called for.
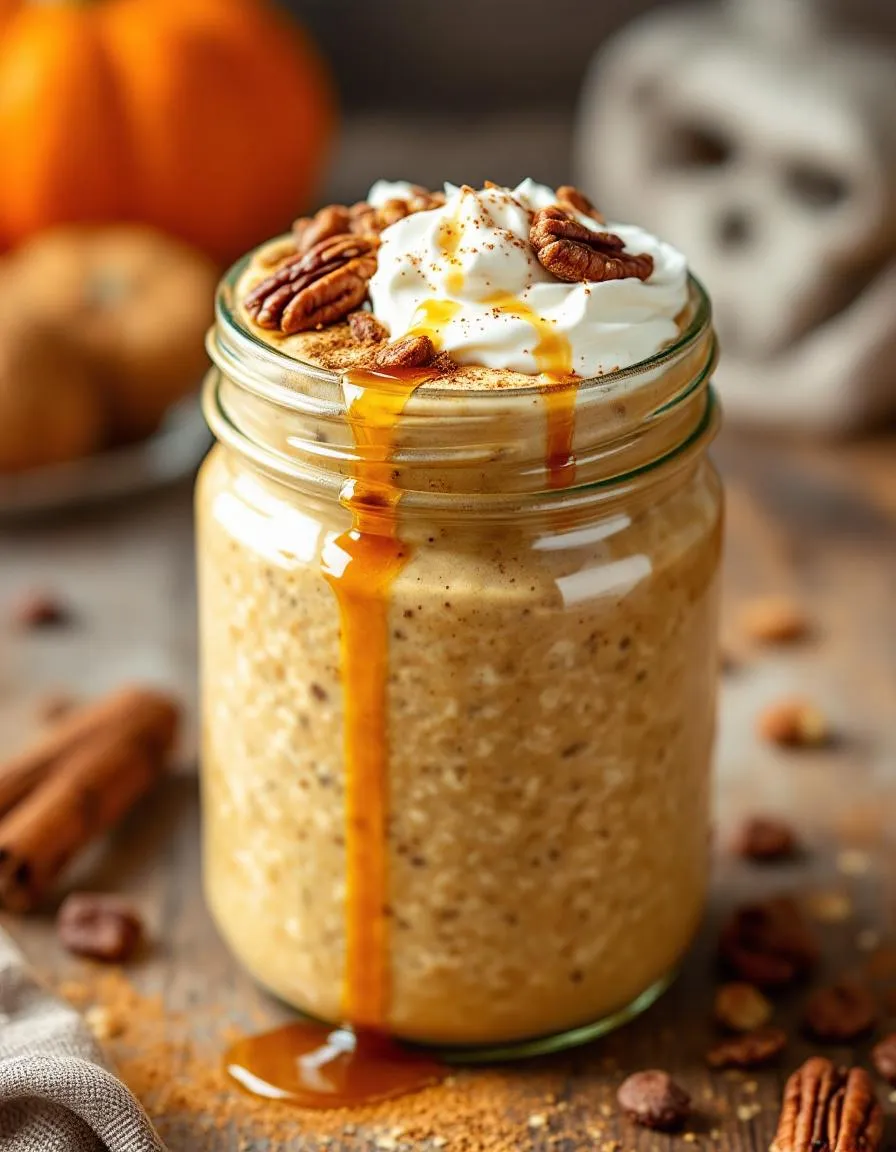
Easy Pumpkin Pie Overnight Oats Recipe
Introduction
Do you ever wake up craving the cozy, spiced sweetness of pumpkin pie but know you need a healthy, quick breakfast? We completely understand that morning struggle. Fortunately, we have the perfect solution that lets you enjoy dessert for breakfast without any guilt. This recipe for Pumpkin Pie Overnight Oats will transform your hectic mornings into a moment of autumnal bliss. Ultimately, it is the make-ahead miracle you have been searching for.
Pumpkin Pie Overnight Oats is a no-cook breakfast where you combine rolled oats, pumpkin puree, milk, and warm spices in a jar the night before. As the mixture rests in the refrigerator, the oats soften and absorb all the incredible flavors, creating a creamy, pudding-like consistency. This dish matters because it delivers a powerful nutritional punch packed with fiber, vitamins, and sustained energy, all while tasting like a decadent treat. It perfectly fits our blog’s mission to provide delicious, approachable recipes that make healthy eating simple and enjoyable. Furthermore, it is an excellent way to use seasonal ingredients, much like our popular Creamy Vegan Pumpkin Soup. For anyone new to this style of breakfast, our guide on How to Make Overnight Oats covers all the essential basics to ensure your success every single time.
Why I Love This Recipe
I genuinely love this recipe because it single-handedly solved my chaotic morning routine. As a parent, I often found myself skipping breakfast to get everyone else out the door, leaving me drained by mid-morning. Now, I look forward to opening the fridge to a ready-made jar of these Pumpkin Pie Overnight Oats. The taste instantly transports me to my favorite holiday memories, yet it fuels my body properly for the day ahead. It feels like a small, personal act of self-care that is both effortless and deeply satisfying.
Health and Nutrition
Why it’s good for your body
This Pumpkin Pie Overnight Oats recipe delivers a powerful nutritional punch to start your day. For instance, pumpkin puree provides a fantastic dose of vitamin A, which actively supports healthy vision and a strong immune system. Moreover, the oats serve as an excellent source of soluble fiber, specifically beta-glucan. Consequently, this fiber helps to regulate cholesterol levels and promotes a feeling of fullness that can curb mid-morning snacking.
Additionally, the spices like cinnamon and nutmeg do more than just add flavor. In fact, they bring their own anti-inflammatory and antioxidant properties to the mix. Meanwhile, the natural sweetness from ingredients like maple syrup offers a satisfying treat without the crash associated with refined sugars. Therefore, you can enjoy a delicious breakfast that truly nourishes your body from within. Ultimately, preparing a jar of Pumpkin Pie Overnight Oats means you are choosing a meal that supports sustained energy and overall wellness.
How it fits in a healthy lifestyle
This recipe seamlessly fits into various healthy eating plans. If you follow a gluten-free diet, simply ensure you use certified gluten-free oats. The combination of complex carbs, fiber, and plant-based protein makes it an ideal heart-healthy choice that supports stable energy levels throughout the morning.
Meal prepping a few jars at once sets you up for success on busy weekdays, eliminating the temptation for less nutritious grab-and-go options. For more inspiration on planning your meals, explore our guide to easy meal prep ideas. Furthermore, if you are looking to incorporate more whole foods into your routine, this dish is a perfect example of a satisfying, minimally processed breakfast. Discover other ways to fuel your day with our roundup of healthy breakfast recipes that keep you full and focused.
A creamy, spiced breakfast that tastes like pumpkin pie but is ready to grab and go in the morning.
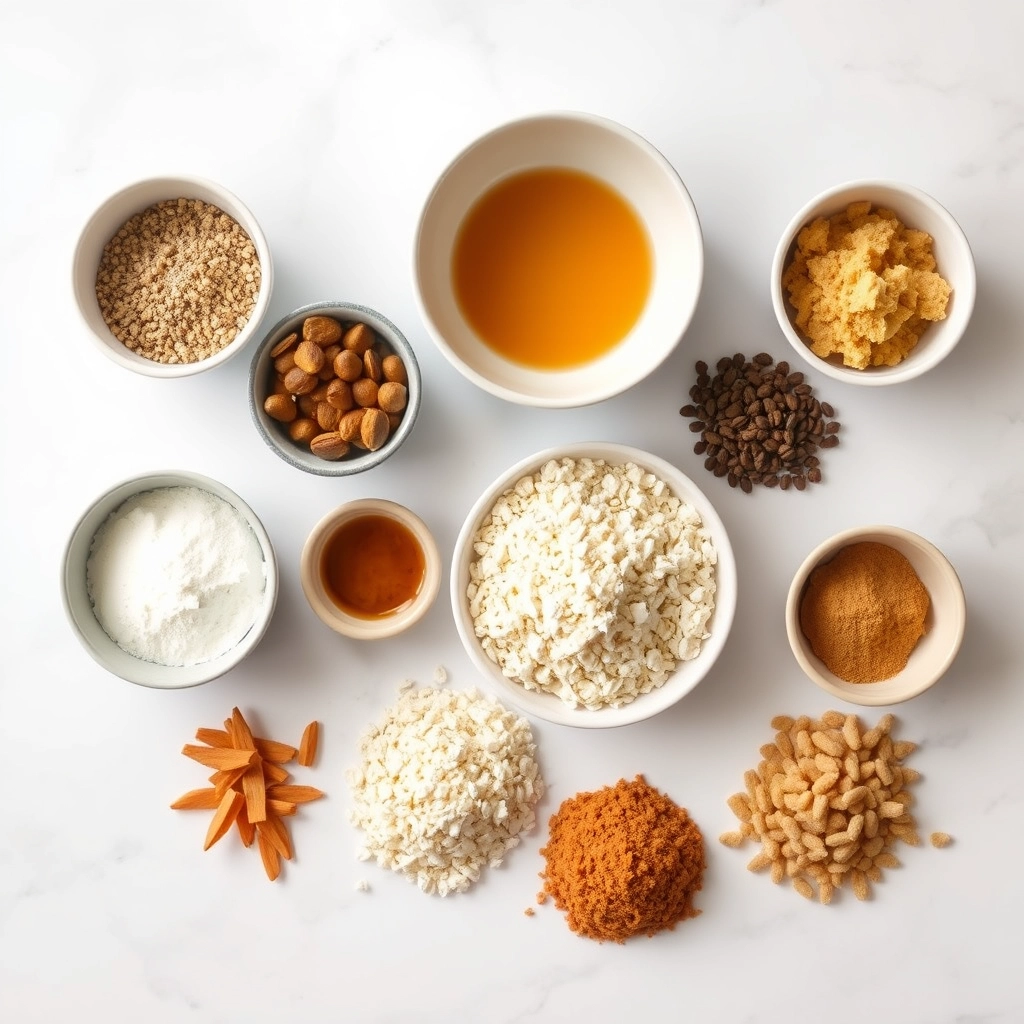
Ingredients
Scale
For the Crust:
1/2 cup rolled oats
1/2 cup milk of choice
1/4 cup pumpkin puree
1 tbsp maple syrup
1/2 tsp pumpkin pie spice
Pinch of salt
1 tbsp chia seeds
1/4 tsp vanilla extract
Instructions
1. Prepare the Crust:
In a jar or bowl, combine all ingredients and stir well until fully mixed.
Cover and refrigerate for at least 4 hours, or overnight.
Stir before serving. Add a splash of milk if desired, and top with nuts or whipped cream.
Notes
You can customize the seasonings to taste.
How to Prepare This Dish
Steps and time-saving tips
First, grab a large mixing bowl and a trusty whisk. Combine your rolled oats, chia seeds, pumpkin pie spice, and a pinch of salt. Whisk these dry ingredients together thoroughly. This crucial step ensures every single oat gets perfectly coated in that warm, spiced flavor. Next, add the pumpkin puree, your milk of choice, maple syrup, and a dash of vanilla extract. Now, stir everything vigorously for a full minute. You want the mixture to look completely uniform with no streaks of pumpkin or dry pockets. Pour the mixture into your jars or containers, leaving a little space at the top. Finally, seal the containers tightly and immediately place them in the refrigerator. They need at least four hours to set, but overnight is truly ideal for the creamiest texture. In the morning, simply give them a good stir, add your favorite toppings, and enjoy a perfect breakfast.
Mistakes I’ve made and learned from
I have absolutely learned the hard way that not all oats are created equal for this recipe. Initially, I used quick oats, which resulted in a disappointingly mushy texture that lacked any satisfying bite. Now, I always use old-fashioned rolled oats because they hold their shape perfectly and provide that ideal chewy consistency. Another classic blunder of mine was getting impatient and skipping the crucial whisking step for the dry ingredients. This led to clumps of spice that created overwhelmingly strong bites, which was a real shame. Through trial and error, I discovered that taking that extra minute to whisk everything together first makes all the difference for a perfectly balanced flavor in every single spoonful. For more tips on getting the texture just right, check out my guide on achieving the perfect oatmeal texture. And if you’re looking for more make-ahead inspiration, my easy meal prep breakfast ideas are a great place to start.
We often trace the roots of Pumpkin Pie Overnight Oats back to two classic American traditions. Firstly, we have the beloved pumpkin pie, a staple on Thanksgiving tables for generations. Secondly, we have the practical need for quick, nutritious breakfasts. Consequently, this recipe beautifully marries heritage with modern convenience. My own family, for instance, always made a huge deal out of the first pumpkin pie of the season. Eventually, I wanted that same cozy feeling on a random Tuesday morning without the fuss. That is how my version of Pumpkin Pie Overnight Oats was born.
Around the world, people adapt the concept with local flavors. In Australia, for example, cooks might use wattleseed for a nutty, coffee-like twist. Meanwhile, in the UK, they may favor a steamed pudding spice blend. Alternatively, some Caribbean variations incorporate sweet potato and a hint of nutmeg. Regardless of the region, the core idea remains the same. Ultimately, we all seek that comforting, spiced sweetness to start our day.
ays-cooking">How it fits in today’s cooking
This dish fits perfectly into our current fast-paced lifestyle. Moreover, it delivers the nostalgic flavors of a holiday dessert in a genuinely healthy format. Busy home cooks especially appreciate how they can prepare a week’s worth of breakfast in one go. Furthermore, the recipe is incredibly adaptable for different dietary needs. You can easily swap in your favorite plant based milk to keep it vegan.
We now see Pumpkin Pie Overnight Oats as a year-round favorite, not just an autumn treat. It has become a staple for meal preppers and families alike. For a complete morning spread, many people pair it with other make ahead dishes. For instance, it goes wonderfully with a batch of healthy morning muffins. Ultimately, this simple jar of oats continues to connect us to tradition while firmly fitting into our modern routines.
Taste and Texture
What makes it delicious
This Pumpkin Pie Overnight Oats recipe delivers a creamy, spiced experience that feels like dessert for breakfast. Each spoonful offers a velvety smooth texture from the soaked oats, punctuated by the gentle chew of plump raisins or crunchy pecans. The warm, fragrant aroma of cinnamon and pumpkin pie spice greets you first, followed by the rich, earthy sweetness of real pumpkin puree. Ultimately, the cozy, familiar flavors of a classic pumpkin pie shine through in every satisfying bite of these Pumpkin Pie Overnight Oats.
r">Boosting the flavor
For an even more decadent treat, consider swirling in a spoonful of maple syrup or a dollop of vanilla yogurt just before serving. Additionally, toasting your nuts and seeds beforehand unlocks a deeper, richer flavor that beautifully complements the warm spices. If you adore the combination of pumpkin and chocolate, you can stir in some mini chocolate chips for a delightful twist. For another fantastic make-ahead breakfast that uses similar warming spices, explore our popular Chai Overnight Oats. Furthermore, a drizzle of our simple Vanilla Greek Yogurt Frosting transforms your jar into a truly gourmet experience.
Tips for Success
Best practices for results
Always use pure pumpkin puree for the best flavor and texture in your Pumpkin Pie Overnight Oats. Furthermore, make sure you thoroughly mix all the ingredients until the consistency looks completely smooth. Consequently, you will avoid any clumps of spice or oats. For the creamiest results, always let your mixture chill for a full eight hours. Finally, give your oats a good stir before serving to redistribute any moisture.
>Mistakes to avoid
Avoid using a liquid that is too thin, as this can make your Pumpkin Pie Overnight Oats soupy. Instead, opt for thicker bases like Greek yogurt or almond milk. Additionally, do not skip the salt, as it is crucial for balancing the sweetness and spices. For more guidance on getting the perfect texture, read our guide on how to make overnight oats. Moreover, resist the urge to add all your toppings the night before. Otherwise, nuts will lose their crunch and fresh fruit may release too much water. For ideas on what to add right before serving, explore our list of healthy overnight oats toppings.
Serving and Pairing Suggestions
How to serve this dish
Elevate your Pumpkin Pie Overnight Oats with a few simple presentation tricks. For instance, always layer your oats in a clear glass or mason jar to showcase the beautiful autumn colors. Top each serving with an extra dollop of whipped cream, a sprinkle of cinnamon, and a few toasted pecans for a festive crunch. This dish truly shines during holiday brunches or as a special make-ahead breakfast for guests. Furthermore, you can serve these oats in small cups for a delightful and portable Thanksgiving morning treat.
What goes well with it
A hot cup of coffee perfectly cuts through the creamy sweetness of Pumpkin Pie Overnight Oats. Alternatively, a glass of cold almond milk also makes a wonderfully refreshing companion. For a heartier breakfast spread, consider adding a side of crispy air fryer bacon for a savory contrast. Moreover, a warm slice of our popular healthy banana bread complements the spiced pumpkin flavors beautifully.
Yes, canned pumpkin puree is perfect for Pumpkin Pie Overnight Oats. It provides a smooth texture and concentrated flavor. Just be sure you are using 100% pure pumpkin puree, not pumpkin pie filling which has added sugars and spices.
How long do pumpkin overnight oats last?
Properly stored in an airtight container in the refrigerator, your Pumpkin Pie Overnight Oats will stay fresh for up to 4-5 days. This makes them an excellent option for preparing a healthy breakfast for the entire workweek ahead.
ank-math-faq-item">
Do you eat overnight oats hot or cold?
Overnight oats are traditionally enjoyed cold straight from the fridge, as the name implies. However, if you prefer a warm breakfast, you can gently heat your Pumpkin Pie Overnight Oats in the microwave for 60-90 seconds, stirring halfway through.
What is the best liquid to use for overnight oats?
Dairy milk or unsweetened almond milk are the most popular and effective choices for Pumpkin Pie Overnight Oats. The key is to use your preferred milk to achieve a creamy, pudding-like consistency after the oats have soaked overnight.
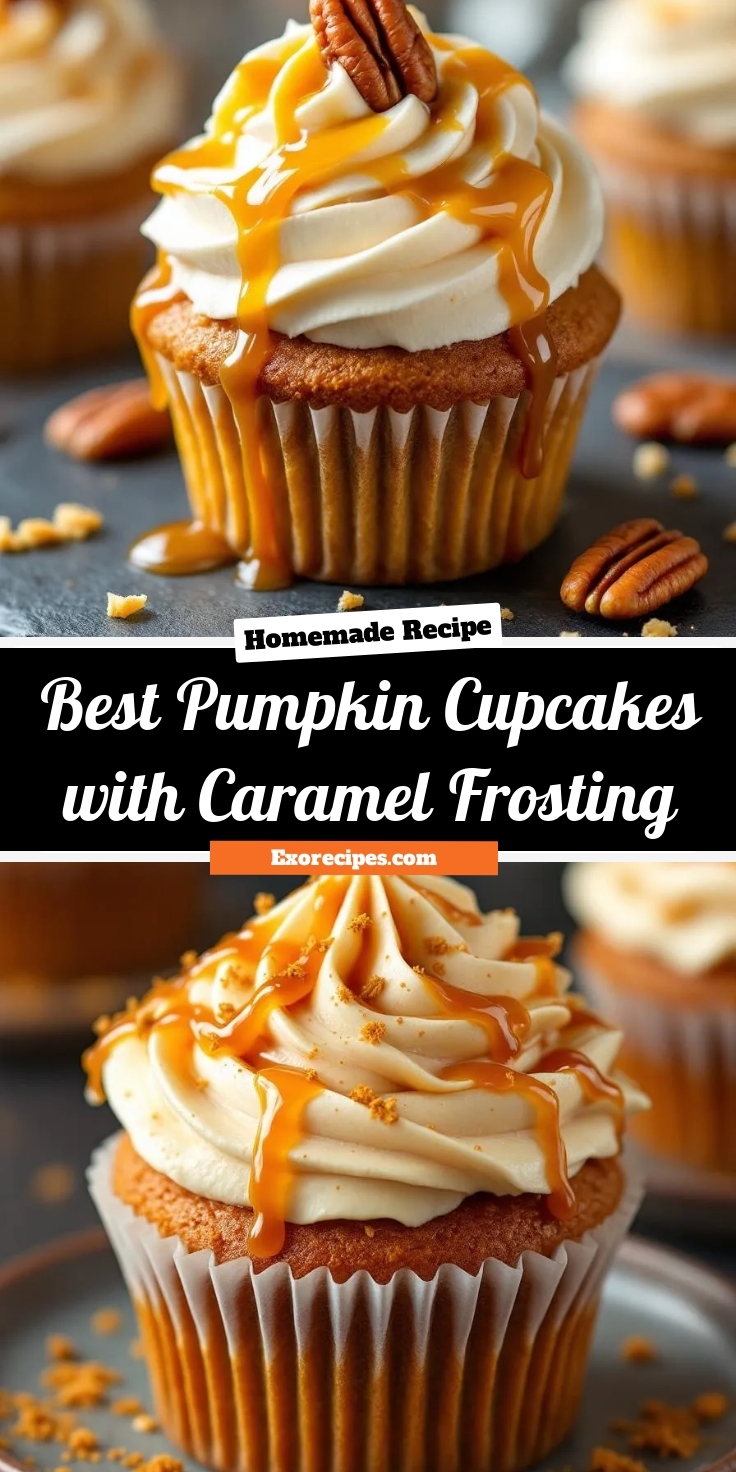
Best Pumpkin Cupcakes with Caramel Frosting
Introduction
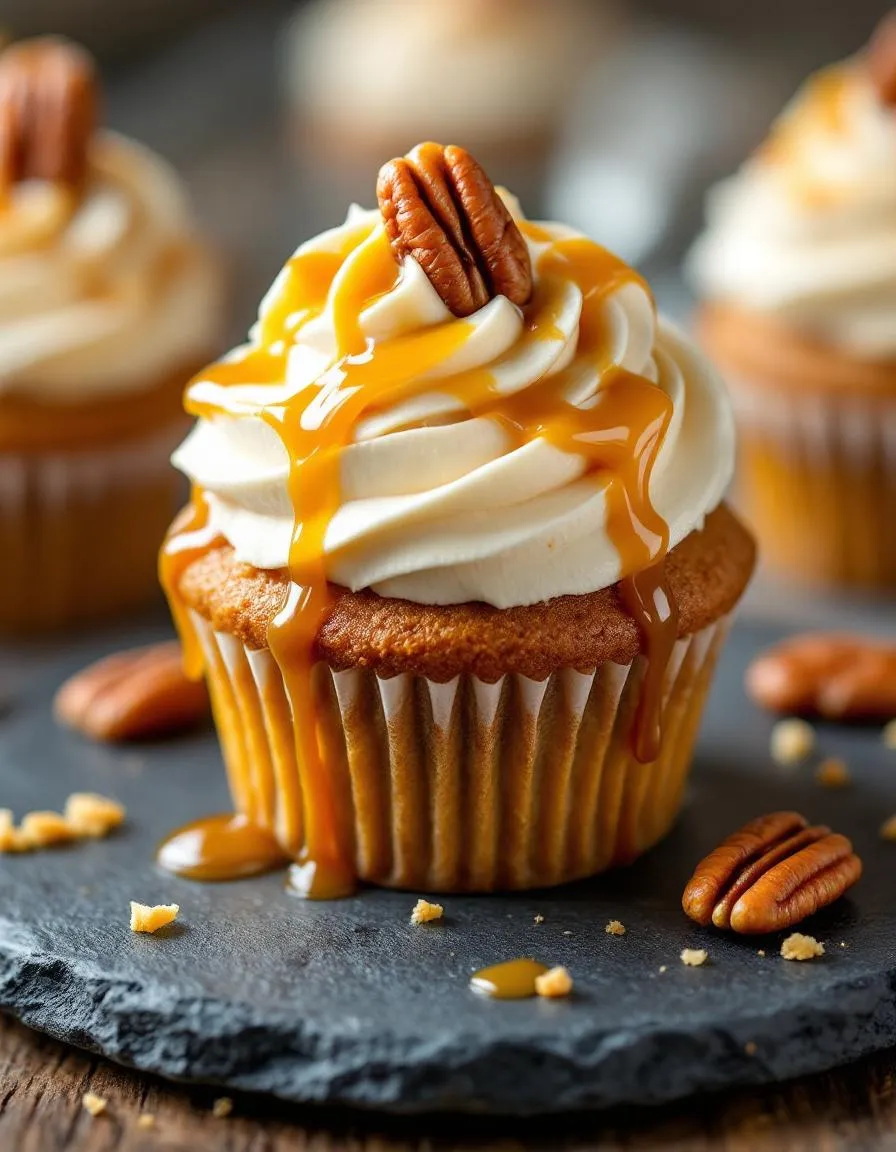
Is there anything more comforting than the warm, spiced aroma of pumpkin baking? It instantly wraps you in a cozy hug, promising a moment of pure, autumnal bliss. Now, imagine capturing that feeling in a single, perfect bite. These Pumpkin Cupcakes with Caramel Cream Cheese Frosting do exactly that, offering a miniature escape into fall flavor that feels both nostalgic and excitingly new. They are the ultimate treat to savor with a hot drink, creating a simple yet profound moment of joy.
Pumpkin Cupcakes with Caramel Cream Cheese Frosting are a quintessential fall dessert that masterfully balances flavor and texture. The cupcake itself is incredibly moist and tender, packed with warm spices like cinnamon, nutmeg, and ginger that perfectly complement the earthy sweetness of pumpkin puree. Furthermore, the real showstopper is the frosting. This isn’t just any cream cheese frosting; we enrich it with a generous swirl of homemade caramel sauce, which introduces a deep, buttery sweetness that cuts through the tangy cream cheese beautifully. Consequently, each component works in harmony, creating a dessert that feels both decadent and familiar. This recipe matters because it transforms simple, seasonal ingredients into something extraordinary, perfect for everything from a casual Tuesday treat to the centerpiece of your holiday dessert table. Moreover, it fits our blog’s tone perfectly, as we always strive to share approachable recipes that deliver restaurant-quality results right in your own kitchen. For instance, if you adore these flavors, you might also enjoy our popular Pumpkin Spice Cake, which offers a similar cozy vibe in a larger format. Ultimately, this recipe empowers you to create a stunning dessert that will impress everyone, proving that baking from scratch is not only possible but incredibly rewarding.
Why I Love This Recipe
This recipe holds a special place in my heart because it reminds me of baking with my grandmother. She always believed the best conversations happened over something sweet fresh from the oven. I have refined her original spice cake recipe over the years, and adding the caramel swirl to the frosting was my own twist. Now, every time I make these Pumpkin Cupcakes with Caramel Cream Cheese Frosting, my kitchen fills with that same loving aroma, and I get to share that feeling of warmth and generosity with my own family and friends. It is more than a dessert; it is a delicious tradition. For another family favorite, my Apple Crisp carries on a similar legacy of comfort.
Health and Nutrition
Why it’s good for your body
These Pumpkin Cupcakes with Caramel Cream Cheese Frosting offer more than just incredible flavor. First, pumpkin puree provides a powerful dose of vitamin A, which actively supports your vision and immune system. Furthermore, this essential ingredient also delivers a healthy amount of fiber, promoting good digestive health and helping you feel satisfied.
Additionally, the warming spices like cinnamon and nutmeg do more than create a cozy aroma. In fact, they possess natural anti-inflammatory properties. Consequently, enjoying these seasonal treats can contribute to your overall well-being in a delicious way. The cream cheese frosting, meanwhile, adds a valuable source of calcium for strong bones.
Ultimately, this dessert transforms a classic vegetable into a delightful experience. Therefore, you can feel good about serving Pumpkin Cupcakes with Caramel Cream Cheese Frosting to your family. They provide a wonderful way to enjoy the benefits of pumpkin in a format everyone loves.
How it fits in a healthy lifestyle
You can absolutely enjoy these pumpkin cupcakes as part of a balanced diet. Think of them as a satisfying treat that celebrates real ingredients, not a diet-buster. For a mindful approach, savor one cupcake slowly with a cup of tea or coffee, truly appreciating the complex flavors. This practice helps prevent overindulgence and turns a simple snack into a moment of self-care.
If you have specific dietary needs, you can easily adapt this recipe. For those exploring gluten-free options, simply swap the all-purpose flour for a trusted gluten-free flour blend to make a version everyone can enjoy. You can also adjust the sugar level in the frosting to your preference without losing the decadent caramel essence. Remember, balance is key. Pairing a cupcake with a protein-rich snack or incorporating it after a nutrient-dense meal is a great strategy. For more ideas on creating harmony in your diet, explore our guide on easy healthy meal prep to keep your week on track.
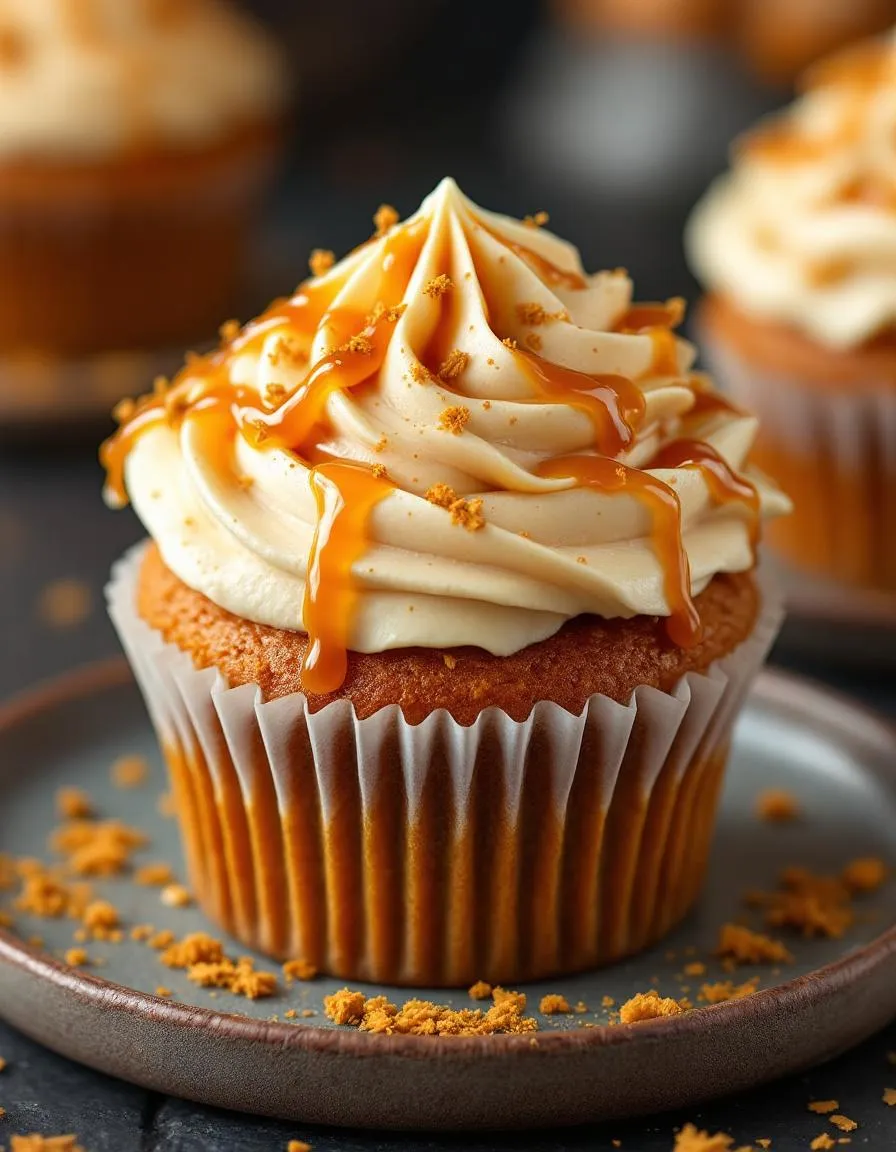
Moist and spiced pumpkin cupcakes topped with a rich caramel cream cheese frosting.
Ingredients
Scale
For the Crust:
1 3/4 cups all-purpose flour
1 teaspoon baking soda
1/2 teaspoon salt
1 1/2 teaspoons pumpkin pie spice
1 cup canned pumpkin puree
1/2 cup granulated sugar
1/2 cup brown sugar
1/2 cup vegetable oil
2 large eggs
1/4 cup milk
8 oz cream cheese, softened
1/2 cup unsalted butter, softened
1/2 cup caramel sauce
3 cups powdered sugar
1 teaspoon vanilla extract
Instructions
1. Prepare the Crust:
Preheat oven to 350°F and line a muffin tin with cupcake liners.
Whisk together flour, baking soda, salt, and pumpkin pie spice in a medium bowl.
In a large bowl, mix pumpkin puree, sugars, oil, eggs, and milk until smooth. Gradually stir in dry ingredients until just combined.
Divide batter evenly among cupcake liners, filling each about 2/3 full. Bake for 18-22 minutes or until a toothpick comes out clean. Cool completely.
For frosting, beat cream cheese and butter until smooth. Mix in caramel sauce and vanilla. Gradually add powdered sugar and beat until fluffy.
Frost cooled cupcakes and drizzle with extra caramel if desired.
Notes
You can customize the seasonings to taste.
s-dish">How to Prepare This Dish
Steps and time-saving tips
First, preheat your oven and line a muffin tin with paper liners. Meanwhile, whisk your dry ingredients like flour, warming spices, baking soda, and salt in one bowl. In a larger separate bowl, vigorously mix the oil, sugars, eggs, and pumpkin puree until the mixture becomes smooth and well-blended. Gradually add the dry ingredients to the wet, stirring just until you no longer see streaks of flour. Consequently, you will avoid overmixing and guarantee a tender crumb. Scoop the batter evenly into the prepared liners, filling each about two-thirds full. Immediately, pop them into the oven to bake until a toothpick inserted comes out clean. Furthermore, let the Pumpkin Cupcakes with Caramel Cream Cheese Frosting cool completely on a wire rack before you even think about frosting. For the frosting, beat softened cream cheese and butter together until fluffy. Then, slowly mix in powdered sugar and a generous drizzle of caramel sauce. Finally, pipe or spread the luxurious frosting onto each cooled cupcake and add an extra caramel drizzle on top for a stunning finish.
Mistakes I’ve made and learned from
I have absolutely learned the hard way that using cold cream cheese is a one-way ticket to lumpy frosting disaster. Now, I always plan ahead to let my dairy ingredients properly soften at room temperature for a perfectly smooth and pipeable consistency. Another common error I made was underbaking my Pumpkin Cupcakes with Caramel Cream Cheese Frosting, which resulted in a sunken, gummy center that no amount of frosting could truly hide. I finally invested in an oven thermometer to verify my oven’s true temperature, and it completely changed my baking game. Trust me, a few extra minutes for a clean toothpick test is always worth the wait. For more tips on avoiding common pitfalls, my guide on fixing frosting consistency covers all the bases for achieving bakery-quality results at home every single time.
n-and-variations">Cultural Connection and Variations
Where this recipe comes from
Pumpkin Cupcakes with Caramel Cream Cheese Frosting weave a story that stretches from colonial American kitchens to modern-day fall festivities. Early settlers, for instance, embraced the native gourd for its longevity and sweetness, often baking it into hearty breads. Meanwhile, cream cheese frosting gained its fame in the 1940s, famously crowning the red velvet cake. Ultimately, someone brilliantly merged these two beloved traditions, creating the ultimate autumnal treat we adore today.
Different regions put their own spin on this concept. In the American South, bakers might add a pinch of nutmeg or a dash of bourbon to the batter for extra warmth. Conversely, some European bakers prefer a spiced mascarpone frosting over the classic cream cheese. My own family, however, always adds a final flourish—a tiny sprinkle of flaky sea salt on top to cut through the sweetness. This simple twist makes our Pumpkin Cupcakes with Caramel Cream Cheese Frosting a truly memorable dessert.
How it fits in today’s cooking
This dessert absolutely thrives in modern cooking because it perfectly captures the cozy essence of fall. People now bake these cupcakes for everything from Halloween parties to Thanksgiving feasts, solidifying their role as a seasonal staple. Furthermore, contemporary home cooks love adapting the recipe to fit dietary needs, often using our gluten-free flour blends or plant-based alternatives.
Beyond holidays, these
cupcakes also bring everyday comfort. A batch baking in the oven instantly makes a house feel like a home. Many bakers also enjoy making them as a special weekend project, especially since the recipe is so forgiving. For those seeking the perfect texture, our guide on achieving moist cupcakes offers brilliant tips. Ultimately, this classic treat continues to connect us through shared tradition and delicious innovation.
Taste and Texture
What makes it delicious
These Pumpkin Cupcakes with Caramel Cream Cheese Frosting deliver a perfect blend of warm spice and sweet creaminess. First, the moist, tender crumb melts in your mouth, releasing the fragrant aroma of cinnamon, nutmeg, and earthy pumpkin. Meanwhile, the frosting provides a luxurious, tangy counterpoint to the spiced cake. Ultimately, the silky cream cheese frosting, swirled with rich caramel, creates a sweet and slightly salty finish that is utterly irresistible. Every bite of these Pumpkin Cupcakes with Caramel Cream Cheese Frosting feels like a cozy celebration.
Boosting the flavor
For an even more decadent experience, consider a few simple tweaks. Firstly, you can sprinkle a pinch of flaky sea salt on top of the frosting to amplify the caramel’s flavor. Alternatively, a drizzle of extra caramel sauce adds visual appeal and an extra layer of gooey sweetness. For a crunchy contrast, try folding toasted pecans into the batter or using them as a garnish. If you love experimenting with spices, our guide on how to use spices in baking can help you create a custom blend. Furthermore, consider serving these alongside a scoop of vanilla bean ice cream for a stunning dessert. For another fantastic frosting variation, our cream cheese frosting variations offer plenty of creative inspiration.
Always bring your cream cheese and butter to room temperature for a perfectly smooth frosting. Furthermore, use pure pumpkin puree instead of pumpkin pie filling for the best flavor. Spoon and level your flour to avoid dense cupcakes, and do not overmix the batter for a tender crumb. Finally, chill your Pumpkin Cupcakes with Caramel Cream Cheese Frosting for about 20 minutes to help the frosting set beautifully.
Mistakes to avoid
Avoid overbaking your cupcakes, as this will dry them out. Instead, test for doneness a minute or two before the timer goes off. Another common error is using cold dairy ingredients, which can cause your frosting to become lumpy. For a silky smooth result, ensure everything is properly softened. Additionally, do not skip sifting your powdered sugar, otherwise your frosting might not be as light. For more guidance on perfect consistencies, check out our tips on getting your frosting consistency just right. If your caramel sauce seizes or hardens, gently warming it will often bring it back to a drizzle-worthy state. Learn how to fix and prevent this in our caramel sauce troubleshooting guide.
g-suggestions">Serving and Pairing Suggestions
How to serve this dish
For a truly stunning presentation, pipe your Pumpkin Cupcakes with Caramel Cream Cheese Frosting using a large star tip. Consequently, you will create beautiful, bakery-worthy swirls. Next, always serve them at room temperature to ensure the frosting is perfectly soft and the cake is fluffy. Moreover, a light dusting of cinnamon or a tiny drizzle of extra caramel sauce makes a gorgeous, simple garnish. These festive Pumpkin Cupcakes with Caramel Cream Cheese Frosting absolutely shine on a holiday dessert table. Alternatively, they make a delightful sweet treat for a seasonal brunch or a cozy afternoon coffee break.
What goes well with it
A hot mug of spiced chai tea makes a fantastic pairing. Its warm spices beautifully echo the flavors in these Pumpkin Cupcakes with Caramel Cream Cheese Frosting. For a cozy coffee shop experience, serve them with a freshly brewed cup of our perfect pumpkin spice latte. Furthermore, a scoop of vanilla bean ice cream on the side transforms this treat into a decadent dessert. Finally, if you are planning a full fall feast, consider offering our popular salted caramel apple pie bars alongside your cupcakes for an unforgettable autumnal spread.
math-faq-block">
Can I make pumpkin cupcakes with caramel cream cheese frosting ahead of time?
Yes, you can prepare these pumpkin cupcakes a day in advance. For the best results, store the unfrosted cupcakes in an airtight container at room temperature and refrigerate the frosting in a separate container. Frost the cupcakes just before serving to maintain the perfect texture of the caramel cream cheese frosting.
How do you keep cream cheese frosting from getting runny?
The key is to ensure all your ingredients are cold. Use well-chilled, full-fat cream cheese and cold butter. If your caramel sauce is warm, let it cool completely before adding it to the frosting mixture. A firm frosting will pipe beautifully onto your Pumpkin Cupcakes with Caramel Cream Cheese Frosting.
What is a good substitute for eggs in pumpkin cupcakes?
For each egg, you can use 1/4 cup of unsweetened applesauce, mashed banana, or commercial egg replacer. These substitutes work well with the moist, spiced nature of pumpkin cupcakes. The final texture might be slightly denser, but they will still pair wonderfully with the caramel cream cheese frosting.
ank-math-faq-item">
Why are my pumpkin cupcakes dense and gummy?
A gummy texture often results from overmixing the batter, which over-develops the gluten in the flour. To avoid this, mix your wet and dry ingredients just until they are combined. Be careful not to overbake them, as this can also create a dense crumb. Properly made Pumpkin Cupcakes with Caramel Cream Cheese Frosting should be moist and tender.
Easy Crockpot Chicken Corn Soup Recipe
Introduction
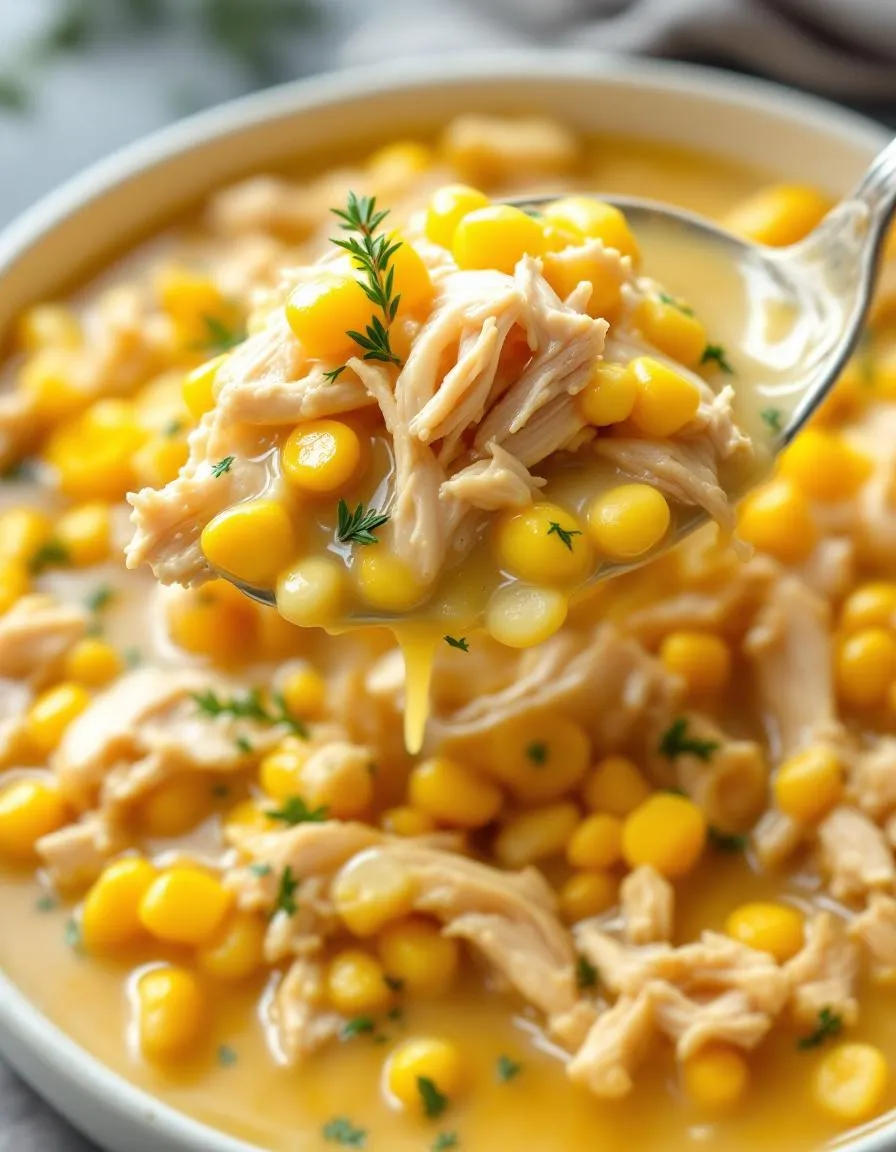
There is something incredibly comforting about a warm bowl of soup that simmers all day, filling your home with an inviting aroma. On a chilly afternoon or after a particularly long day, nothing soothes the soul quite like a classic, homemade soup. This recipe for Crockpot Chicken Corn Soup delivers that deep sense of comfort with minimal effort on your part. Let your slow cooker do the heavy lifting while you enjoy the anticipation of a delicious, hearty meal the whole family will adore.
Crockpot Chicken Corn Soup is a creamy, hearty dish that combines tender chicken, sweet corn, and savory vegetables in a rich, comforting broth. This particular recipe matters because it transforms simple, wholesome ingredients into a nourishing meal without demanding your constant attention in the kitchen. Essentially, the slow cooker gently coaxes the flavors together, creating a depth of taste that you simply cannot achieve with rushed cooking methods. Furthermore, this soup perfectly fits our blog’s tone of creating approachable, family-friendly meals that celebrate real, down-to-earth cooking. It is the ideal solution for a busy weeknight or a relaxed weekend, offering a complete meal in one pot. Additionally, if you enjoy the hands-off approach of this recipe, you will absolutely love our collection of easy slow cooker meals designed for maximum flavor and convenience. This style of cooking not only saves time but also consistently delivers incredible results that make you feel like a kitchen hero. Ultimately, a bowl of this soup represents more than just food; it represents warmth, care, and the simple joy of a home-cooked meal. For another fantastic way to enjoy chicken, consider our popular Creamy Tuscan Chicken, which offers a rich and elegant flavor profile.
Why I Love This Recipe
This Crockpot Chicken Corn Soup holds a special place in my heart because it was my grandmother’s go-to recipe for bringing our family together. I vividly remember walking into her house as a child and being immediately greeted by its unmistakably warm and savory scent. She taught me that the best meals are not about complexity but about love and simplicity. Now, I make this same soup for my own family on busy weekdays, and it never fails to create that same feeling of comfort and togetherness. It is my ultimate comfort food, a tangible link to my past and a staple in my present.
Health and Nutrition
Why it’s good for your body
This Crockpot Chicken Corn Soup delivers a powerful nutritional punch. For starters, it provides a fantastic source of lean protein from the chicken. Consequently, this protein helps your body build and repair tissues while also keeping you feeling full and satisfied for hours. Moreover, the corn contributes valuable dietary fiber, which actively supports a healthy digestive system and promotes stable blood sugar levels.
Additionally, the slow-cooking process gently coaxes all the vitamins and minerals from the vegetables into the broth. As a result, every spoonful of Crockpot Chicken Corn Soup is rich in essential nutrients like vitamin B6 from the chicken and antioxidants from the vegetables. Furthermore, you can control the sodium content completely by using a low-sodium broth and seasoning it to your taste. Ultimately, this makes the soup a wonderfully heart-healthy choice that doesn’t sacrifice any flavor.
Finally, this wholesome Crockpot Chicken Corn Soup is naturally hydrating. Therefore, it is an excellent meal for supporting overall wellness, especially during colder months.
How it fits in a healthy lifestyle
This soup effortlessly fits into a balanced eating plan. It’s naturally gluten-free when you use a verified gluten-free broth, making it a safe and delicious option for many. The high protein content also makes it a fantastic post-workout meal that aids in muscle recovery.
For those focused on meal prep, this recipe is a true superstar. You can make a large batch on the weekend and have healthy lunches ready for the entire week. Pairing a bowl with a simple side salad creates a perfectly rounded meal. If you love this kind of easy, wholesome cooking, you might also enjoy our guide to simple meal prep ideas that save time.
Because it’s packed with lean protein and vegetables, it supports goals like weight management and clean eating. It’s the kind of comforting food that truly nourishes your body from the inside out. For another great option that fits a healthy lifestyle, try our hearty vegetable soup recipe.
A comforting and hearty soup made easily in the slow cooker with tender chicken, sweet corn, and savory vegetables.
Ingredients
Scale
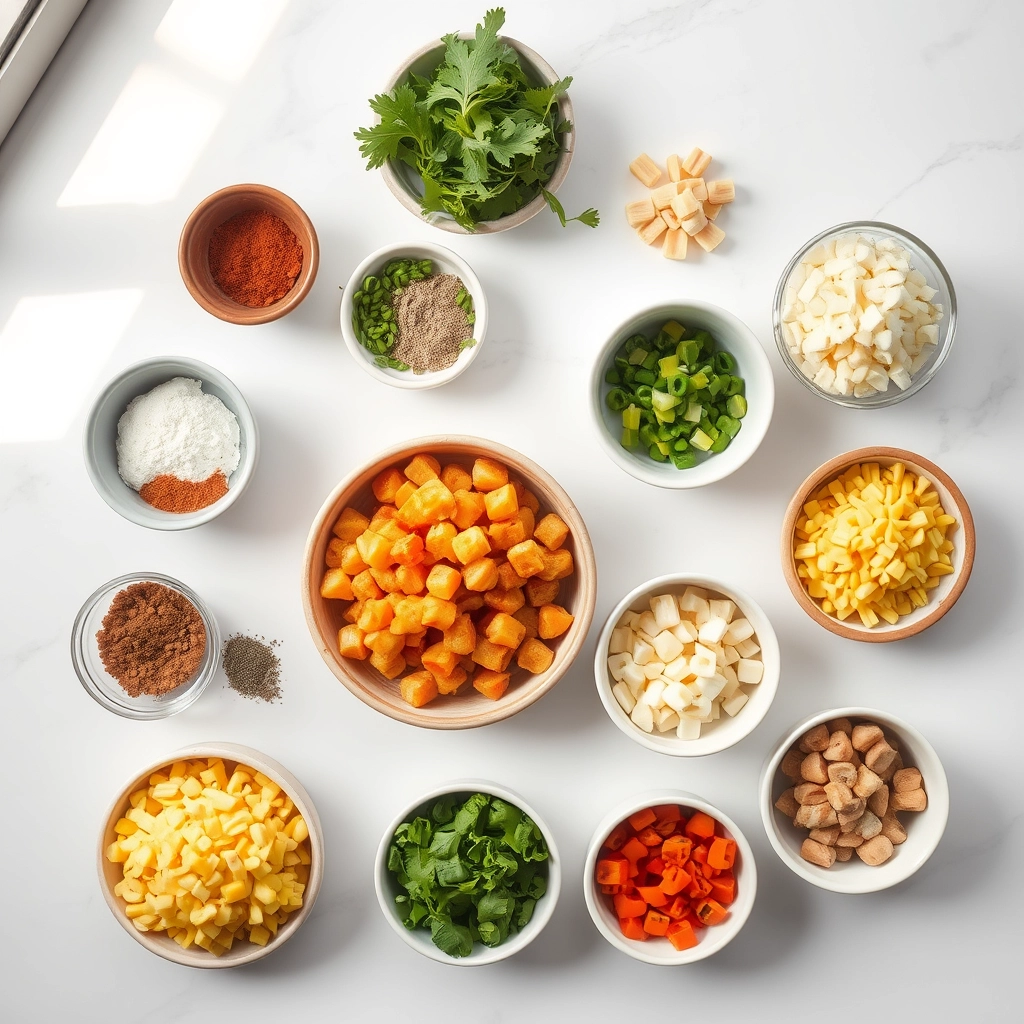
For the Crust:
2 boneless, skinless chicken breasts
4 cups chicken broth
2 cups frozen corn kernels
1 cup diced carrots
1 cup diced celery
1 small onion, finely chopped
2 cloves garlic, minced
1 teaspoon dried thyme
Salt and pepper to taste
1/2 cup heavy cream (optional)
Instructions
1. Prepare the Crust:
Place chicken breasts, chicken broth, corn, carrots, celery, onion, garlic, thyme, salt, and pepper in the crockpot.
Cover and cook on low for 6-7 hours or on high for 3-4 hours, until chicken is cooked through and vegetables are tender.
Remove chicken, shred with two forks, and return to the crockpot.
Stir in heavy cream if using, and heat for an additional 10-15 minutes. Adjust seasoning and serve hot.
Notes
You can customize the seasonings to taste.
s-dish">How to Prepare This Dish
Steps and time-saving tips
First, grab your crockpot and layer the chicken breasts on the bottom. Next, pour in your chicken broth and add the cream of chicken soup. Then, simply whisk these base ingredients together right in the pot until they look smooth. After that, dump in your frozen corn, diced onions, and celery. Importantly, do not stir them in just yet; let them sit on top of the liquid. This little trick helps everything heat more evenly from the start. Now, secure the lid and set your crockpot to cook on low for 6-7 hours or on high for about 3-4 hours. About thirty minutes before serving, carefully remove the chicken breasts and shred them using two forks. Meanwhile, create a simple slurry by whisking together cold water and a bit of cornstarch. Gradually stir this slurry back into the soup to thicken it beautifully. Finally, return the shredded chicken to the pot, give everything one good final stir, and let it cook for those last thirty minutes. This hands-off method delivers an incredibly flavorful Crockpot Chicken Corn Soup with minimal effort.
Mistakes I’ve made and learned from
I have definitely learned a few lessons the hard way with this Crockpot Chicken Corn Soup. My biggest mistake was adding the cornstarch slurry directly to the hot soup without mixing it with cold water first; it immediately clumped into little gelatinous balls that were impossible to fully break apart. Now, I always make a proper slurry in a separate bowl first. Another time, I got impatient and tried to shred the chicken too early, resulting in tough, rubbery meat that just wouldn’t pull apart. I’ve since learned that patience is key for perfectly tender chicken. For more guidance on getting your liquid-to-thickener ratios just right, my post on common soup mistakes breaks it all down. And if you’re new to the slow cooker world, my guide on crockpot basics will help you avoid the other pitfalls I stumbled into, ensuring your soup turns out perfectly every single time.
n-and-variations">Cultural Connection and Variations
Where this recipe comes from
My grandmother first served me this soup on a chilly Pennsylvania Dutch autumn evening. Consequently, I always associate its comforting warmth with family and harvest time. In fact, many cultures feature a version of chicken and corn soup, each telling a unique story. For instance, in parts of the American South, cooks often add a kick of cayenne or a sprinkle of smoked paprika. Meanwhile, in certain Asian cuisines, they might incorporate ginger and star anise for a completely different aromatic profile.
Our family’s version of Crockpot Chicken Corn Soup remains a humble, hearty affair. We prefer the creamy texture that comes from a blend of pureed and whole kernels. Conversely, some traditions keep the broth clear and light, highlighting the sweetness of the corn. Ultimately, this dish acts as a culinary chameleon, effortlessly adapting to local tastes and ingredients. This beautiful versatility makes every bowl of Crockpot Chicken Corn Soup a unique experience.
How it fits in today’s cooking
This soup perfectly fits our modern need for meals that are both nourishing and convenient. Busy home cooks love how the slow cooker does all the work, melding flavors while they tackle their day. Furthermore, it’s a fantastic way to use up leftover chicken, making it a staple for efficient weekly meal prep. You can easily find inspiration for other make-ahead dishes, like these healthy meal prep breakfast ideas, to build a complete routine.
Its relevance extends b
eyond the everyday, however. Many families now feature it as a comforting starter at holiday gatherings or a soothing meal during sick days. Modern twists might include adding quinoa for extra protein or a swirl of pesto for freshness. This adaptability ensures its place in contemporary kitchens. For another great option that caters to a busy schedule, consider this easy gluten free dinner rolls recipe to serve on the side. Ultimately, this soup continues to warm hearts and fill bellies, proving some traditions only get better with time.
Taste and Texture
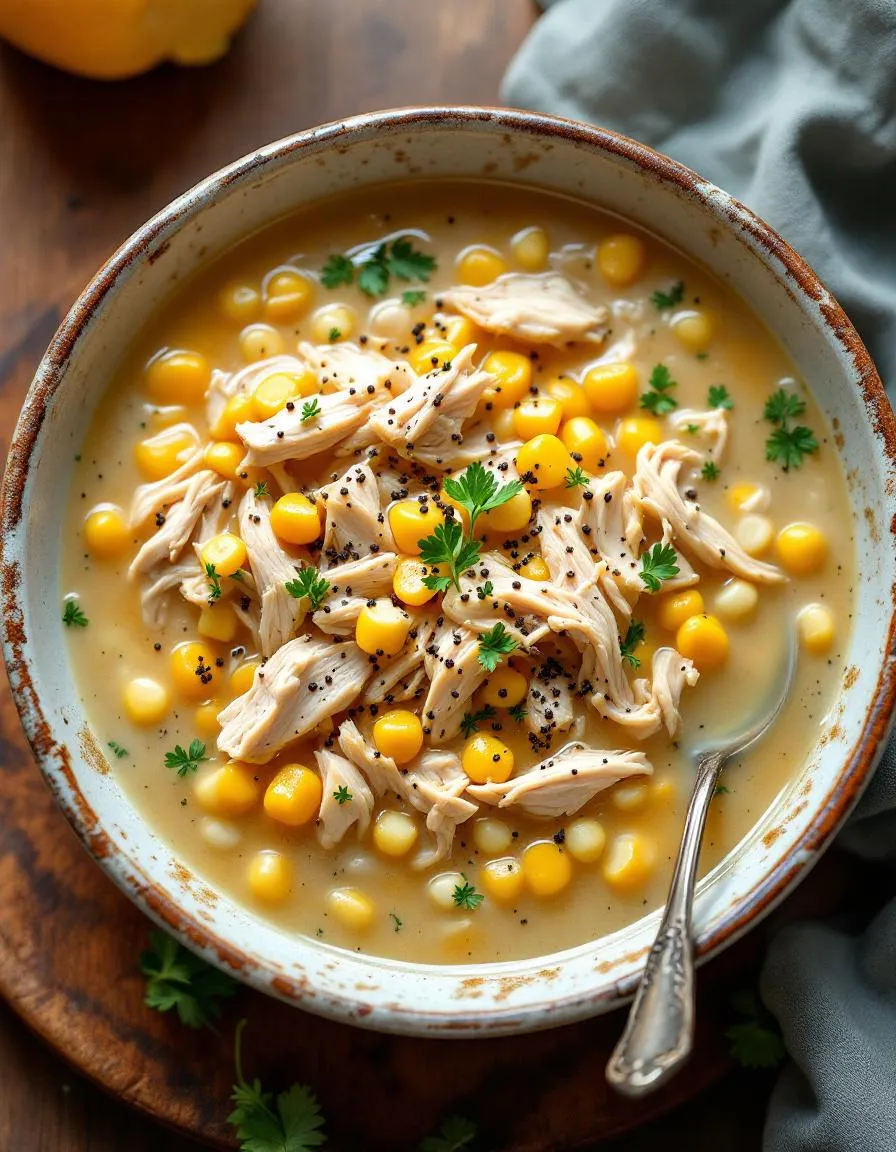
What makes it delicious
This Crockpot Chicken Corn Soup delivers a wonderfully comforting and creamy texture that feels rich and velvety on your tongue. Each spoonful bursts with sweet pops of corn and tender, shredded chicken that practically melts in your mouth. Meanwhile, the savory, aromatic broth, fragrant with herbs and a hint of black pepper, creates a deeply satisfying and cozy flavor profile. Ultimately, the combination of hearty protein and sweet vegetables makes this soup a complete sensory experience.
Boosting the flavor
Fortunately, you can easily elevate your Crockpot Chicken Corn Soup with a few creative tweaks. For instance, try stirring in a spoonful of cream cheese at the end for extra richness or a dash of smoked paprika for a subtle, smoky depth. Furthermore, fresh toppings provide fantastic contrast; consider a squeeze of lime juice for brightness or a sprinkle of crispy bacon for a salty crunch. If you enjoy a bit of heat, a drizzle of our creamy sriracha mayo adds a delicious kick. Finally, serve your soup alongside a slice of hot buttery biscuit for the ultimate comforting meal.
Always use a meat thermometer to ensure your chicken reaches a safe internal temperature of 165°F before shredding. Furthermore, add any dairy or cream-based ingredients during the final thirty minutes to prevent curdling. For the best flavor, use fresh thyme and a good quality stock as the base of your Crockpot Chicken Corn Soup. Finally, do not skip the step of sautéing your onions and garlic; this simple action builds a foundational flavor that truly makes a difference.
Mistakes to avoid
A common error involves adding the corn too early, which can result in an overly mushy texture. Instead, stir in your corn during the last hour of cooking so it retains a pleasant bite. Additionally, avoid overfilling your slow cooker, as this prevents proper heating and can lead to food safety issues. For more guidance on this, read our essential guide to slow cooker safety and capacity. Moreover, do not forget to season in layers; seasoning only at the end will give you a bland broth. If you are unsure about how to balance your spices, our article on perfectly seasoning soups and stews offers excellent advice.
g-suggestions">Serving and Pairing Suggestions
How to serve this dish
Ladle your Crockpot Chicken Corn Soup into deep, pre-warmed bowls to keep it hot longer. For a beautiful finish, top each serving with a sprinkle of fresh chopped chives and a crack of black pepper. This simple garnish adds a pop of color and a burst of fresh flavor. Furthermore, consider a dollop of sour cream or a wedge of lime on the side for guests to customize their bowl. This cozy soup truly shines at a casual family dinner or as a comforting starter for a holiday feast.
Presentation matters, so serve your Crockpot Chicken Corn Soup with style. Ultimately, a rustic bread basket and some soft butter complete the most inviting table setting.
What goes well with it
For a perfect pairing, start with a crusty, warm loaf of bread. Specifically, our incredibly easy No Knead Bread soaks up the rich broth beautifully. Alternatively, a simple side salad offers a refreshing, crisp contrast to the hearty soup. Meanwhile, a chilled glass of slightly sweet Riesling or a crisp lager balances the savory notes of your Crockpot Chicken Corn Soup wonderfully. Finally, for a heartier meal, consider serving it alongside a slice of our savory Zucchini Frittata.
Can I use frozen corn for Crockpot Chicken Corn Soup?
Yes, frozen corn works perfectly in this recipe and is a great way to enjoy the soup year-round. There’s no need to thaw it beforehand; simply add the frozen kernels directly to your slow cooker. Using frozen corn ensures your Crockpot Chicken Corn Soup has a sweet, fresh corn flavor.
How long does it take to cook chicken corn soup in a crockpot?
For the most tender chicken, cook your Crockpot Chicken Corn Soup on the LOW setting for 6-7 hours. If you are short on time, you can cook it on HIGH for 3-4 hours, but the low and slow method yields the best flavor and texture for the shredded chicken.
ank-math-faq-item">
How do you thicken chicken corn soup?
The easiest way to thicken this soup is by making a simple slurry. Mix 2 tablespoons of cornstarch with an equal amount of cold water or broth until smooth, then stir it into the hot soup during the last 30 minutes of cooking. This will give your Crockpot Chicken Corn Soup a richer, heartier consistency without altering the flavor.
Can you put raw chicken in a slow cooker for soup?
Absolutely. Placing raw, boneless chicken breasts or thighs directly into the slow cooker is the standard method for this recipe. The long, gentle cooking process safely cooks the chicken through and makes it incredibly easy to shred at the end, which is ideal for Crockpot Chicken Corn Soup.