Easy Crockpot White Chicken Chili with Cream Cheese
Introduction
Are you craving a cozy, comforting meal that practically makes itself? Moreover, do you need a dinner that your entire family will actually eat without a fuss? You can stop searching right now. This recipe for The Easiest Crockpot White Chicken Chili with Cream Cheese (Kid-Friendly Fall Dinner Recipe!) is your ultimate weeknight hero. It delivers incredible flavor with minimal effort, wrapping you in warmth after a hectic day.
The Easiest Crockpot White Chicken Chili with Cream Cheese (Kid-Friendly Fall Dinner Recipe!) is a creamy, dreamy, and incredibly simple dish that you assemble in your slow cooker. Essentially, it transforms a few pantry staples into a rich and satisfying dinner. This recipe matters because it solves the universal problem of what to feed a busy family. It requires no pre-cooking of the chicken, and the slow cooker does all the work, freeing you up for more important things. Furthermore, the addition of cream cheese at the end creates a luxuriously smooth texture that appeals to both adults and children alike. This dish perfectly fits our blog’s mission to provide reliable, family-approved meals that simplify cooking. For instance, if you adore easy dump-and-go meals, you must explore our collection of easy crockpot recipes. This chili is the ideal solution for crisp fall evenings, hectic schedules, and even casual game-day gatherings. Ultimately, it proves that you do not need complex techniques to create a meal that feels like a hug in a bowl.
Why I Love This Recipe
I have a deep personal connection to The Easiest Crockpot White Chicken Chili with Cream Cheese (Kid-Friendly Fall Dinner Recipe!). It became a staple in our home during a particularly chaotic autumn when my kids’ schedules were overwhelming. This chili was my dependable fallback, and I loved how its aroma welcomed everyone home. I also adore its versatility; I often stir in a can of corn or use our favorite salsa verde for a different twist. Most importantly, it gave me the gift of time at the dinner table with my family instead of time spent cleaning in the kitchen.
Health and Nutrition
Why it’s good for your body
This Easiest Crockpot White Chicken Chili with Cream Cheese (Kid-Friendly Fall Dinner Recipe!) truly nourishes your body from the inside out. First, the lean chicken breast provides a fantastic source of high-quality protein. Consequently, this protein helps build and repair muscle tissue and keeps everyone feeling full and satisfied long after dinner. Moreover, the beans deliver a powerful one-two punch of plant-based protein and fiber.
Additionally, this fiber actively supports a healthy digestive system and promotes stable energy levels. The creamy elements, like the cream cheese, contribute valuable calcium for strong bones. Furthermore, the gentle spices, such as cumin, offer more than just warmth and flavor; they also possess natural anti-inflammatory properties. Ultimately, you can feel great about serving this wholesome meal.
Finally, this Easiest Crockpot White Chicken Chili with Cream Cheese (Kid-Friendly Fall Dinner Recipe!) packs a ton of flavor without relying on excessive salt or unhealthy fats. Instead, it uses simple, whole-food ingredients that work together to create a genuinely nutritious and comforting dish your whole family will love.
How it fits in a healthy lifestyle
This chili fits seamlessly into a balanced eating plan. It’s naturally gluten-free, making it a wonderful option for those with sensitivities. The high protein content from the chicken and beans supports muscle maintenance and can be a great part of a high-protein meal prep strategy for busy weeks. You can easily enjoy it as a standalone meal or pair it with a light side salad for extra volume and nutrients.
Because you make it in a crockpot, this recipe encourages cooking at home, which is a cornerstone of healthy eating. It allows you to control exactly what goes into your food, avoiding the hidden sugars and sodium often found in restaurant meals or pre-packaged foods. For more inspiration on building wholesome meals that the entire family will enjoy, explore our tips for creating kid-friendly dinners that don’t compromise on nutrition. This chili proves that convenient comfort food can also be incredibly good for you.
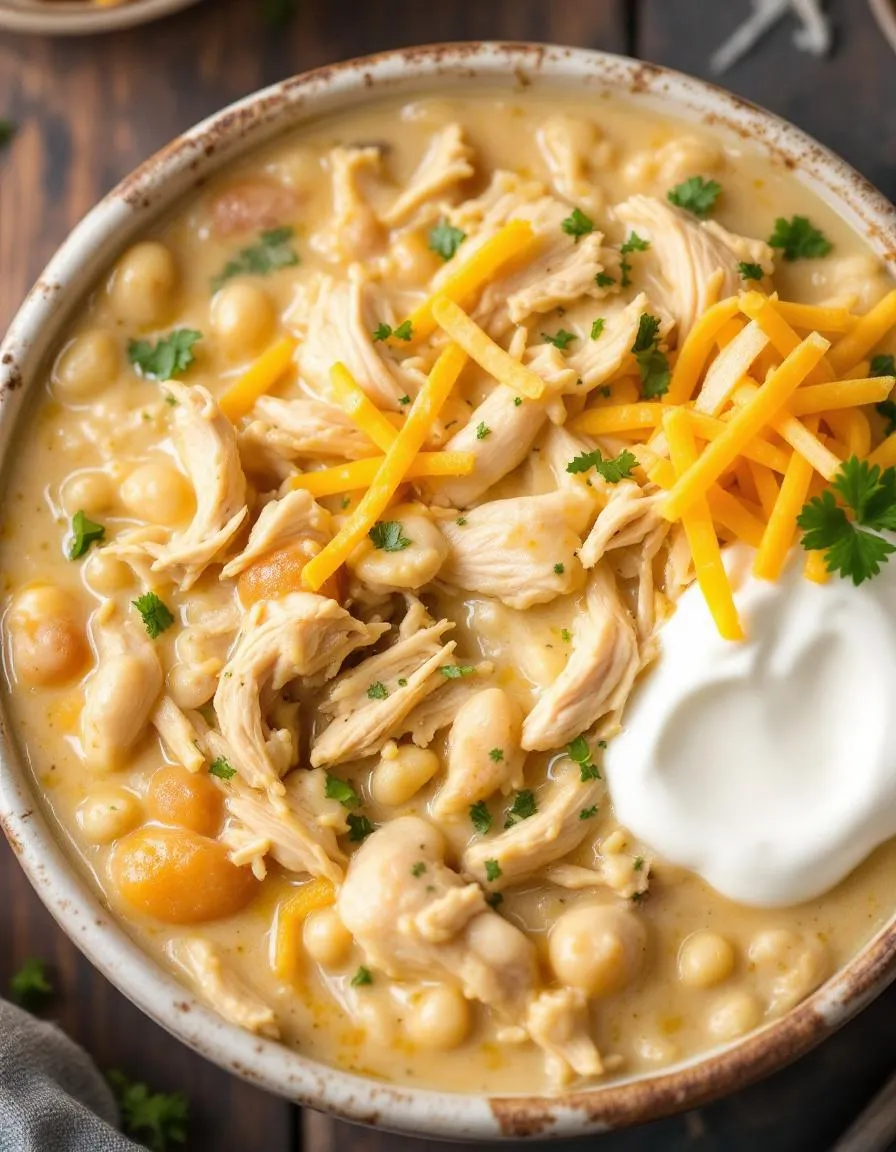
A creamy, comforting, and kid-friendly chili made effortlessly in the crockpot with tender chicken, white beans, and cream cheese.
Ingredients
Scale
For the Crust:
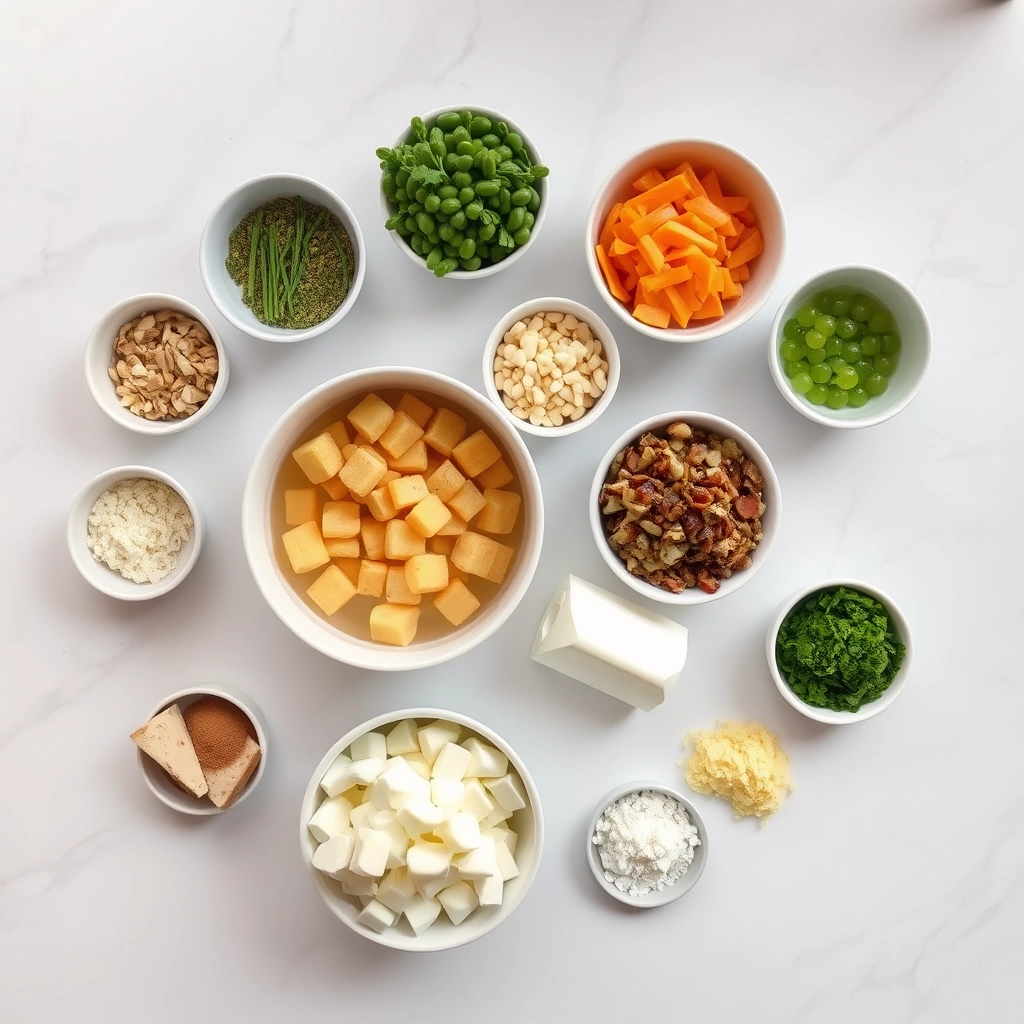
1 lb boneless, skinless chicken breasts
2 (15 oz) cans white beans, drained and rinsed
1 (15 oz) can corn, drained
1 (4 oz) can diced green chiles
1 (32 oz) box chicken broth
1 (8 oz) block cream cheese, cubed
1 packet taco seasoning
1 tsp cumin
1/2 tsp garlic powder
Salt and pepper to taste
Instructions
1. Prepare the Crust:
Place chicken breasts at the bottom of the crockpot.
Add white beans, corn, green chiles, chicken broth, taco seasoning, cumin, and garlic powder. Stir to combine.
Cover and cook on low for 6-7 hours or high for 3-4 hours.
Remove chicken, shred with two forks, and return to crockpot.
Add cubed cream cheese and stir until melted and creamy. Season with salt and pepper.
Serve warm with optional toppings like shredded cheese, sour cream, or tortilla chips.
Notes
You can customize the seasonings to taste.
How to Prepare This Dish
Steps and time-saving tips
First, grab your trusty crockpot and plug it in. Then, simply dump in your boneless, skinless chicken breasts right from the package. Next, pour over the entire container of chicken broth. After that, add your drained cans of white beans and corn directly on top. Now, sprinkle in the seasoning packet and give everything a gentle stir to combine. Importantly, set your crockpot to low for 6-7 hours or high for 3-4 hours. Meanwhile, you can completely forget about it while the magic happens. Once the cooking time is up, carefully remove the chicken breasts and shred them using two forks on a cutting board. Subsequently, return the beautifully shredded chicken to the pot. Finally, add the entire block of cream cheese and stir continuously until it melts completely into the chili, creating a luxuriously creamy sauce. For a brilliant time-saving tip, use a pre-cooked rotisserie chicken; just shred it and add it during the last hour to warm through with the cream cheese. Serve your creation immediately with your favorite toppings for the ultimate comforting meal.
Mistakes I’ve made and learned from
I once made the classic mistake of adding the cream cheese straight from the fridge in one cold, solid block. Consequently, it took forever to melt and I ended up with little creamy pockets instead of a smooth, unified chili. Now, I always cube the cream cheese first; this lets it melt evenly and seamlessly into the hot broth. Another lesson learned the hard way was overcooking the chicken, which made it dry and stringy. I’ve since learned that shredding chicken perfectly requires perfect timing. For this reason, I now use a meat thermometer to pull the chicken at 165°F for the most tender result. Trust me, these small adjustments make a world of difference in your final dish, turning it from a good dinner into a spectacular one that everyone will request again. For more family-friendly inspiration, check out my other easy weeknight dinners that save time and stress.
This recipe pulls from the hearty, comforting traditions of Tex-Mex cuisine. However, we twist it into something uniquely simple and family-focused. Traditionally, a white chili simmers for hours with hominy and a variety of peppers. Our version, in contrast, embraces the slow cooker’s set-it-and-forget-it magic. Furthermore, the addition of cream cheese is a modern, genius hack for incredible creaminess without a roux.
Families across the Southwest might prepare their chili with poblanos or even hatch green chiles. Some versions even include tomatillos for a tangy kick. Personally, my family always adds a extra can of corn for sweetness that kids adore. Ultimately, The Easiest Crockpot White Chicken Chili with Cream Cheese (Kid-Friendly Fall Dinner Recipe!) represents a beautiful fusion. It blends traditional flavors with the practical need for an easy weeknight meal.
ays-cooking">How it fits in today’s cooking
This dish perfectly fits our modern desire for wholesome, hands-off cooking. It effortlessly becomes the star of casual fall gatherings and busy school nights alike. Many cooks now adapt it for meal prep, storing portions for easy lunches throughout the week. Consequently, it saves precious time and reduces stress.
Its kid-friendly profile also makes it a perennial favorite for Halloween or Thanksgiving Eve dinners. Moreover, its creamy, comforting nature provides a warm welcome after seasonal activities like apple picking. For a sweet ending to your cozy meal, consider serving it with a slice of moist pumpkin bread. Alternatively, you can easily set up a toppings bar for everyone to customize their bowl, much like you would for a festive hot chocolate bar. The Easiest Crockpot White Chicken Chili with Cream Cheese (Kid-Friendly Fall Dinner Recipe!) truly earns its place as a contemporary classic.
Taste and Texture
What makes it delicious
This chili welcomes you with a deeply savory and aromatic scent that fills your kitchen long before the first spoonful. Tender, shredded chicken mingles with soft, creamy white beans in a luxuriously velvety broth. The rich cream cheese base melts seamlessly into the stock, creating a smooth and comforting mouthfeel that kids absolutely adore. Gentle spices like cumin and mild green chiles provide a warm, earthy backbone without any harsh heat. Consequently, every bite of The Easiest Crockpot White Chicken Chili with Cream Cheese (Kid-Friendly Fall Dinner Recipe!) delivers a perfect balance of hearty protein, creamy richness, and subtle flavor. Ultimately, the final result is a cozy, nourishing bowl that feels like a warm hug on a cool autumn evening.
r">Boosting the flavor
You can easily elevate your chili with a few simple tweaks. For instance, stir in a cup of frozen corn during the last hour of cooking to add a delightful pop of sweetness and a pleasant textural contrast. Furthermore, a bright, zesty topping like a dollop of tangy sour cream or a squeeze of fresh lime juice can cut through the richness beautifully. If your family enjoys a bit more kick, consider adding a pinch of cayenne pepper or a diced jalapeño. For a truly unforgettable finish, try topping your bowl with our homemade Quick Pickled Red Onions which provide a sharp, vinegary crunch. Finally, serve your creation alongside a slice of warm, buttery Cheddar Bay Biscuits for the ultimate comforting meal.
Tips for Success
Best practices for results
First, always use room temperature cream cheese for your chili. Consequently, it will melt smoothly and evenly into the broth without creating any lumps. Furthermore, do not skip the step of draining and rinsing the canned beans. This simple act prevents excess sodium from overpowering your dish and ensures the perfect consistency for your Easiest Crockpot White Chicken Chili with Cream Cheese (Kid-Friendly Fall Dinner Recipe!). Additionally, shred your chicken directly in the pot using two forks for the most tender, bite-sized pieces that are ideal for kids.
>Mistakes to avoid
One common error is adding the cream cheese directly from the refrigerator. However, this almost guarantees it will seize up and create unpleasant chunks in your otherwise smooth chili. Instead, always let it soften on the counter first. Moreover, many cooks overlook the importance of properly seasoning at the end. Since broths and canned goods vary in saltiness, always taste your creation just before serving and adjust accordingly. For more guidance on balancing flavors in family meals, explore our tips on easy family dinners. Finally, resist the urge to remove the lid frequently to stir, as this significantly drops the temperature and increases cooking time. For a deeper dive into mastering your appliance, check out our crockpot secrets that ensure perfect results every time.
Serving and Pairing Suggestions
How to serve this dish
First, ladle The Easiest Crockpot White Chicken Chili with Cream Cheese (Kid-Friendly Fall Dinner Recipe!) into deep, warm bowls. This simple step keeps everyone cozy from the very first bite. For a beautiful presentation, arrange a vibrant array of toppings in small bowls on the table. Consequently, this creates an interactive and fun experience for both kids and adults. Furthermore, consider serving it straight from the crockpot during a casual game night or a festive holiday gathering. Finally, a final sprinkle of fresh cilantro or a lime wedge on the side adds a pop of color that makes the dish truly inviting.
What goes well with it
This hearty chili pairs wonderfully with a side of warm, fluffy cornbread for dipping. Alternatively, a crisp, simple green salad offers a refreshing contrast to the rich and creamy flavors. For a perfect drink pairing, a glass of chilled apple cider complements the warm spices in this kid-friendly fall dinner recipe. Moreover, you can elevate your meal with our easy Skillet Cornbread, which is a family favorite. Finally, complete your autumn feast with a slice of our delicious Pumpkin Bread for a truly memorable dessert.
Can I make this white chicken chili with frozen chicken?
Yes, you absolutely can! For this Easiest Crockpot White Chicken Chili with Cream Cheese, simply place 1-2 frozen chicken breasts directly into the slow cooker. You may need to add an extra 30-60 minutes to the cooking time on high, or 1-2 hours on low, to ensure the chicken is fully cooked and shreddable.
What can I use instead of cream cheese in chili?
If you need a substitute, full-fat plain Greek yogurt or sour cream are excellent alternatives. Stir them in at the very end of cooking, just like the cream cheese, to maintain their creamy texture and prevent curdling in this Kid-Friendly Fall Dinner Recipe.
ank-math-faq-item">
How do I thicken my crockpot white chicken chili?
The cream cheese in this recipe acts as a natural thickener. If you want it even thicker, create a slurry by mixing 1-2 tablespoons of cornstarch with an equal amount of cold water, then stir it into the chili during the last 30 minutes of cooking on high.
Is this white chicken chili recipe spicy for kids?
Not at all! This version is specifically designed to be mild and kid-friendly. The green chiles are very mild, and the recipe contains no added spicy ingredients. The creamy base from the cream cheese makes The Easiest Crockpot White Chicken Chili with Cream Cheese a comforting and non-spicy meal the whole family will love.
Easy Blueberry Pie Bombs Recipe
Introduction
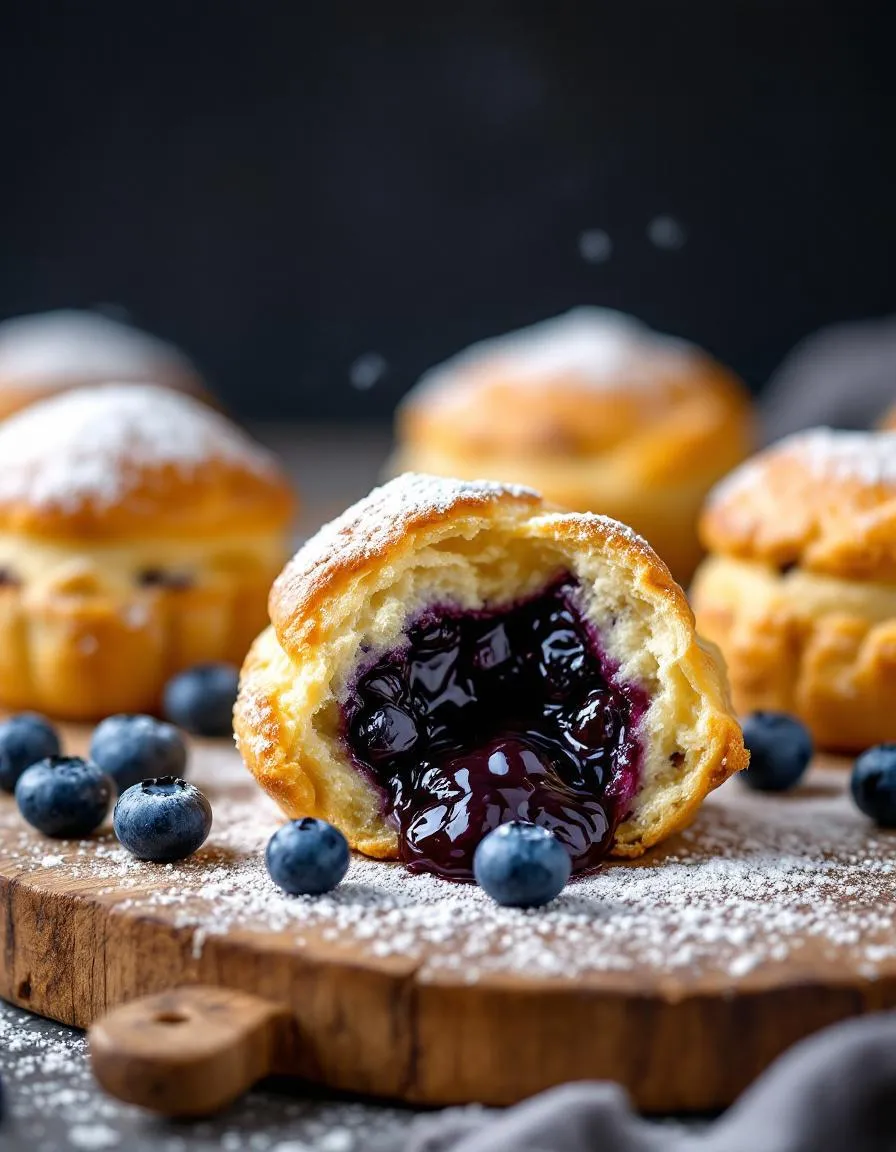
Is there anything better than the smell of warm blueberries and buttery pastry filling your kitchen? Honestly, I think not. That incredible aroma promises pure comfort, and these Blueberry Pie Bombs deliver every single time. They capture all the cozy, fruity goodness of a classic pie but transform it into adorable, handheld treats. Furthermore, they are perfect for anyone craving a simple yet utterly satisfying dessert that feels both nostalgic and exciting.
So what exactly are Blueberry Pie Bombs? Essentially, they are delightful little pastry pockets bursting with a sweet, juicy blueberry filling. We make them using simple ingredients like refrigerated biscuit dough or pie crust, which makes the process incredibly quick and accessible. This recipe matters because it solves a common problem: the desire for a homemade pie without the extensive time commitment and technical skill. Moreover, these portable gems fit perfectly into our modern, on-the-go lifestyles. They are ideal for potlucks, quick family desserts, or even a sweet snack with your afternoon coffee. This blog celebrates approachable recipes that bring joy, and these bombs absolutely embody that mission. They bridge the gap between effortless cooking and impressive results, ensuring everyone can create something special. For another fantastic way to use seasonal fruit, you must try our incredible Peach Cobbler. Ultimately, this recipe empowers you to create a crowd-pleasing dessert that looks like you spent hours in the kitchen, even though the process is wonderfully straightforward. If you enjoy simple desserts, you will also love our easy guide on How to Make Apple Crisp.
Why I Love This Recipe
This recipe holds a special place in my heart because it reminds me of baking with my grandmother. She always had a magical way of turning simple ingredients into the most memorable treats. While we did not call them Blueberry Pie Bombs back then, the spirit of creating joyful, shareable food is exactly the same. I love how these little pastries bring people together, sparking conversations and creating new happy memories around the table. They represent everything I believe home baking should be: uncomplicated, heartfelt, and deeply delicious.
Health and Nutrition
Why it’s good for your body
Blueberry Pie Bombs deliver a powerful nutritional punch in every single bite. First and foremost, they pack a serious antioxidant boost from their star ingredient. Consequently, these antioxidants help your body combat oxidative stress. Moreover, blueberries themselves are a fantastic source of Vitamin C and Vitamin K. These essential vitamins support your immune system and promote bone health.
Additionally, this treat offers a more balanced energy release than many conventional desserts. Unlike sugary snacks that cause a sharp energy spike and crash, Blueberry Pie Bombs provide more sustained fuel. Furthermore, you can feel good about the wholesome ingredients. Ultimately, choosing a dessert with real fruit benefits your overall well-being. You can absolutely enjoy these delicious Blueberry Pie Bombs as a smarter sweet choice.
How it fits in a healthy lifestyle
Blueberry Pie Bombs fit beautifully into a balanced eating plan. You can easily enjoy them as a satisfying treat without derailing your health goals. Think of them as a perfect portion-controlled dessert to cap off a nutritious meal. For anyone exploring specific dietary paths, this recipe is wonderfully adaptable to suit your needs. You can find fantastic inspiration for other healthy twists in our guide to gluten-free baking substitutes to make these bombs gluten-free.
Pairing one of these bombs with a source of protein, like a handful of almonds or a Greek yogurt, makes for a fantastic and balanced snack. This approach helps manage cravings and keeps you feeling full longer. Remember, a healthy lifestyle is all about balance and enjoying the foods you love. For more ideas on creating a sustainable and enjoyable approach to eating, explore our tips for easy weekly meal prep.
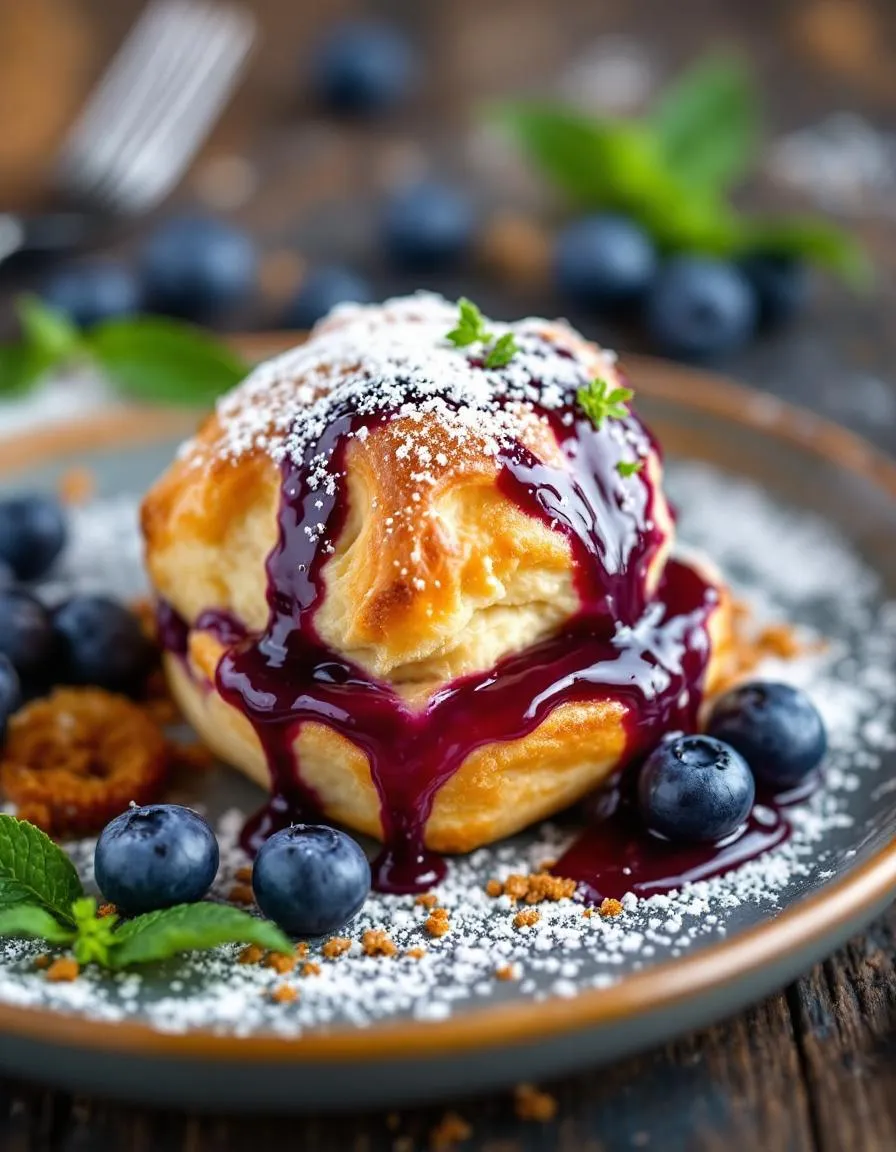
Delicious bite-sized treats with a sweet blueberry filling wrapped in flaky pastry, perfect for snacking or dessert.
Ingredients
Scale
For the Crust:
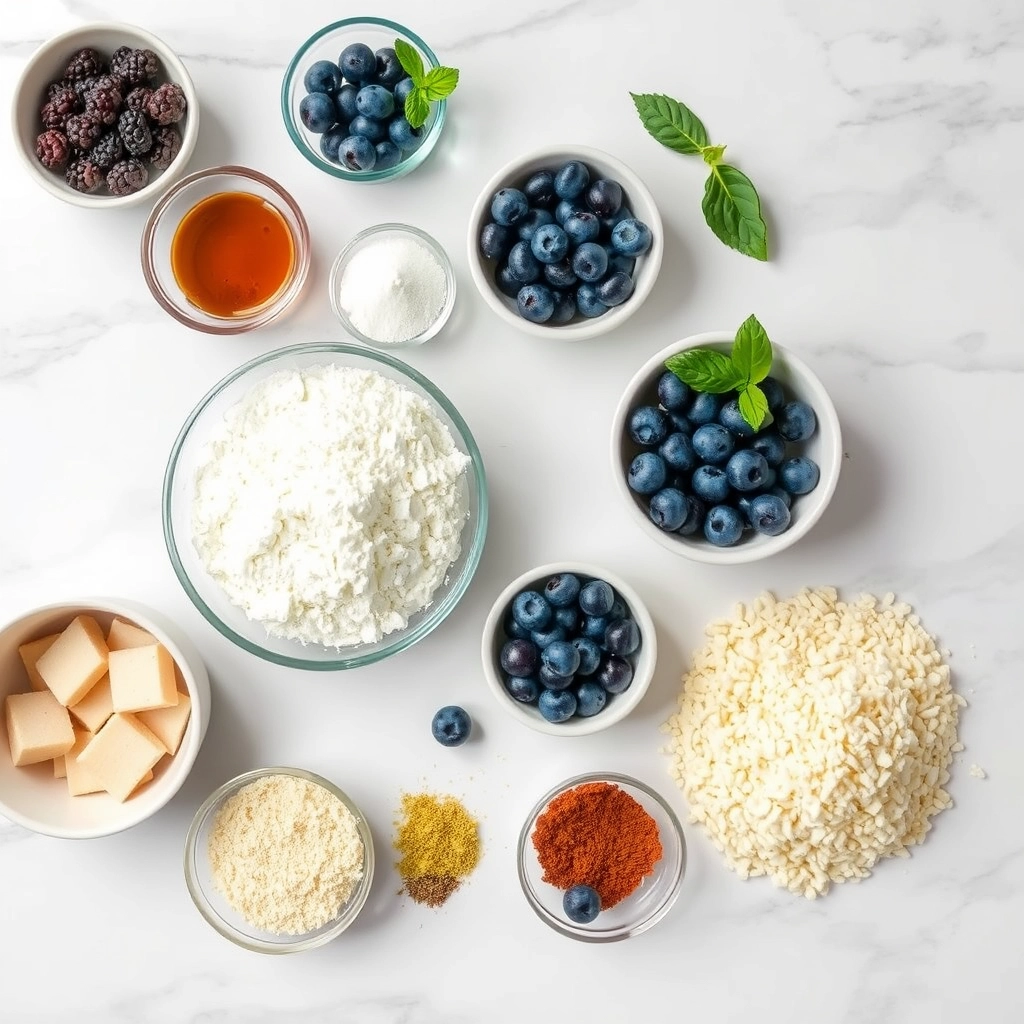
1 package refrigerated pie crusts (2 crusts)
1 cup fresh or frozen blueberries
1/4 cup granulated sugar
1 tablespoon cornstarch
1 teaspoon lemon juice
1/2 teaspoon vanilla extract
1 egg, beaten (for egg wash)
Coarse sugar for sprinkling
Instructions
1. Prepare the Crust:
Preheat oven to 375°F (190°C) and line a baking sheet with parchment paper.
In a bowl, mix blueberries, sugar, cornstarch, lemon juice, and vanilla until well combined.
Unroll pie crusts and cut into 3-inch circles using a cookie cutter or glass.
Place a small spoonful of blueberry mixture in the center of each circle.
Fold dough over filling, press edges with a fork to seal, and place on baking sheet.
Brush each bomb with beaten egg and sprinkle with coarse sugar.
Bake for 15-18 minutes until golden brown. Let cool slightly before serving.
Notes
You can customize the seasonings to taste.
How to Prepare This Dish
Steps and time-saving tips
First, gather your ingredients and preheat your oven to 375°F. Meanwhile, whisk together the flour, sugar, and a pinch of salt in a large bowl. Next, cut your cold butter into small cubes and work it into the flour mixture using your fingertips or a pastry cutter until it resembles coarse crumbs. Then, drizzle in the ice water, one tablespoon at a time, and gently mix until the dough just comes together. Importantly, avoid overworking the dough to keep your pastry flaky. For a fantastic shortcut, however, you can use pre-made pie crust or even crescent roll dough. Now, roll the dough out on a lightly floured surface and use a round cutter to create your circles. Place a small spoonful of your blueberry filling in the center of each circle. Furthermore, brush the edges with a little beaten egg to help them seal. Fold the dough over the filling, crimp the edges with a fork, and place your Blueberry Pie Bombs on a parchment-lined baking sheet. Finally, brush the tops with more egg wash, sprinkle with coarse sugar, and bake for 18-20 minutes until they are golden brown and delicious.
and-learned-from">Mistakes I’ve made and learned from
I have definitely learned a few lessons the hard way with these Blueberry Pie Bombs. Initially, I used to roll my dough way too thin in a rush to get them assembled. Consequently, the filling would often burst through the seams during baking, creating a sticky, messy situation in my oven. Now, I make sure my dough is just thick enough to hold the fruit without breaking. Another common error was overfilling them; it is so tempting to pack in more blueberries, but restraint is key for a perfect seal. I also learned that the temperature of your butter is absolutely crucial for the texture of your pastry. If you are making your own crust, truly cold butter is non-negotiable for achieving that dreamy, flaky layers we all love. For more on mastering pastry, my guide on achieving a flaky pie crust covers all the essentials. And if your filling ever turns out too runny, don’t worry. My tips for thickening fruit pie fillings will save the day and ensure your Blueberry Pie Bombs are perfect every single time.
Cultural Connection and Variations
Where this recipe comes from
My grandmother first introduced our family to Blueberry Pie Bombs during a sweltering summer in Maine. Consequently, she never followed a written recipe. Instead, she relied on memory and a deep understanding of local ingredients. She would fold plump, wild blueberries into a simple dough, creating what she called her “handheld pies.” Furthermore, her method was a practical solution for feeding a large family quickly. However, the concept of a portable pie certainly spans cultures.
For instance, the Briti
sh have their pasties, and the Polish enjoy their kolaczki. Meanwhile, in the American South, you might find a similar hand pie bursting with peaches. Essentially, every culture embraces the beautiful idea of a whole pie contained within a single, flaky package. My family’s version, these delightful Blueberry Pie Bombs, always reminds me of those warm, berry-stained afternoons. Ultimately, it is a humble recipe that carries the weight of tradition and the sweetness of summer in every bite.
How it fits in today’s cooking
Today, Blueberry Pie Bombs fit perfectly into our fast-paced lives. They offer all the nostalgic comfort of a classic dessert but in a convenient, individual portion. Modern cooks constantly adapt the recipe, too. For example, many now use an air fryer for a quicker, less messy bake. Others might experiment with gluten-free flour or a sugar substitute. Consequently, this versatility makes them a fantastic option for any gathering.
They shine as a standout addition to any easy dessert table at a summer picnic or baby shower. Moreover, their handheld nature makes them a fantastic treat for kids. You can even prepare a large batch and freeze them for a future quick fix. Pairing them with a scoop of vanilla ice cream transforms them into an elegant, yet simple, finale for a dinner party. They also pair wonderfully with a refreshing summer drink recipe for the ultimate seasonal experience. Ultimately, this classic treat continues to capture hearts and taste buds with its timeless appeal and modern adaptability.
>Taste and Texture
What makes it delicious
Each Blueberry Pie Bomb delivers a perfect handheld burst of summer. First, you encounter a wonderfully flaky, buttery crust that shatters delicately with every bite. Then, your teeth sink into the warm, juicy blueberry filling which strikes a magnificent balance between sweet and tart. A hint of lemon zest and cinnamon adds a fragrant, cozy depth that makes the fruit sing. Ultimately, the experience is a delightful contrast of crisp pastry and a soft, gooey center that feels incredibly comforting. These Blueberry Pie Bombs absolutely capture the essence of a classic pie in a fun, pop-able form.
Boosting the flavor
For an even more decadent treat, consider drizzling a simple vanilla glaze over the top of your warm Blueberry Pie Bombs. Alternatively, a scoop of vanilla bean ice cream melts into a creamy sauce that beautifully complements the warm berries. If you adore warm spices, a pinch of cardamom or nutmeg mixed with the cinnamon will introduce a wonderfully complex aroma. For a delightful citrus twist, fold some orange zest into the blueberry filling. Explore our perfect vanilla bean ice cream recipe for the ultimate pairing. Furthermore, our easy cinnamon glaze can add a sweet and spicy finish that takes them to the next level.
Tips for Success
Best practices for results
Always chill your dough thoroughly before shaping your Blueberry Pie Bombs because this prevents the butter from melting too early. Furthermore, use parchment paper on your baking sheet for an easy release and a perfectly golden bottom crust. Additionally, do not overfill each bomb with blueberry filling to avoid messy leaks during baking. For the best results, brush the tops with an egg wash for a beautifully shiny, professional finish.
Mistakes to avoid
A common error involves rolling the dough too thin, which consequently causes the filling to burst out. Instead, aim for an even, quarter-inch thickness to securely contain the blueberries. Moreover, ensure your oven is fully preheated before baking; otherwise, you risk a soggy crust instead of a flaky one. If you find your filling is often too runny, consider using a cornstarch slurry to thicken it, much like our guide for how to thicken blueberry pie filling. Finally, always allow your Blueberry Pie Bombs to cool slightly on a wire rack, as this prevents the steam from making the pastry soggy, a technique we also recommend in our perfect pie crust tips.
Serving and Pairing Suggestions
How to serve this dish
Serve your warm Blueberry Pie Bombs in a rustic basket for a cozy family breakfast. Alternatively, arrange them on a elegant cake stand for a stunning dessert centerpiece at your next gathering. For a beautiful finishing touch, dust them with a light snowfall of powdered sugar. These handheld treats truly shine at brunch potlucks or holiday morning celebrations. Finally, always offer them fresh from the oven when the flaky crust is at its peak perfection.
h-it">What goes well with it
A scoop of vanilla bean ice cream creates a fantastic hot-and-cold contrast with the warm Blueberry Pie Bombs. Moreover, a hot cup of our creamy Vanilla Chai Latte makes a wonderfully spiced companion. For a brunch spread, consider pairing these sweet bombs with savory items. For instance, our fluffy Classic Quiche Lorraine balances the meal perfectly. Ultimately, a simple dollop of freshly whipped cream lets the juicy blueberry filling remain the star.
What are Blueberry Pie Bombs made of?
Blueberry Pie Bombs are typically made with a simple combination of refrigerated biscuit dough or pie crust, canned blueberry pie filling, and a butter and cinnamon-sugar topping. The biscuit dough acts as the outer shell that encases the sweet blueberry filling, creating a handheld treat. This easy recipe delivers all the flavor of a classic blueberry pie in a fun, single-serving format.
ank-math-faq-item">
Can you bake Blueberry Pie Bombs instead of frying?
Absolutely! Baking is a popular and healthier alternative to frying Blueberry Pie Bombs. Simply brush the assembled bombs with melted butter, roll them in cinnamon sugar, and bake in a preheated oven until they are golden brown and the filling is bubbly. Baking yields a deliciously crispy exterior without the need for oil.
Can I use fresh blueberries instead of canned filling for pie bombs?
Yes, you can use fresh blueberries to make a homemade filling for your Blueberry Pie Bombs. Simply toss fresh blueberries with a little sugar, cornstarch (to thicken the juices), and lemon juice before spooning the mixture into the dough. Using fresh fruit allows you to control the sweetness and creates a wonderfully fresh flavor in your pie bombs.
How do you keep Blueberry Pie Bombs from bursting open?
To prevent your Blueberry Pie Bombs from bursting, avoid overfilling them—use about one tablespoon of filling per bomb. Ensure you completely seal the edges by pinching the dough firmly together. Chilling the assembled bombs for 15-20 minutes before baking also helps the dough set, reducing the chance of the seams splitting open in the oven.
div>
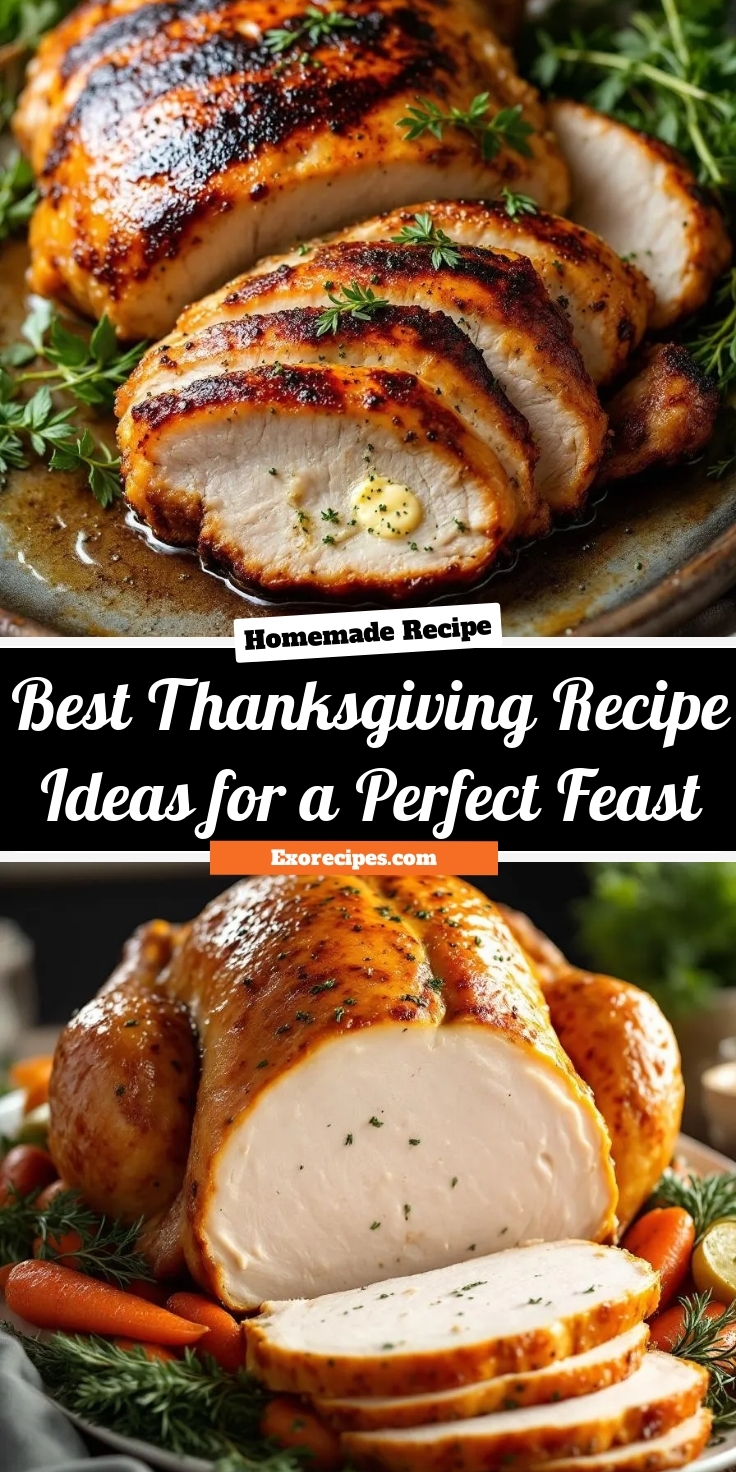
Best Thanksgiving Recipe Ideas for a Perfect Feast
Introduction
Thanksgiving brings a unique blend of joy and pressure, doesn’t it? You want to create a feast that feels both comforting and spectacular, a meal that your family will remember all year. Fortunately, you can stop stressing because we have gathered The BEST Thanksgiving Recipe Ideas to make your holiday both delicious and delightfully simple. These dishes turn your table into the heart of the home, where everyone gathers to share gratitude and make new memories over incredible food.
So what exactly makes this collection The BEST Thanksgiving Recipe Ideas? Ultimately, it is our curated selection of proven, crowd-pleasing dishes that balance timeless tradition with modern flair. We focus on recipes that deliver maximum flavor without requiring professional chef skills, ensuring your day is spent enjoying company, not just cooking. This approach matters because Thanksgiving is more than a meal; it is a core memory in the making. The right recipes build a seamless experience, from the first bite of a perfectly crispy appetizer to the last spoonful of decadent dessert. Moreover, these ideas perfectly match our blog’s tone of accessible, reliable, and genuinely delicious home cooking. We believe every cook deserves to feel like a hero on this food-focused holiday, and our guide provides the blueprint for that success. You will find everything from the juiciest turkey to the most flavorful vegetarian sides, ensuring every guest leaves your table completely satisfied. For instance, our method for a succulent roasted turkey is a game-changer that guarantees perfect results. This comprehensive resource takes the guesswork out of your menu planning, allowing you to craft a cohesive and unforgettable feast with confidence.
Why I Love This Recipe
I truly love sharing The BEST Thanksgiving Recipe Ideas because this holiday centers around my favorite childhood memories. My grandmother always hosted, and her table groaned with platters of food that represented our family’s story. Now, I get to recreate that magic for my own family, and these recipes are my trusted partners. They give me the freedom to put my own spin on classics while knowing the outcome will be fantastic, which lets me actually relax and enjoy the day. Passing down these dishes and the stories behind them is my greatest joy.
Health and Nutrition
Why it’s good for your body
The BEST Thanksgiving Recipe Ideas deliver a powerful nutritional punch. For instance, these recipes often feature antioxidant-rich sweet potatoes and vitamin-packed dark leafy greens. Consequently, your body gets a fantastic boost of essential nutrients with every delicious bite.
Moreover, these dishes provide excellent sources of dietary fiber. Fiber supports healthy digestion and promotes a lasting feeling of fullness. Therefore, you can enjoy your holiday meal without experiencing that overly stuffed sensation later.
Additionally, The BEST Thanksgiving Recipe Ideas incorporate lean proteins like turkey breast. This macronutrient is crucial for muscle repair and maintaining energy levels throughout a busy day. Furthermore, many recipes utilize healthy fats from sources like olive oil and nuts, which support heart health and brain function. Ultimately, these thoughtful ingredients make the holiday spread both satisfying and smart for your well-being.
How it fits in a healthy lifestyle
These recipes perfectly support a balanced approach to eating, especially during the indulgent holiday season. You can easily find options that align with specific health goals, whether you are managing your weight or simply aiming for more wholesome meals. The focus on whole foods and vegetables means you are nourishing your body with every serving.
For anyone following a gluten-free diet, many dishes naturally fit this lifestyle without any special modifications. If you are looking for more everyday inspiration beyond the holidays, exploring our gluten-free breakfast ideas can help you maintain that momentum. The principles of balance and whole ingredients truly make The BEST Thanksgiving Recipe Ideas a cornerstone of mindful eating. And remember, enjoying these foods is part of a healthy relationship with food. For more tips on maintaining this balance all year round, check out our guide on healthy meal prep strategies that save time and support your goals.
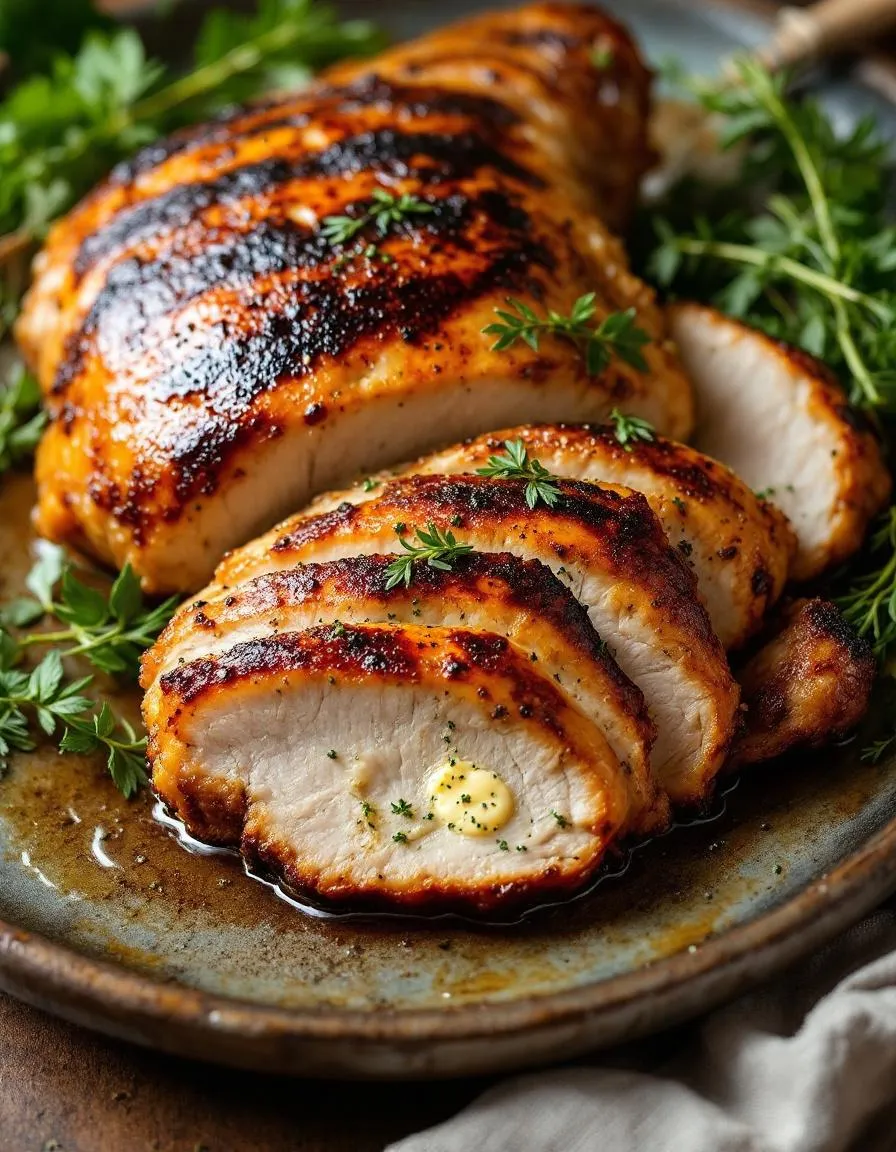
A perfectly juicy and flavorful roasted turkey with a golden-brown skin, infused with aromatic herbs and butter.
Ingredients
Scale
For the Crust:
1 whole turkey (12–14 lbs), thawed
1 cup unsalted butter, softened
2 tbsp fresh rosemary, chopped
2 tbsp fresh thyme, chopped
2 tbsp fresh sage, chopped
4 cloves garlic, minced
1 lemon, zested and juiced
Salt and black pepper to taste
1 large onion, quartered
2 carrots, chopped
2 celery stalks, chopped
2 cups chicken or turkey broth
Instructions
1. Prepare the Crust:
Preheat oven to 325°F (165°C). Pat the turkey dry with paper towels.
In a bowl, mix softened butter, rosemary, thyme, sage, garlic, lemon zest, lemon juice, salt, and pepper.
Gently loosen the skin over the turkey breast and rub half of the herb butter underneath. Rub the remaining butter all over the outside of the turkey.
Stuff the cavity with onion, carrots, and celery. Tie the legs together with kitchen twine.
Place turkey breast-side up on a rack in a roasting pan. Pour broth into the bottom of the pan.
Roast for about 3 to 3.5 hours, basting every 45 minutes, until the internal temperature reaches 165°F in the thickest part of the thigh.
Let rest for 30 minutes before carving. Serve with pan juices.
Notes
You can customize the seasonings to taste.
How to Prepare This Dish
Steps and time-saving tips
First, gather all your ingredients for The BEST Thanksgiving Recipe Ideas. This simple prep step saves you from frantic mid-recipe searches. Next, preheat your oven; a hot oven is crucial for that perfect golden-brown finish. Meanwhile, whisk your dry ingredients together in a large bowl. In a separate bowl, vigorously cream your butter and sugar until the mixture is light and fluffy. Gradually incorporate your wet ingredients into the dry ones, mixing just until combined. Overmixing is the enemy of a tender texture, so please exercise a gentle hand. Then, pour your batter into a prepared pan and smooth the top with a spatula. For an extra flavor boost, consider folding in some toasted nuts or dried cranberries. Finally, slide your creation into the center of the oven and set your timer. Remember, you can always make components of The BEST Thanksgiving Recipe Ideas a day or two ahead. Simply store them in an airtight container and refresh them in the oven just before your guests arrive. This brilliant strategy drastically cuts down on day-of stress and lets you enjoy the celebration.
Mistakes I’ve made and learned from
I once rushed the creaming process for my butter and sugar, resulting in a disappointingly dense texture. Now, I patiently let my mixer run for a full three minutes until the mixture is pale and fluffy, which makes all the difference for a lighter crumb. Another classic blunder was using cold ingredients straight from the fridge; this caused my batter to seize up and bake unevenly. I learned to set everything out on the counter at least an hour before I start baking. This simple tip ensures a smooth, emulsified batter every single time. For more guidance on avoiding common pitfalls, my post on common baking mistakes dives deeper. And if your dessert needs a show-stopping companion, don’t miss my ultimate guide to crafting the perfect flaky pie crust to round out your meal.
Thanksgiving, at its heart, tells a story of gathering and gratitude. Consequently, the meal becomes the centerpiece of that narrative. Every family brings its own unique history to the table, creating a beautiful tapestry of flavors. For instance, some might swear by a cornbread stuffing, while others passionately defend a sausage and herb version. These variations are the soul of the holiday, passed down through generations like cherished heirlooms.
Globally, the concept of a harvest feast appears in many cultures. Canada celebrates its own Thanksgiving in October. Meanwhile, Germany holds Erntedankfest, a church festival that gives thanks for a good year. Although these celebrations might feature local staples like bratwurst or apple strudel, the core sentiment remains beautifully identical. Ultimately, crafting The BEST Thanksgiving Recipe Ideas means weaving your own story into that global tapestry of thankfulness.
In my own family, the m
enu constantly evolves. We might add a spicy chorizo twist to the sweet potatoes or a tangy pomegranate glaze to the turkey. This willingness to experiment honors the spirit of the first feast, where two communities shared their best food. Therefore, your table should reflect your own journey. Embrace those regional twists and personal touches that make your meal uniquely yours.
How it fits in today’s cooking
Today, these dishes absolutely thrive beyond the November holiday. Modern cooks cleverly adapt these recipes for everyday comfort. For example, that leftover turkey instantly transforms into a brilliant turkey pot pie soup that warms up a chilly weeknight. Similarly, we see sweet potato casserole ingredients inspiring healthier, quickbread versions for a cozy breakfast.
Furthermore, the principles of a hearty, vegetable-forward feast perfectly align with contemporary eating habits. The focus on whole foods and seasonal produce makes The BEST Thanksgiving Recipe Ideas surprisingly modern. Many families now incorporate dietary-friendly options, ensuring everyone at the table can enjoy the feast. This adaptability proves the tradition’s enduring power. For a sweet finish that works any day of the year, a slice of pumpkin pie cupcakes captures all the classic flavor in a perfectly portable treat. Ultimately, these recipes continue to connect us, providing comfort and joy throughout the entire season and beyond.
>Taste and Texture
What makes it delicious
Ultimately, The BEST Thanksgiving Recipe Ideas deliver a symphony of comforting flavors and contrasting textures. Imagine a fork gliding through impossibly creamy mashed potatoes, their rich and buttery flavor perfectly complementing the crisp, salty skin of a roasted turkey. Meanwhile, the deep, caramelized sweetness of roasted vegetables provides a fragrant and chewy counterpoint to every savory bite. This harmonious blend of creamy, crisp, and tender elements makes the entire meal an unforgettable sensory experience. Consequently, each component of The BEST Thanksgiving Recipe Ideas works together to create a truly delicious and satisfying feast.
Boosting the flavor
Fortunately, you can easily elevate your main dishes with a few clever tweaks. For instance, try rubbing your turkey with a homemade spice blend featuring smoked paprika and garlic powder for a deeper, more aromatic crust. Similarly, a generous pat of compound herb butter under the skin will keep the meat incredibly juicy and infuse it with flavor from the inside out. Furthermore, consider serving a tangy cranberry sauce or a rich gravy on the side; these sauces add a wonderful layer of moisture and complexity that beautifully ties the whole plate together. For more inspiration on creating show-stopping centerpieces, explore our ultimate guide to holiday mains. Additionally, a drizzle of browned butter over your mashed potatoes or roasted carrots introduces a delightful nutty note that instantly makes them taste gourmet. Finally, a sprinkle of flaky sea salt just before serving enhances every flavor and adds a pleasant textural crunch. Discover even more ways to create a memorable spread with our curated collection of festive side dishes.
Tips for Success
Best practices for results
First, always read the entire recipe before you start. Consequently, you can gather all your ingredients and tools ahead of time. Furthermore, use a sharp knife for chopping to ensure even cooking and beautiful presentation. For the best texture, do not overmix your batters and doughs. Ultimately, these simple steps guarantee that your The BEST Thanksgiving Recipe Ideas turn out perfectly.
Mistakes to avoid
A common error is not preheating your oven, which leads to uneven baking. Instead, always allow your oven to fully preheat for at least 15 minutes. Additionally, many cooks forget to properly season their dishes throughout the cooking process. Therefore, remember to taste and adjust your seasoning as you go. For more guidance on this, explore our guide on how to season perfectly. Moreover, do not overcrowd your roasting pan, as the steam will prevent that beautiful, crispy skin we all love. For a flawless main course, follow our turkey tips for beginners to avoid this pitfall.
Serving and Pairing Suggestions
How to serve this dish
Present The BEST Thanksgiving Recipe Ideas on a large, elegant platter to create a stunning centerpiece for your holiday table. For a truly memorable occasion, garnish the dish with fresh herbs like rosemary or thyme. Alternatively, serve individual portions on warm plates to keep everything cozy and inviting. This approach works beautifully for a family style dinner where everyone can share the feast.
You can also make your
meal feel extra special by adding seasonal touches like small pumpkins or autumn leaves as part of the tablescape. Ultimately, these presentation tips will elevate your gathering and highlight the wonderful flavors of The BEST Thanksgiving Recipe Ideas.
What goes well with it
A crisp, chilled white wine like Sauvignon Blanc offers a fantastic pairing. Its bright acidity cuts through the richness and refreshes the palate between every delicious bite.
For side dishes, consider a classic and creamy option. Our incredibly smooth mashed potatoes provide a comforting and textural contrast that everyone will love. Furthermore, a tart and vibrant cranberry sauce introduces a sweet and tangy element that perfectly complements the savory notes of the main dish.
Finally, complete your
feast with a light, green salad. For instance, our easy arugula salad with a simple vinaigrette adds a fresh, peppery crunch that balances the entire meal beautifully.
What is the most popular Thanksgiving recipe?
Classic roasted turkey with a perfectly crispy, golden-brown skin remains the undisputed champion and centerpiece of the holiday table. However, side dishes like creamy mashed potatoes, savory stuffing, and green bean casserole are also top contenders for the most popular spot. Including a well-executed version of this classic is essential for any list of The BEST Thanksgiving Recipe Ideas.
ank-math-faq-item">
What are some unique Thanksgiving side dishes?
For a memorable twist, consider roasted Brussels sprouts with a balsamic glaze and bacon, or a sweet potato casserole with a crunchy pecan streusel topping. A wild rice pilaf with dried cranberries and pecans or maple-roasted carrots with thyme also offer unique and delicious flavors. These creative sides can elevate your meal and become a new favorite part of your Thanksgiving recipe ideas.
How do I make a moist turkey?
The key to a moist turkey is brining it for 12-24 hours before roasting, which helps the meat retain moisture during cooking. Cooking the turkey to the correct internal temperature of 165°F in the thickest part of the thigh is also crucial to prevent drying out. Letting the bird rest for at least 30 minutes before carving allows the juices to redistribute, ensuring every bite is succulent.
What is a good dessert for Thanksgiving besides pie?
For a delightful non-pie option, consider a pumpkin cheesecake with a gingersnap crust or individual apple crisps served warm with vanilla ice cream. A spiced pear and cranberry galette offers a rustic, free-form alternative that is easier than a traditional pie. These desserts provide a fantastic finale to your search for The BEST Thanksgiving Recipe Ideas.
div>
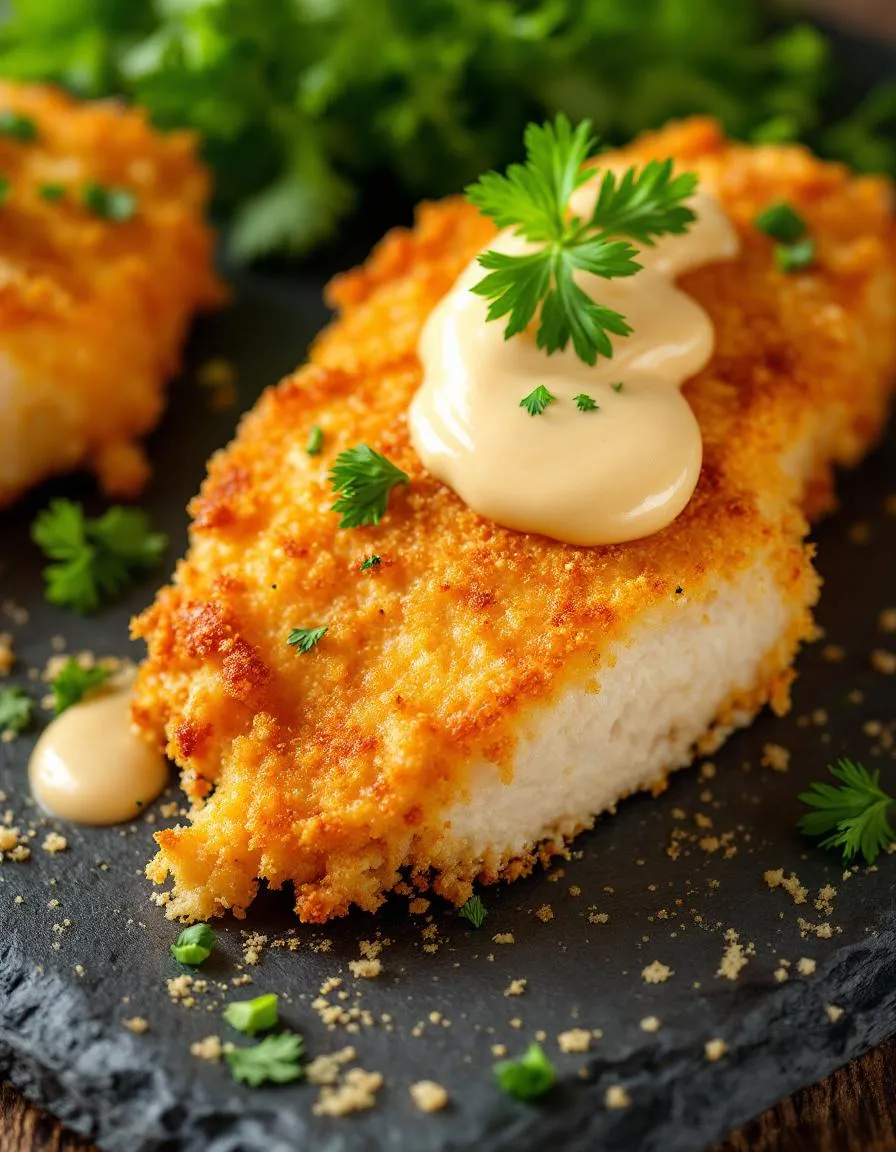
Easy Crispy Parmesan Crusted Chicken with Mayo
Introduction
Have you ever craved a restaurant-quality chicken dinner that you can actually make on a busy weeknight without a mountain of dirty dishes? We all deserve a meal that feels both indulgent and incredibly simple. This recipe for Crispy Parmesan Crusted Chicken with Mayo delivers exactly that. It transforms a few basic ingredients into a golden, juicy, and spectacularly flavorful main course that will have everyone asking for seconds. Ultimately, it is the kind of hassle-free, crowd-pleasing dish that makes weeknights something to genuinely look forward to.
Crispy Parmesan Crusted Chicken with Mayo is a brilliantly simple yet incredibly effective recipe. It uses mayonnaise as a clever shortcut to create an unbelievably moist interior and a perfectly golden, crunchy exterior without the mess of traditional egg washes and flour dredging. The mayonnaise, which is simply an emulsion of oil and eggs, clings to the chicken beautifully. It then acts as a glue for a savory crust made from Parmesan cheese and seasoned breadcrumbs. As the chicken bakes, the mayo keeps the meat incredibly juicy while the cheese toasts into a flavorful, crispy shell that is downright irresistible.
This dish matters because it solves a real problem for home cooks: how to make something truly delicious without specialized skills or hours in the kitchen. It fits our blog’s tone perfectly, as we champion recipes that are both accessible and extraordinary. For instance, if you love this easy, cheesy approach to cooking, you might also enjoy our One-Pan Garlic Butter Chicken and Rice for another simple, all-in-one meal. Furthermore, the method is so versatile that you can easily adapt the seasonings to your taste, much like you can customize our popular Ultimate Breakfast Burrito. This recipe proves that a few smart ingredients can create magic on a plate.
Why I Love This Recipe
I have a deep personal connection to this Crispy Parmesan Crusted Chicken with Mayo because it was the first “fancy” meal I ever confidently made for friends. I remember feeling so intimidated by the idea of cooking for a group, but this recipe was my safety net. The ingredients were already in my fridge, and the steps were foolproof. When I pulled that beautifully browned chicken out of the oven and saw everyone’s faces light up, I felt like a true chef. It taught me that the best recipes are not about complexity, but about reliability and the joy they bring to the table. This dish has been my go-to for a quick family dinner or a last-minute gathering ever since.
Health and Nutrition
Why it’s good for your body
This Crispy Parmesan Crusted Chicken with Mayo delivers a powerful protein punch. Furthermore, chicken breast provides lean protein that builds muscle and keeps you feeling full for hours. The parmesan cheese crust also contributes a significant amount of calcium, which actively strengthens your bones.
Moreover, the mayonnaise in the coating creates that incredible crispiness without deep frying. Consequently, you enjoy a satisfying crunch while consuming less oil than traditional frying methods. Additionally, this cooking technique helps the dish retain more of its natural moisture and nutrients.
You will also appreciate the versatility of this meal. For instance, you can easily pair your Crispy Parmesan Crusted Chicken with Mayo with a side of leafy greens or steamed vegetables for a well-rounded plate. Ultimately, this combination offers a delicious way to support your body’s needs with every flavorful bite.
How it fits in a healthy lifestyle
This Crispy Parmesan Crusted Chicken with Mayo fits beautifully into a balanced eating plan. It centers on a lean protein source, making it an excellent choice for anyone following a high-protein diet for fitness or weight management goals. You can feel good about serving it to your family for a weeknight dinner that feels indulgent but is actually quite wholesome.
If you need a gluten-free option, simply swap the breadcrumbs for your favorite certified gluten-free alternative. Pair your chicken with a vibrant quinoa salad or some roasted vegetables for a complete, nutrient-dense meal. For more inspiration on building a healthy plate, explore our guide on effortless weekly meal prep that takes the stress out of eating well.
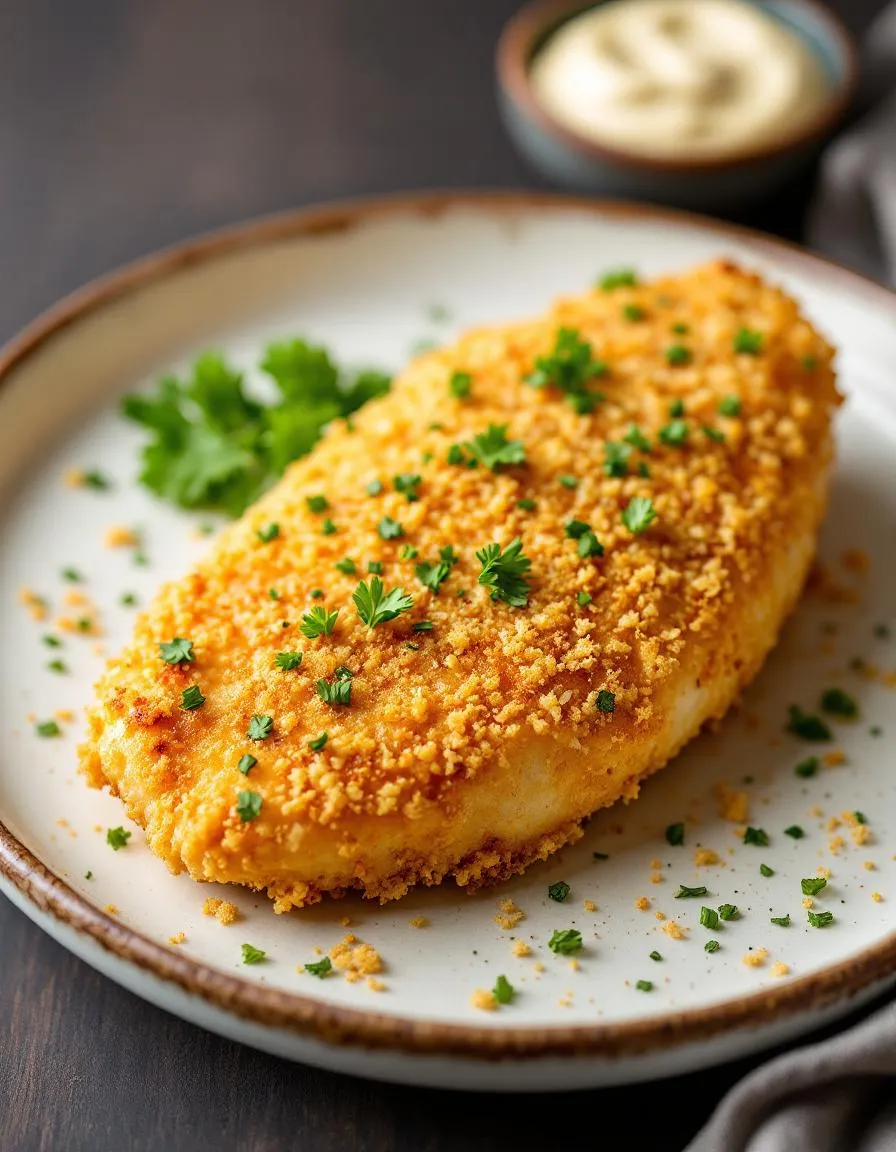
Tender chicken breasts coated in a crispy, golden parmesan and breadcrumb crust with a creamy mayo base for extra flavor and moisture.
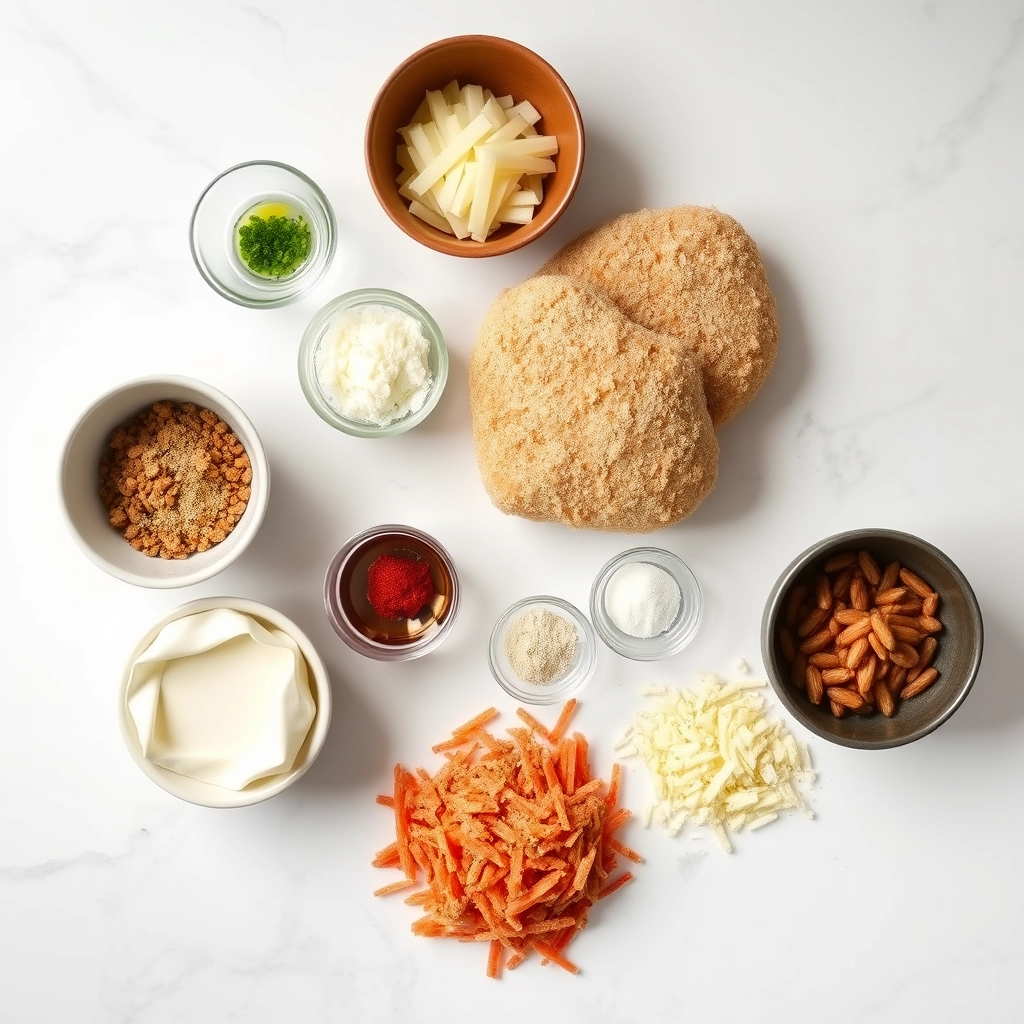
Ingredients
Scale
For the Crust:
4 boneless, skinless chicken breasts
1 cup mayonnaise
1 cup grated parmesan cheese
1 cup panko breadcrumbs
1 teaspoon garlic powder
1 teaspoon paprika
1/2 teaspoon black pepper
1/2 teaspoon salt
2 tablespoons fresh parsley, chopped
Cooking spray or olive oil
Instructions
1. Prepare the Crust:
Preheat oven to 400°F (200°C) and line a baking sheet with parchment paper.
In a bowl, mix mayonnaise, parmesan, garlic powder, paprika, pepper, and salt until well combined.
Pat chicken breasts dry and coat each evenly with the mayonnaise mixture.
Press each chicken breast into panko breadcrumbs, ensuring full coverage on both sides.
Place chicken on the prepared baking sheet, lightly spray or drizzle with oil, and bake for 25-30 minutes until golden and internal temperature reaches 165°F.
Garnish with fresh parsley and let rest for 5 minutes before serving.
Notes
You can customize the seasonings to taste.
How to Prepare This Dish
Steps and time-saving tips
First, grab two shallow bowls for your breading station. Meanwhile, preheat your oven to 400°F and line a baking sheet with parchment paper. Next, pat your chicken breasts completely dry with paper towels; this crucial step helps the mayo mixture stick perfectly. In one bowl, whisk together the mayonnaise, grated garlic, and a pinch of black pepper until it is smooth and creamy. In the second bowl, combine the panko breadcrumbs, finely grated Parmesan cheese, and Italian seasoning. Now, generously coat each chicken breast in the mayo mixture, ensuring every inch is covered. Subsequently, press the chicken firmly into the panko-Parmesan mixture, coating both sides for that ultimate crispy crust. Place each piece on your prepared baking sheet. For an extra golden finish, lightly drizzle or spray the tops with olive oil. Finally, bake for 20-25 minutes until the internal temperature reaches 165°F and the coating is deeply golden and incredibly crispy. Let the chicken rest for five minutes before serving to lock in all the juices.
and-learned-from">Mistakes I’ve made and learned from
I have definitely learned a few things the hard way with this Crispy Parmesan Crusted Chicken with Mayo. My biggest mistake was using coarse, pre-shredded Parmesan from a bag; it simply would not stick to the chicken and created a patchy, disappointing crust. Now, I always take the extra minute to finely grate a block of real Parmesan cheese myself, which makes all the difference for a flawless, even coating. Another lesson came from overcrowding the baking sheet, which steamed the chicken instead of baking it. I solved this by using a larger pan or baking in batches, ensuring each piece has plenty of space to get truly crispy. For more tips on getting that perfect golden finish without burning, check out my guide on perfect baking temperatures. And if you’re wondering what to serve alongside this main, my list of easy weeknight sides has some fantastic pairings that come together in no time.
Cultural Connection and Variations
Where this recipe comes from
This dish weaves together a beautiful culinary tale. While its exact origin is a bit hazy, the method of using mayonnaise as a secret weapon for a juicy, crispy crust likely comes from American home cooks getting clever in the mid-20th century. They discovered that mayo, an emulsion of oil and egg, creates an incredibly flavorful and moist barrier that locks in the chicken’s juices while helping the parmesan cheese form that irresistible golden shell. My own grandmother made a version she called “party chicken” for every potluck, always boasting about its foolproof nature.
Around the world, cultu
res put their own spin on this concept. In Japan, cooks might use panko breadcrumbs with parmesan for an extra-crunchy texture, often serving it with a tonkatsu-style sauce. Meanwhile, an Italian nonna might skip the mayo entirely, opting instead for an egg wash and a focus on high-quality, aged Parmigiano-Reggiano. Some families add a punch of garlic powder or a sprinkle of Italian seasoning to the mix. Ultimately, the beauty of Crispy Parmesan Crusted Chicken with Mayo is its incredible adaptability to different pantries and tastes.
How it fits in today’s cooking
This recipe absolutely thrives in modern kitchens because it solves the eternal weeknight dinner dilemma. It delivers restaurant-quality flavor and texture with minimal effort and basic ingredients. Busy home cooks love how it comes together in one pan, making it a perfect companion for a quick easy side dish for chicken. Furthermore, its high-protein, low-carb profile fits right into contemporary eating habits, though nobody can resist that cheesy, crispy exterior.
Today, people constantly adapt this classic. For instance, many use it as a delicious topping for a hearty dinner salad, turning a simple green bowl into a satisfying meal. Others might swap the chicken for cauliflower steaks to create a fantastic vegetarian alternative. It also remains a star for casual entertaining. You can easily double the batch for a crowd, ensuring you have a main course that everyone adores. Simply pair it with some quick weeknight pasta recipes for a complete and comforting feast that feels both special and effortless.
>Taste and Texture
What makes it delicious
This Crispy Parmesan Crusted Chicken with Mayo delivers a phenomenal contrast in every bite. Initially, your fork cracks through an incredibly crisp, golden-brown crust that shatters audibly. Consequently, you discover a center of unbelievably juicy and tender chicken that practically melts in your mouth. The parmesan cheese provides a deep, savory umami flavor and a subtle nutty saltiness, while the mayonnaise base creates an impossibly rich and creamy foundation. Moreover, the entire dish boasts a wonderfully fragrant and savory aroma that will absolutely fill your kitchen. Ultimately, the magic of this Crispy Parmesan Crusted Chicken with Mayo lies in its perfect harmony of crunchy, creamy, and savory elements.
Boosting the flavor
Feel free to get creative and amplify the flavor profile of this fantastic dish. For instance, you can easily mix a teaspoon of smoked paprika or garlic powder directly into the mayo and parmesan coating for an instant depth of flavor. Furthermore, serving it with a zesty squeeze of fresh lemon juice or a side of creamy ranch dressing provides a bright, tangy contrast that cuts through the richness beautifully. Alternatively, consider topping your finished chicken with a simple arugula salad dressed in lemon vinaigrette for a fresh, peppery kick. If you are searching for the perfect side, our incredible Creamy Garlic Mashed Potatoes make a heavenly companion. Finally, for a complete meal experience, pair it with our simple Perfect Dinner Rolls to soak up every last delicious crumb.
Tips for Success
Best practices for results
First, always pat your chicken breasts completely dry with paper towels; this crucial step helps the flavorful mayo and parmesan coating adhere perfectly. Furthermore, use a light hand when pressing the chicken into the cheese mixture to form an even, cohesive crust that will crisp up beautifully. For the best texture, make sure your oil is properly hot before adding the chicken; a few breadcrumbs dropped in should sizzle immediately. Finally, avoid crowding your skillet so each piece of Crispy Parmesan Crusted Chicken with Mayo cooks evenly and develops that ideal golden-brown sear.
Mistakes to avoid
One common error is using pre-shredded cheese from a bag; however, these products often contain anti-caking agents that prevent proper melting and browning. Instead, always grate your own parmesan cheese from a block for the crispiest crust. Additionally, do not move the chicken around in the pan right after you place it; otherwise, you risk the crust sticking and tearing. Let it cook undisturbed for a few minutes to form a perfect sear, a technique we also recommend for our Crispy Skillet Chicken Thighs. Moreover, resist the urge to crank the heat too high to speed up cooking; consequently, the cheese coating will likely burn before the inside cooks through. For more guidance on managing stovetop temperatures, our guide on Perfect Pan Seared Steak offers excellent tips.
Serving and Pairing Suggestions
How to serve this dish
Impress your guests by plating your Crispy Parmesan Crusted Chicken with Mayo on a warm, rustic platter. For a beautiful final touch, sprinkle the cutlets with freshly chopped parsley and a light grating of lemon zest. This simple garnish adds a pop of color and a burst of fresh flavor that perfectly complements the rich, savory crust. Furthermore, consider serving this dish for a special weekend dinner or even as the star of a holiday brunch spread. Ultimately, its golden-brown, crispy appearance makes it a visually stunning centerpiece for any table.
h-it">What goes well with it
This delicious Crispy Parmesan Crusted Chicken with Mayo pairs wonderfully with a variety of sides. For a light and refreshing contrast, serve it alongside a simple arugula salad with a lemon vinaigrette. Additionally, the peppery greens cut through the dish’s richness beautifully. Moreover, a classic creamy garlic mashed potato makes another fantastic companion, as its smooth texture is the ideal match for that satisfying crunch. For a drink pairing, a crisp, chilled Sauvignon Blanc wonderfully highlights the Parmesan’s savory notes.
Can I use something other than mayo for parmesan crusted chicken?
Yes, you can substitute the mayo with an equal amount of Greek yogurt, sour cream, or even Dijon mustard mixed with a little olive oil. These alternatives will still provide the necessary fat and moisture to help the parmesan crust adhere to the chicken, though the flavor profile will change slightly. The classic Crispy Parmesan Crusted Chicken with Mayo recipe relies on mayo for its unique richness and ability to create an exceptionally crispy crust.
ank-math-faq-item">
What is the best way to get the crust to stick to the chicken?
The key is to pat the chicken breasts completely dry with paper towels before applying the mayo. The mayo acts as a flavorful adhesive—spread a thin, even layer over the entire surface of the chicken. Then, firmly press the parmesan and breadcrumb mixture onto the mayo to ensure it sticks well before baking or pan-frying.
Do you bake or fry parmesan crusted chicken?
You can successfully cook Crispy Parmesan Crusted Chicken with Mayo using either method. Pan-frying in a skillet with a little oil will give you a faster, deeper golden-brown crust. Baking is a healthier, hands-off approach that results in a uniformly crispy finish; bake at 400°F (200°C) for 18-22 minutes. Both methods deliver a deliciously crispy parmesan crust.
What sides go well with this chicken dish?
This rich and savory chicken pairs beautifully with lighter, fresh sides. A simple arugula salad with lemon vinaigrette, roasted asparagus, garlic mashed potatoes, or a side of buttered pasta are all excellent choices. The sides help balance the flavorful and crispy parmesan crusted chicken with mayo for a complete meal.
div>
Best Pumpkin Cupcakes with Cinnamon Cream Cheese Frosting
Introduction
Is there anything more comforting than the warm, spiced aroma of pumpkin baking? It instantly wraps you in a cozy blanket of autumnal bliss. Now, imagine that feeling transformed into a perfectly portioned, handheld delight. These Pumpkin Cupcakes with Cinnamon Cream Cheese Frosting capture that exact magic. They are your favorite fall sweater in dessert form, promising a moment of pure, spiced joy with every single bite. Ultimately, they are the treat you never knew you needed but will immediately crave.
Pumpkin Cupcakes with Cinnamon Cream Cheese Frosting are a quintessential fall dessert that masterfully balances moist, warmly spiced cake with a luxuriously tangy and sweet frosting. This combination matters because it elevates a simple cupcake into a seasonal event. The pumpkin puree ensures an incredibly tender crumb and adds a depth of flavor that vanilla or chocolate bases simply cannot achieve. Furthermore, the cinnamon-infused cream cheese frosting provides the perfect creamy counterpoint, cutting through the sweetness with its distinctive zip. This recipe fits our blog’s tone perfectly because we champion approachable baking that delivers impressive, crowd-pleasing results. You do not need to be a professional pastry chef to create something extraordinary. In fact, these cupcakes come together quickly, making them ideal for last-minute gatherings, Thanksgiving potlucks, or simply satisfying a weekday baking urge. They are a fantastic entry point into seasonal baking and a guaranteed way to make any occasion feel special. For more inspiration on using seasonal flavors, explore our collection of easy fall desserts. Moreover, understanding the role of each ingredient, like how pumpkin puree adds moisture, can improve all your baking projects. You can learn more about this in our guide to baking with pumpkin puree.
Why I Love This Recipe
This recipe holds a special place in my heart because it truly marks the beginning of my favorite season. I always know fall has officially arrived when my kitchen smells like these Pumpkin Cupcakes with Cinnamon Cream Cheese Frosting. They remind me of crisp air, changing leaves, and gathering with family. Personally, I love how the frosting swirls into soft peaks and how the sprinkle of cinnamon on top makes them look as beautiful as they taste. Most importantly, sharing these cupcakes has created some of my most cherished memories, from school bake sales to cozy nights in with friends.
Health and Nutrition
Why it’s good for your body
These Pumpkin Cupcakes with Cinnamon Cream Cheese Frosting offer more than just incredible flavor; they also provide some surprising nutritional perks. For instance, pumpkin serves as the star ingredient, and it packs a powerful punch of beta-carotene. Your body converts this antioxidant into vitamin A, which actively supports healthy vision and a strong immune system.
Furthermore, pumpkin contributes a hearty dose of dietary fiber. Consequently, this helps promote healthy digestion and can keep you feeling satisfied for longer after you enjoy a treat. Additionally, the warming spices like cinnamon and nutmeg do more than just taste amazing; they also bring their own anti-inflammatory properties to these Pumpkin Cupcakes with Cinnamon Cream Cheese Frosting.
Moreover, the cream cheese frosting, especially when made with a balanced hand, provides a source of calcium and protein. Ultimately, enjoying one of these cupcakes means you are treating yourself to a dessert that thoughtfully combines indulgence with beneficial nutrients. Therefore, you can feel good about serving Pumpkin Cupcakes with Cinnamon Cream Cheese Frosting to your family.
How it fits in a healthy lifestyle
You can absolutely enjoy these pumpkin cupcakes as part of a balanced diet. Think of them as a celebratory treat or a satisfying end to a nutritious meal, not an everyday indulgence. Practicing mindful eating allows you to fully savor the rich flavors and spices, making one cupcake a truly fulfilling experience.
For those with specific dietary needs, you can easily adapt this recipe. You can use a trusted gluten-free flour blend to make it celiac-friendly. You can also explore using sugar substitutes in baking to adjust the sweetness level to your personal preference. Pair your cupcake with a source of protein, like a handful of nuts or a glass of milk, for a more balanced snack that keeps your energy levels steady.
Remember, a healthy lifestyle is all about balance and joy. Baking these at home allows you to control the ingredients, and sharing them with loved ones contributes to your overall well-being. For more ideas on incorporating treats into your plan, check out our tips for building healthy eating habits that last.
Moist and spiced pumpkin cupcakes topped with a creamy cinnamon cream cheese frosting, perfect for autumn gatherings.
Ingredients
Scale
For the Crust:
1 3/4 cups all-purpose flour
1 teaspoon baking soda
1/2 teaspoon salt
1 1/2 teaspoons ground cinnamon
1/2 teaspoon ground nutmeg
1/4 teaspoon ground cloves
1/4 teaspoon ground ginger
1/2 cup unsalted butter, softened
1 cup granulated sugar
2 large eggs
1 cup canned pumpkin puree
1/3 cup milk
8 oz cream cheese, softened
1/4 cup unsalted butter, softened
2 cups powdered sugar
1 teaspoon vanilla extract
1 teaspoon ground cinnamon
Instructions
1. Prepare the Crust:
Preheat oven to 350°F (175°C) and line a muffin tin with cupcake liners.
In a medium bowl, whisk together flour, baking soda, salt, cinnamon, nutmeg, cloves, and ginger.
In a large bowl, cream together 1/2 cup butter and granulated sugar until light and fluffy. Beat in eggs one at a time, then mix in pumpkin puree.
Gradually add dry ingredients to wet ingredients, alternating with milk, beginning and ending with dry ingredients. Mix until just combined.
Fill cupcake liners 2/3 full and bake for 18-22 minutes, or until a toothpick inserted comes out clean. Cool completely before frosting.
For frosting, beat cream cheese and 1/4 cup butter until smooth. Gradually add powdered sugar, then mix in vanilla and cinnamon until creamy. Frost cooled cupcakes.
Notes
You can customize the seasonings to taste.
s-dish">How to Prepare This Dish
Steps and time-saving tips
First, preheat your oven to 350°F and line a muffin tin with your favorite cupcake liners. Meanwhile, whisk your dry ingredients—flour, baking powder, baking soda, and warm spices—in a medium bowl. In a separate, larger bowl, vigorously whisk together the pumpkin puree, oil, eggs, and both sugars until the mixture is completely smooth and beautifully combined. Gradually add your dry ingredients to the wet ingredients, stirring gently just until the flour disappears; overmixing is your enemy here. For a speedy cleanup, use a large ice cream scoop to evenly distribute the batter into the liners, filling each about two-thirds full. Bake your Pumpkin Cupcakes with Cinnamon Cream Cheese Frosting for 18-22 minutes, or until a toothpick inserted into the center comes out clean. Let them cool completely in the pan before you even think about frosting. For the frosting, simply beat room-temperature cream cheese and butter together until fluffy, then gradually mix in the powdered sugar, vanilla, and cinnamon. Finally, swirl that glorious frosting on top of each cooled cupcake for a perfect, bakery-worthy treat.
Mistakes I’ve made and learned from
I have absolutely been there, pulling a tray of sunken Pumpkin Cupcakes with Cinnamon Cream Cheese Frosting from the oven because I got overzealous with the mixer. Overmixing the batter develops too much gluten, leading to a dense, tough crumb instead of that light, fluffy texture we all crave. My solution is to mix by hand once the dry ingredients are added, stopping the very second no flour streaks remain. Another classic blunder of mine was frosting cupcakes that were even slightly warm. The result was a delicious but sadly melted puddle of cinnamon cream cheese frosting sliding right off the dome. Now, I practice patience and let them cool entirely, which is a great time to properly clean my stand mixer for the next step. Learning these small but crucial details transformed my baking results and gave me the confidence to master other baking temperatures and techniques for all my desserts.
n-and-variations">Cultural Connection and Variations
Where this recipe comes from
Pumpkin Cupcakes with Cinnamon Cream Cheese Frosting feel like a warm hug from autumn itself. Their story, however, stretches back much further than modern bakeries. We can trace the pumpkin’s culinary journey to Native American tribes who first cultivated it. They roasted it, stewed it, and even dried it for sustenance. Meanwhile, European settlers brought their love of spices and baking techniques. Eventually, these traditions merged on the colonial table, creating the foundation for the spiced pumpkin treats we adore today.
Families often pass down their own unique twists. For instance, some bakers add a pinch of nutmeg or clove to the batter for extra warmth. Others might fold in chopped pecans or walnuts for a delightful crunch. In different regions, you might even find a maple glaze instead of the classic cream cheese frosting. Personally, my grandmother always used a splash of vanilla extract in her frosting, a simple touch that made them uniquely hers. No matter the variation, the goal remains the same: to capture the cozy, comforting essence of the season in every single bite.
This beautiful evolution shows how a simple ingredient can inspire countless interpretations. Ultimately, baking a batch of Pumpkin Cupcakes with Cinnamon Cream Cheese Frosting connects us to a rich, shared history of harvest and home.
ays-cooking">How it fits in today’s cooking
Today, these cupcakes absolutely dominate fall gatherings. They have become a non-negotiable star at Thanksgiving feasts and Halloween parties alike. Furthermore, modern home cooks constantly find new ways to enjoy them. You might bake a batch for a weekend treat, enjoying one with a hot coffee for the perfect afternoon break.
Many bakers also adapt the recipe to fit dietary needs, easily creating delicious vegan or gluten-free versions that everyone can enjoy. Their portable size makes them ideal for school bake sales or as a thoughtful gift for a neighbor. Moreover, the combination of pumpkin and warming spices like cinnamon feels inherently cozy, offering a much-needed comfort during the busier, colder months.
This timeless dessert seamlessly fits into our modern rhythm. For another fantastic way to use seasonal flavors, consider trying our apple cider doughnuts. They pair wonderfully with these spiced cupcakes for a full autumn-themed spread. Ultimately, this recipe continues to thrive because it delivers both nostalgia and deliciousness in every single bite.
>Taste and Texture
What makes it delicious
These Pumpkin Cupcakes with Cinnamon Cream Cheese Frosting deliver a wonderfully moist and tender crumb that simply melts in your mouth. Each bite bursts with warm, fragrant spices like cinnamon and nutmeg, which perfectly complement the earthy sweetness of the pumpkin puree. Furthermore, the rich and tangy cream cheese frosting, generously swirled on top, provides a luxuriously creamy and cool contrast. Ultimately, the experience is a cozy symphony of autumnal flavors and comforting textures that feels both indulgent and familiar.
Boosting the flavor
For an extra flavor kick, consider toasting your spices in a dry pan before adding them to the batter; this simple step unlocks their essential oils and dramatically deepens their warmth. Alternatively, a sprinkle of crunchy, spiced pecans on top of your Pumpkin Cupcakes with Cinnamon Cream Cheese Frosting introduces a delightful textural contrast. If you adore that creamy element, explore our guide to the best types of frosting for more inspiration. Moreover, a drizzle of salted caramel sauce just before serving beautifully enhances the sweet and savory notes. For another seasonal twist that uses similar warming spices, our pumpkin cinnamon rolls recipe is a fantastic next baking project.
Tips for Success
Best practices for results
First, always bring your cream cheese and butter to room temperature for a perfectly smooth frosting. Furthermore, use a trigger-release scoop to fill your liners evenly for uniform baking. Then, make sure you thoroughly cool your Pumpkin Cupcakes with Cinnamon Cream Cheese Frosting base before applying the frosting. Finally, chill the frosted cupcakes for about 15 minutes to set the frosting beautifully.
Mistakes to avoid
Avoid overmixing your batter after adding the flour, as this can lead to dense cupcakes. Instead, gently fold the ingredients until they are just combined. Additionally, do not use cold cream cheese, otherwise your frosting might become lumpy. For more guidance on getting your frosting silky smooth, read our guide on how to fix frosting consistency. Moreover, ensure your spices are fresh for the most vibrant flavor in your Pumpkin Cupcakes with Cinnamon Cream Cheese Frosting. If your baked goods often turn out dry, our tips for avoiding dry cakes can help you achieve a perfectly moist crumb every time.
Serving and Pairing Suggestions
How to serve this dish
Present your Pumpkin Cupcakes with Cinnamon Cream Cheese Frosting on a beautiful rustic platter for a charming touch. Furthermore, garnish each one with a tiny sprinkle of cinnamon or a single toasted pecan for a simple yet elegant finish. These cupcakes truly shine during autumn gatherings and holiday feasts. Consequently, they make a stunning centerpiece for any dessert table. Always serve them at room temperature to let the rich, spiced flavor of the Pumpkin Cupcakes with Cinnamon Cream Cheese Frosting fully bloom.
h-it">What goes well with it
A hot cup of spiced chai tea makes a perfect partner. Its warm spices beautifully echo the cinnamon and pumpkin notes in these delightful cupcakes. Alternatively, a glass of cold milk provides a classic, creamy contrast that everyone loves. For a truly decadent dessert spread, consider serving these cupcakes alongside a slice of our rich chocolate lava cake. Finally, a scoop of our homemade vanilla bean ice cream on the side creates a wonderful temperature and texture contrast that is simply irresistible.
Can I make pumpkin cupcakes with cinnamon cream cheese frosting ahead of time?
Absolutely! You can bake the pumpkin cupcakes up to two days in advance. Store them unfrosted in an airtight container at room temperature. For the best texture and flavor, prepare the cinnamon cream cheese frosting and frost the cupcakes the day you plan to serve them.
ank-math-faq-item">
How do you keep cream cheese frosting from getting runny?
The key to a stable cinnamon cream cheese frosting is using cold, full-fat cream cheese and room-temperature butter. Ensure your butter is not too soft, and avoid overmixing the frosting. Chilling the frosting for 15-20 minutes before piping can also help it hold its shape perfectly on your Pumpkin Cupcakes with Cinnamon Cream Cheese Frosting.
What is a good substitute for eggs in pumpkin cupcakes?
For each egg, you can use 1/4 cup of unsweetened applesauce, mashed banana, or commercial egg replacer. These substitutes add moisture, which complements the pumpkin puree well. Be aware that the texture might be slightly denser, but your Pumpkin Cupcakes with Cinnamon Cream Cheese Frosting will still be delicious.
Do pumpkin cupcakes need to be refrigerated?
Yes, due to the dairy in the cinnamon cream cheese frosting, these cupcakes must be refrigerated. Place them in an airtight container and store them in the refrigerator for up to 4 days. For the best taste, let them sit at room temperature for about 30 minutes before serving.