There’s something undeniably comforting about a dish that balances bright, zesty flavors with savory depth. If you’re craving a meal that feels both refreshing and satisfying, this Tangy Lemon Shallot Chicken Recipe is about to become your new favorite. Whether you’re cooking for a weeknight dinner or impressing guests, this recipe delivers juicy chicken with a punchy citrus kick and the subtle sweetness of caramelized shallots. Best of all, it comes together in one pan, making cleanup a breeze. Let’s dive into why this dish deserves a spot in your regular rotation.
The Tangy Lemon Shallot Chicken Recipe is a vibrant twist on classic pan-seared chicken. By combining tangy lemon juice, aromatic shallots, and a hint of herbs, this dish creates a harmony of flavors that elevate simple ingredients into something extraordinary. What sets it apart is its versatility. You can pair it with roasted vegetables, fluffy rice, or even a crisp salad for a complete meal. Moreover, it fits perfectly with our blog’s mission to share approachable yet impressive recipes that anyone can master. If you love bold flavors without complicated steps, this recipe checks every box.
For those who appreciate quick, flavorful meals, this dish is a game-changer. The tangy sauce clings to the chicken, ensuring every bite bursts with brightness. Meanwhile, the shallots caramelize into a sweet, mellow contrast that rounds out the acidity. If you’re looking for more one-pan wonders, our Garlic Butter Salmon offers a similarly effortless yet delicious option. Alternatively, if you want to explore other citrus-infused dishes, our Honey Orange Glazed Chicken brings a different but equally delightful flavor profile.
Why I Love This Recipe
This Tangy Lemon Shallot Chicken Recipe holds a special place in my heart because it reminds me of family dinners growing up. My mom would whip it up on busy evenings, and the aroma of lemon and shallots sizzling in the pan always signaled comfort. Even now, cooking it brings back those cozy memories while still feeling fresh and exciting. Plus, it’s a dish that never fails to get compliments, whether I’m serving it to friends or just treating myself. Simple, flavorful, and nostalgic—what more could you ask for in a recipe?
Health and Nutrition
Why it’s good for your body
Tangy Lemon Shallot Chicken Recipe packs a nutritious punch while delighting your taste buds. First, lean chicken breast serves as an excellent source of high-quality protein, which helps build and repair muscles. Additionally, the dish includes fresh lemon juice, a powerhouse of vitamin C that boosts immunity and aids iron absorption.
Moreover, shallots bring more than just flavor. They contain antioxidants and compounds that may support heart health and reduce inflammation. When you combine these ingredients, Tangy Lemon Shallot Chicken Recipe becomes a meal that nourishes your body from the inside out. The light, citrusy sauce also keeps calories in check, making it a smarter choice than heavy cream-based dishes.
Furthermore, this recipe skips processed additives, relying instead on whole, natural ingredients. The tangy lemon not only enhances flavor but also aids digestion. Whether you’re fueling up after a workout or simply craving a balanced dinner, Tangy Lemon Shallot Chicken Recipe delivers both satisfaction and nutrition in every bite.
How it fits in a healthy lifestyle
Tangy Lemon Shallot Chicken Recipe fits seamlessly into a balanced diet. If you’re watching your carb intake, pair it with roasted vegetables or a crisp salad for a low-carb meal. The high protein content also makes it ideal for those focusing on muscle gain or recovery, like the readers of our post-workout meal guide.
For heart-conscious eaters, the dish uses minimal oil and relies on heart-healthy fats from olive oil. It’s naturally gluten-free, so it accommodates dietary restrictions without sacrificing flavor. If you’re meal prepping, the recipe stores well, aligning with the tips in our meal prep ideas article. Whether you’re cooking for one or feeding a family, Tangy Lemon Shallot Chicken Recipe keeps health and convenience on the table.
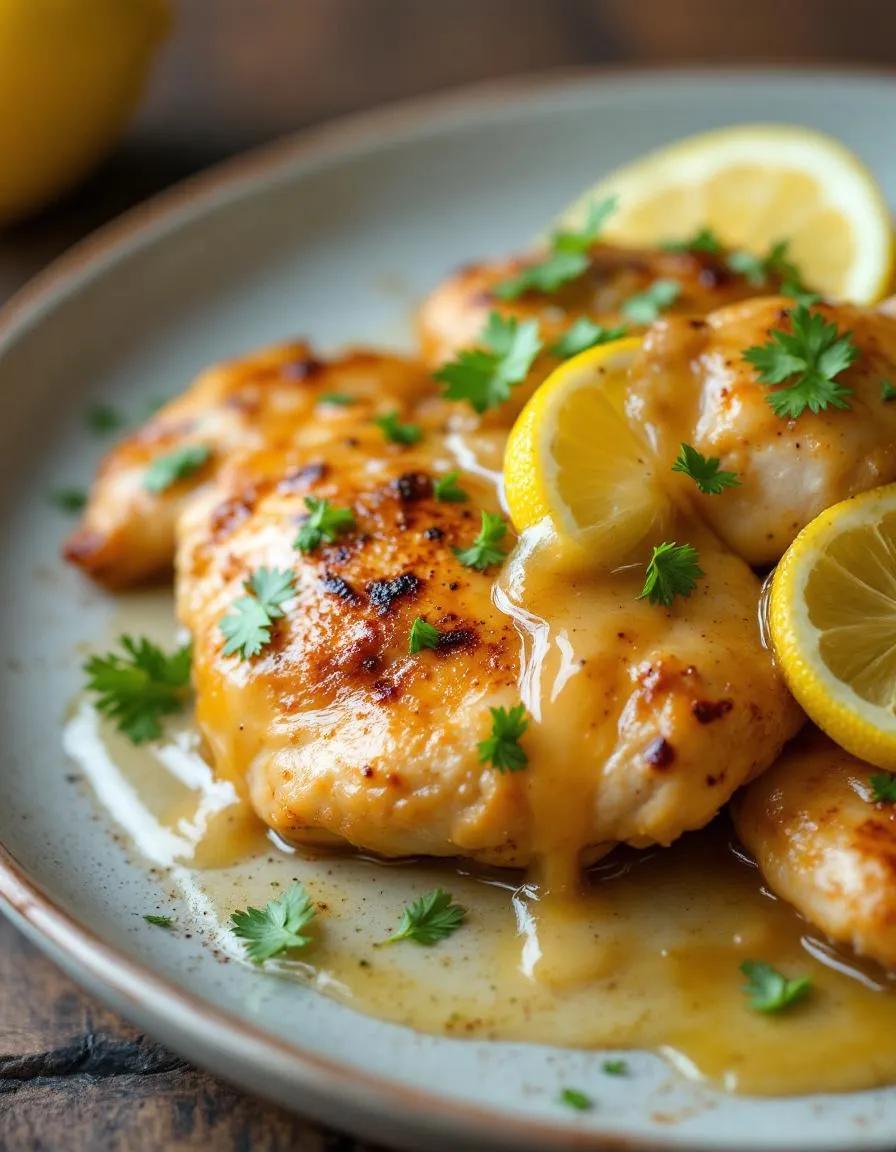
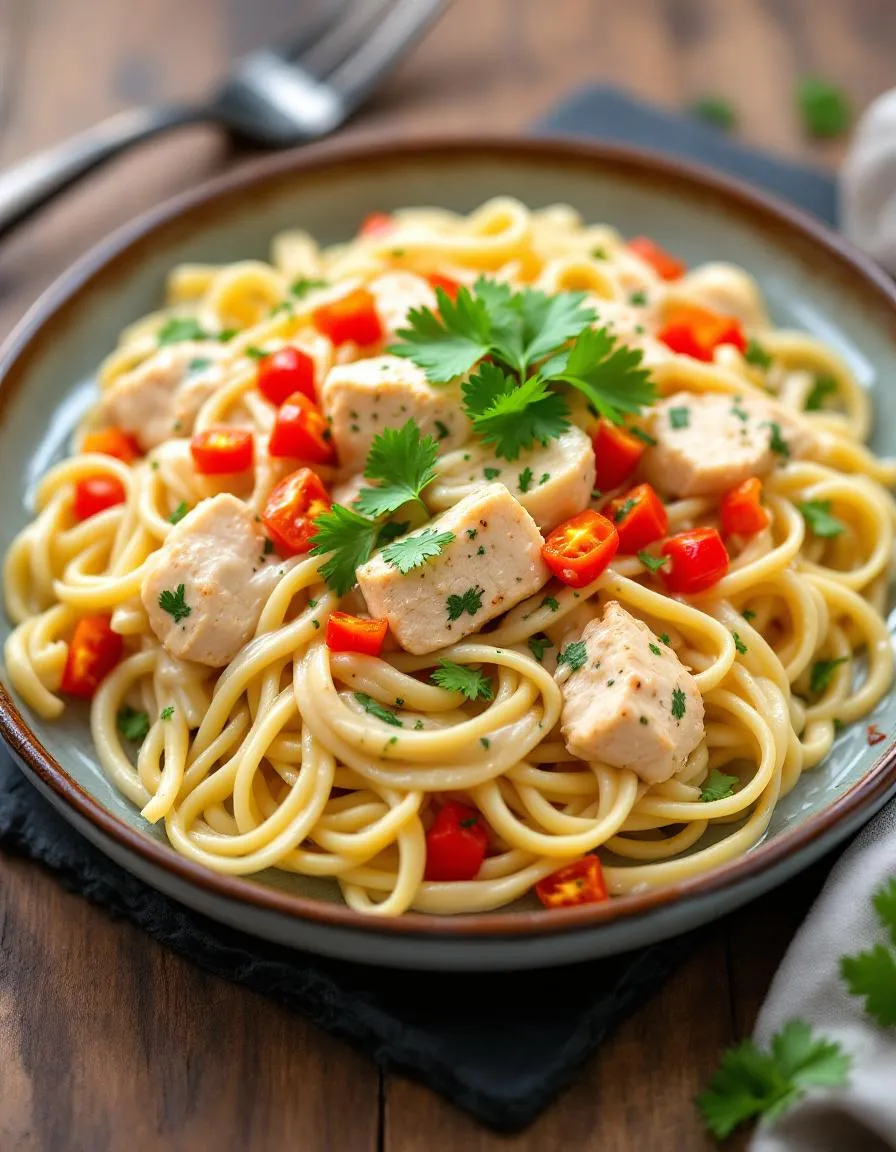
A zesty and flavorful chicken dish with the perfect balance of tangy lemon and sweet shallots.
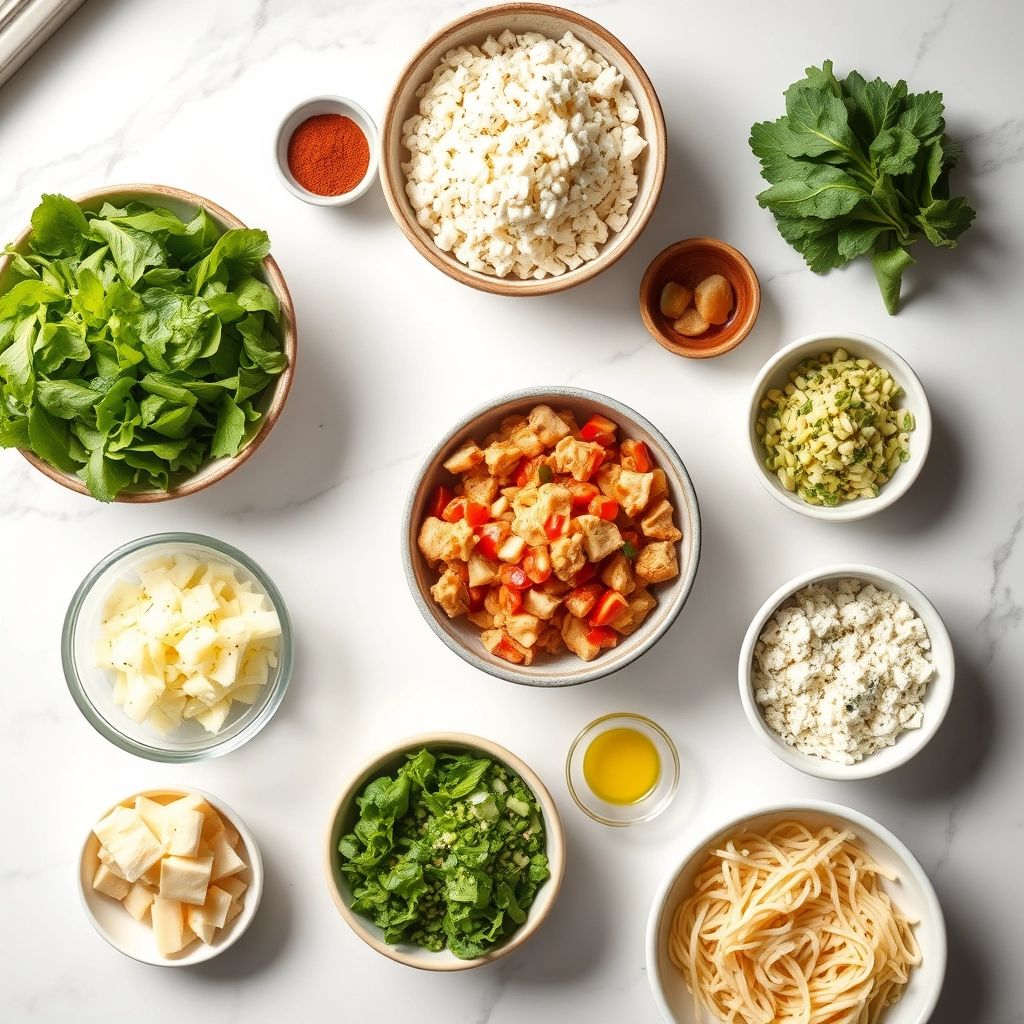
Ingredients
Scale
For the Crust:
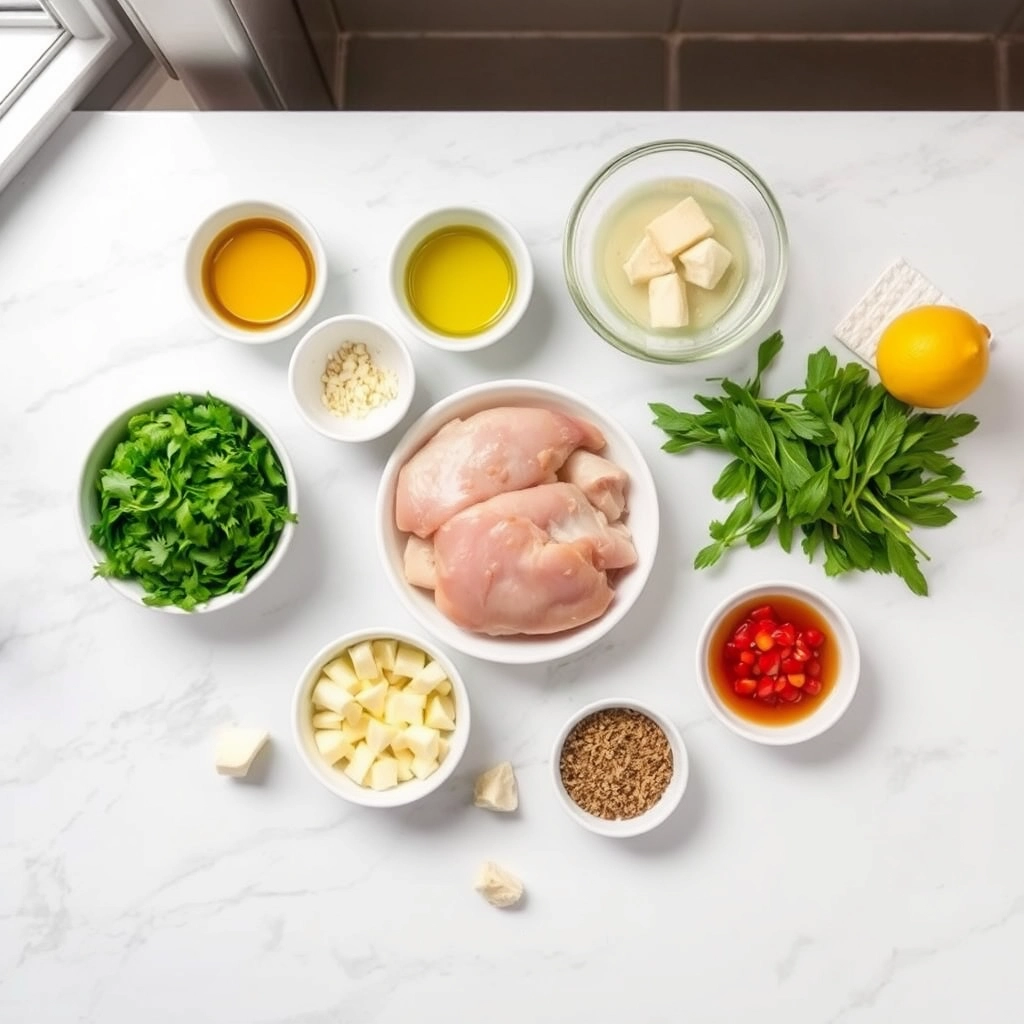
4 boneless, skinless chicken breasts
3 medium shallots, thinly sliced
2 lemons, juiced and zested
3 cloves garlic, minced
2 tbsp olive oil
1 tsp dried thyme
1/2 tsp salt
1/4 tsp black pepper
1/2 cup chicken broth
1 tbsp honey
Instructions
1. Prepare the Crust:
Heat olive oil in a large skillet over medium-high heat.
Season chicken breasts with salt, pepper, and thyme, then add to the skillet. Cook for 5-6 minutes per side until golden brown. Remove and set aside.
In the same skillet, add shallots and garlic. Sauté for 2-3 minutes until softened.
Stir in lemon juice, zest, chicken broth, and honey. Bring to a simmer.
Return chicken to the skillet, spooning the sauce over the top. Cook for another 5 minutes until chicken is fully cooked and sauce has slightly thickened.
Serve hot, garnished with additional lemon slices if desired.
Notes
You can customize the seasonings to taste.
How to Prepare This Dish
Steps and time-saving tips
Start by preheating your oven to 375°F to ensure it’s ready when you are. While the oven heats, whisk together the tangy lemon shallot chicken marinade—combine fresh lemon juice, minced shallots, olive oil, garlic, and a pinch of salt in a bowl. Next, place the chicken breasts in a resealable bag or shallow dish, then pour the marinade over them, making sure each piece is fully coated. Let the chicken marinate for at least 20 minutes, or up to 4 hours for deeper flavor. Meanwhile, line a baking sheet with parchment paper for easy cleanup later. Once marinated, transfer the chicken to the baking sheet and drizzle any remaining marinade on top. Bake for 25-30 minutes, or until the internal temperature reaches 165°F. For a golden finish, broil the chicken for the last 2 minutes. While the chicken cooks, toss together a quick side salad or steam some vegetables to complete the meal. To save time, prep the marinade the night before and store it in the fridge—this way, you can quickly assemble and bake the tangy lemon shallot chicken recipe the next day.
and-learned-from">Mistakes I’ve made and learned from
I’ve learned the hard way that overcrowding the baking sheet leads to unevenly cooked chicken—now I always leave space between each piece for proper airflow. Another mistake? Skipping the broiling step, which meant missing out on that perfect caramelized crust. If your chicken turns out dry, try brining it first, like I do with my perfect roast chicken. Also, don’t forget to let the chicken rest for 5 minutes after baking—this locks in the juices, just like with my grilled lemon herb chicken. Trust me, these small tweaks make all the difference in your tangy lemon shallot chicken recipe turning out tender and flavorful every time.
Cultural Connection and Variations
Where this recipe comes from
The Tangy Lemon Shallot Chicken Recipe dances between rustic comfort and bright sophistication, a dish that feels equally at home in a cozy kitchen or a festive gathering. Its roots weave through Mediterranean flavors, where lemons and shallots star in countless regional dishes. However, this particular recipe takes inspiration from French Provençal cooking, where chefs often pair poultry with tangy citrus and aromatic alliums. Over time, home cooks have adapted it globally—some add capers for a briny punch, while others toss in olives or fresh herbs like thyme or rosemary.
In my family, the Tangy
Lemon Shallot Chicken Recipe became a springtime staple, perfect for bridging the gap between hearty winter meals and lighter summer fare. My grandmother would swap shallots for red onions when pantry supplies ran low, proving how flexible this dish can be. Across the Middle East, you might find a similar chicken dish with sumac or preserved lemons, while Italian versions often lean into white wine and garlic. No matter the variation, the balance of zesty lemon and sweet shallots always shines through.
How it fits in today’s cooking
Today, the Tangy Lemon Shallot Chicken Recipe holds its own as a weeknight hero and a dinner-party standout. Busy cooks love its one-pan simplicity, while meal preppers appreciate how well it reheats for lunches. For those embracing seasonal eating, it’s a natural fit for spring and summer when farmers’ markets overflow with fresh lemons and tender shallots. Some modern twists include swapping chicken thighs for breasts or even trying it with vegetarian alternatives like cauliflower steaks.
It’s also a sneaky way to impress guests without stress—pair it with a crisp salad or easy side dishes, and suddenly you’ve curated a restaurant-worthy meal. Whether you stick to the classic or experiment with global flavors, this recipe adapts effortlessly to today’s fast-paced, flavor-driven kitchens.
>Taste and Texture
What makes it delicious
The Tangy Lemon Shallot Chicken Recipe delivers a vibrant burst of flavors with every bite. Juicy, tender chicken soaks up the bright, zesty lemon sauce, while caramelized shallots add a subtle sweetness and buttery softness. The dish smells irresistible—fragrant garlic and fresh herbs mingle with the tangy citrus aroma, making your mouth water before the first forkful. Each piece of chicken boasts a crisp, golden sear on the outside, giving way to a succulent interior. Meanwhile, the sauce strikes the perfect balance between sharp and smooth, clinging to the meat for a rich, satisfying finish. Whether you serve it over rice or with crusty bread, the Tangy Lemon Shallot Chicken Recipe guarantees a memorable meal.
Boosting the flavor
For an extra flavor kick, try marinating the chicken in lemon juice and herbs for an hour before cooking—this deepens the tangy profile. If you love heat, a pinch of red pepper flakes or a drizzle of honey sriracha glaze adds a spicy contrast. Fresh thyme or rosemary elevates the herbal notes, while a splash of white wine deglazes the pan for a more complex sauce. Pair the Tangy Lemon Shallot Chicken Recipe with a light, refreshing side like cucumber avocado salad to balance the bold flavors. Small tweaks make a big difference, so don’t hesitate to experiment!
Tips for Success
Best practices for results
For the best Tangy Lemon Shallot Chicken Recipe, always pat the chicken dry before seasoning to ensure a crispier sear. Additionally, let the chicken rest for at least five minutes after cooking so the juices redistribute evenly. Meanwhile, use fresh lemon juice rather than bottled for a brighter, more vibrant flavor. Finally, slice the shallots thinly so they caramelize quickly and blend seamlessly into the dish.
Mistakes to avoid
Avoid overcrowding the pan when searing the chicken, as this steams the meat instead of browning it. Instead, cook in batches if needed for even results. Also, don’t skip deglazing the pan with lemon juice and broth—this step builds the flavorful sauce that makes the Tangy Lemon Shallot Chicken Recipe shine. For more on perfecting pan-seared chicken, check out our guide on essential cooking techniques. And if you’re unsure about balancing acidic flavors, our flavor pairing tips can help.
Serving and Pairing Suggestions
How to serve this dish
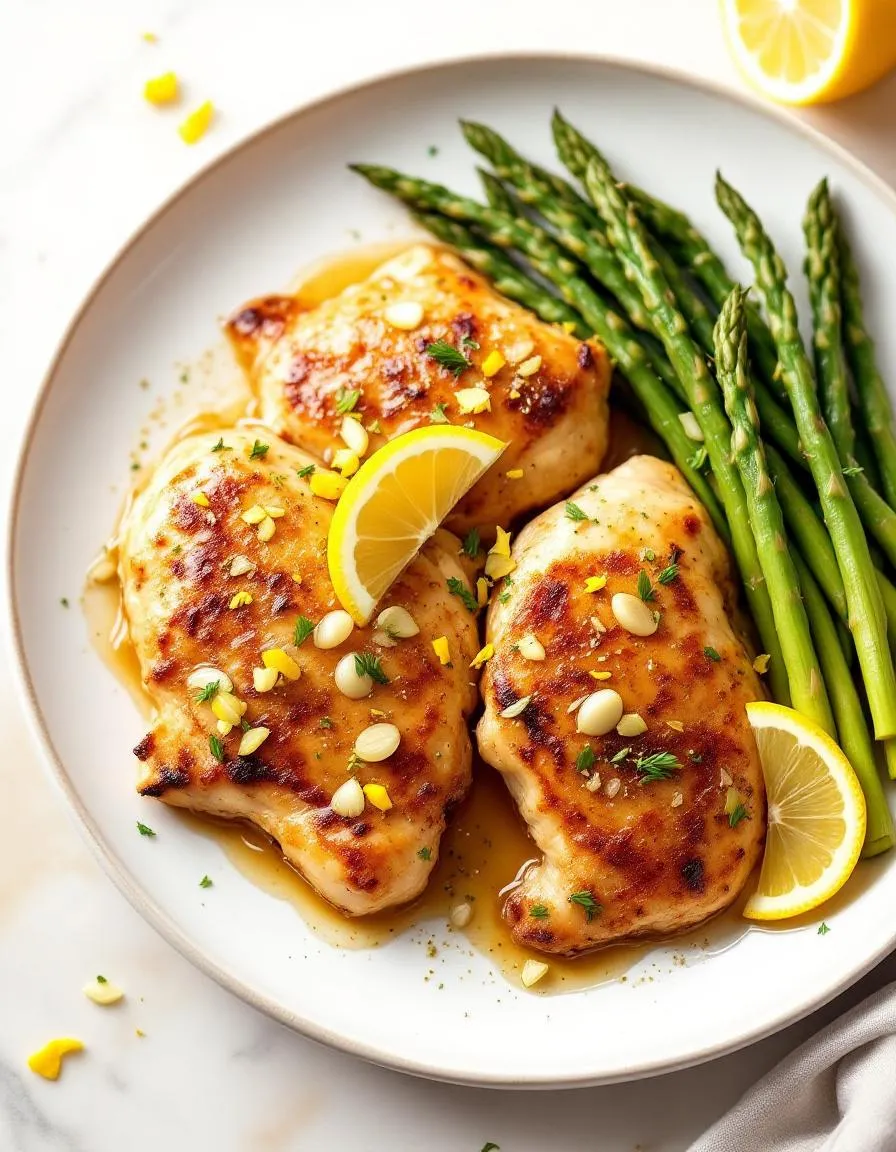
For a stunning presentation, plate the Tangy Lemon Shallot Chicken Recipe over a bed of fluffy jasmine rice or creamy mashed potatoes. Meanwhile, drizzle the bright pan sauce generously over the top to highlight its glossy finish. Alternatively, garnish with fresh parsley or microgreens for a pop of color that contrasts beautifully with the golden-brown chicken. Since this dish balances zesty and savory flavors, it works equally well for casual weeknight dinners or festive gatherings like Easter brunch. To elevate the experience, serve it family-style on a rustic platter with lemon wedges for an extra tangy kick.
h-it">What goes well with it
Pair the Tangy Lemon Shallot Chicken Recipe with a crisp, chilled Sauvignon Blanc to enhance its citrusy notes. If you prefer non-alcoholic options, a sparkling lemonade with a hint of thyme makes a refreshing match. For sides, try our Garlic Herb Roasted Potatoes, which add a hearty texture that soaks up the tangy sauce. Alternatively, a light Arugula Pear Salad balances the dish with peppery and sweet flavors. Finally, a warm baguette or crusty bread completes the meal by scooping up every last drop of the delicious sauce.
What sides pair well with Tangy Lemon Shallot Chicken Recipe?
This dish pairs beautifully with roasted potatoes, steamed asparagus, or a fresh arugula salad. The bright flavors of Tangy Lemon Shallot Chicken Recipe also complement quinoa or crusty bread for soaking up the delicious sauce.
ank-math-faq-item">
Can I make Tangy Lemon Shallot Chicken Recipe ahead of time?
Yes! The flavors of Tangy Lemon Shallot Chicken Recipe actually deepen when marinated overnight. Cook the chicken as directed, then reheat gently before serving to maintain the perfect texture.
How do I prevent the shallots from burning in this recipe?
Cook shallots over medium heat and stir frequently until they soften. For Tangy Lemon Shallot Chicken Recipe, adding a splash of chicken broth or lemon juice helps prevent burning while building flavor.
Can I use chicken thighs instead of breasts for Tangy Lemon Shallot Chicken Recipe?
Absolutely! Chicken thighs work wonderfully in Tangy Lemon Shallot Chicken Recipe, offering richer flavor and staying juicier. Just increase cooking time by 2-3 minutes since thighs are thicker than breasts.
div>
Best Soft Cinnamon Apple Fritters – Easy Homemade Recipe
Introduction
There’s something magical about the aroma of warm cinnamon and sweet apples wafting through the kitchen. Whether you’re craving a cozy weekend treat or a nostalgic bite of comfort, these Irresistible Soft Cinnamon Apple Fritters deliver every time. Imagine tender dough studded with juicy apples, fried to golden perfection, and dusted with a sugary cinnamon glaze. One bite, and you’ll understand why this recipe holds a special place in so many hearts.
Irresistible Soft Cinnamon Apple Fritters are more than just a dessert—they’re a celebration of simple, homestyle baking. Unlike dense donuts or overly sweet pastries, these fritters strike the perfect balance: fluffy on the inside, crispy on the outside, and packed with fresh apple flavor. They’re ideal for fall gatherings, holiday brunches, or anytime you want to turn an ordinary day into something extraordinary. Plus, they pair beautifully with a cup of coffee or a scoop of vanilla ice cream for an indulgent twist.
Here at Exorecipes, we love recipes that bring people together, and these fritters do exactly that. They’re easy enough for beginners yet impressive enough to wow guests. If you’re a fan of apple desserts, you’ll also adore our Homemade Apple Pie or Caramel Apple Crisp. But today, let’s focus on these little pockets of joy—because sometimes, the simplest treats leave the biggest impression.
Why I Love This Recipe
Growing up, my grandmother made apple fritters every Sunday, and the smell alone would draw the whole family to the table. Now, whenever I whip up a batch of Irresistible Soft Cinnamon Apple Fritters, it feels like carrying on a tradition. They remind me of laughter, shared stories, and the kind of love that comes from homemade food. Even on busy days, this recipe never fails to bring a little warmth and sweetness into my kitchen—and I hope it does the same for yours.
Health and Nutrition
Why it’s good for your body
Irresistible Soft Cinnamon Apple Fritters pack a surprising nutritional punch while satisfying your sweet tooth. First, fresh apples bring natural sweetness and fiber, which supports digestion and keeps you fuller longer. Additionally, cinnamon adds more than just warmth—it boasts antioxidants that may help reduce inflammation. Moreover, when you bake these fritters instead of deep-frying them, you cut down on excess oil without sacrificing flavor.
Beyond the ingredients, Irresistible Soft Cinnamon Apple Fritters offer a balanced treat for energy. The combination of whole grains and apples provides steady carbs, perfect for a mid-day pick-me-up. Furthermore, you can easily tweak the recipe to boost protein by adding Greek yogurt or nuts. Finally, because these fritters use minimal processed sugar, they’re a smarter choice than store-bought pastries.
Whether you enjoy them as a snack or dessert, Irresistible Soft Cinnamon Apple Fritters deliver comfort without guilt. Their wholesome ingredients make them a tasty way to sneak in nutrients. Plus, the aroma alone can lift your mood—a bonus for mental well-being!
How it fits in a healthy lifestyle
Irresistible Soft Cinnamon Apple Fritters fit seamlessly into a balanced diet when enjoyed mindfully. Pair them with a protein source like almond butter or a high-protein snack to create a satisfying mini-meal. For those watching sugar intake, reducing the sweetener or opting for natural alternatives like honey keeps them diet-friendly.
If you follow specific dietary needs, these fritters adapt easily. Swap in gluten-free flour for a celiac-safe version, or use oat flour for extra fiber. They also align with heart-healthy eating when prepared with unsaturated fats. Craving more wholesome dessert ideas? Explore our guilt-free desserts for inspiration. With simple tweaks, Irresistible Soft Cinnamon Apple Fritters become a versatile part of your wellness routine.
Deliciously soft and fluffy apple fritters loaded with cinnamon and fresh apples, perfect for a sweet treat.
Ingredients
Scale
For the Crust:
2 cups all-purpose flour
1/4 cup granulated sugar
1 tbsp baking powder
1 tsp ground cinnamon
1/2 tsp salt
2/3 cup milk
2 large eggs
1 tsp vanilla extract
2 cups diced apples
Vegetable oil for frying
1/2 cup powdered sugar (for dusting)
Instructions
1. Prepare the Crust:
In a large bowl, whisk together flour, sugar, baking powder, cinnamon, and salt.
In another bowl, mix milk, eggs, and vanilla extract until well combined.
Pour the wet ingredients into the dry ingredients and stir until just combined. Fold in the diced apples.
Heat oil in a deep fryer or large pot to 350°F (175°C).
Drop spoonfuls of batter into the hot oil and fry for 2-3 minutes per side until golden brown.
Remove fritters and drain on paper towels. Dust with powdered sugar before serving.
Notes
You can customize the seasonings to taste.
s-dish">How to Prepare This Dish
Steps and time-saving tips
Start by peeling and finely dicing two medium apples, then toss them with a teaspoon of cinnamon and a tablespoon of sugar to enhance their natural sweetness. Meanwhile, whisk together the dry ingredients—flour, baking powder, and a pinch of salt—in a large bowl. In another bowl, beat the eggs lightly before adding milk, melted butter, and vanilla extract. Pour the wet mixture into the dry ingredients and gently fold until just combined. Overmixing will make your Irresistible Soft Cinnamon Apple Fritters dense, so stop as soon as the batter comes together. Next, fold in the spiced apples, ensuring even distribution. Heat oil in a deep skillet over medium heat, then drop spoonfuls of batter into the oil. Fry until golden brown, flipping once for even cooking. Drain on paper towels and dust with powdered sugar while warm. For a quicker version, bake them at 375°F for 12-15 minutes instead of frying. Either way, serve immediately for the best texture.
Mistakes I’ve made and learned from
Early on, I rushed the oil temperature and ended up with greasy, undercooked fritters. Now I always use a thermometer to keep it at 350°F—trust me, it makes all the difference. Another blunder? Skipping the apple prep. Once, I left the pieces too large, and they didn’t soften enough during cooking. Dicing them finely, as I do for my Perfect Apple Pie Filling, ensures they meld seamlessly into the batter. And if you’re new to frying, don’t overcrowd the pan like I did. It drops the oil temp and leads to uneven browning. For more foolproof tips, check out my guide on Mastering Deep Frying. These small adjustments transformed my Irresistible Soft Cinnamon Apple Fritters from messy experiments to crowd-pleasing treats.
n-and-variations">Cultural Connection and Variations
Where this recipe comes from
Irresistible Soft Cinnamon Apple Fritters carry a cozy, nostalgic charm that spans generations. Many trace their roots to European harvest traditions, where cooks transformed apples into warm, spiced treats during autumn. In Germany, they often resemble apfelküchle, thinly sliced apples dipped in batter and fried. Meanwhile, Dutch versions might include raisins or a dusting of powdered sugar. Every culture adds its own twist, but the heart remains the same: a celebration of seasonal abundance.
In my family, Irresistible Soft Cinnamon Apple Fritters became a fall ritual. My grandmother used tart Granny Smith apples and a hint of nutmeg, claiming it “kept the dough tender.” Some Southern U.S. kitchens swap cinnamon for bourbon glaze, while others fold in pecans for crunch. No matter the variation, these fritters always bring people together—whether at county fairs, holiday brunches, or lazy Sunday mornings.
How it fits in today’s cooking
Today, these fritters bridge tradition and modern convenience. Home bakers love them for their versatility, pairing them with coffee for breakfast or serving them as a dessert with homemade vanilla ice cream. They’re also a star at Thanksgiving gatherings, offering a lighter alternative to pie. Plus, food bloggers and meal preppers adore how easily they freeze and reheat.
Health-conscious cooks
tweak the recipe too, using almond flour or air-frying for a lighter bite. Others add them to coffee cake muffin batters for a hybrid treat. Whether you stick to the classic or experiment, Irresistible Soft Cinnamon Apple Fritters prove comfort food never goes out of style.
Taste and Texture
What makes it delicious
Irresistible Soft Cinnamon Apple Fritters deliver a warm, cozy bite that feels like a hug in dessert form. The outside boasts a delicate crispness, while the inside stays impossibly soft and fluffy, thanks to the perfect balance of buttery dough and tender apple chunks. Each bite bursts with sweet-tart apple flavor, deepened by fragrant cinnamon and a hint of vanilla. The aroma alone—a mix of caramelized sugar, spiced apples, and golden fried dough—will have everyone hovering near the kitchen. Plus, the subtle chewiness from the apples contrasts beautifully with the melt-in-your-mouth texture, making Irresistible Soft Cinnamon Apple Fritters impossible to resist.
Boosting the flavor
For an extra flavor boost, try tossing the apple chunks in brown sugar and a pinch of nutmeg before folding them into the batter. This adds a deeper caramel-like sweetness. Alternatively, drizzle the fritters with a simple vanilla glaze or serve them with a scoop of homemade cinnamon ice cream for a decadent twist. A dusting of powdered sugar or a sprinkle of toasted pecans also elevates the texture and taste. Experiment with these tweaks to make your fritters even more memorable.
Always use fresh, crisp apples for your Irresistible Soft Cinnamon Apple Fritters to ensure the perfect texture. Meanwhile, keep the oil temperature steady at 350°F for even frying. Additionally, let the dough rest for 10 minutes before shaping to make it easier to handle. For extra flavor, toss the apple pieces in cinnamon sugar right after frying. Finally, serve the fritters warm to enjoy their irresistible softness at its best.
Mistakes to avoid
Avoid overcrowding the pan when frying, as this lowers the oil temperature and leads to greasy fritters. Instead, fry in small batches for the crispiest results. Also, don’t skip draining the fritters on a wire rack after frying—this prevents sogginess. If you’re new to frying, check out our guide to perfect frying for more expert advice. Lastly, measure your flour correctly by spooning it into the cup and leveling it off, as too much flour makes the dough dense. For more baking essentials, explore our common baking mistakes article.
g-suggestions">Serving and Pairing Suggestions
How to serve this dish
Serve Irresistible Soft Cinnamon Apple Fritters warm for the best texture and aroma. Meanwhile, arrange them on a rustic wooden board or a vintage platter for a cozy, inviting look. For special occasions, dust them with powdered sugar and drizzle caramel sauce in zigzag patterns. Additionally, top with a scoop of vanilla ice cream for a decadent dessert. These fritters shine at brunch gatherings, holiday breakfasts, or as a sweet afternoon treat with coffee.
What goes well with it
Pair Irresistible Soft Cinnamon Apple Fritters with a steaming cup of spiced chai latte to enhance the warm cinnamon notes. Alternatively, try them alongside a refreshing glass of cold milk for a classic combo. For a heartier spread, serve with our fluffy Buttermilk Pancakes or crispy Homemade Bacon to balance the sweetness. Finally, a dollop of whipped cream or a side of vanilla yogurt adds a creamy contrast to the fritters’ crispy edges.
math-faq-block">
What makes Irresistible Soft Cinnamon Apple Fritters so soft?
The secret to ultra-soft Irresistible Soft Cinnamon Apple Fritters lies in the dough’s moisture content. Using buttermilk or yogurt in the batter keeps them tender, while diced apples add natural juiciness. The cinnamon-sugar coating also helps lock in freshness for days.
Can I make Irresistible Soft Cinnamon Apple Fritters ahead of time?
Yes! These fritters stay fresh for 2-3 days stored airtight at room temperature. For longer storage, freeze them for up to 3 months—just reheat in the oven to restore their irresistible soft texture. The cinnamon flavor actually deepens overnight.
What type of apples work best for Irresistible Soft Cinnamon Apple Fritters?
Firm, slightly tart apples like Granny Smith or Honeycrisp hold their shape best during frying. Their tangy flavor balances the sweet cinnamon glaze in Irresistible Soft Cinnamon Apple Fritters. Avoid mealy varieties like Red Delicious, which turn mushy.
ank-math-faq-item">
How do I prevent my apple fritters from absorbing too much oil?
Maintain oil at 350-375°F and fry Irresistible Soft Cinnamon Apple Fritters in small batches to avoid temperature drops. Drain them on a wire rack (not paper towels) to prevent sogginess. The perfect fritter will be golden with a crisp exterior and pillowy center.
Best Creamy Southwest Chicken Alfredo Recipe
Introduction
Craving a dish that blends comfort and excitement in every bite? Look no further than Creamy Southwest Chicken Alfredo – A Flavorful Twist on a Classic Dish. This recipe takes the rich, velvety goodness of traditional Alfredo and infuses it with bold Southwest flavors, creating a meal that feels both familiar and thrilling. Whether you’re cooking for a weeknight dinner or impressing guests, this dish delivers satisfaction without compromise. Plus, it’s surprisingly easy to make, proving that gourmet flavors belong in your everyday kitchen.
Creamy Southwest Chicken Alfredo – A Flavorful Twist on a Classic Dish combines tender chicken, smoky spices, and a luscious Alfredo sauce for a meal that stands out. Unlike traditional Alfredo, this version incorporates ingredients like cumin, chili powder, and roasted peppers, adding depth and a touch of heat. The result? A creamy, indulgent pasta with a kick that keeps you coming back for more. This recipe matters because it bridges the gap between classic comfort food and adventurous flavors, making it perfect for those who love to experiment without straying too far from the classics. If you enjoy dishes like our Spicy Chipotle Pasta, you’ll adore this twist. It fits our blog’s tone by offering approachable yet exciting recipes that inspire creativity in the kitchen. Best of all, you can pair it with a simple side like our Garlic Parmesan Asparagus for a complete, restaurant-worthy meal at home.
Why I Love This Recipe
This dish holds a special place in my heart because it reminds me of family gatherings where bold flavors and hearty meals brought everyone together. The first time I made Creamy Southwest Chicken Alfredo – A Flavorful Twist on a Classic Dish, my kitchen filled with the irresistible aroma of spices and cream, and I knew it would become a staple. It’s the kind of recipe that feels like a hug but tastes like an adventure, and that’s exactly what I love about it. Every time I serve it, I watch smiles spread around the table, and that’s the magic of a truly great meal.
Health and Nutrition
Why it’s good for your body
Creamy Southwest Chicken Alfredo – A Flavorful Twist on a Classic Dish packs a nutritious punch while delighting your taste buds. First, the lean chicken provides high-quality protein, which helps build and repair muscles. Additionally, the dish includes a blend of spices like cumin and chili powder, which may boost metabolism and support digestion.
Moreover, Creamy Southwest Chicken Alfredo – A Flavorful Twist on a Classic Dish incorporates garlic and onions, both known for their immune-boosting properties. These ingredients add depth to the flavor while contributing antioxidants. The creamy sauce, when made with moderation, offers calcium for strong bones, especially if you use a dairy-based Alfredo.
Finally, this dish balances indulgence with nourishment. By using whole-grain pasta or zucchini noodles, you can increase fiber intake for better digestion. Whether you stick to the classic version or opt for a lighter twist, Creamy Southwest Chicken Alfredo – A Flavorful Twist on a Classic Dish keeps meals exciting and health-conscious.
How it fits in a healthy lifestyle
Creamy Southwest Chicken Alfredo – A Flavorful Twist on a Classic Dish fits seamlessly into a balanced diet. For protein-focused eaters, the chicken delivers a satisfying portion to support muscle maintenance. If you prefer gluten-free options, simply swap regular pasta for a gluten-free alternative like those in our gluten-free pasta guide.
This dish also works well for meal prepping, saving you time while keeping nutrition on track. Pair it with a fresh side salad or steamed veggies to round out your plate. For more ideas on balancing rich flavors with wholesome ingredients, check out our healthy comfort food swaps. Whether you enjoy it as a weekend treat or a weeknight staple, this recipe proves that flavor and nutrition can go hand in hand.
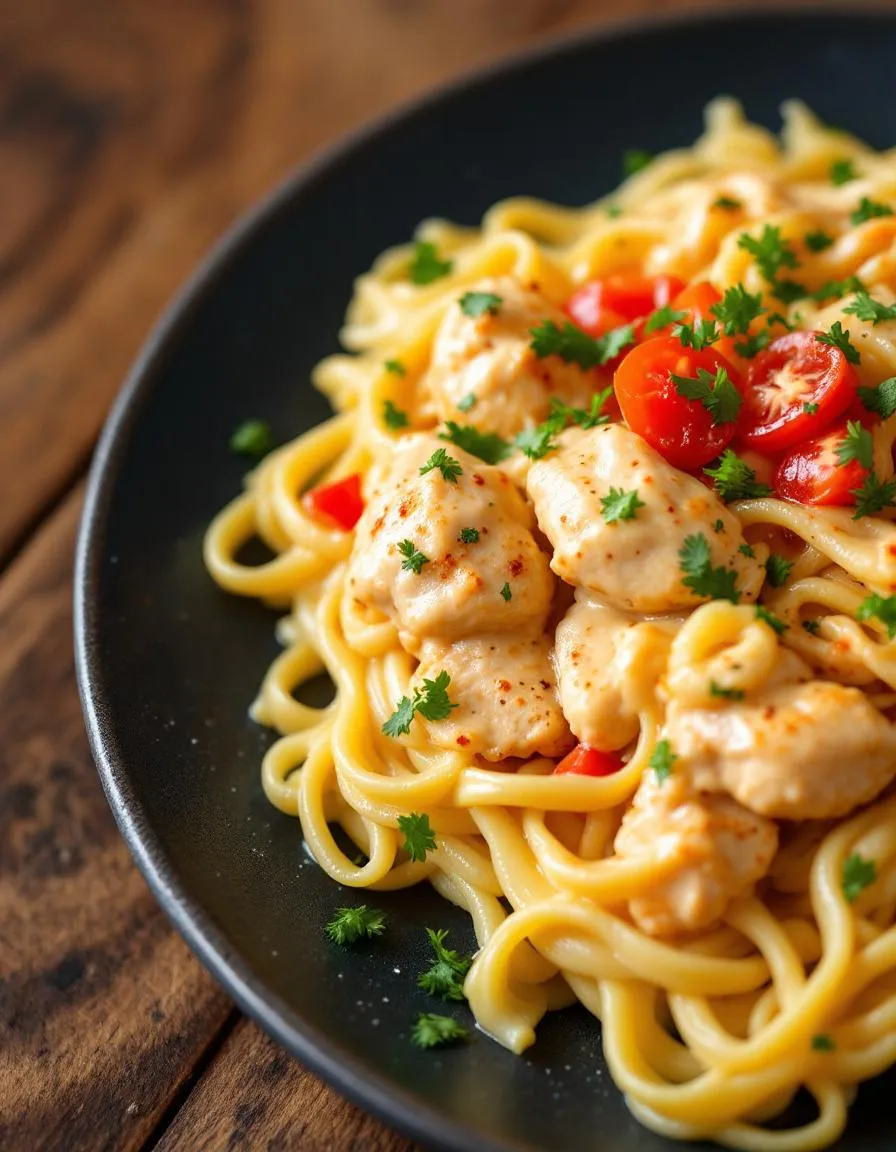
A creamy and flavorful twist on classic Alfredo with a Southwest kick, featuring tender chicken, peppers, and a rich, spicy sauce.
Ingredients
Scale
For the Crust:
1 lb fettuccine pasta
2 boneless, skinless chicken breasts, sliced
1 red bell pepper, diced
1 green bell pepper, diced
1 small onion, diced
2 cloves garlic, minced
1 cup heavy cream
1/2 cup grated Parmesan cheese
1 tsp chili powder
1/2 tsp cumin
1/2 tsp paprika
Salt and pepper to taste
2 tbsp olive oil
Fresh cilantro for garnish
Instructions
1. Prepare the Crust:
Cook the fettuccine according to package instructions. Drain and set aside.
Heat olive oil in a large skillet over medium heat. Add chicken, season with salt, pepper, chili powder, cumin, and paprika. Cook until browned and fully cooked, about 6-8 minutes. Remove from skillet and set aside.
In the same skillet, add onions, bell peppers, and garlic. Sauté until softened, about 5 minutes.
Reduce heat to low and pour in heavy cream, stirring constantly. Add Parmesan cheese and stir until the sauce is smooth and creamy.
Return the cooked chicken to the skillet and mix well. Add the cooked fettuccine and toss until everything is evenly coated.
Garnish with fresh cilantro before serving.
Notes
You can customize the seasonings to taste.
How to Prepare This Dish
Steps and time-saving tips
Start by seasoning boneless chicken breasts with a blend of southwest spices like cumin, chili powder, and smoked paprika. Meanwhile, heat olive oil in a large skillet over medium-high heat and sear the chicken until golden brown, about 5 minutes per side. Remove the chicken and let it rest while you prepare the sauce. In the same skillet, sauté minced garlic and diced onions until fragrant, then whisk in heavy cream, grated parmesan, and a splash of chicken broth for extra flavor. Stir constantly until the sauce thickens slightly, then fold in diced tomatoes, black beans, and corn for that signature southwest twist. Slice the rested chicken into strips and gently layer them back into the skillet, letting everything simmer together for a few minutes. Toss the creamy southwest chicken Alfredo with freshly cooked fettuccine, drizzle with lime juice, and garnish with chopped cilantro. For a time-saving shortcut, use pre-cooked rotisserie chicken or batch-prep the spice mix ahead of time.
and-learned-from">Mistakes I’ve made and learned from
Early on, I rushed the sauce and ended up with a grainy texture because I added the cheese too quickly. Now, I let the cream warm gently before whisking in the parmesan little by little. Another blunder? Overcooking the chicken, which made it dry. I’ve since learned to pull it off the heat at 165°F and let residual heat do the rest. If you’re new to balancing bold flavors, check out my guide on spice blends for beginners to avoid overwhelming the dish. And if you’ve ever struggled with timing pasta and sauce, my pasta perfection tips will save you from soggy noodles. Trust me, a few small tweaks make all the difference in this creamy southwest chicken Alfredo.
Cultural Connection and Variations
Where this recipe comes from
Creamy Southwest Chicken Alfredo – A Flavorful Twist on a Classic Dish blends Italian tradition with bold Southwestern flair. While classic Alfredo hails from Rome, this version takes inspiration from the vibrant flavors of the American Southwest. Families in Arizona and New Mexico often add roasted green chiles or smoky chipotle for extra heat, while others fold in sweet corn or black beans for texture. My grandmother, who loved experimenting in the kitchen, first introduced me to this fusion by tossing in a handful of cilantro and a squeeze of lime. The result? A dish that feels both familiar and excitingly new.
Across borders, cooks p
ut their own spin on it. In Texas, you might find it loaded with jalapeños and Monterey Jack cheese. Meanwhile, coastal regions sometimes swap chicken for shrimp. Creamy Southwest Chicken Alfredo – A Flavorful Twist on a Classic Dish proves how food evolves as it travels, carrying stories from one kitchen to another. Whether served at a weeknight dinner or a festive gathering, it always sparks conversation about flavor and heritage.
How it fits in today’s cooking
Today, this dish thrives as a versatile crowd-pleaser. Busy parents love it for its one-pan simplicity, while meal preppers often double the recipe for easy lunches. During summer, grilled chicken and fresh tomatoes brighten it up, while winter versions might feature roasted poblanos for warmth. It’s also a star at potlucks, especially when paired with a crisp Southwest chopped salad.
Modern twists keep it relevant, like using cauliflower Alfredo sauce for a lighter take or topping it with avocado crema. Some even repurpose leftovers into a killer chicken Alfredo stuffed shells bake. Whether you crave comfort or crave adventure, Creamy Southwest Chicken Alfredo – A Flavorful Twist on a Classic Dish bridges the gap, making it a timeless favorite for any table.
>Taste and Texture
What makes it delicious
Creamy Southwest Chicken Alfredo – A Flavorful Twist on a Classic Dish delivers a rich, velvety experience with every bite. The alfredo sauce coats tender chicken and pasta in a luscious, garlicky embrace, while smoky chipotle and zesty lime add a vibrant kick. Juicy tomatoes and crisp bell peppers bring a fresh crunch, balancing the dish’s indulgent creaminess. Meanwhile, aromatic cumin and cilantro weave in earthy, herbal notes that make each forkful irresistible. Whether you savor it hot off the stove or as leftovers, Creamy Southwest Chicken Alfredo – A Flavorful Twist on a Classic Dish keeps its comforting texture—creamy yet light—with just the right amount of spice to linger on your palate.
Boosting the flavor
For an extra flavor boost, try stirring in roasted poblano peppers or a dash of smoked paprika to deepen the Southwest vibe. A sprinkle of crumbled cotija cheese or a drizzle of cilantro lime dressing brightens the dish instantly. If you love heat, toss in pickled jalapeños or a spoonful of homemade chili oil for a fiery finish. Don’t forget to toast your pasta lightly before boiling—it adds a nutty depth that pairs perfectly with the creamy sauce. With these tweaks, your Creamy Southwest Chicken Alfredo will taste even more dynamic.
Tips for Success
Best practices for results
For the best Creamy Southwest Chicken Alfredo – A Flavorful Twist on a Classic Dish, always cook the chicken until it reaches 165°F to ensure safety and juiciness. Additionally, toast the spices briefly before adding them to the sauce to deepen their flavor. Stir the Alfredo sauce constantly over medium heat to prevent clumping, and use freshly grated Parmesan for a smoother texture. Finally, let the dish rest for 5 minutes before serving so the flavors meld perfectly.
Mistakes to avoid
Avoid overcooking the pasta, as it will continue to soften in the sauce. Instead, aim for al dente by checking it 2 minutes before the package instructions suggest. Many cooks also skip seasoning the chicken properly, which can leave the dish bland. For more seasoning tips, check out our guide on seasoning chicken perfectly. Lastly, don’t rush the sauce—simmer it gently to avoid curdling. If you’re new to sauces, our creamy sauce techniques will help you master the process.
Serving and Pairing Suggestions
How to serve this dish
For a stunning presentation, serve Creamy Southwest Chicken Alfredo – A Flavorful Twist on a Classic Dish in wide, shallow bowls to showcase its rich texture. Top it with fresh cilantro, a sprinkle of smoked paprika, or a drizzle of lime crema for a vibrant pop of color. Meanwhile, this dish shines at casual weeknight dinners yet also makes a fantastic centerpiece for potlucks or game-day gatherings. If you want to elevate the experience, pair it with warm, crusty bread or tortilla chips for dipping into the creamy sauce.
h-it">What goes well with it
A crisp, citrusy margarita or chilled Mexican beer balances the bold flavors of Creamy Southwest Chicken Alfredo – A Flavorful Twist on a Classic Dish perfectly. For sides, try a light, refreshing mango avocado salad to contrast the dish’s creaminess. Alternatively, roasted poblano peppers or a side of cheesy garlic bread add warmth and texture. Each pairing enhances the dish’s Southwest-inspired flair while keeping the meal satisfying.
What makes Creamy Southwest Chicken Alfredo different from traditional Alfredo?
Creamy Southwest Chicken Alfredo adds a bold twist to the classic dish by incorporating flavors like cumin, chili powder, and roasted peppers. The creamy Alfredo sauce gets a kick from these Southwest-inspired ingredients, creating a richer, more complex taste while keeping the velvety texture you love.
ank-math-faq-item">
Can I make Creamy Southwest Chicken Alfredo ahead of time?
Yes, you can prepare Creamy Southwest Chicken Alfredo up to 2 days in advance, but store the sauce and pasta separately to prevent sogginess. Reheat gently on the stove with a splash of milk to restore the creamy texture before serving.
What sides pair well with Creamy Southwest Chicken Alfredo?
For a complete meal, serve Creamy Southwest Chicken Alfredo with garlic bread, a crisp green salad, or roasted vegetables. The dish’s bold flavors also complement lighter sides like black bean salsa or grilled corn for a true Southwest experience.
How spicy is Creamy Southwest Chicken Alfredo?
The spice level in Creamy Southwest Chicken Alfredo can be adjusted to your preference—it typically has mild to medium heat from the Southwest seasonings. For less heat, reduce the chili powder or use mild roasted peppers instead of jalapeños.
div>
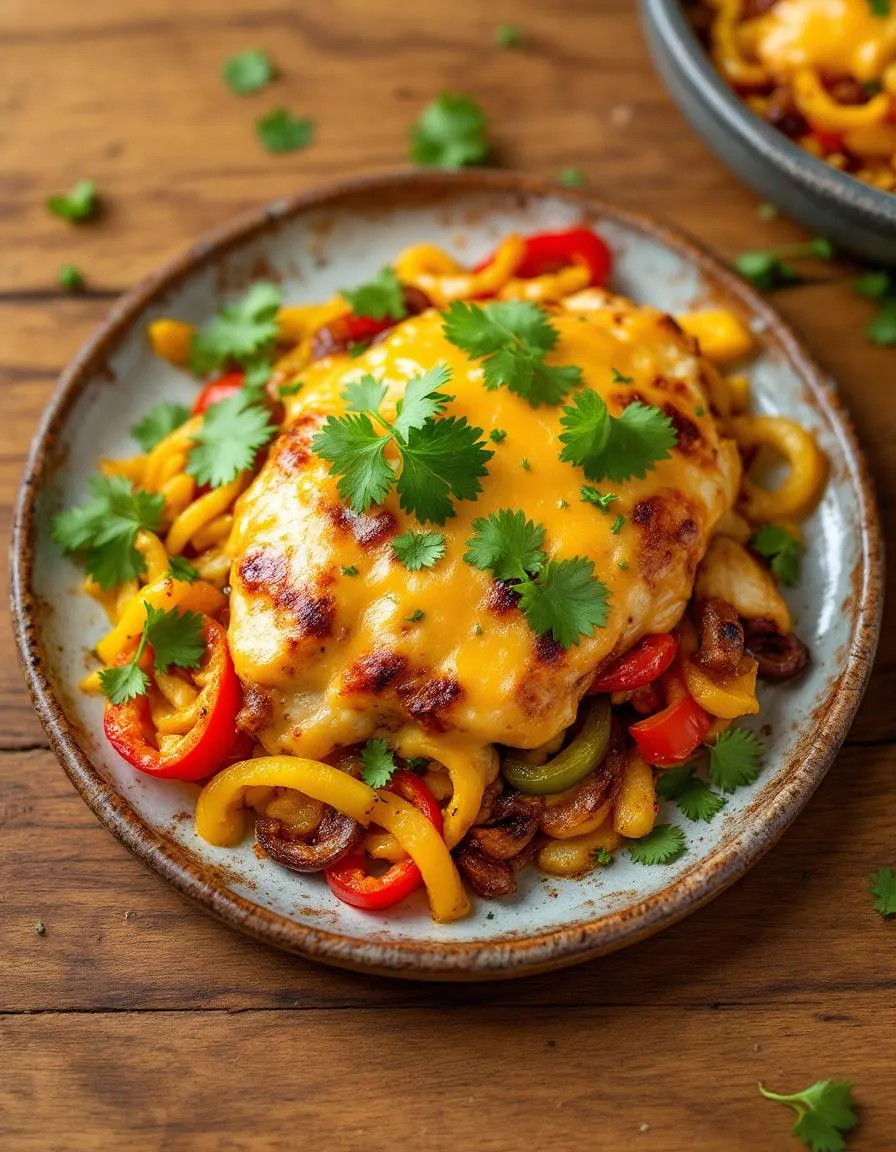
Best Cheesy Baked Fajita Chicken Delight Recipe
Introduction
Craving a meal that’s bursting with flavor yet simple enough for a busy weeknight? Say hello to Cheesy Baked Fajita Chicken Delight, a dish that wraps tender chicken, vibrant peppers, and gooey cheese into one irresistible package. Whether you’re feeding a crowd or just treating yourself, this recipe delivers comfort, excitement, and a touch of Tex-Mex magic in every bite. Plus, it’s the kind of meal that makes you feel like a kitchen hero without the fuss.
Cheesy Baked Fajita Chicken Delight combines juicy chicken breasts with classic fajita flavors—think smoky paprika, zesty lime, and sizzling bell peppers—all baked under a blanket of melted cheese. What sets it apart? First, it’s incredibly versatile. You can serve it over rice, stuff it into tortillas, or even layer it onto nachos for a fun twist. Second, it’s a crowd-pleaser. Kids love the cheesy goodness, while adults appreciate the bold, well-balanced spices. Finally, it fits perfectly with our blog’s mission: recipes that are approachable, flavorful, and worth every minute. If you’re a fan of dishes like our Creamy Garlic Parmesan Chicken or Sheet Pan Chili Lime Shrimp, you’ll adore this one too.
Why I Love This Recipe
This dish holds a special place in my heart because it’s the ultimate weeknight savior. I first made Cheesy Baked Fajita Chicken Delight on a hectic evening when takeout wasn’t an option, and it instantly became a family favorite. The aroma alone—smoky, cheesy, with a hint of lime—transforms my kitchen into a cozy haven. Best of all, it reminds me of gathering around the table with loved ones, sharing stories, and savoring something truly delicious. Every time I make it, I’m reminded that great food doesn’t have to be complicated to feel extraordinary.
Health and Nutrition
Why it’s good for your body
Cheesy Baked Fajita Chicken Delight packs a nutritious punch while delivering bold flavors. First, the lean chicken breast provides high-quality protein to support muscle growth and repair. Additionally, the colorful bell peppers and onions add a dose of antioxidants, which help combat inflammation. Moreover, the melted cheese offers calcium for strong bones, making this dish a well-rounded choice.
Beyond its protein and vitamins, Cheesy Baked Fajita Chicken Delight includes metabolism-boosting spices like cumin and paprika. These spices not only enhance flavor but also aid digestion. Furthermore, baking instead of frying keeps the dish lower in unhealthy fats. As a result, you enjoy a satisfying meal without unnecessary grease.
Finally, this recipe balances indulgence with nourishment. While the cheese adds richness, the fresh vegetables keep it light and fiber-rich. Therefore, Cheesy Baked Fajita Chicken Delight satisfies cravings while fueling your body. Whether you need a post-workout meal or a family-friendly dinner, it delivers both taste and nutrition.
How it fits in a healthy lifestyle
Cheesy Baked Fajita Chicken Delight fits seamlessly into balanced eating habits. If you follow a high-protein diet, the chicken and cheese help you meet daily goals without excess carbs. For gluten-free eaters, this dish naturally avoids grains, making it a safe and flavorful option. Even better, the veggies add fiber to keep you full longer, reducing unnecessary snacking.
Pair this meal with a side salad or roasted veggies for extra nutrients. If you love meal prepping, Cheesy Baked Fajita Chicken Delight stores well for quick lunches. For more gluten-free ideas, check out our gluten-free dinner recipes. Or, if protein-packed meals are your focus, explore our high-protein meal plan. With simple swaps and smart pairings, this dish adapts to nearly any dietary need.
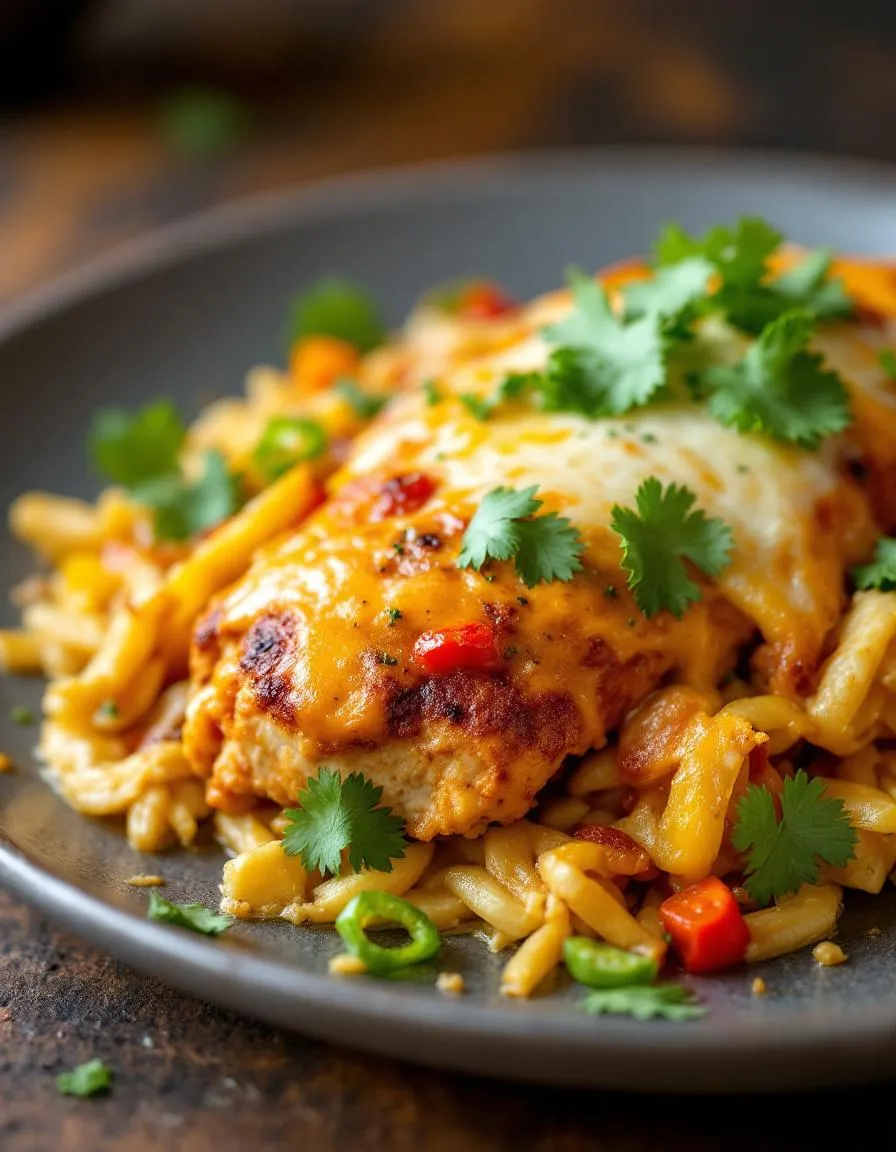
A flavorful and cheesy baked chicken dish with fajita-inspired seasonings, perfect for a quick and delicious dinner.
Ingredients
Scale
For the Crust:
4 boneless, skinless chicken breasts
2 bell peppers (any color), sliced
1 onion, sliced
1 cup shredded cheddar cheese
1 cup shredded Monterey Jack cheese
2 tbsp fajita seasoning
2 tbsp olive oil
1/2 tsp salt
1/2 tsp black pepper
1/4 cup chopped fresh cilantro (optional)
Instructions
1. Prepare the Crust:
Preheat oven to 375°F (190°C).
In a large bowl, toss chicken breasts with olive oil, fajita seasoning, salt, and black pepper until evenly coated.
Place chicken in a baking dish and arrange sliced bell peppers and onions around it.
Bake for 25 minutes or until chicken is cooked through (internal temperature reaches 165°F).
Remove from oven and sprinkle both cheeses evenly over the chicken and vegetables.
Return to oven for 5 minutes or until cheese is melted and bubbly.
Garnish with chopped cilantro if desired and serve hot.
Notes
You can customize the seasonings to taste.
How to Prepare This Dish
Steps and time-saving tips
Start by preheating your oven to 375°F so it’s ready when you finish prepping the Cheesy Baked Fajita Chicken Delight. While the oven heats, grab a large mixing bowl and whisk together olive oil, lime juice, and fajita seasoning for a zesty marinade. Toss your chicken breasts in the mixture, making sure each piece gets fully coated for maximum flavor. Meanwhile, slice bell peppers and onions into thin strips—this ensures they cook evenly and blend perfectly with the chicken. Layer the veggies in a greased baking dish, then place the marinated chicken on top. Cover the dish with foil and bake for 20 minutes to lock in moisture. While it bakes, shred your favorite cheese blend for a gooey finish. Remove the foil, sprinkle the cheese generously, and bake uncovered for another 10 minutes until bubbly and golden. For a time-saving hack, prep the marinade and chop veggies the night before. Serve your Cheesy Baked Fajita Chicken Delight straight from the oven with warm tortillas or cilantro lime rice for a complete meal.
and-learned-from">Mistakes I’ve made and learned from
I once rushed the marinating step for my Cheesy Baked Fajita Chicken Delight, and the chicken turned out bland. Now I let it sit for at least 30 minutes—or even overnight—for deeper flavor. Another time, I overcrowded the baking dish, which steamed the chicken instead of letting it bake properly. Spreading everything in a single layer made a huge difference! If you’re new to baking chicken, check out my guide on perfectly cooked chicken to avoid dryness. Also, don’t skip the foil step like I did once—the cheese browned too fast before the chicken finished cooking. For more foolproof tips, my kitchen hacks post covers how to balance prep and baking times like a pro.
Cultural Connection and Variations
Where this recipe comes from
Cheesy Baked Fajita Chicken Delight carries the vibrant spirit of Tex-Mex cuisine, blending bold Mexican flavors with hearty American comfort food. While fajitas themselves trace back to ranch workers in Northern Mexico, this baked version adds a cozy twist by layering melty cheese and tender chicken under a golden crust. Families in Texas often serve it during weekend gatherings, where the aroma of sizzling peppers and spices fills the air. Meanwhile, in coastal regions, cooks might swap chicken for shrimp or add a splash of citrus for a brighter kick.
In my own kitchen, Chee
sy Baked Fajita Chicken Delight became a weeknight hero after a friend shared her abuela’s secret: a dash of smoked paprika for depth. Some versions in the Southwest skip the oven entirely, grilling the ingredients for a smokier flavor. No matter the method, the dish always brings people together, whether at a casual potluck or a festive Cinco de Mayo spread.
How it fits in today’s cooking
Today, Cheesy Baked Fajita Chicken Delight fits perfectly into our love for fuss-free, crowd-pleasing meals. Busy home cooks adore its one-pan simplicity, while meal preppers reheat portions for easy lunches. During holidays, it’s a star at game-day parties or alongside Tex-Mex side dishes like cilantro lime rice. Health-conscious tweaks, like using Greek yogurt instead of sour cream, keep it fresh for modern diets.
Seasonal twists also keep it exciting. In summer, farmers’ market veggies like zucchini or corn add sweetness, while winter calls for heartier toppings like black beans. For more inspiration on balancing flavors, check out these quick dinner hacks. Whether you stick to tradition or experiment, this dish proves that comfort food never goes out of style.
>Taste and Texture
What makes it delicious
Cheesy Baked Fajita Chicken Delight bursts with bold, smoky flavors and a satisfying contrast of textures. Tender, juicy chicken soaks up vibrant fajita spices, while melted cheese adds a rich, gooey layer that pulls apart with every bite. Meanwhile, caramelized peppers and onions bring a sweet, slightly crisp balance to each forkful. The aroma alone—a mix of sizzling garlic, cumin, and bubbling cheese—will have everyone gathering around the table. Whether you serve it straight from the oven or let it rest for a minute, Cheesy Baked Fajita Chicken Delight delivers a comforting yet exciting meal that feels indulgent and wholesome at once.
Boosting the flavor
For an extra kick, swap Monterey Jack cheese with pepper jack or sprinkle crushed tortilla chips on top for crunch. A drizzle of creamy chipotle sauce adds smoky depth, while fresh cilantro and lime zest brighten the dish. If you love heat, toss in sliced jalapeños or a pinch of chili flakes. Pair it with cilantro lime rice to round out the meal. With just a few tweaks, you can customize Cheesy Baked Fajita Chicken Delight to match any craving.
Tips for Success
Best practices for results
Always preheat your oven before baking Cheesy Baked Fajita Chicken Delight to ensure even cooking. For maximum flavor, marinate the chicken for at least 30 minutes, though overnight works even better. Additionally, use freshly shredded cheese instead of pre-shredded for a smoother melt. To prevent dryness, cover the dish with foil during the first half of baking, then remove it for a golden finish. Finally, let the dish rest for 5 minutes before serving so the flavors settle perfectly.
Mistakes to avoid
Avoid overcrowding the baking dish, as this can lead to uneven cooking and soggy results. Instead, spread the chicken and veggies in a single layer for crisp edges. Also, don’t skip the step of patting the chicken dry before seasoning—excess moisture can dilute the spices. For more seasoning tips, check out our guide on balancing spices. Another common mistake is overbaking the dish, which dries out the chicken. Use a meat thermometer to confirm it reaches 165°F, and for more on perfect poultry, see our chicken doneness guide.
Serving and Pairing Suggestions
How to serve this dish
Bring your Cheesy Baked Fajita Chicken Delight to life with vibrant presentation. For a family dinner, layer it over a bed of cilantro-lime rice and top with fresh avocado slices. Alternatively, serve it straight from the skillet for a rustic, shareable centerpiece at potlucks. Brighten the dish with a sprinkle of chopped cilantro or a drizzle of crema. Since it’s hearty yet versatile, this recipe shines at weeknight meals, game-day gatherings, or even festive brunches. For extra flair, pair it with warm tortillas or toasted bread to scoop up every cheesy bite.
h-it">What goes well with it
Balance the bold flavors of Cheesy Baked Fajita Chicken Delight with cooling sides like a crisp mango avocado salad or tangy lime-kissed slaw. For heartier meals, try serving it alongside smoky black beans or roasted sweet potatoes. A chilled margarita or citrusy sparkling water cuts through the richness perfectly. If you love dipping sauces, whip up a batch of our creamy chipotle dressing for an extra kick. Each pairing enhances the dish’s zesty, cheesy goodness without overpowering it.
What ingredients do I need for Cheesy Baked Fajita Chicken Delight?
You’ll need boneless chicken breasts, bell peppers, onions, fajita seasoning, shredded cheese (like cheddar or Monterey Jack), and optional toppings like sour cream or cilantro. Cheesy Baked Fajita Chicken Delight combines these simple ingredients for a flavorful, one-pan meal.
ank-math-faq-item">
How long does it take to bake Cheesy Baked Fajita Chicken Delight?
Cheesy Baked Fajita Chicken Delight typically bakes for 25-30 minutes at 375°F. The chicken should reach an internal temperature of 165°F, and the cheese should be fully melted and bubbly. Prep time is just 10-15 minutes, making it a quick weeknight dinner.
Can I make Cheesy Baked Fajita Chicken Delight ahead of time?
Yes! Assemble the dish (without baking) and refrigerate it for up to 24 hours before cooking. For best results, let Cheesy Baked Fajita Chicken Delight sit at room temperature for 15 minutes before baking to ensure even cooking.
What sides go well with Cheesy Baked Fajita Chicken Delight?
Pair Cheesy Baked Fajita Chicken Delight with Mexican rice, refried beans, or a fresh avocado salad. Warm tortillas or tortilla chips also complement the dish perfectly for a complete Tex-Mex experience.
div>
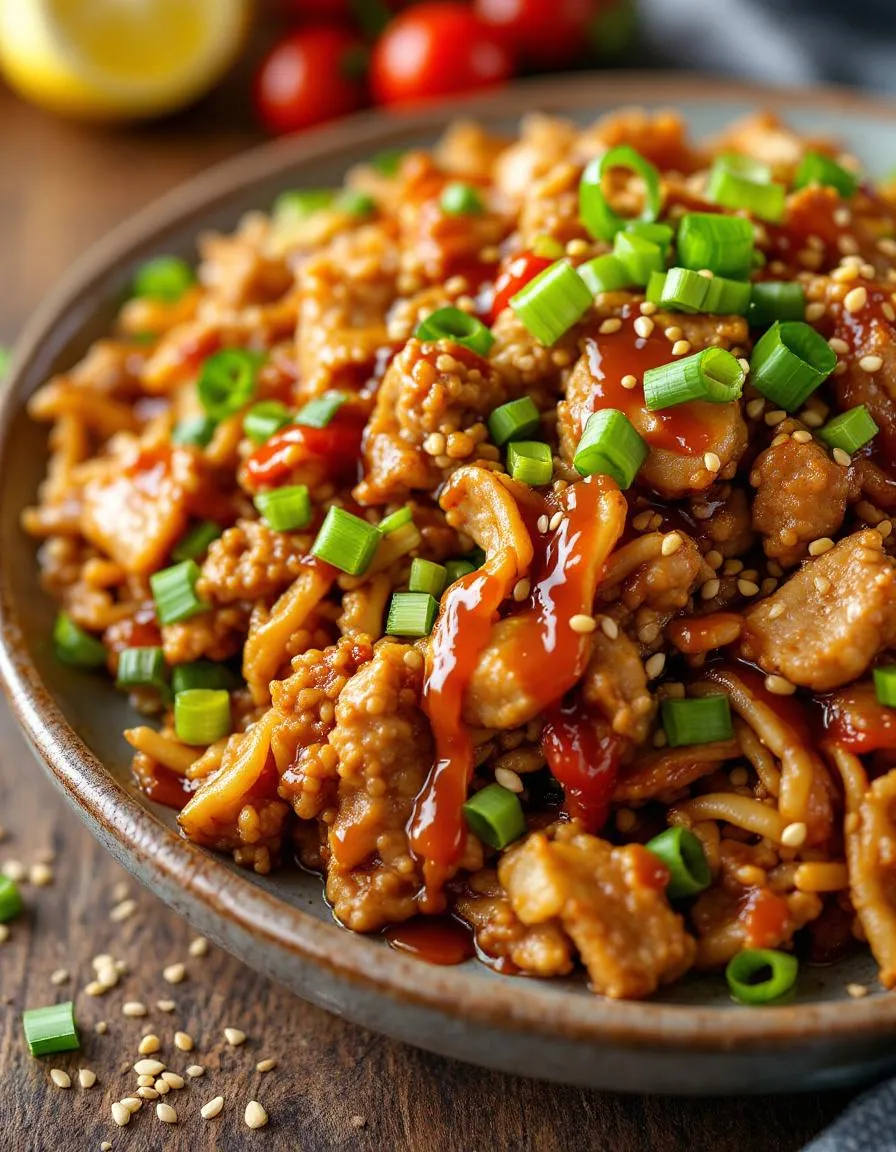
Easy Ground Turkey Teriyaki Stir Fry Recipe
Introduction
Craving a quick, flavorful meal that doesn’t skimp on taste or nutrition? Look no further than this Flavorful Ground Turkey Teriyaki Stir Fry. Whether you’re juggling a busy schedule or simply want a healthier twist on takeout, this dish delivers bold flavors and satisfying textures in under 30 minutes. Plus, it’s packed with protein and veggies, making it a win for both your taste buds and your well-being. Let’s dive into why this recipe deserves a permanent spot in your weeknight rotation.
Flavorful Ground Turkey Teriyaki Stir Fry combines tender ground turkey, crisp vegetables, and a homemade teriyaki sauce that strikes the perfect balance of sweet and savory. Unlike traditional stir-fries that rely on heavy sauces or excessive oil, this version keeps things light without sacrificing depth of flavor. Ground turkey, a lean and versatile protein, soaks up the rich teriyaki glaze while staying juicy. Meanwhile, colorful bell peppers, broccoli, and snap peas add crunch and nutrients, creating a well-rounded meal. This recipe aligns perfectly with our blog’s mission to share easy, wholesome dishes that fit modern lifestyles. If you love quick dinners, you’ll also enjoy our 15-Minute Honey Garlic Shrimp or our One-Pan Lemon Herb Chicken for equally effortless options.
Why I Love This Recipe
This Flavorful Ground Turkey Teriyaki Stir Fry holds a special place in my kitchen because it’s the ultimate weeknight lifesaver. On hectic evenings, I appreciate how quickly it comes together without compromising on flavor. The aroma of garlic and ginger sizzling in the pan instantly lifts my mood, and the vibrant colors make even a simple dinner feel exciting. Plus, my family adores it—even the picky eaters clean their plates. It’s a reminder that healthy eating doesn’t have to be complicated or bland, and that’s a lesson I love sharing with all of you.
Health and Nutrition
Why it’s good for your body
Flavorful Ground Turkey Teriyaki Stir Fry packs a nutritious punch while delighting your taste buds. First, lean ground turkey serves as an excellent protein source, helping you build muscle and stay full longer. Additionally, it contains less saturated fat than beef, making it a heart-smart choice. Meanwhile, the colorful veggies in this dish deliver essential vitamins like A and C, which boost immunity and skin health.
Moreover, the teriyaki sauce adds a savory-sweet flavor without overwhelming the dish with sugar. By using a balanced homemade or reduced-sodium version, you keep the sodium in check. Furthermore, Flavorful Ground Turkey Teriyaki Stir Fry includes fiber-rich ingredients like bell peppers and broccoli, aiding digestion and keeping blood sugar stable. The dish also provides iron and zinc, supporting energy levels and immune function.
Finally, this stir fry comes together quickly, meaning you can enjoy a wholesome meal without sacrificing time or nutrition. Whether you need a post-workout refuel or a family-friendly dinner, Flavorful Ground Turkey Teriyaki Stir Fry covers all the bases. With its lean protein, vibrant veggies, and mindful sauce, it’s a win for your body and your schedule.
How it fits in a healthy lifestyle
Flavorful Ground Turkey Teriyaki Stir Fry fits seamlessly into a balanced diet, whether you’re focused on high-protein meals, gluten-free eating, or simply want a nutrient-dense dinner. The lean turkey keeps calories in check while delivering 20+ grams of protein per serving, perfect for fitness goals. Pair it with cauliflower rice for a low-carb twist, or serve over brown rice for sustained energy.
For those managing heart health, this dish skips heavy oils and relies on minimal added fats. The veggies also contribute potassium, which helps regulate blood pressure. If you’re exploring gluten-free options, simply swap regular soy sauce for tamari in the teriyaki sauce. Need more weeknight dinner inspiration? Check out our healthy meal prep ideas to streamline your routine. Or, if you love balancing flavors, our Asian-inspired recipes offer more ways to enjoy wholesome, tasty meals. Flavorful Ground Turkey Teriyaki Stir Fry proves that eating well doesn’t mean skipping flavor or convenience.
A quick and delicious stir fry with ground turkey and vegetables coated in a homemade teriyaki sauce.
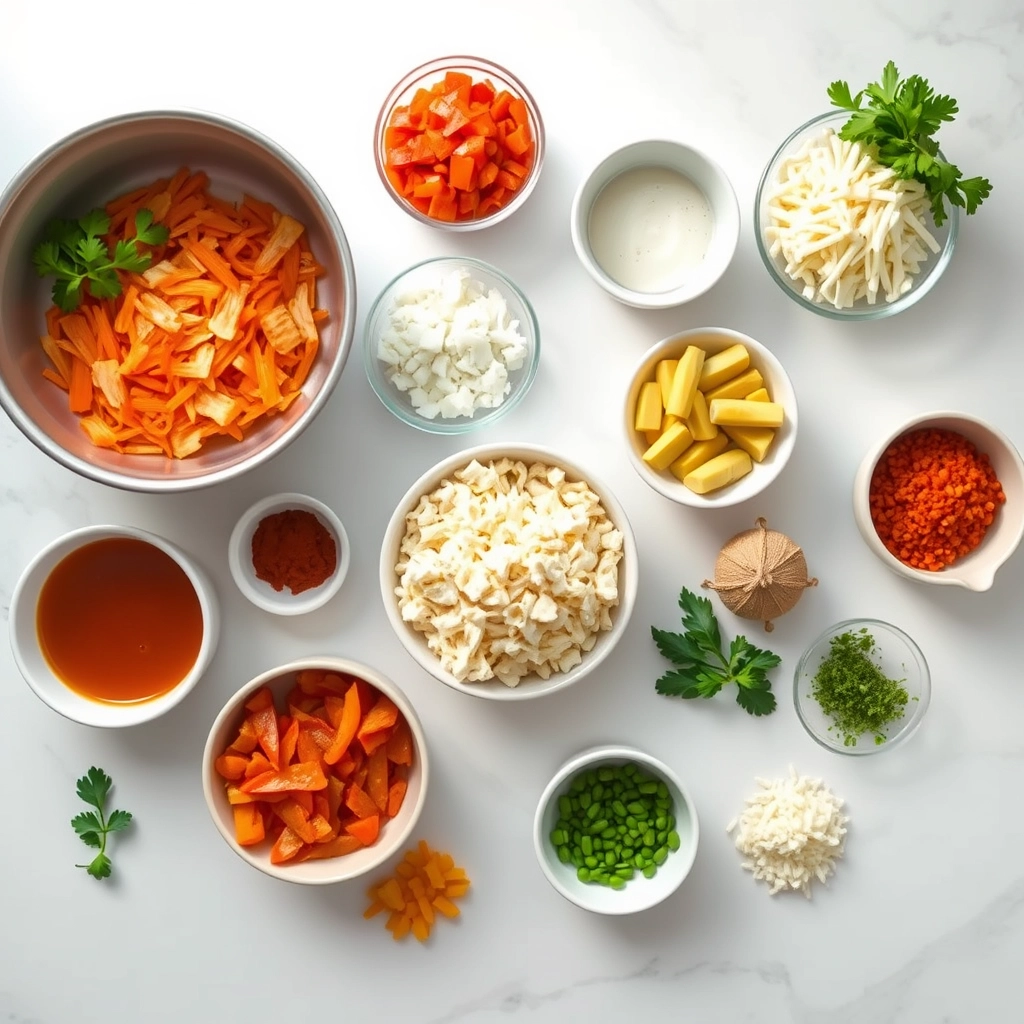
Ingredients
Scale
For the Crust:
1 lb ground turkey
2 cups broccoli florets
1 red bell pepper, sliced
1 carrot, julienned
3 cloves garlic, minced
1 tbsp ginger, grated
1/4 cup soy sauce
2 tbsp honey
1 tbsp rice vinegar
1 tsp sesame oil
2 tbsp water
1 tbsp cornstarch
2 green onions, sliced
1 tbsp sesame seeds
Instructions
1. Prepare the Crust:
In a small bowl, whisk together soy sauce, honey, rice vinegar, sesame oil, water, and cornstarch to make the teriyaki sauce. Set aside.
Heat a large skillet or wok over medium-high heat. Add ground turkey and cook until browned, breaking it apart with a spoon.
Add garlic and ginger to the skillet, stirring for 30 seconds until fragrant.
Add broccoli, bell pepper, and carrot to the skillet. Stir-fry for 4-5 minutes until vegetables are tender-crisp.
Pour the teriyaki sauce over the turkey and vegetables. Stir well to coat and cook for 2-3 minutes until the sauce thickens.
Garnish with sliced green onions and sesame seeds before serving.
Notes
You can customize the seasonings to taste.
“`html
s-dish">How to Prepare This Dish
Steps and time-saving tips
Start by heating a large skillet or wok over medium-high heat and adding a drizzle of oil. Once the oil shimmers, toss in the ground turkey and break it apart with a wooden spoon. Cook until it browns evenly, stirring occasionally to prevent sticking. Meanwhile, whisk together the teriyaki sauce ingredients—soy sauce, honey, garlic, ginger, and a splash of rice vinegar—in a small bowl. Once the turkey is fully cooked, pour the sauce over it and stir well to coat every bite. Let the mixture simmer for a few minutes until the sauce thickens slightly. Toss in your favorite stir-fry veggies, like bell peppers or snap peas, and cook just until they’re crisp-tender. Serve the Flavorful Ground Turkey Teriyaki Stir Fry over steamed rice or noodles, garnished with sesame seeds and green onions. For a quicker meal, prep the sauce ahead or use pre-chopped veggies. If you’re short on time, swap homemade teriyaki for a high-quality store-bought version, but adjust the sweetness to taste.
Mistakes I’ve made and learned from
Early on, I overcrowded the skillet, which steamed the turkey instead of browning it. Now, I cook in batches or use a wider pan for better texture. Another blunder? Overcooking the veggies until they turned mushy. I’ve since learned to add them late in the process for a crisp bite. If you’re new to stir-frying, check out my guide to perfect stir-fry techniques for more pro tips. Also, I once used low-sodium soy sauce without adjusting the seasoning, leaving the dish bland. Taste as you go, and don’t shy away from a pinch of salt or extra garlic. For more sauce-balancing tricks, my Asian flavor balancing post breaks it down simply.
The Flavorful Ground Turkey Teriyaki Stir Fry carries a delicious blend of East-meets-West inspiration. While teriyaki sauce traces its roots to Japan, where chefs traditionally glaze fish or meat with a sweet-savory soy-based sauce, this recipe takes a modern twist by using ground turkey for a leaner, quicker meal. In Japan, you might find teriyaki served over grilled eel or chicken, but here, we swap in ground turkey for a protein-packed weeknight dinner.
Across Asia, stir-fries vary wildly. In Hawaii, loco moco tops rice with a hamburger patty and gravy, while Korean bibimbap mixes rice with veggies and gochujang. The Flavorful Ground Turkey Teriyaki Stir Fry borrows the speed of stir-frying but keeps the sticky-sweet teriyaki charm. Some families add pineapple for tang or swap in ground chicken. My aunt even sneaks in extra ginger for a spicy kick. No matter the version, the dish stays a crowd-pleaser.
ays-cooking">How it fits in today’s cooking
Today, the Flavorful Ground Turkey Teriyaki Stir Fry fits perfectly into busy lives. It cooks in under 30 minutes, making it ideal for weeknights or meal prep. Health-conscious cooks love it because turkey packs protein without excess fat. Plus, it’s versatile—serve it over rice, quinoa, or even zucchini noodles for a low-carb twist.
Modern kitchens also tweak the recipe to match dietary needs. For example, coconut aminos replace soy sauce in gluten-free versions, and honey swaps in for refined sugar. Some cooks pair it with a side of garlic parmesan roasted broccoli for extra veggies. Others turn it into a filling for potstickers, proving how adaptable this dish is. Whether you crave comfort food or a light dinner, this stir fry delivers.
Taste and Texture
What makes it delicious
Flavorful Ground Turkey Teriyaki Stir Fry bursts with savory-sweet depth, thanks to a glossy teriyaki glaze that coats every bite. The ground turkey soaks up the rich, umami sauce, while caramelized onions and garlic add a fragrant, slightly sweet backbone. Crisp bell peppers and snap peas bring a refreshing crunch, balancing the tender, juicy meat. Meanwhile, a hint of ginger and sesame oil lingers in the background, warming each forkful with just the right amount of spice. Every mouthful of Flavorful Ground Turkey Teriyaki Stir Fry delivers a satisfying contrast—chewy, velvety, and crisp—all at once.
r">Boosting the flavor
For an extra punch, try swapping ground turkey for ground chicken or beef, which adds a deeper, bolder richness. A sprinkle of toasted sesame seeds or chopped green onions elevates the nutty, fresh notes. If you love heat, a drizzle of spicy sriracha mayo or a dash of red pepper flakes amps up the kick. For a tangy twist, toss in a splash of pineapple juice or serve with a side of quick-pickled vegetables. Small tweaks make this dish endlessly adaptable—so get creative!
Tips for Success
Best practices for results
Always brown the ground turkey thoroughly before adding sauces to develop deep flavor in your Flavorful Ground Turkey Teriyaki Stir Fry. Meanwhile, prep all vegetables in advance so they cook evenly. For the best texture, stir the teriyaki sauce into the turkey just before serving to prevent overcooking. Additionally, taste and adjust seasoning at the end since soy sauce can vary in saltiness. Finally, let the dish rest for a minute or two before serving to allow flavors to meld.
>Mistakes to avoid
Avoid overcrowding the pan, as this steams the turkey instead of browning it. Instead, cook in batches if needed for crispier results. Also, don’t skip toasting the sesame seeds—they add a nutty crunch that elevates the Flavorful Ground Turkey Teriyaki Stir Fry. For more stir-fry techniques, check out our guide on perfect stir-fry tips. Another common mistake is using bottled teriyaki sauce with high fructose corn syrup, which can make the dish overly sweet. Instead, try our homemade teriyaki sauce for balanced flavor.
Serving and Pairing Suggestions
How to serve this dish
Flavorful Ground Turkey Teriyaki Stir Fry shines when you serve it fresh and steaming hot. For a restaurant-worthy presentation, pile it high over a bed of jasmine rice and garnish with sesame seeds and thinly sliced green onions. Alternatively, try serving it in lettuce cups for a fun, hands-on meal that’s perfect for casual gatherings. If you’re hosting a weeknight dinner, pair it with colorful stir-fried veggies to make the dish pop visually. This versatile recipe also works well for meal prep—simply pack it into bento boxes with a side of pickled ginger for a lunch that feels special.
What goes well with it
A crisp, chilled glass of riesling balances the sweet-savory notes of Flavorful Ground Turkey Teriyaki Stir Fry beautifully. For a non-alcoholic option, try sparkling ginger lemonade—its zesty kick cuts through the rich teriyaki glaze. On the side, serve steamed broccoli or our popular Garlic Butter Noodles for extra comfort. If you love bold flavors, drizzle everything with a spoonful of our Spicy Mayo Sauce to add creamy heat. Finally, end the meal with fresh pineapple slices to cleanse the palate and echo the dish’s tropical undertones.
What vegetables go well with Flavorful Ground Turkey Teriyaki Stir Fry?
Bell peppers, broccoli, snap peas, and carrots pair perfectly with Flavorful Ground Turkey Teriyaki Stir Fry. These veggies add crunch and color while absorbing the delicious teriyaki sauce. For extra flavor, try adding mushrooms or zucchini.
Can I make Flavorful Ground Turkey Teriyaki Stir Fry ahead of time?
Yes! Flavorful Ground Turkey Teriyaki Stir Fry keeps well in the fridge for 3-4 days. Store it in an airtight container and reheat gently in a skillet or microwave, adding a splash of water if needed to refresh the sauce.
ank-math-faq-item">
How do I prevent my ground turkey from drying out in stir fry?
For juicy Flavorful Ground Turkey Teriyaki Stir Fry, cook the turkey just until no pink remains (about 5-6 minutes). The teriyaki sauce helps keep it moist. Avoid overcooking, and consider adding a tablespoon of oil or broth if needed.
What can I serve with Flavorful Ground Turkey Teriyaki Stir Fry besides rice?
Try serving Flavorful Ground Turkey Teriyaki Stir Fry over quinoa, cauliflower rice, or noodles for variety. It also pairs well with a simple side salad or steamed edamame for a complete meal.