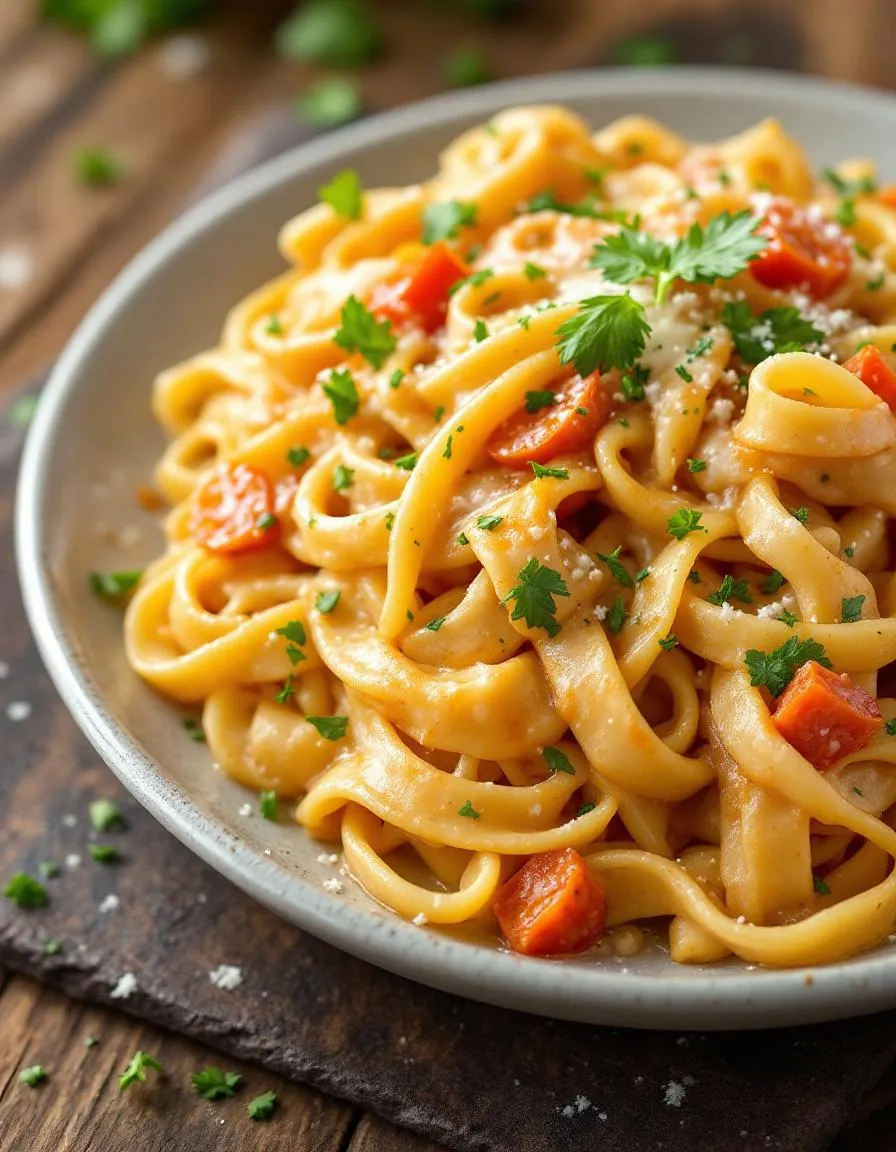
There’s something magical about walking into Olive Garden and being greeted by the rich aroma of creamy pasta dishes. Now, imagine bringing that same comforting flavor home with minimal effort. That’s exactly what this Creamy Crockpot Olive Garden Chicken Pasta delivers—a luscious, restaurant-quality meal that simmers effortlessly in your slow cooker while you tackle your day. Whether you’re craving a cozy weeknight dinner or need a crowd-pleasing dish for gatherings, this recipe wraps you in warmth with every bite.
This Creamy Crockpot Olive Garden Chicken Pasta combines tender chicken, al dente pasta, and a velvety sauce infused with Italian herbs and Parmesan. Unlike fussy recipes, the slow cooker does most of the work, melding flavors into a dish that tastes like it took hours of stirring—but didn’t. It’s perfect for busy home cooks who want indulgence without the hassle, and it pairs beautifully with a crisp salad or garlic bread. If you love easy, flavorful meals, you’ll adore our Crockpot Creamy Tuscan Chicken, which shares the same effortless appeal. Plus, it’s a fantastic way to repurpose leftover chicken, making it as practical as it is delicious. Our blog celebrates approachable, family-friendly recipes, and this dish fits right in—offering comfort, convenience, and a touch of restaurant flair.
Why I Love This Recipe
This recipe holds a special place in my heart because it reminds me of Sunday dinners with my family. My mom would layer ingredients into the crockpot before church, and we’d return to a kitchen smelling like our favorite Italian spot. Now, I make this Creamy Crockpot Olive Garden Chicken Pasta for my own kids, and it’s become our go-to for busy nights and potlucks alike. For more slow cooker inspiration, try our Slow Cooker Honey Garlic Chicken—it’s another weeknight hero that never disappoints.
Health and Nutrition
Why it’s good for your body
Creamy Crockpot Olive Garden Chicken Pasta delivers a satisfying meal packed with nutrients. First, the lean chicken breast provides high-quality protein to support muscle growth and repair. Additionally, the slow-cooking process locks in moisture, ensuring tender bites without excess fat. Moreover, the creamy sauce, when made with Greek yogurt or light cream, adds richness while keeping calories in check.
Beyond protein, this dish includes wholesome ingredients like garlic and herbs, which offer immune-boosting and anti-inflammatory benefits. Furthermore, the pasta supplies complex carbohydrates for steady energy, especially if you opt for whole-grain varieties. Meanwhile, the olive oil in the recipe contributes heart-healthy monounsaturated fats. As a result, Creamy Crockpot Olive Garden Chicken Pasta balances macronutrients while delivering deep, comforting flavors.
Finally, the convenience of a crockpot means you can prep this meal ahead for busy days. Since it simmers slowly, the flavors meld beautifully without needing heavy creams or excessive salt. Therefore, Creamy Crockpot Olive Garden Chicken Pasta becomes a smart choice for both taste and nutrition. Whether you need a post-workout refuel or a family-friendly dinner, this dish covers all the bases.
How it fits in a healthy lifestyle
Creamy Crockpot Olive Garden Chicken Pasta easily adapts to various dietary needs. For a gluten-free version, swap regular pasta for chickpea or brown rice noodles. If you prioritize heart health, use olive oil and lean chicken to keep saturated fats low. High-protein seekers can double the chicken portion or add white beans for extra plant-based protein.
This meal also fits into meal prep routines, saving time without sacrificing nutrition. Pair it with a side salad or steamed veggies for added fiber, like these easy meal prep ideas. For those watching portions, divide leftovers into containers for balanced lunches. And if you love flavorful yet light dinners, explore our quick healthy dinners for more inspiration. Creamy Crockpot Olive Garden Chicken Pasta proves that comfort food can align with your wellness goals.
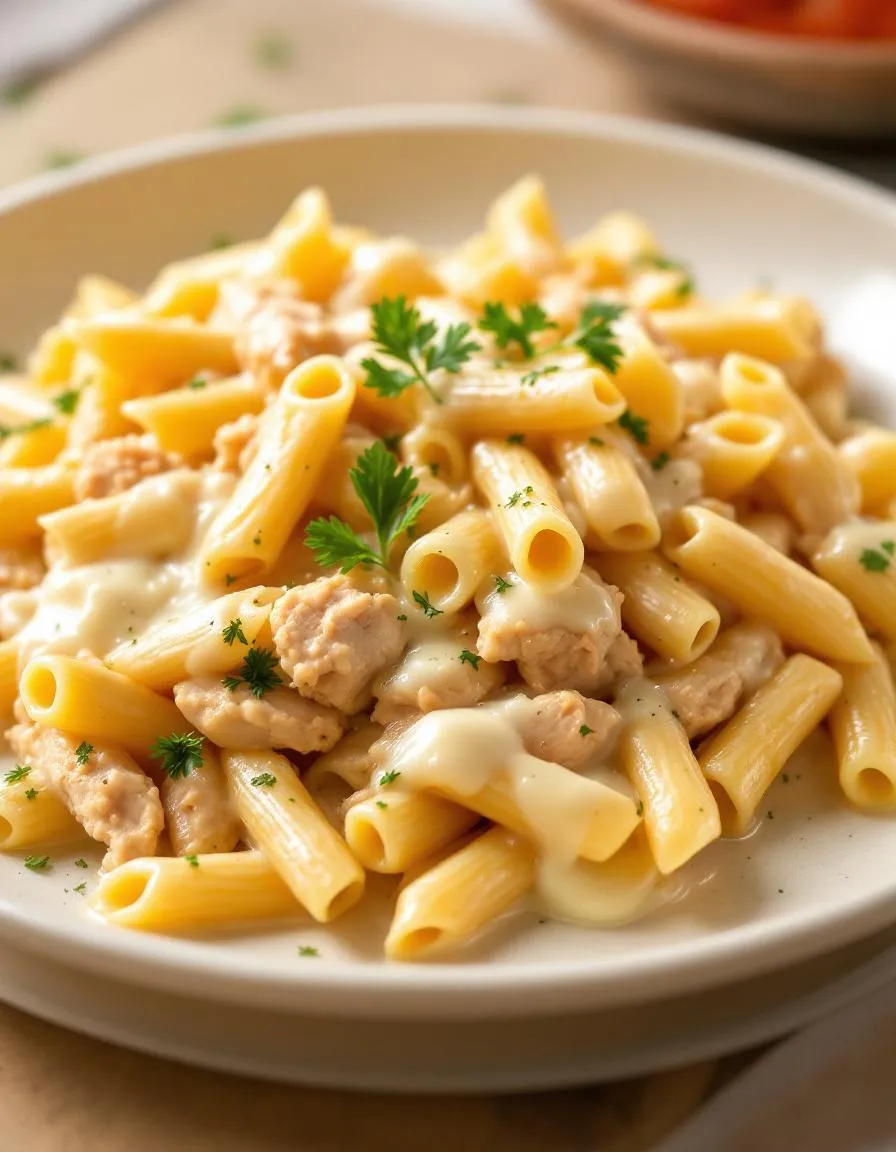
A rich and creamy pasta dish inspired by Olive Garden, made effortlessly in a crockpot with tender chicken and a decadent sauce.
Ingredients
Scale
For the Crust:
2 lbs boneless, skinless chicken breasts
1 (16 oz) jar Alfredo sauce
1 (24 oz) jar marinara sauce
1 cup heavy cream
1 tsp garlic powder
1 tsp Italian seasoning
1/2 tsp salt
1/2 tsp black pepper
1 lb penne pasta
1 cup shredded mozzarella cheese
1/4 cup grated Parmesan cheese
Instructions
1. Prepare the Crust:
Place chicken breasts in the crockpot.
In a bowl, mix Alfredo sauce, marinara sauce, heavy cream, garlic powder, Italian seasoning, salt, and pepper. Pour over chicken.
Cover and cook on low for 6 hours or high for 3 hours, until chicken is tender.
Shred chicken with two forks and stir into the sauce.
Cook pasta according to package instructions, then drain and add to the crockpot. Stir to combine.
Sprinkle mozzarella and Parmesan cheese on top, cover until cheese melts (about 5 minutes).
Notes
You can customize the seasonings to taste.
How to Prepare This Dish
Steps and time-saving tips
Start by seasoning your chicken breasts with salt, pepper, and Italian seasoning for that signature Olive Garden flavor. Then, layer them at the bottom of your crockpot. Next, pour in the chicken broth and Alfredo sauce, making sure the chicken is fully submerged. Cover and cook on low for 4-5 hours or until the chicken shreds easily with a fork. Meanwhile, boil your pasta separately until al dente, then drain and set aside. Once the chicken is tender, shred it directly in the crockpot and stir in the cooked pasta, sun-dried tomatoes, and spinach. Let everything simmer for 10 more minutes so the flavors meld. For a creamier texture, fold in a splash of heavy cream or grated Parmesan right before serving. Garnish with fresh basil and a sprinkle of red pepper flakes if you like a little heat. To save time, use pre-shredded chicken or a store-bought rotisserie chicken, but adjust cooking time since it won’t need as long to tenderize.
and-learned-from">Mistakes I’ve made and learned from
I once overcooked the chicken by leaving it in the crockpot too long, which turned it dry and stringy. Now I set a timer and check for doneness at the 4-hour mark. Another mistake? Skipping the pasta cooking step and tossing uncooked noodles into the crockpot—they absorbed too much liquid and turned mushy. Lesson learned: always cook pasta separately for the perfect texture. If you’re new to crockpot meals, my guide on crockpot basics covers these pitfalls in detail. And if you love creamy dishes, my Alfredo sauce hacks will help you nail the consistency every time.
Cultural Connection and Variations
Where this recipe comes from
Imagine walking into an Olive Garden on a chilly evening, greeted by the aroma of garlic, herbs, and simmering sauces. That’s the vibe Creamy Crockpot Olive Garden Chicken Pasta captures—a cozy, Italian-American classic with a slow-cooked twist. While Olive Garden popularized this dish in the U.S., its roots stretch back to Italy’s love for rich, creamy pasta sauces like Alfredo. Families in Rome might use fresh fettuccine and hand-whisked sauce, but our crockpot version brings the same comfort with minimal effort.
Across the globe, simil
ar dishes take on local flavors. In Sweden, they might add dill and sour cream for a Nordic twist. Meanwhile, in Mexico, cooks often toss in roasted poblano peppers for a smoky kick. My grandma, however, swore by adding a splash of white wine and extra Parmesan—her “secret” touch. Whether you stick to the classic or tweak it, Creamy Crockpot Olive Garden Chicken Pasta always feels like a hug in a bowl.
How it fits in today’s cooking
Today, this dish thrives as a weeknight hero. Busy parents love dumping ingredients into a crockpot and coming home to a ready-to-serve meal. It’s also a star at potlucks, especially during the holidays when creamy pasta dishes steal the show. Modern cooks often lighten it up with Greek yogurt or gluten-free pasta, proving its versatility.
For those craving more easy comfort food, try pairing it with garlic butter steak bites for a hearty feast. Or, if you’re meal prepping, pair it with air fryer roasted veggies for balance. Creamy Crockpot Olive Garden Chicken Pasta isn’t just a recipe—it’s a timeless tradition that adapts to every kitchen and season.
>Taste and Texture
What makes it delicious
Creamy Crockpot Olive Garden Chicken Pasta wraps you in rich, velvety comfort from the first bite. The tender chicken melts in your mouth, while the al dente pasta holds just enough bite to balance the luscious sauce. Garlic and Parmesan infuse every forkful with a savory, umami depth, and sun-dried tomatoes add a sweet-tangy pop. Meanwhile, the creamy Alfredo sauce coats everything in a silky, indulgent finish. As it simmers, the dish fills your kitchen with an irresistible aroma of herbs and roasted garlic. Whether you crave hearty comfort or restaurant-quality flavor, Creamy Crockpot Olive Garden Chicken Pasta delivers both effortlessly.
Boosting the flavor
For an extra flavor kick, try stirring in a handful of fresh spinach or artichoke hearts during the last 30 minutes of cooking—they’ll add brightness and texture. If you love heat, a pinch of red pepper flakes or a drizzle of homemade chili oil will elevate the dish with a spicy contrast. Crumbled bacon or toasted pine nuts also make fantastic crunchy toppings. For a tangy twist, swap half the Alfredo sauce with sun-dried tomato pesto, blending creamy and zesty flavors. With these tweaks, Creamy Crockpot Olive Garden Chicken Pasta becomes even more unforgettable.
Tips for Success
Best practices for results
Always sear the chicken before adding it to the crockpot for deeper flavor in your Creamy Crockpot Olive Garden Chicken Pasta. Additionally, stir the pasta sauce occasionally during cooking to prevent sticking. For the creamiest texture, use full-fat heavy cream and freshly grated Parmesan. Finally, add the uncooked pasta during the last 30 minutes to avoid overcooking.
Mistakes to avoid
Avoid overfilling the crockpot, as this can lead to uneven cooking. Instead, leave at least an inch of space at the top. Many cooks also forget to season the dish properly, so taste and adjust the salt and pepper before serving. For more crockpot tips, check out our guide on crockpot basics. Another common mistake is using pre-shredded cheese, which often contains anti-caking agents that affect creaminess. For better results, follow our cheese selection guide.
Serving and Pairing Suggestions
How to serve this dish
Bring out the comfort-food charm of Creamy Crockpot Olive Garden Chicken Pasta by serving it family-style in a warm, shallow bowl. For a restaurant-worthy touch, garnish with freshly grated Parmesan, a sprinkle of chopped parsley, and a crack of black pepper. Meanwhile, if you’re hosting a cozy dinner party, layer individual portions over garlic-rubbed crostini for a playful twist. This dish shines at potlucks, weeknight dinners, or even holiday gatherings—just pair it with crusty bread to soak up every bit of the creamy sauce.
h-it">What goes well with it
Balance the richness of Creamy Crockpot Olive Garden Chicken Pasta with a crisp, tangy side like our Easy Mediterranean Salad, which adds refreshing contrast. For a heartier meal, try roasted garlic green beans or a warm loaf of Homemade Focaccia Bread. Meanwhile, a chilled glass of Pinot Grigio or sparkling lemonade cuts through the creaminess beautifully, making each bite even more satisfying.
Can I make Creamy Crockpot Olive Garden Chicken Pasta without heavy cream?
Yes! You can substitute heavy cream with half-and-half, whole milk, or even coconut milk for a lighter version of Creamy Crockpot Olive Garden Chicken Pasta. The sauce may be slightly thinner, but it will still deliver rich flavor.
ank-math-faq-item">
How long should I cook Creamy Crockpot Olive Garden Chicken Pasta on low?
For best results, cook Creamy Crockpot Olive Garden Chicken Pasta on low for 4-6 hours. This ensures the chicken becomes tender and the flavors meld perfectly without overcooking the pasta.
What type of pasta works best for Creamy Crockpot Olive Garden Chicken Pasta?
Short pasta like penne, rotini, or farfalle holds up well in Creamy Crockpot Olive Garden Chicken Pasta. Avoid delicate noodles like angel hair, as they may become mushy during slow cooking.
Can I freeze leftovers of Creamy Crockpot Olive Garden Chicken Pasta?
Yes, Creamy Crockpot Olive Garden Chicken Pasta freezes well for up to 3 months. Store in airtight containers and reheat gently on the stove with a splash of milk to restore the creamy texture.
div>
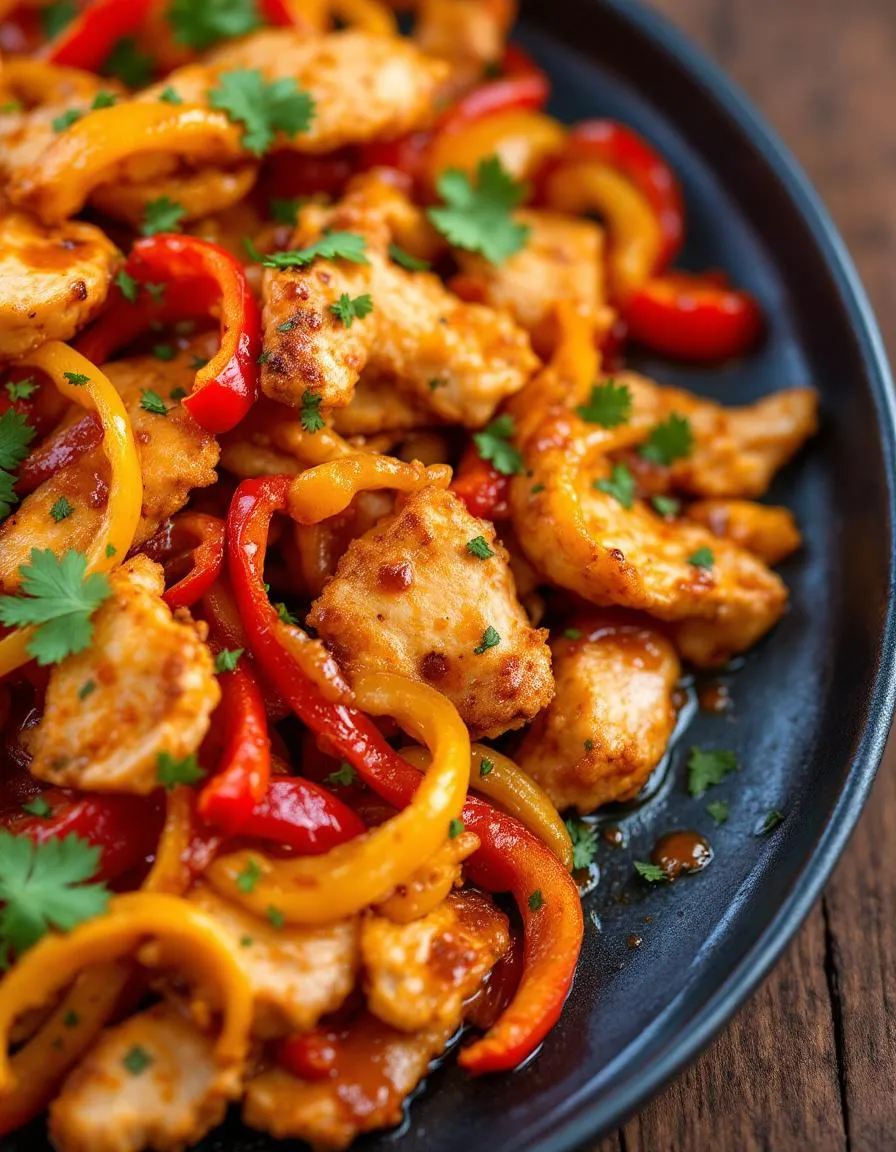
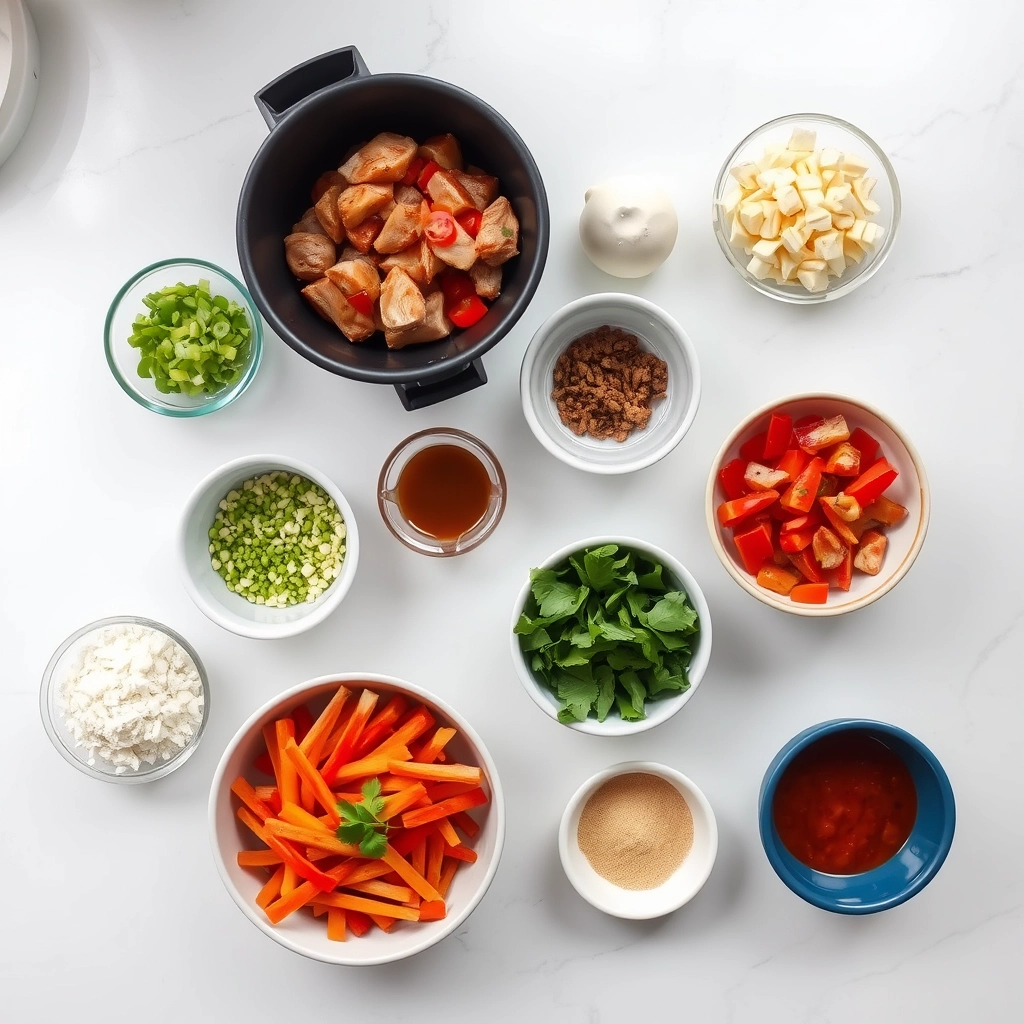
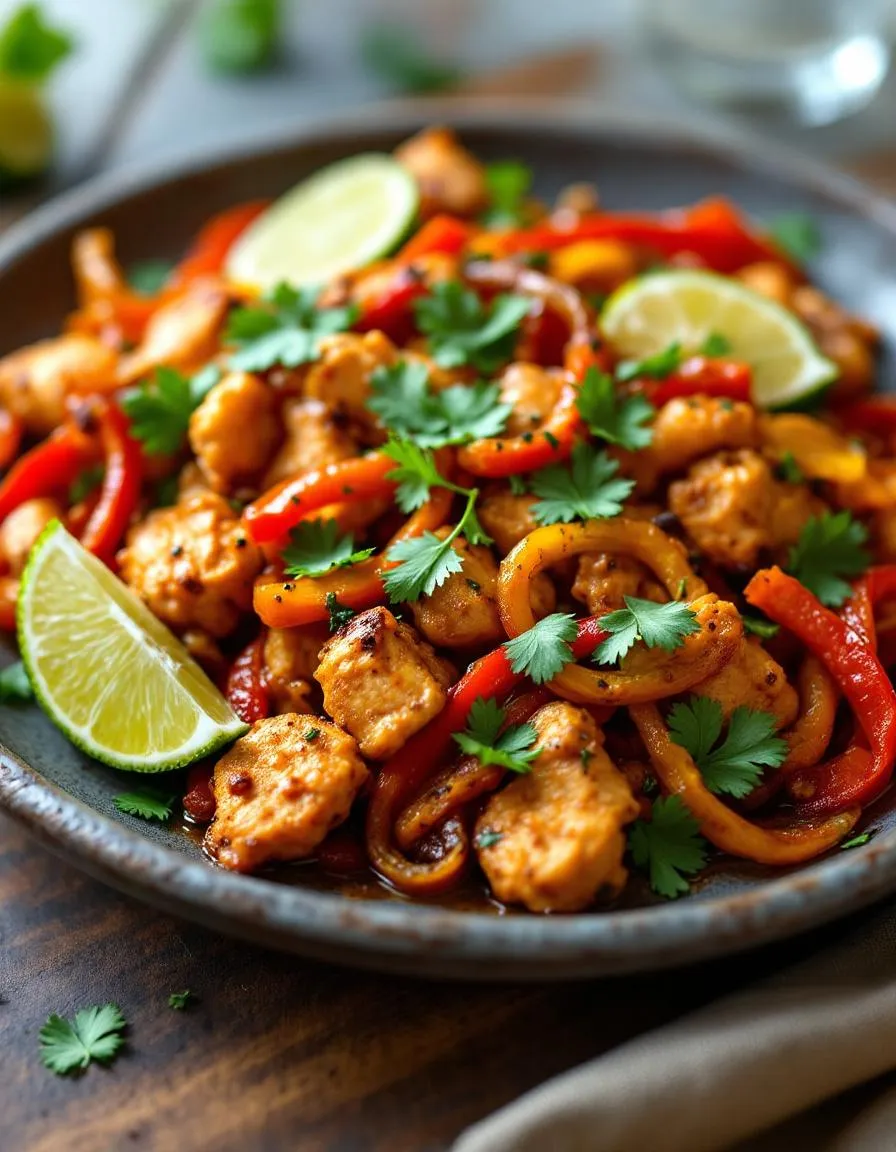
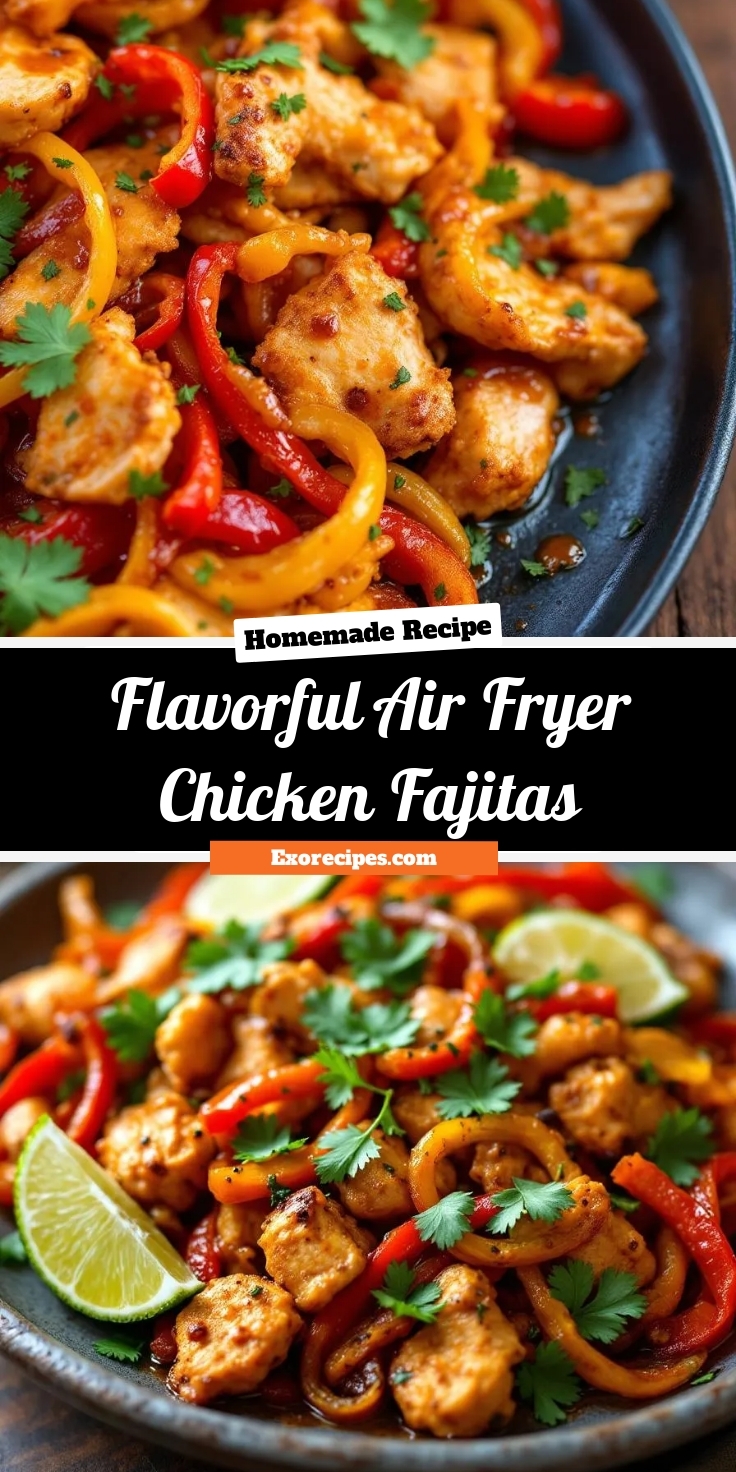
Easy Air Fryer Chicken Fajitas – Quick & Flavorful
Introduction
Craving restaurant-quality fajitas without the hassle? Flavorful Air Fryer Chicken Fajitas bring sizzling Tex-Mex flavors to your kitchen in minutes. Whether you’re juggling a busy schedule or simply want a healthier twist on a classic, this recipe delivers juicy chicken, crisp peppers, and bold spices—all with minimal cleanup. Best of all, your air fryer does the heavy lifting, so you can enjoy a vibrant, satisfying meal any night of the week.
Flavorful Air Fryer Chicken Fajitas reinvent a weeknight staple by combining convenience with irresistible taste. Unlike traditional skillet fajitas, this version locks in moisture and caramelizes the veggies perfectly, thanks to the air fryer’s rapid circulation. The marinade—a zesty blend of lime, cumin, and smoked paprika—infuses every bite with depth, while the cooking method slashes oil without sacrificing texture. For families or solo cooks, this dish adapts effortlessly: pile the filling into warm tortillas, or serve it over rice for a low-carb twist. Plus, it aligns with our blog’s mission to simplify gourmet-inspired meals, much like our Mexican-inspired dinner ideas and healthy air fryer favorites. With prep under 15 minutes, it’s a game-changer for anyone seeking flavor-packed simplicity.
Why I Love This Recipe
Flavorful Air Fryer Chicken Fajitas remind me of lazy weekend dinners with friends—minus the effort. I first tested this recipe during a hectic workweek, and the way the spices filled my kitchen instantly lifted my mood. Now, it’s my go-to when I need a meal that feels special but cooks like clockwork. The air fryer’s crisp edges on the peppers and onions? Absolutely magical. Every time I make it, I’m amazed how such simple ingredients create something so vibrant and satisfying.
Health and Nutrition
Why it’s good for your body
Flavorful Air Fryer Chicken Fajitas pack a nutritious punch while keeping meals exciting. First, the lean chicken breast delivers high-quality protein to support muscle growth and repair. Additionally, the colorful bell peppers and onions provide a hefty dose of antioxidants and fiber, which help digestion and reduce inflammation. Since you cook them in an air fryer, you also cut down on excess oil without sacrificing crispness or flavor.
Moreover, Flavorful Air Fryer Chicken Fajitas balance macros and micronutrients effortlessly. The dish includes healthy fats from a drizzle of olive oil, which promotes heart health. Meanwhile, the spices like cumin and paprika not only enhance taste but also offer metabolism-boosting benefits. Because the air fryer locks in moisture, the chicken stays tender without needing heavy sauces or additives.
Finally, this meal fits seamlessly into various dietary preferences. Whether you focus on high-protein eating or simply want a lighter twist on Tex-Mex classics, Flavorful Air Fryer Chicken Fajitas deliver. The combination of fresh ingredients and smart cooking methods makes it a standout choice for anyone prioritizing both health and flavor.
How it fits in a healthy lifestyle
Flavorful Air Fryer Chicken Fajitas align perfectly with balanced eating habits. For gluten-free diets, swapping traditional tortillas for lettuce wraps keeps the meal light and compliant. If you follow a heart-healthy plan, the lean protein and veggie-heavy mix support cardiovascular wellness. Plus, the air fryer method slashes unnecessary calories, making it easier to stay on track with weight management goals.
Busy weeknights don’t have to derail nutrition goals. This dish comes together quickly, proving that healthy eating can be simple and satisfying. Pair it with a side of quinoa salad for extra fiber or enjoy it as a standalone high-protein option. For more meal prep inspiration, check out these easy meal prep strategies to keep your routine stress-free. Flavorful Air Fryer Chicken Fajitas prove that wholesome meals don’t require compromise—just smart choices and great flavor.
Quick and delicious chicken fajitas made in the air fryer with tender chicken, bell peppers, and onions, seasoned to perfection.
Ingredients
Scale
For the Crust:
1 lb boneless, skinless chicken breasts, sliced into strips
1 red bell pepper, sliced
1 green bell pepper, sliced
1 yellow onion, sliced
2 tbsp olive oil
1 tbsp fajita seasoning
1 tsp garlic powder
1 tsp cumin
1/2 tsp salt
1/2 tsp black pepper
8 small flour tortillas
Fresh cilantro, for garnish (optional)
Lime wedges, for serving (optional)
Instructions
1. Prepare the Crust:
Preheat the air fryer to 375°F (190°C) for 5 minutes.
In a large bowl, toss the chicken strips, bell peppers, and onion with olive oil, fajita seasoning, garlic powder, cumin, salt, and black pepper until evenly coated.
Place the seasoned chicken and vegetables in the air fryer basket in a single layer. Cook for 12-15 minutes, shaking the basket halfway through, until the chicken is cooked through and the vegetables are tender.
While the fajitas cook, warm the tortillas in a dry skillet or microwave.
Serve the fajita mixture on warm tortillas. Garnish with fresh cilantro and a squeeze of lime if desired.
Notes
You can customize the seasonings to taste.
s-dish">How to Prepare This Dish
Steps and time-saving tips
Start by slicing your chicken breasts into thin strips for even cooking. Toss them in a bowl with olive oil, lime juice, and a blend of fajita spices like cumin, paprika, and chili powder. Meanwhile, slice bell peppers and onions into uniform strips so they cook evenly in the air fryer. Preheat your air fryer to 375°F for about 3 minutes—this helps lock in the juices. Layer the chicken and veggies in the air fryer basket, making sure not to overcrowd it. Cook for 12 minutes, shaking the basket halfway through to ensure everything gets crispy and caramelized. While the fajitas cook, warm your tortillas in a dry skillet or microwave for 30 seconds. Serve the chicken and veggies hot with fresh toppings like avocado, sour cream, and cilantro. For a time-saving hack, prep your veggies the night before and store them in an airtight container. If you’re short on time, use pre-sliced chicken or frozen pepper strips—just pat them dry to avoid excess moisture.
Mistakes I’ve made and learned from
I once overcrowded the air fryer basket, and the Flavorful Air Fryer Chicken Fajitas turned out soggy instead of crispy. Now I cook in batches, even if it takes a few extra minutes. Another mistake? Skipping the preheat—it makes a huge difference in texture. If your chicken sticks to the basket, try lightly spraying it with oil or using parchment paper designed for air fryers. I also learned the hard way that overcooking the veggies turns them mushy, so I keep a close eye after the 10-minute mark. For more air fryer tips, check out my guide on air fryer basics. And if you’re new to meal prepping, my meal prep ideas can help you save time without sacrificing flavor.
n-and-variations">Cultural Connection and Variations
Where this recipe comes from
Flavorful Air Fryer Chicken Fajitas carry the vibrant spirit of Mexican street food, where sizzling meats and peppers fill the air with irresistible aromas. Traditionally, cooks prepare fajitas over an open flame or cast iron, but the air fryer gives this classic a modern twist without losing its bold flavors. In northern Mexico, you might find them served with extra lime and smoky chipotle, while coastal regions often add fresh seafood alongside the chicken.
My family puts its own spin on Flavorful Air Fryer Chicken Fajitas by tossing in pineapple chunks for a sweet kick. Meanwhile, Tex-Mex versions pile on melted cheese and sour cream, turning them into hearty, shareable platters. No matter the variation, the dish always brings people together. Whether it’s a weeknight dinner or a festive gathering, these fajitas deliver both comfort and excitement in every bite.
How it fits in today’s cooking
Today, Flavorful Air Fryer Chicken Fajitas fit perfectly into busy lives. They’re quick, healthy, and packed with flavor, making them ideal for meal prep or last-minute dinners. Many home cooks pair them with easy weeknight sides like cilantro rice or black beans for a complete meal. Plus, the air fryer cuts down on oil without sacrificing that signature char.
Beyond convenience, the
se fajitas shine at gatherings. They’re a hit at game-day parties or summer cookouts, especially when served with crowd-pleasing dips. Modern twists, like using plant-based chicken or extra-spicy seasonings, keep the recipe fresh and adaptable. Whether you stick to tradition or experiment, Flavorful Air Fryer Chicken Fajitas remain a timeless favorite.
Taste and Texture
What makes it delicious
Flavorful Air Fryer Chicken Fajitas deliver a mouthwatering mix of smoky, zesty, and savory notes. The chicken turns juicy and tender, while the peppers and onions caramelize into sweet, crisp perfection. A bold blend of cumin, chili powder, and garlic infuses every bite with warmth, while a splash of lime brightens the dish. The aroma alone—fragrant and slightly spicy—will make your kitchen smell irresistible. Plus, the air fryer locks in moisture, ensuring each piece of chicken stays succulent. Whether wrapped in a warm tortilla or piled high on a plate, Flavorful Air Fryer Chicken Fajitas offer a satisfying crunch and melt-in-your-mouth tenderness in every forkful.
Boosting the flavor
Elevate your Flavorful Air Fryer Chicken Fajitas with a few easy tweaks. For extra heat, toss in diced jalapeños or a sprinkle of cayenne. Creamy toppings like avocado crema or tangy Greek yogurt balance the spices beautifully. If you love depth, try marinating the chicken in a smoky chipotle sauce or a splash of citrusy mojo marinade. Fresh cilantro, crumbled queso fresco, or pickled red onions add vibrant texture and brightness. Experiment with different tortillas, too—charred corn or garlic-infused flour wraps take the meal to the next level. With these simple upgrades, every bite becomes even more unforgettable.
First, always slice your chicken and vegetables evenly so they cook uniformly in the air fryer. Next, preheat your air fryer for 3-5 minutes to ensure crispy, Flavorful Air Fryer Chicken Fajitas every time. Additionally, shake the basket halfway through cooking to prevent sticking and promote even browning. Finally, let the fajitas rest for a minute before serving to lock in juices and enhance flavor.
Mistakes to avoid
Avoid overcrowding the air fryer basket, as this leads to steaming instead of crisping. Instead, cook in batches if needed for the best texture. Also, don’t skip marinating the chicken—it’s key for maximizing flavor. For more on perfect marinades, check out our guide to air fryer marinades. Lastly, remember to check your chicken’s internal temperature with a meat thermometer to avoid undercooking. For more air fryer safety tips, see our air fryer troubleshooting post.
g-suggestions">Serving and Pairing Suggestions
How to serve this dish
Flavorful Air Fryer Chicken Fajitas shine when served fresh and sizzling straight from the air fryer. For a vibrant presentation, arrange the chicken and peppers on a warm tortilla and top with fresh cilantro, avocado slices, and a squeeze of lime. Alternatively, serve them family-style on a large platter with colorful toppings like pico de gallo, shredded cheese, and sour cream for a DIY fajita bar. These fajitas make a fantastic weeknight dinner, but they also work well for casual gatherings or game day spreads. To elevate the experience, warm your tortillas briefly in the oven or on a skillet for extra texture.
What goes well with it
Pair Flavorful Air Fryer Chicken Fajitas with a refreshing mango margarita or a crisp Mexican lager to balance the smoky spices. For sides, try a light and tangy Mexican street corn salad, which adds a creamy contrast to the dish. If you prefer something heartier, a bowl of Instant Pot black beans delivers protein-rich flavor that complements the fajitas perfectly. Finally, don’t forget a dollop of cool guacamole or a drizzle of spicy chipotle sauce for an extra kick.
math-faq-block">
How long do you cook chicken fajitas in an air fryer?
For Flavorful Air Fryer Chicken Fajitas, cook at 375°F for 12–15 minutes, shaking the basket halfway. The chicken should reach 165°F internally, and the veggies should be tender-crisp. Adjust time slightly based on your air fryer model.
What’s the best seasoning for air fryer chicken fajitas?
A mix of chili powder, cumin, smoked paprika, garlic powder, and lime juice creates the perfect flavor for Flavorful Air Fryer Chicken Fajitas. For extra kick, add a pinch of cayenne or use a pre-made fajita seasoning blend.
Can you use frozen chicken for air fryer fajitas?
Yes, but thaw it first for even cooking. Frozen chicken won’t brown properly in the air fryer and may leave excess moisture. For best results with Flavorful Air Fryer Chicken Fajitas, use fresh or fully thawed chicken breasts or thighs.
ank-math-faq-item">
What vegetables go well with air fryer chicken fajitas?
Classic bell peppers and onions are perfect, but you can add zucchini, mushrooms, or jalapeños for variety. Cut veggies uniformly so they cook evenly with the chicken in your Flavorful Air Fryer Chicken Fajitas.
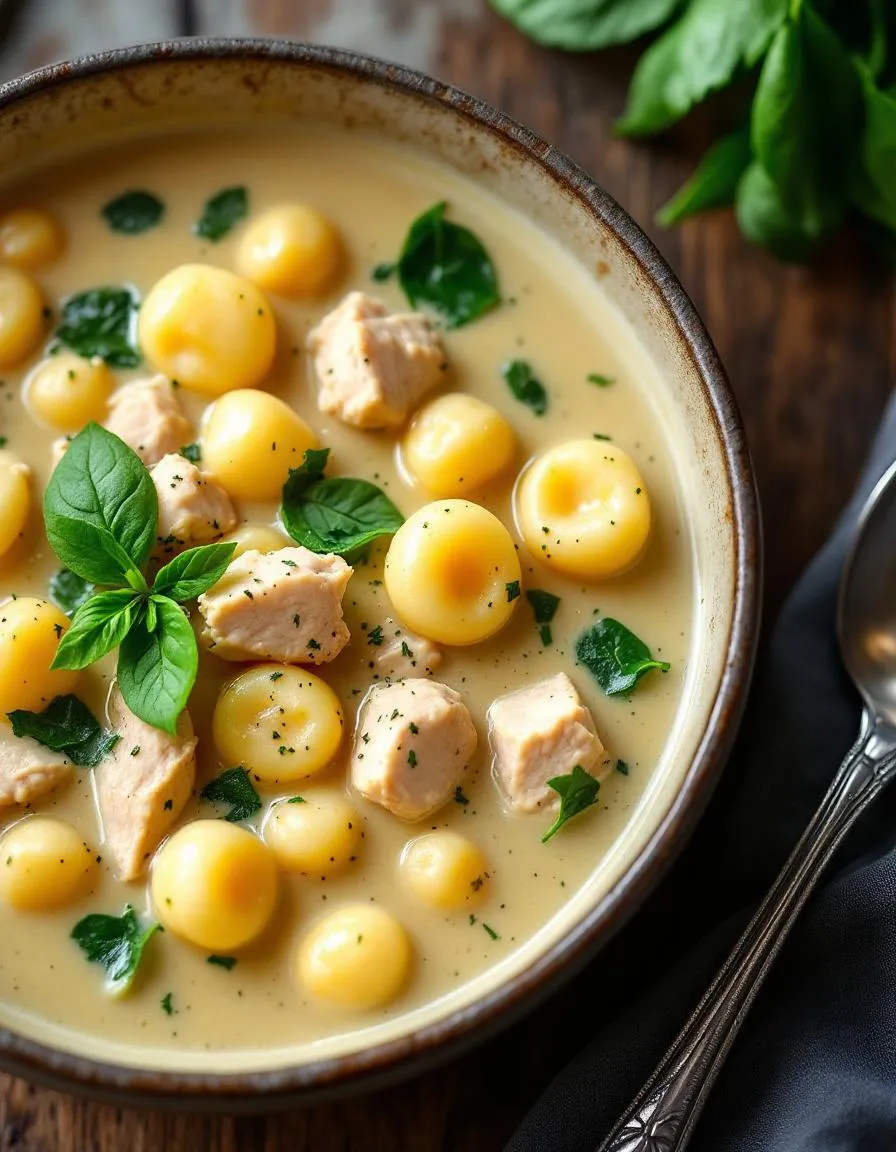
Best Creamy Chicken Gnocchi Soup – Easy Recipe
Introduction
There’s something undeniably comforting about a warm bowl of soup, especially when it’s as rich and satisfying as Creamy Chicken Gnocchi Soup Delight. Whether you’re craving a cozy meal on a chilly evening or need a dish that feels like a hug in a bowl, this recipe delivers. With tender chicken, pillowy gnocchi, and a velvety broth, every spoonful wraps you in comfort. Plus, it’s surprisingly easy to make, so you can enjoy restaurant-quality flavors without leaving your kitchen. Ready to dive in? Let’s explore what makes this soup so special.
Creamy Chicken Gnocchi Soup Delight is a hearty, flavor-packed dish that combines tender shredded chicken, soft potato gnocchi, and a luxuriously smooth broth infused with garlic, herbs, and a touch of cream. Unlike heavy cream-based soups, this version strikes the perfect balance—rich but not overwhelming, comforting yet fresh. It’s the kind of meal that suits busy weeknights or lazy weekends, and it pairs beautifully with crusty bread or a simple salad. If you love our Creamy Tuscan Chicken, you’ll adore this soup’s similar depth of flavor with an extra dose of coziness.
What sets this recipe apart is its versatility. You can customize it with spinach, mushrooms, or even a sprinkle of parmesan for extra flair. It’s also a fantastic way to use leftover rotisserie chicken, making it practical and budget-friendly. For more inspiration on transforming leftovers, check out our Leftover Chicken Recipes roundup. Whether you’re cooking for a crowd or meal-prepping for the week, Creamy Chicken Gnocchi Soup Delight fits seamlessly into any plan. It’s the ultimate comfort food that feels indulgent without requiring hours in the kitchen.
Why I Love This Recipe
This soup holds a special place in my heart because it reminds me of family dinners growing up. My mom would whip up a similar version on snowy nights, and the aroma alone made everything feel right. Now, whenever I make Creamy Chicken Gnocchi Soup Delight, it’s like revisiting those cherished moments. Beyond nostalgia, I love how effortlessly it comes together—no fancy techniques, just honest, delicious ingredients. It’s the kind of recipe that never fails to impress, whether I’m serving it to guests or enjoying a quiet bowl by myself. Truly, it’s comfort in every bite.
Health and Nutrition
Why it’s good for your body
Creamy Chicken Gnocchi Soup Delight packs a nutritious punch while satisfying your comfort food cravings. First, the tender chicken provides lean protein, which helps repair muscles and keeps you full longer. Additionally, the gnocchi offers energizing carbohydrates, giving you the fuel you need for an active day. Moreover, the creamy broth delivers a dose of healthy fats, especially if you use olive oil or a light cream base.
Beyond macronutrients, this soup brims with vitamins and minerals. For example, carrots and spinach add fiber, vitamin A, and iron, supporting digestion and immunity. Furthermore, garlic and onions bring antioxidants that fight inflammation. Because of its balanced ingredients, Creamy Chicken Gnocchi Soup Delight can boost your energy levels without weighing you down.
Finally, this dish is versatile enough to fit various dietary needs. If you use whole-grain gnocchi, you increase fiber intake. Alternatively, swapping heavy cream for Greek yogurt adds probiotics. Whether you enjoy it as a hearty lunch or a cozy dinner, Creamy Chicken Gnocchi Soup Delight nourishes your body while delighting your taste buds.
How it fits in a healthy lifestyle
Creamy Chicken Gnocchi Soup Delight fits seamlessly into a balanced diet. If you’re watching your carb intake, simply reduce the gnocchi portion and load up on extra veggies. For a high-protein twist, add more chicken or stir in white beans. The soup also works well for meal prep, making it easy to enjoy wholesome meals during busy weeks.
This recipe adapts to heart-healthy eating too. Use low-sodium broth and skip heavy cream to keep it light. Pair it with a crisp salad from our healthy salad roundup for a well-rounded meal. If you’re gluten-free, opt for gluten-free gnocchi, which still keeps the dish comforting and satisfying.
For those focused on mindful eating, Creamy Chicken Gnocchi Soup Delight encourages portion control without sacrificing flavor. Serve it with a side of whole-grain bread from our homemade bread guide to complete the meal. Whether you’re fueling up post-workout or winding down for the evening, this soup supports your health goals deliciously.
A rich and comforting soup with tender chicken, pillowy gnocchi, and a creamy broth.
Ingredients
Scale
For the Crust:
1 lb boneless, skinless chicken breasts, diced
1 package (16 oz) potato gnocchi
3 cups chicken broth
1 cup heavy cream
1 cup fresh spinach, chopped
1 small onion, diced
2 cloves garlic, minced
1 tsp dried thyme
1 tsp dried rosemary
Salt and pepper to taste
2 tbsp olive oil
Instructions
1. Prepare the Crust:
Heat olive oil in a large pot over medium heat. Add diced chicken and cook until no longer pink, about 5-7 minutes. Remove and set aside.
In the same pot, sauté onion and garlic until fragrant, about 2 minutes.
Add chicken broth, thyme, rosemary, salt, and pepper. Bring to a boil.
Stir in gnocchi and cook according to package instructions, about 3-4 minutes.
Reduce heat to low. Stir in cooked chicken, heavy cream, and spinach. Simmer for 5 minutes until spinach wilts.
Adjust seasoning if needed and serve hot.
Notes
You can customize the seasonings to taste.
How to Prepare This Dish
Steps and time-saving tips
Start by heating a large pot over medium heat and drizzle in a tablespoon of olive oil. Once the oil shimmers, toss in diced onions, minced garlic, and shredded carrots. Stir them for about 3 minutes until they soften and release their aroma. Next, add bite-sized chunks of chicken breast and cook until they turn golden, which usually takes 5-7 minutes. Meanwhile, sprinkle in dried thyme and a pinch of salt for extra flavor. Pour in chicken broth and bring the mixture to a gentle boil before dropping in the gnocchi. Let them cook for 3-4 minutes until they float to the top. Then, reduce the heat to low and whisk in heavy cream and grated Parmesan cheese until the soup becomes luxuriously creamy. For a time-saving hack, use pre-cooked rotisserie chicken and store-bought gnocchi to cut prep time in half. Finally, garnish with fresh parsley and a crack of black pepper before serving. The whole process takes under 30 minutes, making it perfect for busy weeknights.
Mistakes I’ve made and learned from
When I first made Creamy Chicken Gnocchi Soup Delight, I overcooked the gnocchi, turning them into mushy lumps. Now, I set a timer for 3 minutes as soon as they hit the broth and fish one out to test for doneness. Another blunder was adding cold cream straight from the fridge, which caused curdling. To avoid this, I let the cream sit at room temperature for 10 minutes or warm it slightly before stirring it in. If you’re new to creamy soups, check out my guide on avoiding curdling in creamy soups for more tips. Also, I once skipped the Parmesan, thinking it was optional, but it’s key for depth of flavor. For cheese lovers, my best cheeses for soups post explains why Parmesan works magic here. Trust me, these small tweaks make all the difference!
Creamy Chicken Gnocchi Soup Delight whispers of cozy Italian kitchens, where pillowy gnocchi swim in rich broths long before modern chefs gave it a creamy twist. Originally, Italian nonnas simmered gnocchi in simple broths, often pairing them with seasonal vegetables or leftover meats. Over time, as Italian immigrants brought their recipes to America, the dish evolved. Cream found its way into the pot, and chicken became a star player, turning it into the comforting bowl we love today.
In Northern Italy, you might still find gnocchi served lighter, perhaps in a clear broth with fresh herbs. Meanwhile, in the U.S., regional twists pop up—some add spinach for color, while others toss in crispy bacon for smokiness. My family’s version? A generous pinch of red pepper flakes for warmth, because nothing beats that gentle kick against the creamy backdrop. Whether you stick to tradition or riff freely, Creamy Chicken Gnocchi Soup Delight always feels like a hug in a bowl.
ays-cooking">How it fits in today’s cooking
Today, Creamy Chicken Gnocchi Soup Delight bridges nostalgia and modern ease. Busy cooks lean on shortcuts like store-bought gnocchi or meal-prep tricks to whip it up faster, while foodies might hand-roll their gnocchi for weekend projects. It’s a staple in fall and winter menus, but honestly? Its creamy comfort works year-round—swap in spring peas or summer corn for seasonal flair.
What keeps it relevant? Versatility. It’s hearty enough for dinner yet elegant for holiday starters. Plus, it’s a crowd-pleaser for potlucks, much like other comfort food classics. Whether you’re craving familiarity or a blank canvas for creativity, this soup delivers. And let’s be real—after a long day, who wouldn’t want a steaming bowl of creamy, dreamy goodness?
Taste and Texture
What makes it delicious
Creamy Chicken Gnocchi Soup Delight wraps you in warmth with its velvety, rich broth and tender gnocchi pillows. Each spoonful bursts with savory chicken, earthy herbs, and a hint of garlic that lingers deliciously. The soup smells like a cozy kitchen—fragrant with thyme and a touch of black pepper. Meanwhile, the gnocchi adds a soft, chewy contrast to the silky broth, while diced carrots and celery bring a subtle crunch. Creamy Chicken Gnocchi Soup Delight balances comfort and flavor so perfectly, you’ll crave seconds before finishing your bowl.
r">Boosting the flavor
For an extra flavor boost, try stirring in a spoonful of pesto or a sprinkle of grated parmesan right before serving. If you love heat, a dash of crushed red pepper flakes or a drizzle of chili oil will add a spicy kick. For a deeper umami taste, swap regular chicken broth for a homemade bone broth—our homemade chicken bone broth guide makes it easy. Prefer a smoky twist? Crispy bacon bits or a pinch of smoked paprika work wonders. Pair it with a side of crusty bread, like our garlic herb focaccia, to soak up every last drop.
Tips for Success
Best practices for results
Always sauté the onions and garlic first to build a rich flavor base for your Creamy Chicken Gnocchi Soup Delight. Meanwhile, use fresh gnocchi for the best texture, as frozen varieties can turn mushy. Stir the soup gently to prevent the gnocchi from breaking apart, and simmer on low heat to let the flavors meld perfectly. For extra creaminess, add the heavy cream last and avoid boiling it. Finally, taste and adjust the seasoning just before serving to ensure a balanced dish every time.
>Mistakes to avoid
Overcrowding the pan when browning the chicken will steam it instead of searing it, so cook in batches if needed. Additionally, avoid overcooking the gnocchi, as it can become gummy. For more tips on perfecting gnocchi dishes, check out our guide on how to cook gnocchi like a pro. Another common mistake is skipping the fresh herbs, which add brightness to the Creamy Chicken Gnocchi Soup Delight. If you’re unsure about herb pairings, our best herbs for soups article has great recommendations.
Serving and Pairing Suggestions
How to serve this dish
For a cozy dinner, ladle Creamy Chicken Gnocchi Soup Delight into warm, rustic bowls to keep it piping hot. Top it with a sprinkle of fresh parsley or grated Parmesan for a pop of color and extra flavor. Alternatively, serve it in bread bowls for a fun, edible presentation that guests will love. This dish shines at family gatherings or holiday meals, especially when paired with crusty bread for dipping. To make it even more inviting, drizzle a touch of olive oil or add a swirl of cream just before serving.
What goes well with it
A crisp, refreshing salad like our Spring Mix Salad balances the richness of Creamy Chicken Gnocchi Soup Delight perfectly. For heartier meals, pair it with warm, buttery garlic knots or our Rosemary Focaccia, which soaks up the creamy broth beautifully. If you prefer a drink pairing, a light white wine or sparkling water with lemon elevates the dining experience without overpowering the soup’s comforting flavors.
What makes Creamy Chicken Gnocchi Soup Delight so creamy?
The creaminess in Creamy Chicken Gnocchi Soup Delight comes from a combination of heavy cream, butter, and a roux made with flour. Some recipes also use cream cheese or Parmesan for extra richness. The gnocchi absorbs the creamy broth, making every bite deliciously smooth.
Can I use store-bought gnocchi for Creamy Chicken Gnocchi Soup Delight?
Yes, store-bought gnocchi works perfectly for Creamy Chicken Gnocchi Soup Delight and saves time. Just add them directly to the soup during the last few minutes of cooking. Fresh or frozen gnocchi both work well—just adjust cooking time slightly.
ank-math-faq-item">
How do I thicken Creamy Chicken Gnocchi Soup Delight if it’s too thin?
If your Creamy Chicken Gnocchi Soup Delight needs thickening, mix 1 tbsp cornstarch with 2 tbsp cold water and stir it in. Simmer for 2-3 minutes until desired consistency. Alternatively, mash a few gnocchi pieces to release starch naturally.
What sides pair well with Creamy Chicken Gnocchi Soup Delight?
Creamy Chicken Gnocchi Soup Delight pairs beautifully with crusty bread, a crisp green salad, or roasted vegetables. For heartier meals, try garlic breadsticks or a charcuterie board. The soup’s richness balances well with lighter sides.
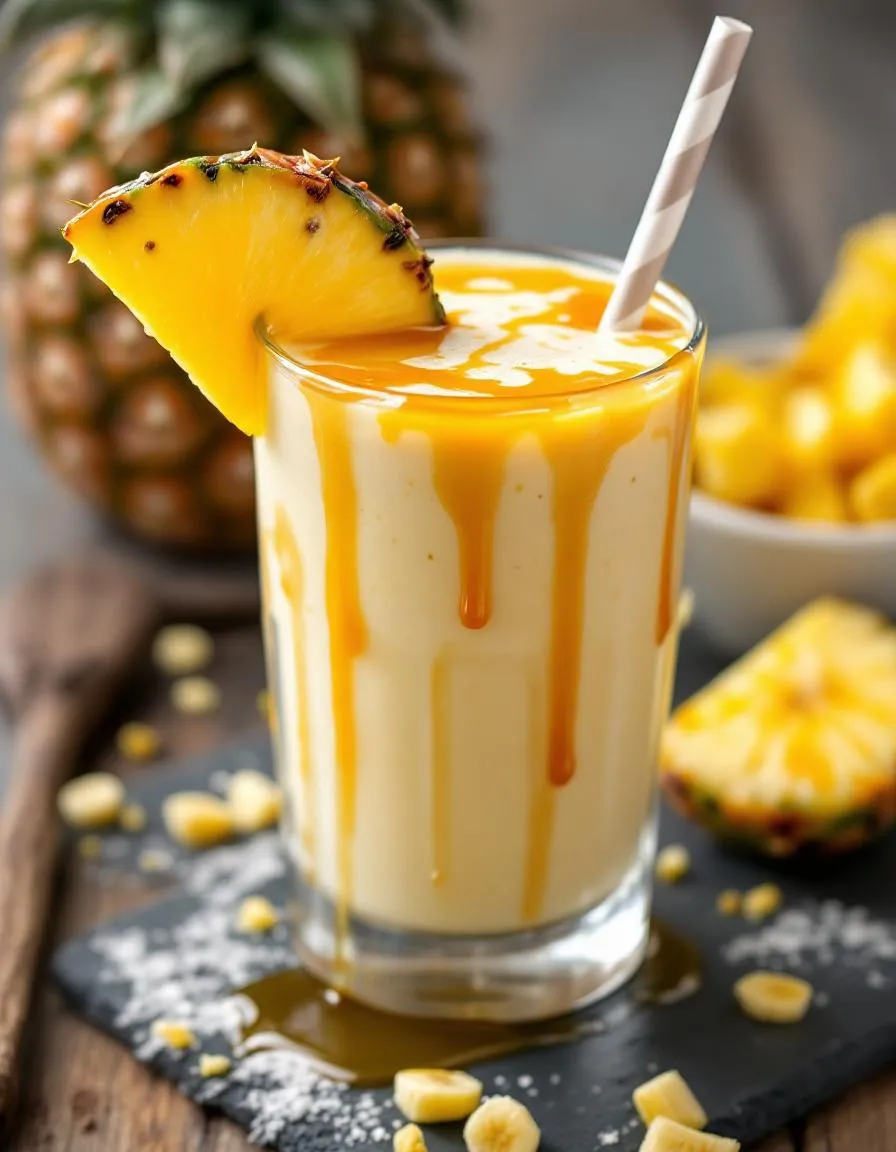
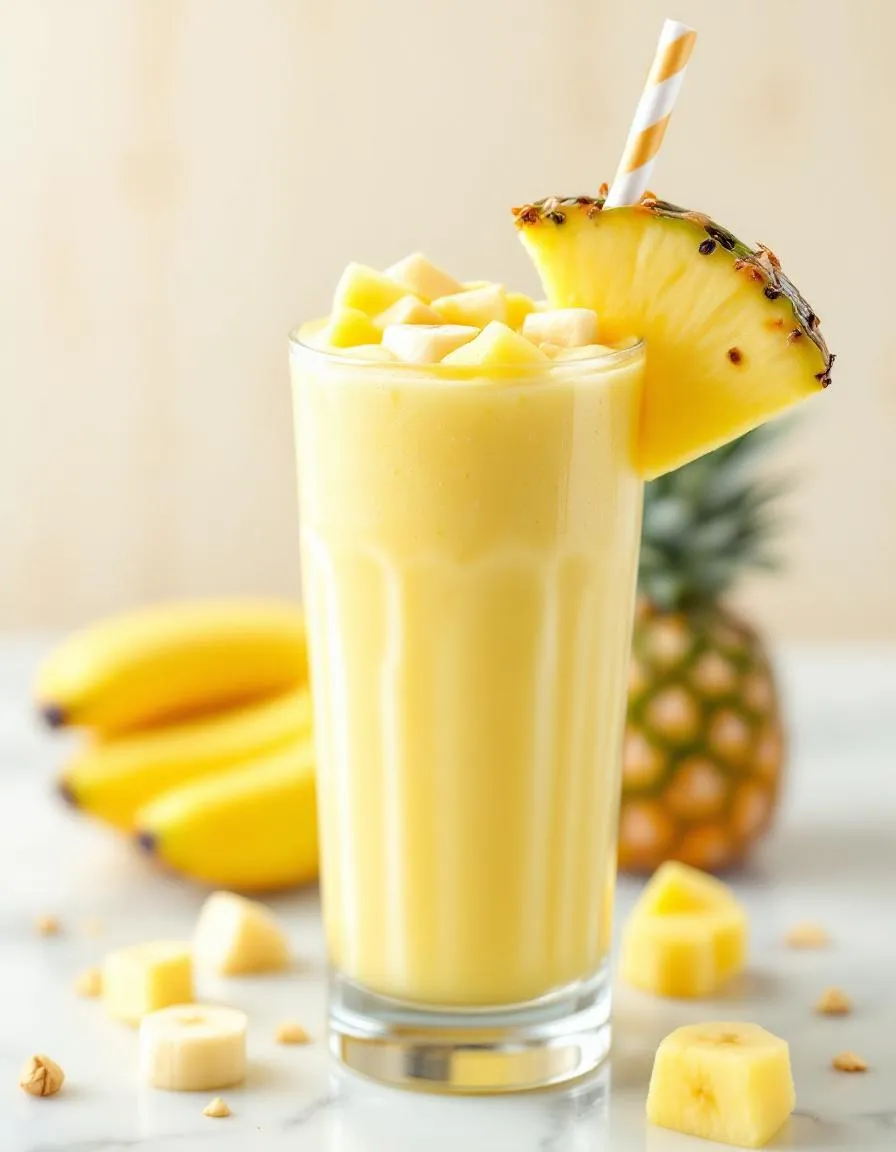
Best Tropical Pineapple Banana Smoothie Delight
Introduction
There’s something magical about blending fresh fruit into a creamy, refreshing drink that instantly transports you to a sunny beach. If you’re craving a taste of paradise, this Tropical Pineapple Banana Smoothie Delight is your ticket. Packed with vibrant flavors and wholesome ingredients, it’s the perfect way to start your day or recharge after a workout. Plus, it’s so easy to make, you’ll wonder why you haven’t tried it sooner.
The Tropical Pineapple Banana Smoothie Delight combines sweet pineapple, creamy banana, and a splash of coconut milk for a drink that’s as nourishing as it is delicious. Unlike store-bought smoothies loaded with added sugars, this recipe lets natural ingredients shine. Whether you’re a busy parent, a fitness enthusiast, or just someone who loves a tropical twist, this smoothie fits effortlessly into any lifestyle. It’s also a fantastic way to use up ripe bananas, reducing food waste while treating yourself. If you’re looking for more ways to enjoy bananas, check out our banana recipe collection for inspiration.
This blog celebrates simple, flavorful recipes that anyone can make, and the Tropical Pineapple Banana Smoothie Delight embodies that spirit. It requires no fancy equipment or hard-to-find ingredients—just a blender and a few minutes of your time. For those who love experimenting, try pairing it with our tropical breakfast ideas to create a full island-inspired meal. Trust me, once you take that first sip, you’ll understand why this smoothie is a staple in my kitchen.
Why I Love This Recipe
This Tropical Pineapple Banana Smoothie Delight holds a special place in my heart because it reminds me of family vacations in Hawaii. My kids would beg for smoothies by the pool, and this recipe became our go-to. Even now, blending it at home brings back those warm memories. Beyond nostalgia, I love how versatile it is—sometimes I add spinach for a green boost or chia seeds for extra protein. It’s a recipe that grows with you, and that’s why I keep coming back to it.
Health and Nutrition
Why it’s good for your body
Packed with vitamins and natural sweetness, Tropical Pineapple Banana Smoothie Delight offers a delicious way to fuel your body. First, pineapple delivers a hefty dose of vitamin C, which boosts immunity and supports skin health. Meanwhile, bananas provide potassium, helping regulate blood pressure and muscle function. Together, these ingredients create a nutrient-rich blend that energizes you naturally.
Additionally, Tropical Pineapple Banana Smoothie Delight contains digestive benefits. Pineapple includes bromelain, an enzyme that aids digestion and reduces bloating. Furthermore, bananas add fiber, promoting gut health and keeping you full longer. Whether you enjoy it for breakfast or a snack, this smoothie keeps your digestive system running smoothly.
Finally, this refreshing drink supports hydration. Since both pineapple and bananas have high water content, Tropical Pineapple Banana Smoothie Delight helps replenish fluids. For an extra boost, you can add coconut water or almond milk. With every sip, you’re nourishing your body while satisfying your taste buds.
How it fits in a healthy lifestyle
Tropical Pineapple Banana Smoothie Delight fits effortlessly into a balanced diet. If you’re following a gluten-free or dairy-free lifestyle, simply swap yogurt for a plant-based alternative. This smoothie also aligns with heart-healthy eating, thanks to its low sodium and high potassium content. For more gluten-free recipe ideas, check out our gluten-free baking guide.
Busy mornings? Blend Tropical Pineapple Banana Smoothie Delight ahead for a quick, nutritious grab-and-go option. It’s also a great post-workout drink, replenishing electrolytes lost during exercise. Pair it with protein-rich snacks like nuts or seeds for a well-rounded meal. Explore our quick healthy breakfasts for more time-saving tips. No matter your routine, this smoothie makes healthy eating simple and enjoyable.
A refreshing and creamy smoothie packed with tropical flavors of pineapple and banana, perfect for a quick breakfast or snack.
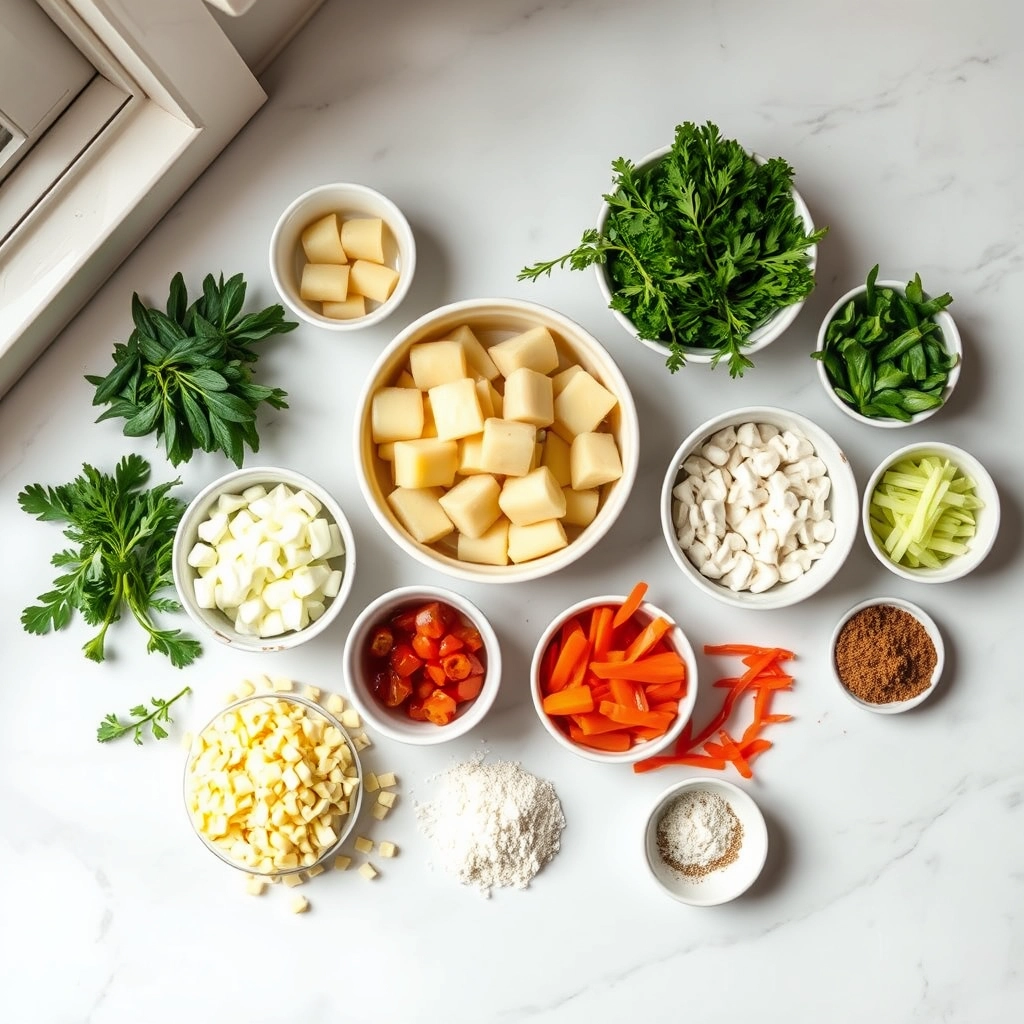
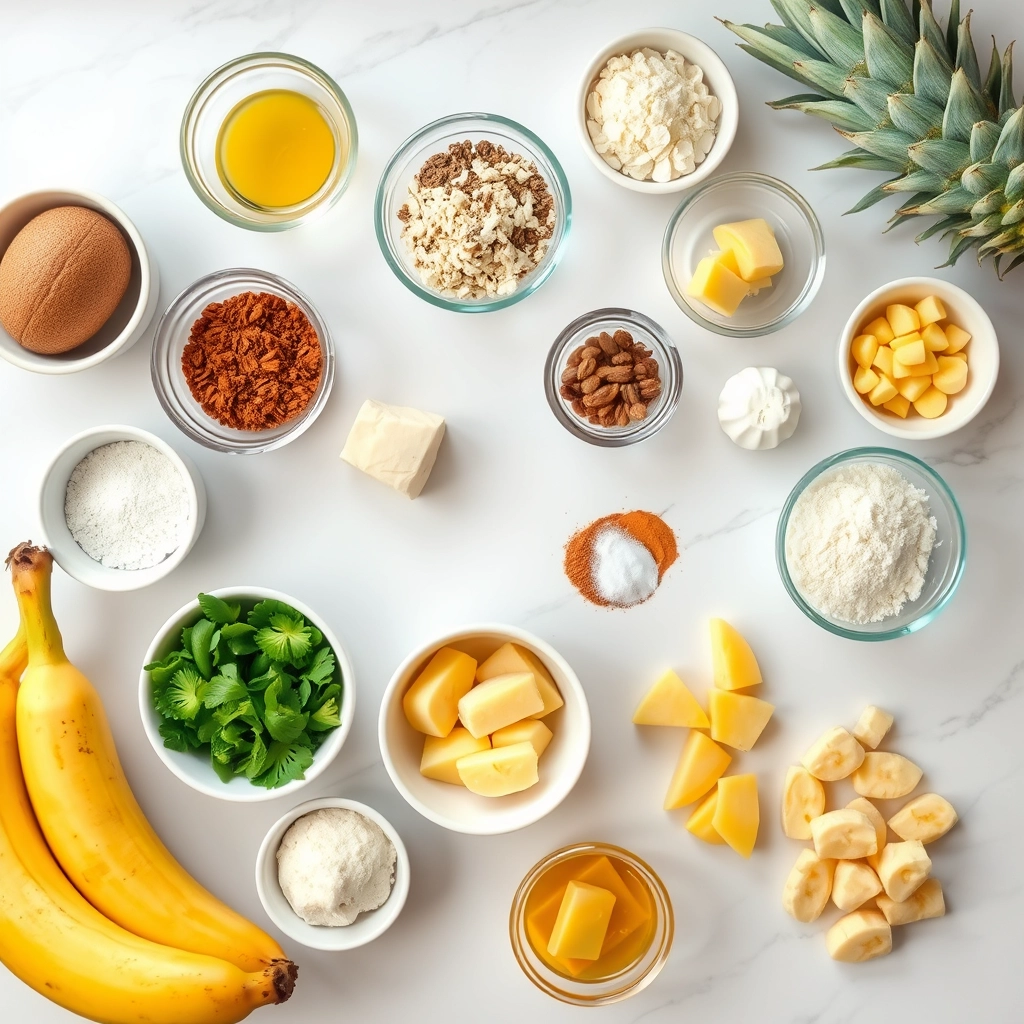
Ingredients
Scale
For the Crust:
1 cup fresh pineapple chunks
1 large ripe banana
1/2 cup Greek yogurt
1/2 cup coconut milk
1 tablespoon honey
1/2 teaspoon vanilla extract
1 cup ice cubes
Instructions
1. Prepare the Crust:
Peel and slice the banana into chunks.
Add all ingredients to a blender.
Blend on high speed until smooth and creamy, about 1-2 minutes.
Pour into glasses and serve immediately.
Notes
You can customize the seasonings to taste.
s-dish">How to Prepare This Dish
Steps and time-saving tips
Start by gathering all your ingredients for the Tropical Pineapple Banana Smoothie Delight to streamline the process. Peel and chop two ripe bananas into chunks, then measure out one cup of fresh pineapple pieces. Toss them into a high-powered blender along with half a cup of coconut milk for creaminess. Add a handful of ice cubes to keep the smoothie refreshingly cold. Blend everything on high speed until the mixture turns smooth and frothy. Meanwhile, drizzle a teaspoon of honey around the inside of your serving glass for a sweet touch. Pour the blended Tropical Pineapple Banana Smoothie Delight into the glass, then top it with a sprinkle of shredded coconut or a pineapple wedge for garnish. If you’re short on time, prep the fruit the night before and store it in the freezer. This way, you can skip the ice and still enjoy a thick, frosty texture. For an extra boost, toss in a spoonful of chia seeds or protein powder before blending. Serve immediately to savor the vibrant flavors at their peak.
Mistakes I’ve made and learned from
Early on, I underestimated how much the ripeness of bananas affects the Tropical Pineapple Banana Smoothie Delight. Using underripe bananas left the smoothie bland and starchy, while overripe ones made it overly sweet. Now, I aim for bananas with just a few brown speckles—perfect for natural sweetness without overpowering the pineapple. Another hiccup was blending too long, which turned the smoothie watery instead of luxuriously thick. A quick pulse does the trick! If you’re new to smoothies, check out my guide on choosing the right blender to avoid frustration. Also, don’t skip the ice unless you’re using frozen fruit—I learned that the hard way after serving a lukewarm smoothie. For more tips on balancing flavors, my post on smoothie flavor combinations has you covered. Small tweaks make all the difference!
n-and-variations">Cultural Connection and Variations
Where this recipe comes from
The Tropical Pineapple Banana Smoothie Delight feels like sunshine in a glass, and for good reason. Its roots trace back to tropical regions where pineapples and bananas grow abundantly, like the Caribbean, Hawaii, and parts of Southeast Asia. Locals there often blend these fruits with coconut milk or yogurt, creating a refreshing treat that cools you down on hot days. Meanwhile, in Brazil, you might find a version with açaí added for an antioxidant boost, while Filipinos sometimes mix in mango for extra sweetness.
In my family, the Tropical Pineapple Banana Smoothie Delight became a weekend staple after a trip to Costa Rica. We fell in love with the way street vendors served it over crushed ice, garnished with a mint sprig. Back home, we tweaked it by adding a splash of orange juice for tanginess. Whether you enjoy it as a post-workout refresher or a lazy brunch companion, this smoothie carries a little piece of the tropics wherever it goes.
How it fits in today’s cooking
Today, the Tropical Pineapple Banana Smoothie Delight fits perfectly into our fast-paced, health-conscious lives. Busy parents blend it for quick breakfasts, while fitness lovers appreciate its natural energy boost. Some modern twists include swapping dairy for almond milk or adding a scoop of protein powder. It’s also a star at summer gatherings, especially when paired with easy summer desserts for a light yet satisfying spread.
Thanks to its versatili
ty, this smoothie bridges the gap between indulgence and nutrition. For instance, meal preppers often freeze portions for grab-and-go mornings. And if you’re hosting a brunch, it pairs wonderfully with healthy brunch ideas, proving that old-school flavors can feel fresh and exciting. No matter how you spin it, this tropical classic isn’t going anywhere.
Taste and Texture
What makes it delicious
The Tropical Pineapple Banana Smoothie Delight bursts with vibrant, sun-kissed flavors that dance on your tongue. Ripe bananas lend a velvety sweetness, while juicy pineapple adds a tangy, tropical zing. Each sip feels luxuriously creamy, thanks to the smooth blend of yogurt and ice, yet refreshingly light with a hint of citrus from fresh lime juice. The aroma alone—fruity, bright, and slightly floral—will transport you to a beachside paradise. Whether you savor it slowly or gulp it down, the Tropical Pineapple Banana Smoothie Delight leaves a lingering, satisfying freshness that’s impossible to resist.
Boosting the flavor
For an even more decadent twist, try swirling in a spoonful of coconut cream to amplify the tropical vibe. Alternatively, a sprinkle of toasted coconut flakes or chia seeds adds a delightful crunch. If you love a touch of warmth, a pinch of cinnamon or ginger pairs beautifully with the fruity notes. For extra inspiration, explore our healthy smoothie add-ins or tropical smoothie bowls to elevate your blend. With these easy tweaks, your Tropical Pineapple Banana Smoothie Delight becomes a customizable masterpiece.
Always use ripe bananas for the sweetest, creamiest Tropical Pineapple Banana Smoothie Delight. Meanwhile, freeze your pineapple chunks beforehand to achieve a thick, frosty texture without diluting the flavor. For the smoothest blend, layer your ingredients with liquids first, then add frozen fruit. Finally, taste and adjust sweetness with a touch of honey if needed, especially if your pineapple isn’t fully ripe.
Mistakes to avoid
One common mistake is overloading the blender, which can strain the motor or leave chunks in your Tropical Pineapple Banana Smoothie Delight. Instead, pulse the ingredients first to break them down. Another error is skipping the chill time for your glass—serving it cold keeps the smoothie refreshing longer. For more blending tips, check out our guide on perfect smoothie texture. Also, avoid using canned pineapple in syrup, as it adds unnecessary sugar; opt for fresh or frozen fruit, as explained in our fresh vs. frozen fruit breakdown.
g-suggestions">Serving and Pairing Suggestions
How to serve this dish
Make your Tropical Pineapple Banana Smoothie Delight shine by serving it in a chilled glass with a colorful paper umbrella or a fresh pineapple wedge on the rim. For a brunch gathering, pour it into small mason jars and let guests grab them as refreshing starters. Alternatively, turn it into a fun dessert by freezing it into popsicle molds for a tropical treat on hot days. Either way, the vibrant yellow hue and sweet aroma will instantly brighten any occasion.
What goes well with it
Pair your Tropical Pineapple Banana Smoothie Delight with fluffy coconut pancakes for a breakfast that feels like a vacation. The creamy smoothie balances the light, crispy texture of the pancakes perfectly. If you prefer a savory contrast, try it alongside avocado toast topped with chili flakes. For an extra indulgence, serve it with a slice of moist mango bread, which echoes the tropical flavors. No matter what you choose, these combinations will elevate your sipping experience.
math-faq-block">
What are the health benefits of a Tropical Pineapple Banana Smoothie Delight?
The Tropical Pineapple Banana Smoothie Delight is packed with vitamins C and B6, fiber, and potassium. Pineapple aids digestion, bananas provide energy, and the combination makes for a refreshing, immune-boosting drink.
Can I make a Tropical Pineapple Banana Smoothie Delight without yogurt?
Absolutely! Substitute yogurt with coconut milk, almond milk, or even orange juice for a dairy-free Tropical Pineapple Banana Smoothie Delight. The result will still be creamy and delicious.
How do I thicken my Tropical Pineapple Banana Smoothie Delight?
Add frozen bananas, chia seeds, or a scoop of Greek yogurt to thicken your Tropical Pineapple Banana Smoothie Delight. For a tropical twist, try blending in frozen mango or avocado.
ank-math-faq-item">
Is a Tropical Pineapple Banana Smoothie Delight good for weight loss?
Yes! The Tropical Pineapple Banana Smoothie Delight is low in calories and high in fiber, keeping you full longer. Just avoid adding sugary extras like honey or syrups to keep it weight-loss friendly.
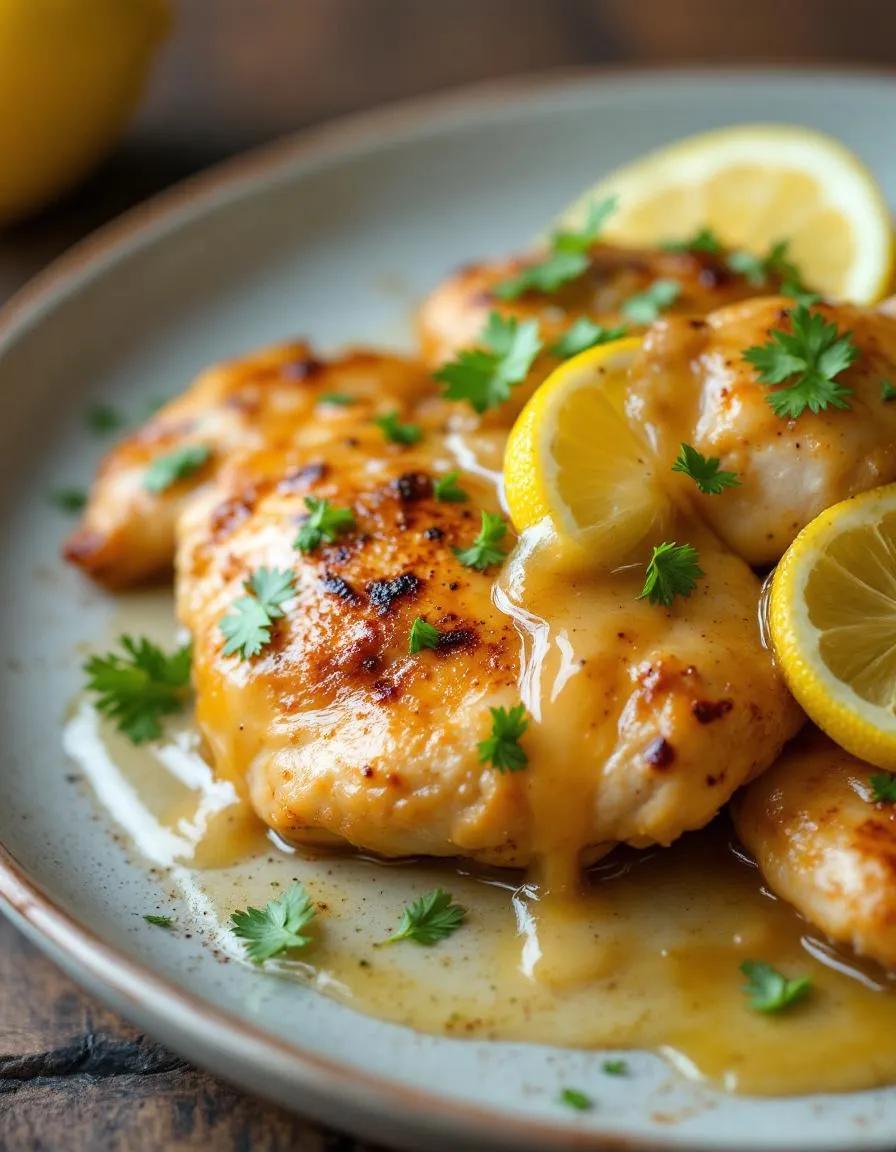
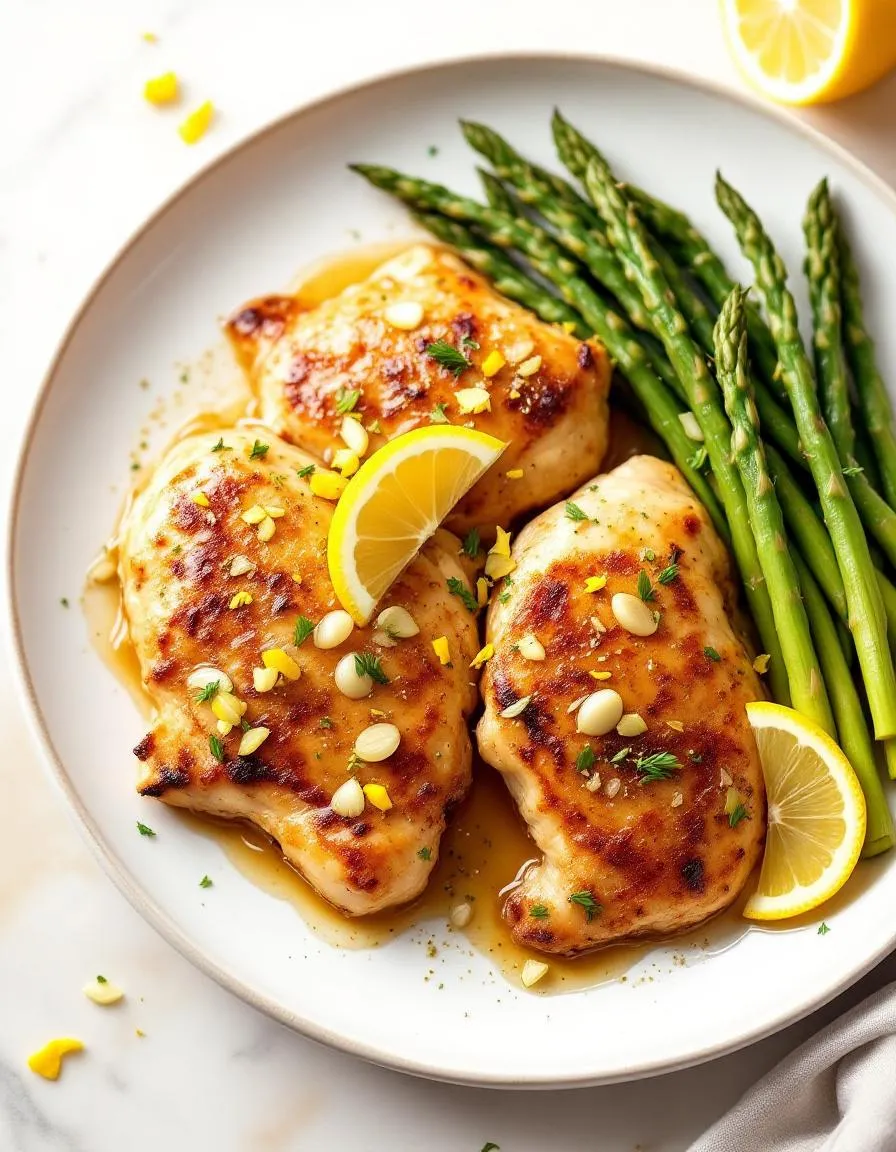
Best Tangy Lemon Shallot Chicken Recipe
Introduction
There’s something undeniably comforting about a dish that balances bright, zesty flavors with savory depth. If you’re craving a meal that feels both refreshing and satisfying, this Tangy Lemon Shallot Chicken Recipe is about to become your new favorite. Whether you’re cooking for a weeknight dinner or impressing guests, this recipe delivers juicy chicken with a punchy citrus kick and the subtle sweetness of caramelized shallots. Best of all, it comes together in one pan, making cleanup a breeze. Let’s dive into why this dish deserves a spot in your regular rotation.
The Tangy Lemon Shallot Chicken Recipe is a vibrant twist on classic pan-seared chicken. By combining tangy lemon juice, aromatic shallots, and a hint of herbs, this dish creates a harmony of flavors that elevate simple ingredients into something extraordinary. What sets it apart is its versatility. You can pair it with roasted vegetables, fluffy rice, or even a crisp salad for a complete meal. Moreover, it fits perfectly with our blog’s mission to share approachable yet impressive recipes that anyone can master. If you love bold flavors without complicated steps, this recipe checks every box.
For those who appreciate quick, flavorful meals, this dish is a game-changer. The tangy sauce clings to the chicken, ensuring every bite bursts with brightness. Meanwhile, the shallots caramelize into a sweet, mellow contrast that rounds out the acidity. If you’re looking for more one-pan wonders, our Garlic Butter Salmon offers a similarly effortless yet delicious option. Alternatively, if you want to explore other citrus-infused dishes, our Honey Orange Glazed Chicken brings a different but equally delightful flavor profile.
Why I Love This Recipe
This Tangy Lemon Shallot Chicken Recipe holds a special place in my heart because it reminds me of family dinners growing up. My mom would whip it up on busy evenings, and the aroma of lemon and shallots sizzling in the pan always signaled comfort. Even now, cooking it brings back those cozy memories while still feeling fresh and exciting. Plus, it’s a dish that never fails to get compliments, whether I’m serving it to friends or just treating myself. Simple, flavorful, and nostalgic—what more could you ask for in a recipe?
Health and Nutrition
Why it’s good for your body
Tangy Lemon Shallot Chicken Recipe packs a nutritious punch while delighting your taste buds. First, lean chicken breast serves as an excellent source of high-quality protein, which helps build and repair muscles. Additionally, the dish includes fresh lemon juice, a powerhouse of vitamin C that boosts immunity and aids iron absorption.
Moreover, shallots bring more than just flavor. They contain antioxidants and compounds that may support heart health and reduce inflammation. When you combine these ingredients, Tangy Lemon Shallot Chicken Recipe becomes a meal that nourishes your body from the inside out. The light, citrusy sauce also keeps calories in check, making it a smarter choice than heavy cream-based dishes.
Furthermore, this recipe skips processed additives, relying instead on whole, natural ingredients. The tangy lemon not only enhances flavor but also aids digestion. Whether you’re fueling up after a workout or simply craving a balanced dinner, Tangy Lemon Shallot Chicken Recipe delivers both satisfaction and nutrition in every bite.
How it fits in a healthy lifestyle
Tangy Lemon Shallot Chicken Recipe fits seamlessly into a balanced diet. If you’re watching your carb intake, pair it with roasted vegetables or a crisp salad for a low-carb meal. The high protein content also makes it ideal for those focusing on muscle gain or recovery, like the readers of our post-workout meal guide.
For heart-conscious eaters, the dish uses minimal oil and relies on heart-healthy fats from olive oil. It’s naturally gluten-free, so it accommodates dietary restrictions without sacrificing flavor. If you’re meal prepping, the recipe stores well, aligning with the tips in our meal prep ideas article. Whether you’re cooking for one or feeding a family, Tangy Lemon Shallot Chicken Recipe keeps health and convenience on the table.
A zesty and flavorful chicken dish with the perfect balance of tangy lemon and sweet shallots.
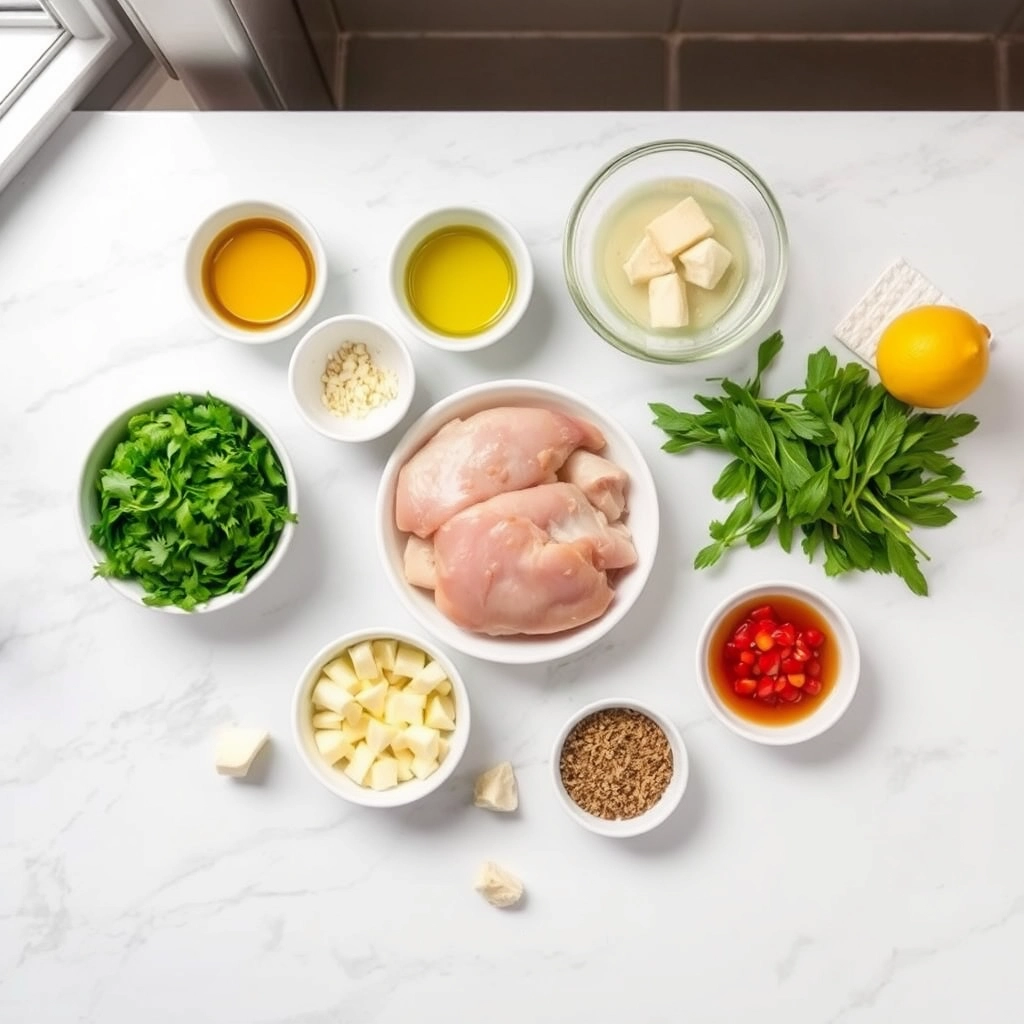
Ingredients
Scale
For the Crust:
4 boneless, skinless chicken breasts
3 medium shallots, thinly sliced
2 lemons, juiced and zested
3 cloves garlic, minced
2 tbsp olive oil
1 tsp dried thyme
1/2 tsp salt
1/4 tsp black pepper
1/2 cup chicken broth
1 tbsp honey
Instructions
1. Prepare the Crust:
Heat olive oil in a large skillet over medium-high heat.
Season chicken breasts with salt, pepper, and thyme, then add to the skillet. Cook for 5-6 minutes per side until golden brown. Remove and set aside.
In the same skillet, add shallots and garlic. Sauté for 2-3 minutes until softened.
Stir in lemon juice, zest, chicken broth, and honey. Bring to a simmer.
Return chicken to the skillet, spooning the sauce over the top. Cook for another 5 minutes until chicken is fully cooked and sauce has slightly thickened.
Serve hot, garnished with additional lemon slices if desired.
Notes
You can customize the seasonings to taste.
How to Prepare This Dish
Steps and time-saving tips
Start by preheating your oven to 375°F to ensure it’s ready when you are. While the oven heats, whisk together the tangy lemon shallot chicken marinade—combine fresh lemon juice, minced shallots, olive oil, garlic, and a pinch of salt in a bowl. Next, place the chicken breasts in a resealable bag or shallow dish, then pour the marinade over them, making sure each piece is fully coated. Let the chicken marinate for at least 20 minutes, or up to 4 hours for deeper flavor. Meanwhile, line a baking sheet with parchment paper for easy cleanup later. Once marinated, transfer the chicken to the baking sheet and drizzle any remaining marinade on top. Bake for 25-30 minutes, or until the internal temperature reaches 165°F. For a golden finish, broil the chicken for the last 2 minutes. While the chicken cooks, toss together a quick side salad or steam some vegetables to complete the meal. To save time, prep the marinade the night before and store it in the fridge—this way, you can quickly assemble and bake the tangy lemon shallot chicken recipe the next day.
and-learned-from">Mistakes I’ve made and learned from
I’ve learned the hard way that overcrowding the baking sheet leads to unevenly cooked chicken—now I always leave space between each piece for proper airflow. Another mistake? Skipping the broiling step, which meant missing out on that perfect caramelized crust. If your chicken turns out dry, try brining it first, like I do with my perfect roast chicken. Also, don’t forget to let the chicken rest for 5 minutes after baking—this locks in the juices, just like with my grilled lemon herb chicken. Trust me, these small tweaks make all the difference in your tangy lemon shallot chicken recipe turning out tender and flavorful every time.
Cultural Connection and Variations
Where this recipe comes from
The Tangy Lemon Shallot Chicken Recipe dances between rustic comfort and bright sophistication, a dish that feels equally at home in a cozy kitchen or a festive gathering. Its roots weave through Mediterranean flavors, where lemons and shallots star in countless regional dishes. However, this particular recipe takes inspiration from French Provençal cooking, where chefs often pair poultry with tangy citrus and aromatic alliums. Over time, home cooks have adapted it globally—some add capers for a briny punch, while others toss in olives or fresh herbs like thyme or rosemary.
In my family, the Tangy
Lemon Shallot Chicken Recipe became a springtime staple, perfect for bridging the gap between hearty winter meals and lighter summer fare. My grandmother would swap shallots for red onions when pantry supplies ran low, proving how flexible this dish can be. Across the Middle East, you might find a similar chicken dish with sumac or preserved lemons, while Italian versions often lean into white wine and garlic. No matter the variation, the balance of zesty lemon and sweet shallots always shines through.
How it fits in today’s cooking
Today, the Tangy Lemon Shallot Chicken Recipe holds its own as a weeknight hero and a dinner-party standout. Busy cooks love its one-pan simplicity, while meal preppers appreciate how well it reheats for lunches. For those embracing seasonal eating, it’s a natural fit for spring and summer when farmers’ markets overflow with fresh lemons and tender shallots. Some modern twists include swapping chicken thighs for breasts or even trying it with vegetarian alternatives like cauliflower steaks.
It’s also a sneaky way to impress guests without stress—pair it with a crisp salad or easy side dishes, and suddenly you’ve curated a restaurant-worthy meal. Whether you stick to the classic or experiment with global flavors, this recipe adapts effortlessly to today’s fast-paced, flavor-driven kitchens.
>Taste and Texture
What makes it delicious
The Tangy Lemon Shallot Chicken Recipe delivers a vibrant burst of flavors with every bite. Juicy, tender chicken soaks up the bright, zesty lemon sauce, while caramelized shallots add a subtle sweetness and buttery softness. The dish smells irresistible—fragrant garlic and fresh herbs mingle with the tangy citrus aroma, making your mouth water before the first forkful. Each piece of chicken boasts a crisp, golden sear on the outside, giving way to a succulent interior. Meanwhile, the sauce strikes the perfect balance between sharp and smooth, clinging to the meat for a rich, satisfying finish. Whether you serve it over rice or with crusty bread, the Tangy Lemon Shallot Chicken Recipe guarantees a memorable meal.
Boosting the flavor
For an extra flavor kick, try marinating the chicken in lemon juice and herbs for an hour before cooking—this deepens the tangy profile. If you love heat, a pinch of red pepper flakes or a drizzle of honey sriracha glaze adds a spicy contrast. Fresh thyme or rosemary elevates the herbal notes, while a splash of white wine deglazes the pan for a more complex sauce. Pair the Tangy Lemon Shallot Chicken Recipe with a light, refreshing side like cucumber avocado salad to balance the bold flavors. Small tweaks make a big difference, so don’t hesitate to experiment!
Tips for Success
Best practices for results
For the best Tangy Lemon Shallot Chicken Recipe, always pat the chicken dry before seasoning to ensure a crispier sear. Additionally, let the chicken rest for at least five minutes after cooking so the juices redistribute evenly. Meanwhile, use fresh lemon juice rather than bottled for a brighter, more vibrant flavor. Finally, slice the shallots thinly so they caramelize quickly and blend seamlessly into the dish.
Mistakes to avoid
Avoid overcrowding the pan when searing the chicken, as this steams the meat instead of browning it. Instead, cook in batches if needed for even results. Also, don’t skip deglazing the pan with lemon juice and broth—this step builds the flavorful sauce that makes the Tangy Lemon Shallot Chicken Recipe shine. For more on perfecting pan-seared chicken, check out our guide on essential cooking techniques. And if you’re unsure about balancing acidic flavors, our flavor pairing tips can help.
Serving and Pairing Suggestions
How to serve this dish
For a stunning presentation, plate the Tangy Lemon Shallot Chicken Recipe over a bed of fluffy jasmine rice or creamy mashed potatoes. Meanwhile, drizzle the bright pan sauce generously over the top to highlight its glossy finish. Alternatively, garnish with fresh parsley or microgreens for a pop of color that contrasts beautifully with the golden-brown chicken. Since this dish balances zesty and savory flavors, it works equally well for casual weeknight dinners or festive gatherings like Easter brunch. To elevate the experience, serve it family-style on a rustic platter with lemon wedges for an extra tangy kick.
h-it">What goes well with it
Pair the Tangy Lemon Shallot Chicken Recipe with a crisp, chilled Sauvignon Blanc to enhance its citrusy notes. If you prefer non-alcoholic options, a sparkling lemonade with a hint of thyme makes a refreshing match. For sides, try our Garlic Herb Roasted Potatoes, which add a hearty texture that soaks up the tangy sauce. Alternatively, a light Arugula Pear Salad balances the dish with peppery and sweet flavors. Finally, a warm baguette or crusty bread completes the meal by scooping up every last drop of the delicious sauce.
What sides pair well with Tangy Lemon Shallot Chicken Recipe?
This dish pairs beautifully with roasted potatoes, steamed asparagus, or a fresh arugula salad. The bright flavors of Tangy Lemon Shallot Chicken Recipe also complement quinoa or crusty bread for soaking up the delicious sauce.
ank-math-faq-item">
Can I make Tangy Lemon Shallot Chicken Recipe ahead of time?
Yes! The flavors of Tangy Lemon Shallot Chicken Recipe actually deepen when marinated overnight. Cook the chicken as directed, then reheat gently before serving to maintain the perfect texture.
How do I prevent the shallots from burning in this recipe?
Cook shallots over medium heat and stir frequently until they soften. For Tangy Lemon Shallot Chicken Recipe, adding a splash of chicken broth or lemon juice helps prevent burning while building flavor.
Can I use chicken thighs instead of breasts for Tangy Lemon Shallot Chicken Recipe?
Absolutely! Chicken thighs work wonderfully in Tangy Lemon Shallot Chicken Recipe, offering richer flavor and staying juicier. Just increase cooking time by 2-3 minutes since thighs are thicker than breasts.