Cheesy Ground Beef Pasta Skillet

cheesy-ground-beef-pasta-skillet

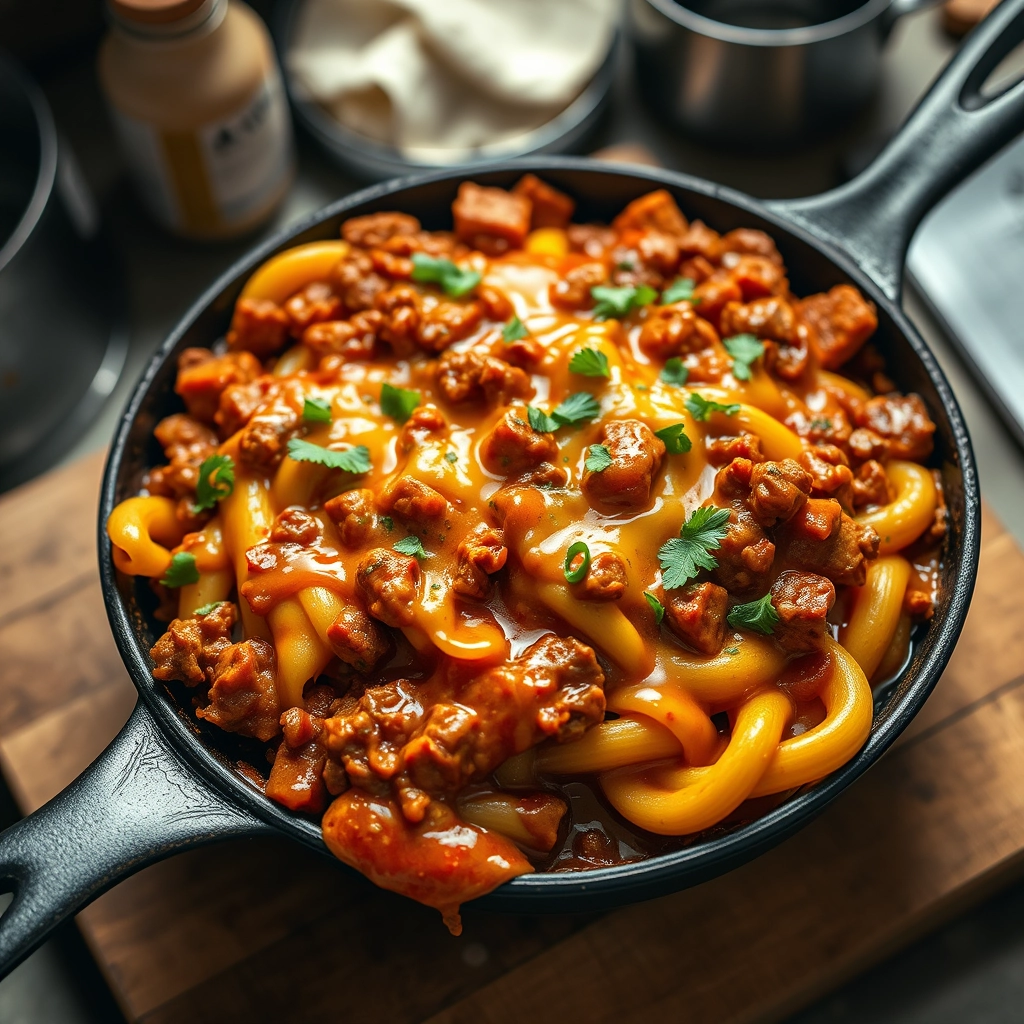
When Comfort Calls: My Cheesy Ground Beef Pasta Skillet

There are evenings when the world feels a little heavier than usual—when the rain taps insistently against the window, or the to-do list stretches longer than the daylight. On nights like these, I crave the kind of meal that wraps around you like a well-loved blanket: something hearty, uncomplicated, and deeply satisfying. That’s how this Cheesy Ground Beef Pasta Skillet came to be—a one-pan wonder that’s become my go-to for cozy nourishment. It’s the dish my family gathers around when we need a reminder that joy can be as simple as melted cheese and savory beef tangled in tender pasta.

Ingredients You’ll Need (and Why I Love Them)

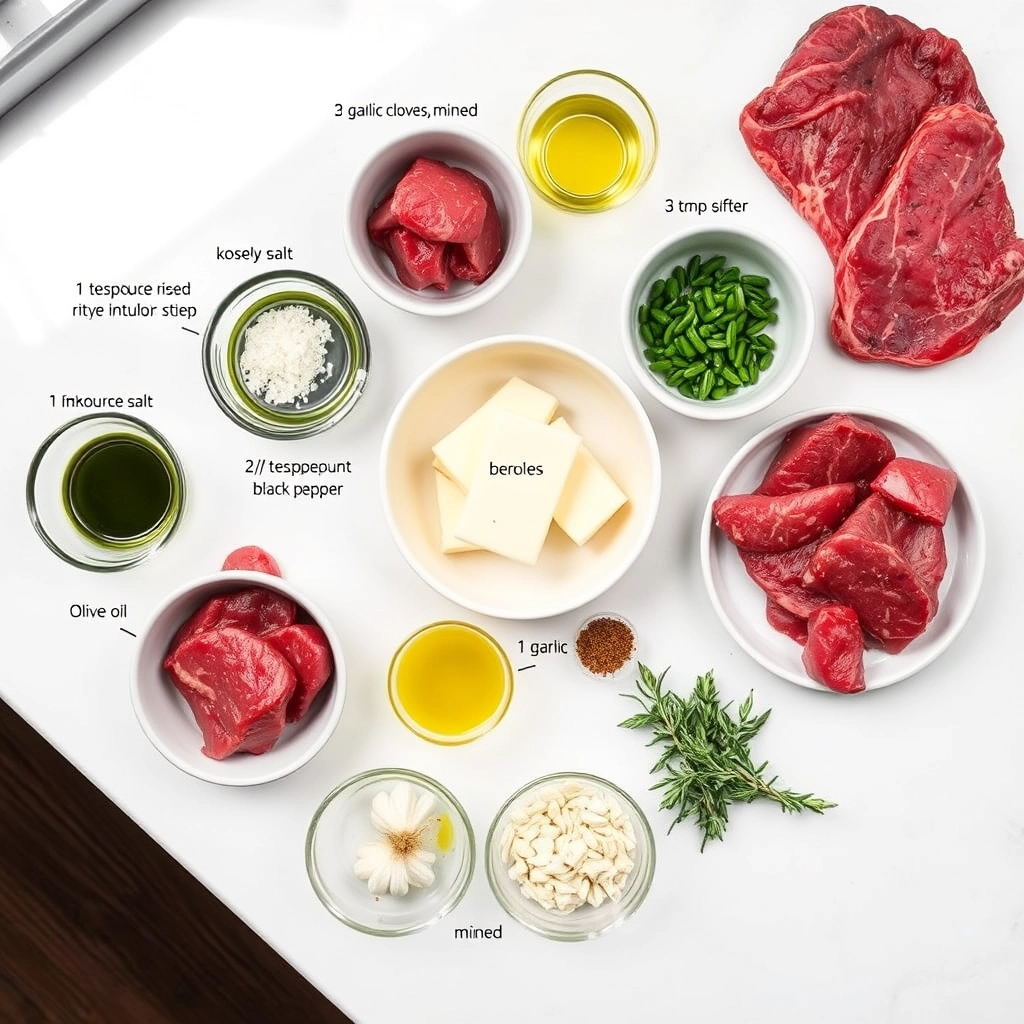
  • 1 lb ground beef (85/15 blend) – The slight fat content keeps it juicy, but lean enough to let the other flavors shine.
  • 1 small yellow onion, diced – Sweet and aromatic, it’s the quiet backbone of the dish.
  • 2 cloves garlic, minced – Because what’s a skillet meal without that golden, fragrant sizzle?
  • 1 tsp dried oregano + ½ tsp smoked paprika – My little twist—the smokiness adds depth without overwhelming.
  • 2 cups dried penne pasta – Rigatoni or fusilli work too, but penne holds the sauce so beautifully.
  • 2 cups beef broth – Homemade if you have it, but store-bought works just fine (I like low-sodium to control the salt).
  • 1 (15 oz) can crushed tomatoes – The tangy brightness that balances the richness.
  • 1 cup shredded sharp cheddar – For that irresistible pull. Extra points for grating it fresh!
  • ½ cup grated Parmesan – The salty, nutty finish that makes every bite sing.
  • Handful of fresh parsley, chopped – A pop of color and freshness to brighten it all up.

Let’s Make Magic in One Pan

Step 1: The Sizzle That Starts It All
Heat a large, deep skillet (I use my trusty 12-inch cast iron) over medium-high. Add the ground beef, breaking it up with a wooden spoon as it browns—don’t rush this! We want those little crispy edges for texture. Once no pink remains, toss in the onions and garlic, stirring until they soften and turn translucent, about 3 minutes. (Tip: If there’s excess grease, drain just a bit, but leave a tablespoon or two—it’s flavor!)

Step 2: Spice It Up
Sprinkle in the oregano, smoked paprika, and a pinch of salt and pepper. Stir until the spices bloom and coat the beef, about 30 seconds. This is when the kitchen starts smelling like home.

Step 3: Pasta’s Turn to Shine
Add the uncooked pasta straight to the skillet—yes, uncooked! Pour in the beef broth and crushed tomatoes, stirring gently to combine. Bring it to a lively simmer, then reduce the heat to medium-low. Cover with a lid (or foil if your skillet doesn’t have one) and let it cook for 12-15 minutes, stirring occasionally. The pasta will drink up the broth and tomatoes, becoming plump and tender.

Step 4: The Cheesy Grand Finale
Once the pasta is al dente, remove the lid and sprinkle the cheddar and Parmesan evenly over the top. Let it sit off the heat for 2 minutes—just enough time for the cheeses to melt into gooey perfection. (Resist the urge to stir! We want that beautiful cheesy blanket.) Garnish with parsley, and maybe an extra crack of black pepper if you’re feeling fancy.

Pro Tips, Variations, and Substitutions

This cheesy ground beef pasta skillet is wonderfully adaptable to your tastes and what you have on hand. Here are some ideas to make it your own:

  • Protein swap: Try ground turkey, chicken, or Italian sausage instead of beef for a different flavor profile.
  • Vegetable boost: Stir in sautéed mushrooms, bell peppers, or spinach for extra nutrition.
  • Cheese options: While cheddar is classic, mozzarella, Monterey Jack, or a blend of Italian cheeses work beautifully too.
  • Pasta alternatives: Any short pasta shape will do – penne, rotini, or shells are all great choices.
  • Creamy version: For extra richness, stir in 1/4 cup of cream cheese or heavy cream with the tomato sauce.

What to Serve With Your Cheesy Pasta Skillet

This hearty dish is satisfying on its own, but pairs perfectly with:

  • A crisp green salad with vinaigrette to cut through the richness
  • Garlic bread or crusty baguette for soaking up every last bit of sauce
  • Roasted vegetables like broccoli or Brussels sprouts
  • A glass of red wine or sparkling water with lemon

Storage and Reheating Tips

Leftovers (if you have any!) store beautifully:

  • Refrigerator: Store in an airtight container for 3-4 days.
  • Freezer: Freeze in portion-sized containers for up to 3 months. Thaw overnight in the refrigerator before reheating.
  • Reheating: Warm in a skillet over medium-low heat with a splash of water or milk to restore creaminess. Microwave works too – cover and heat at 50% power, stirring occasionally.

Frequently Asked Questions

Can I make this dish ahead of time?
Absolutely! Prepare through step 4 (before adding cheese), let cool, and refrigerate. When ready to serve, reheat and add the cheese topping.

Is there a way to make this recipe gluten-free?
Yes! Simply use your favorite gluten-free pasta and double-check that your Worcestershire sauce is gluten-free.

Can I use fresh tomatoes instead of canned?
You sure can! Substitute 2 cups of diced fresh tomatoes for the canned variety. The sauce might be slightly less thick, so you may want to simmer it a bit longer.

How can I make this dish spicier?
Add a pinch of red pepper flakes with the garlic, or stir in some diced jalapeños when cooking the onions. A dash of hot sauce at the end works great too!

Final Thoughts

There’s something so comforting about a bubbling skillet of cheesy pasta, especially when it comes together in one pan with minimal fuss. This recipe has become a weeknight hero in my kitchen – the kind of meal that brings everyone to the table with happy anticipation. Whether you’re cooking for a crowd or just want leftovers for tomorrow’s lunch, this dish delivers on flavor, comfort, and convenience. I hope it becomes a favorite in your home too, sparking many cozy dinners and happy memories around the table.

Print
clock clock iconcutlery cutlery iconflag flag iconfolder folder iconinstagram instagram iconpinterest pinterest iconfacebook facebook iconprint print iconsquares squares iconheart heart iconheart solid heart solid icon

Cheesy Ground Beef Pasta Skillet

  • Author: Trusted Blog

Description

A quick and comforting one-pan meal with ground beef, pasta, and melted cheese.


Ingredients

Scale

For the Crust:

  • 1 lb ground beef
  • 8 oz pasta (such as penne or rotini)
  • 1 small onion, diced
  • 2 cloves garlic, minced
  • 1 can (14.5 oz) diced tomatoes
  • 1 cup beef broth
  • 1 tsp Italian seasoning
  • 1/2 tsp salt
  • 1/4 tsp black pepper
  • 1 cup shredded cheddar cheese
  • 1/2 cup shredded mozzarella cheese

Instructions

1. Prepare the Crust:

  1. In a large skillet, brown the ground beef over medium heat. Drain excess fat.
  2. Add onion and garlic to the skillet and cook until softened, about 3 minutes.
  3. Stir in diced tomatoes, beef broth, Italian seasoning, salt, and pepper. Bring to a simmer.
  4. Add uncooked pasta to the skillet, stirring to combine. Cover and simmer for 12-15 minutes, or until pasta is tender.
  5. Sprinkle cheeses evenly over the top, cover, and let melt for 2-3 minutes.
  6. Serve hot, garnished with fresh parsley if desired.

Notes

You can customize the seasonings to taste.

Greek Chicken Bowls

greek-chicken-bowls

Greek Chicken Bowls: A Taste of the Mediterranean at Home

There’s something about Greek flavors that feels like sunshine on a plate—bright, vibrant, and utterly comforting. I first fell in love with these Greek Chicken Bowls on a lazy summer evening when the idea of a complicated dinner felt impossible. I wanted something fresh, flavorful, and fuss-free, and this recipe delivered in every way. Now, it’s a staple in my kitchen, perfect for busy weeknights or when I’m craving a little Mediterranean escape without leaving my dining table.

Ingredients You’ll Need

Let’s gather everything for these colorful, flavor-packed bowls. Don’t be intimidated by the list—it’s mostly pantry staples and fresh ingredients that come together beautifully:

  • Chicken breasts or thighs: I prefer thighs for their juiciness, but breasts work just as well if you’re watching calories.
  • Olive oil: A good glug of extra virgin olive oil is non-negotiable for that authentic Greek taste.
  • Lemon juice & zest: Freshly squeezed, please! It makes all the difference in the marinade.
  • Garlic: Minced or crushed—because what’s a Mediterranean dish without garlic?
  • Dried oregano: The herb that screams “Greek cuisine” to me.
  • Salt & pepper: Simple, but essential.
  • Cucumber, cherry tomatoes, red onion: The crisp, fresh trio that adds crunch and color.
  • Kalamata olives: Salty, briny little gems that elevate every bite.
  • Feta cheese: Crumbled or in blocks—because no Greek bowl is complete without it.
  • Tzatziki sauce: Store-bought for convenience, or homemade if you’re feeling ambitious.
  • Cooked rice or quinoa: I love fluffy jasmine rice, but quinoa keeps it light and protein-packed.

Let’s Make Those Bowls!

Now, onto the fun part—bringing these ingredients together into a meal that’s as satisfying to make as it is to eat.

  1. Marinate the chicken: In a bowl, whisk together olive oil, lemon juice, garlic, oregano, salt, and pepper. Add the chicken, making sure each piece is well-coated. Let it sit for at least 20 minutes (or up to 4 hours if you have time). This is where the magic happens—the longer it marinates, the more flavorful your chicken will be!
  2. Cook the chicken: Heat a skillet over medium-high heat and cook the chicken for 5-7 minutes per side, or until golden and cooked through. Let it rest for a few minutes before slicing—this keeps all those delicious juices locked in.
  3. Prep the veggies: While the chicken cooks, dice the cucumber, halve the cherry tomatoes, and thinly slice the red onion. Toss them together lightly—no dressing needed yet, as the tzatziki will bring everything together.
  4. Assemble your bowls: Start with a base of rice or quinoa, then layer on the sliced chicken, fresh veggies, olives, and a generous sprinkle of feta. Drizzle with tzatziki just before serving—I like to add an extra squeeze of lemon for brightness.

And just like that, you’ve got a meal that’s as beautiful as it is delicious. The best part? These bowls are endlessly customizable—add a handful of spinach, swap the rice for pita bread, or throw in some roasted red peppers if you’re feeling adventurous. The Mediterranean is your oyster!

Pro Tips, Variations, and Substitutions

Making Greek Chicken Bowls is wonderfully flexible, so don’t hesitate to tweak the recipe to suit your tastes or what’s in your pantry. Here are some ideas to inspire you:

  • Protein Swap: Not a fan of chicken? Try grilled shrimp, lamb, or even chickpeas for a vegetarian twist.
  • Grain Alternatives: Swap the rice for quinoa, couscous, or even a bed of crisp greens for a lighter option.
  • Extra Flavor: Add a sprinkle of crumbled feta or a drizzle of extra tzatziki for an extra punch of Greek goodness.
  • Veggie Boost: Roasted red peppers, artichoke hearts, or sliced avocado would all be delicious additions.

What to Serve With Greek Chicken Bowls

These bowls are hearty enough to stand alone, but if you’d like to round out the meal, here are a few tasty pairings:

  • A simple Greek salad with cucumbers, tomatoes, olives, and feta.
  • Warm pita bread or crispy pita chips for scooping up every last bite.
  • A refreshing glass of homemade lemonade or a chilled white wine like Assyrtiko.

Storage and Reheating Tips

Greek Chicken Bowls make fantastic leftovers—just store them properly to keep everything fresh and flavorful!

  • Storage: Keep components separate if possible, especially the tzatziki and fresh veggies, to prevent sogginess. Store in airtight containers in the fridge for up to 3 days.
  • Reheating: Warm the chicken and rice in the microwave or a skillet over medium heat. Add fresh toppings like cucumbers and tomatoes after reheating for the best texture.
  • Meal Prep: These bowls are perfect for make-ahead lunches! Assemble everything except the tzatziki and fresh veggies the night before, then add those just before eating.

Frequently Asked Questions

Can I make Greek Chicken Bowls ahead of time?
Absolutely! Prep the chicken, rice, and veggies in advance, but wait to assemble with fresh toppings and tzatziki until serving for the best texture.

What can I use instead of tzatziki?
If you don’t have tzatziki, hummus or a simple yogurt-lemon sauce with garlic and dill makes a great substitute.

Can I grill the chicken instead of cooking it on the stove?
Definitely! Grilled chicken adds a lovely smoky flavor—just marinate as usual and cook over medium heat until done.

Is there a low-carb option for this dish?
Yes! Skip the rice and serve the chicken and toppings over a bed of greens or cauliflower rice for a lighter, low-carb version.

Final Thoughts

Greek Chicken Bowls are one of those meals that feel like a warm hug—fresh, flavorful, and endlessly customizable. Whether you’re meal-prepping for the week or serving a crowd, this dish is sure to become a favorite. The bright Mediterranean flavors, the satisfying textures, and the ease of putting it all together make it a winner in my book. I hope you love it as much as I do!

Print
clock clock iconcutlery cutlery iconflag flag iconfolder folder iconinstagram instagram iconpinterest pinterest iconfacebook facebook iconprint print iconsquares squares iconheart heart iconheart solid heart solid icon

Greek Chicken Bowls

  • Author: Trusted Blog

Description

A flavorful and healthy Mediterranean-inspired dish featuring marinated chicken, fresh veggies, and tangy tzatziki sauce.


Ingredients

Scale

For the Crust:

  • 1.5 lbs boneless, skinless chicken thighs
  • 2 tbsp olive oil
  • 2 tbsp lemon juice
  • 2 cloves garlic, minced
  • 1 tsp dried oregano
  • 1 tsp salt
  • 1/2 tsp black pepper
  • 2 cups cooked brown rice
  • 1 cucumber, diced
  • 1 cup cherry tomatoes, halved
  • 1/2 red onion, thinly sliced
  • 1/4 cup kalamata olives
  • 1/2 cup crumbled feta cheese
  • 1/2 cup tzatziki sauce

Instructions

1. Prepare the Crust:

  1. In a bowl, whisk together olive oil, lemon juice, garlic, oregano, salt, and pepper. Add chicken thighs and marinate for at least 30 minutes.
  2. Grill or pan-sear chicken over medium-high heat for 6-8 minutes per side until cooked through. Let rest for 5 minutes, then slice.
  3. Assemble bowls by dividing rice among four bowls. Top with sliced chicken, cucumber, tomatoes, red onion, olives, and feta cheese.
  4. Drizzle with tzatziki sauce before serving.

Notes

You can customize the seasonings to taste.

Classic Italian Meatballs (Tender and Juicy!)

classic-italian-meatballs-tender-juicy

The Secret to Tender Italian Meatballs (Just Like Nonna Used to Make)

There’s something deeply comforting about a plate of perfectly tender meatballs, isn’t there? I still remember my first bite of authentic Italian meatballs at a tiny trattoria in Rome – the way they practically melted in my mouth, the rich tomato sauce clinging to every nook and cranny. When I got home, I became obsessed with recreating that magic. After countless trials (and a few hilariously dense hockey-puck versions), I finally cracked the code to juicy, flavorful meatballs that would make any Italian grandmother nod in approval.

Ingredients You’ll Need

  • 1 lb ground beef (80/20 blend) – The fat is your friend here for juicy results!
  • 1/2 lb ground pork – Adds incredible depth of flavor
  • 1/2 cup fresh breadcrumbs – Tear up day-old Italian bread for the best texture
  • 1/4 cup whole milk – This is our secret moisture booster
  • 1/3 cup grated Parmesan – Use the good stuff from the cheese counter
  • 1 large egg – Our binding agent
  • 3 garlic cloves, minced – Because can you ever have too much garlic?
  • 1/4 cup fresh parsley, finely chopped – Brightens all those rich flavors
  • 1 tsp dried oregano – That classic Italian aroma
  • 1 tsp salt – Seasoning is key
  • 1/2 tsp black pepper – Freshly ground makes all the difference

Let’s Make Some Magic

First, let’s create our panade – that’s just a fancy term for the bread-milk mixture that keeps our meatballs tender. In a small bowl, combine the breadcrumbs and milk, stirring until the bread has absorbed all the liquid. Let it sit for about 5 minutes while you prepare everything else – this helps the bread break down completely.

In a large mixing bowl, gently combine the ground beef and pork with your fingertips. Yes, hands are the best tools here! The key is to mix just until combined – overworking the meat leads to tough meatballs. Now add all your remaining ingredients including the panade, using that same light touch to incorporate everything evenly.

Here’s my favorite tip: before forming all your meatballs, test a small patty. Cook it in a skillet for about 2 minutes per side, then taste. This is your chance to adjust seasoning before committing to the whole batch – a game changer I learned after one very bland meatball incident!

When you’re ready, lightly moisten your hands (this prevents sticking) and form the mixture into golf ball-sized portions. I like to use an ice cream scoop for consistent sizing, then roll gently between my palms. Place them on a parchment-lined tray as you go – don’t crowd them yet!

Pro Tips for Perfect Italian Meatballs Every Time

Making tender, juicy meatballs is easier than you think with these insider secrets:

  • Handle gently: Overmixing makes meatballs tough. Mix just until ingredients come together.
  • Test fry: Cook a tiny patty to check seasoning before forming all your meatballs.
  • Keep cold: Chill the mixture for 30 minutes before shaping – it helps them hold together.
  • Size matters: Use an ice cream scoop for evenly sized meatballs that cook uniformly.

Delicious Variations to Try

While this classic recipe is perfection, sometimes it’s fun to mix things up:

  • Cheese lovers: Add 1/2 cup grated Pecorino Romano to the mixture
  • Spicy kick: Mix in 1 tsp red pepper flakes or 2 tbsp chopped Calabrian chiles
  • Herbaceous: Swap parsley for fresh basil or oregano
  • Turkey twist: Use ground turkey instead of beef (add 1 tbsp olive oil to keep moist)

The Perfect Pairings

These versatile meatballs shine in so many dishes:

  • Tossed with spaghetti and marinara for the ultimate comfort meal
  • Stuffed into crusty Italian rolls with melted provolone for meatball subs
  • Served as appetizers with toothpicks and warm marinara for dipping
  • Topped on creamy polenta with a sprinkle of Parmesan

Keeping and Reheating Your Meatballs

Leftovers? Lucky you! Here’s how to enjoy them later:

  • Refrigerator: Store in airtight container for 3-4 days
  • Freezer: Freeze on baking sheet, then transfer to bags for up to 3 months
  • Reheating: Simmer gently in sauce on low heat, or microwave at 50% power in 30-second intervals

Frequently Asked Questions

Can I bake instead of fry the meatballs?
Absolutely! Bake at 400°F for 20-25 minutes on a parchment-lined sheet. They’ll be slightly less crispy but just as delicious.

Why do my meatballs fall apart?
This usually happens from insufficient binding. Try adding an extra egg yolk or 1/4 cup more breadcrumbs next time.

Can I make these gluten-free?
Yes! Simply swap the breadcrumbs for gluten-free panko or almond flour.

How do I know when they’re fully cooked?
The internal temperature should reach 160°F. Cut one open – it should be uniformly colored with no pink.

A Taste of Home

There’s something magical about a plate of homemade Italian meatballs that instantly transports you to Nonna’s kitchen. Whether you’re serving them over pasta, in a sub, or straight from the pan (no judgment here!), these tender morsels are guaranteed to become a family favorite. The best part? Every bite is infused with love – the secret ingredient that makes all the difference. Mangia!

Print
clock clock iconcutlery cutlery iconflag flag iconfolder folder iconinstagram instagram iconpinterest pinterest iconfacebook facebook iconprint print iconsquares squares iconheart heart iconheart solid heart solid icon

Classic Italian Meatballs (Tender and Juicy!)

  • Author: Trusted Blog

Description

Juicy and flavorful Italian meatballs made with a blend of ground meats, breadcrumbs, and aromatic herbs.


Ingredients

Scale

For the Crust:

  • 1 lb ground beef
  • 1/2 lb ground pork
  • 1/2 cup breadcrumbs
  • 1/4 cup grated Parmesan cheese
  • 1/4 cup chopped fresh parsley
  • 2 cloves garlic, minced
  • 1 large egg
  • 1 tsp salt
  • 1/2 tsp black pepper
  • 1/2 tsp dried oregano
  • 1/4 cup milk
  • 2 tbsp olive oil

Instructions

1. Prepare the Crust:

  1. In a large bowl, combine ground beef, ground pork, breadcrumbs, Parmesan cheese, parsley, garlic, egg, salt, pepper, and oregano.
  2. Add milk and mix gently until just combined. Avoid overmixing to keep the meatballs tender.
  3. Shape the mixture into 1.5-inch meatballs (about 20-24 meatballs).
  4. Heat olive oil in a large skillet over medium heat. Brown the meatballs in batches, turning occasionally, for about 8-10 minutes or until golden on all sides.
  5. Transfer the meatballs to a plate and serve with marinara sauce or your favorite pasta.

Notes

You can customize the seasonings to taste.

Easy Asian Cucumber Salad

easy-asian-cucumber-salad

The Crisp, Cool Magic of Asian Cucumber Salad

There’s something about the first bite of a perfectly chilled cucumber salad that feels like a whisper of relief on a sweltering summer day. I remember the first time I tasted this dish—it was at a tiny family-run restaurant tucked into a bustling alley of Seoul. The cucumbers were impossibly crisp, the dressing tangy with just a hint of sweetness, and the sprinkle of sesame seeds added this nutty depth that made me pause mid-bite. I’ve been chasing that moment ever since, and today, I’m sharing my foolproof version of that magic—a recipe so simple, yet so transformative, it’ll become your go-to for potlucks, weeknight dinners, or just when you need a little crunch in your life.

Ingredients You’ll Need

  • 2 English cucumbers – Their thin skin and minimal seeds make them ideal for salads (no peeling required!). If you can’t find them, regular cucumbers work too—just scoop out the seeds with a spoon.
  • 1 tsp salt – This isn’t just for seasoning; it draws out excess water so your salad stays crisp, not soggy.
  • 2 cloves garlic, minced – Fresh is best here. The sharpness mellows into something sweet and fragrant once it mingles with the dressing.
  • 1 tbsp rice vinegar – Mild and slightly sweet, it’s the backbone of the dressing. Apple cider vinegar can sub in a pinch.
  • 1 tbsp soy sauce – Use low-sodium if you’re watching salt, but the umami punch of regular soy sauce is worth it.
  • 1 tsp honey or maple syrup – Just a touch to balance the tang. If you like heat, swap in a drizzle of chili crisp!
  • 1 tsp toasted sesame oil – The secret weapon. That nutty aroma? Pure comfort.
  • 1 tbsp toasted sesame seeds – For crunch and a little toastiness. I always toast extra—they disappear fast.
  • Optional: Thinly sliced red onion or scallions – For color and a gentle bite.

Let’s Make It Together

Step 1: Prep your cucumbers. Slice them thinly—about ¼-inch thick—or for fun, use the back of a fork to score the sides before slicing (it helps the dressing cling!). Toss them in a colander with the salt and let them sit for 10 minutes. This step is non-negotiable for that perfect crunch.

Step 2: While the cucumbers relax, whisk together the garlic, rice vinegar, soy sauce, honey, and sesame oil in a small bowl. Taste and adjust—maybe an extra drop of honey? A pinch of red pepper flakes? Make it yours.

Step 3: Rinse the cucumbers lightly to remove excess salt, then pat them dry with a kitchen towel. Be gentle—they’re delicate now! Toss them with the dressing, sprinkle with sesame seeds, and let the salad sit for at least 15 minutes before serving. (I know, waiting is hard—but trust me, the flavors need this time to dance together.)

At this point, your kitchen will smell like a dream, and you’ll be tempted to eat it straight from the bowl. Resist (or don’t—I won’t judge). The next steps are all about the finishing touches… but those? Well, those are a story for next time.

Pro Tips, Variations, and Substitutions

This Asian cucumber salad is wonderfully forgiving and adaptable. Here are some ways to make it your own:

  • Spice it up: Add a teaspoon of chili crisp or a sprinkle of red pepper flakes for heat.
  • Herb variations: Swap cilantro for Thai basil or mint for a refreshing twist.
  • Crunch factor: Toss in some toasted sesame seeds or crushed peanuts for extra texture.
  • Vinegar alternatives: No rice vinegar? Apple cider vinegar or white wine vinegar work in a pinch.
  • Make it heartier: Add thin slices of red onion or shredded carrots for more substance.

What to Serve With Your Asian Cucumber Salad

This crisp, tangy salad plays well with so many dishes! Try pairing it with:

  • Grilled meats like Korean BBQ or teriyaki chicken
  • Takeout favorites like orange chicken or beef and broccoli
  • Summer rolls or dumplings for a light meal
  • Rice bowls topped with your protein of choice
  • As part of a potluck spread alongside other Asian-inspired dishes

Storage and Reheating Tips

While best enjoyed fresh, you can store leftovers in an airtight container in the refrigerator for 2-3 days. The cucumbers will soften slightly but still taste delicious. A few things to note:

  • The flavors intensify over time – you might need to drain excess liquid before serving.
  • No need to reheat – this salad is meant to be served cold or at room temperature.
  • For meal prep, keep the dressing separate until ready to serve for maximum crunch.

Frequently Asked Questions

Can I use English cucumbers instead?

Absolutely! English cucumbers work beautifully and don’t even need seeding. Just slice and enjoy.

How long should I let the salad marinate?

At least 15 minutes for flavors to meld, but even 5 minutes will do in a pinch. For deeper flavor, let it sit up to 1 hour.

Is there a low-sodium version?

Yes! Simply reduce the soy sauce by half and add a squeeze of lime or lemon to brighten it up.

Can I make this ahead for a party?

You can prep components separately up to a day ahead, but combine just before serving for the best texture.

A Final Thought

There’s something magical about how such simple ingredients can come together to create a salad that’s greater than the sum of its parts. This Asian cucumber salad has been my go-to for everything from weeknight dinners to summer cookouts, and I hope it becomes one of your kitchen staples too. The crisp freshness, the tangy-sweet dressing, the way it makes even takeout feel special – it’s the little things that make everyday meals memorable. Wishing you many happy crunch-filled moments at your table!

Print
clock clock iconcutlery cutlery iconflag flag iconfolder folder iconinstagram instagram iconpinterest pinterest iconfacebook facebook iconprint print iconsquares squares iconheart heart iconheart solid heart solid icon

Easy Asian Cucumber Salad

  • Author: Trusted Blog

Description

A refreshing and tangy cucumber salad with Asian-inspired flavors, perfect as a side dish or light appetizer.


Ingredients

Scale

For the Crust:

  • 2 large cucumbers, thinly sliced
  • 1/4 cup rice vinegar
  • 2 tablespoons soy sauce
  • 1 tablespoon sesame oil
  • 1 tablespoon honey
  • 2 cloves garlic, minced
  • 1 teaspoon red pepper flakes
  • 1 tablespoon toasted sesame seeds
  • 2 green onions, thinly sliced

Instructions

1. Prepare the Crust:

  1. In a large bowl, whisk together rice vinegar, soy sauce, sesame oil, honey, garlic, and red pepper flakes.
  2. Add the sliced cucumbers to the bowl and toss gently to coat with the dressing.
  3. Sprinkle with toasted sesame seeds and green onions before serving.

Notes

You can customize the seasonings to taste.

Pan-Seared Steak in Butter Sauce

pan-seared-steak-butter-sauce

The Art of a Perfectly Pan-Seared Steak (and Why Butter Makes Everything Better)

There’s something almost magical about the sizzle of a steak hitting a hot pan—the way the aroma fills the kitchen, promising richness and comfort in every bite. I remember the first time I mastered a proper pan-seared steak at home. It was a chilly Sunday evening, the kind where the golden light slants through the window just right, and all you crave is something indulgent yet simple. No fancy techniques, no complicated marinades—just good meat, a hot pan, and a generous knob of butter. That’s when I realized: sometimes, the most extraordinary meals come from trusting the basics.

What You’ll Need

  • 2 thick-cut steaks (ribeye or New York strip work beautifully)—because a thin steak won’t give you that glorious crust-to-juicy-interior ratio.
  • Kosher salt & freshly cracked black pepper—don’t skimp! This is your steak’s flavor foundation.
  • 2 tablespoons high-smoke-point oil (like avocado or grapeseed)—for that initial sear without setting off the smoke alarm.
  • 3 tablespoons unsalted butter—the star of our sauce, because everything tastes better when it’s swirled in butter.
  • 2 garlic cloves, lightly crushed—for a whisper of aromatic depth.
  • A few sprigs of fresh thyme or rosemary (optional, but highly recommended)—because herbs make even a simple steak feel elegant.

Let’s Get Cooking

Step 1: The Patience Game (a.k.a. Bringing Steak to Room Temp)
Take your steaks out of the fridge at least 30 minutes before cooking. Cold meat in a hot pan is a recipe for uneven cooking—trust me, I’ve learned this the hard way. While you wait, pat them dry with paper towels. Moisture is the enemy of a good sear!

Step 2: Season Like You Mean It
Generously sprinkle both sides of the steak with salt and pepper. Don’t be shy—this isn’t just seasoning, it’s creating a flavorful crust. I like to do this right before cooking to keep the salt from drawing out too much moisture.

Step 3: Heat the Pan (and Your Confidence)
Place a heavy skillet (cast iron is my go-to) over medium-high heat and add the oil. Wait until it shimmers—that’s your cue it’s hot enough. A drop of water should dance on contact. Now, lay the steaks in the pan, pressing them down gently to ensure even contact. Resist the urge to move them! Let them sear undisturbed for 3-4 minutes for a gorgeous golden crust.

Step 4: The Butter Ballet
Once you flip the steaks, reduce the heat to medium and add the butter, garlic, and herbs. As the butter melts, tilt the pan slightly and use a spoon to baste the steaks continuously with that golden, fragrant liquid. This is where the magic happens—the butter infuses the meat with richness, and the garlic and herbs add layers of flavor. Keep basting for another 3-4 minutes, or until your steak reaches your desired doneness (a meat thermometer is your best friend here).

Mastering the Art of Pan-Seared Steak in Butter Sauce

Now that you’ve got the basics down for creating that perfect, buttery steak, let’s take your culinary skills to the next level. Whether you’re cooking for a special occasion or just treating yourself to a delicious weeknight dinner, these pro tips and serving suggestions will make your meal unforgettable.

Pro Tips for Steak Perfection

  • Patience is key: Always let your steak rest at room temperature for 30 minutes before cooking for even doneness
  • The sizzle test: Your pan should be hot enough that a drop of water immediately dances across the surface
  • Butter timing: Add butter in the last 2-3 minutes of cooking to prevent burning
  • Baste like a pro: Tilt your pan slightly and spoon the melted butter over the steak continuously

Delicious Variations to Try

While our classic butter sauce is divine, sometimes it’s fun to mix things up:

  • Garlic-Herb Butter: Add 3 minced garlic cloves and 1 tbsp chopped fresh rosemary or thyme to the butter
  • Spicy Kick: Stir in 1 tsp crushed red pepper flakes with the butter
  • Mushroom Lover’s: Sauté sliced mushrooms in the pan before adding butter
  • Blue Cheese Twist: Crumble 2 tbsp blue cheese into the butter sauce

The Perfect Pairings

This rich, flavorful steak deserves equally impressive sides:

  • Creamy mashed potatoes or crispy roasted potatoes
  • Sautéed green beans or asparagus
  • A simple arugula salad with lemon vinaigrette
  • Grilled corn on the cob in summer months
  • A bold red wine like Cabernet Sauvignon or Malbec

Storing and Reheating Your Leftovers

While steak is best enjoyed fresh, here’s how to handle leftovers:

  • Storage: Place cooled steak in an airtight container for up to 3 days in the refrigerator
  • Reheating: Warm gently in a skillet over low heat with a splash of broth to maintain moisture
  • Cold Option: Thinly slice leftover steak for amazing sandwiches or salads

Frequently Asked Questions

Can I use margarine instead of butter?
While you can, we don’t recommend it. Butter provides superior flavor and browning. If avoiding dairy, try ghee or a high-quality plant-based butter alternative.

How do I know when my steak is done?
Use the finger test or a meat thermometer: 120°F for rare, 130°F for medium-rare, 140°F for medium, and 150°F for well-done. Remember the temperature will rise 5-10 degrees while resting.

What’s the best cut of steak for pan-searing?
Ribeye, New York strip, or filet mignon work beautifully. Choose steaks at least 1-inch thick for best results.

Can I make this gluten-free?
Absolutely! This recipe is naturally gluten-free as written. Just ensure any sauces or sides you pair it with are also gluten-free.

A Final Word From Our Kitchen

There’s something truly magical about the combination of perfectly seared steak and rich, golden butter sauce. Whether you’re cooking to impress a date, celebrating a special occasion, or simply showing yourself some love, this dish never fails to deliver. The beauty lies in its simplicity – just quality ingredients treated with care. So light those candles, pour that wine, and savor every buttery bite. Here’s to many delicious meals shared around your table!

Print
clock clock iconcutlery cutlery iconflag flag iconfolder folder iconinstagram instagram iconpinterest pinterest iconfacebook facebook iconprint print iconsquares squares iconheart heart iconheart solid heart solid icon

Pan-Seared Steak in Butter Sauce

  • Author: Trusted Blog

Description

A juicy, tender steak seared to perfection and finished with a rich butter sauce.


Ingredients

Scale

For the Crust:

  • 2 (8-ounce) ribeye or sirloin steaks
  • 1 teaspoon kosher salt
  • 1/2 teaspoon black pepper
  • 2 tablespoons olive oil
  • 3 tablespoons unsalted butter
  • 2 garlic cloves, minced
  • 1 teaspoon fresh thyme leaves
  • 1 teaspoon fresh rosemary, chopped

Instructions

1. Prepare the Crust:

  1. Pat the steaks dry with paper towels and season generously with salt and pepper on both sides.
  2. Heat olive oil in a heavy skillet (preferably cast iron) over medium-high heat until shimmering.
  3. Add the steaks and sear for 3-4 minutes per side for medium-rare, or until desired doneness.
  4. Reduce heat to medium-low. Add butter, garlic, thyme, and rosemary to the skillet.
  5. Tilt the pan slightly and spoon the melted butter over the steaks for 1-2 minutes.
  6. Remove steaks from the pan and let rest for 5 minutes before serving with the butter sauce.

Notes

You can customize the seasonings to taste.