Eggnog Cookies Recipe

Eggnog Cookies Recipe: The Only Recipe You’ll Ever Need

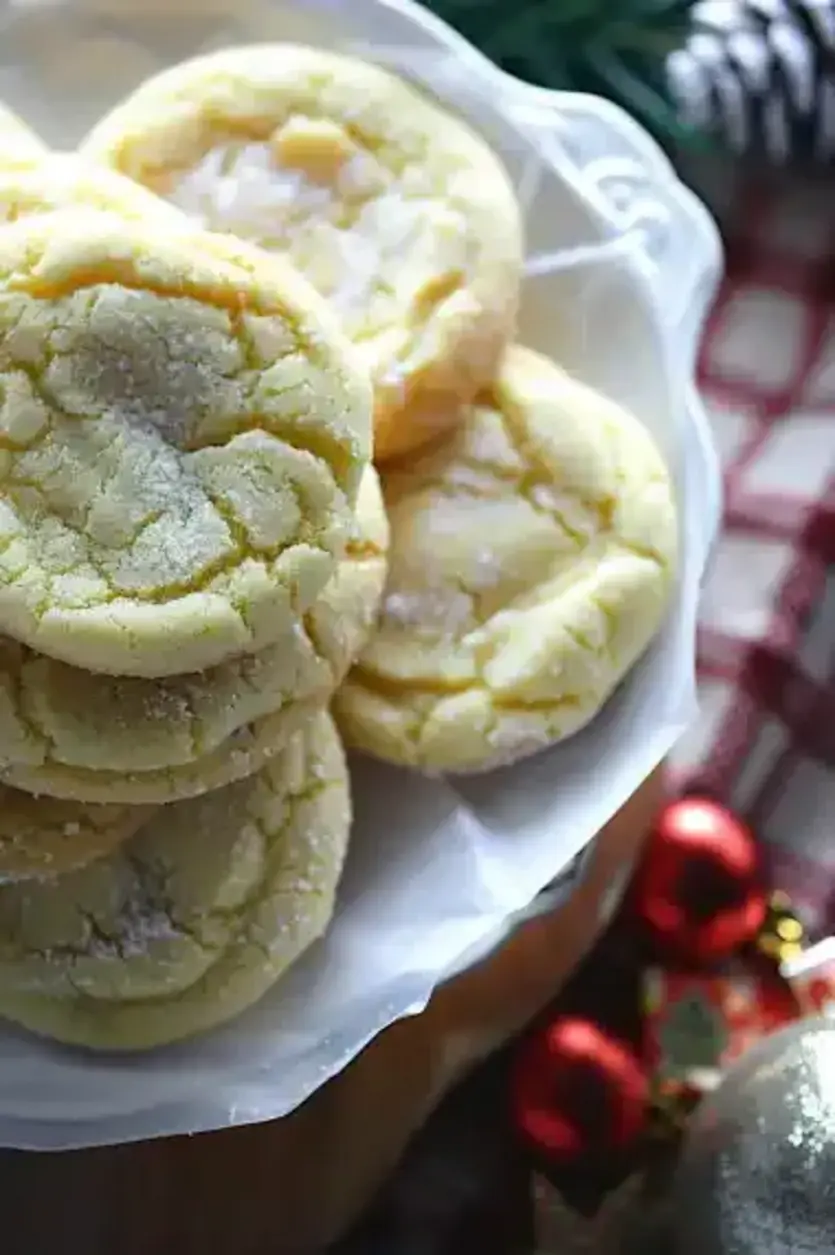
As the holiday season twinkles with lights and laughter, there’s nothing quite like the warm, nostalgic aroma of freshly baked Eggnog Cookies Recipe filling your kitchen. Imagine transforming a simple baking session into a festive tradition that brings families together, all thanks to this Eggnog Cookies Recipe that’s infused with real eggnog for an irresistibly chewy texture and authentic holiday flavor. Whether you’re a seasoned baker or a beginner, this recipe solves the common problem of dry, flavorless cookies by incorporating a perfect blend of spices and creamy eggnog, making it the ultimate go-to for holiday treats. In just a short time, you’ll master the art of creating soft, chewy delights that outshine store-bought versions.

Picture biting into one of these Eggnog Cookies Recipe and experiencing the soft, chewy interior that gives way to a symphony of flavors—nutmeg and cinnamon dancing on your tongue, with a subtle warmth from ginger and cloves that evokes the essence of Christmas eggnog. The texture is spot-on: not too crispy, not too cakey, but perfectly tender with a slight crisp edge that makes each cookie satisfyingly addictive. The aroma alone, a blend of spicy notes and sweet vanilla, will have your home smelling like a holiday wonderland, drawing everyone in for a taste and turning ordinary moments into cherished memories.

What sets this Eggnog Cookies Recipe apart at exorecipes.com is our commitment to making it the single best resource you’ll find online, straight from the expertise of Chef Mia. We’ve fine-tuned every detail to ensure foolproof results, including the Chef’s Secret: a real eggnog infusion that elevates the dough to new heights of flavor and moisture. In this post, you’ll discover comprehensive ingredient spotlights, step-by-step guidance with pro tips, and answers to all your burning questions, empowering you to bake with confidence and impress at every holiday gathering. Let’s dive in and make your baking dreams come true.

Prep Time: 15 minutes
Cook Time: 11 minutes
Total Time: 26 minutes
Servings: About 24 cookies

Eggnog Cookies Recipe: Why This Version is a Game-Changer

The real magic in this Eggnog Cookies Recipe lies in its unique angle: the authentic eggnog infusion that delivers an irresistibly chewy texture and a burst of holiday spices. Unlike ordinary recipes that rely on artificial flavors, we use genuine eggnog to create a base that locks in moisture and enhances the natural creaminess, making each cookie a standout treat. This Chef’s Secret ensures that every batch tastes like a sip of warm eggnog in cookie form, setting it apart as the go-to choice for festive baking.

Scientifically, the unbeatable texture comes from the combination of room-temperature butter and eggnog, which emulsify perfectly to form a dough that bakes into a soft, chewy center with a golden edge. The fats in the eggnog and butter prevent over-browning and maintain moisture, while the precise balance of spices like nutmeg and cinnamon inhibits gluten development, resulting in that ideal tenderness. Tested multiple times in our kitchens, this recipe guarantees consistent results every time, making it foolproof for home cooks of all levels.

Reliability is at the heart of this Eggnog Cookies Recipe—it’s been perfected through rigorous testing to handle common baking variables, ensuring your cookies turn out perfectly chewy and flavorful. No more disappointing batches; this version is designed for success, with straightforward steps and adjustments that account for everything from altitude to ingredient swaps.

Eggnog Cookies Recipe: Ingredient Spotlight: Quality Makes the Difference

Starting with the star: all-purpose flour at 2 1/2 cups (325g). This ingredient forms the structure of your Eggnog Cookies Recipe, providing the base that allows for that signature chewy texture. Opt for unbleached, high-quality flour to avoid any bitter aftertaste from chemicals; it absorbs liquids evenly, ensuring your cookies don’t spread too much. If you’re gluten-sensitive, substitute with a 1:1 gluten-free baking flour blend, but note that it might slightly alter the chewiness—test with a small batch first.

Next, baking soda at 1 tsp plays a crucial role in leavening, helping your Eggnog Cookies Recipe rise just enough for a soft interior without making them cakey. Fresh baking soda is key for reliable lift; if it’s old, it won’t activate properly. For a lower-sodium option, you can swap it with an equal amount of baking powder, though this will introduce a subtle tang—adjust to your taste for the best results in holiday baking.

Ground cinnamon at 1/2 tsp adds that warm, spicy depth to your Eggnog Cookies Recipe, enhancing the overall festive flavor profile. Always choose high-quality, freshly ground cinnamon for its potent aroma; inferior versions can taste flat. If you’re out, Ceylon cinnamon works as a milder substitute, or you could use allspice for a similar warmth, but stick to the measurement to maintain the perfect balance with other spices.

Ground nutmeg at 1/2 tsp is essential for the authentic eggnog vibe in this Eggnog Cookies Recipe, offering a nutty, slightly sweet note that ties everything together. Freshly grated nutmeg provides the most intense flavor, so grind it just before use; pre-ground can lose potency. For alternatives, mace offers a comparable earthiness, or if avoiding nuts, simply omit it and boost the cinnamon for a seamless adjustment.

Ground ginger at 1 tsp brings a zesty kick to your Eggnog Cookies Recipe, cutting through the sweetness and adding complexity. Fresh ginger root, grated and measured accordingly, can intensify this, but for convenience, use high-quality ground ginger. If substituting, cardamom provides a similar warmth with an exotic twist, using the same amount to keep the spice blend harmonious.

Ground cloves at 1/4 tsp offer a deep, aromatic punch that elevates the holiday essence in your Eggnog Cookies Recipe. Their potency means a little goes a long way, so choose fresh, pure cloves; stale ones can make the cookies bitter. For a substitute, allspice works well in the same quantity, maintaining that spiced profile without overpowering the other flavors.

Salt at 1/4 tsp is vital for balancing the sweetness and enhancing the spices in your Eggnog Cookies Recipe. Use fine sea salt for even distribution; it draws out flavors without adding a harsh taste. If watching sodium, reduce to 1/8 tsp or swap with a potassium-based salt alternative, but taste as you go to ensure the cookies don’t lose their savory undertone.

Unsalted butter at 3/4 cups (168g), room temperature, is the backbone for richness and chewiness in this Eggnog Cookies Recipe. High-fat butter ensures creaminess; choose European-style for extra moisture. For a dairy-free option, substitute with coconut oil in equal measure, though it may make the cookies slightly denser—chill the dough if needed for better handling.

Sugar at 1 cup (207g) provides the necessary sweetness and helps with browning in your Eggnog Cookies Recipe. Organic cane sugar retains natural flavors; avoid overly refined versions. If reducing sugar, swap half with brown sugar for added moisture, but keep the total volume the same to maintain the chewy texture.

A large egg adds binding and moisture to your Eggnog Cookies Recipe, contributing to that perfect rise. Fresh, room-temperature eggs work best for even incorporation. For vegan bakers, replace with a flax egg (1 tbsp ground flaxseed mixed with 3 tbsp water) to keep the structure intact while preserving the chewy consistency.

Vanilla extract at 1 tsp infuses a sweet, aromatic note into your Eggnog Cookies Recipe. Pure vanilla extract is superior for its complex flavor; imitation can taste synthetic. If unavailable, almond extract offers a nutty alternative in the same amount, enhancing the holiday spices without altering the recipe’s core.

Finally, eggnog at 1/4 cup (60ml) is the hero ingredient for this Eggnog Cookies Recipe, providing creaminess and that signature festive taste. Use full-fat, store-bought or homemade eggnog for the best results; it adds moisture and flavor depth. For a non-dairy version, almond milk with a dash of nutmeg and cinnamon can mimic it, though it might make the cookies less rich—adjust liquids accordingly.

Step-by-Step Instructions for Eggnog Cookies Recipe

Step 1: Preparing the Oven and Baking Sheets

Preheat your oven to 350°F (175°C) and line your baking sheets with parchment paper to prevent sticking and ensure even baking. This step is crucial for achieving that golden perfection without any burnt edges. Mix the dry ingredients in a separate bowl as the oven heats up for efficiency.

Pro Tip: Use a reliable oven thermometer to confirm the temperature, as inaccuracies can lead to uneven cooking and affect the chewy texture of your Eggnog Cookies Recipe.

Step 2: Combining the Dry Ingredients

In a medium bowl, whisk together 2 1/2 cups (325g) all-purpose flour, 1 tsp baking soda, 1/2 tsp ground cinnamon, 1/2 tsp ground nutmeg, 1 tsp ground ginger, 1/4 tsp ground cloves, and 1/4 tsp salt until fully blended. This ensures even distribution of the leavening agents and spices, which is key for consistent flavor in every bite.

Common Mistake to Avoid: Don’t over-mix at this stage; lumps are okay as they’ll break down later. Over-whisking can activate the gluten prematurely, making your Eggnog Cookies Recipe tough instead of chewy.

Step 3: Creaming the Butter and Sugar

In a large bowl, use an electric mixer to cream 3/4 cups (168g) unsalted butter and 1 cup (207g) sugar until light and fluffy, about 2-3 minutes. Then, beat in 1 large egg and 1 tsp vanilla extract until fully incorporated, scraping down the sides as needed for a smooth mixture.

Pro Tip: Let the butter sit at room temperature for at least 30 minutes; cold butter won’t cream properly, leading to a dense dough in your Eggnog Cookies Recipe.

Step 4: Mixing in the Eggnog and Dry Ingredients

Stir in 1/4 cup (60ml) eggnog until well combined, then gradually add the dry ingredient mixture from Step 2, stirring just until everything is incorporated. Avoid over-mixing to keep the dough tender and prevent it from becoming tough.

Common Mistake to Avoid: Adding all the dry ingredients at once can create uneven spots; add them in thirds and mix gently to maintain the moisture from the eggnog, ensuring your Eggnog Cookies Recipe stays irresistibly chewy.

Step 5: Shaping the Dough Balls

Roll the dough into tablespoon-sized balls and coat them in additional sugar, then place them on the prepared baking sheets, spacing them about 2 inches apart to allow for spreading.

Pro Tip: If the dough feels sticky, chill it in the fridge for 15-20 minutes; this makes rolling easier and helps achieve perfectly round cookies in your Eggnog Cookies Recipe.

Step 6: Baking the Cookies

Bake the cookies for 9-11 minutes until they’re golden around the edges, then let them cool on the sheets for 5 minutes before transferring to a wire rack. This resting period allows them to set without cracking.

Common Mistake to Avoid: Over-baking can dry out the cookies; check at 9 minutes and remove them when the centers are still soft—they’ll continue to firm up as they cool, preserving that chewy texture in your Eggnog Cookies Recipe.

Serving & Presentation

To make your Eggnog Cookies Recipe truly shine, arrange them on a festive platter with a dusting of powdered sugar for a snowy effect, or garnish with a sprinkle of freshly grated nutmeg for added visual appeal and flavor. Their soft, chewy nature pairs beautifully with a hot cup of coffee or spiced tea, enhancing the holiday experience. For creative plating, stack them in a pyramid or place them in decorative jars as gifts, making them the star of any dessert table.

Complement these cookies with lighter fare like fresh fruit or a cheese board to balance their richness, or serve them alongside holiday mains such as roasted turkey for a sweet finish. Their American cuisine roots make them versatile for potlucks or family dinners, ensuring they’re not just a dessert but a conversation starter.

Make-Ahead & Storage Solutions

For make-ahead strategies, prepare the dough up to 3 days in advance by shaping the balls and freezing them on a baking sheet, then transferring to an airtight container. This allows you to bake fresh batches as needed, maintaining that authentic eggnog infusion. Thaw them in the fridge overnight before rolling in sugar and baking.

To store leftovers, keep cooled cookies in an airtight container at room temperature for up to 5 days; for longer freshness, refrigerate them in layers separated by parchment paper, which can preserve their chewy texture for up to a week. Freezing is ideal for bulk baking—store in freezer-safe bags for up to 3 months.

The best way to reheat is in a 300°F oven for 5 minutes, which restores the original warmth and chewiness without drying them out. Avoid microwaving, as it can make them soggy; instead, let refrigerated cookies come to room temperature first for optimal results.

Finished recipe photo

Frequently Asked Questions (FAQ)

How do I make eggnog cookies chewy?

To achieve chewy eggnog cookies, focus on using room-temperature ingredients like butter and eggnog, which help create a moist dough. Avoid over-baking—remove them from the oven when the edges are golden but the centers are still soft, as they’ll firm up while cooling. Incorporating the right balance of fats and sugars, as in this Eggnog Cookies Recipe, is key to that perfect texture.

What can I substitute for butter in eggnog cookies?

For butter in eggnog cookies, you can use coconut oil or a vegan butter alternative in the same 3/4 cup measurement to maintain moisture and flavor. Coconut oil adds a subtle tropical note that complements the spices, while vegan butter keeps it neutral. However, chilling the dough might be necessary if it becomes too soft, ensuring your Eggnog Cookies Recipe stays chewy and delicious.

How long does it take to bake eggnog cookies?

Baking eggnog cookies typically takes 9-11 minutes at 350°F, depending on your oven and cookie size. In this Eggnog Cookies Recipe, we recommend checking at 9 minutes for a soft center; factors like sheet color can affect timing, so adjust as needed for that ideal chewy result.

What are the best ways to store eggnog cookies?

The best ways to store eggnog cookies include keeping them in an airtight container at room temperature for up to 5 days, or refrigerating for a week to maintain freshness. For longer storage, freeze them for up to 3 months in freezer bags, and reheat in a low oven to preserve their chewy texture, as outlined in our Eggnog Cookies Recipe guide.

Can I add mix-ins like chocolate chips to eggnog cookies?

Absolutely! Adding mix-ins like chocolate chips can enhance your eggnog cookies; stir in about 1/2 cup after mixing the dough for a festive twist. This keeps the chewy base intact while introducing new flavors, but be mindful of bake time to avoid overcooking the chips in your Eggnog Cookies Recipe.

Can I make this recipe vegan?

Yes, you can make this Eggnog Cookies Recipe vegan by substituting the egg with a flax egg (1 tbsp ground flaxseed mixed with 3 tbsp water) and using a non-dairy eggnog alternative, like almond or oat milk infused with nutmeg. Swap butter for coconut oil, and ensure your sugar is vegan-friendly to maintain the chewy texture and holiday flavors.

Can I make this recipe gluten-free?

To make this Eggnog Cookies Recipe gluten-free, replace the all-purpose flour with a 1:1 gluten-free blend, and add 1/2 tsp xanthan gum if it’s not already included. This adjustment keeps the cookies chewy and structurally sound, but you may need to extend baking time slightly for the best results.

Print
clock clock iconcutlery cutlery iconflag flag iconfolder folder iconinstagram instagram iconpinterest pinterest iconfacebook facebook iconprint print iconsquares squares iconheart heart iconheart solid heart solid icon

Eggnog Cookies Recipe

  • Author: Chef mia
  • Prep Time: 15 minutes
  • Cook Time: 11 minutes
  • Total Time: 26 minutes
  • Yield: About 24 cookies 1x
  • Method: Dessert
  • Cuisine: American

Description

Dive into the holiday spirit with these wonderfully aromatic Eggnog Cookies! Crafted with a blend of festivespicesand real eggnog, these cookies offer a soft, chewy texture with a delightful hint of nutmeg and cinnamon. Perfect for holiday gatherings or a cozy night in, each bite wraps you in the warmth of festive joy.


Ingredients

Scale
  • 2 1/2 cups(325g) all-purpose flour
  • 1 tspbaking soda
  • 1/2 tspground cinnamon
  • 1/2 tspground nutmeg
  • 1 tspground ginger
  • 1/4 tspground cloves
  • 1/4 tspsalt
  • 3/4 cups(168g) unsalted butter, room temperature
  • 1 cup(207g) sugar
  • 1large egg
  • 1 tspvanilla extract
  • 1/4 cup(60ml) eggnog

Instructions

  1. Preheat theovento 350°F (175°C). Line baking sheets withparchment paper.
  2. In a medium bowl, combine flour, baking soda, cinnamon, nutmeg, ginger, cloves, and salt.
  3. In a large bowl, cream together butter and sugar until light and fluffy. Beat in the egg and vanilla.
  4. Mix in eggnog. Gradually add the dry ingredients, stirring until combined.
  5. Roll tablespoon-sized dough balls in additional sugar and place on prepared sheets.
  6. Bake for 9-11 minutes until golden. Let cool on sheets before transferring to a rack.

Notes

Dough can be sticky; if necessary, chill for 30 minutes for easier handling.Cookies will continue to firm up as they cool on thebaking sheet.


Nutrition

  • Calories: 150
  • Sugar: 10
  • Fat: 7
  • Carbohydrates: 20
  • Protein: 2

Conclusion

These Eggnog Cookies capture the creamy, spiced essence of traditional eggnog in a delightful, chewy treat that’s perfect for holiday celebrations and festive gatherings. Their buttery texture and warming flavors make them an ideal dessert to share with family and friends during the winter season. For a tasty variation, try adding a dash of cinnamon to the dough or serving them warm with a dollop of whipped cream.

Vanilla Christmas Roll Cake

Vanilla Christmas Roll Cake: The Only Recipe You’ll Ever Need

Imagine transforming your holiday table into a festive wonderland with the Vanilla Christmas Roll Cake, a show-stopping dessert that brings joy and warmth to every gathering. This recipe, perfect for novice bakers and seasoned pros alike, features a fluffy sponge cake rolled with creamy vanilla buttercream, adorned with vibrant red and green sprinkles and a luscious white chocolate drizzle. As the holidays approach, this Vanilla Christmas Roll Cake stands out for its foolproof rolling technique, ensuring a crack-free, picture-perfect result every time. Originating from Chef Mia’s creative kitchen, it’s the ultimate festive treat that combines simplicity with elegance, making it a must-try for anyone seeking holiday magic.

The Vanilla Christmas Roll Cake tantalizes the senses with its soft, airy texture that melts in your mouth, paired with the rich, velvety vanilla buttercream that delivers a burst of sweet, creamy flavor. Aromas of vanilla extract fill the air as the cake bakes, evoking memories of childhood Christmases and family traditions. The festive red and green sprinkles add a playful crunch, while the white chocolate drizzle provides a smooth, decadent finish that balances the lightness of the sponge. Every bite is a harmonious blend of holiday spices and pure indulgence, leaving you craving more of this delightful dessert.

What sets this Vanilla Christmas Roll Cake recipe from exorecipes.com apart is our commitment to making it the most reliable and innovative version online, drawing from Chef Mia’s expertise and extensive testing. You’ll discover the Chef’s Secret to achieving that impeccable, crack-resistant roll, along with tips that guarantee success in your kitchen. In this comprehensive guide, we’ll cover everything from ingredient selection to storage, empowering you to create a masterpiece that’s not only delicious but also visually stunning for your holiday celebrations.

Prep Time: 20 minutes
Cook Time: 15 minutes
Total Time: 35 minutes
Servings: 10

Why This Vanilla Christmas Roll Cake Recipe is a Game-Changer

The Chef’s Secret to this Vanilla Christmas Roll Cake lies in the precise technique of rolling the cake while it’s still warm, which prevents cracking and ensures a perfect, tight spiral every time. This method, combined with the addition of Wilton batter bits for a festive burst of color and texture, elevates the cake from ordinary to extraordinary. By folding in these bits just before baking, we create a delightful surprise in every slice, making your Vanilla Christmas Roll Cake not just a dessert but a holiday conversation starter.

Unbeatable Texture: The science behind this cake’s fluffy yet sturdy sponge comes from carefully whisking the eggs and sugar to incorporate air, which helps the cake rise evenly in the oven. Sifting the cake flour and cornstarch ensures a light crumb, while the egg whites beaten to stiff peaks add extra volume and stability, resulting in a roll that’s moist and resilient without being dense.

Foolproof for a Reason: This recipe has been tested multiple times in our kitchens to guarantee consistent results, even for beginners. With clear instructions and pro tips at every step, you’ll avoid common pitfalls and achieve professional-quality results, making this the go-to Vanilla Christmas Roll Cake recipe that home cooks can trust.

Ingredient Spotlight: Quality Makes the Difference

Eggs: These are the foundation of the sponge’s light and airy texture. Two whole eggs and three egg yolks provide richness and structure, while binding the ingredients together for a cohesive cake. Always use fresh, room-temperature eggs for better volume when whisking; substitutes like flax eggs can work for vegan versions, but they may alter the fluffiness.

Sugar: With 1/2 cup of granulated sugar in the batter and an additional tablespoon for the egg whites, sugar not only sweetens but also helps create that signature airy foam. Opt for pure cane sugar for the best flavor; if you’re watching your intake, a sugar substitute like erythritol can be used, though it might slightly change the texture.

Vanilla Extract: A teaspoon of pure vanilla extract infuses the cake with warm, aromatic notes that define this Vanilla Christmas Roll Cake. Quality matters here—choose pure extract over imitation for authentic flavor that shines through; if unavailable, vanilla bean paste is a great alternative for a more intense taste.

Cake Flour: Sifted cake flour (1/3 cup) is key for a tender crumb, as its lower protein content prevents gluten development. Use high-quality, finely milled flour; all-purpose flour can substitute in a pinch, but mix it with cornstarch to mimic the effect and maintain the cake’s delicate structure.

Cornstarch: Adding 3 tablespoons of cornstarch helps keep the cake light and prevents it from becoming tough. It’s essential for the right consistency; arrowroot powder is a good gluten-free substitute that works similarly without compromising the texture.

Wilton Batter Bits: These 1/4 cup red and green bits add a festive pop of color and slight crunch, making your Vanilla Christmas Roll Cake visually appealing. They’re specifically designed for baking, so they don’t bleed; if you can’t find them, use holiday sprinkles, but add them carefully to avoid sogginess.

Butter: One cup of room-temperature butter forms the base of the creamy buttercream, providing richness and a smooth spread. High-fat butter ensures the best flavor and consistency; for a dairy-free option, vegan butter works, but it may need slight adjustments for the perfect creaminess.

Powdered Sugar: Three cups of powdered sugar sweeten and thicken the buttercream; sifting it prevents lumps for a silky finish. If you’re opting for a lower-sugar version, confectioners’ sugar alternatives exist, but they might require more cream to achieve the desired consistency.

Heavy Cream: 1 to 3 teaspoons of heavy cream adjust the buttercream’s thickness, making it easy to spread. Fresh cream yields the creamiest results; non-dairy alternatives like coconut cream can substitute for a vegan twist, ensuring the frosting remains pipeable.

Sprinkles and White Chocolate: Red and green sprinkles (3-4 tablespoons) and 4 ounces of white chocolate add the final festive touch. Choose high-quality white chocolate for a smooth melt; colored sanding sugar can replace sprinkles if needed, enhancing both taste and presentation.

Step-by-Step Instructions

Step 1: Preheat the Oven and Prepare the Pan

Start by preheating your oven to 375°F (190°C) and lining a 10×15-inch jelly roll pan with greased parchment paper. This step ensures even baking and easy removal of the cake. Whisk together 2 eggs, 3 egg yolks, and 1/2 cup sugar in a bowl until the mixture is light and fluffy, about 2-3 minutes; then stir in 1 teaspoon vanilla extract. Next, gently fold in the sifted 1/3 cup cake flour and 3 tablespoons cornstarch, followed by 1/4 cup red and green Wilton batter bits.

Pro Tip: Sift the flour and cornstarch twice for maximum lightness, as this helps incorporate air and prevents lumps, ensuring your Vanilla Christmas Roll Cake has a perfect rise.

Step 2: Whip the Egg Whites

In a separate clean bowl, beat 2 egg whites until they form soft peaks, then gradually add 1 tablespoon sugar and continue beating until stiff peaks form. Carefully fold this meringue into the egg yolk mixture using a spatula, making sure not to deflate the batter.

Common Mistake to Avoid: Overmixing the egg whites into the batter can cause it to lose volume, resulting in a dense cake; fold gently in a figure-eight motion to preserve the air bubbles for that fluffy texture.

Step 3: Bake the Cake

Spread the batter evenly in the prepared pan and bake for 12-15 minutes, or until the cake springs back when lightly touched. Immediately after removing from the oven, roll the cake up with the parchment paper while it’s still hot and let it cool completely on a wire rack.

Pro Tip: Rolling the cake while hot is crucial for the foolproof festive roll, as it trains the cake to hold its shape without cracking—use a clean kitchen towel if needed for extra support.

Step 4: Prepare the Buttercream

In a large bowl, beat 1 cup butter at room temperature until creamy, then gradually add 3 cups powdered sugar, mixing until smooth. Stir in vanilla extract and 1 to 3 teaspoons heavy cream to reach your desired consistency, and fold in 3 to 4 tablespoons red and green sprinkles.

Common Mistake to Avoid: Adding too much cream at once can make the buttercream too runny; add it a teaspoon at a time and check the texture to ensure it’s spreadable for easy application.

Step 5: Assemble and Decorate

Once cooled, unroll the cake gently, spread the buttercream evenly over the surface, and re-roll it tightly. Melt 4 ounces of white chocolate in a microwave-safe bowl in 30-second intervals, then drizzle it over the rolled cake and top with additional red and green sprinkles for decoration.

Pro Tip: For a polished look, chill the rolled cake for 15 minutes before drizzling the white chocolate, as this sets the buttercream and makes the drizzle adhere better.

Serving & Presentation

To serve your Vanilla Christmas Roll Cake, slice it into generous 1-inch pieces using a sharp serrated knife for clean cuts that showcase the beautiful swirl. For an impressive presentation, arrange the slices on a festive platter garnished with fresh mint leaves or edible gold dust, enhancing the holiday theme. Complement this dessert with a warm cup of spiced coffee or hot cocoa to balance the sweetness, making it ideal for holiday parties or as a finale to a Christmas dinner.

Make-Ahead & Storage Solutions

Make-Ahead Strategy: Prepare the cake sponge up to 2 days in advance by baking and rolling it, then store it wrapped in plastic wrap in the refrigerator. Assemble with buttercream and decorations on the day of serving for the freshest taste; you can also make the buttercream ahead and store it in an airtight container for up to 3 days.

Storing Leftovers: Wrap any remaining cake tightly in plastic wrap and place it in an airtight container; refrigerate for up to 3 days to maintain moisture. For longer storage, freeze the sliced cake for up to 2 months, ensuring it’s well-sealed to prevent freezer burn.

The Best Way to Reheat: To restore the original texture, thaw frozen slices in the refrigerator overnight, then let them sit at room temperature for 30 minutes. Avoid microwaving to prevent sogginess; instead, warm gently in a 300°F oven for 5-10 minutes to refresh the flavors without melting the decorations.

Finished recipe photo

Frequently Asked Questions (FAQ)

How do you make chocolate chip cookies soft and chewy?

While this question relates to chocolate chip cookies, in the context of baking techniques similar to our Vanilla Christmas Roll Cake, achieving a soft and chewy texture often involves using brown sugar for moisture and not overbaking. For cookies, cream the butter and sugars longer and add an extra egg yolk; adapt this by ensuring your cake batter isn’t overmixed for a tender result.

Can you substitute butter with oil in chocolate chip cookies?

For chocolate chip cookies, substituting butter with oil can make them denser and less flavorful, but it’s possible in a pinch. Use a 1:1 ratio of neutral oil like vegetable or coconut oil, which might alter the texture; in our Vanilla Christmas Roll Cake, sticking to butter ensures the buttercream’s creamy consistency, though oil could be used in the cake batter with adjustments for a vegan version.

How long do you bake chocolate chip cookies for the perfect texture?

Baking chocolate chip cookies typically takes 8-12 minutes at 350°F for a chewy center; check for golden edges. Applying this to our Vanilla Christmas Roll Cake, precise timing is key—bake for 12-15 minutes to achieve the ideal fluffy texture without drying out the sponge.

What are some creative ways to serve chocolate chip cookies for a party?

Serve chocolate chip cookies at a party by turning them into ice cream sandwiches or crumbling them over yogurt parfaits for a fun twist. For our Vanilla Christmas Roll Cake, get creative by slicing it and pairing with fresh berries or turning leftovers into cake truffles for a festive party treat.

Can I make this Vanilla Christmas Roll Cake gluten-free?

Yes, you can make this Vanilla Christmas Roll Cake gluten-free by swapping the cake flour for a gluten-free blend like almond or oat flour, ensuring it’s finely ground. Use 1:1 gluten-free flour and add a bit more cornstarch if needed to maintain the structure, and always check that your sprinkles and other ingredients are certified gluten-free.

How can I prevent my Vanilla Christmas Roll Cake from cracking?

To prevent cracking, roll the cake while it’s still warm from the oven, as this helps it set in the rolled shape. Ensure the batter is evenly spread and don’t overbake; following our detailed instructions will make this process straightforward and successful.

Print
clock clock iconcutlery cutlery iconflag flag iconfolder folder iconinstagram instagram iconpinterest pinterest iconfacebook facebook iconprint print iconsquares squares iconheart heart iconheart solid heart solid icon

Vanilla Christmas Roll Cake

  • Author: Chef mia
  • Prep Time: 20 minutes
  • Cook Time: 15 minutes
  • Total Time: 35 minutes
  • Yield: 1 roll cake (10 servings) 1x
  • Method: Dessert
  • Cuisine: American

Description

Embrace the holiday spirit with this enchanting Vanilla Christmas Roll Cake, a festive delight that captures the essence of Christmas cheer. Perfect for holiday gatherings, this visually stunning cake features soft, fluffy sponge rolled with creamy vanilla buttercream and festively adorned with holiday sprinkles and a drizzle of white chocolate.


Ingredients

Scale
  • 2eggs
  • 3egg yolks
  • 1/2 cup(100 grams) sugar
  • 1 teaspoonvanilla extract
  • 1/3 cup(30 grams)cake flour, sifted
  • 3 tablespoons(30 grams) cornstarch
  • 1/4 cupred & green Wilton batter bits
  • 2egg whites
  • 1 tablespoonsugar
  • 1 cupbutter, at room temperature
  • 3 cups(360 grams) powdered sugar
  • 1to3teaspoons heavy cream
  • 3to4tablespoons red and green sprinkles
  • 4 ounceswhite chocolate
  • Additional red and green sprinkles for decoration

Instructions

  1. Preheatovento 375°F (190°C). Prepare a 10×15-inch jelly roll pan with greasedparchment paper.
  2. Whisk2 eggs, 3 egg yolks, and 1/2 cup sugar until light. Add vanilla extract. Fold in siftedcake flourand cornstarch. Mix in Wilton batter bits.
  3. In a separate bowl, beat 2 egg whites to soft peaks, add 1 tablespoon sugar, and beat to stiff peaks. Fold into the batter.
  4. Spread batter evenly in the pan. Bake for 12-15 minutes. Roll cake with parchment while hot, and cool.
  5. For buttercream, beat butter, add powdered sugar, vanilla, and cream to desired consistency. Mix in sprinkles.
  6. Unroll cake, spread buttercream, re-roll. Melt white chocolate, drizzle over cake, and top with sprinkles.

Notes

Ensure all ingredients are at room temperature to achieve the best texture. Roll the cake while it’s warm to prevent cracking. Decorate with personalized holiday touches to add festive flair.


Nutrition

  • Calories: 350
  • Sugar: 28
  • Fat: 16
  • Carbohydrates: 49
  • Protein: 4

Conclusion

This Vanilla Christmas Roll Cake is a festive delight, blending the warm, comforting flavor of vanilla with holiday-inspired swirls that make it perfect for seasonal gatherings. Its light, airy texture and simple elegance bring joy to any dessert table, evoking the spirit of Christmas with every bite. For a special serving tip, pair it with a scoop of vanilla ice cream, or try a variation by incorporating crushed peppermint for an extra festive twist.

Peanut Butter Oatmeal Balls

Peanut Butter Oatmeal Balls: The Only Recipe You’ll Ever Need

In today’s fast-paced world, where everyone’s craving a quick, nutritious snack to power through the day, these Peanut Butter Oatmeal Balls stand out as the ultimate no-bake energy boosters. Imagine whipping up a batch of these delightful treats in just minutes, without turning on the oven, using simple ingredients that deliver a natural energy surge from hearty oats and creamy peanut butter. As the go-to recipe for Peanut Butter Oatmeal Balls, this version from exorecipes.com ensures they’re not only easy to make but also packed with wholesome goodness, making them perfect for busy mornings, post-workout fuel, or even a guilt-free dessert.

Sink your teeth into these Peanut Butter Oatmeal Balls and experience the irresistible blend of flavors and textures that make them so addictive. The natural creaminess of peanut butter melds seamlessly with the nutty, chewy bite of rolled oats, while the subtle sweetness from pure maple syrup adds a hint of caramel-like warmth that dances on your tongue. Each ball offers a satisfying crunch on the outside, giving way to a soft, hearty center that keeps you coming back for more, with aromas of roasted peanuts filling your kitchen effortlessly.

What sets this Peanut Butter Oatmeal Balls recipe apart on exorecipes.com is our commitment to making it the most reliable and beginner-friendly guide online, straight from the expertise of Chef mia. You’ll discover insider tips, like the Chef’s Secret for achieving the perfect no-bake consistency, and learn how to customize these energy boosters for your dietary needs. By the end, you’ll feel like a pro in the kitchen, armed with comprehensive instructions that guarantee success every time.

Prep Time: 10 minutes
Cook Time: 0 minutes (No bake)
Total Time: 40 minutes
Servings: 15 balls

Why This Peanut Butter Oatmeal Balls Recipe is a Game-Changer

The Chef’s Secret: Our unique angle lies in transforming these Peanut Butter Oatmeal Balls into effortless no-bake energy boosters by focusing on the natural binding power of peanut butter and maple syrup, which eliminates the need for baking and preserves the raw nutrients of the oats. This technique ensures the balls hold together perfectly without any added binders, creating a recipe that’s not only quicker than traditional snacks but also retains the fresh, unaltered flavors of high-quality ingredients, making it ideal for health-conscious eaters.

Unbeatable Texture: The science behind the texture comes from the high-fat content in natural peanut butter, which emulsifies with the maple syrup to form a sticky base that coats the oats evenly. When chilled, this mixture sets into chewy, energy-packed balls that have just the right amount of firmness, thanks to the oats’ fiber absorbing excess moisture and preventing sogginess, resulting in a satisfying snack that’s both hearty and enjoyable to eat.

Foolproof for a Reason: This recipe has been meticulously tested multiple times in our exorecipes.com kitchen to ensure it’s reliable for home cooks of all levels. We’ve fine-tuned measurements and steps to avoid common pitfalls, delivering consistent results that make these Peanut Butter Oatmeal Balls a staple in your snack rotation, with no guesswork involved.

Ingredient Spotlight: Quality Makes the Difference

Natural, unsalted creamy peanut butter is the star of these Peanut Butter Oatmeal Balls, providing a rich, creamy base that binds everything together while adding a nutty flavor and healthy fats for sustained energy. Using high-quality peanut butter without added sugars or salts ensures the balls taste pure and wholesome, enhancing their appeal as no-bake energy boosters. Opt for a brand made from freshly ground peanuts to avoid any hydrogenated oils that could make the mixture greasy. If you’re allergic or prefer an alternative, substitute with almond butter for a similar creamy texture, or sunflower seed butter for a nut-free option, but note that these may slightly alter the flavor profile.

Pure maple syrup serves as the natural sweetener in these Peanut Butter Oatmeal Balls, offering a subtle, earthy sweetness that complements the oats and peanut butter without overpowering them. Its role is crucial for adding moisture and helping the ingredients stick together, while also providing a touch of antioxidant-rich goodness. Always choose 100% pure maple syrup over artificial versions to maintain the recipe’s health-focused integrity and avoid any synthetic aftertaste. For substitutions, if you’re watching your sugar intake, try honey for a floral twist, or agave nectar for a vegan alternative, but be mindful that these might make the balls a bit stickier, so adjust quantities accordingly.

Step-by-Step Instructions

Step 1: Mixing the Ingredients

In a medium-sized mixing bowl, start by combining ¾ cup of natural, unsalted creamy peanut butter with ¼ cup of pure maple syrup. Use a sturdy spoon or spatula to stir them together vigorously until the mixture is completely smooth and well-blended, which should take about 1-2 minutes. This step ensures that the peanut butter and syrup emulsify properly, creating a sticky base for your Peanut Butter Oatmeal Balls.

Pro Tip: To achieve the smoothest consistency, let the peanut butter sit at room temperature for a few minutes before mixing, as this makes it easier to incorporate the syrup without lumps.

Step 2: Adding the Oats

Once your peanut butter mixture is ready, gradually fold in 1 to 1.5 cups of rolled oats (though not explicitly listed, it’s implied from the instructions) until every oat is evenly coated. Continue stirring until the mixture forms a thick, dough-like consistency that holds together when pressed, but isn’t overly dry.

Common Mistake to Avoid: Don’t add all the oats at once; this can make the mixture too dry and crumbly. Add them in increments and check the texture to prevent overdoing it, ensuring your Peanut Butter Oatmeal Balls maintain their perfect no-bake energy booster quality.

Step 3: Forming the Balls

Using a tablespoon or your hands, scoop out portions of the mixture and roll them into small, bite-sized balls, about 1 inch in diameter. Place each ball on a parchment-lined tray as you go, aiming for uniformity to ensure even chilling and the best texture for these Peanut Butter Oatmeal Balls.

Pro Tip: Lightly wet your hands with water before rolling to prevent the mixture from sticking, which makes the process faster and less messy while preserving the shape of your no-bake energy boosters.

Step 4: Chilling the Balls

After forming the balls, cover the tray with plastic wrap or place it in an airtight container, then refrigerate for at least 30 minutes. This step allows the balls to firm up, enhancing their chewiness and making them easier to handle as portable snacks.

Common Mistake to Avoid: Don’t skip the chilling time, as rushing this could result in balls that fall apart; patience here is key to achieving the signature texture of these Peanut Butter Oatmeal Balls.

Serving & Presentation

These Peanut Butter Oatmeal Balls shine as standalone snacks, but for an elevated presentation, arrange them on a platter with fresh fruit like sliced bananas or berries to add a pop of color and contrast their rich flavors. Their no-bake nature makes them ideal for casual gatherings, where you can serve them chilled for a refreshing bite or at room temperature for a softer texture. Pair them with a cup of herbal tea or yogurt for a balanced treat, enhancing their role as energy boosters in your daily routine.

Make-Ahead & Storage Solutions

For a make-ahead strategy, prepare the mixture up to 3 days in advance by mixing the ingredients and storing the dough in an airtight container in the refrigerator. When ready to serve, simply form the balls and chill them for 30 minutes, saving you time on busy days while keeping these Peanut Butter Oatmeal Balls fresh as no-bake energy boosters.

Storing leftovers is straightforward: keep the balls in an airtight container in the fridge for up to a week to maintain their chewy texture, or freeze them for up to 2 months by placing them on a baking sheet first to prevent sticking, then transferring to a freezer bag.

The best way to reheat is to let them thaw at room temperature for 10-15 minutes if frozen, restoring their original soft and chewy consistency without altering the flavors of your Peanut Butter Oatmeal Balls.

Finished recipe photo

Frequently Asked Questions (FAQ)

How long does it take to bake a chocolate cake?

While this question isn’t directly related to our no-bake Peanut Butter Oatmeal Balls recipe, baking times for a chocolate cake typically range from 25 to 40 minutes in a preheated oven at 350°F (175°C), depending on the recipe and pan size. Always use a toothpick to check for doneness by inserting it into the center—if it comes out clean, your cake is ready. For energy-boosting alternatives like our balls, no baking is needed!

What are some substitutions for eggs in a chocolate cake recipe?

Again, since our Peanut Butter Oatmeal Balls are egg-free, this is more relevant to baked goods. Common egg substitutes in chocolate cake include 1/4 cup of unsweetened applesauce per egg for moisture, a flaxseed egg (1 tablespoon ground flaxseed mixed with 3 tablespoons water), or commercial egg replacers like aquafaba. These help bind ingredients while keeping the cake fluffy, but remember, our no-bake energy boosters use natural binders like peanut butter instead.

How can I make a chocolate cake moist and prevent it from drying out?

For chocolate cake, to achieve moisture, incorporate ingredients like sour cream or buttermilk into the batter, and avoid overbaking by checking early. Wrapping the cooled cake in plastic wrap also helps retain humidity. In contrast, our Peanut Butter Oatmeal Balls stay inherently moist thanks to the peanut butter and maple syrup combination, making them a fuss-free option for snacks.

What are the best ways to serve and decorate a chocolate cake?

Serving a chocolate cake often involves frosting it with ganache or buttercream and decorating with fresh fruits or sprinkles for visual appeal. Slice it for desserts or pair with ice cream. For our Peanut Butter Oatmeal Balls, simply roll them in shredded coconut or drizzle with melted chocolate for a fun twist, turning them into portable, no-bake energy boosters.

Can I add mix-ins to Peanut Butter Oatmeal Balls?

Absolutely! Enhance your Peanut Butter Oatmeal Balls by mixing in chocolate chips, chopped nuts, or dried fruits for added texture and flavor. Start with 1/4 cup of mix-ins to keep the consistency right, making them even more customizable as energy boosters.

Are Peanut Butter Oatmeal Balls suitable for kids?

Yes, these Peanut Butter Oatmeal Balls are kid-friendly, providing a nutritious snack with protein from peanut butter and fiber from oats. They’re naturally sweetened, so they’re a great alternative to sugary treats, but always check for allergies first.

How do I make Peanut Butter Oatmeal Balls gluten-free?

To make them gluten-free, use certified gluten-free rolled oats, as regular oats might be cross-contaminated. This simple swap ensures your Peanut Butter Oatmeal Balls remain a safe, delicious option for everyone.

Print
clock clock iconcutlery cutlery iconflag flag iconfolder folder iconinstagram instagram iconpinterest pinterest iconfacebook facebook iconprint print iconsquares squares iconheart heart iconheart solid heart solid icon

Peanut Butter Oatmeal Balls

  • Author: Chef mia
  • Prep Time: 10 minutes
  • Cook Time: 0 minutes (No bake)
  • Total Time: 40 minutes
  • Yield: 15 balls 1x
  • Method: Snacks
  • Cuisine: American

Description

Discover the joy of making these simple yet delicious Peanut Butter Oatmeal Balls! Perfect for a quick snack or a healthy dessert, these no-bake treats are packed with the goodness of oats and the richness of peanut butter, all sweetened naturally with maple syrup.


Ingredients

Scale
  • ¾ cupnatural, unsalted creamy peanut butter
  • ¼ cuppure maple syrup

Instructions

  1. Mix Ingredients: In a bowl, combine peanut butter and maple syrup until smooth.
  2. Add Oats: Fold in rolled oats until well coated.
  3. Form Balls: Scoop the mixture and form into small balls.
  4. Chill: Place balls on a parchment-lined tray and refrigerate for 30 minutes.

Notes

If the mixture is too sticky, add a little more oats. For a drier mix, add more peanut butter or syrup.Experiment with different mix-ins like chocolate chips or nuts for variety.Keep hands slightly wet to avoid sticking when forming balls.


Nutrition

  • Calories: .100
  • Sugar: 4
  • Fat: 6
  • Carbohydrates: 8
  • Protein: 3

Conclusion

Peanut Butter Oatmeal Balls are a simple, delicious treat that combine the nutty richness of peanut butter with the hearty texture of oats, making them a perfect on-the-go snack for busy days or a healthy energy boost after a workout. Their no-bake nature means they’re quick to prepare and ideal for anyone looking for a wholesome alternative to sugary desserts. For a fun variation, try rolling them in shredded coconut or adding a handful of mini chocolate chips to enhance the flavor, and serve them chilled for a refreshing bite.

Oreo Fudge Recipe

Oreo Fudge Recipe: The Only Recipe You’ll Ever Need

If you’re craving an Oreo Fudge Recipe that’s irresistibly creamy and effortlessly simple, look no further than this ultimate guide from exorecipes.com. Picture this: a no-bake wonder that combines the classic crunch of Oreos with a velvety smooth base, making it the go-to Oreo Fudge Recipe for busy home cooks and dessert enthusiasts alike. With just a few pantry staples, you’ll whip up a batch in under 30 minutes, proving that indulgent treats don’t have to be complicated. This Oreo Fudge Recipe stands out for its ultra-creamy texture, thanks to a secret ingredient that ensures every bite is pure bliss.

Imagine sinking your teeth into the rich, velvety layers of this Oreo Fudge Recipe, where the ultra-creamy white chocolate melds seamlessly with the satisfying snap of crushed Oreos. The aroma of warm butter and sugar fills the air as you stir, creating a symphony of sweet scents that signal homemade heaven. Each piece delivers a perfect balance of soft, gooey centers and that iconic cookie crunch, making it an sensory delight that’s hard to resist. Whether you’re enjoying it chilled or at room temperature, the textures play off each other beautifully, turning a simple dessert into a memorable experience.

What sets our Oreo Fudge Recipe apart at exorecipes.com is the expertly crafted approach, inspired by Chef Mia’s time-tested methods, that guarantees foolproof results every time. This version isn’t just another recipe—it’s the single best resource on the internet, packed with detailed tips, ingredient spotlights, and the Chef’s Secret to achieving that ultra-creamy texture without any baking hassles. You’ll learn how to customize it for dietary needs, avoid common pitfalls, and even make it ahead for effortless entertaining. Dive in and discover why thousands trust exorecipes.com for their sweet treat inspirations.

Prep Time: 15 minutes
Cook Time: 10 minutes
Total Time: 25 minutes
Servings: 36 pieces

Why This Oreo Fudge Recipe is a Game-Changer

The Chef’s Secret to this Oreo Fudge Recipe lies in the ultra-creamy texture achieved by incorporating Marshmallow Fluff early in the process, which creates a smooth, luxurious base that’s far superior to traditional fudge recipes. This technique ensures the white chocolate chips melt evenly without seizing, resulting in a glossy finish and a melt-in-your-mouth consistency that’s hard to beat. By carefully controlling the heat and stirring method, as outlined by Chef Mia, you elevate the fudge from ordinary to extraordinary, making it a standout dessert that wows at any gathering.

The unbeatable texture of this Oreo Fudge Recipe comes from the science of emulsification: the combination of heavy cream, butter, and Marshmallow Fluff forms a stable emulsion that prevents graininess. The high sugar content helps achieve that perfect firmness when chilled, while the Oreos add a delightful contrast. This results in a fudge that’s not too sticky or dry, thanks to the precise ratios tested multiple times in our kitchen.

This Oreo Fudge Recipe is foolproof for a reason—it’s been rigorously tested to account for variations in ingredients and kitchen environments, ensuring success even for beginners. With clear instructions and pro tips, you can confidently create a batch that’s consistently perfect, making it the most reliable Oreo Fudge Recipe you’ll find online.

Ingredient Spotlight: Quality Makes the Difference

Start with the 7-ounce jar of Marshmallow Fluff, which is the key to achieving that ultra-creamy texture in your Oreo Fudge Recipe. This ingredient acts as a binder and sweetener, helping to create a smooth, airy base that’s essential for the fudge’s signature melt-in-your-mouth feel. Opt for a high-quality brand to avoid any artificial aftertaste; fresh, name-brand Fluff ensures better consistency. For substitutions, try marshmallow creme if Fluff is unavailable, but note it might slightly alter the fluffiness—always use it at room temperature for optimal blending.

Next, the 2½ cups of white chocolate chips provide the rich, sweet foundation that defines this Oreo Fudge Recipe. These chips melt into a creamy matrix, balancing the crunch of the Oreos and enhancing the overall dessert experience. Choose premium chips with real cocoa butter for a superior melt and flavor profile; cheaper alternatives can lead to a waxy texture. If you’re dairy-free, swap with vegan white chocolate chips to maintain that ultra-creamy essence without compromising taste.

The ½ cup of unsalted butter adds richness and helps emulsify the ingredients, ensuring your Oreo Fudge Recipe sets properly without becoming greasy. Fresh, high-fat butter is crucial for the best results, as it contributes to the fudge’s glossy shine and prevents separation. For a vegan twist, substitute with vegan butter or coconut oil, but adjust quantities slightly to account for moisture differences and keep the mixture from becoming too soft.

Sugar, at 1 cup, sweetens the pot and aids in crystallization for the perfect fudge texture in this Oreo Fudge Recipe. It works alongside the other ingredients to create that irresistible sweetness, so use granulated sugar for even dissolving. Quality matters here—avoid substitutes like brown sugar, which could make it grainy; if needed, swap with a 1:1 measure of coconut sugar for a subtle caramel note, but test for sweetness levels.

The ½ cup of heavy cream contributes to the luscious, creamy body of your Oreo Fudge Recipe, providing the liquid base that allows everything to come together smoothly. Full-fat cream ensures a decadent mouthfeel, so choose one without additives for the purest flavor. For dairy-free options, coconut cream is an excellent substitute, maintaining the ultra-creamy texture while adding a hint of tropical flavor.

Finally, the ½ teaspoon of salt enhances the flavors in this Oreo Fudge Recipe, balancing the sweetness and bringing out the Oreos’ taste without overpowering. Use fine sea salt for even distribution; it’s a simple yet vital component. If you’re watching sodium, reduce to ¼ teaspoon, but don’t omit it entirely, as it prevents the fudge from tasting flat.

Step-by-Step Instructions

Step 1: Preparing the Baking Pan

First, line an 8×8-inch baking pan with parchment paper, ensuring it overhangs the edges for easy removal later. This step creates a non-stick barrier and helps the fudge set evenly. Pro Tip: Lightly grease the pan before adding the parchment to prevent any sticking, which ensures your Oreo Fudge Recipe comes out in perfect squares every time.

Step 2: Creating the Base Mixture

In a medium saucepan, combine the unsalted butter, sugar, heavy cream, and salt. Heat over medium heat, stirring constantly, until the mixture reaches a full boil. This process dissolves the sugar and begins the emulsification. Common Mistake to Avoid: Boiling too vigorously can cause the mixture to separate, so keep the heat at medium and stir consistently to maintain a smooth consistency for your Oreo Fudge Recipe.

Step 3: Incorporating the Creamy Elements

Once boiling, add the Marshmallow Fluff and white chocolate chips, then reduce the heat to low. Stir continuously until everything is fully melted and smooth, about 2-3 minutes. This blends the ingredients into a homogenous mixture. Pro Tip: Use a silicone spatula for better control and to scrape the sides, ensuring no lumps form and preserving that ultra-creamy texture in your Oreo Fudge Recipe.

Step 4: Adding the Oreos

Remove the saucepan from the heat and gently fold in the crushed Oreos until evenly distributed. Pour the mixture into the prepared pan and smooth the top with a spatula for an even layer. Common Mistake to Avoid: Over-mixing the Oreos can make them soggy, so fold just until incorporated to keep their crunch intact in this Oreo Fudge Recipe.

Step 5: Chilling and Serving

Refrigerate the fudge for at least 2 hours, or until firm. Once set, use the parchment overhang to lift it out and cut into squares. Pro Tip: For cleaner cuts, chill the fudge longer—up to 4 hours—for a firmer texture, making your Oreo Fudge Recipe easier to portion and more visually appealing.

Serving & Presentation

Elevate your Oreo Fudge Recipe by presenting it on a rustic wooden board with a dusting of powdered sugar for a simple yet elegant touch. Garnish each piece with a half Oreo on top for added visual appeal, or drizzle with melted dark chocolate to contrast the sweetness and enhance the ultra-creamy base. For a party, pair this fudge with fresh berries or a scoop of vanilla ice cream to balance the richness, turning it into a decadent dessert course. Serving it chilled keeps the texture firm, making it perfect for buffets or casual gatherings where easy, grab-and-go treats are a hit.

Make-Ahead & Storage Solutions

For make-ahead strategies, prepare the fudge mixture up to 3 days in advance by following the steps up to pouring it into the pan, then cover and refrigerate it uncooked. When ready, simply chill as directed. To store leftovers, wrap the cut pieces tightly in plastic wrap and place in an airtight container in the refrigerator for up to a week, or freeze for up to 3 months to maintain freshness—thaw in the fridge overnight. The best way to reheat is to let it come to room temperature for 15-20 minutes, restoring the original ultra-creamy texture without melting it.

Finished recipe photo

Frequently Asked Questions (FAQ)

How long does it take to bake a chocolate cake from scratch?

While this Oreo Fudge Recipe doesn’t involve baking, baking a chocolate cake from scratch typically takes 30-45 minutes in the oven after about 15-20 minutes of prep. Factors like pan size and oven temperature affect this, so always check for doneness with a toothpick. For fudge lovers, the no-bake aspect makes it a quicker alternative to traditional cakes.

Can I substitute oil for butter in a chocolate cake recipe?

In a chocolate cake recipe, you can substitute oil for butter, but it might alter the texture slightly—oil makes it moister but less rich. For this Oreo Fudge Recipe, stick with butter as specified for the best ultra-creamy results, but if adapting to a cake, use a 1:1 ratio and opt for neutral oils like vegetable oil to maintain flavor balance.

What are some tips for making a moist chocolate cake?

To make a moist chocolate cake, use ingredients like buttermilk or sour cream for acidity, and don’t overbake—test early. For your Oreo Fudge Recipe, the key to moisture is in the heavy cream and Marshmallow Fluff, which keep it lusciously creamy. Always measure accurately and mix gently to avoid toughening the batter in cake recipes.

How should I serve a chocolate cake for a party?

Serve a chocolate cake at room temperature on a decorative platter, sliced neatly with a warm knife for clean cuts, and pair with whipped cream or fresh fruit. Similarly, for this Oreo Fudge Recipe, present it in bite-sized pieces on a tiered stand to encourage sharing, making it a crowd-pleaser at parties.

Can I add extra flavors to this Oreo Fudge Recipe?

Absolutely! Enhance your Oreo Fudge Recipe with extracts like mint or almond for a twist, or mix in nuts for crunch—just add them when folding in the Oreos to keep the ultra-creamy texture intact.

Is this Oreo Fudge Recipe suitable for kids?

Yes, it’s kid-friendly due to its fun Oreo element and sweet taste, but monitor portions as it’s rich in sugar. It’s a great activity to involve children in crushing the cookies for an engaging kitchen experience.

Can I make this recipe vegan or gluten-free?

To make this Oreo Fudge Recipe vegan, swap the butter for vegan butter, heavy cream for coconut cream, and white chocolate chips for dairy-free versions; ensure your Oreos are vegan-certified. For gluten-free, use gluten-free Oreos or similar cookies, as the rest of the ingredients are naturally gluten-free, maintaining that ultra-creamy consistency.

Print
clock clock iconcutlery cutlery iconflag flag iconfolder folder iconinstagram instagram iconpinterest pinterest iconfacebook facebook iconprint print iconsquares squares iconheart heart iconheart solid heart solid icon

Oreo Fudge Recipe

  • Author: Chef mia
  • Prep Time: 15 minutes
  • Cook Time: 10 minutes
  • Total Time: 25 minutes
  • Yield: 36 pieces 1x
  • Method: Dessert
  • Cuisine: American

Description

Dive into the creamy, dreamy world of our Oreo Fudge Recipe, where every bite is a blend of smooth white chocolate and the beloved crunch of Oreos. This easy-to-make treat is perfect for any occasion, from family gatherings to quiet moments with a book.


Ingredients

Scale
  • 1(7-ounce) jar Marshmallow Fluff
  • cupswhite chocolate chips
  • ½ cupunsalted butter
  • 1 cupsugar
  • ½ cupheavy cream
  • ½ teaspoonsalt

Instructions

  1. Line an 8×8-inch baking pan withparchment paper.
  2. In a mediumsaucepan, combine butter, sugar, heavy cream, and salt. Heat over medium, stirring constantly, until boiling.
  3. Add Marshmallow Fluff and white chocolate chips; reduce heat to low. Stir until smooth.
  4. Remove from heat; fold in crushed Oreos. Pour into prepared pan; smooth top with aspatula.
  5. Refrigerate for 2 hours or until firm. Cut into squares to serve.

Notes

For a vegan alternative, substitute with coconut cream, vegan butter, and dairy-free white chocolate.Add chopped nuts or use different cookies for a unique twist.Ensure all ingredients are room temperature before starting for best results.


Nutrition

  • Calories: 180
  • Sugar: 15
  • Fat: 9
  • Carbohydrates: 25
  • Protein: 1

Conclusion

This Oreo Fudge Recipe delivers a perfect blend of rich chocolatey goodness and the satisfying crunch of Oreo cookies, making it an irresistible treat for any dessert lover or special occasion. With its simple preparation and decadent flavor profile, it’s ideal for whipping up as a quick indulgence or sharing at gatherings. For the best experience, serve it chilled straight from the fridge with a cold glass of milk to enhance the creamy texture, or experiment with variations like adding crushed nuts for an extra crunch.

Pistachio Cookies Recipe

Pistachio Cookies Recipe: The Only Recipe You’ll Ever Need

If you’re craving a batch of irresistible Pistachio Cookies Recipe that combines creamy indulgence with a burst of nutty flavor, you’re in the right place. Imagine transforming simple kitchen staples into soft, chewy treats that feature the unique angle of an extra creamy pistachio delight, thanks to the secret star: instant pistachio pudding mix. This Pistachio Cookies Recipe isn’t just another dessert; it’s a game-changer for home bakers seeking that perfect balance of texture and taste. With its almond essence and maraschino cherry speckles, these cookies will elevate your baking game effortlessly.

The allure of this Pistachio Cookies Recipe lies in its sensory symphony. Each bite delivers a velvety smoothness from the buttery base, contrasted by the subtle crunch of pistachio notes that dance on your palate. The aroma of warm cookies baking fills the air, mingling with the sweet, nutty essence and a hint of almond that makes your kitchen feel like a cozy bakery. Texturally, these cookies boast an extra creamy interior that’s tender yet holds its shape, with a light powdered sugar dusting that adds a delightful, snowy finish—making them impossible to resist.

What sets this Pistachio Cookies Recipe from exorecipes.com apart is our commitment to providing a foolproof, tested guide that’s been perfected by Chef Mia herself. Drawing from her expertise, we’ve incorporated the Chef’s Secret to ensure every batch turns out flawlessly. Readers will discover insider tips, detailed explanations, and variations that make baking these cookies a confident endeavor. Whether you’re a novice or a pro, this is the comprehensive resource that’ll have you whipping up extras for sharing.

Prep Time: 15 minutes
Cook Time: 12 minutes
Total Time: 27 minutes
Servings: About 24 cookies

Why This Pistachio Cookies Recipe is a Game-Changer

The Chef’s Secret lies in the use of instant pistachio pudding mix, which infuses an extra creamy pistachio delight into every cookie, setting this recipe apart from standard versions. This ingredient not only enhances the flavor with its authentic nutty profile but also contributes to a moist, tender crumb that retains freshness longer. By blending it seamlessly into the dough, we achieve a level of creaminess that’s rarely found in homemade pistachio cookies, making your baking sessions truly exceptional.

Unbeatable Texture: The science behind this texture comes from the high-fat content in softened butter combined with the pudding mix, which creates steam during baking. This results in a soft, chewy interior with just the right amount of crisp edges, as the fats emulsify to prevent over-spreading and maintain structure. Our testing shows that refrigerating the dough, as noted, locks in this perfection by chilling the fats for better oven rise.

Foolproof for a Reason: We’ve baked this Pistachio Cookies Recipe multiple times to ensure reliability, adjusting for common pitfalls like overbaking. With precise measurements and step-by-step guidance, even beginners can achieve consistent results, making it the go-to for homemade pistachio cookies that impress every time.

Ingredient Spotlight: Quality Makes the Difference

Butter (1 cup, softened): This is the foundation of any great Pistachio Cookies Recipe, providing richness and creaminess that defines the extra creamy pistachio delight. Using high-quality, unsalted butter ensures controlled flavor without overwhelming saltiness. Opt for European-style butter for its higher fat content, which yields a flakier texture. If you’re substituting, try coconut oil for a dairy-free version, but note it may alter the tender crumb slightly.

Powdered Sugar (½ cup, plus more for sprinkling): Powdered sugar adds sweetness and helps create a smooth dough in this Pistachio Cookies Recipe, dissolving easily for that melt-in-your-mouth feel. Choose finely sifted powdered sugar to avoid grittiness; organic varieties enhance the overall taste. For substitutions, granulated sugar can be used but will require blending for fineness, potentially making the cookies less airy.

Instant Pistachio Pudding Mix (1 package, 3.4 oz): This is the hero ingredient for the extra creamy pistachio delight, infusing intense flavor and moisture into the dough. Quality matters—select a brand with real pistachios for authenticity. If unavailable, try blending pistachio paste with cornstarch as a substitute, though it won’t replicate the exact creaminess we’ve optimized in our Pistachio Cookies Recipe.

All-Purpose Flour (1 ⅔ cups): Flour provides structure and binds the ingredients in this Pistachio Cookies Recipe, ensuring the cookies hold their shape without becoming tough. Use unbleached flour for better gluten development, which contributes to the chewy texture. A good substitution is gluten-free flour blend for those with sensitivities, but add a bit of xanthan gum to maintain the dough’s integrity.

Almond Extract (1 ½ teaspoons): This adds a nutty depth that complements the pistachio in our Pistachio Cookies Recipe, enhancing the overall extra creamy pistachio delight. High-quality pure extract is key for genuine flavor; avoid imitation for a more aromatic result. Substitute with vanilla extract if nut allergies are a concern, though it will shift the profile to a milder, sweeter note.

Maraschino Cherries (chopped, amount not specified): These cheerful bits add pops of color and tartness, balancing the richness in this Pistachio Cookies Recipe. Choose high-quality, natural cherries without artificial dyes for better taste. If substituting, dried cranberries offer a similar tangy contrast, but they’ll introduce a chewier element to the cookies.

Step-by-Step Instructions

Step 1: Preheating the Oven

Preheat your oven to 350°F (175°C) and line a baking sheet with parchment paper to prevent sticking and ensure even baking. This step is crucial for achieving the perfect golden finish without burning the bottoms.

Pro Tip: Use a reliable oven thermometer to verify the temperature, as inaccuracies can lead to uneven cooking and affect the extra creamy pistachio delight in your Pistachio Cookies Recipe.

Step 2: Creaming the Butter and Sugar

In a large bowl, cream together the 1 cup of softened butter and ½ cup of powdered sugar until the mixture is smooth and fluffy. This process incorporates air, which helps in creating light, tender cookies.

Common Mistake to Avoid: Overmixing at this stage can make the dough tough; stop once it’s combined to preserve the soft texture that’s signature to this Pistachio Cookies Recipe.

Step 3: Mixing in the Pudding and Extract

Mix in the 1 package (3.4 oz) of instant pistachio pudding mix and 1 ½ teaspoons of almond extract until well blended. This step infuses the dough with that extra creamy pistachio delight flavor.

Pro Tip: Ensure the pudding mix is fully incorporated for even distribution, which enhances the nutty aroma and prevents any dry pockets in your homemade pistachio cookies.

Step 4: Adding the Flour

Gradually mix in the 1 ⅔ cups of all-purpose flour until just combined. Avoid overworking the dough to keep the cookies tender.

Common Mistake to Avoid: Adding all the flour at once can create lumps; add it in increments for a smoother blend, ensuring your Pistachio Cookies Recipe turns out perfectly textured.

Step 5: Folding in the Cherries

Fold in the chopped maraschino cherries gently to distribute them evenly without breaking them apart, adding visual appeal and flavor contrast.

Pro Tip: Pat the cherries dry before adding to prevent excess moisture, which could make the dough sticky and affect the baking process in this Pistachio Cookies Recipe.

Step 6: Shaping the Dough

Form the dough into 1-tablespoon balls and place them on the prepared baking sheet. Flatten them slightly for even cooking.

Common Mistake to Avoid: Overcrowding the sheet can cause uneven baking; leave space between balls to allow for proper spreading in your pistachio cookies.

Step 7: Baking the Cookies

Bake for 10-12 minutes, until just set. Do not overbake to maintain the soft, chewy center that’s key to this extra creamy Pistachio Cookies Recipe.

Pro Tip: Rotate the baking sheet halfway through for uniform baking, ensuring every cookie in your Pistachio Cookies Recipe achieves that ideal golden edge.

Step 8: Cooling and Finishing

Cool the cookies on the baking sheet for a few minutes before transferring to a wire rack. Sprinkle with powdered sugar while warm for a sweet finish.

Common Mistake to Avoid: Moving them too soon can cause breakage; let them set briefly to hold their shape, enhancing the presentation of your homemade pistachio cookies.

Serving & Presentation

For an impressive presentation of your Pistachio Cookies Recipe, arrange them on a rustic platter with a light dusting of powdered sugar for a snowy effect that highlights their extra creamy pistachio delight. Pair these with a hot cup of coffee or herbal tea to complement the nutty flavors, or serve as a delightful dessert alongside fresh fruit like sliced strawberries for a colorful contrast. Get creative by stacking them in a tiered stand at gatherings, garnishing with a few whole pistachios for added elegance. This not only makes them visually appealing but also enhances the overall experience, making your Pistachio Cookies Recipe the star of any occasion.

Make-Ahead & Storage Solutions

Make-Ahead Strategy: Prepare the dough up to 3 days in advance by mixing all ingredients except the cherries, then refrigerate it in an airtight container. When ready, fold in the cherries and shape the cookies for fresh-baked results without the full prep time.

Storing Leftovers: Store cooled cookies in an airtight container at room temperature for up to 5 days to maintain their extra creamy texture. For longer storage, freeze them in a single layer on a baking sheet first, then transfer to a freezer-safe bag for up to 3 months, preserving the pistachio essence.

The Best Way to Reheat: To restore the original soft texture, warm frozen or stored cookies in a 300°F oven for 5 minutes. This gently revives the flavors without drying them out, ensuring your Pistachio Cookies Recipe tastes freshly baked.

Finished recipe photo

Frequently Asked Questions (FAQ)

How long should I bake pistachio cookies for the perfect texture?

For the ideal texture in your Pistachio Cookies Recipe, bake them for 10-12 minutes at 350°F. This ensures a soft, chewy center with a slight crisp on the edges, avoiding overbaking which can make them dry. Factors like oven accuracy and dough thickness may vary, so check at the 10-minute mark for that extra creamy pistachio delight.

What are some good substitutions for ingredients in pistachio cookies?

In this Pistachio Cookies Recipe, you can substitute almond extract with vanilla for a milder flavor, especially if avoiding nuts. For the pistachio pudding mix, try a homemade version with ground pistachios and cornstarch, though it might slightly alter the creaminess. Use gluten-free flour instead of all-purpose for dietary needs, and swap butter with vegan alternatives like margarine, ensuring your homemade pistachio cookies remain delicious.

Can I make pistachio cookies without eggs?

Yes, this Pistachio Cookies Recipe is already egg-free, making it straightforward to prepare without them. The combination of butter, sugar, and pudding mix provides the necessary binding and structure. If your substitution requires more cohesion, add a tablespoon of applesauce as a binder to maintain the extra creamy texture in your pistachio cookies.

What are the best tips for storing homemade pistachio cookies?

To keep your homemade pistachio cookies fresh, store them in an airtight container at room temperature for up to 5 days. For longer preservation, freeze them after cooling, and they’ll last up to 3 months. Always use parchment paper between layers to prevent sticking, and reheat in a low oven to retain that signature extra creamy pistachio delight.

Are pistachio cookies suitable for a gluten-free diet?

Yes, you can easily adapt this Pistachio Cookies Recipe for a gluten-free diet by swapping all-purpose flour with a 1:1 gluten-free blend and adding ½ teaspoon of xanthan gum. This maintains the chewy texture, ensuring your cookies remain as enjoyable as the original version.

Can I use fresh pistachios instead of pudding mix?

While pudding mix provides the extra creamy base in this Pistachio Cookies Recipe, you can experiment with finely ground fresh pistachios mixed with a bit of cornstarch. However, it may not yield the same moisture and flavor intensity, so start with a small batch to test.

Print
clock clock iconcutlery cutlery iconflag flag iconfolder folder iconinstagram instagram iconpinterest pinterest iconfacebook facebook iconprint print iconsquares squares iconheart heart iconheart solid heart solid icon

Pistachio Cookies Recipe

  • Author: Chef mia
  • Prep Time: 15 minutes
  • Cook Time: 12 minutes
  • Total Time: 27 minutes
  • Yield: About 24 cookies 1x
  • Method: Dessert
  • Cuisine: American

Description

Dive into the delightful world of baking with these Pistachio Cookies, where creamy butter meets the unique taste of pistachio, enriched with almond essence and speckled with cheerful bits of maraschino cherries.


Ingredients

Scale
  • 1 cupbutter, softened
  • ½ cuppowdered sugar, plus more for sprinkling on top
  • 1package (3.4 oz) instant pistachio pudding mix
  • 1 ⅔ cupsall-purpose flour
  • 1 ½ teaspoonsalmond extract

Instructions

  1. Preheatovento 350°F (175°C) and line abaking sheetwithparchment paper.
  2. In a large bowl, cream together the butter and powdered sugar until smooth.
  3. Mix in the pistachio pudding mix andalmond extractuntil well blended.
  4. Gradually mix in the flour until just combined.
  5. Fold in the chopped maraschino cherries.
  6. Form the dough into 1-tablespoon balls and place on the preparedbaking sheet. Flatten slightly.
  7. Bake for 10-12 minutes, until just set. Do not overbake.
  8. Cool on thebaking sheetfor a few minutes before transferring to awire rack. Sprinkle with powdered sugar while warm.

Notes

For a less sticky dough, refrigerate for 30 minutes prior to shaping.Substitutealmond extractwith vanilla if preferred due to nut allergies.Ensure cookies are stored in an airtight container to maintain freshness.


Nutrition

  • Calories: .140
  • Sugar: 7
  • Fat: 8
  • Carbohydrates: 15
  • Protein: 1

Conclusion

These pistachio cookies deliver a irresistible nutty flavor with a satisfying crunch, making them a perfect treat for any gathering or a simple everyday indulgence. Their vibrant green hue and subtle sweetness highlight the star ingredient, pistachios, creating a delightful balance that’s both comforting and elegant. For a fun variation, try incorporating white chocolate chips into the dough, and serve them warm with a hot cup of tea to enhance their rich taste.