Best Crockpot Chicken Noodle Soup – Easy & Hearty

best-crockpot-chicken-noodle-soup

The Coziest Crockpot Chicken Noodle Soup for Soulful Evenings

There’s something almost magical about the way a simmering pot of chicken noodle soup can turn a dreary day into a warm, comforting embrace. I remember coming home from school as a child, my cheeks still stinging from the autumn wind, to find my grandmother’s kitchen filled with the scent of tender chicken, earthy herbs, and buttery noodles. She’d wrap me in a quilt at the kitchen table and serve me a steaming bowl—her secret? Letting the slow cooker do all the loving work while she simply stirred in the noodles at the end. Today, I’m sharing my version of that nostalgia, a crockpot chicken noodle soup that’s as effortless as it is soul-warming.

Ingredients You’ll Need

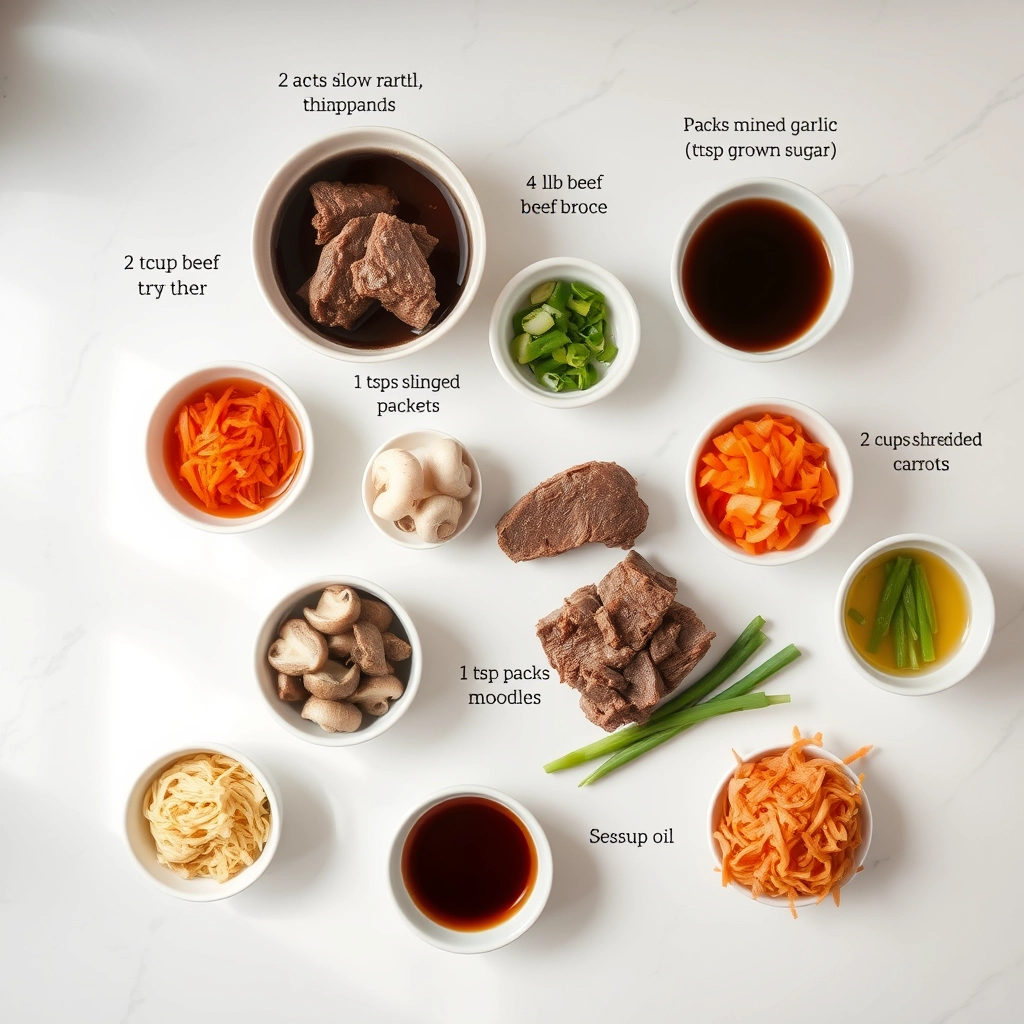
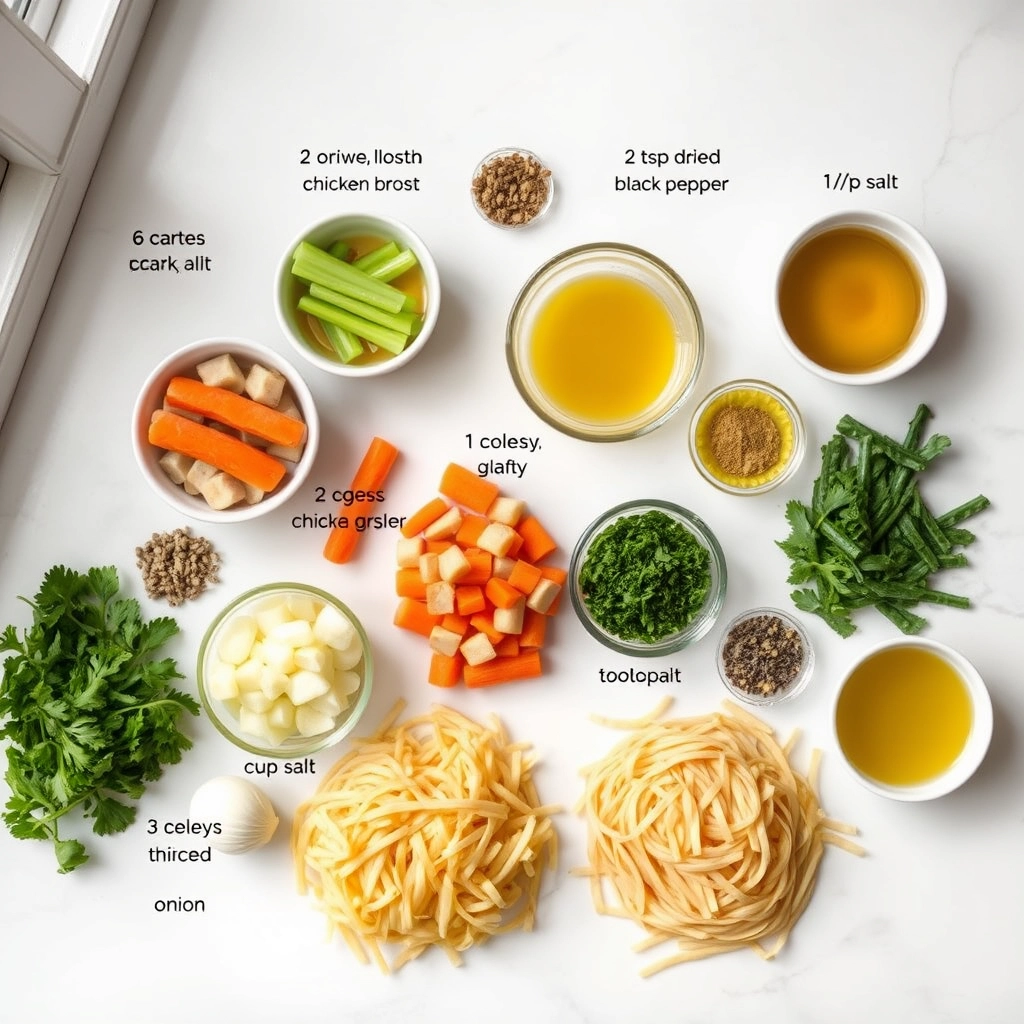
  • 1.5 lbs boneless, skinless chicken thighs – Thighs stay juicier than breasts during slow cooking, but feel free to swap if you prefer white meat.
  • 6 cups chicken broth – Homemade is dreamy, but a good-quality store-bought broth works beautifully.
  • 3 carrots, sliced into coins – Their natural sweetness balances the savory broth.
  • 3 celery stalks, chopped – Don’t skip the leaves! They add a lovely herbaceous note.
  • 1 yellow onion, diced – The humble onion is the flavor foundation here.
  • 3 garlic cloves, minced – Because every great soup starts with garlic.
  • 1 tsp dried thyme – Earthy and warm, like a hug in spice form.
  • 2 bay leaves – They’ll infuse the broth with depth—just remember to fish them out later!
  • 2 cups wide egg noodles – The classic choice, but any short pasta will do.
  • Salt & pepper to taste – Season as you go, but especially at the end.
  • Fresh parsley (optional) – A bright green sprinkle before serving makes it extra inviting.

Let’s Make Some Comfort

  1. Layer the aromatics: Start by scattering the onions, carrots, and celery in the bottom of your crockpot. This creates a flavorful “bed” for the chicken. Toss in the garlic, thyme, and bay leaves—no need to stir yet!
  2. Nestle in the chicken: Place the chicken thighs on top of the veggies in a single layer. Season generously with salt and pepper. Pour the broth over everything; it should nearly cover the chicken (add a splash of water if needed).
  3. Slow cook to tenderness: Cover and cook on LOW for 6-7 hours or HIGH for 3-4 hours. The chicken should shred easily with a fork when done. (Tip: If you’re home, give it a gentle stir halfway through—but no peeking otherwise! Keeping the lid on ensures rich flavor.)
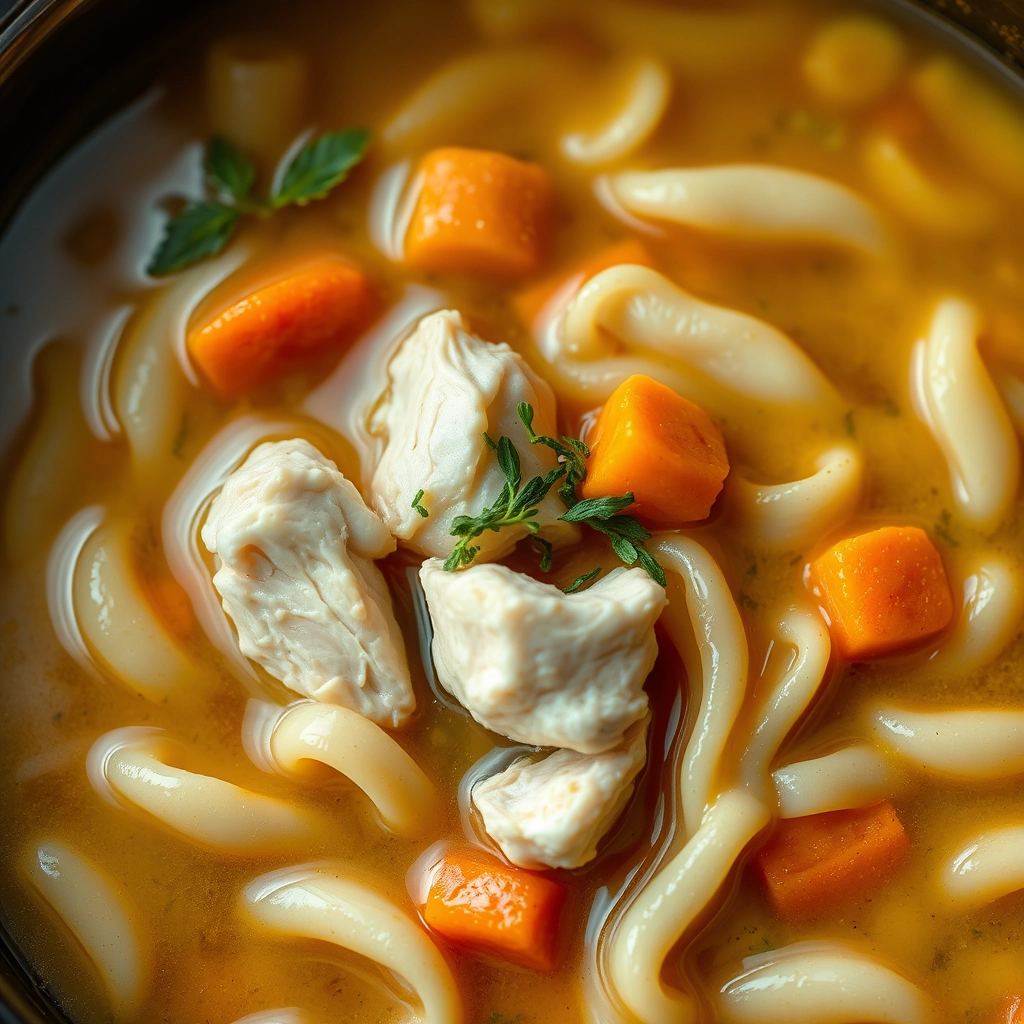
  4. Shred & simmer: Use two forks to shred the chicken right in the pot. It’ll soak up even more broth this way. Then, stir in the egg noodles, submerging them completely. Cover and cook on HIGH for 10-15 more minutes, just until the noodles are al dente.

At this point, your kitchen will smell like every happy childhood memory. But we’re not done yet—stay tuned for the finishing touches (think: buttery richness, herbaceous freshness) and my favorite ways to serve this hug-in-a-bowl…

Pro Tips, Variations, and Substitutions

This crockpot chicken noodle soup is wonderfully forgiving, so don’t be afraid to make it your own! Here are some ways to customize it:

  • Swap the protein: Use leftover turkey instead of chicken for a post-holiday twist.
  • Make it creamy: Stir in a splash of heavy cream or a dollop of cream cheese at the end for a richer broth.
  • Veggie lovers: Add mushrooms, zucchini, or kale for extra nutrients and texture.
  • Gluten-free option: Use gluten-free noodles or swap them for rice or quinoa.
  • Herb boost: Fresh thyme, rosemary, or a bay leaf will deepen the flavor.

What to Serve With Your Soup

This soup is a meal in itself, but a few cozy sides can make it even more satisfying:

  • Warm, crusty bread or buttery rolls for dipping
  • A simple green salad with a tangy vinaigrette
  • Grilled cheese sandwiches (because who can resist?)
  • Garlic knots or flaky biscuits

Storage and Reheating Tips

This soup keeps beautifully, making it perfect for meal prep or leftovers:

  • Refrigerator: Store in an airtight container for up to 4 days.
  • Freezer: Freeze without noodles for up to 3 months. Add fresh noodles when reheating.
  • Reheating: Warm gently on the stovetop over low heat. If the broth thickens, add a splash of water or broth.

Frequently Asked Questions

Can I use frozen chicken?
Yes! Just add it straight to the crockpot—no need to thaw. Increase the cooking time by about an hour to ensure it cooks through.

Why do the noodles get mushy?
Noodles absorb liquid over time. For the best texture, cook them separately and add them to individual bowls when serving, or wait until the last 30 minutes of cooking.

Can I make this soup in an Instant Pot?
Absolutely! Sauté the veggies first, then pressure cook on high for 10 minutes with a quick release. Add the noodles and cook on “Sauté” until tender.

How can I make it more flavorful?
Browning the chicken first or using homemade broth will add depth. A squeeze of lemon juice or a sprinkle of Parmesan at the end brightens the flavors, too.

Final Thoughts

There’s something magical about a bowl of homemade chicken noodle soup—it’s comfort in every spoonful. Whether you’re fighting off a cold, craving something cozy, or just need an easy dinner, this crockpot version delivers. The best part? It fills your home with the most irresistible aroma while doing all the work for you. So grab your slow cooker, snuggle up, and let this soup warm your soul. Happy cooking!

Print
clock clock iconcutlery cutlery iconflag flag iconfolder folder iconinstagram instagram iconpinterest pinterest iconfacebook facebook iconprint print iconsquares squares iconheart heart iconheart solid heart solid icon

Crockpot Chicken Noodle Soup

  • Author: Trusted Blog

Description

A comforting and hearty chicken noodle soup made effortlessly in the crockpot.


Ingredients

Scale

For the Crust:

  • 1 lb boneless, skinless chicken breasts
  • 6 cups chicken broth
  • 3 carrots, sliced
  • 3 celery stalks, sliced
  • 1 onion, diced
  • 2 cloves garlic, minced
  • 1 tsp dried thyme
  • 1 tsp dried parsley
  • 1/2 tsp salt
  • 1/4 tsp black pepper
  • 2 cups egg noodles
  • 1 tbsp olive oil

Instructions

1. Prepare the Crust:

  1. Heat olive oil in a skillet over medium heat. Add chicken breasts and cook for 3-4 minutes per side until lightly browned.
  2. Transfer chicken to the crockpot. Add chicken broth, carrots, celery, onion, garlic, thyme, parsley, salt, and pepper.
  3. Cover and cook on low for 6-7 hours or high for 3-4 hours.
  4. Remove chicken and shred with two forks. Return shredded chicken to the crockpot.
  5. Add egg noodles and cook on high for an additional 15-20 minutes until noodles are tender.
  6. Serve hot and enjoy.

Notes

You can customize the seasonings to taste.

Best Easy Baked Honey Dijon Chicken Recipe

best-easy-baked-honey-dijon-chicken

The Coziest Honey Dijon Chicken You’ll Ever Make

There’s something about golden, sticky chicken straight from the oven that feels like a warm hug on a busy weeknight. I remember the first time I whipped up this honey Dijon chicken—it was one of those evenings when the fridge seemed bare, but a few humble ingredients came together in the most magical way. The sweet honey, the tangy Dijon, and the way the chicken caramelizes into tender perfection… well, let’s just say it’s been on repeat ever since. This recipe is for those nights when you want something effortlessly delicious without sacrificing flavor. Let’s get cooking!

Ingredients You’ll Need

  • 4 boneless, skinless chicken breasts – The star of the show! If they’re thick, I like to gently pound them to an even thickness for even cooking.
  • ¼ cup honey – Use the good stuff—local honey adds a lovely depth, but any will do.
  • 2 tablespoons Dijon mustard – That tangy kick is what makes this dish sing.
  • 2 tablespoons olive oil – For richness and to help the marinade cling to the chicken.
  • 2 cloves garlic, minced – Because garlic makes everything better.
  • 1 tablespoon apple cider vinegar – A little acidity balances the sweetness.
  • ½ teaspoon smoked paprika – Just a whisper of smokiness—trust me on this.
  • Salt and freshly ground black pepper – To taste, of course!
  • Fresh thyme or parsley (optional) – For a pretty, herby finish.

Let’s Make This Honey Dijon Chicken

First, preheat your oven to 375°F (190°C). While it warms up, let’s prepare the chicken. If your chicken breasts are on the thicker side, place them between two sheets of parchment paper and gently pound them to an even thickness—about ½ inch works beautifully. This ensures they cook evenly and stay juicy.

Next, whisk together the honey, Dijon mustard, olive oil, minced garlic, apple cider vinegar, smoked paprika, and a generous pinch of salt and pepper in a small bowl. Taste it—yes, really! Adjust the sweetness or tang to your liking. If it’s too sweet, add a splash more vinegar; if it’s too sharp, a drizzle more honey will mellow it out.

Now, place the chicken breasts in a baking dish (I love using my trusty ceramic one for this) and pour that glorious honey Dijon sauce over them, making sure every inch is coated. If you have time, let them marinate for 15–20 minutes—though I won’t judge if you’re too hungry to wait!

Pop the dish into the oven and bake for 20–25 minutes, or until the chicken reaches an internal temperature of 165°F (74°C). About halfway through, I like to spoon some of the pan juices over the chicken for extra flavor and that irresistible sticky glaze.

Pro Tips, Variations, and Substitutions

This honey Dijon chicken recipe is wonderfully flexible, so feel free to make it your own! Here are some ways to customize it:

  • Spice it up: Add a pinch of cayenne or red pepper flakes to the glaze for a subtle kick.
  • Herb lovers: Stir fresh thyme or rosemary into the marinade for extra fragrance.
  • Dairy-free option: Replace the butter with olive oil—it still caramelizes beautifully.
  • Chicken cuts: Works great with thighs or drumsticks too! Just adjust baking time as needed.

What to Serve With Honey Dijon Chicken

This dish pairs beautifully with so many sides! Our favorites include:

  • Fluffy mashed potatoes (perfect for soaking up the glaze)
  • Roasted carrots or Brussels sprouts
  • A crisp green apple salad
  • Buttery egg noodles or wild rice

Storage and Reheating Tips

Leftovers? Lucky you! Store them in an airtight container in the fridge for up to 3 days. To reheat:

  • Oven method: Place chicken on a baking sheet at 350°F for 10-15 minutes until warmed through.
  • Skillet method: Warm gently in a pan with a splash of water to keep it moist.

Pro tip: The glaze tastes even better the next day as the flavors meld!

Frequently Asked Questions

Can I make this ahead of time?

Absolutely! Marinate the chicken overnight for maximum flavor. Just wait to bake until you’re ready to serve.

My glaze is too thin—how can I thicken it?

Simmer it in a small saucepan for 2-3 minutes until it reduces. Or mix 1 tsp cornstarch with 1 tbsp cold water and stir it in while heating.

Can I use regular mustard instead of Dijon?

You can, but the flavor will be sharper. We recommend using half Dijon and half yellow mustard if that’s what you have.

Is this recipe freezer-friendly?

Yes! Freeze baked chicken (without garnishes) for up to 2 months. Thaw overnight in the fridge before reheating.

Final Thoughts

There’s something so comforting about this honey Dijon chicken—the way the sweet and tangy glaze caramelizes in the oven, how the chicken stays impossibly juicy, and how effortlessly it comes together. It’s the kind of meal that feels special enough for company but simple enough for busy weeknights. I hope this recipe finds its way into your regular rotation and becomes one of those dependable dishes your family requests again and again. Happy cooking, friends—may your kitchen be warm and your plates be full!

Print
clock clock iconcutlery cutlery iconflag flag iconfolder folder iconinstagram instagram iconpinterest pinterest iconfacebook facebook iconprint print iconsquares squares iconheart heart iconheart solid heart solid icon

Easy Baked Honey Dijon Chicken

  • Author: Trusted Blog

Description

A simple and flavorful baked chicken dish with a sweet and tangy honey Dijon glaze.


Ingredients

Scale

For the Crust:

  • 4 boneless, skinless chicken breasts
  • 1/4 cup Dijon mustard
  • 1/4 cup honey
  • 1 tablespoon olive oil
  • 1 teaspoon garlic powder
  • 1/2 teaspoon paprika
  • Salt and pepper to taste
  • Fresh parsley for garnish (optional)

Instructions

1. Prepare the Crust:

  1. Preheat oven to 375°F (190°C). Lightly grease a baking dish.
  2. In a small bowl, whisk together Dijon mustard, honey, olive oil, garlic powder, paprika, salt, and pepper.
  3. Place chicken breasts in the prepared baking dish and coat evenly with the honey Dijon mixture.
  4. Bake for 25-30 minutes or until chicken reaches an internal temperature of 165°F (74°C).
  5. Garnish with fresh parsley if desired and serve warm.

Notes

You can customize the seasonings to taste.

Easy Slow Cooker Orange Chicken – Simple & Delicious

easy-slow-cooker-orange-chicken

A Cozy Kitchen Miracle: Slow Cooker Orange Chicken

There’s something magical about walking into a home that smells like citrus and spice—like sunshine and comfort all at once. That’s exactly what happened last Sunday when I decided to toss a few simple ingredients into my slow cooker before heading out for a morning walk. By the time I returned, the tangy-sweet aroma of orange chicken had taken over the house, and my family was already hovering near the kitchen, forks in hand. No fuss, no endless stirring—just tender, flavorful chicken waiting to be devoured. If that’s not a weeknight (or lazy weekend) win, I don’t know what is!

Ingredients You’ll Need

Gather these pantry staples and fresh favorites—most of them might already be in your kitchen!

  • Boneless, skinless chicken thighs (1.5 lbs) – Thighs stay juicier in the slow cooker, but breasts work too if you prefer leaner meat.
  • Fresh orange juice (1 cup) – Squeeze it yourself for the brightest flavor, or use good-quality store-bought in a pinch.
  • Soy sauce (1/3 cup) – The salty backbone of our sauce. I use low-sodium to control the saltiness.
  • Honey (1/4 cup) – For that perfect sticky-sweet balance. Maple syrup works beautifully too!
  • Rice vinegar (2 tbsp) – A little tang to keep things interesting.
  • Fresh garlic (4 cloves, minced) – Because everything’s better with garlic.
  • Grated ginger (1 tbsp) – Warm, peppery, and oh-so-cozy.
  • Orange zest (1 tbsp) – Don’t skip this! It’s where the magic lives.
  • Red pepper flakes (1/2 tsp) – Just enough heat to make you smile.
  • Cornstarch (2 tbsp) – Our trusty sauce thickener.

Let’s Get Cooking: Effortless Steps to Flavor Town

This recipe is so simple, you’ll wonder why you ever ordered takeout. Here’s how we do it:

  1. Prep the chicken. Pat your chicken thighs dry (this helps the sauce cling better) and place them in the slow cooker. No need to chop—they’ll shred beautifully later!
  2. Whisk the sauce. In a bowl, combine orange juice, soy sauce, honey, rice vinegar, garlic, ginger, orange zest, and red pepper flakes. Give it a taste—adjust the sweetness or spice if needed. Pour this glorious liquid over the chicken.
  3. Slow cook to perfection. Cover and cook on LOW for 4-5 hours (or HIGH for 2-3). Your kitchen will smell like a dream!
  4. Thicken the sauce. Once the chicken is fork-tender, remove it and shred lightly. Mix cornstarch with 2 tbsp of cold water, stir into the slow cooker, and let it bubble for 10-15 minutes until the sauce coats the back of a spoon.

Tip: If you’re home while it cooks, baste the chicken with the sauce once or twice—it’s not necessary, but it adds extra flavor love!

Pro Tips, Variations, and Substitutions

This slow cooker orange chicken is wonderfully forgiving, making it easy to tweak to your taste. Here are some ways to make it your own:

  • Spice it up: Add a teaspoon of red pepper flakes or a dash of sriracha for a spicy kick.
  • Make it gluten-free: Swap soy sauce for tamari or coconut aminos.
  • Use fresh oranges: If you have fresh oranges on hand, replace the orange juice with 1/2 cup freshly squeezed juice and add a tablespoon of zest for extra brightness.
  • Swap the protein: This sauce works beautifully with shrimp, tofu, or even pork for a fun twist.

What to Serve With Slow Cooker Orange Chicken

This dish is a star when paired with simple sides that let the flavors shine:

  • Steamed jasmine or basmati rice to soak up the delicious sauce
  • Stir-fried or roasted broccoli for a crisp, fresh contrast
  • Quick-pickled cucumbers or carrots for a tangy bite
  • Fortune cookies and hot tea for a fun, takeout-inspired finish

Storage and Reheating Tips

This orange chicken keeps beautifully, making it perfect for meal prep:

  • Refrigerator: Store in an airtight container for up to 4 days.
  • Freezer: Freeze portions in freezer-safe bags for up to 3 months. Thaw overnight in the refrigerator before reheating.
  • Reheating: Warm gently in a skillet over medium-low heat with a splash of water or broth to refresh the sauce. Microwave works too – just cover and heat in 30-second intervals.

Frequently Asked Questions

Can I make this orange chicken in an Instant Pot?
Absolutely! Use the sauté function to brown the chicken first, then pressure cook on high for 5 minutes with a quick release.

Is there a way to make this less sweet?
Yes! Reduce the brown sugar to 2 tablespoons and add an extra tablespoon of soy sauce for balance.

Can I use frozen chicken?
It’s best to thaw first for even cooking, but you can use frozen in a pinch – just extend the cooking time by 1-2 hours.

How do I thicken the sauce if it’s too thin?
Mix 1 tablespoon cornstarch with 2 tablespoons cold water, stir into the slow cooker, and cook on high for 15 minutes uncovered.

Cozy Final Thoughts

There’s something so comforting about coming home to the sweet, citrusy aroma of this orange chicken filling your kitchen. Whether you’re craving a nostalgic takeout favorite or need an effortless weeknight dinner, this slow cooker version delivers all the flavor with none of the fuss. I love how the chicken becomes meltingly tender while the sauce develops deep, balanced flavors – it’s the kind of meal that makes everyone at the table happy. Wishing you many cozy meals ahead with this simple, satisfying recipe!

Print
clock clock iconcutlery cutlery iconflag flag iconfolder folder iconinstagram instagram iconpinterest pinterest iconfacebook facebook iconprint print iconsquares squares iconheart heart iconheart solid heart solid icon

Easy Slow Cooker Orange Chicken

  • Author: Trusted Blog

Description

A delicious and simple slow cooker orange chicken recipe with a sweet and tangy sauce.


Ingredients

Scale

For the Crust:

  • 1.5 lbs boneless, skinless chicken thighs, cut into bite-sized pieces
  • 1/2 cup orange juice
  • 1/4 cup soy sauce
  • 1/4 cup honey
  • 2 tbsp rice vinegar
  • 3 cloves garlic, minced
  • 1 tbsp ginger, grated
  • 1 tsp red pepper flakes (optional)
  • 1 tbsp cornstarch
  • 2 tbsp water
  • 2 green onions, sliced (for garnish)
  • 1 tbsp sesame seeds (for garnish)

Instructions

1. Prepare the Crust:

  1. In a slow cooker, combine orange juice, soy sauce, honey, rice vinegar, garlic, ginger, and red pepper flakes (if using). Stir well.
  2. Add the chicken pieces to the slow cooker and toss to coat evenly with the sauce.
  3. Cover and cook on low for 4-5 hours or on high for 2-3 hours, until chicken is cooked through.
  4. In a small bowl, mix cornstarch and water to create a slurry. Stir the slurry into the slow cooker to thicken the sauce.
  5. Cook for an additional 15-20 minutes until the sauce has thickened.
  6. Garnish with sliced green onions and sesame seeds before serving.

Notes

You can customize the seasonings to taste.

Easy Slow Cooker Beef Ramen Noodles Recipe

easy-slow-cooker-beef-ramen

Slow Cooker Beef Ramen: The Coziest Bowl of Comfort

There’s something magical about the way a slow cooker transforms humble ingredients into something extraordinary—especially on those days when the wind howls outside, and all you crave is a steaming bowl of comfort. This beef ramen recipe was born on one such afternoon, when my pantry held little more than a package of ramen noodles and a lonely chuck roast. What unfolded was pure alchemy: tender, melt-in-your-mouth beef swimming in a rich, savory broth, tangled with springy noodles and topped with all the fixings. It’s become my go-to for busy weeknights and lazy Sundays alike, and I have a feeling it’ll steal your heart too.

Ingredients You’ll Need (And Why They Matter)

  • 2 lbs beef chuck roast – The star of the show! Chuck roast becomes fork-tender when slow-cooked, and its marbling adds incredible depth to the broth.
  • 1 tablespoon sesame oil – A nutty, fragrant base that gives the broth an unmistakable ramen-shop aroma.
  • 4 cloves garlic, minced + 1 thumb-sized knob of ginger, grated – The dynamic duo that builds layers of flavor. Don’t skimp!
  • 6 cups beef broth – Opt for low-sodium so you can adjust seasoning later. Homemade bone broth? Even better.
  • 3 tablespoons soy sauce + 1 tablespoon mirin – The salty-sweet balance that makes ramen broth irresistible.
  • 1 teaspoon chili paste (like sambal oelek) – Just enough warmth to tingle your lips. Adjust to your spice tolerance!
  • 2 packs ramen noodles – Discard the seasoning packets (we’re making something far more delicious).
  • Toppings of choice – Soft-boiled eggs, sliced green onions, shredded carrots, nori strips… the canvas is yours!

Let’s Get Cooking (The Slow & Steady Way)

Step 1: Sear the beef for soulful flavor. Heat the sesame oil in a skillet over medium-high, then sear the chuck roast on all sides until deeply browned. This step isn’t just for looks—those caramelized bits are flavor gold! Transfer the beef to your slow cooker.

Step 2: Build the broth base. In the same skillet, sauté the garlic and ginger for just 30 seconds until fragrant (burnt garlic is bitter, so keep it moving!). Deglaze with a splash of beef broth, scraping up all those tasty browned bits, then pour everything into the slow cooker.

Step 3: The long, lazy simmer. Add the remaining broth, soy sauce, mirin, and chili paste to the slow cooker. Cover and cook on low for 7-8 hours (or high for 4-5) until the beef shreds effortlessly with a fork. Pro tip: Resist the urge to peek—every lift of the lid adds 15 minutes to cooking time!

Pro Tips, Variations, and Substitutions

This slow cooker beef ramen is wonderfully forgiving, so don’t hesitate to make it your own! Here are some ideas to customize your bowl:

  • Protein Swap: Swap the beef for chicken thighs, pork shoulder, or even tofu for a vegetarian twist.
  • Veggie Boost: Add mushrooms, bok choy, or snap peas during the last 30 minutes of cooking for extra crunch and nutrition.
  • Spice It Up: Stir in a spoonful of chili garlic sauce or sriracha for a kick of heat.
  • Broth Options: Use low-sodium beef broth if preferred, or mix in a splash of coconut milk for a creamier texture.

What to Serve with Slow Cooker Beef Ramen

While this dish is hearty enough to stand alone, a few simple sides can turn it into a full feast:

  • Soft-boiled or jammy eggs (a ramen classic!)
  • Quick-pickled cucumbers or radishes for brightness
  • Crispy wonton strips or seaweed snacks for texture
  • A light cucumber salad or steamed edamame

Storage and Reheating Tips

Leftovers? No problem! Here’s how to keep your ramen tasting fresh:

  • Storage: Keep broth and noodles separate in airtight containers for up to 3 days in the fridge.
  • Reheating: Warm the broth on the stove or microwave, then add freshly cooked noodles (or briefly reheat pre-cooked noodles in hot water to prevent mushiness).
  • Freezing: Freeze the broth (without noodles) for up to 2 months. Thaw overnight before reheating.

Frequently Asked Questions

Can I use instant ramen noodles?

Absolutely! Just discard the seasoning packet and cook the noodles separately before adding to your bowl.

How can I make this gluten-free?

Swap regular ramen noodles for rice noodles or gluten-free ramen, and use tamari instead of soy sauce.

Can I cook the noodles in the slow cooker?

We recommend cooking them separately—adding them too early can make them overly soft. Stir them in just before serving.

What if my broth tastes too salty?

Dilute it with a bit of water or unsalted broth, or balance it with a squeeze of lime or a teaspoon of honey.

Final Thoughts

There’s something magical about coming home to a slow cooker full of rich, savory beef ramen—the kind of meal that warms you from the inside out. Whether it’s a busy weeknight or a lazy weekend, this recipe is here to make life a little cozier, one slurp at a time. Don’t forget to garnish with green onions and a soft egg for that picture-perfect finish. Happy cooking, and may your ramen always be steaming hot and full of flavor!

Print
clock clock iconcutlery cutlery iconflag flag iconfolder folder iconinstagram instagram iconpinterest pinterest iconfacebook facebook iconprint print iconsquares squares iconheart heart iconheart solid heart solid icon

Slow Cooker Beef Ramen Noodles

  • Author: Trusted Blog

Description

A comforting and flavorful beef ramen noodle dish made effortlessly in the slow cooker.


Ingredients

Scale

For the Crust:

  • 1 lb beef chuck roast, thinly sliced
  • 4 cups beef broth
  • 2 tbsp soy sauce
  • 1 tbsp brown sugar
  • 1 tbsp minced garlic
  • 1 tsp ginger paste
  • 2 packs ramen noodles (seasoning packets discarded)
  • 2 cups sliced mushrooms
  • 1 cup shredded carrots
  • 2 green onions, sliced
  • 1 tbsp sesame oil

Instructions

1. Prepare the Crust:

  1. In the slow cooker, combine beef broth, soy sauce, brown sugar, garlic, and ginger paste. Stir well.
  2. Add the sliced beef and mushrooms to the slow cooker. Cover and cook on low for 6-7 hours or high for 3-4 hours.
  3. About 30 minutes before serving, add the shredded carrots and ramen noodles to the slow cooker. Stir gently to submerge the noodles.
  4. Cover and cook for an additional 20-30 minutes until noodles are tender.
  5. Stir in sesame oil and garnish with sliced green onions before serving.

Notes

You can customize the seasonings to taste.

Easy Salmon Rice Bowls – Quick & Healthy Recipe

easy-salmon-rice-bowls

Easy Salmon Rice Bowls: A Weeknight Savior That Feels Like a Hug

There are evenings when the thought of cooking feels like climbing a mountain, aren’t there? The kind where takeout menus start whispering your name, and the couch looks infinitely more inviting than the stove. That’s exactly where I was last Tuesday—exhausted, hungry, and dangerously close to dialing for pizza—until I remembered the salmon fillets tucked in my fridge. Twenty minutes later, I was sitting down to these vibrant, nourishing salmon rice bowls, feeling like I’d pulled off a tiny kitchen miracle.

What I love most about this recipe (besides its speed) is how effortlessly it balances comfort and nourishment. Flaky salmon, garlicky greens, and fluffy rice come together like old friends, while the creamy drizzle of sauce ties it all up with a bow. It’s the kind of meal that leaves you satisfied but light, the perfect antidote to chaotic days. Let’s make it together—I promise it’s easier than deciding what to stream tonight!

Gather Your Ingredients (Pantry Heroes, Assemble!)

  • 2 salmon fillets – Skin-on or off, your choice! I prefer wild-caught for its richer flavor, but any good-quality salmon will shine here.
  • 1 cup jasmine or basmati rice – Fragrant and fluffy, it’s the ideal base. Brown rice works too if you’re feeling extra virtuous.
  • 2 cups baby spinach or kale – Wilted greens add that pop of color and make you feel like a responsible adult.
  • 1 clove garlic, minced – Because everything’s better with garlic. Always.
  • 1 tbsp olive oil + 1 tsp butter – The butter is my secret for golden salmon edges. Shhh.
  • 1 avocado, sliced – Creamy, dreamy, non-negotiable.
  • 1 tbsp soy sauce or tamari – For that umami kiss.
  • 1 tsp honey or maple syrup – Just a whisper of sweetness to balance the savory.
  • Salt, pepper, and a squeeze of lemon – The holy trinity of brightening flavors.

Let’s Make Magic (Quick & Cozy Steps)

  1. Cook the rice – Rinse it first (trust me, fluffier grains await), then simmer with 1.5 cups water until tender. While it works, let’s multitask!
  2. Pat the salmon dry – This is the golden rule for crispy skin! Season generously with salt and pepper. Heat oil and butter in a skillet over medium-high—when the butter stops foaming, add the salmon skin-side down. Resist the urge to poke! Let it sizzle for 4 minutes until golden, then flip for 2 more minutes. Transfer to a plate; it’ll keep cooking slightly as it rests.
  3. Sauté your greens – In the same pan (hello, flavor!), toss in garlic until fragrant, about 30 seconds. Add greens and a pinch of salt, stirring just until wilted. Drizzle with a little lemon juice to wake them up.

At this point, your kitchen should smell like a seaside bistro—garlicky, buttery, with that irresistible salmon aroma. Take a deep breath and admire your almost-finished masterpiece! We’ll assemble the bowls in just a moment, but first, a pro tip: flake the salmon gently with a fork so it mingles happily with the rice. And if you’re feeling fancy, that sauce I mentioned? Whisk together 2 tbsp mayo, 1 tsp sriracha, and a squeeze of lemon—drizzle it over everything like edible confetti.

Pro Tips, Variations & Substitutions

This salmon rice bowl recipe is wonderfully adaptable to whatever ingredients you have on hand. Here are some of my favorite ways to switch it up:

  • Protein swap: Try grilled chicken, shrimp, or even crispy tofu instead of salmon
  • Rice alternatives: Quinoa, cauliflower rice, or soba noodles work beautifully
  • Veggie variations: Swap in roasted sweet potatoes, sautéed mushrooms, or shredded carrots
  • Sauce options: Drizzle with sriracha mayo, teriyaki glaze, or a simple squeeze of lemon

Pro tip: For extra crispy salmon skin, pat the filets completely dry before seasoning and cook skin-side down first in a very hot pan.

What to Serve With Salmon Rice Bowls

While these bowls are satisfying on their own, here are some delicious pairing ideas:

  • A simple side salad with ginger dressing
  • Miso soup or a light vegetable broth
  • Quick pickled vegetables for a tangy crunch
  • Steamed edamame with sea salt

Storage & Reheating Tips

These bowls keep well for meal prep with a few simple tricks:

  • Store components separately in airtight containers for up to 3 days
  • Reheat salmon gently in the oven at 275°F to prevent drying out
  • Rice reheats best with a sprinkle of water before microwaving
  • Add fresh toppings like avocado or herbs just before serving

Frequently Asked Questions

Can I use frozen salmon?
Absolutely! Just thaw completely in the refrigerator overnight and pat very dry before cooking.

How do I know when the salmon is done?
The salmon should flake easily with a fork and reach 145°F internally. The flesh will turn from translucent to opaque.

Can I make this gluten-free?
Yes! Just use tamari instead of soy sauce and check any other sauce ingredients.

What’s the best rice for this bowl?
I love short-grain white or brown rice, but jasmine or basmati work well too – choose what you enjoy most!

Final Thoughts

There’s something so comforting about a nourishing rice bowl that comes together with minimal effort. I hope this recipe becomes one of your go-to weeknight dinners – the kind that feels special but doesn’t require hours in the kitchen. The beauty is in the simplicity: good ingredients, balanced flavors, and the satisfaction of a meal that’s as wholesome as it is delicious. Wishing you many cozy nights with this salmon rice bowl – may it bring warmth to your table and joy to your tastebuds!

Print
clock clock iconcutlery cutlery iconflag flag iconfolder folder iconinstagram instagram iconpinterest pinterest iconfacebook facebook iconprint print iconsquares squares iconheart heart iconheart solid heart solid icon

Salmon Rice Bowls

  • Author: Trusted Blog

Description

A healthy and flavorful bowl featuring crispy salmon, rice, and fresh vegetables.


Ingredients

Scale

For the Crust:

  • 1 lb salmon fillet, skin-on
  • 1 cup white rice, cooked
  • 1 avocado, sliced
  • 1 cucumber, diced
  • 2 tbsp soy sauce
  • 1 tbsp sesame oil
  • 1 tsp garlic powder
  • 1 tsp ginger powder
  • 1 tbsp sesame seeds
  • 1 lime, cut into wedges

Instructions

1. Prepare the Crust:

  1. Preheat oven to 400°F (200°C). Line a baking sheet with parchment paper.
  2. Place salmon skin-side down on the baking sheet. Drizzle with sesame oil and soy sauce, then sprinkle with garlic powder and ginger powder.
  3. Bake for 12-15 minutes until salmon is cooked through and flaky.
  4. Divide cooked rice into bowls. Top with baked salmon, avocado slices, and diced cucumber.
  5. Sprinkle with sesame seeds and serve with lime wedges on the side.

Notes

You can customize the seasonings to taste.