Best Italian Meatball Soup – Classic Comfort Food

best-italian-meatball-soup

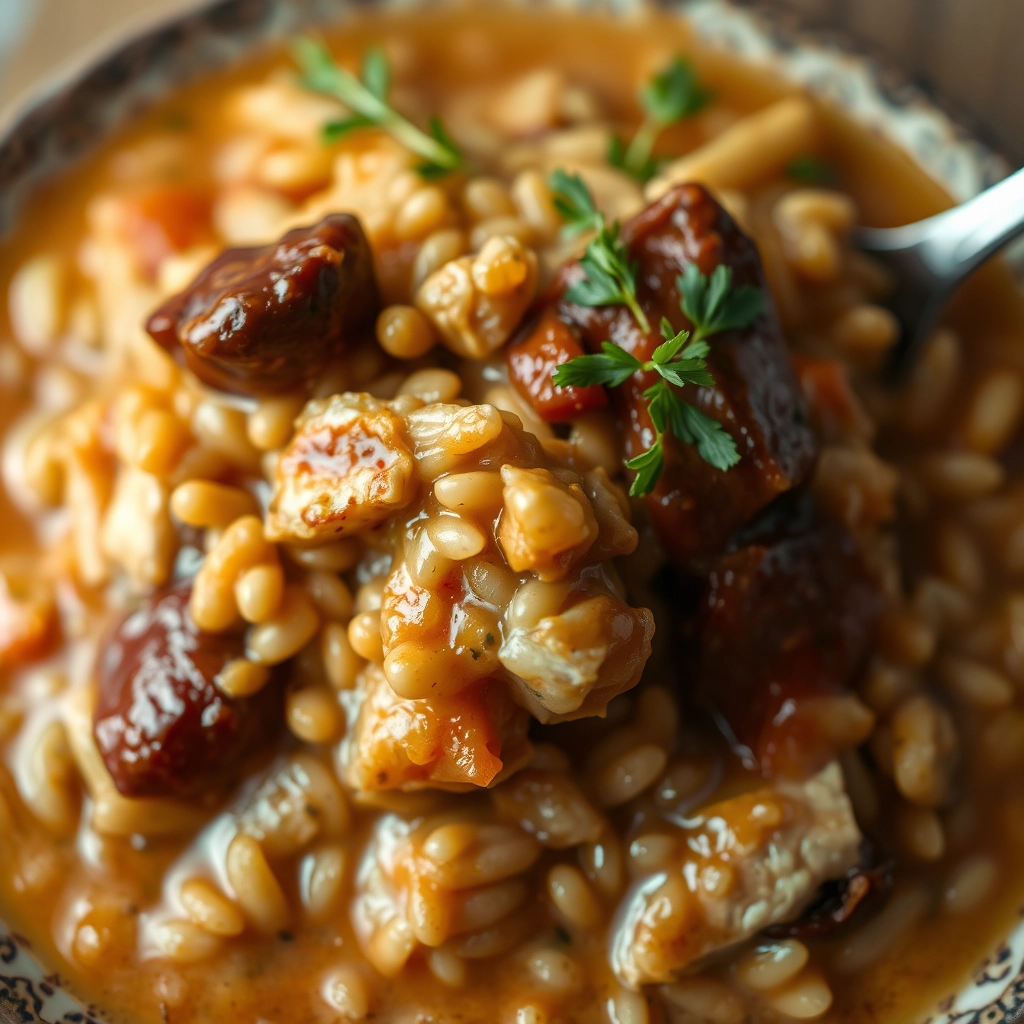
The Best Italian Meatball Soup – A Bowl Full of Love

There’s something magical about a simmering pot of soup on a chilly evening—the way the aroma fills the kitchen, promising warmth and comfort with every spoonful. This Italian Meatball Soup is one of those recipes that feels like a hug from the inside out. I first had it at my Nonna’s house years ago, where she’d ladle it into big, mismatched bowls with a sprinkle of Parmesan and a hunk of crusty bread on the side. It was simple, hearty, and utterly unforgettable. Now, it’s my go-to when I need a little extra coziness (or when my family starts dropping not-so-subtle hints).

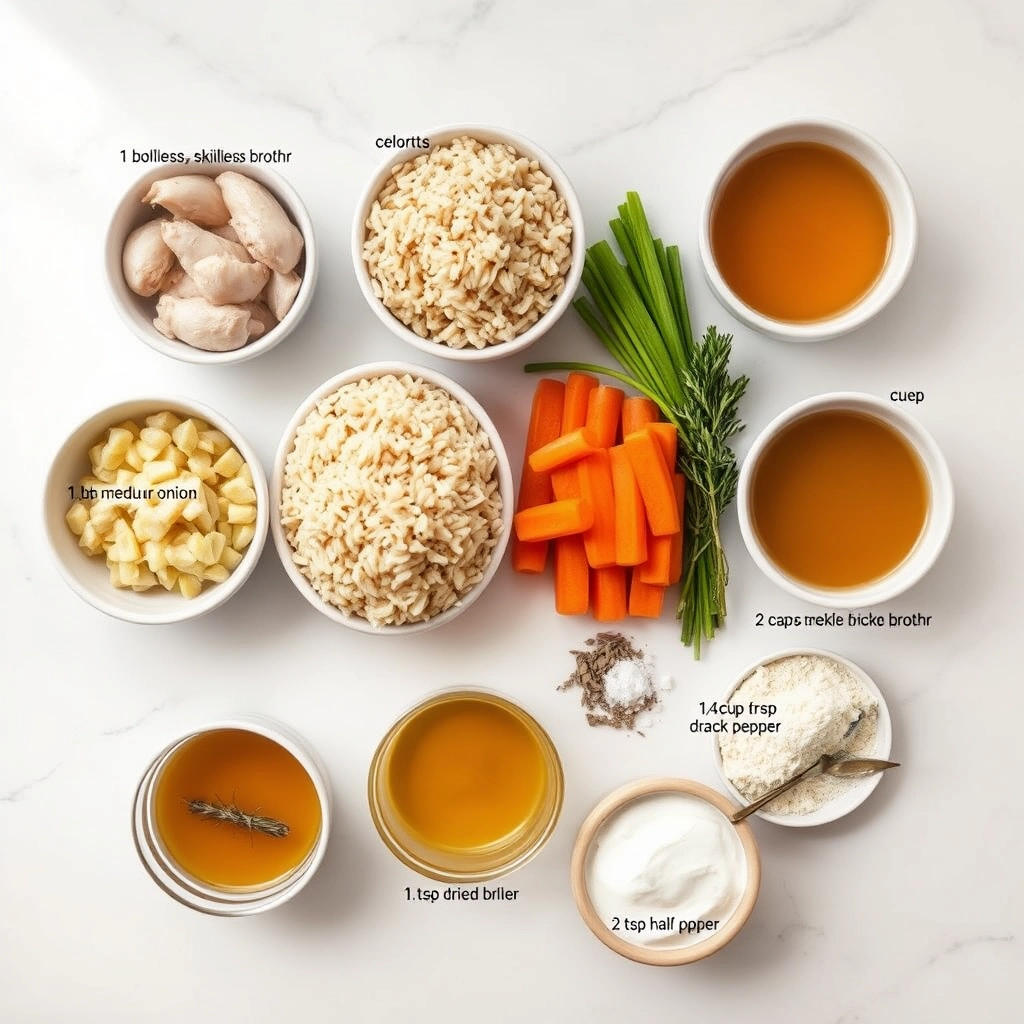
Gather Your Ingredients – The Heart of the Soup

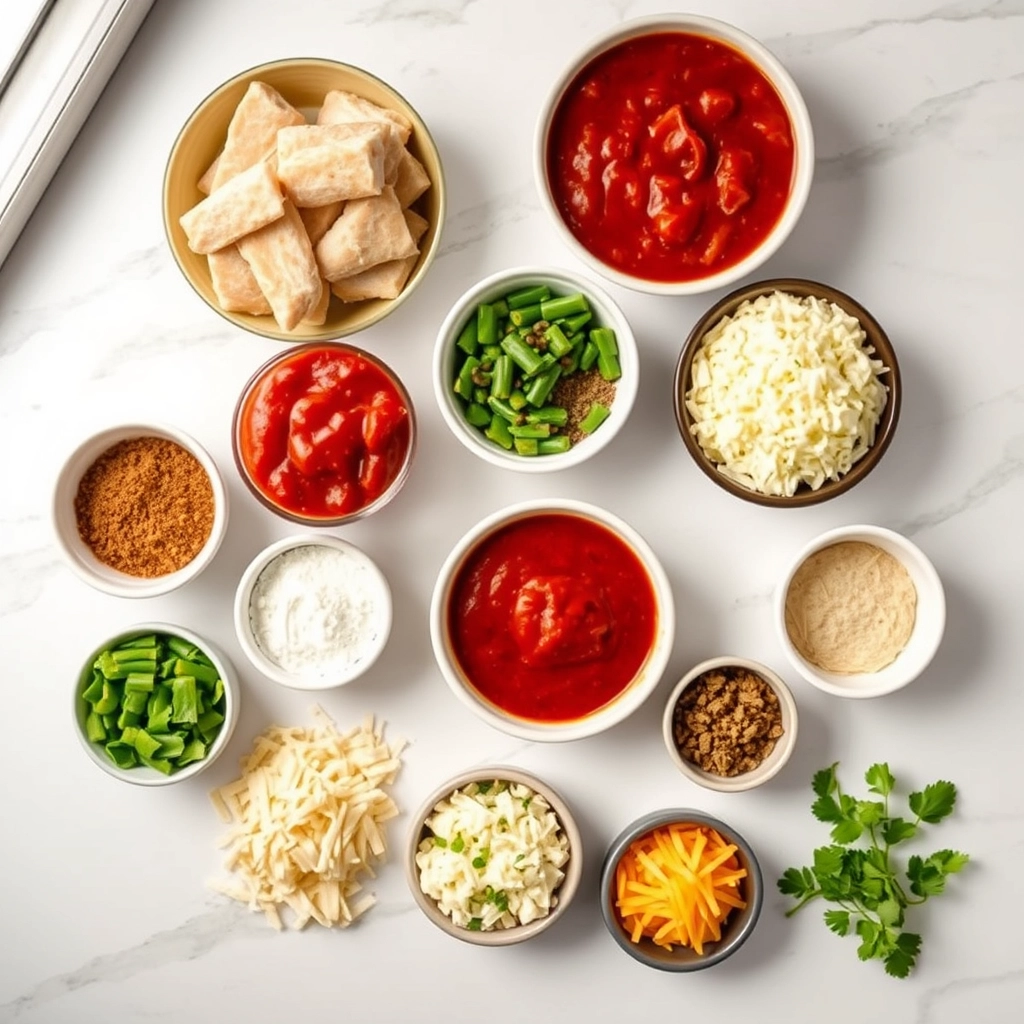
Every great soup starts with great ingredients, and this one is no exception. Here’s what you’ll need to make this soul-warming dish:

  • For the meatballs: 1 lb ground beef (I like 80/20 for juiciness), ½ lb ground pork (for extra flavor), ½ cup breadcrumbs (Panko works beautifully), ¼ cup grated Parmesan (the real stuff, please!), 1 egg (to bind it all together), 2 cloves garlic (minced), 1 tsp dried oregano, ½ tsp salt, and a pinch of red pepper flakes (for a subtle kick).
  • For the soup: 1 tbsp olive oil (extra virgin, if you have it), 1 small onion (diced), 2 carrots (peeled and sliced into coins), 2 celery stalks (chopped—don’t skip these, they add such depth!), 4 cloves garlic (minced), 6 cups chicken broth (homemade if you’re fancy, but store-bought works too), 1 (28 oz) can crushed tomatoes (San Marzano are my favorite), 1 tsp dried basil, 1 bay leaf (remove it before serving—trust me), and 1 cup ditalini pasta (or any small pasta you love).
  • For serving: Freshly grated Parmesan, chopped parsley (for that pop of green), and crusty bread (mandatory for dunking).

Let’s Make Some Magic – Step by Step

Now that we’ve got everything ready, it’s time to bring this soup to life. Follow these steps, and don’t forget to breathe in that incredible smell as it cooks!

  1. Make the meatballs: In a large bowl, combine the ground beef, ground pork, breadcrumbs, Parmesan, egg, garlic, oregano, salt, and red pepper flakes. Use your hands to mix gently—overworking the meat will make the meatballs tough. Roll into 1-inch balls (about the size of a walnut) and set aside on a plate.
  2. Brown the meatballs: Heat the olive oil in a large Dutch oven or soup pot over medium heat. Working in batches, add the meatballs and brown them on all sides—about 2 minutes per side. They don’t need to be fully cooked yet; we’re just building flavor here. Remove them and set aside.
  3. Sauté the veggies: In the same pot, add the onion, carrots, and celery. Cook until softened, about 5 minutes, stirring occasionally. Add the garlic and cook for another 30 seconds—just until fragrant (don’t let it burn!).
  4. Simmer the soup base: Pour in the chicken broth and crushed tomatoes, then stir in the basil and bay leaf. Bring to a gentle boil, then reduce the heat to low and let it simmer for 10 minutes to let the flavors meld.

At this point, your kitchen should smell like an Italian trattoria, and your stomach might be growling—hang in there, we’re almost done! (Stay tuned for the second half, where we finish the soup and talk about the best ways to serve it.)

Pro Tips, Variations, and Substitutions

This Italian meatball soup is wonderfully adaptable to your taste and what you have on hand. Here are some ways to make it your own:

  • Meatball magic: Swap beef for ground turkey, chicken, or a plant-based alternative. For extra flavor, mix in grated Parmesan or chopped fresh herbs like parsley or basil.
  • Veggie boost: Add chopped zucchini, bell peppers, or kale in the last 10 minutes of cooking for extra nutrition.
  • Pasta possibilities: Small pasta like ditalini or orzo works beautifully, but feel free to use whatever you have. Just adjust cooking time accordingly.
  • Broth basics: Chicken or vegetable broth can stand in for beef broth if needed. For richer flavor, use half broth and half tomato juice.

What to Serve With Italian Meatball Soup

This soup is a meal in itself, but these accompaniments make it even more special:

  • Crusty Italian bread or garlic toast for dipping
  • A simple green salad with balsamic dressing
  • Grated Parmesan or pecorino cheese for sprinkling
  • A glass of Chianti or Sangiovese wine

Storage and Reheating Tips

Like many soups, this one gets even better the next day! Here’s how to keep it tasting fresh:

  • Refrigerator: Store in airtight containers for up to 4 days. The pasta will absorb liquid, so you may need to add a splash of broth when reheating.
  • Freezer: Freeze without pasta for up to 3 months. Add freshly cooked pasta when reheating.
  • Reheating: Warm gently on the stovetop over medium-low heat, stirring occasionally. Microwave in 1-minute intervals, stirring between each.

Frequently Asked Questions

Can I make the meatballs ahead of time?
Absolutely! Form the meatballs and refrigerate for up to 24 hours before cooking. You can also freeze raw meatballs on a baking sheet, then transfer to a freezer bag once solid.

How can I make this soup gluten-free?
Use gluten-free breadcrumbs in the meatballs and substitute your favorite gluten-free pasta. Check that your broth is gluten-free as well.

Why do my meatballs sometimes fall apart in the soup?
Make sure your meatball mixture isn’t too wet (drain any excess liquid from ingredients), and gently simmer rather than boil the soup. Chilling the formed meatballs for 30 minutes before cooking also helps them hold together.

Can I make this in a slow cooker?
Yes! Brown the meatballs first, then add all ingredients except pasta to the slow cooker. Cook on low 6-8 hours or high 3-4 hours. Add cooked pasta just before serving.

Warm Comfort in Every Bowl

There’s something truly special about this Italian meatball soup – the way the savory broth wraps around tender meatballs, the comforting texture of pasta, and the way the aroma fills your kitchen with warmth. It’s the kind of meal that brings people together, perfect for chilly evenings, family gatherings, or when you just need a hug in a bowl. However you choose to make it, I hope this soup becomes a cherished recipe in your home, creating delicious memories one spoonful at a time.

Print
clock clock iconcutlery cutlery iconflag flag iconfolder folder iconinstagram instagram iconpinterest pinterest iconfacebook facebook iconprint print iconsquares squares iconheart heart iconheart solid heart solid icon

Italian Meatball Soup

  • Author: Trusted Blog

Description

A hearty and flavorful soup with tender meatballs, vegetables, and Italian herbs.


Ingredients

Scale

For the Crust:

  • 1 lb ground beef
  • 1/2 cup breadcrumbs
  • 1 egg
  • 1/4 cup grated Parmesan cheese
  • 1 tsp Italian seasoning
  • 1 tbsp olive oil
  • 1 onion, diced
  • 2 carrots, sliced
  • 2 celery stalks, chopped
  • 4 cups beef broth
  • 1 can (14 oz) diced tomatoes
  • 1 tsp garlic powder
  • 1 tsp dried basil
  • Salt and pepper to taste
  • 1 cup small pasta (like ditalini)

Instructions

1. Prepare the Crust:

  1. In a bowl, mix ground beef, breadcrumbs, egg, Parmesan cheese, and Italian seasoning. Form into small meatballs.
  2. Heat olive oil in a large pot over medium heat. Add onion, carrots, and celery. Cook until softened, about 5 minutes.
  3. Add beef broth, diced tomatoes, garlic powder, basil, salt, and pepper. Bring to a boil.
  4. Gently drop meatballs into the boiling soup. Reduce heat and simmer for 15 minutes.
  5. Add pasta and cook for an additional 10 minutes or until pasta is tender.
  6. Serve hot, garnished with extra Parmesan if desired.

Notes

You can customize the seasonings to taste.

Best Slow Cooker Chicken Wild Rice Soup Recipe

best-slow-cooker-chicken-rice-soup

The Coziest Slow Cooker Chicken Wild Rice Soup for Soul-Warming Evenings

There’s something almost magical about the way a slow cooker transforms humble ingredients into a meal that feels like a hug in a bowl. Last Sunday, as the first crisp whispers of autumn curled through my kitchen window, I found myself craving that exact kind of comfort—something hearty, nourishing, and utterly effortless. That’s when this Slow Cooker Chicken Wild Rice Soup came to the rescue. It’s the kind of recipe that simmers quietly while you go about your day, filling the house with the kind of aroma that makes everyone pause and ask, “When’s dinner?”

Gathering Your Ingredients: A Symphony of Comfort

What I love most about this soup is how simple, wholesome ingredients come together to create something extraordinary. Here’s what you’ll need:

  • 1 lb boneless, skinless chicken thighs – Thighs stay juicy and tender during the long cook time, but breasts work too if you prefer.
  • 1 cup wild rice blend – The nutty, chewy texture is key! I adore the mix of wild and brown rice for depth.
  • 3 carrots, diced – Sweet, earthy, and packed with color.
  • 3 celery stalks, chopped – For that classic, comforting base.
  • 1 yellow onion, finely diced – It melts into the broth, adding a subtle sweetness.
  • 4 garlic cloves, minced – Because no cozy soup is complete without garlic.
  • 6 cups chicken broth – Homemade if you have it, but store-bought works beautifully.
  • 1 tsp dried thyme – A whisper of herbal warmth.
  • 1 bay leaf – The secret behind so many great soups.
  • 1 cup heavy cream (or half-and-half) – Added at the end for luxurious silkiness.
  • Salt and pepper to taste – Don’t be shy—season as you go!

Let’s Get Cooking: Slow and Steady Wins the Flavor Race

This recipe is as easy as layering ingredients and letting time work its magic. Here’s how I do it:

  1. Prep your veggies. Give the carrots, celery, and onion a rough chop—no need for perfection here. The slow cooker softens everything into tender goodness. (A little tip: I often do this the night before and store them in the fridge for an even quicker morning.)
  2. Layer it all in. Place the chicken thighs at the bottom of your slow cooker, then add the wild rice, veggies, garlic, thyme, and bay leaf. Pour the broth over everything—it should just cover the ingredients. If not, add a splash more water.
  3. Set it and (almost) forget it. Cook on low for 6-7 hours or high for 3-4. The soup is ready when the rice is tender and the chicken shreds effortlessly with a fork.
  4. Shred the chicken. Use two forks to pull the thighs apart right in the pot—they’ll be so tender, they’ll practically fall apart on their own.

At this point, your kitchen will smell like everything good in the world. But we’re not done yet—the final touches make all the difference…

Pro Tips, Variations, and Substitutions

This slow cooker chicken wild rice soup is wonderfully forgiving—just like your favorite cozy sweater. Here are some ways to make it your own:

  • For extra richness: Stir in 1/2 cup heavy cream during the last 30 minutes of cooking
  • Vegetable lovers: Add diced carrots or celery with the onions for more texture
  • Gluten-free option: Use cornstarch instead of flour to thicken (mix 2 tbsp cornstarch with 1/4 cup cold water before adding)
  • Herb variations: Fresh thyme or rosemary make lovely additions to the seasoning blend
  • Short on time? Use 2 cups cooked wild rice blend instead of uncooked (add during last hour)

The Perfect Pairings

This soul-warming soup deserves equally comforting companions:

  • Crusty artisan bread for dipping (try a warm baguette or sourdough)
  • A simple green salad with vinaigrette to brighten up the meal
  • Buttery garlic knots for when you want extra indulgence
  • A crisp white wine like Chardonnay or Pinot Grigio

Storing Your Soup for Future Comfort

One of the best things about this recipe is how beautifully it keeps:

  • Refrigerator: Store in airtight containers for 3-4 days
  • Freezer: Portion into freezer-safe containers (leave 1-inch headspace) for up to 3 months
  • Reheating: Thaw frozen soup overnight in fridge. Warm gently on stove over medium-low heat, adding a splash of broth if needed
  • Pro tip: The rice will continue absorbing liquid—just stir in extra broth when reheating

Frequently Asked Questions

Can I use brown rice instead of wild rice?
Absolutely! Brown rice will work, though the texture and cooking time will differ. Use precooked brown rice (add during last hour) or extend cooking time by 1-2 hours.

My soup turned out too thick—how can I fix it?
No worries! Simply stir in additional chicken broth (or even water) until you reach your desired consistency. The soup thickens as it sits, so you may need to do this when reheating leftovers too.

Can I make this vegetarian?
Yes! Substitute vegetable broth for chicken broth and omit the chicken (or use plant-based chicken alternatives). For protein, add white beans during the last hour of cooking.

Why is my wild rice still crunchy?
Wild rice can vary in cooking time. If your rice isn’t tender after 6 hours, continue cooking in 30-minute increments until done. Older wild rice may take longer to soften.

A Bowl Full of Comfort

There’s something magical about coming home to the aroma of this soup simmering away in your slow cooker. Whether you’re serving it to soothe a winter chill, nourish a loved one under the weather, or simply because your soul needs some warmth, this chicken wild rice soup is like a hug in a bowl. The tender chicken, nutty wild rice, and creamy broth come together in perfect harmony—a reminder that the simplest meals often bring the greatest comfort. May your kitchen be filled with good smells, your bowls with steaming soup, and your heart with the joy of sharing something made with love.

Print
clock clock iconcutlery cutlery iconflag flag iconfolder folder iconinstagram instagram iconpinterest pinterest iconfacebook facebook iconprint print iconsquares squares iconheart heart iconheart solid heart solid icon

Slow Cooker Chicken Wild Rice Soup

  • Author: Trusted Blog

Description

A hearty and comforting soup made with tender chicken, wild rice, and vegetables, all cooked to perfection in a slow cooker.


Ingredients

Scale

For the Crust:

  • 1 lb boneless, skinless chicken breasts
  • 1 cup wild rice, uncooked
  • 1 medium onion, diced
  • 2 carrots, diced
  • 2 celery stalks, diced
  • 3 cloves garlic, minced
  • 6 cups chicken broth
  • 1 tsp dried thyme
  • 1 tsp dried rosemary
  • 1/2 tsp salt
  • 1/4 tsp black pepper
  • 1 cup half-and-half
  • 2 tbsp all-purpose flour

Instructions

1. Prepare the Crust:

  1. Place chicken breasts, wild rice, onion, carrots, celery, garlic, chicken broth, thyme, rosemary, salt, and pepper in the slow cooker.
  2. Cover and cook on low for 6-7 hours or on high for 3-4 hours, until chicken is cooked through and rice is tender.
  3. Remove chicken from the slow cooker and shred it using two forks. Return shredded chicken to the slow cooker.
  4. In a small bowl, whisk together half-and-half and flour until smooth. Stir into the soup.
  5. Cover and cook on high for an additional 15-20 minutes, until soup has thickened slightly.
  6. Serve hot, garnished with fresh herbs if desired.

Notes

You can customize the seasonings to taste.

Easy Grilled Cheese Sloppy Joes – Comfort Food Recipe

easy-grilled-cheese-sloppy-joes

Easy Grilled Cheese Sloppy Joes: The Ultimate Comfort Food Hug

There’s something about the golden, buttery crunch of grilled cheese meeting the saucy, messy joy of a sloppy joe that feels like a warm hug on a chaotic weeknight. I first stumbled upon this magical mashup when my pantry was nearly bare, and my kids were begging for something “fun” (read: not another bowl of soup). A can of Manwich, some leftover hamburger buns, and a block of cheddar later—this accidental masterpiece was born. Now, it’s our go-to when comfort is non-negotiable.

Ingredients You’ll Need

  • 1 lb ground beef (or turkey for a lighter twist)—because every great sloppy joe starts with a sizzling foundation.
  • 1 can (15 oz) Manwich sauce (or homemade sloppy joe sauce if you’re feeling fancy).
  • 4 hamburger buns—soft and squishy, the better to soak up all that saucy goodness.
  • 8 slices of American cheese (yes, two per sandwich—trust me, it’s worth it).
  • 2 tbsp butter, softened—for that irresistible golden crisp.
  • 1 small onion, diced (optional, but adds a sweet depth).
  • Pinch of garlic powder—because everything’s better with garlic.

Note: If you’re feeling adventurous, a sprinkle of shredded sharp cheddar on top of the Manwich before grilling adds a delightful gooey surprise!

Let’s Get Cooking

  1. Brown the beef: In a skillet over medium heat, cook the ground beef (and onion, if using) until no pink remains. Drain any excess grease—unless you’re embracing the indulgence, in which case, carry on.
  2. Simmer the sauce: Stir in the Manwich and garlic powder, letting it bubble gently for 5 minutes. The aroma will have everyone hovering in the kitchen—fair warning.
  3. Butter up: Spread softened butter on the outside of each bun (this is the secret to grill marks and that perfect crunch).
  4. Layer with love: On the unbuttered side of each bun bottom, place a slice of cheese, a generous scoop of sloppy joe mix, another slice of cheese (yes, really), and the bun top.

Pro tip: Press the sandwiches lightly with your spatula while grilling—this helps melt the cheese into every nook and cranny.

Pro Tips for the Perfect Grilled Cheese Sloppy Joes

This recipe is wonderfully forgiving, but these little tricks will take it from good to can’t-stop-eating-it greatness:

  • Cheese matters: While American melts beautifully, try mixing in sharp cheddar or pepper jack for extra flavor
  • Bread basics: Texas toast or brioche buns make exceptional vehicles for all that cheesy goodness
  • Drain the grease: After browning your beef, drain excess fat to prevent soggy sandwiches
  • Low and slow: Let the meat mixture simmer for at least 15 minutes to develop deeper flavors

Delicious Variations to Try

One of the best things about this recipe is how easily it adapts to different tastes and dietary needs:

  • Vegetarian version: Swap ground beef for lentils or plant-based crumbles
  • Spicy kick: Add diced jalapeños or a dash of hot sauce to the meat mixture
  • Breakfast twist: Serve with a fried egg on top for an incredible brunch option
  • Gluten-free: Use your favorite GF bread and ensure your Worcestershire sauce is GF

The Perfect Sides for Your Sloppy Joes

This hearty sandwich deserves equally comforting companions:

  • Crispy seasoned fries or tater tots
  • A simple green salad with ranch dressing
  • Classic dill pickles for that perfect tangy crunch
  • Sweet potato fries for a delicious contrast
  • Homemade coleslaw to cut through the richness

Storing and Reheating Your Leftovers

While best enjoyed fresh, you can absolutely save some for later:

  • Storage: Keep meat mixture and bread separate in airtight containers for up to 3 days
  • Reheating: Warm the meat in a skillet over medium heat with a splash of water to prevent drying
  • Freezing: The meat mixture freezes well for up to 2 months – thaw overnight before reheating
  • Pro tip: Assemble sandwiches fresh each time for the best texture

Frequently Asked Questions

Can I make this in advance?

Absolutely! The meat mixture actually tastes better after sitting for a few hours as the flavors meld. Just reheat gently before serving.

What’s the best cheese for melting?

American cheese melts the creamiest, but combining it with mozzarella or mild cheddar gives you both great melt and flavor.

How can I make this less messy to eat?

Try lightly toasting the bread before assembling, and don’t overfill the sandwiches. A fork and knife are perfectly acceptable tools here!

Can I use ground turkey instead of beef?

Definitely! Ground turkey works beautifully – just add a tablespoon of olive oil to the pan as it’s leaner than beef.

Cozy Comfort in Every Bite

There’s something magical about the combination of melty cheese, savory meat, and buttery bread that just feels like a warm hug. Whether you’re feeding hungry kids after soccer practice, hosting a casual game night with friends, or just craving some good old-fashioned comfort food, these Grilled Cheese Sloppy Joes deliver every time. Don’t be surprised if this becomes one of those recipes your family requests again and again – it’s that kind of special. Now go grab that spatula and get ready for some seriously satisfying eats!

Print
clock clock iconcutlery cutlery iconflag flag iconfolder folder iconinstagram instagram iconpinterest pinterest iconfacebook facebook iconprint print iconsquares squares iconheart heart iconheart solid heart solid icon

Grilled Cheese Sloppy Joes

  • Author: Trusted Blog

Description

A delicious twist on classic sloppy joes with melty grilled cheese.


Ingredients

Scale

For the Crust:

  • 1 lb ground beef
  • 1 small onion, diced
  • 1/2 cup ketchup
  • 1 tbsp mustard
  • 1 tbsp Worcestershire sauce
  • 1 tsp garlic powder
  • 1 tsp onion powder
  • Salt and pepper to taste
  • 8 slices bread
  • 8 slices cheddar cheese
  • 2 tbsp butter

Instructions

1. Prepare the Crust:

  1. In a skillet over medium heat, brown the ground beef with diced onion until fully cooked.
  2. Drain excess fat and stir in ketchup, mustard, Worcestershire sauce, garlic powder, onion powder, salt, and pepper. Simmer for 5 minutes.
  3. Butter one side of each bread slice. Place a slice of cheese on the unbuttered side of 4 bread slices.
  4. Spoon the sloppy joe mixture over the cheese, then top with another slice of cheese and the remaining bread slices (buttered side out).
  5. Grill sandwiches in a skillet over medium heat until golden brown and cheese is melted, about 3-4 minutes per side.

Notes

You can customize the seasonings to taste.

Best White Chicken Enchiladas – Easy Homemade Recipe

best-white-chicken-enchiladas

The Coziest White Chicken Enchiladas You’ll Ever Make

There’s something magical about the moment you pull a bubbling dish of enchiladas from the oven—the way the cheese stretches like golden ribbons, the comforting aroma of roasted chicken and spices filling the kitchen. This recipe came to me on one of those evenings when the rain tapped softly against the windows, and my soul craved warmth. My abuelita used to say that good food should hug you from the inside, and these creamy white chicken enchiladas do just that. They’re the kind of meal that turns an ordinary Tuesday into something quietly special.

Ingredients You’ll Need

  • 3 cups shredded cooked chicken – I love using leftover rotisserie chicken for this! It adds so much flavor without extra work.
  • 10 soft flour tortillas – The pillowy ones that puff up just right in the oven.
  • 2 cups shredded Monterey Jack cheese – Because melty, gooey cheese is non-negotiable.
  • 1/2 cup diced onion – Sweet yellow onions work beautifully here.
  • 1 (4 oz) can diced green chiles – Mild or hot, depending on how adventurous you’re feeling.
  • 3 tablespoons butter – The rich foundation of our creamy sauce.
  • 3 tablespoons all-purpose flour – To thicken the sauce to velvety perfection.
  • 2 cups chicken broth – Homemade if you have it, but store-bought works too.
  • 1 cup sour cream – The secret to that luscious tang in every bite.
  • 1 teaspoon ground cumin – For that earthy, warm whisper of flavor.
  • Salt and pepper to taste – Always taste as you go!
  • Fresh cilantro for garnish – Because everything is better with a pop of green.

Let’s Make the Magic Happen

First, preheat your oven to 350°F (175°C) and grab your favorite baking dish—the one that makes you smile when you pull it from the cupboard. Lightly grease it with butter or cooking spray, and let’s begin.

  1. Prepare the filling: In a large bowl, combine the shredded chicken, half of the shredded cheese, diced onion, and green chiles. Give it a gentle mix—I like to use my hands for this part, feeling the textures come together.
  2. Warm the tortillas: Wrap them in a damp paper towel and microwave for 30 seconds. This makes them pliable and prevents cracking when you roll them. Grandma’s trick!
  3. Roll with love: Spoon about 1/3 cup of the chicken mixture onto each tortilla, roll tightly, and place seam-side down in your baking dish. Nestle them close—they’re better when they cozy up together.

Now, here’s where the real alchemy begins: the creamy white sauce. Melt the butter in a saucepan over medium heat, then whisk in the flour until it forms a smooth paste. Cook for just a minute to take the raw edge off the flour—this is called a roux, and it’s the backbone of so many comforting dishes.


“`html

Pro Tips, Variations, and Substitutions

Making the best white chicken enchiladas is all about personalizing the dish to your taste. Here are some expert tips and variations to help you make it your own:

  • Shredded Chicken Shortcut: Use a store-bought rotisserie chicken to save time—just shred the meat and skip the cooking step!
  • Cheese Swap: Monterey Jack or a Mexican cheese blend can replace the white cheddar for a different flavor profile.
  • Spice It Up: Add diced jalapeños or a pinch of cayenne pepper to the filling for extra heat.
  • Vegetarian Option: Swap the chicken for sautéed mushrooms, spinach, or black beans for a meatless version.
  • Creamier Sauce: Stir in a dollop of sour cream or Greek yogurt into the sauce for extra richness.

What to Serve with White Chicken Enchiladas

These enchiladas are delicious on their own, but pairing them with the right sides can turn them into a full feast. Here are some of our favorites:

  • Mexican Rice: A fluffy, tomato-based rice dish balances the creamy enchiladas perfectly.
  • Refried Beans: Creamy, savory beans add heartiness to the meal.
  • Fresh Salad: A simple avocado and lime salad cuts through the richness.
  • Tortilla Chips & Salsa: For a little crunch and tang on the side.
  • Margaritas or Agua Fresca: A refreshing drink to complement the meal.

Storage and Reheating Tips

Leftovers? No problem! These enchiladas keep well and taste just as delicious the next day. Here’s how to store and reheat them:

  • Refrigerator: Store in an airtight container for up to 3 days.
  • Freezer: Wrap individual portions tightly in foil and freeze for up to 2 months. Thaw overnight in the fridge before reheating.
  • Reheating: Warm in the oven at 350°F (175°C) for 15–20 minutes, or microwave in 30-second intervals until heated through.

Frequently Asked Questions

Can I make these enchiladas ahead of time?
Absolutely! Assemble them up to a day in advance, cover with foil, and refrigerate. Bake just before serving.

Can I use corn tortillas instead of flour?
Yes, but corn tortillas can be more fragile. Lightly fry or warm them first to prevent cracking when rolling.

Why is my sauce too thick?
If the sauce thickens too much while cooking, simply whisk in a splash of chicken broth or milk to thin it out.

Can I add more veggies to the filling?
Definitely! Diced bell peppers, zucchini, or corn make great additions—just sauté them before mixing with the chicken.

Final Thoughts

There’s something truly comforting about a pan of bubbly, cheesy white chicken enchiladas fresh from the oven. Whether it’s a cozy weeknight dinner or a gathering with loved ones, this dish always brings warmth to the table. We hope you love making (and eating!) this recipe as much as we do. Don’t forget to share your creations—we’d love to hear how you made it your own. Happy cooking!

“`
Print

clock clock iconcutlery cutlery iconflag flag iconfolder folder iconinstagram instagram iconpinterest pinterest iconfacebook facebook iconprint print iconsquares squares iconheart heart iconheart solid heart solid icon

White Chicken Enchiladas

  • Author: Trusted Blog

Description

Creamy and flavorful white chicken enchiladas with a rich cheese sauce.


Ingredients

Scale

For the Crust:

  • 2 cups cooked shredded chicken
  • 1 cup sour cream
  • 1 (10.5 oz) can cream of chicken soup
  • 1 (4 oz) can diced green chilies
  • 2 cups shredded Monterey Jack cheese
  • 8 flour tortillas
  • 1/2 cup milk
  • 1/2 tsp garlic powder
  • 1/2 tsp onion powder
  • Salt and pepper to taste

Instructions

1. Prepare the Crust:

  1. Preheat oven to 350°F (175°C). Lightly grease a 9×13-inch baking dish.
  2. In a large bowl, mix shredded chicken, 1/2 cup sour cream, green chilies, 1 cup cheese, garlic powder, onion powder, salt, and pepper.
  3. Spoon the chicken mixture evenly onto each tortilla, roll up, and place seam-side down in the baking dish.
  4. In a separate bowl, whisk together remaining sour cream, cream of chicken soup, and milk until smooth. Pour over the enchiladas.
  5. Sprinkle remaining cheese on top. Bake for 25-30 minutes until bubbly and golden.

Notes

You can customize the seasonings to taste.

Best Slow Cooker Chicken Enchiladas – Easy & Flavorful

best-slow-cooker-chicken-enchiladas

The Coziest Slow Cooker Chicken Enchiladas You’ll Ever Make

There’s something magical about walking into a home filled with the warm, spicy aroma of enchiladas simmering away in the slow cooker. It takes me right back to my abuela’s kitchen, where the scent of cumin and roasted tomatoes would hug you the moment you stepped through the door. These slow cooker chicken enchiladas are my weeknight love letter to those memories – all the rich, comforting flavors without the fuss of oven-baking or constant stirring. Perfect for busy days when you want to come home to something that tastes like it simmered all day (because it did!).

Gather Your Ingredients (The Flavor Builders!)

  • 2 lbs boneless, skinless chicken thighs – Thighs stay juicy during the long cook time, but breasts work too if you prefer leaner meat.
  • 1 large yellow onion, diced – The sweet foundation of our flavor base.
  • 3 cloves garlic, minced – Because what’s a good enchilada without garlic’s warm hug?
  • 1 (15 oz) can fire-roasted tomatoes – The smokiness makes all the difference!
  • 1 (4 oz) can diced green chiles – Mild heat that even my spice-averse husband adores.
  • 2 cups chicken broth – Homemade if you have it, but store-bought works beautifully.
  • 2 tbsp tomato paste – Our secret weapon for depth of flavor.
  • 1 tbsp ground cumin – The earthy heartbeat of Mexican cooking.
  • 1 tsp smoked paprika – Just a whisper for that campfire essence.
  • 8-10 corn tortillas – Sturdier than flour tortillas for slow cooking.
  • 2 cups shredded cheese – I use a mix of Monterey Jack and sharp cheddar for the perfect melt.
  • Fresh cilantro & avocado – For that bright, cool finish!

Let’s Get Cooking (The Cozy Part!)

Step 1: Start by placing your chicken thighs in the slow cooker – no need to brown them first! Scatter the diced onion and minced garlic over the top like you’re tucking them in for a long, flavor-filled nap.

Step 2: In a bowl, whisk together the fire-roasted tomatoes (with their juices!), green chiles, chicken broth, tomato paste, cumin, and smoked paprika. Pour this ruby-red elixir over the chicken – you should hear a happy little sizzle as it hits the bottom of the pot.

Step 3: Cover and cook on LOW for 6-7 hours or HIGH for 3-4 hours. Your house will smell like a Mexican cantina in the best possible way. When the chicken shreds easily with a fork, remove it to a bowl and shred it, then stir it back into that glorious sauce.

Pro Tip: About 30 minutes before serving, I like to stir in a handful of fresh cilantro stems (save the leaves for garnish!). They infuse the sauce with this bright, almost citrusy note that balances the richness perfectly.

Pro Tips, Variations, and Substitutions

Making the best slow cooker chicken enchiladas is all about personalizing the flavors to suit your taste. Here are some ways to make this dish your own:

  • Spice it up: Add diced jalapeños or a pinch of cayenne pepper for extra heat.
  • Cheese swap: Try pepper jack or queso fresco instead of cheddar for a different flavor profile.
  • Vegetarian twist: Replace the chicken with black beans or sautéed mushrooms for a meatless version.
  • Corn vs. flour tortillas: Corn tortillas offer an authentic taste, but flour tortillas are easier to roll and hold up well in the slow cooker.
  • Fresh toppings: Garnish with avocado slices, cilantro, or a squeeze of lime for a bright finish.

What to Serve With Slow Cooker Chicken Enchiladas

These enchiladas are a meal on their own, but a few well-paired sides can make dinner even more special:

  • Cilantro lime rice: A light and zesty side that complements the rich enchiladas.
  • Refried beans: Creamy and comforting—perfect for scooping up with tortilla chips.
  • Mexican street corn: Grilled or roasted corn with cotija cheese and chili powder adds a smoky touch.
  • Simple salad: A crisp green salad with a lime vinaigrette balances the richness.

Storage and Reheating Tips

Leftovers? No problem! These enchiladas keep well and taste just as delicious the next day.

  • Refrigerate: Store in an airtight container for up to 3 days.
  • Freeze: Wrap individual portions tightly in foil and freeze for up to 2 months. Thaw overnight in the fridge before reheating.
  • Reheat: Warm in the oven at 350°F (175°C) for 15–20 minutes or microwave in 30-second intervals until heated through.

Frequently Asked Questions

Can I make these enchiladas ahead of time?

Absolutely! Assemble them the night before, cover tightly, and refrigerate. Just add an extra 10–15 minutes to the cooking time if starting cold.

Do I have to use shredded chicken?

Not at all! Leftover rotisserie chicken or even ground turkey works beautifully in this recipe.

Can I use store-bought enchilada sauce?

Yes! A good-quality store-bought sauce saves time, but homemade always tastes fresher. If using canned, try sprucing it up with a dash of cumin or garlic powder.

How do I prevent soggy tortillas?

Lightly frying or warming the tortillas before rolling helps them hold up better. Also, don’t over-sauce the enchiladas before baking.

Final Thoughts

There’s something so comforting about a warm plate of slow cooker chicken enchiladas—melty cheese, tender chicken, and just the right amount of spice. Whether it’s a busy weeknight or a cozy weekend dinner, this dish is sure to bring everyone to the table with smiles. I hope it becomes a favorite in your home, just like it is in mine. Happy cooking, friends!

Print
clock clock iconcutlery cutlery iconflag flag iconfolder folder iconinstagram instagram iconpinterest pinterest iconfacebook facebook iconprint print iconsquares squares iconheart heart iconheart solid heart solid icon

Slow Cooker Chicken Enchiladas

  • Author: Trusted Blog

Description

Easy and flavorful chicken enchiladas made in the slow cooker for a hands-off dinner.


Ingredients

Scale

For the Crust:

  • 2 lbs boneless, skinless chicken breasts
  • 1 (10 oz) can red enchilada sauce
  • 1 (4 oz) can diced green chiles
  • 1 tsp ground cumin
  • 1 tsp garlic powder
  • 1/2 tsp salt
  • 8 flour tortillas
  • 2 cups shredded Mexican cheese blend
  • 1/2 cup chopped fresh cilantro (optional)

Instructions

1. Prepare the Crust:

  1. Place chicken breasts in the slow cooker. Pour enchilada sauce over the chicken, then add green chiles, cumin, garlic powder, and salt. Stir to coat the chicken.
  2. Cover and cook on LOW for 6 hours or HIGH for 3 hours, until chicken is tender and shreds easily.
  3. Remove chicken from the slow cooker and shred with two forks. Mix shredded chicken back into the sauce in the slow cooker.
  4. Warm tortillas according to package instructions. Spoon about 1/3 cup of the chicken mixture onto each tortilla, sprinkle with cheese, and roll up tightly.
  5. Place rolled enchiladas seam-side down in a greased baking dish. Top with remaining sauce from the slow cooker and sprinkle with remaining cheese.
  6. Broil in the oven for 3-5 minutes until cheese is melted and bubbly. Garnish with cilantro if desired.

Notes

You can customize the seasonings to taste.