Table of Contents
Easy & Delicious Creamsicle Orange Fluff
Introduction
Did you know that nostalgic desserts are making a major comeback, with searches for “vintage dessert recipes” increasing by over 60% in the last year? If you’re craving a taste of childhood that’s both effortless and impressive, you’ve found your perfect match. This Easy & Delicious Creamsicle Orange Fluff is a dreamy, creamy dessert made with mandarin oranges, whipped cream, and instant vanilla pudding. It perfectly captures the iconic flavor of a melting creamsicle pop in a light, fluffy, no-bake form. Whether you need a last-minute potluck hero, a refreshing end to a summer BBQ, or a sweet treat that won’t heat up your kitchen, this orange fluff delivers. It’s the ultimate crowd-pleaser that proves simple ingredients can create pure magic.
Ingredients List
Gather these simple ingredients for a dessert that serves 8-10 people. The beauty lies in their synergy, creating a texture that’s both cloud-like and satisfyingly creamy.
- 1 (3.4 oz) package Instant Vanilla Pudding Mix: The secret stabilizer. This isn’t cooked; it thickens the mixture and provides a sweet, creamy vanilla base that mimics the “ice cream” center of a creamsicle. Substitution: Use sugar-free instant pudding for a lower-calorie version, or try cheesecake-flavored pudding for a tangier twist.
- 1 cup Cold Whole Milk: Essential for activating the instant pudding. The cold temperature helps it set quickly and properly. Substitution: Any cold milk (2%, almond, oat, or soy) will work, but full-fat dairy yields the richest, creamiest texture.
- 1 (8 oz) tub Cool Whip, thawed: The “fluff” factor. This pre-whipped topping is stable and convenient, giving the dessert its signature airy volume. Substitution: For a homemade touch, whip 2 cups of heavy cream with 1/4 cup powdered sugar until stiff peaks form.
- 1 (11 oz) can Mandarin Oranges in Light Syrup or Juice, well-drained: The star flavor. Their bright, sweet-tart citrus bursts are the essence of creamsicle. Substitution: Use fresh mandarin or clementine segments, peeled and pith removed. If using fresh, you may want to add a tablespoon of orange juice concentrate to intensify the flavor.
- 1 (20 oz) can Crushed Pineapple, well-drained (optional but recommended): The flavor enhancer. Pineapple adds a subtle tropical acidity that prevents the dessert from being overly sweet and complements the orange beautifully. Substitution: Drained fruit cocktail or even well-drained peach chunks.
- 1 cup Mini Marshmallows (optional): For textural fun. They add little pockets of chewy sweetness. Substitution: Toasted coconut flakes or chopped nuts for crunch.
Timing
Compared to many baked desserts that require 30+ minutes of active prep and an hour in the oven, this Creamsicle Orange Fluff is a speed demon. Your active involvement is under 15 minutes. The majority of the time is hands-off chilling, allowing the flavors to meld and the texture to set perfectly. This makes it an ideal “make-ahead” dessert, freeing you up to focus on the rest of your meal.
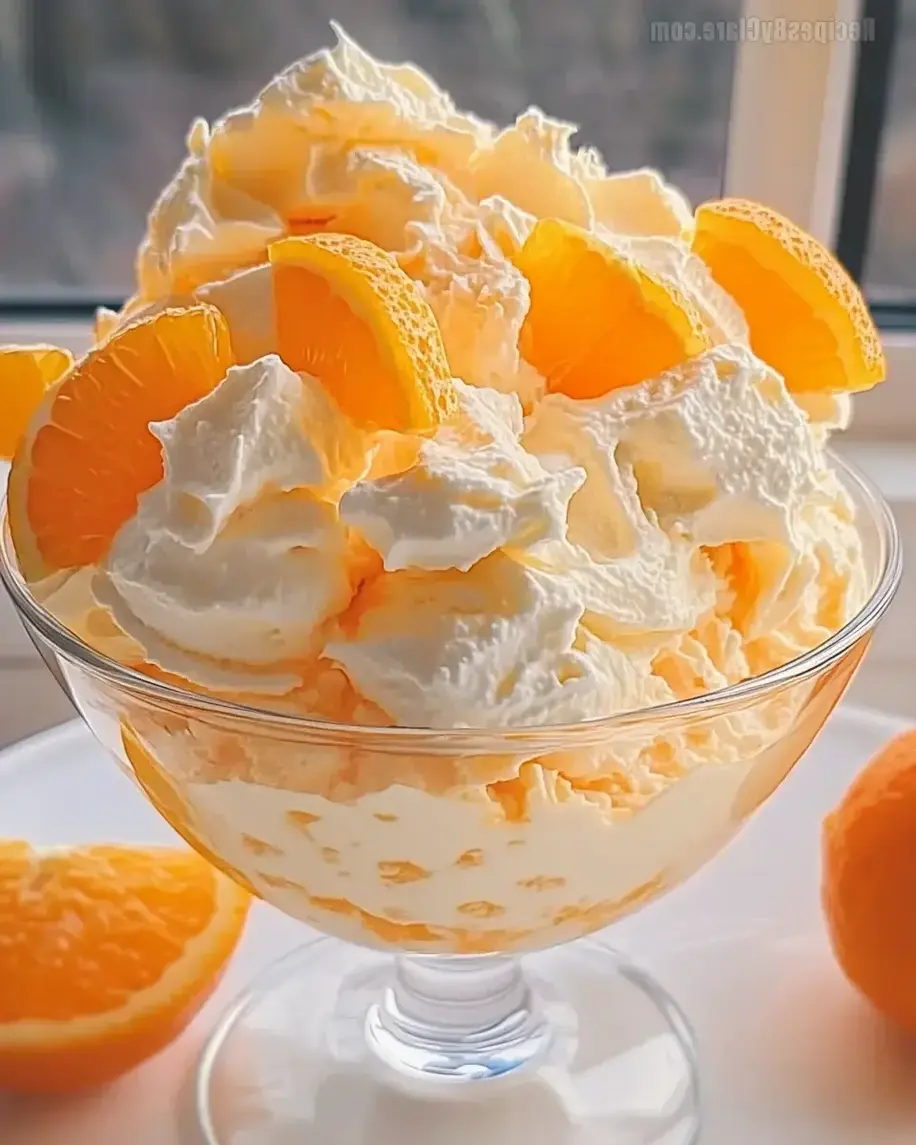
A vibrant bowl of Creamsicle Orange Fluff, ready to bring a burst of sunshine to your table.
Step-by-Step Instructions
Step 1: Prepare Your Tools and Ingredients
Grab a large mixing bowl, a sturdy whisk or spatula, and your measuring cups. This is where success begins. Critically drain your canned fruits. I press the mandarin oranges and crushed pineapple in a fine-mesh strainer and then gently pat them dry with a paper towel. Excess liquid is the enemy of fluffy desserts—it will make your fluff runny. If using the optional mini marshmallows, have them ready to go. Ensure your Cool Whip is fully thawed in the refrigerator for easy folding.
Step 2: Make the Pudding Base
In your large bowl, combine the instant vanilla pudding mix with the one cup of cold milk. Whisk vigorously for a full two minutes. You’ll see it transform from a liquid to a thick, creamy paste. This step is non-negotiable; whipping for the full time ensures the pudding powders are fully dissolved and activated, creating a stable base that will hold up the whipped topping and fruit without becoming gritty.
Step 3: Fold in the Fluff
Here’s the technique for maximum fluffiness: add the entire tub of thawed Cool Whip to the pudding base. Using your spatula, gently fold the two together. Don’t stir or beat aggressively—you want to preserve as much air as possible. Use a motion where you cut down through the center, sweep along the bottom, and fold over the top. Once the mixture is mostly combined and no large streaks of pudding remain, gently fold in the well-drained mandarin oranges, drained pineapple, and mini marshmallows (if using). Stop as soon as everything is evenly distributed.
Step 4: Chill and Serve
Transfer the fluffy mixture to a serving bowl, cover tightly with plastic wrap, and refrigerate for at least one hour, though two is better. This chilling time is crucial. It allows the pudding to fully set and the flavors to marry, transforming the mixture from good to spectacularly creamy and cohesive. When ready to serve, give it one gentle stir and scoop into bowls or cups.
Nutritional Information
The following is an approximate nutritional breakdown per serving (based on 10 servings, using whole milk, Cool Whip, and including pineapple).
- Calories: ~180 kcal
- Total Fat: 5g
- Saturated Fat: 4g
- Carbohydrates: 32g
- Sugars: 26g
- Protein: 2g
- Vitamin C: ~15% Daily Value (from mandarin oranges)
Healthier Alternatives
Love the flavor but want a lighter version? These swaps maintain the dreamy texture and taste while adjusting the nutrition profile.
- Dairy & Topping: Use unsweetened almond milk and a sugar-free instant pudding mix. Substitute the Cool Whip with an equal amount of whipped coconut cream (chill a can of full-fat coconut milk, scoop out the solid cream, and whip it) or light whipped topping.
- Fruit: Opt for mandarin oranges packed in 100% juice or water, and drain thoroughly. Increase the fruit-to-cream ratio by adding more oranges and reducing the Cool Whip by a quarter.
- Sweetness: The pudding and fruit provide plenty of sweetness. You can omit the optional marshmallows and consider adding a handful of fresh raspberries or strawberries for a natural, tart contrast.
Serving Suggestions
This versatile fluff shines in many settings. Serve it in clear parfait glasses layered with crumbled vanilla wafers or graham crackers for a beautiful presentation. For a summer party, use it as a dip for fresh strawberries, pineapple chunks, or angel food cake cubes. It also makes a fantastic filling for a pre-made graham cracker pie crust—just chill for 4 hours and you have a stunning Creamsicle Fluff Pie. A garnish of fresh mint or a light sprinkle of orange zest elevates it instantly.
Common Mistakes
- Not Draining Fruit Enough: This is the #1 reason for a watery, soupy fluff. Take the extra minute to press and pat the fruit dry.
- Overmixing After Adding Cool Whip: Vigorous stirring deflates the air, resulting in a dense dessert. Be gentle and fold.
- Skipping the Chill Time: Serving immediately means the pudding hasn’t set, and the flavors haven’t blended. Patience is key.
- Using Warm Milk: Instant pudding requires cold liquid to set properly. Warm milk will lead to a thin, un-set base.
Storing Tips
Store any leftovers covered tightly in the refrigerator for up to 3 days. The texture is best within the first 48 hours. I do not recommend freezing this dessert, as the whipped topping and fruit will separate and become watery upon thawing. If you need to make it further in advance, you can prepare the pudding base and drain the fruit a day ahead, storing them separately in the fridge. Combine everything and fold in the Cool Whip no more than 4 hours before serving for optimal texture.
Conclusion
This Easy & Delicious Creamsicle Orange Fluff is more than just a recipe; it’s a bite of pure, joyful nostalgia that comes together with astonishing ease. With its perfect balance of creamy vanilla and bright citrus, it’s a guaranteed hit for any occasion, from weeknight treats to festive gatherings. The simplicity is its superpower. I hope this recipe becomes a cherished staple in your home as it is in mine. Did you try it with any fun variations? What’s your favorite nostalgic dessert? Share your thoughts, photos, and tips in the comments below—I love hearing from you! If you enjoyed this recipe, please share it with your friends on Pinterest or Facebook.
Made this Creamsicle Orange Fluff? Tag @exorecipes on social media so we can see your beautiful creations! Don’t forget to save this recipe to your dessert board for later.
FAQs
***Can I use fresh whipped cream instead of Cool Whip?***
Absolutely! Whip 2 cups of heavy cream with 1/4 cup of powdered sugar and 1 teaspoon of vanilla extract until you have stiff peaks. Fold it in just as you would the Cool Whip. The texture will be slightly richer and less stable over multiple days, but utterly delicious.
***How long does this last in the fridge?***
For the best texture and flavor, enjoy it within 2-3 days. After that, the fruit may continue to release a bit of liquid, and the fluff can soften.
***Can I make this dessert sugar-free?***
Yes, you can. Use a sugar-free instant vanilla pudding mix, a sugar-free whipped topping, and mandarin oranges packed in water or their own juice (check the label for no added sugar). The result will be a much lower-carb, keto-friendly version.