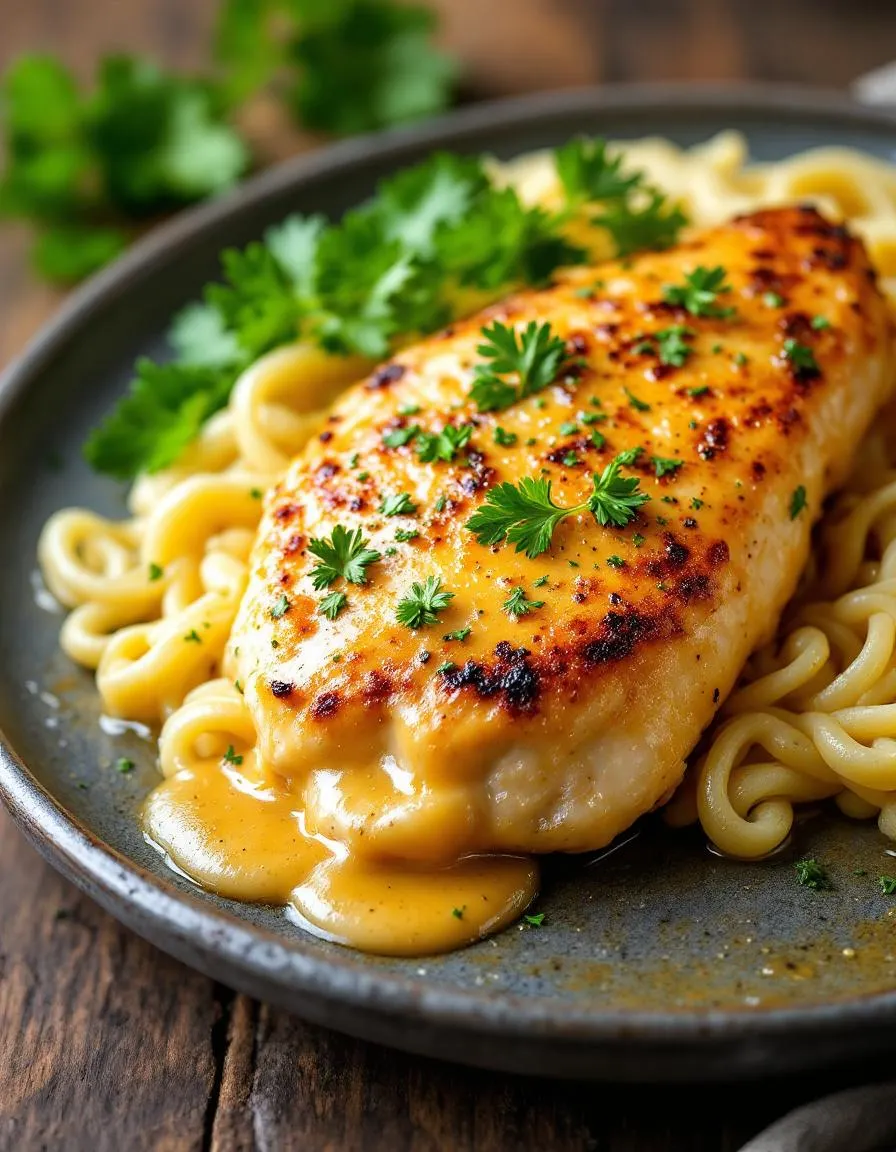
There’s something undeniably comforting about a dish that wraps you in warmth from the first bite. That’s exactly what you’ll get with this Creamy Garlic Parmesan Chicken—a recipe that feels like a cozy hug on a busy weeknight. Whether you’re cooking for family or treating yourself, this dish delivers rich flavors without demanding hours in the kitchen. Plus, it pairs perfectly with everything from pasta to roasted veggies, making it a versatile star in your meal rotation.
Creamy Garlic Parmesan Chicken is a decadent yet approachable dish that combines tender chicken breasts with a velvety sauce infused with garlic, Parmesan, and a touch of cream. What makes it special? First, it’s quick enough for weeknights but elegant enough for date nights. Second, it’s a crowd-pleaser—kids and adults alike adore its savory depth. Finally, it embodies the brekcakes.com philosophy: recipes should be delicious, reliable, and infused with joy. If you love dishes like my One-Pot Chicken Alfredo, you’ll appreciate how this recipe balances simplicity and indulgence. And if you’re new to cooking with garlic, my Garlic Roasted Potatoes guide will help you master its magic.
Why I Love This Recipe
This Creamy Garlic Parmesan Chicken holds a special place in my heart because it’s the dish that taught me the power of a well-balanced sauce. Years ago, I struggled to get the consistency just right—until one evening, after a little extra stirring and a lot of taste-testing, everything clicked. Now, every time I make it, I remember that moment of triumph. It’s a reminder that even the simplest recipes can hold big lessons (and even bigger flavors).
Health and Nutrition
Why it’s good for your body
Creamy Garlic Parmesan Chicken packs a nutritious punch while tasting indulgent. First, chicken provides lean protein, which helps build muscle and keeps you full longer. Additionally, garlic offers immune-boosting properties, thanks to its natural antimicrobial compounds. Meanwhile, Parmesan cheese adds calcium for strong bones without overloading the dish with heavy cream.
Moreover, this dish includes healthy fats from olive oil, which support heart health and reduce inflammation. The creamy sauce also gets richness from ingredients like Greek yogurt or light cream, balancing flavor and nutrition. Since Creamy Garlic Parmesan Chicken uses simple, whole ingredients, you avoid processed additives often found in restaurant versions.
Finally, the dish delivers a satisfying umami flavor while keeping carbs moderate. Whether you pair it with veggies or a small portion of whole grains, Creamy Garlic Parmesan Chicken fits seamlessly into a nutrient-dense meal. With its combination of protein, healthy fats, and vitamins, it’s a smart choice for both taste and wellness.
How it fits in a healthy lifestyle
Creamy Garlic Parmesan Chicken adapts easily to various dietary needs. For gluten-free eaters, it’s naturally safe when served with gluten-free sides like roasted vegetables or quinoa. If you’re focusing on high-protein meals, the chicken delivers a solid base, and you can boost portions with extra veggies or a side of lentils.
For heart-healthy eating, use olive oil and light dairy options to keep saturated fats in check. This dish also works well for meal prep, making it a practical choice for busy weeknights. Pair it with a crisp salad or steamed greens for a balanced plate. If you love flavorful dinners without guilt, explore our healthy dinner ideas for more inspiration.
Even if you’re watching calories, Creamy Garlic Parmesan Chicken fits into moderation. Portion control is key, and you can lighten the sauce without sacrificing taste. For more tips on balancing indulgence with nutrition, check out our guide to eating clean without giving up flavor.
Tender chicken breasts smothered in a rich and creamy garlic parmesan sauce.
Ingredients
Scale
For the Crust:
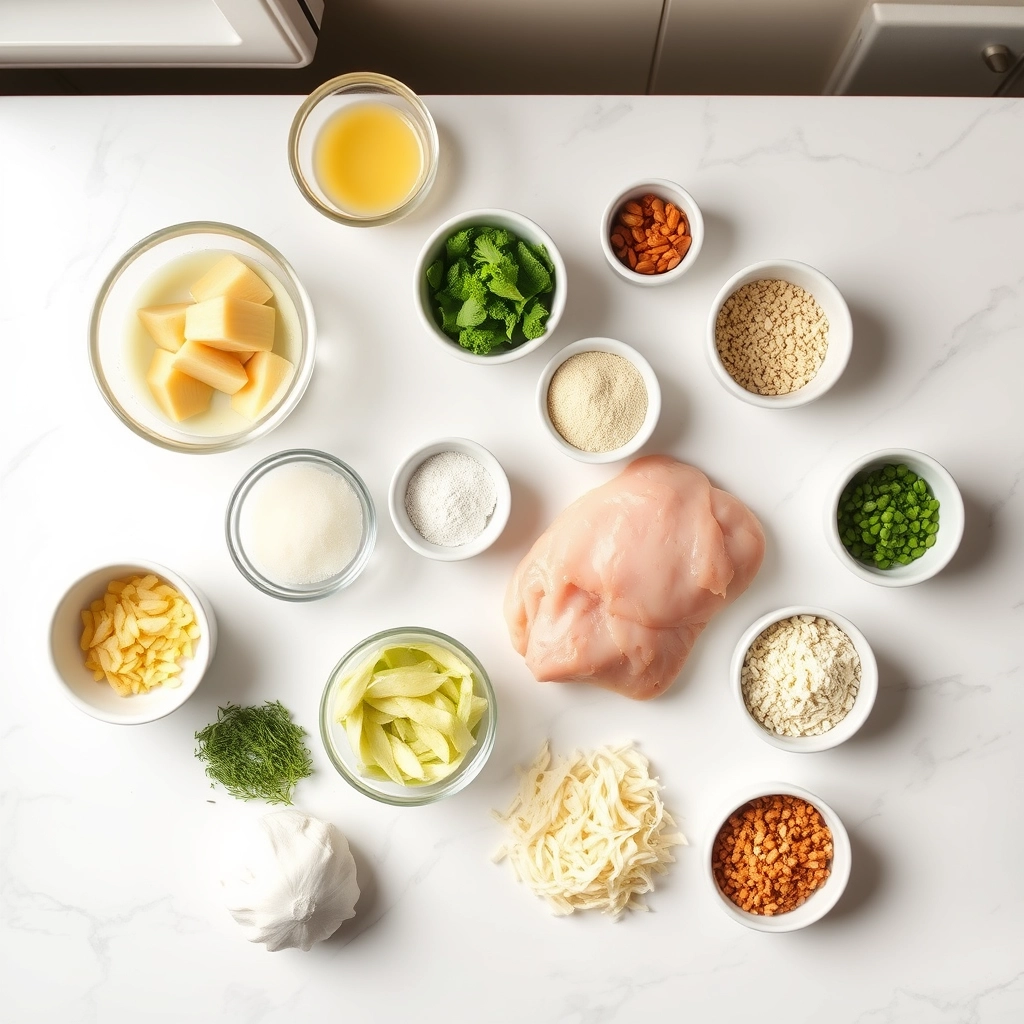
4 boneless, skinless chicken breasts
1 tablespoon olive oil
2 tablespoons butter
4 cloves garlic, minced
1 cup heavy cream
1/2 cup grated parmesan cheese
1 teaspoon Italian seasoning
1/2 teaspoon salt
1/4 teaspoon black pepper
1 tablespoon fresh parsley, chopped
Instructions
1. Prepare the Crust:
Heat olive oil in a large skillet over medium-high heat. Season chicken breasts with salt and pepper, then cook until golden brown and cooked through, about 6-7 minutes per side. Remove from skillet and set aside.
In the same skillet, melt butter over medium heat. Add minced garlic and sauté for 1 minute until fragrant.
Pour in heavy cream, then stir in parmesan cheese, Italian seasoning, salt, and pepper. Bring to a simmer and cook for 3-4 minutes until sauce thickens.
Return chicken to the skillet, spooning sauce over the top. Simmer for 2-3 minutes to heat through.
Garnish with fresh parsley before serving.
Notes
You can customize the seasonings to taste.
s-dish">How to Prepare This Dish
Steps and time-saving tips
Start by seasoning your chicken breasts with salt and pepper on both sides. Heat olive oil in a large skillet over medium-high heat, then sear the chicken until golden brown, about 4-5 minutes per side. Remove the chicken and set it aside. In the same skillet, melt butter and sauté minced garlic until fragrant, about 30 seconds. Whisk in heavy cream and chicken broth, then bring the mixture to a gentle simmer. Stir in grated Parmesan cheese until the sauce thickens slightly. Return the chicken to the skillet, spooning the creamy garlic Parmesan sauce over the top. Let everything simmer together for another 5 minutes so the flavors meld. For a time-saving tip, prep your garlic and grate the Parmesan ahead of time. If you’re short on stove space, you can also bake the chicken and sauce in a casserole dish at 375°F for 20 minutes instead. Garnish with fresh parsley and serve over pasta or mashed potatoes for a complete meal.
Mistakes I’ve made and learned from
One mistake I made early on was overcooking the chicken, leaving it dry and tough. Now, I use a meat thermometer to ensure it reaches 165°F internally without going over. Another issue was my sauce breaking—turns out, high heat can cause the cream to separate. To fix this, I keep the heat at a gentle simmer and stir constantly. If you’re new to creamy sauces, check out my guide on perfecting sauces every time for more tips. I also learned the hard way that pre-shredded Parmesan doesn’t melt as smoothly as freshly grated. For the best texture, grab a block and grate it yourself. If you’re looking for more chicken recipes with foolproof techniques, my weeknight chicken dinners post has plenty of inspiration.
n-and-variations">Cultural Connection and Variations
Where this recipe comes from
Creamy Garlic Parmesan Chicken feels like a love letter to Italian-American cuisine, blending rich flavors with hearty comfort. While it doesn’t trace back to a specific nonna’s kitchen, it captures the spirit of dishes like chicken alfredo—think creamy, garlicky, and utterly indulgent. In Italy, you’ll find lighter versions with less cream, often leaning on fresh herbs and aged Parmigiano-Reggiano. Meanwhile, in the U.S., home cooks might add spinach or mushrooms for extra depth, turning it into a one-pan wonder.
My family’s twist? A splash of white wine to brighten the sauce, plus a sprinkle of red pepper flakes for warmth. Some Southern cooks swap the pasta for biscuits, leaning into comfort food vibes. And in Australia, they might throw in grilled zucchini or serve it over sweet potato mash. No matter where you go, Creamy Garlic Parmesan Chicken adapts beautifully, making it a global crowd-pleaser with local flair.
How it fits in today’s cooking
Today, Creamy Garlic Parmesan Chicken shines as a weeknight hero and a special-occasion star. Busy cooks love it for its 30-minute timeline, while meal preppers reheat it effortlessly—just like these easy meal prep ideas. It’s also a hit during holidays, especially when paired with festive sides. Modern twists? Try coconut milk for dairy-free creaminess or air-fried chicken for a lighter crunch.
Food bloggers often fea
ture it in cozy dinner rotations, proving that comfort never goes out of style. And if you’re hosting a dinner party, pair it with a crisp salad—maybe something from this spring salad collection to balance the richness. Whether you’re craving nostalgia or need a foolproof dish to impress, Creamy Garlic Parmesan Chicken delivers every time.
Taste and Texture
What makes it delicious
Creamy Garlic Parmesan Chicken delivers a rich, savory experience with every bite. The tender chicken soaks up a luscious, garlicky sauce that’s both buttery and slightly tangy from the Parmesan. Fresh garlic adds a warm, fragrant punch, while heavy cream creates a velvety smoothness that coats your tongue. Each forkful balances the crisp sear of the chicken with the melt-in-your-mouth sauce, making Creamy Garlic Parmesan Chicken irresistibly comforting. A sprinkle of herbs like parsley or thyme brightens the dish, cutting through the richness for a perfectly balanced flavor.
Boosting the flavor
For an extra layer of depth, try swapping regular garlic for roasted garlic—it adds a sweet, caramelized note. A dash of lemon zest or a squeeze of juice brightens the creaminess, while crispy bacon bits introduce a smoky crunch. If you love heat, a pinch of red pepper flakes or a drizzle of homemade chili oil kicks things up. Serve Creamy Garlic Parmesan Chicken over garlic herb rice to soak up every drop of sauce. Experiment with fresh herbs or a sprinkle of extra Parmesan for a restaurant-worthy finish.
Always pat the chicken dry before cooking to ensure a golden sear on your Creamy Garlic Parmesan Chicken. Additionally, use freshly grated Parmesan instead of pre-shredded cheese for the smoothest, creamiest sauce. Meanwhile, cook the garlic just until fragrant to prevent bitterness, and stir the sauce frequently to avoid clumping. Finally, let the chicken rest for a few minutes before serving so the juices redistribute.
Mistakes to avoid
Avoid overcrowding the pan when searing the chicken, as this steams the meat instead of browning it. For perfectly tender results, check out our guide on how to sear chicken like a pro. Another common mistake is adding cold cream to the sauce, which can cause curdling. Instead, warm it slightly first, just like we recommend in our perfect creamy sauces tutorial. Lastly, don’t skip deglazing the pan—those browned bits add incredible depth to your Creamy Garlic Parmesan Chicken.
g-suggestions">Serving and Pairing Suggestions
How to serve this dish
For a restaurant-worthy presentation, plate your Creamy Garlic Parmesan Chicken over a bed of fluffy mashed potatoes or al dente pasta. Drizzle extra sauce on top and sprinkle fresh parsley or grated Parmesan for a pop of color. Alternatively, serve it family-style in a rustic skillet with crusty bread on the side for soaking up the rich sauce. This dish shines at dinner parties, but it also makes a comforting weeknight meal when paired with a simple salad.
What goes well with it
Pair Creamy Garlic Parmesan Chicken with roasted asparagus or garlic butter green beans for a balanced, veggie-forward meal. The crisp texture of the vegetables contrasts beautifully with the creamy sauce. For a heartier option, try it alongside our Garlic Herb Dinner Rolls, which add a buttery, aromatic touch. To elevate the experience, serve a chilled glass of Sauvignon Blanc or sparkling water with lemon—their bright acidity cuts through the richness of the dish. If you’re craving more indulgence, our Creamy Mushroom Risotto makes a luxurious companion.
math-faq-block">
What sides go well with Creamy Garlic Parmesan Chicken?
Creamy Garlic Parmesan Chicken pairs perfectly with roasted vegetables, mashed potatoes, or a crisp green salad. For a lighter option, try steamed asparagus or garlic butter rice to complement the rich flavors of the dish.
Can I use chicken breasts instead of thighs for Creamy Garlic Parmesan Chicken?
Yes, chicken breasts work well for Creamy Garlic Parmesan Chicken, though they may cook faster than thighs. To keep them juicy, pound them to an even thickness and avoid overcooking—the creamy sauce adds extra moisture.
How do I store leftover Creamy Garlic Parmesan Chicken?
Store leftovers in an airtight container in the fridge for up to 3 days. Reheat gently on the stove with a splash of milk to restore the creamy texture of the Garlic Parmesan sauce.
rank-math-faq-item">
Is Creamy Garlic Parmesan Chicken gluten-free?
Yes, if you use gluten-free flour or cornstarch to thicken the sauce, Creamy Garlic Parmesan Chicken can be gluten-free. Always check labels for parmesan cheese and other ingredients to ensure they meet dietary needs.
Best Stuffed Baked Acorn Squash Recipe
Introduction
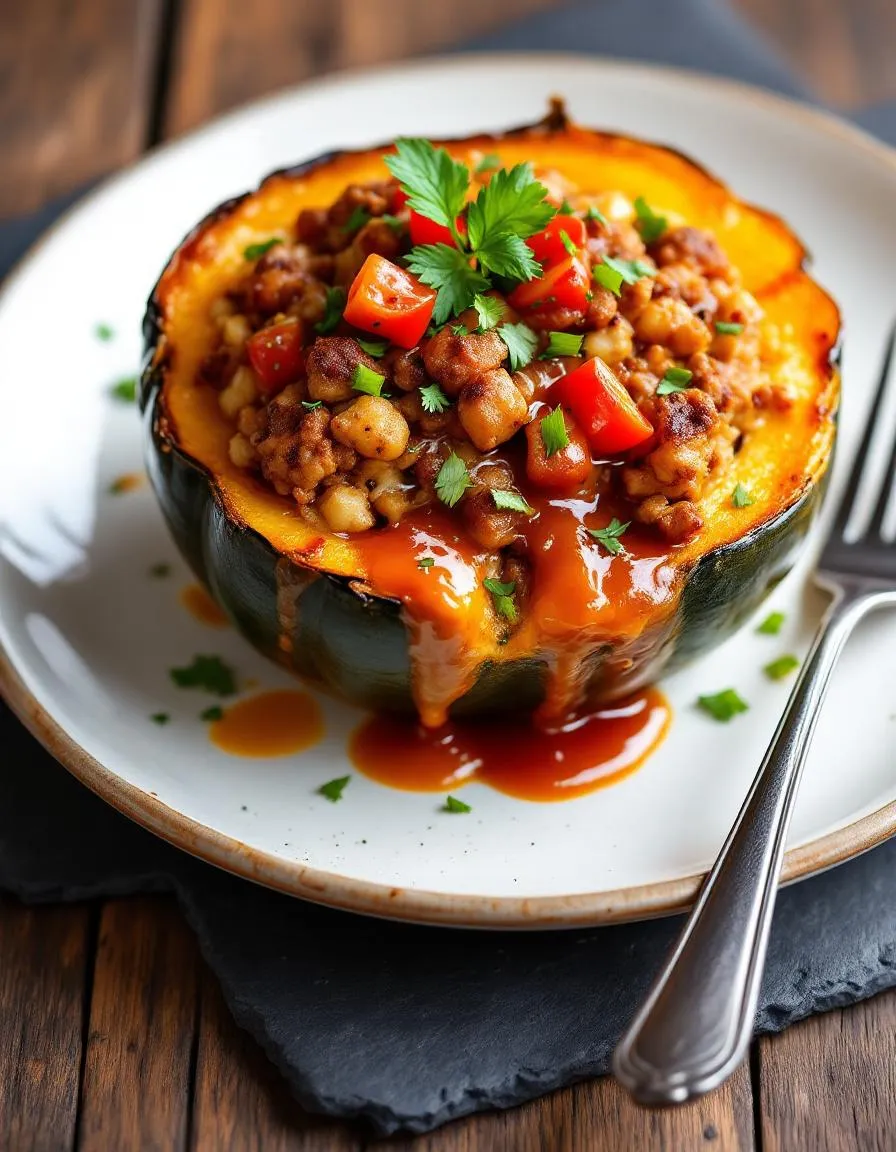
There’s something undeniably comforting about a dish that warms both your hands and your heart. That’s exactly why I adore Stuffed Baked Acorn Squash—it’s a cozy, flavorful masterpiece that feels like a hug on a plate. Whether you’re looking for a hearty weeknight dinner or a showstopping side for your next gathering, this recipe delivers. Plus, it’s packed with wholesome ingredients that make every bite as nourishing as it is delicious.
Stuffed Baked Acorn Squash is a seasonal favorite that transforms humble acorn squash into a vibrant, satisfying meal. Roasted until tender, the squash becomes a natural edible bowl filled with a savory stuffing—think grains, herbs, and sometimes even a touch of cheese or nuts for crunch. Not only does it look stunning on the table, but it also brings together textures and flavors in a way that’s both rustic and refined. For anyone who loves fall-inspired recipes, this dish is a must-try. It’s versatile enough to adapt to dietary preferences, whether you’re vegetarian, gluten-free, or just craving something wholesome. And if you’re new to cooking with squash, don’t worry—this recipe is as forgiving as it is flavorful. For more tips on working with seasonal produce, check out my guide to seasonal cooking.
Why I Love This Recipe
Stuffed Baked Acorn Squash holds a special place in my kitchen because it reminds me of family dinners during crisp autumn evenings. The first time I made it, my kids devoured it—squash skeptics turned into fans! What I love most is how it balances simplicity with elegance. It’s a dish that feels celebratory yet effortless, perfect for busy weeknights or leisurely weekends. Every time I pull it out of the oven, golden and fragrant, I’m reminded why seasonal cooking brings so much joy.
Health and Nutrition
Why it’s good for your body
Stuffed Baked Acorn Squash packs a powerful nutritional punch while tasting delicious. First, acorn squash delivers a hefty dose of fiber, which keeps your digestion smooth and helps you feel full longer. Additionally, its vibrant orange flesh means it’s rich in beta-carotene, a nutrient your body converts to vitamin A for healthy vision and immunity.
Moreover, the stuffing in Stuffed Baked Acorn Squash often includes protein-rich ingredients like quinoa, beans, or lean turkey. These additions balance the meal, ensuring steady energy levels. Meanwhile, the squash itself provides essential minerals like potassium and magnesium, which support heart health and muscle function.
Beyond nutrients, Stuffed Baked Acorn Squash is naturally low in calories but high in satisfaction. Its combination of complex carbs, fiber, and protein makes it a smart choice for weight management. Finally, roasting the squash caramelizes its natural sugars, enhancing flavor without needing excessive salt or fat.
How it fits in a healthy lifestyle
Stuffed Baked Acorn Squash fits seamlessly into a balanced diet, whether you’re gluten-free, plant-based, or just aiming to eat cleaner. Its versatility lets you customize the stuffing to match your goals, like using quinoa for extra protein or walnuts for heart-healthy fats. For more gluten-free meal ideas, check out our gluten-free dinner recipes.
This dish also works well for meal prep, since you can bake multiple squashes at once and reheat them throughout the week. Pair it with a simple salad or steamed greens for a complete, nutrient-dense meal. If you’re exploring more ways to incorporate squash into your diet, our healthy squash recipes offer plenty of inspiration.
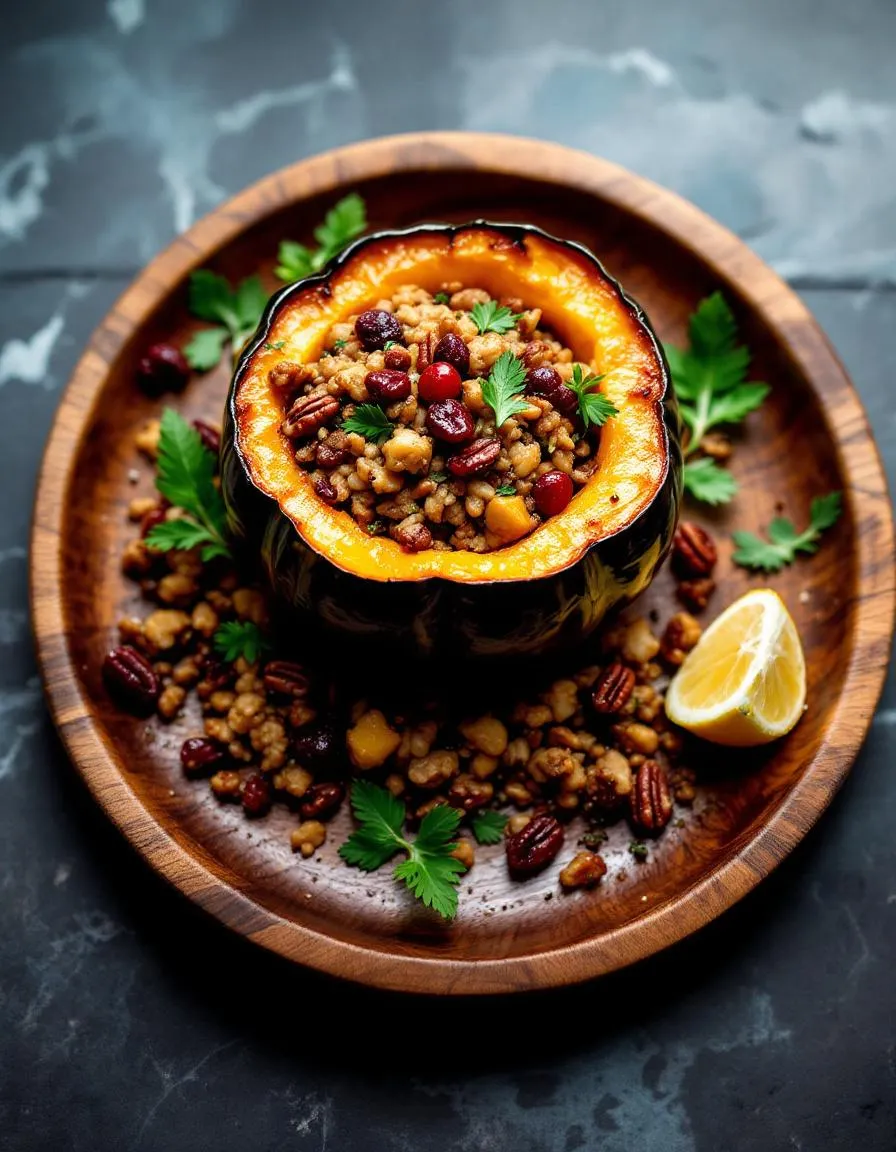
A hearty and flavorful dish featuring roasted acorn squash stuffed with a savory mixture of grains, vegetables, and herbs.
Ingredients
Scale
For the Crust:
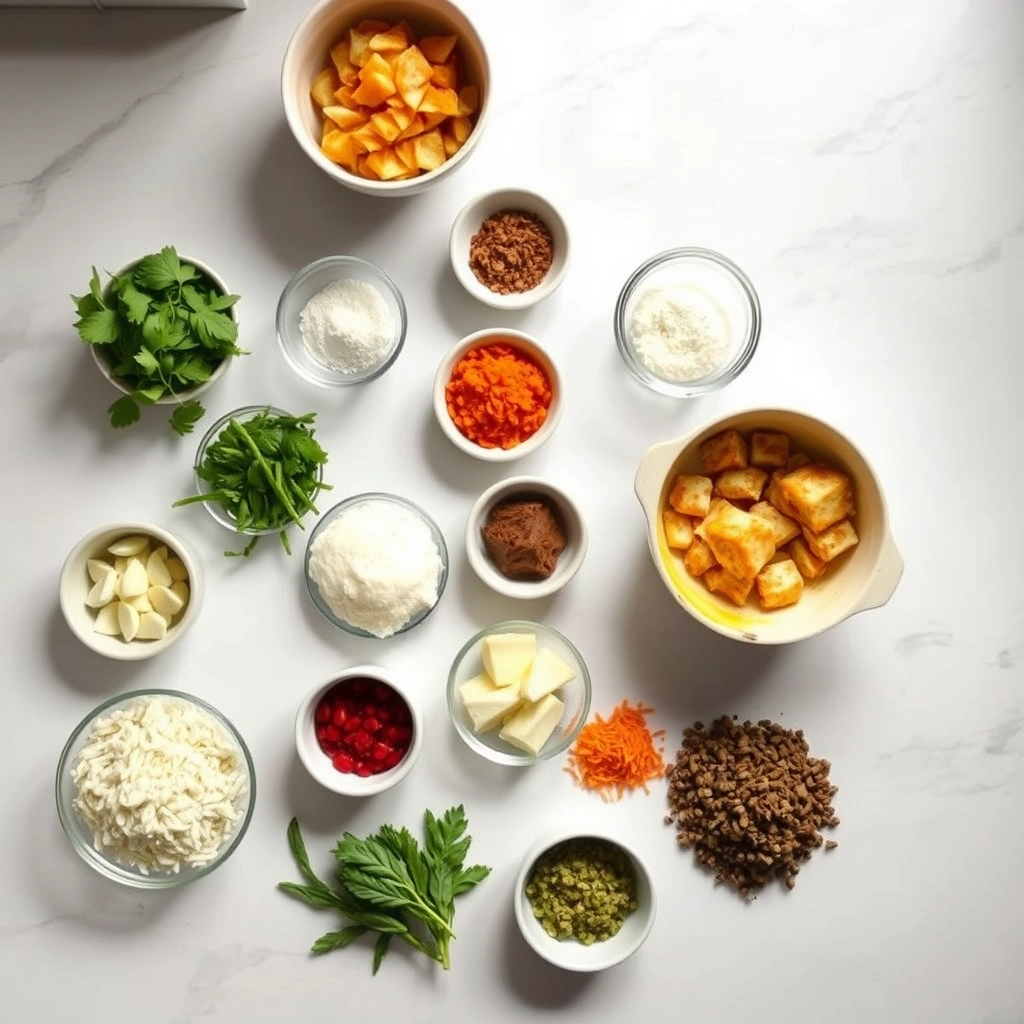
2 medium acorn squash, halved and seeds removed
1 tablespoon olive oil
1/2 teaspoon salt
1/4 teaspoon black pepper
1 cup cooked quinoa or brown rice
1/2 cup diced onion
1/2 cup diced celery
1/2 cup diced carrots
2 cloves garlic, minced
1 teaspoon dried thyme
1 teaspoon dried sage
1/2 cup vegetable broth
1/4 cup dried cranberries
1/4 cup chopped pecans
Instructions
1. Prepare the Crust:
Preheat oven to 400°F (200°C). Brush the cut sides of the acorn squash with olive oil and season with salt and pepper. Place cut-side down on a baking sheet and roast for 25-30 minutes until tender.
While the squash roasts, heat 1 tablespoon olive oil in a skillet over medium heat. Add onion, celery, and carrots, and sauté for 5 minutes until softened.
Add garlic, thyme, and sage, and cook for another minute. Stir in cooked quinoa or brown rice, vegetable broth, cranberries, and pecans. Cook for 3-4 minutes until heated through.
Remove the squash from the oven and flip them cut-side up. Divide the stuffing mixture evenly among the squash halves.
Return to the oven and bake for an additional 10 minutes. Serve warm.
Notes
You can customize the seasonings to taste.
s-dish">How to Prepare This Dish
Steps and time-saving tips
Start by preheating your oven to 400°F so it’s ready when you are. While it heats, halve the acorn squash lengthwise and scoop out the seeds with a spoon. Drizzle the cut sides with olive oil, then sprinkle with salt and pepper. Place them cut-side down on a baking sheet and roast for 25 minutes until tender. Meanwhile, heat a skillet over medium and cook the sausage until browned, breaking it into crumbles. Transfer the sausage to a bowl and sauté onions, garlic, and apples in the same pan for extra flavor. Stir in cooked quinoa, dried cranberries, and a pinch of cinnamon for warmth. Once the squash is ready, flip them over and stuff each half generously with the filling. Return to the oven for 10 more minutes to let everything meld together. For a crispy finish, broil the stuffed baked acorn squash for 2-3 minutes. Let it cool slightly before serving to avoid burning your mouth. If you’re short on time, prep the filling ahead or use pre-cooked quinoa to speed things up.
Mistakes I’ve made and learned from
I once undercooked the squash because I skipped the initial roasting step, thinking the filling would soften it. Big mistake—the texture was tough and uneven. Now I always roast it first until a fork slides in easily. Another time, I overstuffed the halves, and the filling spilled everywhere. Lesson learned: leave a little room for the ingredients to settle. If you’re new to working with squash, check out my guide on choosing and preparing winter squash to avoid common pitfalls. Also, if your filling feels dry, a splash of broth or a drizzle of maple syrup helps. For more flavor combos, my creative quinoa stuffings post has great ideas to mix things up.
n-and-variations">Cultural Connection and Variations
Where this recipe comes from
Stuffed Baked Acorn Squash has deep roots in seasonal cooking, especially in North America where fall harvests inspire hearty, comforting dishes. Native American tribes first cultivated squash, and early settlers adapted it into their meals, often stuffing it with grains, nuts, and meats. Today, this dish reflects a blend of traditions—some families stuff it with wild rice and cranberries, while others lean toward savory sausage and herbs.
Across the globe, variations of Stuffed Baked Acorn Squash pop up in surprising ways. In Italy, cooks might fill it with risotto and Parmesan, while in the Middle East, you’ll find versions with spiced lamb and pine nuts. Even within the U.S., regional twists shine. In the South, cornbread stuffing dominates, while coastal areas might add seafood. My grandmother always added a touch of maple syrup, turning it into a sweet-and-savory masterpiece.
How it fits in today’s cooking
Stuffed Baked Acorn Squash still holds a special place in modern kitchens, especially as people embrace seasonal, plant-forward meals. It’s a star at Thanksgiving tables, but also fits effortlessly into weeknight dinners. Busy cooks love that they can prep it ahead, making it a perfect match for meal prep routines like those in our healthy meal prep guide.
Today’s adaptati
ons keep it fresh—think quinoa for gluten-free diets or vegan fillings with lentils and walnuts. Some even turn it into a brunch dish by adding eggs, similar to our savory breakfast bowls. Whether you stick to tradition or experiment, this dish proves that humble ingredients can always feel new again.
Taste and Texture
What makes it delicious
Stuffed Baked Acorn Squash delivers a symphony of flavors and textures in every bite. The tender, caramelized squash melts in your mouth, while the savory stuffing adds a satisfying contrast with its hearty, chewy texture. Warm spices like cinnamon and nutmeg mingle with earthy herbs, creating a fragrant aroma that fills your kitchen. Sweet maple syrup balances the richness of ingredients like sausage or quinoa, making each forkful irresistible. Whether you opt for a meaty or plant-based filling, Stuffed Baked Acorn Squash always feels comforting and indulgent.
Boosting the flavor
Elevate your Stuffed Baked Acorn Squash with a few creative tweaks. For a nutty crunch, sprinkle toasted pecans or walnuts over the top before serving. Alternatively, drizzle with a tangy balsamic glaze to brighten the dish. If you love heat, a pinch of smoked paprika or cayenne adds depth. For a creamy finish, swirl in herbed goat cheese or a dollop of garlic aioli. Experimenting with fresh herbs like rosemary or sage also enhances the aroma and taste. Small changes make a big difference!
Always roast the acorn squash halves before stuffing them to ensure they soften evenly. Meanwhile, use fresh herbs like sage or thyme to enhance the flavor of your Stuffed Baked Acorn Squash. For even cooking, make sure to scoop out all the seeds and stringy bits thoroughly. Additionally, lightly brush the squash with olive oil to help it caramelize beautifully in the oven. Finally, let the stuffed squash rest for 5 minutes after baking so the flavors meld perfectly.
Mistakes to avoid
Avoid overstuffing the squash, as this can lead to uneven cooking and a messy presentation. Instead, fill each half just enough to keep the stuffing intact. Many cooks also forget to season the squash cavity before adding the filling, so sprinkle a pinch of salt inside for balanced flavor. If your stuffing seems dry, try adding a splash of broth or a dollop of butter—this trick works wonders for moisture. For more stuffing tips, check out our guide on perfect stuffing consistency. Also, resist the urge to skip the roasting step—raw squash won’t soften properly. Learn how to roast vegetables correctly with our roasting vegetables 101 tutorial.
g-suggestions">Serving and Pairing Suggestions
How to serve this dish
Stuffed Baked Acorn Squash makes a stunning centerpiece for any table. For a festive touch, drizzle the squash with a balsamic glaze and sprinkle fresh pomegranate seeds on top. Alternatively, serve it on a wooden board with roasted nuts and herbs for a rustic look. This dish shines at holiday gatherings, but it also works beautifully for cozy weeknight dinners. To impress guests, slice the squash into wedges before plating, revealing the colorful filling inside.
What goes well with it
Pair Stuffed Baked Acorn Squash with a crisp white wine like Sauvignon Blanc, which cuts through the richness of the dish. For a non-alcoholic option, try sparkling apple cider for a refreshing contrast. If you want a heartier meal, serve it alongside a warm bowl of roasted Brussels sprouts or a fresh kale salad. For more side dish inspiration, check out our favorite garlic herb roasted potatoes or this creamy butternut squash soup. Both recipes balance the savory flavors of the squash perfectly.
math-faq-block">
How long does it take to bake stuffed acorn squash?
Stuffed Baked Acorn Squash typically takes about 45–60 minutes to bake at 375°F (190°C). The exact time depends on the size of the squash and the filling. Always check for tenderness with a fork before serving.
What are good fillings for stuffed acorn squash?
Popular fillings for Stuffed Baked Acorn Squash include quinoa with vegetables, ground turkey or sausage with herbs, or a vegetarian mix of wild rice, cranberries, and pecans. Cheese, breadcrumbs, or nuts add extra texture and flavor.
Can you make stuffed acorn squash ahead of time?
Yes! Prepare Stuffed Baked Acorn Squash up to 24 hours in advance—store it covered in the fridge before baking. For best results, add 5–10 minutes to the baking time if starting from cold.
rank-math-faq-item">
Is acorn squash skin edible after baking?
The skin of Stuffed Baked Acorn Squash becomes tender when fully cooked and is safe to eat, though some prefer to scoop out the flesh. For softer skin, rub the squash with oil before baking.
If you’ve ever craved a dish that wraps you in comfort while bursting with rich, savory flavors, then Chicken Paprikash is your answer. This Hungarian classic, with its tender chicken and velvety paprika-infused sauce, feels like a warm hug on a chilly evening. Whether you’re cooking for family or simply treating yourself, this recipe delivers both nostalgia and excitement in every bite. Plus, it’s surprisingly easy to make, even on busy weeknights.
Chicken Paprikash is a beloved Hungarian stew that combines succulent chicken, sweet or smoked paprika, and a luscious sour cream sauce. Unlike many complicated dishes, it relies on humble ingredients but transforms them into something extraordinary. The vibrant red hue from the paprika makes it as visually stunning as it is delicious. What truly sets it apart, though, is its versatility. You can serve it over homemade egg noodles for authenticity or pair it with crusty bread to soak up every last drop of sauce. For those who adore cozy, one-pot meals, this dish fits right in with other favorites like my creamy mushroom risotto. It’s the kind of recipe that turns an ordinary dinner into a memorable experience.
Why I Love This Recipe
Chicken Paprikash holds a special place in my heart because it reminds me of my grandmother’s kitchen. She taught me how to balance the smokiness of paprika with the tang of sour cream, creating a harmony of flavors that still feels like home. Every time I make it, I’m transported back to those moments of laughter and shared meals. More than just a recipe, it’s a connection to heritage, love, and the simple joy of cooking for others.
Health and Nutrition
Why it’s good for your body
Chicken Paprikash packs a nutritious punch while delivering rich, comforting flavors. First, it features lean chicken breast, which provides high-quality protein to support muscle growth and repair. Additionally, the dish includes a generous amount of paprika, a spice loaded with antioxidants that help combat inflammation. Because it also contains onions and garlic, Chicken Paprikash offers immune-boosting properties alongside its savory taste.
Moreover, the creamy sauce in Chicken Paprikash often uses yogurt or sour cream, which adds probiotics for gut health. Unlike heavier comfort foods, this dish balances indulgence with nourishment. For instance, the tomatoes in the recipe contribute vitamin C, enhancing iron absorption from the chicken. Meanwhile, the moderate use of oil keeps the meal heart-friendly without sacrificing richness.
Finally, Chicken Paprikash is naturally low in carbs, making it a great option for those watching their sugar intake. Whether you enjoy it over egg noodles or with a side of steamed vegetables, this dish adapts easily to different dietary needs. With its blend of protein, vitamins, and antioxidants, Chicken Paprikash proves that delicious food can also be good for you.
How it fits in a healthy lifestyle
Chicken Paprikash fits seamlessly into a balanced diet, whether you’re focusing on high-protein meals or gluten-free eating. Since it relies on simple, whole ingredients, you can easily adjust the recipe to meet your goals. For example, swapping traditional noodles for zucchini spirals keeps it low-carb while adding extra fiber. If you’re meal prepping, Chicken Paprikash stores well and reheats beautifully, making it a practical choice for busy weeks.
This dish also aligns with heart-healthy eating, especially if you use olive oil and lean chicken. Pair it with a fresh salad or roasted vegetables for a well-rounded plate. If you’re exploring more gluten-free options, check out our guide to gluten-free meal ideas for additional inspiration. And for those prioritizing protein, Chicken Paprikash pairs perfectly with our high-protein sides to create a satisfying, muscle-friendly meal.
Ultimately, Chicken Paprikash proves that wholesome eating doesn’t mean sacrificing flavor. By incorporating nutrient-dense ingredients and adaptable preparation methods, it supports a variety of health goals without compromise.
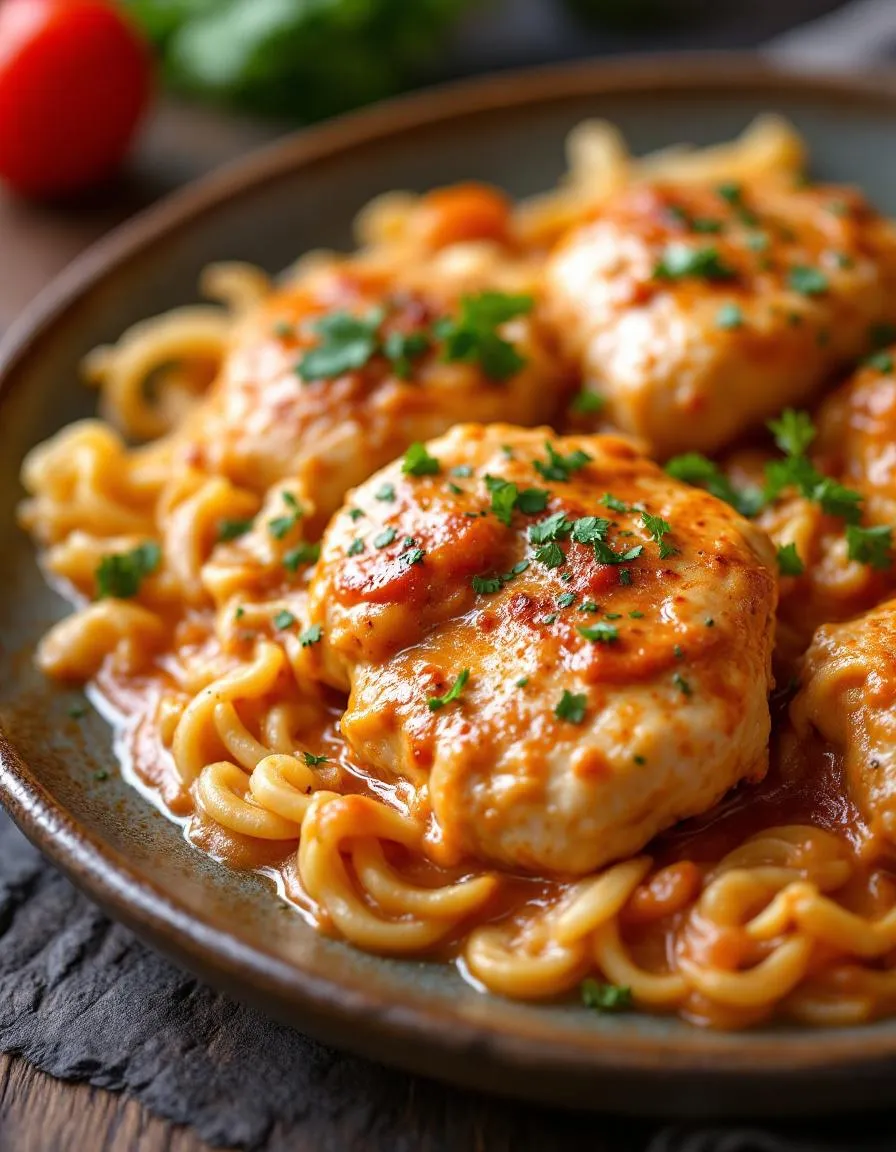
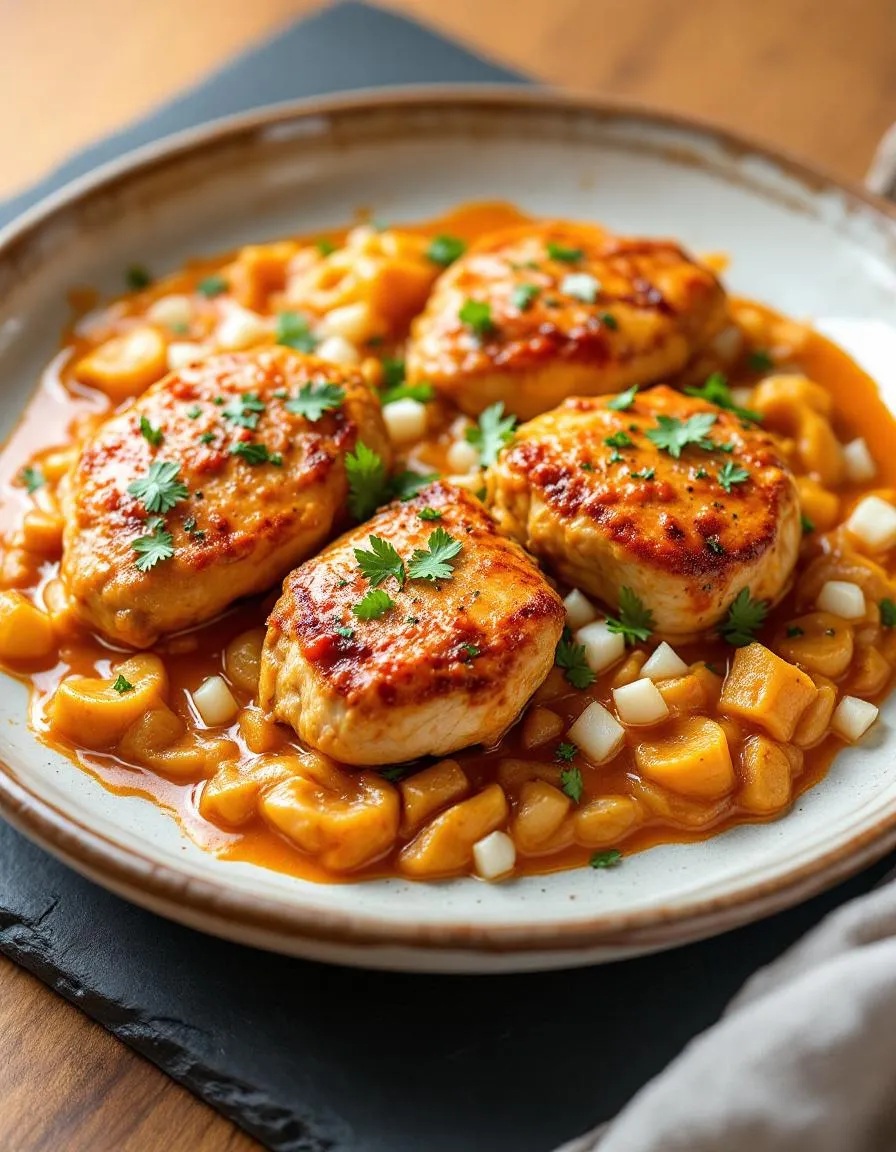
A classic Hungarian dish featuring tender chicken in a rich, creamy paprika sauce.
Ingredients
Scale
For the Crust:
4 chicken thighs, bone-in and skin-on
1 large onion, diced
2 tablespoons sweet paprika
1 cup chicken broth
1/2 cup sour cream
2 tablespoons all-purpose flour
2 tablespoons vegetable oil
Salt and pepper to taste
Instructions
1. Prepare the Crust:
Heat oil in a large skillet over medium heat. Season chicken thighs with salt and pepper, then brown on both sides. Remove and set aside.
In the same skillet, sauté onions until soft. Stir in paprika and cook for 1 minute.
Whisk flour into chicken broth, then pour into the skillet. Return chicken to the skillet, cover, and simmer for 25 minutes.
Remove chicken and stir in sour cream until smooth. Return chicken to the sauce and heat through.
Notes
You can customize the seasonings to taste.
s-dish">How to Prepare This Dish
Steps and time-saving tips
Start by seasoning the chicken pieces generously with salt and pepper. Heat a large Dutch oven over medium-high heat and add a drizzle of oil. Once hot, sear the chicken until golden brown on all sides, about 5 minutes per side. Remove the chicken and set it aside. Next, toss in the diced onions and sauté until translucent, stirring frequently to avoid burning. Sprinkle in the sweet paprika and stir for just 30 seconds to release its aroma—this prevents bitterness. Pour in the chicken broth and scrape up any browned bits for extra flavor. Return the chicken to the pot, reduce the heat to low, and let it simmer covered for 25 minutes. Meanwhile, whisk together the sour cream and flour in a small bowl to create a smooth slurry. Once the chicken is tender, stir in the slurry and simmer for another 5 minutes until the sauce thickens. For a time-saving hack, prep the onions and measure spices ahead of time. Serve the Chicken Paprikash over egg noodles or mashed potatoes for a comforting meal.
Mistakes I’ve made and learned from
Early on, I rushed the paprika step, letting it cook too long and turning the sauce bitter. Now I know to add it just before the liquid for maximum flavor. Another blunder? Skipping the sour cream slurry—I once dumped it straight into the hot pot, and it curdled instantly. Lesson learned: always temper it with a ladle of warm sauce first. If you’re new to thickening sauces, my guide on avoiding lumpy sauces has more tips. Also, don’t overcrowd the pan when browning the chicken, or it’ll steam instead of sear. For perfect browning every time, check out my searing meat like a pro post. These small tweaks transformed my Chicken Paprikash from mediocre to restaurant-worthy.
n-and-variations">Cultural Connection and Variations
Where this recipe comes from
Chicken Paprikash whispers stories of Hungarian countryside kitchens, where generations simmered this dish with love and pride. Born in the heart of Central Europe, it hugs the soul with its rich, paprika-kissed sauce and tender chicken. Families often pass down their own twists—some add a splash of white wine, while others swear by a dollop of sour cream right at the end. In Hungary, they might serve it with nokedli (tiny dumplings), but in my grandma’s kitchen, we always ladled it over buttery egg noodles.
Travel further, and you’ll find Chicken Paprikash wearing different hats. In Romania, they might toss in extra garlic or a handful of fresh dill. Some Austrian versions skip the sour cream entirely, letting the paprika shine solo. Even across the Atlantic, home cooks tweak it—maybe swapping chicken thighs for breasts or sneaking in bell peppers for sweetness. No matter the variation, though, the dish always feels like a warm hug from the past.
How it fits in today’s cooking
Today, Chicken Paprikash still earns its spot as a weeknight hero and a holiday star. Busy cooks love how it transforms humble ingredients into something extraordinary, while food bloggers rave about its Instagram-worthy vibes. Some modern twists include pressure-cooking the dish for a 30-minute miracle or pairing it with gluten-free dumplings for dietary needs.
Seasonal cooks celebrat
e it too—think cozy winter suppers or summer garden parties with a paprika-infused twist. Whether you’re reviving family traditions or discovering it for the first time, Chicken Paprikash bridges old-world charm and today’s hustle beautifully. It’s proof that some flavors never fade.
Taste and Texture
What makes it delicious
Chicken Paprikash wraps your senses in warmth, thanks to its rich, velvety sauce and tender, fall-off-the-bone chicken. The dish bursts with deep, smoky sweetness from Hungarian paprika, balanced by a tangy hint of sour cream. Each bite coats your tongue in creamy comfort, while the slow-cooked onions melt into the sauce, adding a subtle sweetness. Meanwhile, the aroma alone—fragrant with garlic, paprika, and a touch of thyme—will make your kitchen smell irresistible. Whether served over egg noodles or fluffy dumplings, Chicken Paprikash delivers a hearty, soul-satisfying experience that keeps you coming back for more.
Boosting the flavor
For an extra flavor kick, try swapping sour cream with crème fraîche—its slightly nutty taste elevates the sauce’s richness. Alternatively, a splash of white wine deglazes the pan, adding bright acidity to balance the paprika’s smokiness. If you love heat, a pinch of cayenne pepper or a dollop of homemade hot sauce brings a spicy contrast. Don’t forget fresh herbs! A sprinkle of dill or parsley right before serving adds a pop of freshness. For more inspiration, explore our guide to flavorful spice blends to customize your Chicken Paprikash even further.
Always use fresh, high-quality Hungarian paprika for authentic Chicken Paprikash flavor. Brown the chicken pieces well before simmering to lock in juices and deepen the dish’s richness. Meanwhile, stir the paprika into the onions gently to prevent burning, as this ensures a vibrant color and balanced taste. For the creamiest texture, blend the sour cream with a ladle of hot broth before adding it to the pot. Finally, let the Chicken Paprikash rest for 10 minutes off the heat to thicken slightly before serving.
Mistakes to avoid
Avoid rushing the onion-cooking step, as undercooked onions can make the Chicken Paprikash taste sharp. Instead, caramelize them slowly until golden for natural sweetness. Many cooks also add sour cream directly to the hot pot, which can curdle. To fix this, temper it first as mentioned above. For more on balancing creamy sauces, check out our guide to perfect sauces. Lastly, don’t skip the fresh garnish—parsley or dill brightens the dish. If you’re new to pairing herbs, explore our tips for herb pairings to elevate your meal.
g-suggestions">Serving and Pairing Suggestions
How to serve this dish
For a stunning presentation, serve Chicken Paprikash in a shallow bowl to showcase its rich, creamy sauce. Top it with a dollop of sour cream and a sprinkle of fresh parsley or dill for a pop of color. Alternatively, garnish with a few slices of red bell pepper to echo the dish’s vibrant flavors. This hearty meal shines at family dinners or cozy gatherings, but it also makes a memorable centerpiece for holiday feasts. If you’re hosting a casual brunch, pair it with crusty bread for dipping—guests will love soaking up every last bite.
What goes well with it
First, try pairing Chicken Paprikash with buttery egg noodles or fluffy mashed potatoes—their mild flavors balance the dish’s bold paprika notes perfectly. For a lighter option, a crisp cucumber salad adds refreshing contrast. Meanwhile, a glass of dry white wine, like Pinot Grigio, enhances the sauce’s richness without overpowering it. Craving more pairing inspiration? Explore our garlic butter dinner rolls for a side that soaks up the sauce beautifully. Or, if you’re serving a crowd, our roasted vegetable medley adds colorful, wholesome flair to the meal.
math-faq-block">
What is Chicken Paprikash made of?
Chicken Paprikash is a Hungarian dish made with chicken, onions, garlic, sweet or hot paprika, tomatoes, and sour cream. The key ingredient is paprika, which gives the dish its signature rich red color and smoky flavor. Traditionally, it’s served with dumplings or egg noodles to soak up the creamy sauce.
What’s the difference between Chicken Paprikash and Chicken Paprika?
Chicken Paprikash refers specifically to the Hungarian dish with a creamy paprika-infused sauce, while “Chicken Paprika” is a broader term that might describe simpler paprika-seasoned chicken recipes. Authentic Chicken Paprikash always includes sour cream and a generous amount of paprika for its distinct flavor profile.
Can you make Chicken Paprikash without sour cream?
Yes, you can substitute Greek yogurt or crème fraîche for sour cream in Chicken Paprikash, though the flavor will be slightly tangier. For a dairy-free version, coconut cream works surprisingly well. However, traditional Chicken Paprikash relies on sour cream for its signature richness.
rank-math-faq-item">
What side dishes go well with Chicken Paprikash?
Chicken Paprikash pairs perfectly with Hungarian dumplings (nokedli), egg noodles, or spaetzle to soak up the sauce. For lighter options, try roasted potatoes or a crisp cucumber salad. A crusty bread is also excellent for scooping up every last bit of the flavorful paprika sauce.
Best Crunchy Chicken Romesco Sandwich Recipe
If you’re craving a sandwich that delivers both comfort and excitement in every bite, you’ve come to the right place. The Crunchy Chicken Romesco Sandwich is more than just a meal—it’s a flavor-packed experience that balances crispy textures with rich, smoky romesco sauce. Whether you’re packing lunch for a busy day or hosting a casual get-together, this recipe promises to impress without demanding hours in the kitchen. Trust me, one bite and you’ll understand why it’s become a staple in my home.
The Crunchy Chicken Romesco Sandwich combines tender, golden-fried chicken with a vibrant romesco sauce made from roasted red peppers, almonds, and a hint of garlic. Unlike ordinary sandwiches, it brings a touch of Spanish-inspired flair to your table while keeping the prep simple enough for weeknights. What makes it special? First, the contrast of textures—crispy chicken against creamy sauce—creates a symphony in every bite. Second, it’s versatile: serve it warm for dinner or cold for picnics. If you love bold flavors, you’ll adore how the smokiness of the romesco complements the juicy chicken. For more sandwich inspiration, check out my Ultimate Guide to Sandwiches or explore Quick Weeknight Dinners for time-saving ideas.
Why I Love This Recipe
This sandwich holds a special place in my heart because it reminds me of my first trip to Barcelona, where I fell in love with romesco sauce. Back home, I spent weeks perfecting my own version, and pairing it with crunchy chicken felt like a revelation. Now, it’s my go-to for cheering up rainy days or celebrating small wins. Every time I make it, the aroma takes me back to those sunlit Spanish plazas—and I hope it brings a little joy to your kitchen too.
“`
Health and Nutrition
Why it’s good for your body
The Crunchy Chicken Romesco Sandwich packs a nutritious punch while satisfying your taste buds. First, the lean chicken breast delivers high-quality protein to support muscle repair and keep you full longer. Meanwhile, the romesco sauce, made with almonds and roasted red peppers, adds heart-healthy fats and antioxidants. Together, these ingredients create a balanced meal that fuels your body without weighing you down.
Additionally, the Crunchy Chicken Romesco Sandwich includes fiber-rich whole-grain bread, which aids digestion and stabilizes blood sugar levels. The fresh vegetables, like crisp lettuce and juicy tomatoes, provide essential vitamins and hydration. Because the sandwich combines protein, healthy fats, and complex carbs, it offers sustained energy rather than a quick crash.
Finally, the bold flavors of the Crunchy Chicken Romesco Sandwich mean you won’t miss heavy sauces or excess salt. The romesco sauce naturally enhances taste with its smoky, nutty profile, reducing the need for unhealthy additives. Whether you’re refueling after a workout or need a midday pick-me-up, this sandwich delivers both nutrition and satisfaction.
How it fits in a healthy lifestyle
The Crunchy Chicken Romesco Sandwich fits seamlessly into a balanced diet. For those focusing on high-protein meals, the chicken and almonds provide a solid foundation. If you prefer gluten-free options, simply swap the bread for a gluten-free alternative—this sandwich adapts easily to your needs.
Busy weeknights call for quick, wholesome meals, and this sandwich delivers. Pair it with a side of roasted veggies or a light salad for a complete, nutrient-dense dinner. For more heart-healthy meal ideas, explore our Mediterranean-inspired recipes. If you’re meal prepping, the Crunchy Chicken Romesco Sandwich stores well for lunches, making healthy choices effortless. Check out our meal prep guide for more time-saving strategies.
With its versatile ingredients and balanced macros, this sandwich supports active lifestyles without sacrificing flavor. It’s proof that eating well can be delicious and convenient.
A delicious sandwich featuring crispy chicken and rich romesco sauce, perfect for a hearty lunch.
Ingredients
Scale
For the Crust:
2 boneless, skinless chicken breasts
1 cup breadcrumbs
1 egg, beaten
1/2 cup romesco sauce
4 ciabatta rolls
1 cup arugula
1/4 cup sliced red onions
1 tbsp olive oil
Salt and pepper to taste
Instructions
1. Prepare the Crust:
Preheat oven to 375°F (190°C).
Season chicken breasts with salt and pepper. Dip each breast in beaten egg, then coat with breadcrumbs.
Heat olive oil in a skillet over medium heat. Cook chicken for 3-4 minutes per side until golden brown. Transfer to the oven and bake for 10-12 minutes until fully cooked.
Slice ciabatta rolls in half and lightly toast them.
Spread romesco sauce on the bottom half of each roll. Top with arugula, sliced red onions, and a crispy chicken breast. Cover with the top half of the roll.
Start by preheating your oven to 375°F to crisp the chicken while you prep the romesco sauce. For the sauce, toss roasted red peppers, almonds, garlic, and smoked paprika into a food processor and blend until smooth. Drizzle in olive oil as it runs for a rich, velvety texture. Meanwhile, season your chicken cutlets with salt, pepper, and a pinch of cayenne for a subtle kick. Coat them in panko breadcrumbs for maximum crunch, then bake for 20 minutes until golden. While the chicken cooks, lightly toast your ciabatta rolls and slice fresh veggies like lettuce and tomato. To assemble the Crunchy Chicken Romesco Sandwich, spread a generous layer of romesco on both sides of the roll, then stack the crispy chicken, veggies, and a sprinkle of feta. Press gently so everything holds together. For a time-saving hack, make the romesco sauce a day ahead—it deepens the flavors and cuts prep time in half. If you’re short on time, use store-bought rotisserie chicken and crisp it in the oven with breadcrumbs for 10 minutes.
Mistakes I’ve made and learned from
My first attempt at the Crunchy Chicken Romesco Sandwich was a mess—literally. I over-processed the romesco sauce until it turned into a watery paste, and my chicken lost its crunch because I skipped the panko. After trial and error, I learned to pulse the sauce just until chunky and to double-coat the chicken in breadcrumbs for extra texture. Another blunder? Skipping the toasting step for the rolls, which left them soggy. Now, I always toast them lightly, even if I’m in a rush. If you’re new to sauces, my romesco sauce guide breaks down the perfect consistency. And if your chicken isn’t crispy enough, try my oven-fried chicken trick for foolproof results every time.
The Crunchy Chicken Romesco Sandwich carries the bold flavors of Spain’s Catalonia region, where romesco sauce—a smoky blend of roasted peppers, almonds, and tomatoes—has been a staple for centuries. Originally, fishermen paired it with seafood, but creative home cooks soon slathered it on everything, including juicy chicken. Today, the sandwich embodies Mediterranean comfort food with a satisfying crunch. In Barcelona, you might find it served on crusty bread with grilled chicken, while in Valencia, they often add a touch of saffron for extra depth.
Meanwhile, American twists on the Crunchy Chicken Romesco Sandwich lean into convenience without sacrificing flavor. Some families swap traditional almonds for cashews or even pepitas, while others pile on pickled onions for tang. My aunt, for instance, insists on toasting the bread in garlic oil for an extra punch. No matter the variation, the heart of the dish remains: a smoky, nutty sauce that turns simple chicken into something unforgettable.
ays-cooking">How it fits in today’s cooking
Even in fast-paced modern kitchens, the Crunchy Chicken Romesco Sandwich holds its own. Meal preppers love it because the sauce keeps for days, and busy parents appreciate how easily it dresses up leftover chicken. Plus, it’s a star at summer picnics, pairing perfectly with easy pasta salads or crisp white wine. For a lighter take, some cooks grill the chicken instead of frying it or use whole-grain bread.
Its versatility also makes it a favorite for themed dinners. Imagine serving it alongside Spanish tortilla for a tapas night at home. Whether you stick to tradition or experiment with new twists, the Crunchy Chicken Romesco Sandwich bridges the gap between rustic heritage and modern cravings—one delicious bite at a time.
Taste and Texture
What makes it delicious
The Crunchy Chicken Romesco Sandwich delivers a symphony of textures and bold flavors in every bite. Crispy, golden-brown chicken contrasts with the velvety romesco sauce, while fresh lettuce and juicy tomatoes add a refreshing crunch. The sauce—a smoky, nutty blend of roasted peppers, almonds, and garlic—brings a rich depth that lingers on the palate. Meanwhile, the toasted bread holds everything together with a satisfying chew. Whether you take your first bite or your last, the Crunchy Chicken Romesco Sandwich keeps you coming back for its irresistible balance of hearty and bright flavors.
r">Boosting the flavor
Elevate your Crunchy Chicken Romesco Sandwich with a few easy tweaks. For extra heat, sprinkle smoked paprika or drizzle homemade chili oil over the chicken. Swap romesco for a sun-dried tomato spread if you crave deeper umami notes. Top with pickled onions or a handful of peppery arugula to add tang and freshness. If you love bold contrasts, try pairing it with a side of garlic herb fries for a meal that’s as satisfying as it is flavorful. A little creativity goes a long way!
Tips for Success
Best practices for results
Always toast the bread until golden for the perfect crunch in your Crunchy Chicken Romesco Sandwich. Meanwhile, spread the romesco sauce evenly to ensure every bite bursts with flavor. For juicier chicken, let it rest for 5 minutes after cooking before slicing. Additionally, layer the ingredients in this order: sauce, chicken, then veggies to prevent sogginess. Finally, press the sandwich lightly to help everything hold together without squishing it flat.
>Mistakes to avoid
Avoid overcooking the chicken, as it will dry out and ruin the texture of your Crunchy Chicken Romesco Sandwich. Instead, use a meat thermometer to check for 165°F at the thickest part. Many also skip toasting the bread, which leads to a limp sandwich. For extra crispness, try our perfect toast techniques. Another common mistake? Using watery veggies like tomatoes without patting them dry first. For more tips on prepping ingredients, check out our guide on ingredient prep basics.
Serving and Pairing Suggestions
How to serve this dish
Serve your Crunchy Chicken Romesco Sandwich on a rustic wooden board or a colorful plate to make it pop. For a casual lunch, slice it diagonally and skewer each half with a toothpick for easy handling. Meanwhile, for a picnic or potluck, wrap it in parchment paper to keep it fresh and portable. Garnish with a sprinkle of fresh parsley or a drizzle of extra romesco sauce for an Instagram-worthy touch. Whether you’re hosting a summer gathering or need a quick weeknight meal, this sandwich always shines.
What goes well with it
Pair your Crunchy Chicken Romesco Sandwich with a crisp, citrusy salad like our Avocado Citrus Salad to balance the rich flavors. Alternatively, serve it alongside a bowl of roasted garlic potato wedges for a hearty combo. For drinks, a chilled glass of sparkling lemonade or a light Spanish white wine enhances the sandwich’s bold romesco sauce. If you love dipping sauces, try our Creamy Cilantro Lime Dip for an extra zesty kick.
What is a Crunchy Chicken Romesco Sandwich made of?
A Crunchy Chicken Romesco Sandwich typically features crispy chicken, romesco sauce (made with roasted red peppers, almonds, and garlic), and fresh toppings like lettuce or arugula. The sandwich often includes crusty bread or a toasted bun to complement the textures. The combination of crunchy chicken and rich romesco sauce creates a flavorful, satisfying meal.
How do you make romesco sauce for a chicken sandwich?
To make romesco sauce for your Crunchy Chicken Romesco Sandwich, blend roasted red peppers, toasted almonds, garlic, olive oil, and a touch of vinegar or lemon juice. Some recipes include breadcrumbs or smoked paprika for extra depth. This versatile sauce adds a smoky, nutty flavor that pairs perfectly with crispy chicken.
rank-math-faq-item">
What sides go well with a Crunchy Chicken Romesco Sandwich?
Classic sides like sweet potato fries, a simple green salad, or roasted vegetables complement a Crunchy Chicken Romesco Sandwich nicely. For a lighter option, try a cucumber salad or grilled corn. The bold flavors of the sandwich work well with both hearty and fresh accompaniments.
Can I make a vegetarian version of a Crunchy Chicken Romesco Sandwich?
Yes! Substitute the chicken with crispy fried cauliflower, breaded eggplant, or a plant-based chicken alternative to create a vegetarian Crunchy Chicken Romesco Sandwich. The romesco sauce and toppings remain the same, delivering the same delicious flavors without the meat.
Best Homemade Shrimp Butter – Easy Recipe
Introduction
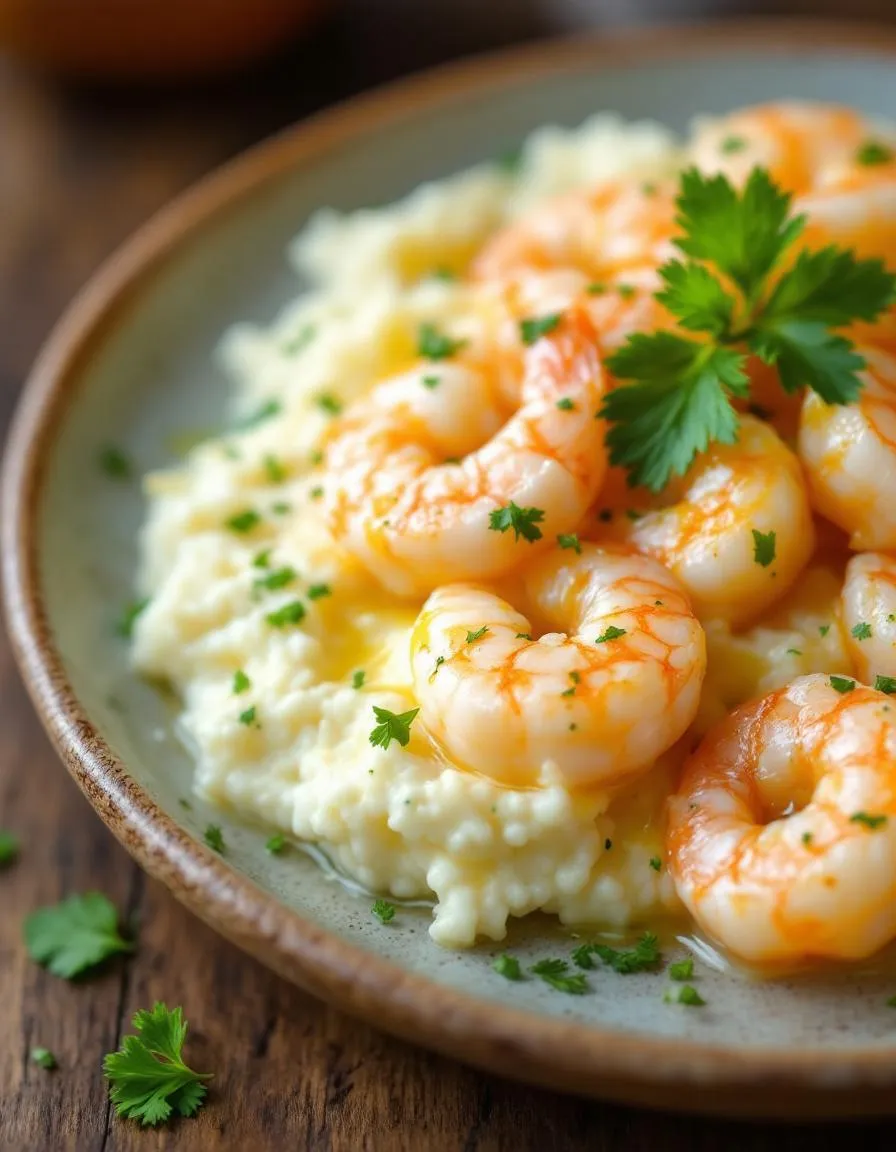
If you’ve ever craved a rich, flavorful spread that elevates everything from crusty bread to grilled seafood, then Homemade Shrimp Butter deserves a spot in your kitchen. Whether you’re hosting a dinner party or simply treating yourself, this luxurious blend of sweet shrimp, creamy butter, and aromatic herbs transforms ordinary meals into something unforgettable. Plus, it’s surprisingly easy to make—no fancy skills required, just a love for bold flavors.
Homemade Shrimp Butter is a versatile condiment that captures the essence of coastal cuisine in every bite. By blending fresh shrimp with high-quality butter, garlic, and a hint of lemon, you create a spread that’s both decadent and deeply satisfying. Unlike store-bought versions, this recipe lets you control the ingredients, ensuring a fresher, more vibrant taste. It pairs perfectly with everything from warm baguettes to grilled steak, making it a must-have for any home cook who values both flavor and simplicity. If you enjoy experimenting with garlic-infused dishes, you’ll adore how this recipe builds on those same principles. And for those who appreciate quick, elegant appetizers, it’s a game-changer—just like my 5-minute crostini ideas.
Why I Love This Recipe
Homemade Shrimp Butter holds a special place in my heart because it reminds me of summer evenings by the shore, where my family would gather for seafood feasts. The first time I made it, I realized how a few simple ingredients could evoke such nostalgia and joy. Now, I keep a batch in my fridge year-round—it’s my secret weapon for impressing guests or adding a touch of indulgence to weeknight meals. Every time I whip it up, I’m transported back to those sunny, laughter-filled moments, and that’s the kind of magic I want to share with you.
Health and Nutrition
Why it’s good for your body
Homemade Shrimp Butter packs a nutritious punch while delighting your taste buds. First, shrimp delivers lean protein, which helps build muscle and keeps you full longer. Additionally, it provides omega-3 fatty acids, known to support heart health and reduce inflammation. Since you control the ingredients, Homemade Shrimp Butter avoids unnecessary additives found in store-bought versions.
Moreover, shrimp contains essential nutrients like selenium, a powerful antioxidant that boosts immunity. When combined with high-quality butter, Homemade Shrimp Butter offers a dose of healthy fats for sustained energy. The dish also includes garlic, which adds flavor while promoting circulation and immune function. For a balanced meal, pair it with whole grains or vegetables to maximize its benefits.
Finally, Homemade Shrimp Butter fits seamlessly into varied diets. Whether you focus on keto, paleo, or simply eating cleaner, this recipe adapts effortlessly. By using fresh, wholesome ingredients, you ensure every bite nourishes your body. Plus, its rich flavor means you won’t miss processed alternatives.
How it fits in a healthy lifestyle
Homemade Shrimp Butter aligns perfectly with balanced eating habits. For a heart-healthy approach, use grass-fed butter and enjoy it in moderation alongside fiber-rich foods like roasted vegetables. If you follow a high-protein diet, pair it with grilled chicken or a crisp salad for a satisfying meal.
This versatile dish also suits gluten-free lifestyles, making it a great alternative to processed spreads. For more inspiration on wholesome cooking, explore our guide to gluten-free dinner ideas. If you’re mindful of portions, try spreading a thin layer on whole-grain toast or using it as a flavorful topping for seafood. For tips on balancing indulgence with nutrition, check out our post on healthy meal prep strategies.
Ultimately, Homemade Shrimp Butter proves that delicious food can also be nutritious. With mindful choices, it elevates everyday meals without compromising health goals.
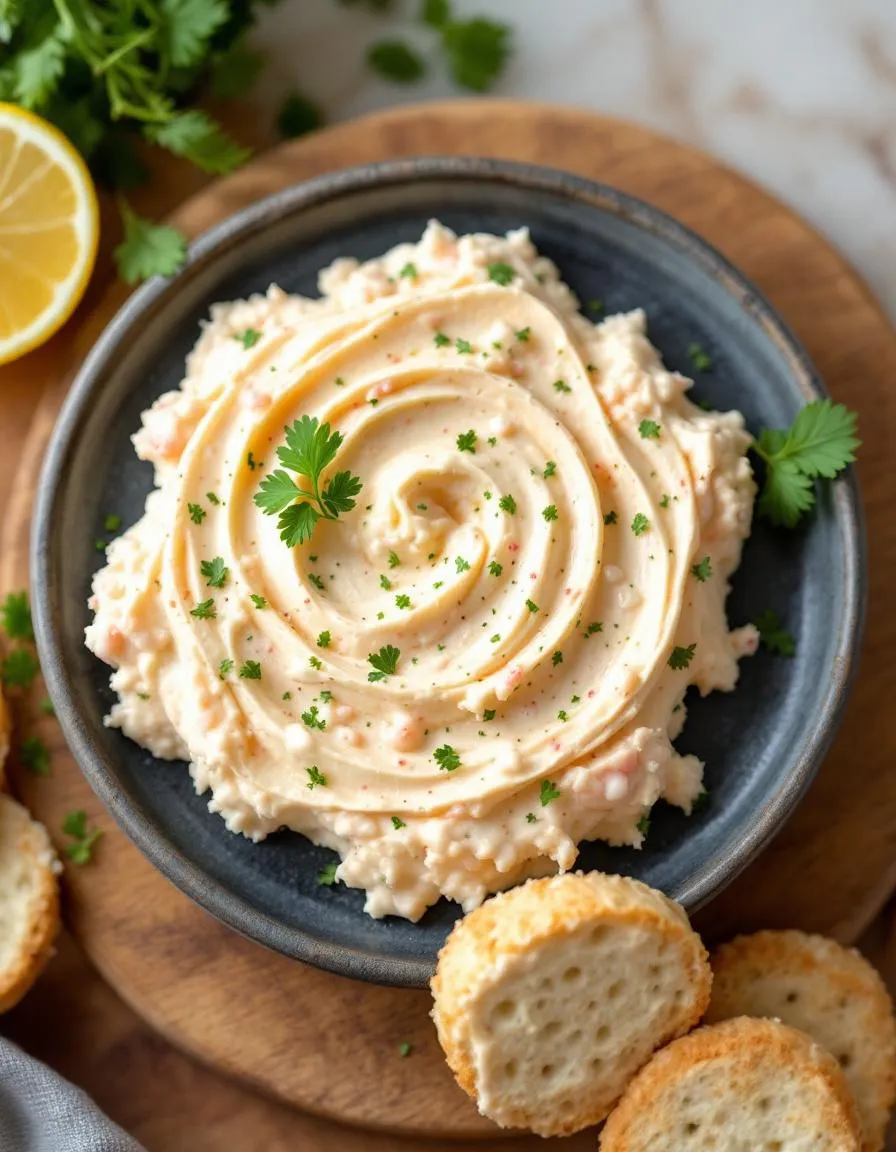
A rich and flavorful shrimp butter perfect for spreading on bread or crackers.
Ingredients
Scale
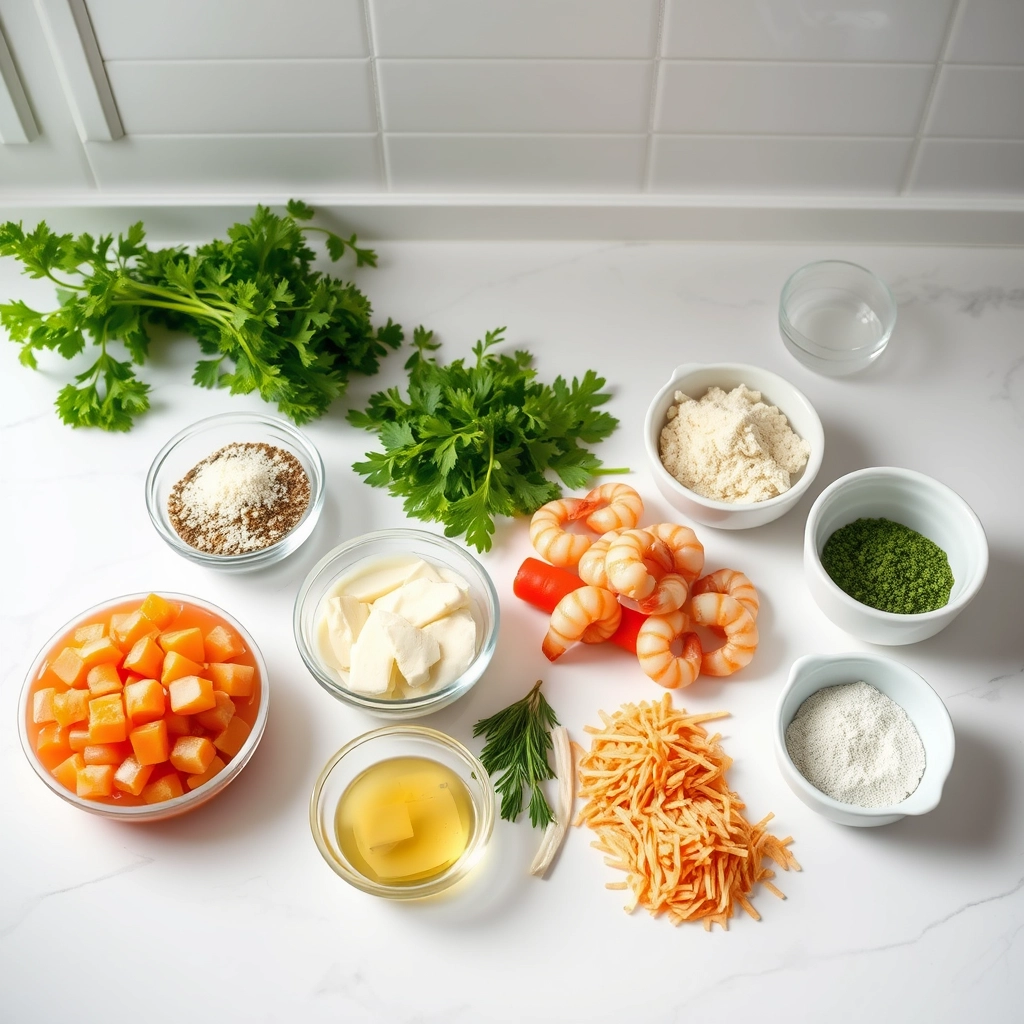
For the Crust:
1/2 lb cooked shrimp, peeled and deveined
1/2 cup unsalted butter, softened
1 clove garlic, minced
1 tbsp lemon juice
1/4 tsp salt
1/4 tsp black pepper
1 tbsp fresh parsley, chopped
Instructions
1. Prepare the Crust:
In a food processor, combine the shrimp, butter, garlic, lemon juice, salt, and pepper.
Pulse until the mixture is smooth and well combined.
Transfer the shrimp butter to a bowl and fold in the chopped parsley.
Serve immediately or refrigerate in an airtight container for up to 3 days.
Notes
You can customize the seasonings to taste.
How to Prepare This Dish
Steps and time-saving tips
Making Homemade Shrimp Butter is easier than you think, and the results are worth every minute. Start by finely chopping cooked shrimp—this ensures a smooth, spreadable texture. Next, soften unsalted butter at room temperature for about 30 minutes so it blends effortlessly. Use a hand mixer or food processor to whip the butter until creamy, then fold in the shrimp, a squeeze of lemon juice, minced garlic, and a pinch of paprika for a subtle kick. If you love extra flavor, toss in fresh herbs like parsley or chives. Once everything is well combined, transfer the mixture onto a sheet of parchment paper and roll it into a log. Chill it in the fridge for at least an hour to firm up, or freeze it for later use. For a time-saving hack, prep the shrimp ahead by cooking and storing them in the fridge overnight. Also, double the batch and freeze half—Homemade Shrimp Butter keeps well for weeks, ready to elevate toast, seafood, or grilled veggies anytime.
and-learned-from">Mistakes I’ve made and learned from
I’ve learned the hard way that overcooked shrimp turn rubbery and ruin the texture of Homemade Shrimp Butter. Now, I follow the perfect shrimp cooking method for tender, juicy results every time. Another lesson? Skipping the taste test before chilling. Once, I undersalted the butter, and the flavor fell flat. Now, I always adjust seasoning while the mixture is soft—trust me, it’s harder to fix later. If you’re new to flavored butters, check out my guide to compound butters for more foolproof tips. Small tweaks make all the difference!
Cultural Connection and Variations
Where this recipe comes from
Homemade Shrimp Butter carries a rich history, blending coastal traditions with home-cooked comfort. Originating in French seafood cuisine, it evolved as a luxurious spread for crusty bread or elegant canapés. However, Southern cooks in the U.S. gave it a bold twist, blending Cajun spices or a splash of hot sauce for extra kick. Meanwhile, in Scandinavia, you might find a lighter version with dill and lemon, often paired with smoked salmon.
In my family, Homemade
Shrimp Butter became a holiday staple, especially during festive gatherings. My grandmother whipped it up with extra garlic and a pinch of paprika, serving it alongside her famous garlic herb dinner rolls. Over time, friends shared their own twists—some added crabmeat for depth, while others folded in chives for freshness. Whether you enjoy it as a spread or a seafood topping, this dish bridges cultures through simple, flavorful ingredients.
How it fits in today’s cooking
Today, Homemade Shrimp Butter stays relevant because it’s versatile and quick to prepare. Busy home cooks love it for elevating weeknight meals, like tossing it with pasta or slathering it on grilled corn. Meanwhile, food bloggers reinvent it as a gourmet appetizer, pairing it with easy homemade focaccia for effortless entertaining.
Seasonal adaptations keep it fresh, too. In summer, chefs brighten it with lime zest, while winter versions might feature roasted garlic for warmth. Plus, its make-ahead convenience fits modern routines—whip up a batch on Sunday, and enjoy it all week. Whether you stick to tradition or experiment, Homemade Shrimp Butter proves that classic flavors never go out of style.
>Taste and Texture
What makes it delicious
Homemade Shrimp Butter delivers a rich, savory experience with every bite. The creamy, velvety texture melts effortlessly on your tongue, while the sweet, briny flavor of fresh shrimp shines through. A hint of garlic and lemon adds brightness, balancing the decadent butter base. Meanwhile, a touch of herbs like parsley or chives brings a fresh, fragrant finish. Whether spread on warm bread or melted over seafood, Homemade Shrimp Butter transforms simple dishes into something extraordinary. The combination of umami depth and smooth mouthfeel makes it irresistible.
Boosting the flavor
Elevate your Homemade Shrimp Butter by experimenting with bold flavors. Try adding a pinch of smoked paprika for a subtle smoky kick or a dash of cayenne for gentle heat. For extra richness, fold in a spoonful of garlic herb compound butter to amplify the aromatic notes. If you love citrus, a squeeze of lime zest brightens the profile beautifully. Pair it with crusty no-knead bread to let the buttery shrimp flavor take center stage. Small tweaks can make a big difference, so don’t hesitate to get creative.
Tips for Success
Best practices for results
Always use fresh, high-quality shrimp for your Homemade Shrimp Butter to ensure the best flavor. Meanwhile, soften the butter slightly before mixing so it blends smoothly with the other ingredients. Additionally, chill the mixture for at least 30 minutes before serving to let the flavors meld perfectly. For extra richness, consider adding a splash of lemon juice right before blending. Finally, store any leftovers in an airtight container to maintain freshness.
Mistakes to avoid
Avoid over-processing the shrimp in the food processor, or the texture will become pasty instead of creamy. Instead, pulse just until combined. Also, don’t skip the chilling step, as Homemade Shrimp Butter needs time to firm up for the ideal spreadable consistency. If you’re unsure about seasoning, check out our guide on balancing flavors for foolproof tips. Lastly, never use frozen shrimp without thawing and patting them dry first—excess moisture can ruin the texture. For more on handling seafood, see our seafood prep basics.
Serving and Pairing Suggestions
How to serve this dish
Elevate your Homemade Shrimp Butter by serving it in a small, elegant ramekin or a chilled glass bowl for a touch of sophistication. For a rustic vibe, spread it on a wooden board alongside crusty bread or crackers. Meanwhile, garnish with fresh herbs like parsley or chives to add color and freshness. This versatile dish shines at brunch gatherings, holiday appetizer spreads, or even as a luxurious snack for wine nights. Additionally, consider pairing it with warm, toasted baguette slices for an irresistible texture contrast.
h-it">What goes well with it
Homemade Shrimp Butter pairs beautifully with crisp white wines like Sauvignon Blanc or a chilled rosé, as their acidity balances the rich, savory flavors. For a non-alcoholic option, try it with sparkling water infused with lemon or cucumber. If you’re serving it as part of a larger meal, complement it with a light salad like our Fresh Spring Salad for a refreshing contrast. Alternatively, turn it into a showstopping appetizer by pairing it with our Garlic Herb Crostini, which adds a delightful crunch and aromatic depth.
What is shrimp butter used for?
Homemade Shrimp Butter is a versatile condiment perfect for spreading on crusty bread, topping grilled seafood, or enhancing pasta dishes. Its rich, savory flavor also makes it a great addition to compound butters for steak or roasted vegetables.
rank-math-faq-item">
How long does homemade shrimp butter last in the fridge?
When stored properly in an airtight container, Homemade Shrimp Butter stays fresh for up to 5 days in the refrigerator. For longer storage, you can freeze it for up to 3 months without losing much flavor.
Can I use frozen shrimp to make shrimp butter?
Absolutely! Thaw frozen shrimp completely and pat them dry before using. Homemade Shrimp Butter made with frozen shrimp tastes just as delicious as fresh, as long as you use high-quality shrimp without added preservatives.
What’s the best way to serve shrimp butter?
Homemade Shrimp Butter shines when served slightly softened at room temperature. Try it on warm baguette slices, melted over grilled fish, or as a flavorful finishing touch for creamy risottos and mashed potatoes.