Easy Lazy Chocolate Chip Cookie Bars Recipe

easy-lazy-chocolate-chip-cookies

When Life Calls for Lazy Baking (And Chocolate, Always Chocolate)

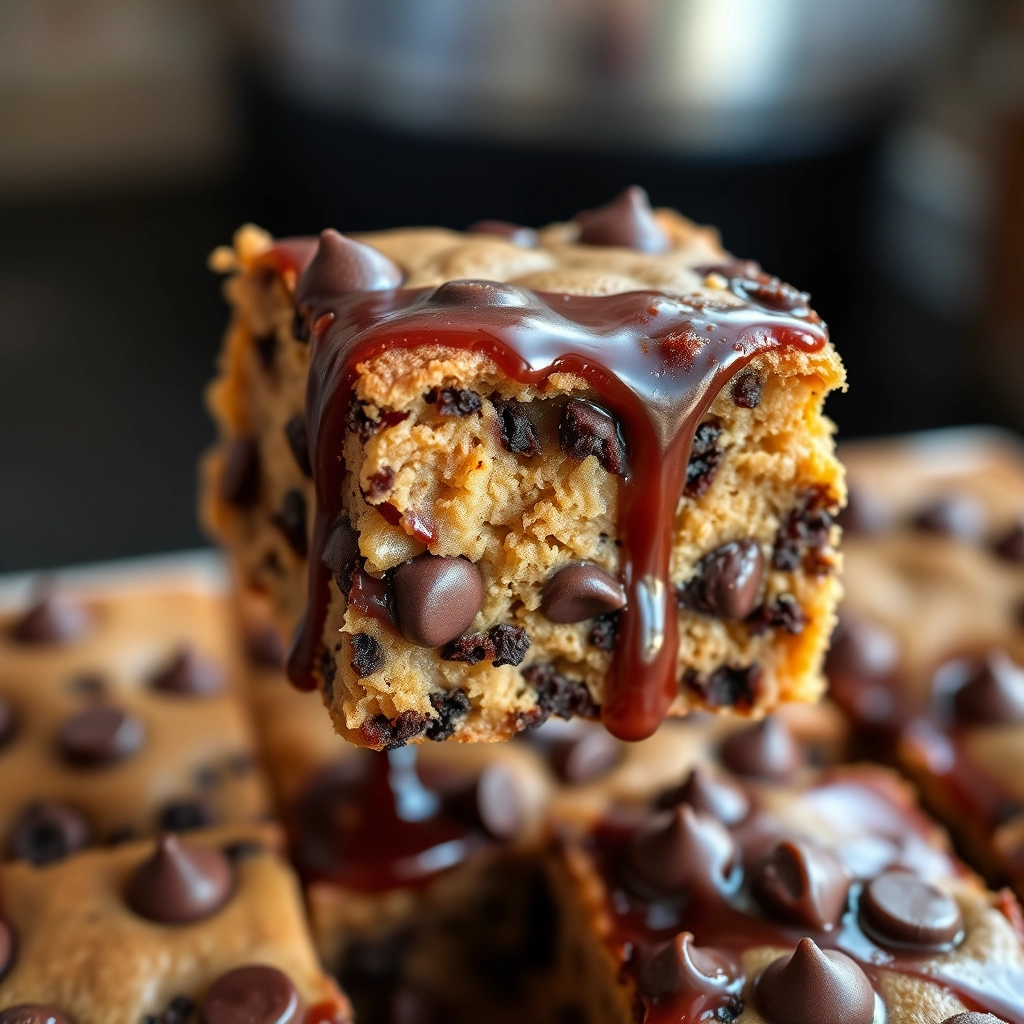
There are days when even the most devoted bakers among us need a shortcut. Maybe it’s a rainy Sunday when the couch feels extra cozy, or perhaps it’s one of those hectic weeknights when the idea of rolling out individual cookies feels like climbing Mount Everest. That’s when these Easy Lazy Chocolate Chip Cookie Bars swoop in to save the day—like a warm, buttery hug with melty chocolate pockets.

I first made these during a particularly chaotic week when my toddler discovered the art of “helping” in the kitchen (read: flour tornadoes). These bars require just one bowl, no fancy equipment, and bake up into the most forgiving, crowd-pleasing treat. The edges get delightfully crisp while the center stays soft and gooey—like the lovechild of a chocolate chip cookie and a blondie.

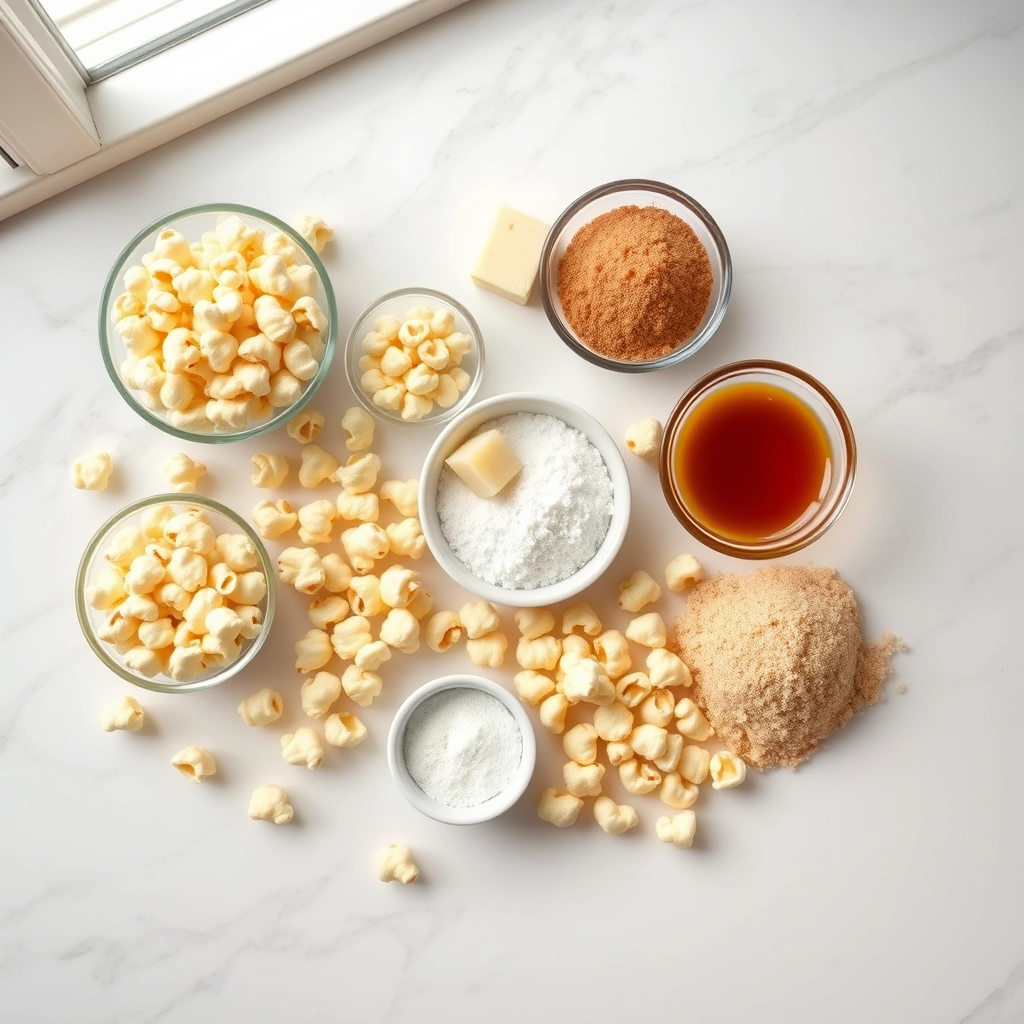
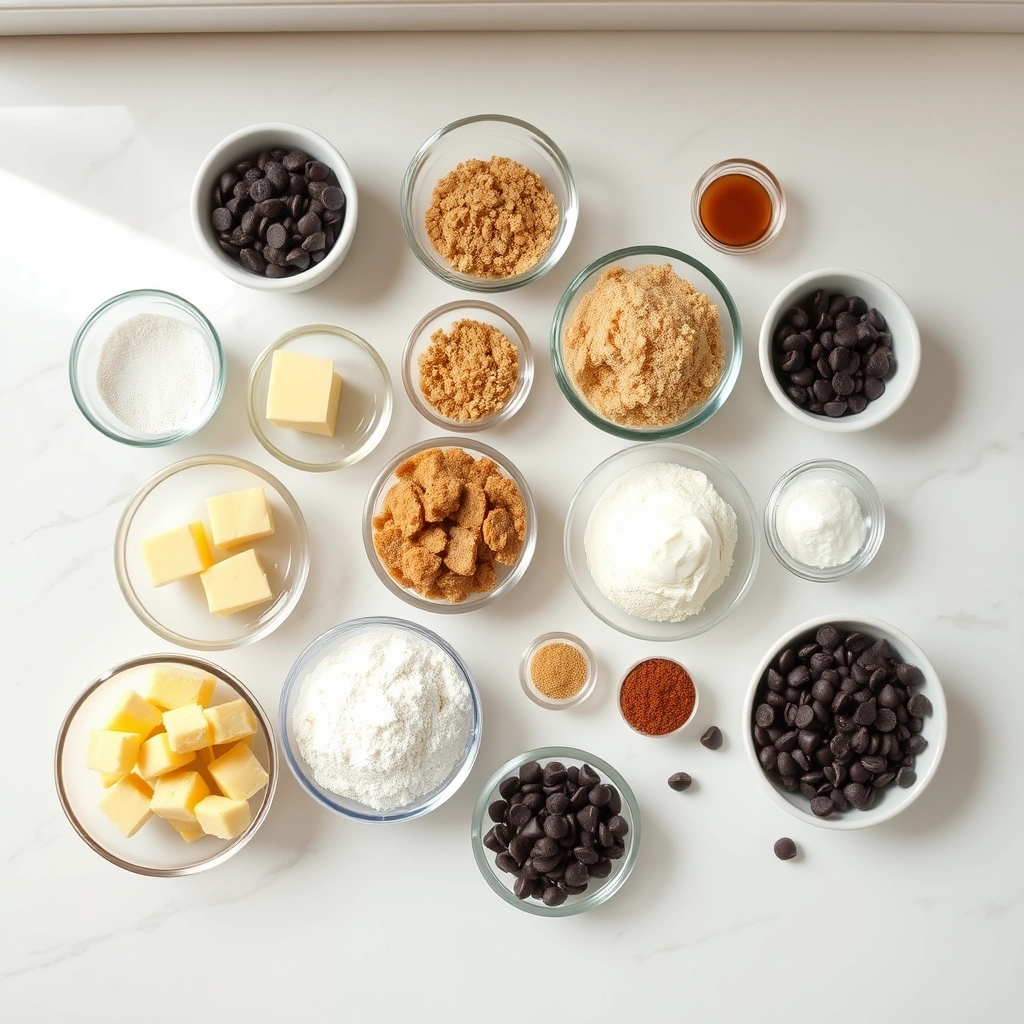
Ingredients You Probably Already Have

  • 1 cup (2 sticks) unsalted butter, melted – The melted butter is our lazy secret weapon! No waiting for it to soften, and it creates those irresistible chewy edges.
  • 1 ½ cups light brown sugar, packed – That molasses-kissed sweetness that makes these bars taste like childhood.
  • 2 large eggs + 1 egg yolk – The extra yolk adds richness without making them cakey. Save the white for morning scrambled eggs!
  • 2 teaspoons pure vanilla extract – Splurge on the good stuff here—it makes all the difference.
  • 2 ¼ cups all-purpose flour – Spoon and level it, friends. No one wants dense hockey pucks.
  • 1 teaspoon baking soda – Our little lift agent for the perfect thickness.
  • ½ teaspoon fine sea salt – The quiet hero that makes the chocolate sing.
  • 2 cups chocolate chips – I use semi-sweet, but milk chocolate or a mix with chunks makes these extra indulgent.

One Bowl Magic: The Lazy Baker’s Ritual

Preheat your oven to 350°F (175°C) and line a 9×13-inch baking pan with parchment paper (or give it a good buttering if you’re feeling extra rustic).

  1. Melt the butter in a large microwave-safe bowl (or saucepan if you’re old-school). Let it cool just enough that it won’t scramble the eggs—about 5 minutes. This is the perfect time to sip your tea and admire your lazy baking prowess.
  2. Whisk in the brown sugar until it looks like liquid caramel. The mixture will be thick and glossy—this is where the chewiness begins!
  3. Add eggs and vanilla, whisking vigorously for about 30 seconds. You’ll see the mixture lighten slightly. Pro tip: Crack eggs into a separate bowl first unless you enjoy fishing out shell fragments.

Now comes the best part: dump in the flour, baking soda, and salt. Switch to a wooden spoon or spatula and mix just until no dry streaks remain. The dough will be thick and luxurious—like edible cookie dough (because, let’s be honest, we’ll all sneak a spoonful).

Fold in the chocolate chips with gentle enthusiasm. I always reserve a handful to sprinkle on top because pretty food tastes better, science says so. Scrape the dough into your prepared pan and use the back of your spoon to press it evenly. Don’t fuss too much—rustic is charming!

Pro Tips, Variations, and Substitutions

These lazy chocolate chip cookie bars are forgiving and easy to customize! Here are some ways to make them your own:

  • Butter substitute: Swap melted butter for coconut oil or vegetable oil in a pinch (use 3/4 cup).
  • Flour swap: For gluten-free bars, use a 1:1 gluten-free flour blend.
  • Mix-in ideas: Try adding chopped nuts, shredded coconut, or a swirl of peanut butter before baking.
  • Extra gooey: Underbake by 2-3 minutes for fudgier bars (the center should still look slightly wet).
  • Salt lovers: Sprinkle flaky sea salt on top right after baking for a sweet-salty kick.

What to Serve With Your Cookie Bars

These bars are delicious on their own, but here are some cozy pairings:

  • A cold glass of milk (classic never fails!)
  • Vanilla ice cream for an easy cookie sundae
  • Hot coffee or cocoa on chilly afternoons
  • Fresh berries for a slightly lighter treat

Storage and Reheating Tips

Keep your cookie bars fresh and delicious with these simple tips:

  • Room temperature: Store in an airtight container for up to 5 days.
  • Freezing: Wrap individual bars in plastic wrap, then freeze in a ziplock bag for up to 3 months.
  • Reheating: Microwave for 10-15 seconds to restore that fresh-baked warmth, or pop frozen bars in a 300°F oven for 5-8 minutes.

Frequently Asked Questions

Can I use chocolate chunks instead of chips?
Absolutely! Chunks will give you those beautiful melty pockets of chocolate – just chop a chocolate bar into rough pieces.

Why are my bars cakey instead of chewy?
This usually means you overmixed the batter or baked too long. Next time, mix just until combined and check for doneness a few minutes early.

Can I halve this recipe?
Yes! Use an 8×8 pan and bake for 20-25 minutes. All ingredients can be divided in half except the egg – use 1 whole egg.

How do I know when they’re done baking?
The edges should be golden and the center will look set but still slightly soft. A toothpick inserted should have moist crumbs (not wet batter).

Final Thoughts

There’s something magical about the smell of chocolate chip cookies wafting through the house – and now you can enjoy that cozy feeling with even less effort! These lazy cookie bars deliver all the nostalgic flavor we love, with the bonus of being easier to make (and share). Whether you’re packing them in lunchboxes, serving them at book club, or sneaking a midnight snack straight from the pan, I hope this recipe brings you as much joy as it does in my kitchen. Happy baking!

Print
clock clock iconcutlery cutlery iconflag flag iconfolder folder iconinstagram instagram iconpinterest pinterest iconfacebook facebook iconprint print iconsquares squares iconheart heart iconheart solid heart solid icon

Lazy Chocolate Chip Cookie Bars

  • Author: Trusted Blog

Description

Easy-to-make chocolate chip cookie bars that require minimal effort but deliver maximum flavor.


Ingredients

Scale

For the Crust:

  • 1 cup (2 sticks) unsalted butter, melted
  • 1 cup light brown sugar, packed
  • 1/2 cup granulated sugar
  • 2 large eggs
  • 2 teaspoons vanilla extract
  • 2 1/4 cups all-purpose flour
  • 1 teaspoon baking soda
  • 1/2 teaspoon salt
  • 2 cups semi-sweet chocolate chips

Instructions

1. Prepare the Crust:

  1. Preheat oven to 350°F (175°C). Grease a 9×13-inch baking pan.
  2. In a large bowl, whisk together melted butter, brown sugar, and granulated sugar until smooth.
  3. Add eggs and vanilla extract, whisking until fully combined.
  4. Stir in flour, baking soda, and salt until just combined. Fold in chocolate chips.
  5. Spread dough evenly into the prepared baking pan.
  6. Bake for 25-30 minutes or until edges are golden brown and center is set.
  7. Allow to cool completely before cutting into bars.

Notes

You can customize the seasonings to taste.

Smash Burger Tacos

smash-burger-tacos

Smash Burger Tacos: When Two Comfort Foods Collide

You know those days when you just can’t decide between a juicy burger or crispy tacos? Last Tuesday was one of those evenings for me. The rain pattered against the kitchen window, my stomach growled, and my cravings were at war. Then it hit me – why choose? Thus began my love affair with Smash Burger Tacos, the glorious mashup that satisfies every comfort food craving in one delicious bite.

Ingredients You’ll Need (And Why We Love Them)

  • 1 lb ground chuck (80/20 blend) – That perfect fat ratio means juicy, flavorful patties that crisp up beautifully when smashed
  • 8 small flour tortillas – Street taco size works best, but feel free to go bigger if you’re feeling ambitious
  • 1 tbsp Worcestershire sauce – Our secret umami booster for the meat
  • 1 tsp garlic powder + 1 tsp onion powder – The dynamic duo that adds depth without overpowering
  • 4 slices American cheese – Yes, the classic burger cheese – it melts like a dream
  • 1 cup shredded iceberg lettuce – For that essential crunch factor
  • 1/2 cup diced white onion – Soak them in ice water for 10 minutes if you want to tame the bite
  • Special sauce (1/4 cup mayo + 2 tbsp ketchup + 1 tbsp pickle relish + 1 tsp mustard) – Trust me, you’ll want to make extra

Let’s Get Smashing: Step-by-Step

Step 1: Mix your ground chuck with Worcestershire, garlic powder, onion powder, and a generous pinch of salt and pepper. Don’t overwork it – just gently combine. I like to let mine sit for 15 minutes so the flavors get cozy.

Step 2: Heat a cast iron skillet or griddle over medium-high heat. While it heats, divide your meat into 8 equal portions (they’ll look small, but remember – we’re smashing!).

Pro Tip: Place a sheet of parchment paper over each portion before smashing. This prevents sticking and makes cleanup a breeze.

Step 3: Working in batches, place a meat portion in the hot skillet, cover with parchment, and SMASH it flat with a spatula or burger press. We’re talking paper-thin here – this creates those lacy, crispy edges that make smash burgers magical.

Step 4: Cook for about 2 minutes until beautifully browned, then flip. Immediately place half a slice of cheese on each patty and let it melt while the other side crisps up (about 1 more minute).

Pro Tips, Variations, and Substitutions

Making smash burger tacos is all about embracing creativity while keeping things simple. Here are some ways to customize your tacos to perfection:

  • Cheese Lovers: Swap American cheese for pepper jack, cheddar, or even a melty blue cheese for an extra kick.
  • Vegetarian Twist: Use smashed black bean or mushroom patties instead of beef—just make sure they’re well-seasoned!
  • Gluten-Free Option: Skip the flour tortillas and use corn tortillas or crisp lettuce wraps for a lighter bite.
  • Extra Crunch: Add pickles, crispy onions, or crushed tortilla chips for a satisfying texture contrast.

What to Serve With Smash Burger Tacos

These tacos are hearty on their own, but pairing them with the right sides can turn them into a full feast. Here are some favorites:

  • Classic Fries: Crispy shoestring or seasoned waffle fries are always a hit.
  • Coleslaw: A tangy, creamy slaw cuts through the richness of the beef.
  • Grilled Corn: Smoky charred corn with a sprinkle of chili powder adds a summery touch.
  • Dill Pickle Spears: Because pickles and burgers are a match made in heaven.

Storage and Reheating Tips

While these tacos are best enjoyed fresh, you can store and reheat leftovers with a little know-how:

  • Storage: Keep the beef patties and tortillas separate in airtight containers in the fridge for up to 2 days.
  • Reheating: Warm the patties in a skillet over medium heat to retain their crisp edges. Microwave tortillas for 10–15 seconds wrapped in a damp paper towel to keep them soft.
  • Freezing: Cooked patties can be frozen for up to a month. Thaw in the fridge before reheating.

Frequently Asked Questions

Can I make smash burger tacos ahead of time?
Yes! Prep the patties and toppings in advance, but assemble just before serving to keep the tortillas from getting soggy.

What’s the best way to smash the burgers?
Use a sturdy spatula or the bottom of a heavy skillet. Press down firmly and quickly for thin, crispy edges.

Can I use ground turkey instead of beef?
Absolutely! Just add a bit of oil to the pan since turkey is leaner, and season well for maximum flavor.

How do I keep the tortillas from tearing?
Warm them slightly before assembling—this makes them more pliable and less likely to crack.

Final Thoughts

Smash burger tacos are the ultimate mashup of two beloved comfort foods—juicy, crispy beef meets soft, warm tortillas in every bite. Whether you’re cooking for a crowd or just treating yourself, this recipe is sure to become a favorite. Don’t be afraid to play with toppings and flavors to make it your own. After all, the best meals are the ones shared (or savored solo) with joy. Happy cooking!

Print
clock clock iconcutlery cutlery iconflag flag iconfolder folder iconinstagram instagram iconpinterest pinterest iconfacebook facebook iconprint print iconsquares squares iconheart heart iconheart solid heart solid icon

Smash Burger Tacos

  • Author: Trusted Blog

Description

A delicious fusion of smash burgers and tacos, featuring crispy beef patties in soft tortillas with classic toppings.


Ingredients

Scale

For the Crust:

  • 1 lb ground beef (80/20 blend)
  • 1 tsp salt
  • 1 tsp black pepper
  • 1 tsp garlic powder
  • 8 small flour tortillas
  • 1 cup shredded lettuce
  • 1/2 cup diced tomatoes
  • 1/2 cup diced onions
  • 1/2 cup shredded cheddar cheese
  • 1/4 cup mayonnaise
  • 1 tbsp ketchup
  • 1 tbsp mustard
  • 1 tbsp pickles, chopped

Instructions

1. Prepare the Crust:

  1. In a bowl, mix ground beef with salt, pepper, and garlic powder. Divide into 8 small balls.
  2. Heat a skillet over medium-high heat. Place a beef ball on the skillet, then press firmly with a spatula to create a thin patty. Cook for 2-3 minutes per side until crispy. Repeat for all patties.
  3. Warm the tortillas in a dry skillet or microwave for 20 seconds.
  4. Mix mayonnaise, ketchup, and mustard to make the burger sauce.
  5. Assemble tacos: place a smash patty on each tortilla, top with lettuce, tomatoes, onions, cheese, pickles, and a drizzle of the burger sauce.
  6. Serve immediately and enjoy!

Notes

You can customize the seasonings to taste.

Easy Caramel Puff Corn – Sweet and Crunchy Snack

easy-caramel-puff-corn-snack

The Cozy Magic of Caramel Puff Corn

There’s something about the scent of caramel wafting through the kitchen that feels like a warm hug. I first discovered caramel puff corn at a little holiday gathering years ago—one bite of that sweet, crunchy goodness, and I was utterly smitten. It reminded me of caramel popcorn but with an airy, melt-in-your-mouth lightness that made it impossible to stop nibbling. Now, it’s my go-to treat for movie nights, potlucks, or just those afternoons when I crave something sweet without the fuss. Best of all? It comes together in minutes with just a handful of ingredients.

Ingredients You’ll Need

  • 8 cups puff corn – Look for the light, airy kind (like Corn Pops or similar). They’re the perfect blank canvas for caramel.
  • 1 cup brown sugar – Packed tight for that deep, molasses-rich sweetness.
  • 1/2 cup unsalted butter – Because everything tastes better with butter, and unsalted lets you control the flavor.
  • 1/4 cup light corn syrup – The secret to that glossy, crackly caramel coating.
  • 1/2 teaspoon baking soda – A pinch of magic to give the caramel a slight lift and crispness.
  • 1 teaspoon vanilla extract – A splash for warmth and depth.
  • Pinch of salt – To balance the sweetness and make every bite irresistible.

That’s it! Simple, pantry-friendly ingredients that transform into something utterly addictive. If you’re feeling adventurous, a sprinkle of cinnamon or a handful of toasted nuts would be lovely here too.

Step-by-Step: Making the Magic Happen

  1. Preheat & Prep: Start by preheating your oven to 250°F (120°C). Line a large baking sheet with parchment paper—this will save you from sticky cleanup later. Pour your puff corn into an enormous mixing bowl (trust me, you’ll need the space!).
  2. The Caramel Dance: In a medium saucepan over medium heat, melt the butter, brown sugar, and corn syrup together. Stir gently until the mixture is smooth and bubbling, about 3-4 minutes. Don’t rush this—let the sugar dissolve completely for the perfect texture.
  3. Baking Soda Surprise: Remove the caramel from heat and quickly stir in the baking soda, vanilla, and salt. It’ll foam up slightly, which is exactly what you want! This little reaction gives the caramel that delightful crispness.
  4. Coat Those Puffs: Pour the caramel over the puff corn and gently fold with a spatula until every piece is glistening. Take your time here—you want even coverage without crushing the delicate puffs.

And that’s where we’ll pause for now—just before the final bake that turns this sticky mixture into golden perfection. But don’t worry, the best part (aka eating it straight from the tray) is coming up next!

Pro Tips, Variations, and Substitutions

Making caramel puff corn is incredibly easy, but a few little tricks can take it from good to unforgettable. Here are some of my favorite tips and twists:

  • Use fresh puff corn – Stale puff corn won’t crisp up as nicely, so check the freshness before starting.
  • Add a pinch of salt – A tiny sprinkle of flaky sea salt at the end balances the sweetness beautifully.
  • Mix in nuts or pretzels – For extra crunch, stir in chopped pecans, peanuts, or mini pretzels before baking.
  • Try different extracts – Swap vanilla for almond, maple, or even a dash of cinnamon for a cozy twist.
  • Make it dairy-free – Use coconut oil instead of butter for a plant-based version.

What to Serve With Caramel Puff Corn

This sweet and crunchy snack is perfect on its own, but it also pairs wonderfully with:

  • A scoop of vanilla ice cream for a fun sundae topping
  • Hot cocoa or spiced cider on a chilly evening
  • A charcuterie board with cheeses and fruits for contrast
  • Movie night alongside buttery popcorn (sweet and salty combo!)

Storage and Reheating Tips

To keep your caramel puff corn fresh and crispy:

  • Store in an airtight container at room temperature for up to 5 days.
  • Revive the crunch by spreading it on a baking sheet and warming it in a 300°F oven for 5 minutes.
  • Avoid humidity – Moisture is the enemy of crispiness, so keep it sealed tight!

Frequently Asked Questions

Can I use microwave popcorn instead of puff corn?

While you can, the texture won’t be the same—puff corn stays lighter and crispier. If you must substitute, use plain popcorn (no butter or salt).

Why is my caramel puff corn chewy?

This usually means it wasn’t baked long enough. Spread it thinly and bake until golden for maximum crunch.

Can I make this ahead for a party?

Absolutely! Make it 1–2 days in advance and store it properly—it holds up beautifully.

Is there a way to make this less sweet?

Yes! Reduce the brown sugar slightly or add an extra pinch of salt to balance the sweetness.

Final Thoughts

There’s something so comforting about the sweet, buttery aroma of caramel puff corn filling the kitchen. Whether you’re making it for a party, a cozy night in, or just because, this snack is guaranteed to bring smiles. It’s one of those recipes that feels like a warm hug—simple, nostalgic, and utterly irresistible. I hope it becomes a favorite in your home too!

Print
clock clock iconcutlery cutlery iconflag flag iconfolder folder iconinstagram instagram iconpinterest pinterest iconfacebook facebook iconprint print iconsquares squares iconheart heart iconheart solid heart solid icon

Caramel Puff Corn

  • Author: Trusted Blog

Description

A sweet and crunchy snack made with puff corn and a homemade caramel coating.


Ingredients

Scale

For the Crust:

  • 8 cups puff corn
  • 1 cup unsalted butter
  • 1 cup brown sugar
  • 1/2 cup light corn syrup
  • 1/2 tsp baking soda
  • 1 tsp vanilla extract

Instructions

1. Prepare the Crust:

  1. Preheat oven to 250°F (120°C). Line a large baking sheet with parchment paper.
  2. In a medium saucepan, melt butter over medium heat. Stir in brown sugar and corn syrup. Bring to a boil and cook for 2 minutes, stirring constantly.
  3. Remove from heat and stir in baking soda and vanilla extract. The mixture will foam slightly.
  4. Pour caramel mixture over puff corn in a large bowl. Gently stir until evenly coated.
  5. Spread coated puff corn onto the prepared baking sheet. Bake for 45 minutes, stirring every 15 minutes.
  6. Let cool completely before breaking into pieces and serving.

Notes

You can customize the seasonings to taste.

Stunning Mongolian Ground Beef Noodles Recipe for a Quick Dinner Delight!

mongolian-ground-beef-noodles-recipe

The Night I Fell in Love with Mongolian Ground Beef Noodles

It was one of those evenings when the clock seemed to tick faster than my ability to plan dinner. My stomach growled impatiently, and my fridge stared back at me with the usual suspects—ground beef, half an onion, and a lonely bundle of noodles. Then, like a culinary lightning bolt, I remembered a recipe my friend had raved about: Mongolian Ground Beef Noodles. Twenty minutes later, I was twirling the most flavorful, saucy, utterly comforting noodles around my fork, wondering how something so simple could taste so extraordinary. Now, it’s my go-to dish for busy nights when takeout sounds tempting, but homemade feels oh-so-right.

Ingredients You’ll Need (and Why They Matter)

  • 1 lb ground beef (85% lean): The perfect balance of richness without being greasy. If you’re feeling adventurous, ground turkey works too!
  • 8 oz dried noodles (udon or lo mein): Chewy, thick noodles hold onto that glorious sauce like a dream.
  • 3 cloves garlic, minced: Because every great dish starts with garlic sizzling in a pan.
  • 1-inch knob of ginger, grated: That warm, zingy kick that makes Mongolian flavors sing.
  • 1/2 cup low-sodium soy sauce: The salty, umami backbone—low-sodium lets you control the seasoning.
  • 1/4 cup brown sugar: Just enough sweetness to caramelize into sticky perfection.
  • 2 tbsp hoisin sauce: My secret weapon for depth and a hint of spice.
  • 1 tbsp rice vinegar: A bright splash to cut through the richness.
  • 1 tsp sesame oil: A drizzle at the end for that nutty aroma you’ll want to bottle.
  • Green onions and sesame seeds: For that fresh crunch and pretty finish!

Let’s Make Magic: Step-by-Step

Step 1: Noodle Prep
Cook your noodles according to the package, but undercook them by 1 minute—they’ll finish cooking in the sauce later. Drain and toss with a tiny bit of oil to prevent sticking. (Pro tip: Save a splash of pasta water to adjust sauce consistency!)

Step 2: The Sauce Waltz
In a small bowl, whisk together soy sauce, brown sugar, hoisin, and rice vinegar. Taste and adjust—want more tang? Add a splash more vinegar. Sweeter? A pinch more sugar. This is your sauce symphony, after all.

Step 3: Beefy Goodness
Heat a large skillet over medium-high and add the beef, breaking it up with a wooden spoon. Let it get a bit crispy at the edges for extra texture. Drain any excess fat (but leave a tablespoon for flavor!), then push the beef to one side.

Step 4: Aromatics Awaken
In the empty space, add garlic and ginger. Stir for just 20 seconds until fragrant—don’t let them burn! Then mix everything together, letting those flavors marry.

Pro Tips, Variations, and Substitutions

This Mongolian ground beef noodles recipe is wonderfully adaptable to suit your taste and pantry staples. Here are some ways to make it your own:

  • Protein Swap: Ground turkey, chicken, or even plant-based crumbles work beautifully if you’re not using beef.
  • Noodle Options: Swap udon for lo mein, rice noodles, or even spaghetti in a pinch.
  • Veggie Boost: Add sliced bell peppers, mushrooms, or shredded carrots for extra color and nutrition.
  • Heat Lovers: Add a teaspoon of chili paste or red pepper flakes for a spicy kick.
  • Gluten-Free: Use tamari instead of soy sauce and your favorite GF noodles.

What to Serve With Mongolian Ground Beef Noodles

This dish is satisfying on its own, but here are some delicious pairings:

  • A simple cucumber salad with rice vinegar dressing
  • Steamed or roasted broccoli
  • Crispy vegetable spring rolls
  • A pot of jasmine or green tea

Storage and Reheating Tips

Leftovers (if you’re lucky enough to have any!) keep beautifully:

  • Refrigerator: Store in an airtight container for up to 3 days.
  • Freezer: Freeze portions for up to 2 months. Thaw overnight in the fridge before reheating.
  • Reheating: Warm in a skillet over medium heat with a splash of water or broth to revive the sauce. Microwave works too – cover and heat in 30-second intervals, stirring between each.

Frequently Asked Questions

Can I make this dish ahead of time?

Absolutely! The sauce can be mixed a day in advance. Cook the noodles fresh when ready to serve for best texture.

Is there a way to make this less sweet?

Simply reduce the brown sugar by half or substitute with honey for a more mellow sweetness.

Can I use frozen vegetables?

Yes! Add frozen stir-fry veggies directly to the pan – no need to thaw first. Just cook an extra minute or two.

What if I don’t have fresh ginger?

Ground ginger works in a pinch – use about 1/4 teaspoon per tablespoon of fresh ginger called for.

There’s something magical about how these simple ingredients come together to create such comforting, flavorful noodles. Whether you’re cooking for a busy weeknight or craving some takeout-style comfort at home, this Mongolian ground beef noodles recipe is sure to become a regular in your rotation. The savory-sweet sauce clinging to every noodle, the satisfying bite of beef, and that irresistible aroma filling your kitchen – it’s pure dinner happiness in every bowl. Don’t be surprised if your family starts requesting it weekly!

Print
clock clock iconcutlery cutlery iconflag flag iconfolder folder iconinstagram instagram iconpinterest pinterest iconfacebook facebook iconprint print iconsquares squares iconheart heart iconheart solid heart solid icon

Stunning Mongolian Ground Beef Noodles Recipe for a Quick Dinner Delight!

  • Author: Trusted Blog

Description

A savory and quick Mongolian-inspired ground beef noodle dish that’s perfect for a weeknight dinner.


Ingredients

Scale

For the Crust:

  • 8 oz rice noodles
  • 1 lb ground beef
  • 3 cloves garlic, minced
  • 1 tbsp ginger, grated
  • 1/2 cup soy sauce
  • 1/4 cup brown sugar
  • 2 tbsp hoisin sauce
  • 1 tbsp sesame oil
  • 2 green onions, sliced
  • 1 tbsp vegetable oil
  • 1 tsp red pepper flakes (optional)

Instructions

1. Prepare the Crust:

  1. Cook rice noodles according to package instructions, then drain and set aside.
  2. In a large skillet, heat vegetable oil over medium-high heat. Add ground beef and cook until browned, breaking it into small pieces.
  3. Add minced garlic and grated ginger to the skillet. Cook for 1-2 minutes until fragrant.
  4. In a small bowl, whisk together soy sauce, brown sugar, hoisin sauce, and sesame oil. Pour the sauce over the beef and stir to combine.
  5. Add the cooked noodles to the skillet and toss until well coated with the sauce. Cook for another 2-3 minutes.
  6. Garnish with sliced green onions and red pepper flakes if desired. Serve hot.

Notes

You can customize the seasonings to taste.

Classic Meatloaf Recipe

classic-meatloaf-recipe

The Comforting Embrace of Classic Meatloaf

There’s something deeply comforting about the aroma of meatloaf wafting through the kitchen as evening falls. It takes me back to my grandmother’s house, where the worn wooden table always had room for one more plate. She’d serve thick slices with a side of buttery mashed potatoes, and suddenly all the worries of the day would melt away. That’s the magic of this humble dish – it’s not just dinner, it’s a warm hug on a plate.

Ingredients You’ll Need

  • 2 lbs ground beef (80/20 blend) – The slight fat content keeps it juicy
  • 1 cup breadcrumbs – Panko works wonderfully for texture
  • 1 large onion, finely diced – Cook until translucent for sweetness
  • 2 cloves garlic, minced – Because everything’s better with garlic
  • 2 eggs – Our binding agent that holds the love together
  • 1/2 cup whole milk – Adds moisture and richness
  • 1/4 cup ketchup + extra for glaze – The classic sweet-tangy touch
  • 1 tbsp Worcestershire sauce – That umami depth we crave
  • 1 tsp dried thyme – My secret flavor booster
  • Salt and pepper – Season generously, friends!

Creating Your Comfort Masterpiece

First, preheat your oven to 350°F (175°C) and lightly grease a loaf pan. There’s something therapeutic about preparing the pan – it’s like tucking in your ingredients for a cozy bake.

Step 1: In a skillet over medium heat, sauté your onions until they turn soft and translucent, about 5 minutes. Add the garlic in the last 30 seconds – we want fragrant, not burnt! Let this mixture cool slightly before adding to your meat. (Hot onions can start cooking the eggs prematurely – learned that the hard way!)

Step 2: In a large mixing bowl, combine the ground beef, breadcrumbs, sautéed onions and garlic. Make a well in the center and crack in the eggs. Pour in the milk, ketchup, Worcestershire sauce, and all your seasonings. Now comes the fun part – roll up your sleeves and mix gently with your hands. There’s no better tool than your fingers to feel when the consistency is just right – evenly combined but not overworked.

Step 3: Transfer the mixture to your prepared loaf pan, shaping it gently. I like to make a slight indentation down the center to prevent doming. Now for the crowning glory – spread a generous layer of ketchup over the top. Some folks like to mix their ketchup with brown sugar or mustard, but I’m a purist when it comes to this nostalgic glaze.

Pro Tips, Variations, and Substitutions

Every home cook has their own twist on classic meatloaf, and that’s what makes it so special! Here are some ways to make this recipe your own:

  • For extra moisture: Add ¼ cup of grated zucchini or shredded carrots to the mix.
  • Gluten-free option: Swap breadcrumbs for gluten-free oats or crushed crackers.
  • Spice it up: A dash of Worcestershire sauce or a spoonful of Dijon mustard adds depth.
  • Leaner meat: Use ground turkey or chicken instead of beef, but add an extra egg to keep it tender.
  • Sweet & tangy glaze: Mix ketchup with a little brown sugar and apple cider vinegar for a caramelized finish.

What to Serve with Meatloaf

Meatloaf is the ultimate comfort food, and it pairs beautifully with classic sides. Here are a few favorites:

  • Creamy mashed potatoes
  • Buttery green beans or roasted carrots
  • Mac and cheese for the ultimate comfort meal
  • A simple garden salad with a tangy vinaigrette

Storage and Reheating Tips

Leftover meatloaf is just as delicious the next day! Here’s how to keep it fresh and tasty:

  • Storage: Let it cool completely, then wrap tightly in foil or store in an airtight container for up to 4 days in the fridge.
  • Freezing: Slice and freeze individual portions for up to 3 months. Thaw in the fridge before reheating.
  • Reheating: Warm slices in a 350°F oven for 10–15 minutes or microwave covered with a damp paper towel to keep them moist.

Frequently Asked Questions

Can I make meatloaf ahead of time?
Absolutely! Assemble the meatloaf, cover it, and refrigerate for up to 24 hours before baking. You may need to add a few extra minutes to the cooking time.

Why does my meatloaf fall apart?
If your meatloaf crumbles, it may need more binding agents. Try adding an extra egg or a bit more breadcrumbs next time.

Can I cook meatloaf without a loaf pan?
Yes! Shape it into a free-form loaf on a baking sheet for a crispy exterior, or use a muffin tin for individual portions (bake for 20–25 minutes instead).

How do I know when it’s done?
The internal temperature should reach 160°F. If you don’t have a thermometer, look for the juices to run clear and the edges to pull away slightly from the pan.

A Comforting Final Thought

There’s something truly special about a well-made meatloaf—warm, hearty, and full of nostalgia. Whether it’s a weeknight dinner or a Sunday family meal, this classic dish never fails to bring comfort to the table. So gather your loved ones, slice into that tender loaf, and savor every bite. Happy cooking!

Print
clock clock iconcutlery cutlery iconflag flag iconfolder folder iconinstagram instagram iconpinterest pinterest iconfacebook facebook iconprint print iconsquares squares iconheart heart iconheart solid heart solid icon

Classic Meatloaf Recipe

  • Author: Trusted Blog

Description

A comforting and hearty meatloaf with a sweet and tangy glaze, perfect for family dinners.


Ingredients

Scale

For the Crust:

  • 1 1/2 lbs ground beef
  • 1 cup breadcrumbs
  • 1/2 cup milk
  • 1 large egg
  • 1 small onion, finely chopped
  • 2 cloves garlic, minced
  • 1/4 cup ketchup
  • 1 tbsp Worcestershire sauce
  • 1 tsp salt
  • 1/2 tsp black pepper
  • 1/4 cup brown sugar
  • 1/4 cup ketchup (for glaze)
  • 1 tbsp mustard (for glaze)

Instructions

1. Prepare the Crust:

  1. Preheat oven to 350°F (175°C). Lightly grease a loaf pan.
  2. In a large bowl, combine ground beef, breadcrumbs, milk, egg, onion, garlic, ketchup, Worcestershire sauce, salt, and pepper. Mix until well combined.
  3. Transfer the mixture into the prepared loaf pan and shape into a loaf.
  4. In a small bowl, mix brown sugar, ketchup, and mustard for the glaze. Spread evenly over the meatloaf.
  5. Bake for 50-60 minutes, or until the internal temperature reaches 160°F (70°C). Let rest for 10 minutes before slicing.

Notes

You can customize the seasonings to taste.