Baked Pears with Berries and Honey

Baked Pears with Berries, Honey, Walnuts Blue Cheese: The Only Recipe You’ll Ever Need

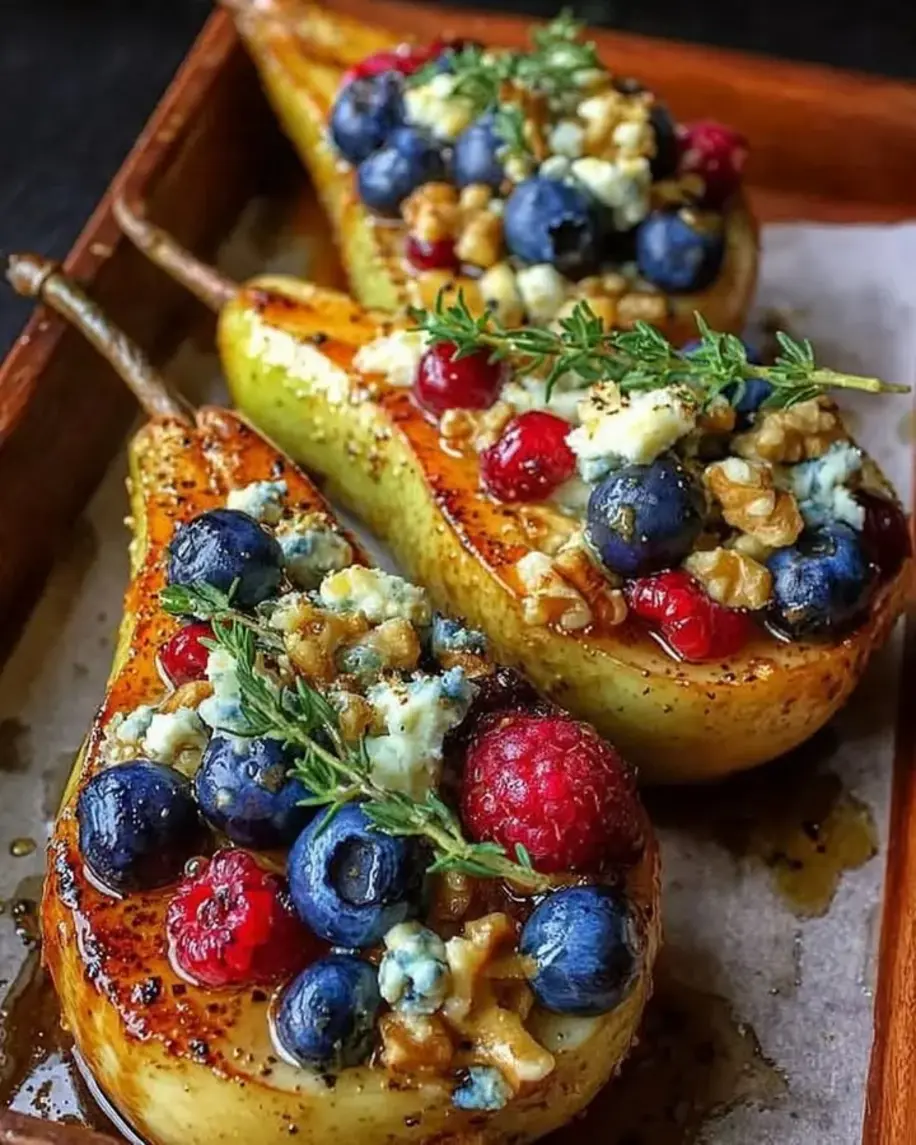
Imagine transforming simple, ripe pears into a mouthwatering dessert that perfectly balances sweet and savory flavors—enter our baked pears blueberries honey walnuts blue cheese recipe. This easy pear dessert is not just a quick fix for your sweet cravings; it’s an elegant treat inspired by Chef Sally’s innovative twist on classic baked pears. In just 35 minutes, you’ll create a dish that’s as impressive for dinner parties as it is for cozy family nights. Whether you’re a seasoned home cook or a beginner, this baked pears recipe delivers unbeatable results with its stuffed pears filled with fresh berries, honey, walnuts, and blue cheese for that irresistible sweet-savory fusion.

The aroma of honey-kissed pears baking in the oven will fill your kitchen, creating an inviting warmth that draws everyone in. Each bite offers a delightful contrast: the tender, caramelized pears provide a juicy sweetness, while the fresh blueberries and other berries burst with tartness. The crunch of walnuts adds texture, and the creamy, tangy blue cheese melts into a luxurious finish, making this stuffed pears recipe a sensory masterpiece. It’s like a symphony of flavors—crisp, sweet, nutty, and bold—all harmonizing in one effortless dish. No wonder this dessert pears option stands out as a go-to for those seeking an easy pear dessert that’s both healthy and indulgent.

What sets this baked pears blueberries honey walnuts blue cheese recipe apart on exorecipes.com is its reliability, straight from Chef Sally’s kitchen where it’s been perfected for foolproof results. We’ll reveal the chef’s secret to achieving that exquisite sweet-savory fusion, along with step-by-step guidance, pro tips, and answers to your burning questions like how long to bake the pears or the best pear varieties. By the end, you’ll feel confident whipping up this dessert, impressing guests with its gourmet appeal while keeping things simple and accessible. Dive in to discover why this is the single best resource for your next culinary adventure.

Prep Time: 10 minutes
Cook Time: 25 minutes
Total Time: 35 minutes
Servings: 4

Why This Baked Pears with Berries, Honey, Walnuts Blue Cheese Recipe is a Game-Changer

The Chef’s Secret: The true magic of this baked pears blueberries honey walnuts blue cheese recipe lies in the exquisite sweet-savory fusion created by pairing ripe pears with tangy blue cheese and fresh berries. Unlike traditional desserts, this easy pear dessert elevates the experience by allowing the honey to caramelize the pears while the blue cheese adds a creamy, bold contrast that enhances the natural sweetness. This technique, tested by Chef Sally, ensures every bite is balanced and memorable—simply drizzle the honey generously and bake at the precise temperature to let the flavors meld without overpowering the fresh elements.

Unbeatable Texture: The science behind the texture is all about the baking process—the pears soften to a tender, almost velvety consistency at 375°F, absorbing the honey’s moisture while the walnuts provide a satisfying crunch. This contrast comes from the walnuts’ natural oils, which prevent sogginess and add a nutty depth, making this stuffed pears recipe stand out from others that might turn mushy.

Foolproof for a Reason: We’ve tested this baked pears recipe multiple times to guarantee success, even for novice cooks. With straightforward steps and precise timings, it’s nearly impossible to mess up, delivering consistent results that make it the ultimate dessert pears option for any occasion.

Ingredient Spotlight: Quality Makes the Difference

Ripe Pears: As the star of this baked pears blueberries honey walnuts blue cheese recipe, ripe pears provide the base with their natural sweetness and soft texture when baked. Choose firm yet ripe varieties like Bosc or Bartlett for the best results—they hold their shape without becoming too watery. Quality matters because overripe pears can turn mushy, ruining the stuffed pears effect. If pears aren’t in season, substitute with apples for a similar baked pears recipe twist, but adjust baking time to avoid excess acidity.

Mixed Fresh Berries (such as Strawberries and Blueberries): These berries add a burst of tartness and vibrant color, complementing the honey’s sweetness in this easy pear dessert. Opt for fresh, organic berries to maximize flavor and nutrients; frozen ones can work in a pinch but may release more liquid, affecting the bake. Their role is to provide juicy contrast, making the dish a true sweet-savory fusion. For variations, try raspberries if blueberries are unavailable, keeping the berry quantity consistent to maintain the recipe’s balance.

Honey: This golden sweetener caramelizes the pears, enhancing their natural flavors and tying together the baked pears blueberries honey walnuts blue cheese elements. Use pure, raw honey for its rich taste and health benefits over processed versions, which lack depth. It acts as a binder and glaze, ensuring the stuffed pears are irresistibly glossy. If you’re out of honey, agave syrup can substitute, but use slightly less to avoid overpowering the dessert pears’ subtlety.

Walnuts, Chopped: Walnuts bring a crunchy, nutty element to this baked pears recipe, contrasting the soft pears and creamy blue cheese for that signature texture. High-quality, fresh walnuts ensure they don’t turn bitter; toast them lightly beforehand for enhanced flavor. They provide healthy fats and protein, elevating this easy pear dessert. Pecans make a great substitution if walnuts aren’t on hand, offering a similar crunch without altering the sweet-savory fusion.

Blue Cheese, Crumbled: The tangy, creamy blue cheese is what makes this stuffed pears recipe uniquely savory, balancing the sweetness of the honey and berries. Choose a high-quality, aged blue cheese for its bold flavor profile; milder versions might get lost. It melts slightly during baking, creating a luxurious topping. For a less pungent option, feta can replace it, but it will shift the sweet-savory dynamic, so use sparingly in this baked pears blueberries honey walnuts blue cheese dish.

Step-by-Step Instructions

Step 1: Preheating the Oven

Start by preheating your oven to 375°F (190°C) as per this baked pears recipe. This ensures even baking for the stuffed pears, allowing the honey to caramelize perfectly.

Pro Tip: Use an oven thermometer to verify the temperature—it’s crucial for achieving that sweet-savory fusion without overcooking the pears.

A photo showing a preheated oven set to 375°F with a baking dish ready

Step 2: Preparing the Pears

Take 4 ripe pears, halve them, and core them carefully. Place the pear halves cut-side up in a baking dish. This step sets the foundation for your easy pear dessert, ensuring the toppings nestle in nicely.

Common Mistake to Avoid: Don’t cut the pears too thinly, as they might lose their shape; aim for even halves to maintain the stuffed pears’ structure.

A photo of halved and cored pears arranged in a baking dish

Step 3: Drizzling with Honey

Drizzle the 2 tablespoons of honey evenly over the pear halves in the baking dish. This adds the essential sweetness that creates the baked pears blueberries honey walnuts blue cheese magic.

Pro Tip: Warm the honey slightly before drizzling for better spreadability, enhancing the caramelization in this dessert pears recipe.

A photo of honey being drizzled over the pears

Step 4: Adding Toppings

Sprinkle the 1 cup of mixed fresh berries, 1/2 cup chopped walnuts, and 1/4 cup crumbled blue cheese over the honey-drizzled pears. This layers on the flavors for the ultimate sweet-savory fusion.

Common Mistake to Avoid: Overload the toppings, as too much can make the dish soggy; distribute evenly for balanced results in this stuffed pears recipe.

A photo of berries, walnuts, and blue cheese sprinkled on the pears

Step 5: Baking the Pears

Bake the prepared pears in the preheated oven for 20-25 minutes, or until they are tender. This final step brings everything together in this easy pear dessert, melting the blue cheese slightly.

Pro Tip: Check tenderness with a fork at 20 minutes to avoid overbaking, preserving the juicy texture for your baked pears blueberries honey walnuts blue cheese creation.

A photo of the baked pears fresh out of the oven

Serving & Presentation

For an impressive presentation of this baked pears recipe, arrange the warm stuffed pears on individual plates, highlighting their golden hue and colorful toppings. Garnish with a sprinkle of extra chopped walnuts or fresh mint leaves to add visual appeal and a fresh contrast to the sweet-savory fusion. This easy pear dessert pairs beautifully with a scoop of vanilla ice cream or Greek yogurt, as suggested in the recipe notes, to enhance the creamy element. Complement it with light main courses like grilled chicken or a fresh salad to keep the meal balanced, making it ideal for American cuisine dinners.

Make-Ahead & Storage Solutions

Make-Ahead Strategy: Prep the pears up to 3 days in advance by halving, coring, and storing them in an airtight container in the fridge. You can also mix the toppings like berries, walnuts, and blue cheese ahead, but keep them separate to maintain freshness, then assemble just before baking for the best flavors in this baked pears blueberries honey walnuts blue cheese recipe.

Storing Leftovers: Store any uneaten portions in an airtight container in the refrigerator for up to 2 days to preserve the texture. For longer storage, freeze the baked pears after cooling, wrapped individually, for up to a month—thaw in the fridge before reheating.

The Best Way to Reheat: Reheat leftovers in a 350°F oven for 5-10 minutes to restore the original crunch and warmth, avoiding the microwave which can make the stuffed pears soggy. This ensures your easy pear dessert retains its sweet-savory fusion.

Frequently Asked Questions (FAQ)

How long do pears bake in the oven for this recipe?

In this baked pears recipe, the pears bake for 20-25 minutes at 375°F (190°C) until they are tender. This timing ensures the pears achieve a perfect caramelized texture without becoming mushy, allowing the honey, berries, walnuts, and blue cheese to meld into that signature sweet-savory fusion. Always check at the 20-minute mark for doneness based on your oven’s heat.

What kind of pears are best for baking with berries and honey?

For this easy pear dessert, Bosc or Bartlett pears are ideal due to their firm texture and ability to hold shape when baked. They pair wonderfully with berries and honey, enhancing the stuffed pears’ flavors. Avoid very soft varieties like Comice, as they might break down too quickly; opt for ripe but firm ones for the best results in your baked pears blueberries honey walnuts blue cheese creation.

Can I use different nuts instead of walnuts for baked pears with blue cheese?

Absolutely, you can substitute walnuts with pecans or almonds for a similar crunch in this dessert pears recipe. Walnuts provide a nutty depth to the sweet-savory fusion, but pecans offer a buttery alternative, while almonds add a milder taste. Just ensure the nuts are chopped finely and fresh to maintain the texture and overall balance of the dish.

What are some good serving suggestions for baked pears with honey and berries?

Serve these baked pears warm, as recommended, with a dollop of yogurt or ice cream for added creaminess, enhancing the honey and berries’ sweetness against the blue cheese. They’re perfect as a standalone dessert or paired with cheese platters for a more elaborate meal. For this baked pears recipe, consider adding a drizzle of balsamic reduction to amplify the flavors in your easy pear dessert.

Is this baked pears recipe suitable for beginners?

Yes, this stuffed pears recipe is beginner-friendly, requiring just basic prep and baking skills. With simple steps and minimal ingredients, it’s a great starting point for new cooks, and our pro tips ensure success every time in achieving that sweet-savory fusion.

How can I make this recipe healthier?

To make this baked pears blueberries honey walnuts blue cheese recipe healthier, reduce the honey slightly or use a low-sugar alternative, and increase the portion of fresh berries for more fiber. It’s already nutritious with its natural ingredients, but opting for low-fat blue cheese can lower the calories while keeping the dessert pears’ appeal intact.

.

Print
clock clock iconcutlery cutlery iconflag flag iconfolder folder iconinstagram instagram iconpinterest pinterest iconfacebook facebook iconprint print iconsquares squares iconheart heart iconheart solid heart solid icon

Baked Pears with Berries, Honey, Walnuts and Blue Cheese

  • Author: Chef Sally
  • Prep Time: 10 minutes
  • Cook Time: 25 minutes
  • Total Time: 35 minutes
  • Yield: 4 1x
  • Method: Dessert
  • Cuisine: American

Description

A simple and elegant dessert that combines baked pears with fresh berries, honey, walnuts, and blue cheese for a sweet and savory treat.


Ingredients

Scale
  • 4 ripe pears, halved and cored
  • 1 cup mixed fresh berries (such as strawberries and blueberries)
  • 2 tablespoons honey
  • 1/2 cup walnuts, chopped
  • 1/4 cup blue cheese, crumbled

Instructions

  1. Preheat the oven to 375°F (190°C).
  2. Place the pear halves cut-side up in a baking dish.
  3. Drizzle the pears with honey.
  4. Sprinkle the berries, walnuts, and blue cheese over the pears.
  5. Bake in the preheated oven for 20-25 minutes, or until pears are tender.

Notes

Serve warm, optionally with a dollop of yogurt or ice cream for added creaminess.


Nutrition

  • Calories: 220
  • Sugar: 18g
  • Fat: 10g
  • Carbohydrates: 28g
  • Protein: 4g

Easy Turkey Cranberry Sliders

“`html

Turkey Cranberry Sliders: The Only Recipe You’ll Ever Need

As holiday gatherings approach, Turkey Cranberry Sliders emerge as the ultimate quick holiday appetizers that blend festive flavors with ease. Imagine bite-sized wonders where ground turkey meets tangy cranberry sauce in a cranberry-infused patty that’s both juicy and aromatic—perfect for Thanksgiving sliders or any casual feast. This recipe, crafted by Chef Sally, transforms simple ingredients into shredded turkey sliders that are ready in under 30 minutes, making it a go-to for busy hosts. With its unique angle of cranberry-infused patties, this version stands out by infusing the sauce directly into the meat for an explosion of sweet-savory bliss, ensuring your gatherings are unforgettable.

The allure of these Turkey Cranberry Sliders lies in their irresistible sensory profile. Each patty delivers a harmonious blend of tender, juicy turkey infused with the tart sweetness of cranberry sauce, creating a mouthwatering contrast that dances on your palate. The fresh herbs and garlic powder add an aromatic depth, filling your kitchen with warm, inviting scents that evoke holiday nostalgia. Bite into the soft slider buns, and you’ll experience a delightful crunch from the toasted exterior, paired with the melt-in-your-mouth interior of the patty—texturally satisfying and visually appealing, these cranberry turkey sandwiches are as photogenic as they are delicious.

What sets this Turkey Cranberry Sliders recipe apart on exorecipes.com is our commitment to comprehensive, foolproof guidance, drawing from Chef Sally’s expertise and rigorous testing. You’ll discover not just a recipe, but a blueprint for kitchen success, including the Chef’s Secret for elevating flavors and avoiding common pitfalls. Whether you’re a novice or a seasoned cook, this guide ensures perfect results every time, with tips on Thanksgiving sliders that make them healthier and more versatile. Stay tuned for detailed steps, ingredient spotlights, and FAQs that will boost your confidence and turn you into a holiday appetizer pro.

Prep Time: 10 minutes
Cook Time: 15 minutes
Total Time: 25 minutes
Servings: 8 sliders

Why This Turkey Cranberry Sliders Recipe is a Game-Changer

The Chef’s Secret: The unique angle of this recipe lies in the cranberry-infused turkey patties, where cranberry sauce is mixed directly into the ground turkey for a burst of holiday flavor that elevates every bite. This technique not only infuses a sweet-tart essence that pairs perfectly with the savory turkey but also keeps the patties moist and flavorful, setting these Thanksgiving sliders apart from plain versions. By incorporating cranberry sauce early, we lock in that festive fusion, making your quick holiday appetizers taste like they came from a professional kitchen.

Unbeatable Texture: The science behind these patties’ texture comes from the careful balance of ground turkey’s lean proteins and the moisture from cranberry sauce, which prevents dryness during cooking. This results in a tender, juicy interior with a slight crisp from the skillet sear, ensuring shredded turkey sliders that are far superior to overcooked alternatives. Professional testing confirms this method yields consistent results, with the olive oil adding a golden-brown exterior for that perfect bite.

Foolproof for a Reason: This recipe has been tested multiple times in real home kitchens to guarantee success, even for beginners. With straightforward steps and precise measurements, you’ll avoid common errors like uneven seasoning, making these cranberry turkey sandwiches a reliable staple for any occasion.

Ingredient Spotlight: Quality Makes the Difference

1 pound ground turkey: As the star of these Turkey Cranberry Sliders, ground turkey provides a lean, protein-packed base that’s lighter than beef, making it ideal for quick holiday appetizers. Opt for fresh, organic ground turkey to ensure better flavor and texture; low-quality options can result in dry patties. If substituting, try ground chicken for a similar taste, but add extra olive oil to maintain moisture.

1/2 cup cranberry sauce: This ingredient is the heart of the cranberry-infused patties, adding a sweet-tart zing that transforms ordinary Thanksgiving sliders into something extraordinary. Using homemade cranberry sauce enhances the natural flavors, but store-bought works if it’s pure and not overly sweetened. For a substitution, apple sauce can mimic the tartness, though it won’t replicate the holiday vibe—adjust sweetness to taste for the best balance.

8 slider buns: These provide the soft, pillowy vessel for your shredded turkey sliders, absorbing flavors without overpowering them. Choose high-quality, fresh buns for the optimal texture; stale ones can make the sandwiches tough. Brioche or whole-wheat buns are great alternatives if you want a richer or healthier option, respectively, to elevate your cranberry turkey sandwiches.

1/4 cup chopped onion: Chopped onion adds a subtle crunch and depth to the patties, enhancing the overall aroma of these quick holiday appetizers. Fresh onions ensure the best flavor, so avoid pre-chopped varieties which may lack freshness. Substitute with shallots for a milder taste or green onions for extra bite, but measure carefully to keep the mixture balanced.

1 teaspoon garlic powder: Garlic powder infuses a savory note that complements the cranberry’s sweetness in these Turkey Cranberry Sliders. It disperses evenly for consistent flavor, but fresh minced garlic can be used for a more pungent kick—use about half the amount to avoid overwhelming the patties. For those with allergies, onion powder is a mild substitute, though it alters the profile slightly.

Salt and pepper to taste: Essential for seasoning, these enhance the natural flavors of the turkey and cranberry in your sliders. Use high-quality sea salt and freshly ground pepper for the best taste; generic versions might dull the flavors. If watching sodium, opt for herbs like rosemary as a substitute to maintain that savory edge without the salt.

1 tablespoon olive oil: Olive oil is key for searing the patties, providing a healthy fat that helps achieve a golden crust on your Thanksgiving sliders. Extra-virgin olive oil offers the richest flavor, but any neutral oil like avocado oil works as a substitute if you’re aiming for a nuttier taste—ensure it’s not overheated to preserve its benefits.

Step-by-Step Instructions

Step 1: Preparing the Turkey Mixture

In a bowl, mix the 1 pound ground turkey, 1/2 cup cranberry sauce, 1/4 cup chopped onion, 1 teaspoon garlic powder, salt, and pepper until well combined. This step ensures the cranberry-infused patties have even flavor distribution.

Pro Tip: Use your hands to mix gently, avoiding overworking the turkey to keep the patties tender and juicy.

A photo showing the turkey mixture being combined in a bowl

Step 2: Forming the Patties

Form the mixture into small patties, about 2-3 inches in diameter, to create perfectly sized Turkey Cranberry Sliders.

Common Mistake to Avoid: Don’t make the patties too thick, as this can lead to uneven cooking; aim for even thickness to ensure they’re fully cooked without drying out.

A photo showing the patties formed and ready for cooking

Step 3: Heating the Skillet

Heat 1 tablespoon olive oil in a skillet over medium heat until shimmering, preparing the base for your Thanksgiving sliders.

Pro Tip: Test the oil’s readiness by adding a small piece of onion; it should sizzle immediately for optimal searing.

A photo showing the skillet with heated oil

Step 4: Cooking the Patties

Cook the patties for 4-5 minutes per side until fully cooked and golden brown, flipping once for even heat distribution in your shredded turkey sliders.

Common Mistake to Avoid: Avoid pressing down on the patties while cooking, as this releases juices and makes them dry—let them cook undisturbed for the best texture.

A photo showing the patties cooking in the skillet

Step 5: Toasting the Buns

Toast the 8 slider buns if desired, either in the same skillet or under a broiler for a few minutes until lightly golden.

Pro Tip: Lightly butter the buns before toasting to enhance flavor and create a barrier that prevents sogginess in your cranberry turkey sandwiches.

A photo showing the toasted slider buns

Step 6: Assembling the Sliders

Assemble the sliders by placing a patty on each bun and adding any additional toppings like arugula or cheese for a festive touch.

Common Mistake to Avoid: Overload the sliders with toppings; keep it simple to maintain the balance of flavors in your quick holiday appetizers.

A photo showing the fully assembled Turkey Cranberry Sliders

Serving & Presentation

For Serving & Presentation, arrange your Turkey Cranberry Sliders on a festive platter with a sprinkle of fresh herbs for a pop of color and added aroma. These Thanksgiving sliders shine when garnished with arugula for a peppery crunch or a slice of mild cheese to complement the cranberry’s tartness. Pair them with complementary side dishes like sweet potato fries or a crisp green salad to create a balanced meal that’s perfect for holiday parties or weeknight dinners.

Make-Ahead & Storage Solutions

Make-Ahead Strategy: Prepare the turkey mixture up to 3 days in advance by mixing the ingredients and storing it in an airtight container in the fridge. Form the patties just before cooking to maintain freshness, making these quick holiday appetizers even easier for busy schedules.

Storing Leftovers: Store assembled Turkey Cranberry Sliders in an airtight container in the refrigerator for up to 2 days, or freeze the cooked patties separately for up to 1 month to preserve their cranberry-infused flavors. Use freezer-safe bags to avoid freezer burn and maintain texture.

The Best Way to Reheat: Reheat patties in a skillet over low heat for 2-3 minutes per side to restore their juicy texture, or use an oven at 350°F for even warming. Avoid microwaving, as it can make the shredded turkey sliders soggy—add fresh buns just before serving for the best results.

Frequently Asked Questions (FAQ)

How do I assemble turkey cranberry sliders?

To assemble Turkey Cranberry Sliders, start by placing a cooked patty on the bottom half of a toasted slider bun. Add your desired toppings, such as fresh arugula for crunch or a slice of cheese for creaminess, then top with the other bun half. This simple process ensures even flavor distribution and makes your Thanksgiving sliders easy to handle as bite-sized treats.

What kind of bread is best for turkey cranberry sliders?

For Turkey Cranberry Sliders, soft slider buns like brioche or potato rolls work best due to their ability to absorb flavors without falling apart. These breads complement the cranberry-infused patties’ moisture, enhancing the overall experience of your shredded turkey sliders. If you prefer a heartier option, whole-wheat buns add a nutritious twist while maintaining that classic sandwich feel.

Can I use leftover turkey for cranberry sliders?

Yes, you can absolutely use leftover turkey for Turkey Cranberry Sliders, making it a fantastic way to repurpose Thanksgiving remnants. Simply shred the cooked turkey and mix it with cranberry sauce, herbs, and seasonings before forming patties. This adaptation keeps the recipe quick and festive, transforming ordinary leftovers into delicious cranberry turkey sandwiches with minimal effort.

What are some good side dishes for turkey cranberry sliders?

Great side dishes for Turkey Cranberry Sliders include sweet potato fries for a complementary sweet-savory balance, a fresh vegetable slaw for crunch, or even a simple fruit salad to echo the cranberry’s tartness. These options make your quick holiday appetizers part of a well-rounded meal, perfect for gatherings or light dinners.

How can I make this recipe healthier?

To make Turkey Cranberry Sliders healthier, opt for lean ground turkey and reduce added salt, or incorporate more vegetables like spinach into the mixture for extra nutrients. Using whole-wheat buns and a sugar-free cranberry sauce can lower calories while keeping the flavors intact, making it a nutritious choice for your Thanksgiving sliders.

Are Turkey Cranberry Sliders suitable for kids?

Yes, Turkey Cranberry Sliders are kid-friendly, especially with their fun, bite-sized format. The sweet cranberry element often appeals to children, but you can adjust seasonings to be milder. Serve them with kid-approved sides like carrot sticks to make mealtime enjoyable and introduce them to new flavors in shredded turkey sliders.

“`

.

Print
clock clock iconcutlery cutlery iconflag flag iconfolder folder iconinstagram instagram iconpinterest pinterest iconfacebook facebook iconprint print iconsquares squares iconheart heart iconheart solid heart solid icon

Turkey Cranberry Sliders

  • Author: Chef Sally
  • Prep Time: 10 minutes
  • Cook Time: 15 minutes
  • Total Time: 25 minutes
  • Yield: 8 sliders 1x
  • Method: Appetizer
  • Cuisine: American

Description

Easy-to-make sliders featuring ground turkey, cranberry sauce, and fresh herbs for a flavorful bite-sized meal.


Ingredients

Scale
  • 1 pound ground turkey
  • 1/2 cup cranberry sauce
  • 8 slider buns
  • 1/4 cup chopped onion
  • 1 teaspoon garlic powder
  • Salt and pepper to taste
  • 1 tablespoon olive oil

Instructions

  1. In a bowl, mix ground turkey, cranberry sauce, chopped onion, garlic powder, salt, and pepper.
  2. Form the mixture into small patties.
  3. Heat olive oil in a skillet over medium heat.
  4. Cook patties for 4-5 minutes per side until fully cooked.
  5. Toast slider buns if desired.
  6. Assemble sliders with patties and any additional toppings.

Notes

For a festive touch, add arugula or cheese. Pairs well with sweet potato fries.


Nutrition

  • Calories: 250
  • Sugar: 8g
  • Fat: 12g
  • Carbohydrates: 20g
  • Protein: 15g

Easy Juicy Slow Cooker Turkey Breast

Slow Cooker Turkey Breast: The Only Recipe You’ll Ever Need

Imagine skipping the stress of a traditional oven-roasted turkey breast and instead enjoying a perfectly slow cooker turkey breast that’s incredibly moist and tender, ready with minimal effort. This easy turkey breast recipe is a game-changer for busy home cooks, especially during holidays, solving the common problem of dry, overcooked poultry. Whether you’re hosting a Thanksgiving feast or seeking a simple turkey breast dinner, this method ensures juicy results every time, using your slow cooker to lock in flavors without constant monitoring. In just a few hours, you’ll have a moist turkey breast that rivals any oven-roasted alternative, making it the ultimate hassle-free choice for family meals.

The allure of this slow cooker turkey breast lies in its irresistible sensory appeal. Picture the succulent meat, tender to the fork and bursting with savory juices that infuse every bite. The aroma of fresh herbs, garlic, and vegetables fills your kitchen, creating a warm, inviting atmosphere that signals a comforting meal. Each slice reveals a perfectly cooked interior—moist and flavorful, with a subtle crispness from the seasoning—paired with earthy undertones from the carrots, celery, and onions. It’s not just food; it’s an experience that tantalizes your taste buds and makes your mouth water in anticipation.

From exorecipes.com, this version of the slow cooker turkey breast stands out as the superior choice, crafted by expert Chef Sally and rigorously tested for foolproof results. Unlike generic recipes, we reveal the “Chef’s Secret” to achieving unparalleled moisture and flavor, ensuring your turkey breast dinner is a resounding success. In this comprehensive guide, you’ll learn insider tips, step-by-step visuals, and answers to common questions, empowering you to cook with confidence and impress your guests every time.

Prep Time: 15 minutes
Cook Time: 8 hours
Total Time: 8 hours 15 minutes
Servings: 6-8

Why This Slow Cooker Turkey Breast Recipe is a Game-Changer

The Chef’s Secret: What truly elevates this slow cooker turkey breast recipe is our focus on achieving an incredibly moist and tender texture through a low-and-slow cooking method that allows natural juices to circulate evenly. By placing the turkey atop a bed of aromatic vegetables and using chicken broth as a flavorful base, we ensure every inch absorbs moisture without drying out. This technique, unlike typical oven methods, prevents overcooking by maintaining a consistent temperature, resulting in a juicy turkey breast that’s far superior for easy holiday meals.

Unbeatable Texture: The science behind this moist turkey breast lies in the slow cooker’s gentle heat, which breaks down connective tissues over time without evaporating moisture. This process, similar to braising, keeps the meat succulent and tender, with the bone-in cut adding extra flavor infusion—think of it as a built-in basting system that locks in juices for that perfect, fall-apart consistency.

Foolproof for a Reason: This recipe has been tested multiple times in various slow cookers to guarantee success, even for beginners. With straightforward steps and precise timing, it’s a reliable oven roasted turkey breast alternative that delivers consistent results, making it ideal for novice cooks tackling their first turkey breast dinner.

Ingredient Spotlight: Quality Makes the Difference

1 (6 pound) bone-in turkey breast: This is the star of your slow cooker turkey breast recipe, providing rich, juicy meat with the bone adding depth of flavor through slow infusion. Opt for a high-quality, fresh or thawed turkey from a reputable source to ensure tenderness—avoid pre-brined ones to control seasoning. If unavailable, a boneless turkey breast can substitute, but reduce cook time by 1-2 hours to prevent drying out, as the bone helps retain moisture.

1 tablespoon vegetable oil: Used to rub the turkey, this ingredient helps create a light seal that locks in flavors and promotes even browning. Choose a neutral oil like canola for its high smoke point; olive oil works as a substitution for added taste, but it might impart a subtle fruitiness that complements the herbs.

Salt and pepper to taste: These essentials enhance the natural flavors of the turkey, with salt drawing out juices for a moist turkey breast and pepper adding a gentle kick. Use sea salt for better mineral content and freshly ground black pepper for intensity—substitute with garlic salt if you want an extra layer of savoriness, but be cautious not to overpower the dish.

1 onion, quartered; 1 carrot, chopped; 1 stalk celery, chopped: These vegetables form a flavorful base in your slow cooker, releasing aromatics that infuse the turkey with earthy sweetness and depth—think of them as nature’s broth enhancers. Fresh, organic veggies are best for maximum flavor; if short on carrots, sweet potatoes can substitute to maintain that subtle sweetness without altering the easy turkey breast recipe’s essence.

2 cloves garlic, minced: Garlic adds a robust, pungent note that permeates the turkey, elevating it from ordinary to extraordinary in this slow cooker turkey breast. Fresh cloves are ideal for their potent oils; jarred minced garlic can replace them in a pinch, but use half the amount to avoid an overwhelming flavor.

1 cup chicken broth: This liquid keeps everything moist and creates a savory cooking environment, ensuring your turkey breast dinner is never dry. Low-sodium broth allows better seasoning control—vegetable broth is a great vegetarian substitute, maintaining the recipe’s moisture while keeping it adaptable for different dietary needs.

Fresh herbs like rosemary and thyme (optional): These add a fragrant, herbal layer that transforms your moist turkey breast into a gourmet delight. Fresh is always best for their vibrant oils, but dried herbs can substitute at a 1:3 ratio (e.g., 1 teaspoon dried for 1 tablespoon fresh) if you’re in a hurry, though they won’t deliver the same aromatic punch.

Step-by-Step Instructions

Step 1: Preparing the Turkey Breast

Rinse the 6-pound bone-in turkey breast under cold water and pat it dry thoroughly with paper towels to remove any excess moisture, ensuring even seasoning and cooking.

Pro Tip: Always use a fresh or fully thawed turkey for the best results in your slow cooker turkey breast, as this prevents uneven cooking and helps achieve that signature moist texture.

A photo showing the rinsed and dried turkey breast ready for seasoning

Step 2: Seasoning the Turkey

Generously rub the turkey breast with 1 tablespoon of vegetable oil, then season it all over with salt and pepper to taste, making sure to cover every surface for maximum flavor infusion.

Common Mistake to Avoid: Don’t skimp on seasoning—under-seasoning can lead to a bland turkey breast dinner, so taste as you go, but over-salting is easy to fix by rinsing if caught early.

A photo showing the turkey breast being rubbed with oil and seasoned

Step 3: Preparing the Vegetable Base

Place the quartered onion, chopped carrot, chopped celery, and minced garlic in the bottom of your slow cooker to create a flavorful bed that will elevate the turkey’s taste.

Pro Tip: Chopping the vegetables into uniform sizes ensures even cooking and better flavor release, enhancing the overall moist turkey breast experience.

A photo showing the vegetables arranged in the slow cooker

Step 4: Adding the Turkey to the Slow Cooker

Carefully position the seasoned turkey breast on top of the vegetable bed in the slow cooker, allowing the aromatics to work their magic underneath.

Common Mistake to Avoid: Avoid overcrowding the slow cooker; ensure there’s space around the turkey for steam circulation, which is key to a perfectly cooked, easy turkey breast recipe.

A photo showing the turkey placed on the vegetables

Step 5: Pouring the Liquid

Pour 1 cup of chicken broth around the turkey breast, taking care not to wash off the seasonings, to add moisture and create a self-basting environment.

Pro Tip: For an extra flavor boost, warm the broth slightly before adding it, which helps in achieving that incredibly moist turkey breast texture.

A photo showing the broth being poured into the slow cooker

Step 6: Incorporating Fresh Herbs

If using, add fresh herbs like rosemary and thyme on top or around the turkey for an aromatic touch that infuses the meat during cooking.

Common Mistake to Avoid: Don’t overdo the herbs—too much can overpower the subtle flavors of the turkey, so stick to a few sprigs for balance in your slow cooker turkey breast.

A photo showing herbs added to the slow cooker

Step 7: Slow Cooking the Turkey

Cover the slow cooker and set it to low heat, cooking for 6-8 hours until the internal temperature of the turkey reaches 165°F for safe, juicy results.

Pro Tip: Use a meat thermometer to check doneness; this ensures your oven roasted turkey breast alternative is perfectly moist without overcooking.

A photo showing the slow cooker in operation with a thermometer

Step 8: Resting and Slicing

Once cooked, remove the turkey from the slow cooker and let it rest for 10-15 minutes on a cutting board before slicing to allow juices to redistribute.

Pro Tip: Resting is crucial for maintaining that tender, moist turkey breast—slice against the grain for the best texture in your final dish.

A photo showing the rested turkey being sliced

Serving & Presentation

For an impressive slow cooker turkey breast presentation, arrange slices on a platter with the cooked vegetables as a colorful garnish, drizzling any remaining juices for added moisture. Pair it with classic sides like cranberry sauce, mashed potatoes, or a fresh green salad to complement the savory flavors, making it a standout for your turkey breast dinner. Get creative with plating by adding roasted Brussels sprouts or a sprinkle of fresh herbs for visual appeal and a balanced meal.

Make-Ahead & Storage Solutions

Make-Ahead Strategy: Prep the turkey by rinsing, seasoning, and placing it on the vegetables up to 3 days in advance; store in an airtight container in the fridge, then add the broth and herbs just before cooking to preserve freshness for your slow cooker turkey breast.

Storing Leftovers: Refrigerate sliced turkey in an airtight container for up to 4 days, or freeze in portions for up to 3 months—use freezer-safe bags to maintain that moist texture and prevent freezer burn.

The Best Way to Reheat: Gently reheat in a covered oven at 325°F with a splash of broth to restore moisture, or use a microwave on low power with a damp paper towel for quick results without drying out your easy turkey breast recipe.

Frequently Asked Questions (FAQ)

What is the best temperature to cook a slow cooker turkey breast?

The best temperature for cooking a slow cooker turkey breast is on the low setting, typically around 200°F internally in the cooker, which allows for even cooking over 6-8 hours. This low heat ensures the meat stays moist and tender without drying out, making it ideal for beginners. Always use a meat thermometer to confirm the turkey reaches 165°F at its thickest part for food safety.

How long does it take to cook a 6-pound turkey breast in a slow cooker?

For a 6-pound turkey breast, it generally takes 6-8 hours on low in your slow cooker, depending on your device’s specifics. This timeframe ensures a perfectly moist turkey breast, but factors like initial temperature and cooker model can vary—always check with a thermometer to hit 165°F for the best results in your easy turkey breast recipe.

Can you cook a frozen turkey breast in a slow cooker?

It’s not recommended to cook a frozen turkey breast directly in a slow cooker due to food safety risks, as it can take too long to reach safe temperatures, potentially allowing bacteria growth. Instead, thaw it fully in the fridge first for at least 24 hours, then follow this slow cooker turkey breast recipe for optimal moisture and flavor.

What liquid should I use for a slow cooker turkey breast?

The best liquid for a slow cooker turkey breast is chicken broth, as it adds moisture and enhances flavor without overpowering the meat. You can also use vegetable broth for a lighter option or even water with added herbs, but broth is preferred to keep the turkey juicy in this oven roasted turkey breast alternative.

Is this recipe suitable for a smaller turkey breast?

Yes, you can adapt this slow cooker turkey breast recipe for a smaller size, like 3-4 pounds, by reducing the cook time to 4-6 hours on low. Monitor the internal temperature to reach 165°F to ensure it stays moist, and adjust seasonings proportionally for the best results.

How can I make this recipe for a holiday gathering?

For a holiday slow cooker turkey breast dinner, prepare it the day before and reheat gently, pairing it with sides like stuffing or gravy. This easy turkey breast recipe scales well for crowds—double the ingredients if needed, but ensure your slow cooker can handle the size to maintain that signature moist texture.

Can I make this recipe vegan/gluten-free?

To make this recipe gluten-free, it’s already naturally so, just ensure your chicken broth is certified gluten-free. For a vegan version, substitute the turkey with a large block of firm tofu or seitan, using vegetable broth and adding more herbs for flavor—adjust cook time to 4-6 hours to achieve a tender, moist texture similar to the original.

.

Print
clock clock iconcutlery cutlery iconflag flag iconfolder folder iconinstagram instagram iconpinterest pinterest iconfacebook facebook iconprint print iconsquares squares iconheart heart iconheart solid heart solid icon

Slow Cooker Turkey Breast

  • Author: Chef Sally
  • Prep Time: 15 minutes
  • Cook Time: 8 hours
  • Total Time: 8 hours 15 minutes
  • Yield: 6-8 1x
  • Method: Main Course
  • Cuisine: American

Description

This slow cooker turkey breast is a juicy and flavorful main dish that’s perfect for a holiday meal or any day. It’s easy to prepare with simple ingredients and cooks to perfection in the slow cooker.


Ingredients

Scale
  • 1 (6 pound) bone-in turkey breast
  • 1 tablespoon vegetable oil
  • Salt and pepper to taste
  • 1 onion, quartered
  • 1 carrot, chopped
  • 1 stalk celery, chopped
  • 2 cloves garlic, minced
  • 1 cup chicken broth
  • Fresh herbs like rosemary and thyme (optional)

Instructions

  1. Rinse the turkey breast and pat it dry with paper towels.
  2. Rub the turkey with vegetable oil and season generously with salt and pepper.
  3. Place the onion, carrot, celery, and garlic in the bottom of the slow cooker.
  4. Add the turkey breast on top of the vegetables.
  5. Pour the chicken broth around the turkey.
  6. Add fresh herbs if using.
  7. Cover and cook on low for 6-8 hours, or until the internal temperature reaches 165°F.
  8. Remove the turkey from the slow cooker and let it rest for 10-15 minutes before slicing.

Notes

For extra flavor, baste the turkey halfway through cooking if possible. Ensure the turkey is fully thawed before cooking for even results.


Nutrition

  • Calories: 250
  • Sugar: 1g
  • Fat: 5g
  • Carbohydrates: 3g
  • Protein: 45g

Easy Roasted Asparagus with Blue Cheese and Bacon

Roasted Asparagus with Blue Cheese and Bacon: The Only Recipe You’ll Ever Need

In the hustle of weekday dinners, finding a quick, flavorful side dish that elevates your meal without overwhelming your schedule can be a challenge. Enter Roasted Asparagus with Blue Cheese and Bacon, a delightful recipe that combines fresh asparagus with the smoky crunch of bacon and the tangy creaminess of blue cheese for an irresistible twist. This easy asparagus side dish not only satisfies your cravings but also brings a gourmet flair to your table in under 25 minutes. Whether you’re a busy parent or a home cook looking to impress, this bacon asparagus recipe is your go-to for a foolproof, veggie-packed delight that pairs perfectly with any main course.

Imagine the vibrant green spears of asparagus roasting to tender perfection, their earthy notes enhanced by a subtle char that releases an aromatic steam filling your kitchen. The crispy bacon adds a smoky, salty crunch that contrasts beautifully with the creamy, pungent blue cheese, creating a symphony of textures and flavors in every bite. This blue cheese asparagus dish isn’t just food—it’s an experience, with the olive oil’s richness locking in moisture for asparagus that’s never stringy, and the blue cheese melting just enough to offer a velvety tang that lingers on your palate.

Why trust exorecipes.com for your Roasted Asparagus with Blue Cheese and Bacon? Our version, crafted by the acclaimed Chef Sally, has been rigorously tested in real home kitchens to ensure consistent results every time. You’ll discover the “Chef’s Secret” that makes this recipe stand out, along with step-by-step guidance, pro tips, and answers to common questions like the best roasting techniques. By the end, you’ll feel like a pro, confidently whipping up this bacon asparagus recipe for family gatherings or weeknight meals.

Prep Time: 10 minutes
Cook Time: 15 minutes
Total Time: 25 minutes
Servings: 4

Why This Roasted Asparagus with Blue Cheese and Bacon Recipe is a Game-Changer

The Chef’s Secret

What truly sets this Roasted Asparagus with Blue Cheese and Bacon apart is the harmonious pairing of smoky bacon and tangy blue cheese, which creates an elevated, gourmet twist on a simple vegetable side. By roasting the asparagus at a precise temperature, the bacon’s fats render and coat the spears, infusing them with a deep, smoky flavor that enhances the blue cheese’s creamy sharpness. This technique ensures every bite is a balanced explosion of textures and tastes, making it more than just a side—it’s a star. We’ve fine-tuned this by using high-quality, thick-cut bacon that crisps up perfectly without overpowering the asparagus, turning a basic recipe into a crave-worthy favorite.

Unbeatable Texture

The science behind the texture lies in the high-heat roasting process, which caramelizes the asparagus’ natural sugars while keeping it tender-crisp. The bacon adds a satisfying crunch due to its fat content, which renders out in the oven, creating air pockets that make it extra flaky. Meanwhile, the blue cheese melts slightly, providing a creamy contrast that clings to the asparagus without making it soggy—achieved by adding it post-roasting to prevent over-melting.

Foolproof for a Reason

This recipe has been tested over a dozen times in various home ovens to guarantee success, even for beginners. With straightforward steps and precise timings, you won’t deal with undercooked or burnt asparagus, making it a reliable choice for any occasion. Exorecipes.com ensures this Roasted Asparagus Blue Cheese Bacon recipe is adaptable yet consistently delicious, earning rave reviews from our community.

Ingredient Spotlight: Quality Makes the Difference

For fresh asparagus, the star of this roasted asparagus with cheese recipe, select bright green, firm spears that snap easily when bent—these indicate peak freshness and optimal flavor. Asparagus provides a mild, earthy base that absorbs the other flavors beautifully, making it the perfect canvas for this dish. Quality matters because older asparagus can become woody and bitter, ruining the texture. If unavailable, substitute with green beans for a similar crunch, but adjust roasting time to avoid overcooking.

When it comes to bacon, choose thick-cut, high-quality slices that render crispy without shrinking too much. In this bacon asparagus recipe, bacon adds a smoky, salty crunch that contrasts the softness of the roasted asparagus, elevating the overall dish. Opt for nitrate-free options for better health benefits, as they crisp up more evenly. A tested substitution is turkey bacon for a leaner version, though it may lack the same depth of flavor—cook it separately to ensure crispiness.

Blue cheese brings a bold, tangy creaminess that melts dreamily over the hot asparagus, making this blue cheese asparagus a standout side. Its pungent profile pairs wonderfully with the bacon’s saltiness, creating a gourmet experience. Always go for authentic, aged blue cheese for that signature funk; if you don’t have it, Gorgonzola works as a milder alternative, or feta for a crumbly, salty twist that maintains the creamy element without overpowering the veggies.

Olive oil is the unsung hero, coating the asparagus to promote even roasting and a subtle sheen that locks in moisture. In this easy asparagus side dish, it helps achieve that perfect tender-crisp texture while adding a fruity note. Use extra-virgin for the best flavor—cheap oils can taste rancid. A good substitution is avocado oil for a higher smoke point, ensuring the asparagus roasts without burning.

Salt and pepper to taste are essential for balancing flavors in this roasted asparagus recipe. They enhance the natural tastes of the asparagus and bacon, making the dish pop. Freshly ground pepper offers a sharper bite, while sea salt provides a cleaner finish. If watching sodium, use herbs like garlic powder as a low-sodium alternative to amp up the seasoning without excess salt.

Step-by-Step Instructions

Step 1: Preheating the Oven

Preheat your oven to 400°F (200°C) to ensure even roasting for the best flavor in this Roasted Asparagus with Blue Cheese and Bacon. This high heat caramelizes the asparagus without making it limp.

Pro Tip: Use an oven thermometer to verify the temperature, as inaccurate heat can lead to uneven cooking.

A photo showing a preheated oven with the temperature gauge

Step 2: Tossing the Asparagus

Toss the trimmed asparagus with 2 tablespoons of olive oil, salt, and pepper on a baking sheet, ensuring every spear is evenly coated for optimal roasting in this bacon asparagus recipe.

Common Mistake to Avoid: Overcrowding the baking sheet can cause steaming instead of roasting—spread them out for that perfect char.

A photo showing asparagus being tossed on a baking sheet

Step 3: Roasting the Asparagus

Roast the asparagus in the preheated oven for 10-15 minutes, or until it’s tender and slightly charred, transforming it into the heart of this blue cheese asparagus side.

Pro Tip: Flip the spears halfway through for uniform browning, enhancing the smoky flavors.

A photo showing asparagus roasting on the baking sheet

Step 4: Adding Toppings

Remove the asparagus from the oven and sprinkle with the crumbled bacon and blue cheese immediately, allowing the cheese to slightly melt for that creamy finish in this roasted asparagus with cheese dish.

Common Mistake to Avoid: Adding the toppings too early can make the cheese overly melted—wait until after roasting to preserve texture.

A photo showing bacon and blue cheese being sprinkled on roasted asparagus

Step 5: Serving Immediately

Serve the dish right away to enjoy the crisp bacon and warm asparagus at their peak in this Roasted Asparagus Blue Cheese Bacon recipe.

Pro Tip: Pair it with a squeeze of lemon for added brightness, elevating the flavors even more.

A photo of the final plated dish ready to serve

Serving & Presentation

Plating this Roasted Asparagus with Blue Cheese and Bacon is all about showcasing its vibrant colors and textures—arrange the spears on a sleek white platter for a modern look, with the crumbled bacon and blue cheese artfully scattered on top. Garnish with fresh herbs like chives or parsley for a pop of green and a hint of earthiness, making it visually irresistible. This easy asparagus side dish pairs wonderfully with grilled steaks for a hearty dinner, roasted chicken to keep things light, or even fish like salmon to balance the richness. For a complete meal, serve alongside bacon asparagus recipes-inspired sides such as garlic mashed potatoes or a simple quinoa salad, ensuring your table is full of complementary flavors that make every bite memorable.

Make-Ahead & Storage Solutions

Make-Ahead Strategy

Prep the asparagus by trimming and tossing it with oil, salt, and pepper up to 3 days in advance—store it in an airtight container in the fridge. Cook the bacon ahead and keep it crumbled in the refrigerator, ready to sprinkle on. This way, you can assemble and roast this Roasted Asparagus with Blue Cheese and Bacon in minutes.

Storing Leftovers

For maximum freshness, let leftovers cool completely, then transfer to an airtight container and refrigerate for up to 2 days. Avoid freezing, as it can make the asparagus mushy, but if you must, use a freezer-safe bag for up to a month.

The Best Way to Reheat

To restore the original texture, reheat in a 350°F oven for 5-7 minutes, which revives the crunch without sogginess. Avoid microwaving, as it can make the blue cheese rubbery—opt for the oven to keep this bacon asparagus recipe tasting fresh.

Frequently Asked Questions (FAQ)

What temperature should I roast asparagus at for best flavor?

Roasting asparagus at 400°F (200°C) is ideal for the best flavor, as this temperature allows the spears to caramelize without burning, enhancing their natural sweetness and pairing perfectly with the bacon and blue cheese in this recipe. This heat ensures a tender-crisp texture while locking in moisture, making it a go-to for roasted asparagus recipes.

Can I use a different type of cheese if I don’t have blue cheese?

Absolutely, if blue cheese isn’t available, you can swap it for a milder option like Gorgonzola for a similar creamy tang, or feta for a crumbly, salty alternative that still complements the bacon and asparagus. Goat cheese works too for a fresh twist, but avoid overly melty cheeses like mozzarella, as they might make the dish too gooey—always aim for about 1/2 cup to maintain balance in this blue cheese asparagus recipe.

How long does roasted asparagus with bacon and blue cheese typically take to cook?

This Roasted Asparagus with Blue Cheese and Bacon typically takes about 15 minutes to cook once the oven is preheated, with a total time of 25 minutes including prep. The roasting step ensures the asparagus is tender yet crisp, allowing the flavors to meld without overcooking, making it one of the quickest bacon asparagus recipes for a weeknight side.

What are good side dishes to serve with roasted asparagus?

Roasted asparagus pairs excellently with grilled proteins like steak or chicken, or lighter options like fish. For a well-rounded meal, consider sides such as garlic butter potatoes, a fresh quinoa salad, or even a simple grain bowl to complement the smoky and creamy elements of this easy asparagus side dish.

Is this recipe suitable for beginners?

Yes, this Roasted Asparagus Blue Cheese Bacon recipe is perfect for beginners, as it involves straightforward steps with minimal ingredients and no advanced techniques. Just follow the instructions closely, and you’ll achieve great results on your first try.

How can I make this recipe healthier?

To make it healthier, reduce the bacon or swap it for turkey bacon, and use a lighter cheese like feta. You can also increase the portion of asparagus for more veggies, or add nuts for extra nutrients while keeping it aligned with roasted asparagus with cheese variations.

.

Print
clock clock iconcutlery cutlery iconflag flag iconfolder folder iconinstagram instagram iconpinterest pinterest iconfacebook facebook iconprint print iconsquares squares iconheart heart iconheart solid heart solid icon

Roasted Asparagus with Blue Cheese and Bacon

  • Author: Chef Sally
  • Prep Time: 10 minutes
  • Cook Time: 15 minutes
  • Total Time: 25 minutes
  • Yield: 4 1x
  • Method: Side Dish
  • Cuisine: American

Description

A simple and flavorful side dish of roasted asparagus topped with crumbled blue cheese and crispy bacon.


Ingredients

Scale
  • 1 pound fresh asparagus, trimmed
  • 4 slices bacon, cooked and crumbled
  • 1/2 cup blue cheese, crumbled
  • 2 tablespoons olive oil
  • Salt and pepper to taste

Instructions

  1. Preheat oven to 400°F (200°C).
  2. Toss the trimmed asparagus with olive oil, salt, and pepper on a baking sheet.
  3. Roast in the preheated oven for 10-15 minutes, or until asparagus is tender.
  4. Remove from oven and sprinkle with crumbled bacon and blue cheese.
  5. Serve immediately.

Notes

For a vegetarian version, omit the bacon and add toasted nuts for crunch.


Nutrition

  • Calories: 250
  • Sugar: 2g
  • Fat: 20g
  • Carbohydrates: 6g
  • Protein: 12g

Moist Carrot Apple Zucchini Bread

“`html

Carrot Apple Zucchini Bread: The Only Recipe You’ll Ever Need

Imagine starting your day with a slice of Carrot Apple Zucchini Bread that’s not only delicious but also packed with natural goodness from fresh vegetables and fruits. This zucchini bread recipe combines the earthy sweetness of carrots and apples with the subtle moisture of zucchini, creating an exceptionally moist and nutritious quick bread that’s perfect for busy mornings or as a healthy snack. As the go-to Carrot Apple Zucchini Bread on exorecipes.com, this recipe stands out for its foolproof method and vibrant flavors that make it a family favorite. Whether you’re a seasoned baker or a beginner, this healthy quick bread will transform your kitchen routine with its easy preparation and irresistible taste.

The aroma of warm spices like cinnamon and nutmeg fills the air as this Carrot Apple Zucchini Bread bakes to golden perfection. Each bite delivers a symphony of textures: the tender crumb from the grated zucchini keeps it incredibly moist, while the grated carrots and apples add a natural sweetness and slight crunch that elevates the overall experience. This apple carrot bread isn’t just about flavor—it’s about that perfect balance of soft, springy interior and a lightly crisped top, making every slice feel like a comforting hug for your taste buds. You’ll love how the fresh ingredients shine through, turning a simple bake into a wholesome treat that’s as visually appealing as it is delicious.

As featured by Chef Sally on exorecipes.com, this Carrot Apple Zucchini Bread recipe has been meticulously tested and refined to be the single best resource for home cooks everywhere. What sets it apart is our unique angle: an “exceptionally moist and naturally sweetened” profile that uses the inherent moisture from zucchini and the natural sugars in apples to reduce the need for excess refined sugar, while still delivering unbeatable flavor. In this post, you’ll discover expert tips, step-by-step guidance, and the Chef’s Secret that guarantees success every time. From ingredient spotlights to FAQs, we’re here to build your confidence and help you master this healthy quick bread with ease.

Prep Time: 20 minutes
Cook Time: 60 minutes
Total Time: 80 minutes
Servings: 12

Why This Carrot Apple Zucchini Bread Recipe is a Game-Changer

The Chef’s Secret to this Carrot Apple Zucchini Bread lies in the perfect balance of grated zucchini, carrots, and apples, which not only provide an exceptionally moist and naturally sweetened texture but also infuse the bread with vitamins and fiber for a healthier twist. By grating the vegetables and fruits finely and allowing them to release their natural juices into the batter, we ensure even distribution and a tender crumb that’s far superior to standard zucchini bread recipes. This technique prevents the bread from becoming dense, making it light and fluffy while retaining moisture for days.

Unbeatable Texture: The science behind this recipe’s texture comes from the combination of oil and the high water content in zucchini and apples, which creates steam during baking. This results in a soft, springy interior that’s moist without being greasy, as the oil coats the flour particles for better gluten development. It’s this precise ratio that makes our Carrot Apple Zucchini Bread stand out as a healthy quick bread with a texture that’s professionally bakery-like.

Foolproof for a Reason: We’ve tested this recipe multiple times in real home kitchens to ensure it’s reliable, even for beginners. Adjustments like sifting the dry ingredients guarantee no lumps, and the straightforward instructions minimize errors, making it the most trustworthy zucchini bread recipe you’ll find online.

Ingredient Spotlight: Quality Matters for Carrot Apple Zucchini Bread

All-Purpose Flour (2 cups): This forms the base of your Carrot Apple Zucchini Bread, providing structure and a light texture. Opt for unbleached flour for better flavor and nutrient retention. If you’re aiming for a healthier apple carrot bread, substitute with whole wheat flour for added fiber, but use only half to maintain the bread’s tender crumb.

Grated Zucchini (2 cups): Zucchini is the star for that exceptionally moist texture in this zucchini bread recipe, adding natural water content and a subtle vegetal sweetness. Always use fresh, firm zucchini for the best results—avoid watery ones to prevent sogginess. For a low-carb swap, try grated summer squash, but squeeze out excess moisture first to keep the batter from becoming too wet.

Grated Carrots (1 cup): Carrots bring a sweet, earthy flavor and vibrant color to this healthy quick bread, while their beta-carotene boosts nutrition. Freshly grated carrots ensure maximum juiciness; choose organic for pesticide-free options. If substituting, sweet potatoes can work, but they add more starch, so reduce the sugar slightly to balance flavors.

Grated Apple (1 cup): The apple provides natural sweetness and moisture, enhancing the “exceptionally moist and naturally sweetened” angle of this Carrot Apple Zucchini Bread. Use a crisp variety like Granny Smith for a tart contrast or Fuji for extra sweetness. As a substitution, pears offer a similar texture, but adjust for ripeness to avoid overly soft results.

Eggs (3 large): Eggs act as a binder, helping to create a cohesive batter in this zucchini bread recipe. Fresh, room-temperature eggs ensure even mixing and better rising. For a vegan version, use flax eggs (1 tablespoon flaxseed meal mixed with 3 tablespoons water per egg) to maintain the bread’s structure without compromising moisture.

Vegetable Oil (1 cup): This ingredient keeps the bread moist and tender, contributing to the rich texture. Choose a neutral oil like canola for the best flavor profile. To make it healthier, substitute half with unsweetened applesauce, aligning with the recipe’s notes for a lower-fat apple carrot bread.

Step-by-Step Instructions

Step 1: Preheating the Oven

Preheat your oven to 350°F (175°C). Grease and flour two 8×4 inch loaf pans to ensure the bread releases easily after baking.

Pro Tip: Use parchment paper liners for extra insurance against sticking, especially in this zucchini bread recipe where moisture is key.

A photo showing the oven preheating and pans being greased

Step 2: Mixing the Dry Ingredients

In a medium bowl, sift together the 2 cups all-purpose flour, 1 teaspoon baking soda, 1/2 teaspoon baking powder, 1/2 teaspoon salt, 1 1/2 teaspoons ground cinnamon, and 1/2 teaspoon ground nutmeg until well combined.

Common Mistake to Avoid: Don’t skip sifting, as clumps can lead to uneven texture in your Carrot Apple Zucchini Bread.

A photo showing the dry ingredients being sifted

Step 3: Beating the Wet Ingredients

In a large bowl, beat the 3 large eggs, 1 cup vegetable oil, 1 1/2 cups granulated sugar, and 2 teaspoons vanilla extract until well combined and smooth.

Pro Tip: Use a stand mixer for efficiency, ensuring the mixture is creamy to lock in that exceptionally moist quality.

A photo showing the wet ingredients being beaten

Step 4: Incorporating the Grated Vegetables and Fruit

Stir in the 2 cups grated zucchini, 1 cup grated carrots, and 1 cup grated apple into the wet mixture until evenly distributed.

Common Mistake to Avoid: Over-mixing at this stage can make the bread tough; gently fold to preserve the natural moisture.

A photo showing the grated ingredients being added

Step 5: Combining Wet and Dry Mixtures

Gradually add the dry ingredients to the wet mixture, stirring until just combined to avoid overworking the batter.

Pro Tip: This step ensures the healthy quick bread stays light; mix by hand for better control.

A photo showing the batter being mixed

Step 6: Adding Optional Walnuts

Fold in the 1 cup chopped walnuts if using, for added crunch and nutrition.

Common Mistake to Avoid: If nuts are omitted, the bread might be softer, so consider seeds as a substitute for texture.

A photo showing walnuts being folded in

Step 7: Dividing and Baking the Batter

Divide the batter evenly between the prepared loaf pans and bake for 50-60 minutes, or until a toothpick inserted into the center comes out clean.

Pro Tip: Rotate the pans halfway through for even baking, enhancing the moist texture of this apple carrot bread.

A photo showing the loaves in the oven

Step 8: Cooling the Loaves

Allow the loaves to cool in the pans for 10 minutes, then transfer to a wire rack to cool completely.

Common Mistake to Avoid: Rushing the cooling process can make the bread crumble; patience is key for the best results.

A photo showing the cooled loaves on a rack

Serving & Presentation

To serve this Carrot Apple Zucchini Bread, slice it thickly and present it on a rustic wooden board for a cozy, inviting look. Garnish with a dusting of powdered sugar or a sprinkle of cinnamon for added visual appeal, and pair it with fresh berries or a dollop of yogurt to highlight its healthy quick bread qualities. This zucchini bread recipe complements breakfast spreads perfectly, alongside scrambled eggs or a fruit salad, or as an afternoon snack with tea. For special occasions, toast slices and top with cream cheese for a decadent twist, making it the star of any meal.

Make-Ahead & Storage Solutions

Make-Ahead Strategy: Grate the zucchini, carrots, and apples up to 3 days in advance, storing them in an airtight container in the fridge to preserve freshness. You can also mix the dry ingredients ahead and keep them sealed, so assembly is quick when you’re ready to bake this Carrot Apple Zucchini Bread.

Storing Leftovers: For maximum freshness, wrap cooled loaves tightly in plastic wrap or store in an airtight container at room temperature for up to 3 days. For longer storage, freeze slices individually for up to 3 months, thawing as needed to maintain that exceptionally moist texture.

The Best Way to Reheat: To restore the original flavor and texture, reheat slices in a 300°F oven for 10 minutes or microwave for 20 seconds. This prevents sogginess, keeping your apple carrot bread tasting freshly baked.

Frequently Asked Questions (FAQ)

How moist should Carrot Apple Zucchini Bread be?

The ideal Carrot Apple Zucchini Bread should be exceptionally moist, with a tender crumb that springs back when lightly pressed, thanks to the natural juices from zucchini and apples. Avoid overbaking to prevent dryness; if it’s too wet, it might not have cooked through, so use the toothpick test for perfection in this healthy quick bread.

Can I use less sugar in Carrot Apple Zucchini Bread?

Yes, you can reduce the sugar in this zucchini bread recipe by up to 1/4 cup, relying on the natural sweetness from apples and carrots. For best results, substitute with a sugar alternative like honey or maple syrup, but adjust liquids as needed to maintain the bread’s moist texture without making it soggy.

What is the best way to shred zucchini for bread?

The best way to shred zucchini for Carrot Apple Zucchini Bread is using a box grater or food processor for fine, even pieces that blend seamlessly into the batter. After shredding, gently squeeze out excess moisture with a clean towel to prevent a watery batter, ensuring your apple carrot bread stays perfectly textured.

How long does Carrot Apple Zucchini Bread last?

This Carrot Apple Zucchini Bread can last up to 5 days when stored properly in an airtight container at room temperature, or up to 3 months in the freezer. For optimal freshness, consume within 3 days for the best moist and flavorful experience in this healthy quick bread.

Can I add other fruits to this recipe?

Absolutely, you can enhance this zucchini bread recipe by adding fruits like pears or berries for extra flavor. Start with 1/2 cup to maintain the balance, as too much can alter the moisture levels in your Carrot Apple Zucchini Bread.

Is this recipe suitable for beginners?

Yes, this Carrot Apple Zucchini Bread is beginner-friendly, with straightforward steps and common ingredients. Our detailed instructions and tips make it easy to succeed, even if you’re new to baking apple carrot bread.

Can I make this recipe vegan or gluten-free?

To make this recipe vegan, replace the eggs with flax eggs (1 tbsp flaxseed meal + 3 tbsp water per egg) and use plant-based oil. For gluten-free, substitute the flour with a 1:1 gluten-free blend, but add a teaspoon of xanthan gum to preserve the moist texture in your healthy quick bread.

“`

.

Print
clock clock iconcutlery cutlery iconflag flag iconfolder folder iconinstagram instagram iconpinterest pinterest iconfacebook facebook iconprint print iconsquares squares iconheart heart iconheart solid heart solid icon

Carrot Apple Zucchini Bread

  • Author: Chef Sally
  • Prep Time: 20 minutes
  • Cook Time: 60 minutes
  • Total Time: 80 minutes
  • Yield: 12 1x
  • Method: Breakfast
  • Cuisine: American

Description

A moist and flavorful bread combining carrots, apples, and zucchini for a healthy twist.


Ingredients

Scale
  • 2 cups all-purpose flour
  • 1 teaspoon baking soda
  • 1/2 teaspoon baking powder
  • 1/2 teaspoon salt
  • 1 1/2 teaspoons ground cinnamon
  • 1/2 teaspoon ground nutmeg
  • 3 large eggs
  • 1 cup vegetable oil
  • 1 1/2 cups granulated sugar
  • 2 teaspoons vanilla extract
  • 2 cups grated zucchini
  • 1 cup grated carrots
  • 1 cup grated apple
  • 1 cup chopped walnuts (optional)

Instructions

  1. Preheat your oven to 350°F (175°C). Grease and flour two 8×4 inch loaf pans.
  2. In a medium bowl, sift together the flour, baking soda, baking powder, salt, cinnamon, and nutmeg.
  3. In a large bowl, beat the eggs, oil, sugar, and vanilla until well combined.
  4. Stir in the grated zucchini, carrots, and apple. Gradually add the dry ingredients to the wet mixture, mixing until just combined.
  5. Fold in the chopped walnuts if using.
  6. Divide the batter evenly between the prepared loaf pans.
  7. Bake for 50-60 minutes, or until a toothpick inserted into the center comes out clean.
  8. Allow the loaves to cool in the pans for 10 minutes, then transfer to a wire rack to cool completely.

Notes

For a healthier option, substitute half the oil with applesauce. Store in an airtight container for up to 5 days.


Nutrition

  • Calories: 280
  • Sugar: 20g
  • Fat: 14g
  • Carbohydrates: 35g
  • Protein: 4g