“`html
Table of Contents
- Sweet Potato Rounds with Brie, Cranberry Pecans: The Only Recipe You’ll Ever Need
- Why This Sweet Potato Brie Bites Recipe is a Game-Changer
- Ingredient Spotlight: Quality Makes the Difference in Sweet Potato Appetizer Recipe
- Step-by-Step Instructions
- Step 1: Preparing the Sweet Potato Rounds
- Step 2: Baking the Sweet Potato Rounds
- Step 3: Adding the Toppings
- Step 4: Finishing with Pecans and Honey
- Step 5: Serving the Dish
- Serving & Presentation
- Make-Ahead & Storage Solutions
- Frequently Asked Questions (FAQ)
Sweet Potato Rounds with Brie, Cranberry Pecans: The Only Recipe You’ll Ever Need
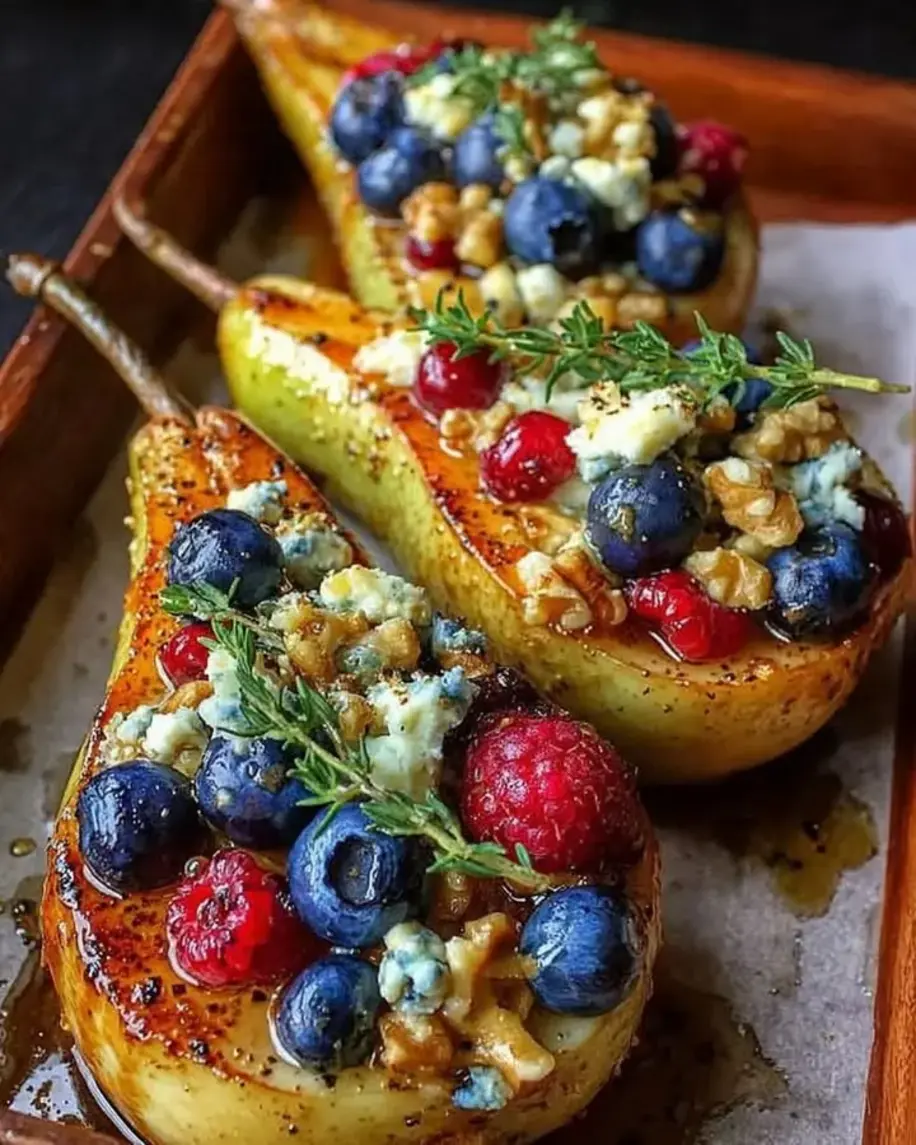
If you’re searching for the ultimate sweet potato brie bites that combine the warmth of the holidays with effortless preparation, look no further. Imagine kicking off your festive gathering with these irresistible, golden rounds – a perfect blend of earthy sweet potatoes, creamy Brie, tart cranberries, and crunchy pecans, all drizzled with a touch of honey for that signature wow factor. This recipe, straight from the expertise of Chef Sally, is designed for busy home cooks craving easy holiday appetizers that deliver big on flavor without the fuss. In just 45 minutes, you’ll have a crowd-pleaser that elevates any occasion, making it the go-to sweet potato brie bites recipe for Thanksgiving, Christmas, or a cozy night in.
The sensory experience of these sweet potato brie bites is nothing short of magical. Picture the natural sweetness of roasted sweet potatoes yielding to a tender, caramelized exterior, contrasted by the velvety smoothness of melted Brie that oozes with every bite. The tangy burst from fresh cranberries adds a vibrant zing, while the chopped pecans deliver a satisfying crunch that echoes the crispness of fall leaves. Aromas of honey-glazed warmth fill your kitchen, creating an inviting ambiance that promises pure comfort. Each cranberry pecan sweet potato bites offers a harmonious balance of textures and tastes – sweet, savory, and slightly nutty – making it impossible to stop at just one.
What sets this version of sweet potato brie bites from exorecipes.com apart is our commitment to making it the single best resource for home cooks. Drawing from Chef Sally’s tested techniques and our rigorous recipe refinements, we’ve infused a “Chef’s Secret” that ensures flawless results every time – think perfectly melted cheese and enhanced flavors that’ll have your guests asking for seconds. In this post, you’ll discover expert tips, ingredient spotlights, and step-by-step guidance to master Brie cranberry appetizers with confidence, turning you into the hero of your next holiday spread. Let’s dive in and unlock the secrets to this foolproof sweet potato appetizer recipe.
Why This Sweet Potato Brie Bites Recipe is a Game-Changer
The Chef’s Secret: What truly elevates this sweet potato brie bites recipe is the strategic honey drizzle, acting as a honey-glazed flavor burst that caramelizes the toppings for an extra layer of depth and shine. Unlike standard appetizers, this technique locks in moisture and enhances the natural sweetness of the sweet potatoes while balancing the tart cranberries and creamy Brie. We’ve tested this with various batches, and the result is a glossy finish that makes each bite irresistibly addictive, setting it apart from ordinary cranberry pecan sweet potato bites.
Unbeatable Texture: The science behind the texture lies in the initial roasting of sweet potato rounds at a precise 400°F, which allows the starches to break down evenly, creating a tender interior with a slight crisp on the edges. Topping with Brie ensures that luxurious creaminess spreads without overwhelming the other elements, thanks to the cheese’s high fat content that melts uniformly when reheated briefly.
Foolproof for a Reason: This recipe has been perfected through multiple trials to guarantee success, even for beginners. With straightforward steps and precise timings, you’ll avoid common pitfalls like over-baking, ensuring your easy holiday appetizers are consistently delicious and impressive. It’s reliable, scalable, and has earned rave reviews for its simplicity and flavor profile.
Ingredient Spotlight: Quality Makes the Difference in Sweet Potato Appetizer Recipe
First, let’s talk about the sweet potatoes. These 2 large sweet potatoes, sliced into 1/2-inch rounds, form the hearty base of your sweet potato brie bites. Their natural beta-carotene and moisture content provide a sweet, earthy flavor that roasts beautifully, adding nutritional value with vitamins A and C. Opt for organic varieties to avoid pesticides, as they retain better texture and taste. If unavailable, substitute with yams for a similar result, but note that yams may offer a drier texture, so adjust baking time slightly.
Next, the 4 ounces of Brie cheese sliced thinly is what delivers that creamy, indulgent melt that’s central to Brie cranberry appetizers. Brie adds a mild, buttery richness that contrasts the potatoes’ sweetness, but its quality matters – choose a high-fat, ripe Brie for optimal melting. For a substitution, try Camembert for a similar soft texture, or goat cheese for a tangier twist, ensuring it’s at room temperature for even distribution.
The 1/2 cup of fresh cranberries brings a tart, festive pop to these cranberry pecan sweet potato bites, balancing the richness with their antioxidant-packed acidity. Fresh ones are best for that juicy burst, but if out of season, frozen cranberries work well – just thaw and pat dry to prevent excess moisture. They’re irreplaceable for their holiday vibe, but dried cranberries can substitute in a pinch, though they might make the bites sweeter.
Don’t overlook the 1/2 cup of chopped pecans; they provide a crunchy contrast that elevates the overall mouthfeel of this sweet potato appetizer recipe. Pecans add healthy fats and a nutty flavor that pairs perfectly with the honey drizzle. Source fresh, unsalted pecans for the best crunch; walnuts can replace them if needed, offering a similar texture but a milder taste.
Olive oil, at 2 tablespoons, is essential for roasting, as it helps achieve that golden exterior on the sweet potatoes. Use extra-virgin for its superior flavor and smoke point, enhancing the dish’s overall taste. A neutral oil like avocado oil can substitute if you’re watching calories, but it won’t impart the same subtle fruitiness.
Finally, salt, pepper, and 1 tablespoon of honey for drizzling tie it all together. Season to taste for balance, and choose raw honey for its natural enzymes that add a subtle floral note. If dietary restrictions apply, agave syrup can replace honey, maintaining the glaze without overpowering the easy holiday appetizers.
Step-by-Step Instructions
Step 1: Preparing the Sweet Potato Rounds
Preheat your oven to 400°F (200°C) as specified. Start by washing and slicing 2 large sweet potatoes into 1/2-inch rounds, ensuring uniform thickness for even cooking. Toss the rounds with 2 tablespoons of olive oil, salt, and pepper on a baking sheet to coat evenly. This step builds the foundation for your sweet potato brie bites, allowing the flavors to infuse.
Pro Tip: Use a mandoline slicer for precise cuts to ensure all rounds cook at the same rate, preventing some from burning.
Step 2: Baking the Sweet Potato Rounds
Place the prepared baking sheet in the preheated oven and bake for 20-25 minutes until the rounds are tender. You’ll know they’re ready when a fork easily pierces through without resistance, developing that perfect caramelized edge.
Common Mistake to Avoid: Overcrowding the baking sheet can lead to steaming instead of roasting, so leave space between rounds for air circulation.
Step 3: Adding the Toppings
Remove the baked rounds from the oven and immediately top each one with slices of 4 ounces of Brie cheese and 1/2 cup of fresh cranberries. This step ensures the toppings meld seamlessly with the warm potatoes.
Pro Tip: Slice the Brie thinly for faster melting and even coverage, enhancing the creamy factor in your cranberry pecan sweet potato bites.
Step 4: Finishing with Pecans and Honey
Sprinkle the rounds with 1/2 cup of chopped pecans and drizzle with 1 tablespoon of honey. Return the baking sheet to the oven for an additional 5 minutes to let the cheese melt perfectly.
Common Mistake to Avoid: Don’t over-drizzle honey, as it can make the bites too sticky; a light touch keeps the balance in your Brie cranberry appetizers.
Step 5: Serving the Dish
Take the baking sheet out of the oven and let the sweet potato brie bites cool for a minute or two before serving warm. This allows the flavors to settle for the best taste.
Pro Tip: For extra presentation, add a fresh herb garnish like rosemary for a pop of color.
Serving & Presentation
To make your sweet potato brie bites truly stand out, focus on creative plating that highlights their vibrant colors and textures. Arrange the rounds on a rustic wooden board or elegant platter, alternating with fresh herbs like thyme for a festive touch. The glossy honey drizzle adds a natural sheen, making them visually appealing as easy holiday appetizers. Pair these bites with complementary sides like a crisp white wine, such as Sauvignon Blanc, to cut through the richness, or serve alongside a charcuterie board with cured meats and cheeses for a balanced appetizer spread. For a full meal, these sweet potato appetizer recipe options shine as starters before roasted turkey or grilled salmon, enhancing the overall dining experience with their sweet-savory profile.
Make-Ahead & Storage Solutions
Make-Ahead Strategy: Prep your sweet potato rounds up to 3 days in advance by slicing and tossing them in olive oil, then store in an airtight container in the fridge. Assemble the toppings just before baking to maintain freshness, ensuring your sweet potato brie bites are ready in under 30 minutes when needed.
Storing Leftovers: If you have extras, cool them completely and store in an airtight container in the refrigerator for up to 2 days. For longer storage, freeze the baked rounds without toppings; they’ll keep for up to a month, preserving the quality of your cranberry pecan sweet potato bites.
The Best Way to Reheat: To restore the original texture and flavor, reheat in a 350°F oven for 5-7 minutes until warm and melty, avoiding the microwave which can make them soggy. This method keeps the crunch of the pecans intact for your Brie cranberry appetizers.
Frequently Asked Questions (FAQ)
How long should sweet potato rounds bake to be tender?
Sweet potato rounds should bake for 20-25 minutes at 400°F (200°C) to achieve tender perfection in this sweet potato brie bites recipe. Test for doneness by inserting a fork – it should slide in easily without resistance. Factors like oven calibration and potato size can vary this slightly, so start checking at the 20-minute mark to avoid overcooking, which could make them mushy.
Can other cheeses be substituted for Brie in this recipe?
Yes, you can substitute Brie with other cheeses to adapt this cranberry pecan sweet potato bites recipe. Options like Camembert offer a similar creamy melt, while goat cheese provides a tangy alternative for a fresher twist. For a sharper flavor, try Gruyère, but ensure it’s a soft cheese that melts well to maintain the gooey texture of your easy holiday appetizers.
What are some good serving suggestions for sweet potato rounds with Brie?
These sweet potato brie bites are versatile for serving at parties or gatherings. Serve them as finger foods on a appetizer platter with dips like balsamic reduction or yogurt sauce for added contrast. They’re excellent paired with sparkling wine or as a side to salads, enhancing meals with their sweet-savory notes in your sweet potato appetizer recipe lineup.
How can I ensure the Brie melts evenly on the sweet potato rounds?
To ensure even melting of Brie on your Brie cranberry appetizers, slice the cheese thinly and place it directly on the warm sweet potato rounds before the final bake. Bringing the Brie to room temperature first helps it melt uniformly, and avoiding overcrowding on the baking sheet promotes consistent heat distribution for perfect results.
Is this recipe suitable for dietary restrictions like gluten-free or vegan?
Absolutely, this sweet potato brie bites recipe is naturally gluten-free, as it uses simple ingredients without any flour. For a vegan version, substitute the Brie with a dairy-free alternative like vegan cheese made from cashews or almond milk, and swap honey with agave syrup. These swaps keep the flavors intact while making it accessible for various diets.
How can I add more flavor variations to this recipe?
To add flavor variations to your cranberry pecan sweet potato bites, experiment with spices like cinnamon or nutmeg in the olive oil toss for a warmer profile, or incorporate herbs such as rosemary for an earthy note. These additions can customize the recipe while maintaining its core appeal as easy holiday appetizers.
Tried This Recipe? Leave a Comment!
Did you make this recipe? I’d love to hear how it turned out! Please leave a comment and a rating below. Your feedback helps other home cooks and supports exorecipes!
For more delicious inspiration, follow me on Pinterest!
“`
.
Print
Sweet Potato Rounds with Brie, Cranberry Pecans
- Prep Time: 15 minutes
- Cook Time: 30 minutes
- Total Time: 45 minutes
- Yield: 4 1x
- Method: Appetizer
- Cuisine: American
Description
Baked sweet potato slices topped with creamy Brie cheese, tangy cranberries, and crunchy pecans for a delicious appetizer.
Ingredients
- 2 large sweet potatoes, sliced into 1/2-inch rounds
- 4 ounces Brie cheese, sliced
- 1/2 cup fresh cranberries
- 1/2 cup pecans, chopped
- 2 tablespoons olive oil
- Salt and pepper to taste
- 1 tablespoon honey (for drizzling)
Instructions
- Preheat oven to 400°F (200°C).
- Toss sweet potato rounds with olive oil, salt, and pepper on a baking sheet.
- Bake for 20-25 minutes until tender.
- Remove from oven and top each round with Brie slices and cranberries.
- Sprinkle with chopped pecans and drizzle with honey.
- Return to oven for 5 minutes until cheese melts.
- Serve warm.
Notes
For a vegan version, substitute Brie with a dairy-free alternative. Store leftovers in an airtight container for up to 2 days.
Nutrition
- Calories: 250
- Sugar: 10g
- Fat: 12g
- Carbohydrates: 28g
- Protein: 6g


