Best Garlic Bread Rolls – Easy Homemade Recipe

best-garlic-bread-rolls-recipe

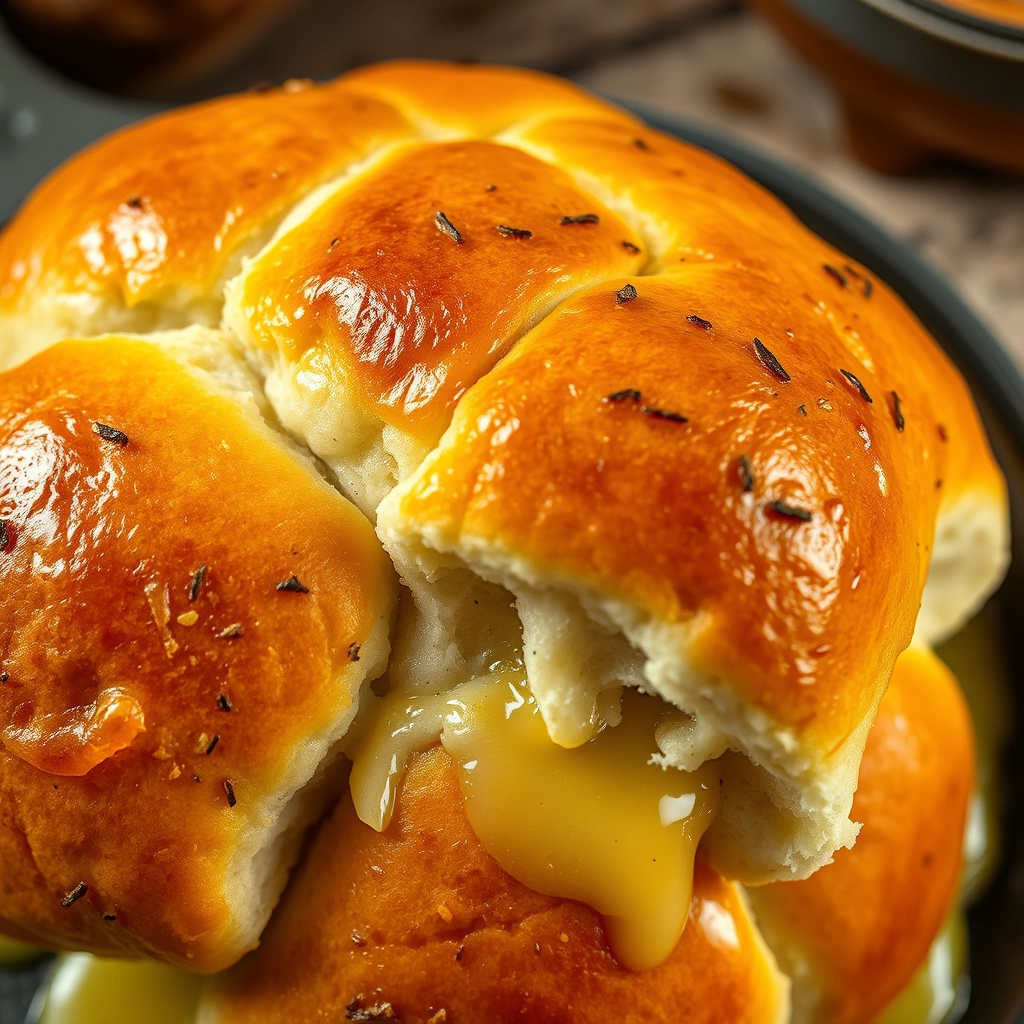
The Coziest Garlic Bread Rolls You’ll Ever Make

There’s something magical about the scent of garlic and butter wafting through the kitchen, isn’t there? I remember rainy Sunday afternoons at my grandmother’s house, where she’d pull golden, garlicky rolls from the oven just as the first droplets hit the windowpane. The way the steam would escape when we tore them apart, the melted butter glistening… that’s the kind of food memory I want to recreate for you today.

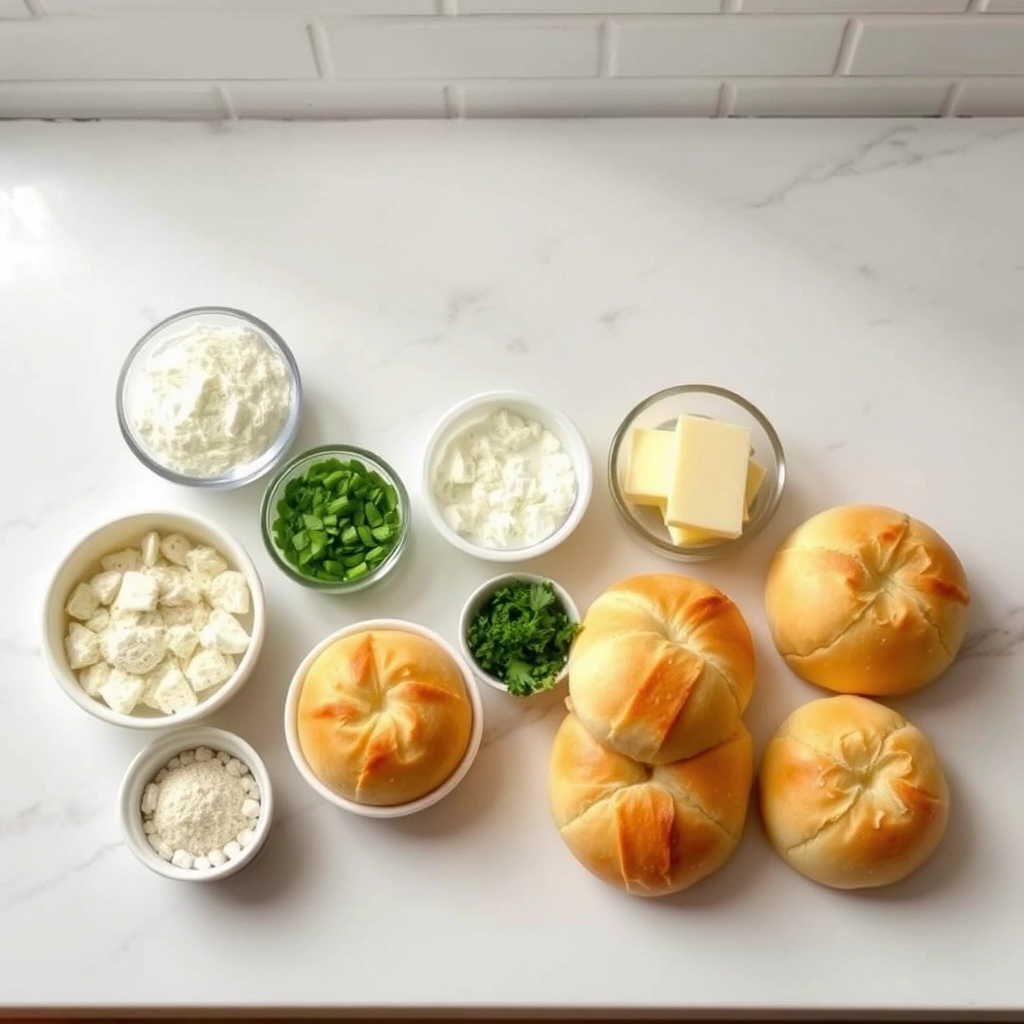
Ingredients That Make Magic

  • 3 cups all-purpose flour – The foundation of our pillowy dreams (bread flour works too for extra chew)
  • 1 packet active dry yeast – Our little microbial helpers that make the dough rise beautifully
  • 1 tbsp sugar – Just enough to feed the yeast and create that perfect golden crust
  • 1 tsp salt – The flavor enhancer that makes all the difference
  • 1 cup warm milk – About 110°F – like a cozy bath for the yeast (test on your wrist like baby’s milk!)
  • 1/4 cup softened butter – Unsalted is best so we can control the seasoning
  • 1 egg – Our binding agent that adds richness
  • 6 garlic cloves, minced – Fresh is non-negotiable here, my friends
  • 1/4 cup parsley, finely chopped – The bright green contrast to all that golden goodness
  • 3 tbsp melted butter – For that glorious garlic butter bath (more if you’re feeling indulgent)

Let’s Make Some Garlicky Magic

First, let’s wake up our yeast. In a small bowl, combine the warm milk, sugar, and yeast. Give it a gentle stir and let it sit for about 5 minutes until it becomes frothy – like a tiny cappuccino for your dough. This is when I love to take a deep breath and inhale that yeasty, promising aroma.

In a large mixing bowl, whisk together the flour and salt. Make a well in the center and add the yeast mixture, softened butter, and egg. Using a wooden spoon (or your hands if you’re feeling nostalgic), mix until a shaggy dough forms. Turn it out onto a lightly floured surface – I always use my grandmother’s old wooden board for this part.

Now comes the therapeutic part: kneading. Press the dough away from you with the heel of your hand, fold it back, turn, and repeat. Do this for about 8-10 minutes until the dough becomes smooth and elastic. If it sticks to your hands, add just a dusting more flour – we want it tacky but not sticky. When you press a finger into it, the dough should spring back slowly – that’s when you know it’s ready.

Pro Tips, Variations, and Substitutions

These garlic bread rolls are wonderfully forgiving, but here are a few tricks to make them even better:

  • Fresh vs. dried herbs: While dried herbs work in a pinch, fresh parsley or basil will give your rolls a brighter, more vibrant flavor.
  • Cheese lovers: Sprinkle a little shredded mozzarella or parmesan on top before baking for an extra indulgent touch.
  • Garlic alternatives: If you’re out of fresh garlic, 1/2 teaspoon of garlic powder per clove works as a substitute.
  • Dairy-free option: Swap the butter for olive oil or vegan butter for a plant-based version that’s just as delicious.

What to Serve With Garlic Bread Rolls

These golden beauties are the ultimate supporting actor to so many meals:

  • Classic pasta dishes like spaghetti bolognese or fettuccine alfredo
  • Hearty soups and stews – perfect for dipping!
  • As part of an Italian-inspired antipasto platter
  • Alongside roasted meats or grilled vegetables
  • Or simply enjoy them warm from the oven with a pat of extra butter

Storage and Reheating Tips

While these rolls are best fresh, here’s how to keep them tasting great:

  • Room temperature: Store in an airtight container for up to 2 days.
  • Freezing: Wrap tightly in foil and freeze for up to 3 months. Thaw at room temperature before reheating.
  • Reheating: Warm in a 350°F oven for 5-7 minutes or until heated through. For extra crispiness, brush with a little melted butter before reheating.

Frequently Asked Questions

Can I make these ahead of time?

Absolutely! Prepare the rolls up to the point before baking, then cover and refrigerate overnight. Let them come to room temperature for 30 minutes before baking as directed.

Why are my rolls dense?

This usually happens if the dough didn’t rise properly. Make sure your yeast is fresh and that you’re letting the dough rise in a warm, draft-free spot.

Can I use pre-made dough?

Yes! Store-bought pizza or bread dough works well in a pinch. Just roll it out, add the garlic butter filling, and proceed with the shaping instructions.

How can I make these spicier?

Add a pinch of red pepper flakes to the garlic butter mixture for a delicious kick that pairs wonderfully with the rich garlic flavor.

Final Thoughts

There’s something truly magical about pulling a tray of golden, garlicky rolls from the oven. The way the aroma fills your kitchen, the satisfying pull-apart texture, and that first warm, buttery bite – these simple pleasures are what home cooking is all about. Whether you’re serving them at a family dinner or enjoying one (or three!) as an afternoon snack, these garlic bread rolls are sure to become a regular in your baking rotation. Happy baking, friends – may your kitchen always smell like garlic and happiness!

Print
clock clock iconcutlery cutlery iconflag flag iconfolder folder iconinstagram instagram iconpinterest pinterest iconfacebook facebook iconprint print iconsquares squares iconheart heart iconheart solid heart solid icon

Garlic Bread Rolls

  • Author: Trusted Blog

Description

Soft and fluffy bread rolls infused with garlic butter, perfect as a side dish or snack.


Ingredients

Scale

For the Crust:

  • 2 1/4 cups all-purpose flour
  • 1 packet (2 1/4 tsp) active dry yeast
  • 1 cup warm water
  • 2 tbsp sugar
  • 1 tsp salt
  • 3 tbsp unsalted butter, melted
  • 4 cloves garlic, minced
  • 2 tbsp fresh parsley, chopped
  • 1/4 cup grated parmesan cheese

Instructions

1. Prepare the Crust:

  1. In a bowl, dissolve yeast and sugar in warm water. Let sit for 5 minutes until frothy.
  2. Add flour, salt, and 1 tbsp melted butter. Mix until a dough forms.
  3. Knead the dough on a floured surface for 5 minutes, then place in a greased bowl. Cover and let rise for 1 hour.
  4. Punch down the dough and divide into 8 equal pieces. Shape into rolls and place on a baking sheet.
  5. Mix remaining melted butter with minced garlic and parsley. Brush over rolls and sprinkle with parmesan.
  6. Bake at 375°F (190°C) for 15-20 minutes until golden brown.

Notes

You can customize the seasonings to taste.

Korean Beef – Easy Korean Ground Beef Recipe

korean-ground-beef-recipe-easy

The Night I Fell in Love with Korean Beef

It was one of those evenings when the rain pattered against the windows, and my stomach growled louder than the distant thunder. I stood in front of the fridge, staring at a lone package of ground beef, willing it to transform into something magical. That’s when I remembered a recipe a friend had raved about—Korean beef. Quick, flavorful, and comforting. Twenty minutes later, I was curled up on the couch with a bowl of sticky-sweet, savory beef over rice, wondering why I hadn’t made this sooner. Now, it’s my go-to dish for busy nights, lazy weekends, and anytime I need a little warmth in a bowl.

Ingredients You’ll Need

This recipe is all about simplicity with big flavors. Here’s what you’ll need to create this cozy dish:

  • 1 lb ground beef – I prefer 85% lean for the perfect balance of flavor and tenderness, but any will work in a pinch.
  • 3 cloves garlic, minced – Fresh is best here! That punch of garlic is what makes this dish sing.
  • 1/4 cup brown sugar – For that irresistible caramelized sweetness. Light or dark works—just use what you have.
  • 1/4 cup soy sauce – The backbone of our sauce. If you’re gluten-free, tamari is a great swap.
  • 1 tbsp sesame oil – Don’t skip this! It adds that nutty depth unique to Korean flavors.
  • 1/2 tsp ginger, grated – Fresh ginger brightens everything up, but 1/4 tsp of ground ginger works too.
  • 1/2 tsp crushed red pepper flakes – Adjust to your spice tolerance. My secret? A pinch more for a gentle kick.
  • 2 green onions, sliced – For that fresh, crisp finish. The green parts make the prettiest garnish!
  • 1 tbsp sesame seeds – Optional, but they add such a lovely crunch.

Let’s Make Some Magic

Now, onto the fun part—bringing this dish to life! Here’s how I make it, with a few cozy tips along the way:

  1. Brown the beef. Heat a large skillet over medium-high heat and add the ground beef. Break it apart with a wooden spoon as it cooks. No oil needed—the beef’s fat will do the work. Cook until no pink remains, about 5-6 minutes. Tip: If there’s excess grease, drain it for a cleaner flavor, but leave a little for richness.
  2. Add the garlic. Push the beef to one side of the pan and toss in the minced garlic. Let it sizzle for just 30 seconds—until fragrant—before stirring it into the beef. This little trick keeps the garlic from burning and fills your kitchen with the best aroma.
  3. Whisk the sauce. While the beef cooks, mix the brown sugar, soy sauce, sesame oil, ginger, and red pepper flakes in a small bowl. Tip: If your brown sugar is clumpy, press it with a fork first—it’ll blend smoother.
  4. Simmer together. Pour the sauce over the beef and stir well. Let it bubble gently for 2-3 minutes, allowing the flavors to meld and the sauce to thicken slightly. You’ll know it’s ready when the sauce clings lovingly to each bit of beef.

At this point, my kitchen smells like my favorite Korean restaurant, and I’m already reaching for a spoon to sneak a bite. But we’re not done yet—the finishing touches make all the difference!

Pro Tips, Variations, and Substitutions

This Korean beef recipe is wonderfully forgiving, but here are a few ways to make it shine even brighter:

  • For extra depth: Add 1 teaspoon grated ginger or a splash of rice vinegar to brighten the flavors.
  • Spice lovers: Toss in some red pepper flakes or a drizzle of gochujang (Korean chili paste) for heat.
  • Vegetarian twist: Swap the ground beef for crumbled firm tofu or plant-based ground meat.
  • Low-sodium option: Use reduced-sodium soy sauce and skip the extra salt.

What to Serve with Korean Beef

This dish is incredibly versatile! Here are some delicious pairings:

  • Steamed white rice or fluffy brown rice
  • Crisp lettuce leaves for wraps
  • Quick-pickled cucumbers or carrots
  • A simple side of roasted broccoli or sautéed bok choy

Storage and Reheating Tips

Leftovers? No problem! Here’s how to keep your Korean beef tasting fresh:

  • Refrigerator: Store in an airtight container for up to 3 days.
  • Freezer: Freeze for up to 2 months in a freezer-safe container.
  • Reheating: Warm gently in a skillet over medium heat with a splash of water to prevent drying out, or microwave in 30-second intervals.

Frequently Asked Questions

Can I use ground turkey instead of beef?
Absolutely! Ground turkey, chicken, or pork all work beautifully in this recipe.

Is there a substitute for brown sugar?
You can use honey, maple syrup, or even white sugar in a pinch – just adjust to taste.

How can I make this gluten-free?
Simply swap the soy sauce for tamari or coconut aminos.

Can I make this ahead for meal prep?
Yes! This dish reheats wonderfully and tastes even better as the flavors meld.

A Cozy Final Thought

There’s something so comforting about this Korean beef recipe – the way the savory-sweet sauce clings to every bite, how quickly it comes together on busy nights, and how it always seems to make everyone at the table happy. Whether you’re serving it over rice for a simple weeknight dinner or packing it into lettuce wraps for a fun meal, I hope this dish brings as much warmth to your kitchen as it does to mine. Don’t be afraid to make it your own – that’s the beauty of home cooking!

Print
clock clock iconcutlery cutlery iconflag flag iconfolder folder iconinstagram instagram iconpinterest pinterest iconfacebook facebook iconprint print iconsquares squares iconheart heart iconheart solid heart solid icon

Korean Beef – Easy Korean Ground Beef Recipe

  • Author: Trusted Blog

Description

A quick and flavorful Korean-inspired ground beef dish that pairs perfectly with rice and vegetables.


Ingredients

Scale

For the Crust:

  • 1 pound ground beef
  • 1/4 cup brown sugar
  • 1/4 cup soy sauce
  • 1 tablespoon sesame oil
  • 3 cloves garlic, minced
  • 1/2 teaspoon ginger, grated
  • 1/4 teaspoon red pepper flakes
  • 2 green onions, sliced
  • 1 tablespoon sesame seeds

Instructions

1. Prepare the Crust:

  1. In a large skillet, cook the ground beef over medium heat until browned, breaking it into small pieces as it cooks.
  2. While the beef cooks, mix together the brown sugar, soy sauce, sesame oil, garlic, ginger, and red pepper flakes in a small bowl.
  3. Once the beef is fully cooked, drain any excess fat. Pour the sauce mixture over the beef and stir to combine. Simmer for 2-3 minutes.
  4. Remove from heat and garnish with sliced green onions and sesame seeds.
  5. Serve hot over rice or with your favorite vegetables.

Notes

You can customize the seasonings to taste.

Meatloaf

meatloaf-recipe

The Coziest Meatloaf You’ll Ever Make (And Why It Tastes Like Home)

There’s something about meatloaf that feels like a hug on a plate. Maybe it’s the way the savory aroma fills the kitchen, or how the first bite takes me straight back to my grandmother’s linoleum-floored kitchen, where she’d serve thick slices with a side of buttery mashed potatoes. I used to think meatloaf was just “that thing” from diner menus—until I realized how deeply comforting it could be when made with love (and a few secret ingredients). This recipe? It’s the one my family begs for on rainy Sundays, and today, I’m sharing it with you.

Gather Your Ingredients (The Building Blocks of Comfort)

  • 2 lbs ground beef (80/20 blend) – The fat is your friend here! It keeps the loaf juicy and flavorful.
  • 1 cup panko breadcrumbs – These light, airy crumbs give the perfect texture—no dense bricks here.
  • 1/2 cup whole milk – Soaking the breadcrumbs in milk is the old-school trick for ultra-tender meatloaf.
  • 1 small yellow onion, finely diced – Cooked until just translucent for sweetness without crunch.
  • 2 cloves garlic, minced – Because everything’s better with garlic.
  • 2 eggs, lightly beaten – The glue that holds it all together.
  • 1/4 cup ketchup + 2 tbsp for glaze – A touch of sweetness and tang. (Swap in BBQ sauce if you’re feeling adventurous!)
  • 1 tbsp Worcestershire sauce – The umami booster you didn’t know you needed.
  • 1 tsp smoked paprika – Adds a whisper of depth—like a cozy sweater for your meatloaf.
  • Salt & freshly ground black pepper – Season boldly! Meatloaf needs it.

Let’s Make Magic (Step by Step)

  1. Preheat your oven to 375°F (190°C) and line a baking sheet with parchment paper (trust me, cleanup is a breeze this way).
  2. Soak the breadcrumbs in milk for 5 minutes while you sauté the onion and garlic in a little olive oil until soft and fragrant. Let this cool slightly—no one wants scrambled eggs in their meatloaf!
  3. In a large bowl, gently mix everything together—ground beef, soaked breadcrumbs, onions, garlic, eggs, ketchup, Worcestershire, and spices. Use your hands (yes, really!) to combine just until everything is evenly distributed. Overmixing = tough meatloaf, and we’re not about that life.
  4. Shape the mixture into a loaf on your prepared baking sheet—about 9×5 inches. Pro tip: Make a slight indentation down the center to prevent a domed top.

Now, here’s where patience comes in: let the meatloaf rest for 10 minutes before baking. This helps the flavors meld and ensures even cooking. While you wait, stir together those remaining 2 tbsp of ketchup with a splash of Worcestershire for a glossy, sticky glaze…

Pro Tips for the Perfect Meatloaf

Every home cook has their own tricks for making meatloaf extra special. Here are a few of my favorites:

  • Don’t overmix – Gently combine ingredients just until incorporated to keep the texture tender.
  • Use a meat thermometer – Cook to 160°F (71°C) for perfect doneness.
  • Let it rest – Allow your meatloaf to sit for 10 minutes before slicing for cleaner cuts.
  • Try the freeform method – Shape on a baking sheet for more crusty edges.

Delicious Variations to Try

One of the best things about meatloaf is how adaptable it is:

  • Italian-style: Add sun-dried tomatoes, basil, and mozzarella
  • BBQ: Mix in smoked paprika and top with barbecue sauce
  • Mushroom Swiss: Fold in sautéed mushrooms and Gruyère cheese
  • Turkey or chicken: Substitute ground poultry for a lighter version
  • Vegetarian: Use lentils or mushrooms as the base

What to Serve with Meatloaf

This comforting main dish pairs beautifully with:

  • Creamy mashed potatoes
  • Buttered green beans or roasted carrots
  • Mac and cheese (for the ultimate comfort meal)
  • A crisp green salad
  • Warm, crusty bread to soak up the juices

Storing and Reheating Your Meatloaf

Leftovers are one of meatloaf’s best features! Here’s how to keep them delicious:

  • Refrigerator: Store in an airtight container for 3-4 days
  • Freezer: Wrap slices tightly in foil, then place in freezer bags for up to 3 months
  • Reheating: Warm slices in a 350°F (175°C) oven for about 15 minutes, or microwave individual portions with a damp paper towel to prevent drying

Meatloaf FAQs

Q: Why does my meatloaf fall apart when I slice it?
A: This usually means it needed more binder (like eggs or breadcrumbs) or didn’t rest long enough after cooking.

Q: Can I make meatloaf ahead of time?
A: Absolutely! Assemble it up to a day in advance and refrigerate until ready to bake. You may need to add 5-10 minutes to the cooking time.

Q: What’s the best pan for baking meatloaf?
A: A loaf pan gives classic shape, but a rimmed baking sheet creates more delicious crust. For even cooking, try a perforated meatloaf pan.

Q: How can I make my meatloaf less dense?
A: Try adding more liquid (milk, broth), using a mix of meats, or incorporating vegetables like grated zucchini.

A Comforting Classic

There’s something truly special about a well-made meatloaf. It’s the kind of meal that fills your kitchen with nostalgic aromas and your belly with warmth. Whether you’re making your grandmother’s cherished recipe or putting your own spin on this timeless dish, meatloaf has a way of bringing comfort to any table. The next time you need a meal that feels like a hug, I hope this recipe finds its way to your oven and into the hearts of everyone who gathers around your table.

Print
clock clock iconcutlery cutlery iconflag flag iconfolder folder iconinstagram instagram iconpinterest pinterest iconfacebook facebook iconprint print iconsquares squares iconheart heart iconheart solid heart solid icon

Classic Meatloaf

  • Author: Trusted Blog

Description

A hearty and comforting classic meatloaf with a savory glaze.


Ingredients

Scale

For the Crust:

  • 1 1/2 lbs ground beef
  • 1 cup breadcrumbs
  • 1/2 cup milk
  • 1 large egg
  • 1 small onion, finely chopped
  • 2 cloves garlic, minced
  • 1 tsp salt
  • 1/2 tsp black pepper
  • 1/2 tsp dried thyme
  • 1/4 cup ketchup
  • 2 tbsp brown sugar
  • 1 tbsp mustard

Instructions

1. Prepare the Crust:

  1. Preheat oven to 350°F (175°C).
  2. In a large bowl, combine ground beef, breadcrumbs, milk, egg, onion, garlic, salt, pepper, and thyme. Mix until well combined.
  3. Shape the mixture into a loaf and place in a greased loaf pan.
  4. In a small bowl, mix ketchup, brown sugar, and mustard. Spread evenly over the meatloaf.
  5. Bake for 1 hour or until the internal temperature reaches 160°F (70°C). Let rest for 10 minutes before slicing.

Notes

You can customize the seasonings to taste.

Best Thai Turmeric Chicken and Noodles Recipe

best-thai-turmeric-chicken-noodles

The Best Thai Turmeric Chicken and Noodles: A Bowl of Sunshine

There’s something magical about the golden hue of turmeric—it’s like sunshine in a spice jar. I first fell in love with this vibrant dish during a rainy afternoon in Bangkok, tucked into a tiny street-side stall where the aroma of lemongrass and coconut milk swirled through the air. The first bite of that tender turmeric-kissed chicken, tangled with silky noodles, was pure comfort. Now, I recreate that warmth in my own kitchen, and today, I’m sharing my foolproof version with you. Whether you’re craving a taste of Thailand or just need a little culinary sunshine, this recipe is here to deliver.

Ingredients You’ll Need

Gathering these ingredients feels like assembling a little treasure chest of flavors. Here’s what you’ll need:

  • Chicken thighs (1 lb, boneless and skinless) – Thighs stay juicy and soak up all the turmeric goodness better than breasts.
  • Rice noodles (8 oz) – Flat rice noodles work best, but any width will do in a pinch.
  • Fresh turmeric (1 tbsp, grated) – If you can’t find fresh, 1 tsp of ground turmeric works, but fresh is *chef’s kiss*.
  • Coconut milk (1 can, full-fat) – The creamy base that makes this dish luxuriously rich.
  • Lemongrass (2 stalks, bruised) – Smack them with the back of a knife to release their citrusy perfume.
  • Garlic (3 cloves, minced) – Because no Thai dish is complete without it.
  • Shallots (2, thinly sliced) – They add a subtle sweetness that balances the spices.
  • Fish sauce (2 tbsp) – The umami backbone—don’t skip it!
  • Brown sugar (1 tbsp) – Just a touch to round out the flavors.
  • Lime (1, juiced + wedges for serving) – That bright, tangy finish is everything.
  • Fresh cilantro and Thai basil (for garnish) – Because herbs make everything better.

Let’s Get Cooking: Step-by-Step

Now, let’s transform these ingredients into a bowl of golden deliciousness. Don’t rush—this dish is all about layering flavors.

  1. Marinate the chicken: In a bowl, mix the chicken with grated turmeric, half the minced garlic, 1 tbsp fish sauce, and a squeeze of lime juice. Let it sit for at least 20 minutes (or overnight for maximum flavor). Tip: Wear gloves if using fresh turmeric—it stains!
  2. Prep the noodles: Soak rice noodles in warm water for 15–20 minutes until pliable but still firm. They’ll finish cooking later. Pro tip: Undercook them slightly to avoid mushiness.
  3. Sizzle the aromatics: Heat a splash of coconut milk in a deep pan over medium heat. Add shallots, lemongrass, and remaining garlic. Sauté until fragrant—about 2 minutes. Your kitchen will smell incredible.
  4. Brown the chicken: Push the aromatics to one side and add the marinated chicken. Let it sear undisturbed for 3–4 minutes per side until golden. Resist the urge to stir too soon!

At this point, your dish is already coming together beautifully—the turmeric is working its magic, and the scent of lemongrass is intoxicating. Stay tuned for the next steps, where we’ll bring it all together with coconut milk and noodles for the ultimate comfort bowl.

Pro Tips, Variations, and Substitutions

This Thai turmeric chicken and noodles recipe is wonderfully forgiving, so don’t be afraid to make it your own! Here are a few ways to customize it:

  • Protein Swap: Not a fan of chicken? Thinly sliced beef, shrimp, or even tofu work beautifully in this dish.
  • Noodle Alternatives: If you can’t find rice noodles, try using udon, soba, or even zucchini noodles for a low-carb twist.
  • Spice Level: Adjust the heat by adding more or less chili paste. A drizzle of sriracha at the end is always a good idea for spice lovers!
  • Fresh Herbs: If Thai basil is hard to find, cilantro or mint make excellent substitutes.

What to Serve With Thai Turmeric Chicken and Noodles

This dish is hearty enough to stand alone, but pairing it with a few sides can turn it into a feast! Here are some delicious accompaniments:

  • Fresh Veggies: A simple cucumber salad or quick-pickled carrots add a refreshing crunch.
  • Spring Rolls: Crispy or fresh, they’re the perfect appetizer.
  • Thai Iced Tea: The creamy sweetness balances the savory turmeric flavors.
  • Sticky Rice: For those who love extra carbs, a side of sticky rice is always welcome.

Storage and Reheating Tips

Leftovers? No problem! Here’s how to keep your Thai turmeric chicken and noodles tasting fresh:

  • Storage: Keep in an airtight container in the fridge for up to 3 days.
  • Reheating: Warm in a skillet over medium heat with a splash of water or broth to prevent drying out. Microwaving works too—just cover with a damp paper towel.
  • Freezing: While possible, the noodles may soften when thawed. If freezing, store the chicken and sauce separately.

Frequently Asked Questions

Can I use ground turmeric instead of fresh?
Yes! Substitute 1 teaspoon of ground turmeric for every tablespoon of fresh. The flavor will be slightly different but still delicious.

Is there a gluten-free option?
Absolutely! Just ensure your soy sauce is gluten-free (tamari works great), and stick to rice noodles.

Can I make this ahead of time?
You can prep the chicken and sauce in advance, but cook the noodles fresh to avoid mushiness.

What if I don’t have fish sauce?
A little soy sauce or coconut aminos can stand in, but the flavor won’t be quite as authentic.

Final Thoughts

There’s something so comforting about a bowl of fragrant, golden turmeric chicken and noodles—it’s like a warm hug from the inside. Whether you’re cooking for a weeknight dinner or impressing friends with your Thai cuisine skills, this dish is sure to delight. Don’t forget to garnish with extra herbs and a squeeze of lime for that perfect finishing touch. Happy cooking, and may your kitchen always smell as wonderful as this dish tastes!

Print
clock clock iconcutlery cutlery iconflag flag iconfolder folder iconinstagram instagram iconpinterest pinterest iconfacebook facebook iconprint print iconsquares squares iconheart heart iconheart solid heart solid icon

Thai Turmeric Chicken and Noodles

  • Author: Trusted Blog

Description

A vibrant and flavorful Thai-inspired dish featuring turmeric-marinated chicken served over noodles with fresh herbs.


Ingredients

Scale

For the Crust:

  • 1 lb boneless chicken thighs, sliced
  • 2 tbsp turmeric powder
  • 3 cloves garlic, minced
  • 1 tbsp ginger, grated
  • 2 tbsp fish sauce
  • 1 tbsp brown sugar
  • 8 oz rice noodles
  • 1 cup bean sprouts
  • 1/4 cup fresh cilantro, chopped
  • 1/4 cup fresh mint, chopped
  • 2 tbsp vegetable oil
  • 1 lime, cut into wedges

Instructions

1. Prepare the Crust:

  1. In a bowl, mix chicken with turmeric, garlic, ginger, fish sauce, and brown sugar. Marinate for at least 30 minutes.
  2. Cook rice noodles according to package instructions. Drain and set aside.
  3. Heat vegetable oil in a pan over medium heat. Add marinated chicken and cook until golden and fully cooked, about 6-8 minutes.
  4. Divide noodles among serving bowls. Top with cooked chicken, bean sprouts, cilantro, and mint.
  5. Serve with lime wedges on the side for squeezing over the dish.

Notes

You can customize the seasonings to taste.

The BEST Meatloaf Recipe I’ve Ever Tried!

best-meatloaf-recipe-ever-tried

The BEST Meatloaf Recipe I’ve Ever Tried!

There’s something deeply comforting about a well-made meatloaf, isn’t there? It takes me back to childhood Sunday dinners at my grandmother’s house—the aroma of savory spices filling the kitchen, the anticipation of that first warm slice smothered in ketchup glaze. For years, I chased that perfect texture and flavor, tweaking recipes until I finally stumbled upon this one. Let me tell you, friends, this isn’t just good meatloaf—it’s the kind that makes you close your eyes and sigh after the first bite.

Ingredients You’ll Need

  • 2 lbs ground beef (80/20 blend) – The fat keeps it juicy, trust me!
  • 1 cup panko breadcrumbs – They give the perfect light texture
  • 1/2 cup whole milk – Whole makes all the difference
  • 1 large yellow onion, finely diced – Sweetness that melts right in
  • 2 garlic cloves, minced – Because everything’s better with garlic
  • 2 eggs – Our binding magic
  • 1/4 cup ketchup + 1/3 cup for glaze – Double duty for flavor and that iconic crust
  • 1 tbsp Worcestershire sauce – The umami secret weapon
  • 1 tsp smoked paprika – Adds that subtle depth
  • 1 tsp dried thyme – My grandma’s special touch
  • 1 1/2 tsp salt – Season generously
  • 1/2 tsp black pepper – Freshly ground if you can

Let’s Make Some Comfort Food Magic

Step 1: First, preheat your oven to 350°F (175°C). While it warms, grab your largest mixing bowl—this is where the magic begins. Combine the milk and panko breadcrumbs, letting them soak for about 5 minutes until the breadcrumbs soften. This little trick prevents dryness!

Step 2: Add your ground beef to the bowl, then gently mix in all remaining ingredients except that extra 1/3 cup of ketchup we reserved. Here’s my golden rule: mix with your hands, but don’t overwork it! Just combine until everything is evenly distributed—overmixing makes tough meatloaf.

Step 3: Transfer the mixture to a loaf pan or shape it free-form on a parchment-lined baking sheet (my preference—it gets more caramelized edges!). Use damp hands to smooth the top into a perfect loaf shape. Now for the pièce de résistance: spread that reserved ketchup evenly over the top like you’re frosting a cake. This will bake into the most glorious sticky-sweet crust.

Step 4: Bake for about 1 hour, but here’s where you need to pay attention. At the 45-minute mark, start checking the internal temperature—we’re aiming for 160°F at the center. If the top is browning too quickly, just tent it loosely with foil. The smell at this point will have everyone hovering in the kitchen!

Pro Tips, Variations, and Substitutions

This meatloaf recipe is wonderfully adaptable to suit your tastes or what you have on hand. Here are some of my favorite tweaks:

  • Breadcrumbs swap: If you don’t have breadcrumbs, crushed saltine crackers or even quick oats work beautifully
  • Meat variations: Try a 50/50 mix of beef and pork for extra richness, or use ground turkey for a lighter version
  • Flavor boosters: Add 1/4 cup grated parmesan cheese or a splash of Worcestershire sauce to the mixture
  • Glaze alternatives: Instead of ketchup, try BBQ sauce or a mix of ketchup and brown sugar for a sweeter crust

The Perfect Sides for Your Meatloaf

This comforting main dish pairs beautifully with so many classic sides. My family’s favorites include:

  • Creamy mashed potatoes (the ultimate comfort food combo!)
  • Roasted carrots or green beans
  • Buttery corn on the cob in summer
  • A crisp garden salad to balance the richness
  • Mac and cheese for the ultimate comfort meal

Storage and Reheating Tips

One of the best things about meatloaf is how well it keeps! Here’s how to enjoy leftovers:

  • Refrigerator: Store cooled meatloaf in an airtight container for 3-4 days
  • Freezer: Wrap individual slices tightly in plastic wrap and foil, then freeze for up to 3 months
  • Reheating: Warm slices in a 350°F oven for about 15 minutes, or microwave individual portions for 1-2 minutes
  • Pro tip: Leftover meatloaf makes incredible sandwiches the next day!

Frequently Asked Questions

Q: Why does my meatloaf fall apart when I slice it?
A: Let it rest for at least 10 minutes after baking – this allows the juices to redistribute and helps it hold its shape.

Q: Can I make this meatloaf ahead of time?
A: Absolutely! Prepare the mixture up to a day in advance and store it covered in the refrigerator until ready to bake.

Q: How do I know when the meatloaf is done?
A: The internal temperature should reach 160°F when measured with a meat thermometer in the center.

Q: Can I make mini meatloaves instead?
A: Yes! Divide the mixture into muffin tins or small loaf pans and reduce baking time to about 25-30 minutes.

A Cozy Final Thought

There’s something truly special about a perfectly baked meatloaf – the way it fills the kitchen with comforting aromas, the anticipation as it comes out of the oven glistening, and the joy of sharing this humble yet deeply satisfying dish with loved ones. Whether it’s a busy weeknight or a special Sunday supper, this recipe has earned its place as a family favorite in our home, and I hope it will in yours too. Happy cooking, and may your table always be filled with good food and even better company!

Print
clock clock iconcutlery cutlery iconflag flag iconfolder folder iconinstagram instagram iconpinterest pinterest iconfacebook facebook iconprint print iconsquares squares iconheart heart iconheart solid heart solid icon

The BEST Meatloaf Recipe I’ve Ever Tried!

  • Author: Trusted Blog

Description

A classic, juicy meatloaf with a sweet and tangy glaze that’s perfect for family dinners.


Ingredients

Scale

For the Crust:

  • 1.5 lbs ground beef
  • 1 cup breadcrumbs
  • 1 small onion, finely chopped
  • 1 egg, beaten
  • 1/2 cup milk
  • 2 tbsp ketchup
  • 1 tsp Worcestershire sauce
  • 1 tsp garlic powder
  • 1 tsp salt
  • 1/2 tsp black pepper
  • 1/4 cup brown sugar
  • 1/4 cup ketchup (for glaze)
  • 1 tbsp mustard (for glaze)

Instructions

1. Prepare the Crust:

  1. Preheat oven to 350°F (175°C). Lightly grease a loaf pan.
  2. In a large bowl, mix ground beef, breadcrumbs, onion, egg, milk, ketchup, Worcestershire sauce, garlic powder, salt, and pepper until well combined.
  3. Press the mixture into the prepared loaf pan.
  4. In a small bowl, mix brown sugar, ketchup, and mustard for the glaze. Spread evenly over the meatloaf.
  5. Bake for 1 hour or until the internal temperature reaches 160°F (70°C). Let rest for 10 minutes before slicing.

Notes

You can customize the seasonings to taste.