Ultimate Short Rib Pho French Dip Banh Mi Recipe

ultimate-short-rib-pho-banh-mi

The Ultimate Comfort Mashup: Short Rib Pho French Dip Banh Mi

There’s something magical about the way certain flavors find each other—like old friends reuniting after years apart. That’s exactly what happened in my kitchen last Sunday, when the pouring rain outside demanded something deeply comforting. I found myself staring at a package of bone-in short ribs, a leftover baguette from breakfast, and a jar of star anise that smelled like my grandmother’s kitchen. Before I knew it, I was creating this love letter to three of my favorite dishes: pho, French dip, and banh mi. The result? A sandwich so soul-warming, I may have hugged my plate when I was done.

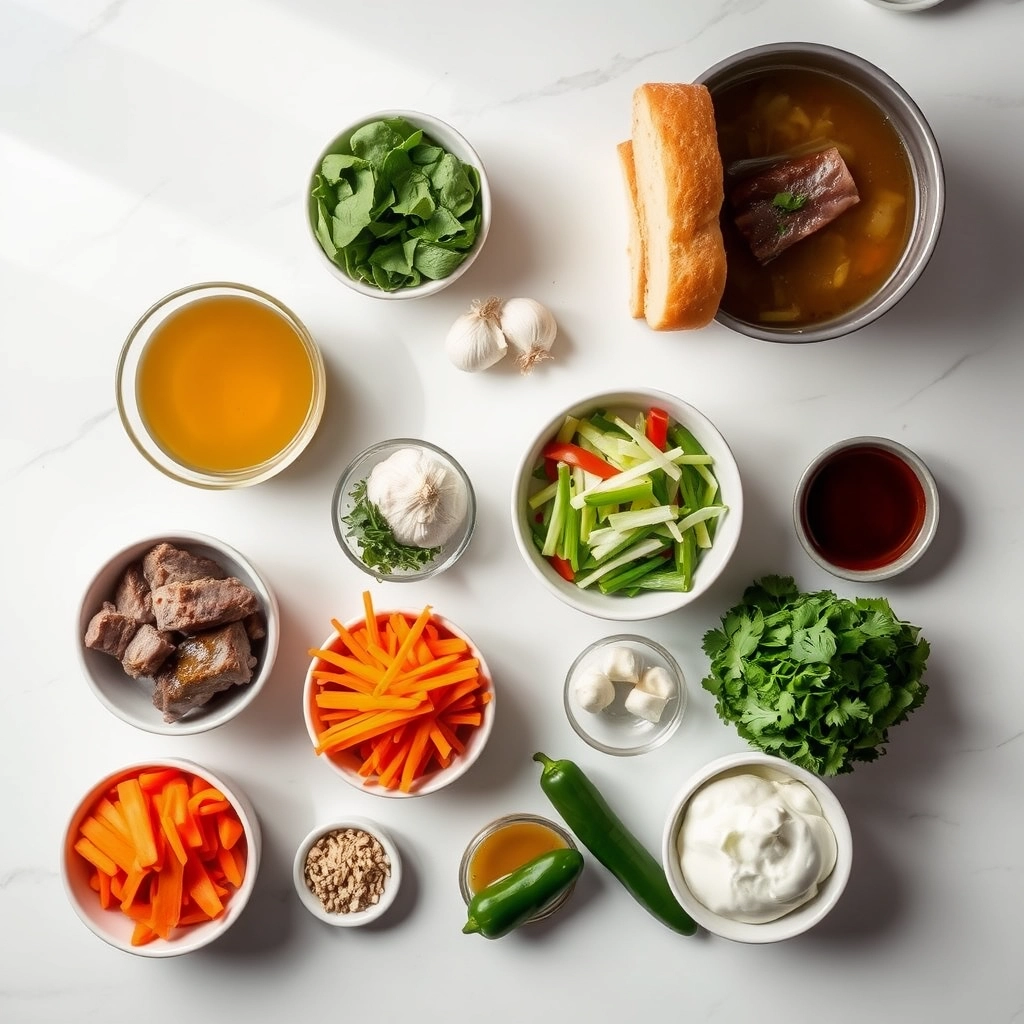
Ingredients You’ll Need (And Why They Matter)

  • 3 lbs bone-in short ribs – The marbling here creates a broth so rich, you’ll want to drink it with a spoon (and you can!)
  • 1 large yellow onion, halved – We’ll char this for that signature pho depth
  • 3-inch knob of ginger, sliced – Don’t peel it! The skin adds wonderful earthiness
  • 5 star anise pods – These little stars are the heart of pho’s fragrance
  • 1 cinnamon stick – Just one—we’re whispering spice, not shouting it
  • 2 tbsp fish sauce – The umami backbone (trust me, it won’t taste fishy)
  • 1 crusty baguette – Seek out one with a crackly exterior and pillowy interior
  • 1 cup shredded carrots & daikon – The bright, crunchy counterpoint to all that richness
  • Fresh cilantro and jalapeños – Because every great banh mi needs herby heat
  • 1 tbsp butter – For the most luxurious au jus you’ve ever dipped

Let’s Build Flavor Together

Step 1: The Charred Aromatics Ritual
Place your onion halves and ginger slices directly on a gas burner (or under the broiler) until blackened in spots. This isn’t about perfection—those dark bits are flavor gold. I always do this while the short ribs are browning, filling the kitchen with that incredible smoky-sweet perfume that makes neighbors peek in curiously.

Step 2: The Long, Slow Simmer
After browning the ribs (don’t rush this—get that crust!), tuck them into your pot with the charred aromatics, spices, and enough water to cover by about 2 inches. Here’s my secret: I add a splash of cold water every 30 minutes as it reduces. This keeps the broth clear and lets the collagen work its magic. Skim the foam occasionally—it’s like giving your broth a spa treatment.

Step 3: The Shredding Ceremony
When the meat falls off the bone with just a nudge (about 3 hours later), strain the broth but save those tender short rib pieces. Let them cool slightly before shredding—this is when I sneak a few bites, “for quality control.” The broth gets strained twice through cheesecloth because we’re going for liquid silk here.

Step 4: The Butter Trick
Before serving, whisk a tablespoon of butter into the strained broth. It’s not traditional, but oh, what a difference it makes—creating that velvety mouthfeel that clings to every dip of your sandwich. I learned this from a French chef who winked and said “sometimes borders are meant to be crossed.”

Pro Tips, Variations, and Substitutions

This Ultimate Short Rib Pho French Dip Banh Mi is already packed with flavor, but here are some ways to make it your own:

  • Protein Swap: No short ribs? Try brisket, chuck roast, or even leftover roast beef for a quicker version.
  • Vegetarian Twist: Swap the meat for marinated tofu or portobello mushrooms and use a rich vegetable broth.
  • Spice Level: Adjust the heat by adding more or less sriracha to the dipping broth.
  • Bread Options: Traditional banh mi rolls are ideal, but a crusty baguette or ciabatta will work in a pinch.

What to Serve It With

This sandwich is a meal in itself, but if you’re looking to round out your table, try these pairings:

  • A simple green salad with a lime vinaigrette
  • Vietnamese-style pickled vegetables (do chua) for extra crunch
  • Crispy spring rolls or shrimp chips
  • A cold beer or iced Vietnamese coffee

Storage and Reheating Tips

Leftovers? Here’s how to keep them tasting fresh:

  • Store components separately: meat in broth, bread at room temperature, and toppings in airtight containers.
  • The pho broth and meat will keep for 3-4 days in the fridge or up to 3 months frozen.
  • Reheat the broth gently on the stove – microwave reheating can make it cloudy.
  • Refresh bread in a 350°F oven for 5 minutes if it’s gone stale.

Frequently Asked Questions

Can I make this in a slow cooker?

Absolutely! Brown the short ribs first, then cook on low for 8 hours with the broth ingredients. The meat will be fall-apart tender.

What if I can’t find all the traditional pho spices?

While star anise and cinnamon are ideal, you can substitute with 1-2 teaspoons of Chinese five-spice powder in a pinch.

How do I prevent the sandwich from getting soggy?

Toast your bread well and layer the meat first, followed by the pickled vegetables and herbs. The fat in the meat creates a moisture barrier.

Can I make this ahead for a party?

Yes! Prepare all components up to 2 days in advance. Assemble sandwiches just before serving to maintain texture.

A Warm Final Thought

There’s something magical about this sandwich – the way the rich, aromatic broth mingles with the crusty bread, the bright pickled vegetables cutting through the richness of the meat. It’s a labor of love that rewards every minute of preparation. Whether you’re serving it for a special occasion or just treating yourself to an extraordinary lunch, this fusion masterpiece is sure to become one of those recipes you return to again and again. The first bite will transport you – and have everyone at your table asking for seconds.

Print
clock clock iconcutlery cutlery iconflag flag iconfolder folder iconinstagram instagram iconpinterest pinterest iconfacebook facebook iconprint print iconsquares squares iconheart heart iconheart solid heart solid icon

Short Rib Pho French Dip Banh Mi with Thai Basil Chimichurri

  • Author: Trusted Blog

Description

A fusion sandwich combining Vietnamese banh mi with French dip and pho flavors, topped with a vibrant Thai basil chimichurri.


Ingredients

Scale

For the Crust:

  • 1.5 lbs beef short ribs
  • 4 cups beef pho broth
  • 1 baguette, sliced into 4 portions
  • 1/2 cup Thai basil leaves
  • 1/4 cup cilantro
  • 2 cloves garlic
  • 1/4 cup olive oil
  • 2 tbsp lime juice
  • 1 tbsp fish sauce
  • 1 tsp sugar
  • 1/2 tsp red pepper flakes
  • 1 carrot, julienned
  • 1/2 cucumber, sliced
  • 1 jalapeño, sliced
  • 1/4 cup mayonnaise

Instructions

1. Prepare the Crust:

  1. Slow cook short ribs in pho broth for 4-6 hours until tender. Shred meat and reserve broth for dipping.
  2. Blend Thai basil, cilantro, garlic, olive oil, lime juice, fish sauce, sugar, and red pepper flakes to make chimichurri.
  3. Toast baguette slices. Spread mayonnaise on each half.
  4. Layer shredded short rib, carrot, cucumber, and jalapeño on baguette. Drizzle with chimichurri.
  5. Serve with small bowls of warm pho broth for dipping.

Notes

You can customize the seasonings to taste.

Easy Apple Mocktail – Refreshing Non-Alcoholic Drink

easy-apple-mocktail-refreshing-drink

A Crisp Autumn Sip: My Favorite Apple Mocktail

There’s something about the first crisp days of autumn that makes me crave the simple pleasures—warm sweaters, golden afternoons, and of course, the sweet-tart kiss of apple season. Last weekend, as I watched amber leaves dance outside my kitchen window, I found myself longing for a drink that captured that cozy-yet-refreshing feeling—something celebratory but without the buzz. That’s how this sparkling apple mocktail was born, and friends, it’s become my new ritual for savoring the season.

Ingredients You’ll Need

  • 2 cups fresh apple cider – Seek out the unfiltered, cloudy kind for that rustic flavor. (I adore the local orchard’s blend with hints of cinnamon!)
  • 1/2 cup ginger beer – The spicy kick balances the sweetness. Fever Tree or Bundaberg are my go-tos.
  • 1 tbsp fresh lemon juice – Just a squeeze brightens everything up.
  • 1 tsp maple syrup – Optional, but adds a lovely autumnal depth.
  • Sparkling water or club soda – For that effervescent lift.
  • Thin apple slices & cinnamon sticks – Because we eat (and drink!) with our eyes first.
  • Ice cubes – Bonus points if you freeze some with tiny apple slices inside!

Let’s Make Magic

Step 1: The Foundation
In your prettiest pitcher (this drink deserves to be festive!), combine the apple cider, lemon juice, and maple syrup if using. Give it a gentle stir—the maple should dissolve easily into the cider’s warmth. Tip: Taste as you go! Some ciders are sweeter than others, so adjust the lemon or syrup accordingly.

Step 2: The Sparkle
Just before serving, pour in the ginger beer and a splash of sparkling water. Here’s my secret: stir lightly with a cinnamon stick instead of a spoon to infuse a whisper of spice. The bubbles will dance merrily, so no need to overmix.

Pro Tips, Variations, and Substitutions

This easy apple mocktail is wonderfully adaptable to suit your taste and what you have on hand. Here are some ways to make it your own:

  • Use different apples: Try tart Granny Smith for a zingy twist or Honeycrisp for extra sweetness.
  • Sparkling water swap: Replace with ginger ale for a spicier kick or lemon-lime soda for extra fizz.
  • Herbal boost: Muddle fresh mint or rosemary in the glass before adding other ingredients for an aromatic touch.
  • Citrus twist: A squeeze of lime or orange juice brightens the flavors beautifully.

What to Serve With Your Apple Mocktail

This refreshing drink pairs perfectly with:

  • Cheese boards featuring sharp cheddar or brie
  • Autumn-inspired appetizers like baked brie with honey
  • Spiced nuts or caramel popcorn for a sweet-and-savory combo
  • Light salads with apple slices and walnuts

Storage and Make-Ahead Tips

While best enjoyed fresh, you can prepare components ahead:

  • Store apple juice mixture (without sparkling water) in the fridge for up to 2 days
  • Add ice and sparkling water just before serving to maintain fizz
  • Freeze apple juice in ice cube trays to prevent drink dilution
  • Leftovers (without ice) keep 1 day refrigerated but will lose carbonation

Frequently Asked Questions

Can I make this into a cocktail?

Absolutely! Add 1-2 oz of bourbon, rum, or vodka per serving for an adult version.

What if I don’t have fresh apples for garnish?

Dried apple slices, cinnamon sticks, or even a sprig of thyme make lovely alternatives.

Is there a sugar-free version?

Use unsweetened apple juice and sugar-free sparkling water. A dash of vanilla extract adds natural sweetness.

Can I make a large batch for parties?

Yes! Mix everything except sparkling water in a pitcher. Add chilled sparkling water to individual glasses when serving.

A Cozy Final Thought

There’s something magical about the crisp, comforting flavors of apple that make this mocktail feel like a warm hug in a glass. Whether you’re hosting friends, enjoying a quiet evening, or simply craving something special, this easy recipe brings joy to any moment. The best part? Every sip reminds us that delicious doesn’t have to be complicated. Here’s to simple pleasures and the sweet taste of autumn any time of year!

Print
clock clock iconcutlery cutlery iconflag flag iconfolder folder iconinstagram instagram iconpinterest pinterest iconfacebook facebook iconprint print iconsquares squares iconheart heart iconheart solid heart solid icon

Easy Apple Mocktail

  • Author: Trusted Blog

Description

A refreshing and simple apple mocktail perfect for any occasion.


Ingredients

Scale

For the Crust:

  • 2 cups apple juice
  • 1/2 cup sparkling water
  • 1 tbsp lemon juice
  • 1 tsp honey
  • Ice cubes
  • Apple slices for garnish

Instructions

1. Prepare the Crust:

  1. In a pitcher, combine apple juice, lemon juice, and honey. Stir well.
  2. Add sparkling water and stir gently to mix.
  3. Fill glasses with ice cubes and pour the mocktail over the ice.
  4. Garnish with apple slices and serve immediately.

Notes

You can customize the seasonings to taste.

Best Steak Marinade – Ultimate Flavor Boost

best-steak-marinade-flavor-boost

The Secret to the Juiciest, Most Flavorful Steak of Your Life

There’s something magical about the sizzle of a perfectly marinated steak hitting a hot grill. The aroma that fills the air, the anticipation of that first tender bite… It takes me back to summer evenings at my grandparents’ ranch, where my grandpa would swear by his “secret” marinade that had everyone begging for seconds. After years of tweaking his recipe (and finally wearing him down to share his secrets), I’m thrilled to pass along this ultimate flavor booster that never fails to impress.

Ingredients That Make the Magic Happen

  • 1/2 cup soy sauce – The salty backbone of our marinade (use reduced-sodium if you’re watching salt intake)
  • 1/4 cup olive oil – Helps carry all those beautiful flavors into the meat
  • 3 tablespoons Worcestershire sauce – That umami kick you can’t quite put your finger on
  • 2 tablespoons balsamic vinegar – My grandpa’s secret weapon for tenderizing
  • 2 tablespoons Dijon mustard – Adds depth and helps emulsify everything
  • 4 garlic cloves, minced – Because can you ever really have too much garlic?
  • 1 tablespoon brown sugar – Just enough sweetness to balance the savory
  • 1 teaspoon smoked paprika – For that subtle campfire essence
  • 1/2 teaspoon black pepper – Freshly ground makes all the difference
  • 1 sprig fresh rosemary – The herbal note that ties it all together

Preparing Your Flavor Bomb

Now comes the fun part – let’s create some magic together! Clear off a little counter space and grab your favorite mixing bowl (I always use my grandmother’s yellow Pyrex – it just makes everything taste better somehow).

  1. Whisk the liquids first – In your bowl, combine the soy sauce, olive oil, Worcestershire, and balsamic vinegar. Watch how the colors swirl together like a savory sunset.
  2. Add the flavor boosters – Stir in the Dijon mustard, minced garlic (take a moment to inhale that glorious aroma), brown sugar, smoked paprika, and black pepper. The mixture should look rich and glossy now.
  3. Bruise your rosemary – This is my favorite trick! Gently crush the rosemary sprig between your palms to release its oils before adding it to the mix. It makes all the difference in infusing that herbal goodness.
  4. Taste and adjust – Dip a spoon in (yes, it’s safe to taste!) – you should get hits of savory, sweet, and tangy all at once. Need more garlic? Go for it! This is your masterpiece.

Now here’s where patience comes into play… but trust me, what comes next is worth the wait. (Stay tuned for the marinating secrets and cooking tips that will take your steak from good to “can I have your recipe?” amazing!)


“`html

Pro Tips for Steak Marinade Success

Want to take your steak marinade from good to legendary? Here are my tried-and-true secrets:

  • Poke holes in thicker cuts with a fork to help the marinade penetrate deeper
  • Always use room temperature steak before grilling for even cooking
  • Marinate in a ziplock bag to ensure every inch gets coated (and less cleanup!)
  • For extra tenderization, add 1 tbsp of pineapple juice or kiwi puree (the natural enzymes break down fibers)

Delicious Variations to Try

This versatile marinade is like your favorite jeans – it goes with everything! Try these twists:

  • Asian-Inspired: Swap Worcestershire for soy sauce, add 1 tsp sesame oil and a thumb of grated ginger
  • Smoky Chipotle: Add 1-2 minced chipotle peppers in adobo sauce
  • Herb Garden: Mix in 2 tbsp each fresh rosemary, thyme and parsley
  • Bourbon Sweet: Replace 1/4 cup oil with bourbon and add 2 tbsp maple syrup

The Perfect Pairings

While this marinade makes steak the star, here’s how to build the perfect plate:

  • Classic: Garlic mashed potatoes + roasted asparagus
  • Summer Vibes: Grilled corn on the cob + watermelon feta salad
  • Comfort Food: Crispy roasted potatoes + creamed spinach
  • Low-Carb: Cauliflower puree + grilled zucchini ribbons

Storing and Reheating Like a Pro

Storage: Leftover marinated steak keeps 3-4 days in the fridge. For longer storage, freeze in marinade for up to 3 months (the acid helps prevent freezer burn!).

Reheating: Never microwave! Instead:

  • Slice cold steak and quickly sear in a hot pan
  • Or place whole steak in 250°F oven until just warmed through

Your Steak Marinade Questions Answered

Q: How long should I marinate steak?
A: 2-4 hours for tender cuts like filet, 4-8 hours for tougher cuts like flank. Overnight is great for extra flavor!

Q: Can I reuse the marinade?
A: Only if you boil it first to kill bacteria. I prefer making extra and setting some aside before adding meat.

Q: Why is my steak tough after marinating?
A: You might have over-marinated! Too much acid (like lemon juice) can actually toughen meat if left too long.

Q: Can I use this for chicken or pork?
A: Absolutely! Just adjust marinating times – chicken needs 1-4 hours, pork can go 4-12 hours.

The Secret to Steakhouse Memories at Home

There’s something magical about that first bite of perfectly marinated steak – the way the flavors bloom, the tender texture, the way it makes an ordinary Tuesday feel like a celebration. This marinade has been my go-to for everything from date nights to backyard BBQs, always earning those coveted “you should open a restaurant!” compliments. The real secret ingredient? Taking that extra moment to let the flavors work their magic. Because good food isn’t just about nourishment – it’s about creating moments worth savoring. Now go forth and make some delicious memories!

“`
Print

clock clock iconcutlery cutlery iconflag flag iconfolder folder iconinstagram instagram iconpinterest pinterest iconfacebook facebook iconprint print iconsquares squares iconheart heart iconheart solid heart solid icon

Best Steak Marinade

  • Author: Trusted Blog

Description

A flavorful and easy marinade that enhances the taste of any steak.


Ingredients

Scale

For the Crust:

  • 1/3 cup soy sauce
  • 1/2 cup olive oil
  • 1/3 cup fresh lemon juice
  • 1/4 cup Worcestershire sauce
  • 1 1/2 tablespoons garlic powder
  • 3 tablespoons dried basil
  • 1 1/2 tablespoons dried parsley flakes
  • 1 teaspoon ground white pepper
  • 1/4 teaspoon hot pepper sauce (optional)
  • 1 teaspoon dried minced garlic (optional)

Instructions

1. Prepare the Crust:

  1. In a medium bowl, whisk together soy sauce, olive oil, lemon juice, and Worcestershire sauce.
  2. Add garlic powder, basil, parsley, white pepper, hot pepper sauce, and minced garlic. Mix well.
  3. Place steak in a resealable plastic bag or shallow dish. Pour marinade over steak, ensuring it is fully coated.
  4. Seal or cover and refrigerate for at least 2 hours, or overnight for best results.
  5. Remove steak from marinade and discard excess marinade. Cook steak as desired.

Notes

You can customize the seasonings to taste.

Best Sweet & Sour Cauliflower – Easy Vegan Recipe

best-sweet-sour-cauliflower-vegan

The Best Sweet & Sour Cauliflower That Even Meat-Lovers Crave

There’s something magical about sweet and sour flavors—that perfect balance of tangy and sugary that makes your taste buds dance. I remember the first time I tried making a vegan version of this classic takeout dish. My husband, a self-proclaimed carnivore, took one bite of this crispy, saucy cauliflower and declared, “Wait… this is better than the original!” That’s when I knew this recipe was a keeper.

Whether you’re looking for a meatless Monday star or a crowd-pleasing appetizer for your next gathering, this sweet and sour cauliflower is guaranteed to disappear fast. The secret? A double-crispy batter and a sauce that’s sticky, glossy, and packed with just the right amount of zing. Let’s get cooking!

Ingredients You’ll Need

This recipe is all about pantry staples with a few fresh twists. Here’s what you’ll need:

  • 1 large head of cauliflower – Look for one that feels heavy for its size with tight, creamy-white florets.
  • 1 cup all-purpose flour – Or swap half with cornstarch for extra crispiness (my little cheat!).
  • 1 cup cold sparkling water – The bubbles make the batter light and airy—trust me, it makes a difference!
  • 2 tbsp soy sauce – For that umami depth. Use tamari if gluten-free.
  • 1/2 cup pineapple juice – The natural sweetness here balances the sauce perfectly. Save the chunks for garnish!
  • 1/4 cup rice vinegar – Mild and slightly sweet—apple cider vinegar works in a pinch.
  • 3 tbsp ketchup – Sounds quirky, but it’s the secret to that nostalgic takeout flavor.
  • 2 cloves garlic, minced – Because everything’s better with garlic.
  • 1-inch knob of ginger, grated – Fresh is best here—it adds a bright, spicy note.
  • Sesame seeds and scallions – For that pretty finish and extra crunch.

Let’s Make That Crispy, Saucy Magic

Now for the fun part! Here’s how we turn humble cauliflower into a showstopper:

  1. Prep the cauliflower: Break the head into bite-sized florets—not too small, or they’ll get lost in the sauce. I like leaving some stem for that satisfying crunch.
  2. Whisk the batter: In a large bowl, combine flour, sparkling water, and soy sauce. It should be the consistency of pancake batter—thick enough to coat but still drippy. Pro tip: Lumps are okay! Overmixing makes the coating tough.
  3. First fry for crispiness: Heat about an inch of neutral oil (like sunflower or grapeseed) in a deep pan to 350°F. Working in batches, dip each floret in batter, let excess drip off, then fry for 2-3 minutes until pale golden. They won’t be fully cooked yet—that’s intentional!
  4. Drain and crisp again: Place the par-fried cauliflower on a wire rack (this keeps them crispy). Once all batches are done, crank the oil to 375°F and fry again for 1-2 minutes until deeply golden. Double-frying = maximum crunch that holds up to sauce!

While the cauliflower drains, we’ll whip up that irresistible sweet & sour glaze—but that’s a story for the next half of this recipe. (Spoiler: It involves bubbling sauce and that glorious sticky toss!)

Pro Tips, Variations, and Substitutions

This sweet and sour cauliflower recipe is wonderfully forgiving and easy to customize! Here are some of my favorite tweaks:

  • Extra crispy: For crunchier cauliflower, bake at 425°F for 20 minutes before adding the sauce
  • Spice it up: Add 1/2 teaspoon of red pepper flakes or a dash of sriracha to the sauce
  • Gluten-free: Use tamari instead of soy sauce and cornstarch instead of flour
  • Fruitier version: Add 1/2 cup pineapple chunks when simmering the sauce
  • Oil-free: Skip frying and roast the cauliflower at 400°F for 25 minutes instead

What to Serve With Sweet & Sour Cauliflower

This vibrant dish pairs beautifully with so many sides! My go-to combinations are:

  • Fluffy jasmine or brown rice to soak up the delicious sauce
  • Quick stir-fried vegetables like bell peppers, snap peas, and carrots
  • Crispy baked tofu or tempeh for extra protein
  • A simple cucumber salad to balance the rich flavors
  • Steamed dumplings or spring rolls for an Asian-inspired feast

Storage and Reheating Tips

Leftovers (if you’re lucky enough to have any!) keep wonderfully:

  • Refrigerator: Store in an airtight container for 3-4 days
  • Freezer: Freeze sauce separately for up to 2 months (cauliflower may soften when thawed)
  • Reheating: Warm in a skillet over medium heat to maintain texture, or microwave in 30-second intervals
  • Reviving crispiness: For leftover fried cauliflower, pop in a 375°F oven for 5-7 minutes

Frequently Asked Questions

Can I use frozen cauliflower?
Yes! Thaw completely and pat very dry before coating and frying. Frozen florets work better for the baked version.

What can I substitute for rice vinegar?
Apple cider vinegar or white wine vinegar work in a pinch, but reduce the quantity slightly as they’re more acidic.

How do I prevent the sauce from being too thin?
Let it simmer uncovered for an extra 2-3 minutes to thicken, or mix 1 teaspoon cornstarch with 1 tablespoon cold water and stir it in.

Can I make this ahead for meal prep?
Absolutely! Prepare components separately and combine when ready to eat. The sauce keeps especially well for 4-5 days.

The Perfect Balance of Sweet & Tangy

There’s something magical about that first bite of crispy cauliflower coated in glossy, flavorful sauce – the perfect harmony of sweet and sour that makes your taste buds sing. Whether you’re serving this as a weeknight dinner centerpiece or bringing it to a potluck to impress, this recipe never fails to delight. The best part? That satisfied feeling when meat-eaters can’t believe something this delicious is completely plant-based. I hope this sweet and sour cauliflower becomes a regular in your kitchen rotation, bringing both comfort and excitement to your table. Happy cooking!

Print
clock clock iconcutlery cutlery iconflag flag iconfolder folder iconinstagram instagram iconpinterest pinterest iconfacebook facebook iconprint print iconsquares squares iconheart heart iconheart solid heart solid icon

Sweet & Sour Cauliflower

  • Author: Trusted Blog

Description

A vegetarian twist on the classic sweet and sour dish, featuring crispy cauliflower in a tangy sauce.


Ingredients

Scale

For the Crust:

  • 1 head cauliflower, cut into florets
  • 1/2 cup cornstarch
  • 2 eggs, beaten
  • 1/2 cup sugar
  • 1/2 cup apple cider vinegar
  • 1/4 cup ketchup
  • 1 tbsp soy sauce
  • 1/2 tsp garlic powder
  • 1/2 tsp onion powder
  • 1 bell pepper, diced
  • 1/2 cup pineapple chunks
  • 2 tbsp vegetable oil

Instructions

1. Prepare the Crust:

  1. Preheat oven to 425°F (220°C). Line a baking sheet with parchment paper.
  2. Dip cauliflower florets in beaten eggs, then coat with cornstarch. Place on baking sheet and bake for 20-25 minutes until crispy.
  3. In a saucepan, combine sugar, vinegar, ketchup, soy sauce, garlic powder, and onion powder. Bring to a simmer and cook for 5 minutes until slightly thickened.
  4. Heat oil in a large skillet over medium heat. Add bell pepper and pineapple, cooking for 3-4 minutes until softened.
  5. Add baked cauliflower to the skillet, pour sauce over, and toss to coat evenly. Cook for 2-3 minutes until heated through.

Notes

You can customize the seasonings to taste.

Easy Seitan Teriyaki – Quick Homemade Recipe

easy-seitan-teriyaki-recipe

A Cozy Kitchen Adventure: Easy Seitan Teriyaki

There’s something deeply comforting about the sweet, savory aroma of teriyaki wafting through the kitchen—especially on those evenings when you crave something hearty but don’t want to spend hours cooking. That’s exactly how this Easy Seitan Teriyaki recipe came to be in my kitchen. One rainy evening, with a half-empty fridge and a serious craving for takeout, I decided to whip up something quick, plant-based, and packed with flavor. The result? A dish so good, it’s now a weekly staple in our home. And the best part? It comes together in under 30 minutes!

Ingredients You’ll Need

Gather these simple, wholesome ingredients to create magic in your pan:

  • 1 cup vital wheat gluten – The star of the show! This gives seitan its chewy, meaty texture. If you’re new to cooking with it, don’t worry—it’s easier to work with than you think.
  • 2 tbsp nutritional yeast – Adds a subtle umami depth. Trust me, it makes a difference!
  • 1 tsp garlic powder – Because every good dish starts with garlic.
  • 1 tsp onion powder – For that extra savory kick.
  • ¾ cup vegetable broth – This keeps the seitan moist and flavorful. Use low-sodium if you’re watching salt intake.
  • ¼ cup soy sauce or tamari – Tamari is my go-to for a gluten-free option.
  • 2 tbsp maple syrup or agave – Just a touch of sweetness to balance the savory.
  • 1 tbsp rice vinegar – A splash of tanginess to brighten the sauce.
  • 1 tsp grated ginger – Fresh is best, but powdered works in a pinch.
  • 1 tbsp cornstarch + 2 tbsp water – Our secret for that glossy, thick teriyaki glaze.
  • 1 tbsp sesame oil – For sautéing. It adds a lovely nutty aroma.
  • Sesame seeds and sliced green onions – For that finishing touch!

Let’s Get Cooking: Step-by-Step

Now, let’s turn these humble ingredients into a dish that’ll have everyone asking for seconds. Here’s how to make it:

  1. Make the seitan dough: In a mixing bowl, combine the vital wheat gluten, nutritional yeast, garlic powder, and onion powder. Pour in the vegetable broth and stir until a dough forms. Knead it for 2-3 minutes—just until it’s elastic but not tough. Let it rest for 5 minutes while you prep the sauce.
  2. Whisk together the teriyaki sauce: In a small bowl, mix the soy sauce, maple syrup, rice vinegar, and grated ginger. In another tiny bowl, dissolve the cornstarch in water to create a slurry—this will thicken the sauce later.
  3. Shape and cook the seitan: Tear the dough into bite-sized pieces (irregular shapes are totally fine—rustic is charming!). Heat the sesame oil in a large pan over medium heat, then add the seitan pieces. Sauté for 5-6 minutes, turning occasionally, until they’re golden and slightly crispy on the edges.

Pro tip: Don’t overcrowd the pan—give those seitan pieces space to brown properly. If needed, cook them in batches!

Pro Tips, Variations, and Substitutions

Making seitan teriyaki at home is wonderfully forgiving, and there are plenty of ways to tweak it to your liking. Here are some pro tips and variations to make it your own:

  • For extra flavor: Marinate the seitan in the teriyaki sauce for 30 minutes before cooking. This helps it soak up even more of that delicious umami goodness.
  • Gluten-free option: Swap the seitan for tofu or tempeh if you’re avoiding gluten. The teriyaki sauce will still coat it beautifully!
  • Spice it up: Add a pinch of red pepper flakes or a drizzle of sriracha to the sauce for a little kick.
  • Low-sodium swap: Use coconut aminos instead of soy sauce if you’re watching your salt intake.

What to Serve With Seitan Teriyaki

This dish is incredibly versatile and pairs well with so many sides. Here are a few of my favorites:

  • Steamed rice: A classic choice—white, brown, or even cauliflower rice for a lighter option.
  • Stir-fried veggies: Bok choy, bell peppers, and snap peas add color and crunch.
  • Noodles: Toss with udon or soba noodles for a heartier meal.
  • Pickled sides: A little tang from quick-pickled cucumbers or radishes balances the sweetness of the teriyaki.

Storage and Reheating Tips

Leftovers? No problem! Here’s how to keep your seitan teriyaki tasting fresh:

  • Fridge: Store in an airtight container for up to 4 days.
  • Freezer: Freeze in a sealed bag for up to 2 months. Thaw in the fridge before reheating.
  • Reheating: Warm in a skillet over medium heat with a splash of water or extra teriyaki sauce to keep it moist. Avoid microwaving if possible—it can make the seitan rubbery.

Frequently Asked Questions

Can I use store-bought teriyaki sauce instead?
Absolutely! If you’re short on time, a good-quality bottled teriyaki sauce works just fine. Look for one with simple ingredients for the best flavor.

Why is my seitan chewy?
Overcooking can make seitan tough. Cook just until heated through and slightly caramelized—about 5–7 minutes should do the trick.

Can I make this oil-free?
Yes! Simply sauté the seitan in a little vegetable broth or water instead of oil. The sauce will still cling nicely.

How do I make it crispier?
For extra crispiness, toss the seitan in a bit of cornstarch before cooking, or broil for the last 2 minutes.

Final Thoughts

There’s something so comforting about a homemade teriyaki dish—the sticky-sweet sauce, the tender seitan, and the way it fills your kitchen with the most inviting aroma. Whether you’re cooking for a weeknight dinner or meal-prepping for the days ahead, this recipe is a keeper. I hope it becomes a staple in your home, just like it has in mine. Happy cooking, friends!

Print
clock clock iconcutlery cutlery iconflag flag iconfolder folder iconinstagram instagram iconpinterest pinterest iconfacebook facebook iconprint print iconsquares squares iconheart heart iconheart solid heart solid icon

Easy Seitan Teriyaki

  • Author: Trusted Blog

Description

A quick and flavorful vegan teriyaki dish made with seitan, perfect for a weeknight dinner.


Ingredients

Scale

For the Crust:

  • 1 lb seitan, sliced into strips
  • 1/4 cup soy sauce
  • 2 tbsp maple syrup
  • 1 tbsp rice vinegar
  • 1 tsp grated ginger
  • 2 cloves garlic, minced
  • 1 tbsp cornstarch
  • 1/4 cup water
  • 1 tbsp vegetable oil
  • 2 green onions, sliced (for garnish)
  • 1 tsp sesame seeds (for garnish)

Instructions

1. Prepare the Crust:

  1. In a small bowl, whisk together soy sauce, maple syrup, rice vinegar, ginger, and garlic to make the teriyaki sauce.
  2. In another small bowl, mix cornstarch and water to create a slurry.
  3. Heat vegetable oil in a large skillet over medium heat. Add seitan strips and cook for 3-4 minutes until lightly browned.
  4. Pour the teriyaki sauce over the seitan and stir to coat. Cook for 2 minutes.
  5. Add the cornstarch slurry and stir well. Simmer for 3-4 minutes until the sauce thickens.
  6. Garnish with sliced green onions and sesame seeds before serving.

Notes

You can customize the seasonings to taste.