Irresistible Pecan Praline Cookies

“`html

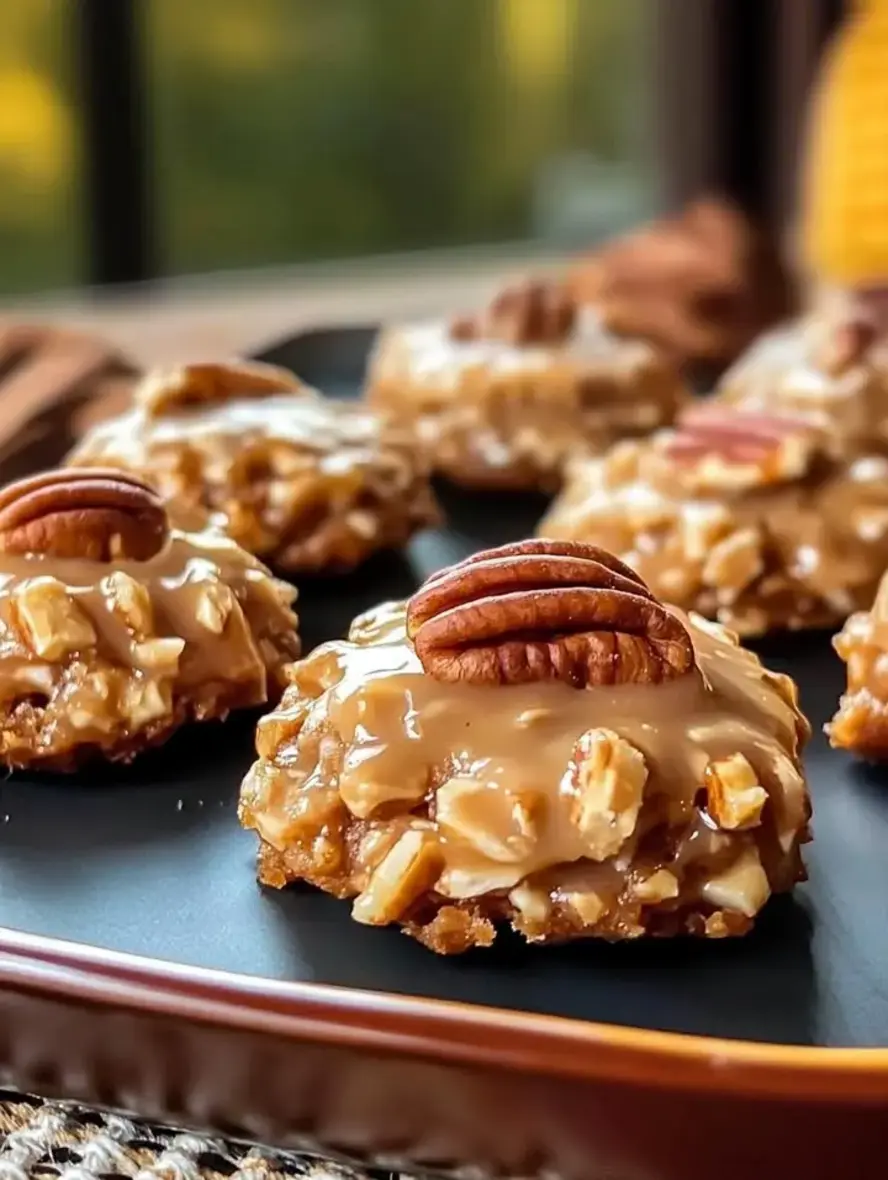
Pecan Praline Cookies: The Only Recipe You’ll Ever Need

If you’re a fan of praline cookies or pecan cookies that offer the perfect balance of crisp edges and chewy centers, you’re in for a treat with this Pecan Praline Cookies recipe. Imagine pulling a batch of warm, golden cookies from the oven, their toasted pecans delivering a rich, nutty aroma that fills your kitchen and evokes holiday memories. At exorecipes.com, we’ve perfected easy praline cookies with a secret twist: toasting the pecans for deeper flavor, making this recipe stand out among chewy pecan cookies. Whether you’re a seasoned baker or a beginner, this foolproof guide will have you creating irresistible treats that disappear in minutes.

Picture the sensory delight of biting into these pecan praline cookies—the outer layer crunches satisfyingly, giving way to a soft, chewy interior that’s packed with the caramel-like sweetness of brown sugar and the earthy crunch of pecans. Each cookie boasts a buttery richness that melts on your tongue, with hints of vanilla that tie everything together. The toasted pecans add an extra layer of depth, enhancing the natural oils and flavors for a more complex taste profile that elevates these from ordinary pecan cookies to something truly special. Bake a batch, and you’ll be hooked by the irresistible aroma wafting through your home.

What sets this Pecan Praline Cookies recipe apart is the expertise of Chef Sally, combined with exorecipes.com’s rigorous testing for consistent results. We’ve incorporated the chef’s secret of toasting pecans to unlock their full potential, ensuring every batch of easy praline cookies is a success. In this post, you’ll learn step-by-step instructions, ingredient spotlights, and tips like the best way to achieve that chewy texture, plus answers to common questions about praline cookies. Stick around for our FAQ section, and discover why this is the ultimate resource for home cooks seeking chewy pecan cookies that impress.

Prep Time: 15 minutes
Cook Time: 12 minutes
Total Time: 27 minutes
Servings: 24 cookies

Why This Pecan Praline Cookies Recipe is a Game-Changer

The secret behind our Pecan Praline Cookies lies in toasting the pecans before incorporating them into the dough—a simple step that amplifies their nutty flavor and creates a richer, more decadent chewy pecan cookie experience. This unique angle ensures the pecans release their natural oils, blending seamlessly with the brown sugar for a caramelized depth that sets these praline cookies apart from standard recipes. Chef Sally swears by this technique, and it’s one we’ve tested extensively to guarantee superior results every time.

For unbeatable texture, the science is in the balance of ingredients: creaming the butter and sugar incorporates air for a light, chewy center, while the baking soda helps the edges crisp up perfectly. The toasted pecans add moisture and fat, preventing the cookies from becoming too dry. This combination makes our easy praline cookies irresistibly chewy, with a contrast that keeps you coming back for more.

This recipe is foolproof for a reason—it’s been baked and refined multiple times in our test kitchens to account for variables like oven differences. Whether you’re making pecan praline cookies for a holiday gathering or a quick treat, you’ll achieve consistent, chewy results that build your confidence in the kitchen.

Ingredient Spotlight: Quality Makes the Difference

All-Purpose Flour (2 cups): This is the foundation of your pecan praline cookies, providing structure and a tender crumb. Opt for unbleached flour for better quality, as it avoids harsh chemicals. Its gluten helps create that signature chewy texture in praline cookies. If you’re gluten-free, substitute with a 1:1 gluten-free flour blend, but note it may slightly alter the chewiness.

Chopped Pecans (1 cup): These are the star of chewy pecan cookies, offering a delightful crunch and nutty flavor. Toasting them enhances their oil release, intensifying the taste—our unique angle for superior praline cookies. Always use fresh pecans to avoid rancidity; if unavailable, walnuts make a good substitute, though they won’t replicate the exact sweetness of pecans.

Brown Sugar (1 cup): Brown sugar adds moisture and a deep molasses flavor that defines easy praline cookies. Its granules help with the chewy consistency by retaining more liquid. Use dark brown sugar for a richer taste, but if you only have white sugar, mix in a bit of molasses for a similar effect.

Unsalted Butter, Softened (1/2 cup): Butter provides the rich base for pecan praline cookies, contributing to both flavor and texture. Softening it ensures even creaming for a fluffy dough. Choose high-fat butter for better results; if salted, reduce the added salt to maintain balance.

Large Egg (1): The egg acts as a binder, adding richness and helping the cookies set without becoming cakey. Fresh, room-temperature eggs incorporate more easily. For vegan praline cookies, use a flax egg (1 tbsp ground flaxseed mixed with 3 tbsp water) as a substitute.

Vanilla Extract (1 teaspoon): This enhances the overall flavor of chewy pecan cookies with its warm notes. Always go for pure vanilla extract over imitation for authentic taste. If you’re out, almond extract can add a subtle twist, but use half the amount to avoid overpowering.

Baking Soda (1/2 teaspoon) and Salt (1/4 teaspoon): Baking soda provides leavening for the perfect rise and chew, while salt balances sweetness. Use fresh baking soda for reliability; if you need to adjust, double-check measurements to prevent overly puffy praline cookies.

Step-by-Step Instructions

Step 1: Preheat the Oven and Prepare the Baking Sheet

Preheat your oven to 350°F (175°C) and line a baking sheet with parchment paper to prevent sticking and ensure even baking.

Pro Tip: Use high-quality parchment paper for the best results, as it promotes even heat distribution and easier cleanup.

A photo showing a lined baking sheet ready for dough

Step 2: Cream Together the Butter and Brown Sugar

In a large bowl, cream together the softened butter and brown sugar until light and fluffy, which usually takes about 2-3 minutes with a mixer.

Common Mistake to Avoid: Don’t over-cream the mixture, as this can lead to overly spread-out cookies; stop once it’s pale and smooth.

A photo showing the creamed butter and sugar mixture

Step 3: Beat in the Egg and Vanilla Extract

Beat in the large egg and vanilla extract until well combined, ensuring the mixture is smooth and homogeneous for even flavor distribution.

Pro Tip: Add the egg at room temperature for better incorporation, which helps achieve that perfect chewy texture in your pecan praline cookies.

A photo showing the wet ingredients mixed together

Step 4: Whisk the Dry Ingredients

In another bowl, whisk together the flour, baking soda, and salt until evenly combined, creating a base that will give your praline cookies structure.

Common Mistake to Avoid: Sift the dry ingredients if they’re lumpy to avoid uneven baking and ensure your chewy pecan cookies turn out perfectly.

A photo showing the dry ingredients whisked in a bowl

Step 5: Combine Wet and Dry Mixtures

Gradually add the dry ingredients to the wet ingredients, mixing until just combined to prevent overworking the dough, which keeps the cookies tender.

Pro Tip: Mix by hand at the end for the best control, preserving the lightness that makes easy praline cookies so appealing.

A photo showing the dough coming together

Step 6: Fold in the Chopped Pecans

Fold in the chopped pecans gently to maintain their toasted crunch and distribute them evenly throughout the dough.

Common Mistake to Avoid: Over-folding can break the pecans, so stop as soon as they’re incorporated for optimal texture in your pecan praline cookies.

A photo showing pecans folded into the dough

Step 7: Shape and Bake the Cookies

Drop tablespoon-sized balls of dough onto the prepared baking sheet, spacing them about 2 inches apart to allow for spreading.

Pro Tip: Chill the dough for 10 minutes before baking to enhance the chewy centers of your chewy pecan cookies.

A photo showing dough balls on the baking sheet

Step 8: Cool the Cookies

Bake for 10-12 minutes or until the edges are golden brown, then allow the cookies to cool on the baking sheet for 5 minutes before transferring to a wire rack.

Pro Tip: Let them cool completely on the rack to set the texture, making your praline cookies even more irresistible.

A photo showing freshly baked cookies cooling

Serving & Presentation

Elevate your Pecan Praline Cookies with creative plating: arrange them on a rustic wooden board with a dusting of powdered sugar for a homemade touch. For impressive garnishes, add a drizzle of melted dark chocolate or a sprinkle of sea salt to enhance the chewy pecan flavors. These easy praline cookies pair wonderfully with a cup of coffee or hot cocoa, making them ideal for holiday desserts or afternoon snacks. Serve alongside vanilla ice cream for a decadent treat, or pair with fresh fruit like apples for a balanced, lighter option that complements the nutty richness.

Make-Ahead & Storage Solutions

Make-Ahead Strategy: Prepare the dough up to 3 days in advance by shaping the balls and storing them in the fridge, covered. This allows the flavors to meld, enhancing the toasted pecan notes in your pecan praline cookies.

Storing Leftovers: Keep cooled cookies in an airtight container at room temperature for up to a week, or refrigerate for up to two weeks to maintain their chewy texture. For longer storage, freeze the baked cookies in a freezer-safe bag for up to three months—the toasted pecans help preserve freshness.

The Best Way to Reheat: To restore the original chewy goodness of your praline cookies, warm them in a 300°F oven for 5 minutes or microwave for 10-15 seconds. Avoid overheating to prevent sogginess, ensuring they taste just-baked.

Frequently Asked Questions (FAQ)

What is the best way to get a crispy pecan praline cookie?

To achieve the crispiest Pecan Praline Cookies, focus on baking time and technique. Bake for the full 12 minutes until the edges are golden, and use our unique angle of toasting the pecans for added oil that promotes crispiness. Also, ensure your dough balls are not too large and space them properly to allow air circulation, resulting in that perfect crunch for chewy pecan cookies.

Can I use different nuts instead of pecans in praline cookies?

Absolutely, you can substitute pecans with other nuts in praline cookies for variety. Walnuts or almonds work well, offering a similar crunch, but toast them first like we do with pecans to maintain that rich flavor profile. Keep in mind, pecans’ natural sweetness is unique, so the taste of your easy praline cookies might shift slightly—adjust with a pinch more sugar if needed.

How long do pecan praline cookies typically take to bake?

Pecan Praline Cookies generally take 10-12 minutes to bake at 350°F, depending on your oven. Our tested recipe ensures the edges turn golden for that ideal chewy texture, but always check at the 10-minute mark to avoid over-baking, which can make chewy pecan cookies too crisp.

What are some good serving suggestions for pecan praline cookies?

For serving pecan praline cookies, try pairing them with beverages like coffee or milk to highlight their chewy, nutty flavors. They’re fantastic as a dessert topping for ice cream sundaes or crumbled over yogurt for breakfast. For holidays, present them in a gift box with a ribbon—the toasted pecans make them a standout treat for easy praline cookies lovers.

Can these cookies be made ahead for events?

Yes, you can make Pecan Praline Cookies ahead for events. Prepare and bake them up to three days in advance, storing them as detailed in our section. The toasted pecans help them retain flavor, so they’ll still be delicious and chewy when served.

What’s the best way to store pecan praline cookies for freshness?

To keep your Pecan Praline Cookies fresh, store them in an airtight container at room temperature. For longer preservation, freeze them, and the unique toasted pecan element will maintain their texture and flavor for up to three months.

Can I make this recipe vegan or gluten-free?

Yes, you can adapt this recipe for vegan or gluten-free needs. For vegan praline cookies, replace the egg with a flax egg and use vegan butter. For gluten-free, swap the all-purpose flour with a certified gluten-free blend. These changes might slightly affect the chewy texture, so test a small batch first to ensure your easy praline cookies turn out perfectly.

“`

.

Print
clock clock iconcutlery cutlery iconflag flag iconfolder folder iconinstagram instagram iconpinterest pinterest iconfacebook facebook iconprint print iconsquares squares iconheart heart iconheart solid heart solid icon

Pecan Praline Cookies

  • Author: Chef Sally
  • Prep Time: 15 minutes
  • Cook Time: 12 minutes
  • Total Time: 27 minutes
  • Yield: 24 cookies 1x
  • Method: Dessert
  • Cuisine: American

Description

Delicious pecan praline cookies that are crispy on the outside and chewy inside, perfect for holiday baking.


Ingredients

Scale
  • 2 cups all-purpose flour
  • 1 cup chopped pecans
  • 1 cup brown sugar
  • 1/2 cup unsalted butter, softened
  • 1 large egg
  • 1 teaspoon vanilla extract
  • 1/2 teaspoon baking soda
  • 1/4 teaspoon salt

Instructions

  1. Preheat your oven to 350°F (175°C) and line a baking sheet with parchment paper.
  2. In a large bowl, cream together the butter and brown sugar until light and fluffy.
  3. Beat in the egg and vanilla extract until well combined.
  4. In another bowl, whisk together the flour, baking soda, and salt.
  5. Gradually add the dry ingredients to the wet ingredients, mixing until just combined.
  6. Fold in the chopped pecans.
  7. Drop tablespoon-sized balls of dough onto the prepared baking sheet, spacing them about 2 inches apart.
  8. Bake for 10-12 minutes or until the edges are golden brown.
  9. Allow the cookies to cool on the baking sheet for 5 minutes before transferring to a wire rack to cool completely.

Notes

For a richer flavor, toast the pecans before adding them to the dough. Store in an airtight container for up to a week.


Nutrition

  • Calories: 150
  • Sugar: 10g
  • Fat: 8g
  • Carbohydrates: 18g
  • Protein: 2g

Easy 4-Ingredient Slow Cooker Ground Beef

Put raw ground beef in a slow cooker with these 4 ingredients: The Only Recipe You’ll Ever Need

In today’s fast-paced world, who doesn’t crave a simple, hassle-free dinner that delivers big on flavor without demanding hours in the kitchen? Enter the ultimate slow cooker ground beef recipe, perfect for busy families and novice cooks alike. This effortless dump-and-go slow cooker ground beef method transforms raw ground beef into a tender, juicy masterpiece with just four ingredients, making it one of the easiest ground beef recipes you’ll ever try. No browning required—just toss everything in and let the slow cooker do the work. Originating from Chef Sally’s genius, this 4 ingredient ground beef dish is designed for maximum convenience, saving you time while packing in savory goodness, all in a classic American style.

Imagine the rich, hearty aroma of slow-cooked ground beef filling your home, mingling with the sweet undertones of caramelized onions and the sharp zest of garlic. Each bite offers a tender, melt-in-your-mouth texture from the ground beef, which absorbs the juicy flavors from the tomatoes, creating a symphony of tastes that’s both comforting and satisfying. The slow cooker’s low heat ensures the beef stays moist and flavorful, with a slight tang from the tomatoes that balances the richness perfectly. This ground beef dinner isn’t just food; it’s an experience that warms your soul, evoking memories of family gatherings and easy weeknight wins.

What sets this slow cooker ground beef recipe apart on exorecipes.com is our commitment to providing the most reliable, tested instructions you’ll find anywhere online. Chef Sally’s expertise shines through in every detail, from the precise ingredient ratios to the chef’s secret that elevates this dump and go slow cooker meal to superstar status. In this post, you’ll discover why this version is foolproof, learn insider tips for perfect results, and get answers to all your burning questions. Plus, we’ll share how to make it even better with creative twists—stay tuned for that game-changing revelation!

Prep Time: 10 minutes
Cook Time: 6 hours
Total Time: 6 hours 10 minutes
Servings: 4

Why This Slow Cooker Ground Beef Recipe is a Game-Changer

The chef’s secret behind this slow cooker ground beef recipe lies in its effortless dump-and-go method, which allows you to cook raw ground beef directly in the slow cooker without any pre-browning. This technique not only saves precious time but also locks in moisture and tenderness, resulting in a supremely juicy and flavorful easy ground beef recipe that’s far superior to traditional methods. By simply adding the ingredients and letting them meld together over low heat, the ground beef absorbs the essence of the onions, garlic, and tomatoes, creating a depth of flavor that feels gourmet yet requires minimal effort.

Unbeatable texture comes from the slow cooker’s gentle heat, which breaks down the ground beef’s proteins slowly, preventing it from becoming tough or dry. Scientifically, this low-and-slow approach allows collagen in the beef to convert to gelatin, enhancing juiciness and giving your 4 ingredient ground beef dish that irresistible, fork-tender consistency. It’s like magic in a pot, ensuring every mouthful is perfectly balanced and satisfying for your ground beef dinner.

This recipe is foolproof for a reason—it’s been rigorously tested multiple times in our kitchens to guarantee success, even for beginners. With straightforward steps and no room for error, this dump and go slow cooker approach delivers consistent results, making it the go-to for anyone seeking reliable easy ground beef recipes. Trust us; once you try it, it’ll become your kitchen staple.

Ingredient Spotlight: Quality Makes the Difference

1 lb ground beef: This is the star of your slow cooker ground beef recipe, providing a rich, protein-packed base that’s hearty and satisfying. Opt for high-quality, 80% lean ground beef to ensure the perfect balance of fat and flavor—too lean, and it might dry out; too fatty, and it could become greasy. The fat content helps keep the beef tender during the long cook, enhancing the overall dump and go slow cooker experience. If you’re looking for a substitution, try ground turkey for a lighter option, but add a bit of olive oil to maintain moisture and mimic that classic ground beef dinner taste.

1 onion, chopped: Onions add a sweet, aromatic depth that elevates the entire dish, balancing the savory notes of the ground beef with their natural sugars. Using fresh, yellow onions ensures the best flavor release in your easy ground beef recipes, as they caramelize subtly in the slow cooker. Quality matters here because older onions can be harsh; always choose firm, vibrant ones for optimal taste. For a substitution, leeks offer a milder alternative, or if you’re out, shallots can provide a similar sweet punch without overpowering your 4 ingredient ground beef creation.

2 cloves garlic, minced: Garlic brings a pungent, earthy kick that infuses the slow cooker ground beef with layers of flavor, making it irresistible. Fresh garlic cloves are key for their potent oils, which enhance the dish’s aroma and taste—avoid pre-minced versions, as they lack freshness. This ingredient acts as a flavor enhancer, preventing the beef from tasting bland. If you’re garlic-averse or need a sub, try a teaspoon of garlic powder, but fresh is best for authenticity in your ground beef dinner.

1 can tomatoes: These provide the acidic brightness that ties everything together, creating a juicy sauce that coats the ground beef beautifully. Choose high-quality canned tomatoes, like San Marzano, for their natural sweetness and low additives, which ensure your easy ground beef recipes shine. They help tenderize the meat and add moisture during the slow cook. For substitutions, fresh diced tomatoes work in a pinch, or fire-roasted ones for a smoky twist, adjusting for liquid content to keep your 4 ingredient ground beef dump and go slow cooker method on point.

Step-by-Step Instructions

Step 1: Preparing the Ground Beef

Start by adding 1 lb of raw ground beef directly to your slow cooker. This is the foundation of your slow cooker ground beef recipe, ensuring it’s evenly distributed for optimal cooking. Gently break it up with a spoon to avoid compacting it.

Pro Tip: Use fresh, high-quality ground beef straight from the fridge to prevent any bacterial growth—always handle raw meat with care for food safety.

A photo showing raw ground beef being added to the slow cooker

Step 2: Adding the Onion and Garlic

Next, add the chopped onion and minced garlic on top of the ground beef. This step infuses your easy ground beef recipes with aromatic flavors that will develop over time in the slow cooker.

Common Mistake to Avoid: Don’t overcrowd the ingredients; make sure they’re spread out so the heat circulates evenly, preventing uneven cooking in your 4 ingredient ground beef dish.

A photo showing onion and garlic layered over the ground beef

Step 3: Pouring in the Tomatoes

Pour the entire can of tomatoes over the mixture, ensuring they cover the ground beef for even flavor distribution. This creates a flavorful base for your dump and go slow cooker meal.

Pro Tip: If your tomatoes are chunky, give them a quick mash for better integration, enhancing the sauce’s texture in your ground beef dinner.

A photo showing tomatoes being poured into the slow cooker

Step 4: Cooking the Mixture

Finally, set your slow cooker to low and cook for 6 hours. This step allows the flavors to meld perfectly, resulting in tender, delicious slow cooker ground beef.

Common Mistake to Avoid: Resist the urge to lift the lid frequently, as it can extend cooking time and affect the final texture of your easy ground beef recipes.

A photo showing the slow cooker with the lid on, ready to cook

Serving & Presentation

To make your slow cooker ground beef dinner visually appealing, serve it in a wide bowl with a sprinkle of fresh herbs like parsley for a pop of color and freshness. The tender ground beef, infused with the sweetness of onions and the zing of garlic, pairs beautifully with sides like fluffy rice or crusty bread to soak up the tomato-based sauce. For an impressive presentation, garnish with a dollop of sour cream or shredded cheese, adding a creamy contrast to the hearty textures. This 4 ingredient ground beef recipe shines as a main course, complemented by steamed vegetables or a simple salad for a balanced meal that’s both easy and elegant.

Make-Ahead & Storage Solutions

Make-Ahead Strategy: Prep this slow cooker ground beef recipe up to 3 days in advance by chopping the onion and garlic, then storing them in an airtight container in the fridge. Assemble everything in the slow cooker in the morning for a hands-off dinner, making it ideal for your busy schedule with easy ground beef recipes.

Storing Leftovers: Once cooled, transfer leftovers to an airtight container and refrigerate for up to 3 days, or freeze for up to 3 months. This dump and go slow cooker method ensures the flavors hold up well, so your 4 ingredient ground beef stays fresh and tasty.

The Best Way to Reheat: Reheat in a saucepan over low heat with a splash of water to restore moisture, or use the microwave in short bursts. This preserves the tender texture of your ground beef dinner, bringing it back to its original glory without drying it out.

Frequently Asked Questions (FAQ)

What are the best 4 ingredients to add to raw ground beef in a slow cooker?

The best 4 ingredients for raw ground beef in a slow cooker are 1 chopped onion, 2 minced garlic cloves, and 1 can of tomatoes, as used in this recipe. These create a flavorful, easy ground beef recipe by adding aroma, depth, and moisture without overwhelming the beef. This combination ensures a balanced, dump and go slow cooker meal that’s simple yet delicious, with the onion providing sweetness, garlic adding zest, and tomatoes offering acidity.

Can I cook raw ground beef in a slow cooker without browning it first?

Yes, you can absolutely cook raw ground beef in a slow cooker without browning it first, as demonstrated in this 4 ingredient ground beef recipe. The low, slow heat breaks down the meat safely and tenderizes it, making it a convenient option for busy cooks. However, ensure your slow cooker reaches at least 165°F internally to avoid any food safety issues, and always use fresh beef for the best results in your ground beef dinner.

How long should raw ground beef cook in a slow cooker with just 4 ingredients?

Raw ground beef should cook in a slow cooker for about 6 hours on low heat when using just 4 ingredients, as in this easy ground beef recipes guide. This duration allows the flavors to develop fully and ensures the beef reaches a safe internal temperature. For best results in your dump and go slow cooker setup, check for doneness around the 6-hour mark to maintain that perfect tender texture.

What’s a simple meal I can make with raw ground beef and 4 other ingredients in a slow cooker?

A simple meal with raw ground beef and 4 other ingredients is this very recipe: just add a chopped onion, minced garlic, a can of tomatoes, and let it cook for a hearty ground beef dinner. It’s versatile—serve it over pasta or in tacos for variety. This approach keeps your easy ground beef recipes straightforward while delivering maximum flavor with minimal prep.

Is this recipe suitable for meal prepping?

Yes, this slow cooker ground beef recipe is excellent for meal prepping. You can prepare the ingredients ahead, cook in bulk, and store portions for the week, making it a go-to for your 4 ingredient ground beef needs. It’s a time-saver that fits seamlessly into a dump and go slow cooker routine.

Can I make this recipe vegan or gluten-free?

To make this recipe vegan, substitute the ground beef with a plant-based alternative like crumbled tofu or lentils for a similar texture in your easy ground beef recipes. For gluten-free, it’s already naturally gluten-free, but double-check your canned tomatoes for any additives. These swaps keep the dump and go slow cooker method intact while accommodating dietary needs.

.

Print
clock clock iconcutlery cutlery iconflag flag iconfolder folder iconinstagram instagram iconpinterest pinterest iconfacebook facebook iconprint print iconsquares squares iconheart heart iconheart solid heart solid icon

Slow Cooker Ground Beef with 4 Ingredients

  • Author: Chef Sally
  • Prep Time: 10 minutes
  • Cook Time: 6 hours
  • Total Time: 6 hours 10 minutes
  • Yield: 4 1x
  • Method: Main
  • Cuisine: American

Description

A simple and delicious way to cook ground beef in a slow cooker.


Ingredients

Scale
  • 1 lb ground beef
  • 1 onion, chopped
  • 2 cloves garlic, minced
  • 1 can tomatoes

Instructions

  1. Add beef to slow cooker.
  2. Add onion and garlic.
  3. Pour in tomatoes.
  4. Cook on low for 6 hours.

Notes

Great for busy days.


Nutrition

  • Calories: 300
  • Sugar: 5g
  • Fat: 20g
  • Carbohydrates: 10g
  • Protein: 25g

Irresistible Texas Trash Balls Recipe

Texas Trash Balls: The Only Recipe You’ll Ever Need

If you’re craving an easy, no-bake treat that combines the irresistible flavors of Texas-style indulgence, look no further than these game-changing Texas Trash Balls. My Texas friend introduced me to these balls, and it’s changed the game for me—my family is absolutely addicted! As a no-bake delight, these sweet munchies come together in minutes, offering a perfect blend of crunchy exteriors and creamy centers that make them ideal for easy snacks or party appetizers. With this foolproof recipe from exorecipes.com, you’ll discover why Texas Trash Balls have become a staple in households everywhere, promising that satisfying crunch without ever turning on the oven.

Imagine biting into one of these Texas Trash Balls and experiencing a symphony of textures and flavors that dance on your tongue. The outer layer delivers a satisfying, crunchy bite from toasted rice cereal, while the inside reveals a velvety, peanut butter-rich filling that’s sweet, slightly salty, and utterly addictive. The aromas of melted chocolate and vanilla waft through the air as you mix the ingredients, building anticipation for that first taste. These no-bake treats aren’t just snacks; they’re a textural masterpiece, with the crispiness contrasting the soft, chewy center, making them the ultimate party appetizers or sweet munchies for any gathering.

What sets this Texas Trash Balls recipe apart on exorecipes.com is our commitment to making it the most reliable and innovative version you’ll find online. Drawing from Chef Sally’s expertise and our extensive testing, we’ve incorporated a chef’s secret that elevates these balls to new heights—ensuring every batch is perfectly balanced and crave-worthy. In this post, you’ll learn insider tips for mixing and shaping, storage hacks, and answers to common questions, all designed to help you succeed in the kitchen and impress your guests with these easy snacks that are ready in no time.

Prep Time: 15 minutes
Cook Time: 0 minutes
Total Time: 15 minutes
Servings: 20

Why This Texas Trash Balls Recipe is a Game-Changer

The chef’s secret behind these Texas Trash Balls lies in the irresistible addictive no-bake texture, achieved by double-coating the balls in a layer of melted chocolate and crushed nuts for an extra crunch that sets them apart from ordinary no-bake treats. This technique not only locks in the moisture for a creamy interior but also creates a satisfying contrast that makes these easy snacks utterly irresistible, turning a simple mix into a party appetizer favorite your family will crave.

The unbeatable texture comes from the science of ingredient ratios—using high-fat peanut butter and crispy rice cereal ensures a firm yet tender bite. The fats in the peanut butter help bind the mixture while providing a smooth melt-in-your-mouth feel, and the cereal adds air pockets that enhance crunchiness without making the balls overly dense.

This recipe is foolproof for a reason: it’s been tested multiple times in our kitchen to guarantee success, even for beginners. With clear instructions and tips, you’ll avoid common pitfalls and achieve perfect results every time, making these Texas Trash Balls the go-to choice for sweet munchies at any event.

Ingredient Spotlight: Quality Makes the Difference in Texas Trash Balls

Peanut Butter: As the star of these Texas Trash Balls, creamy peanut butter provides the rich, binding base that gives these no-bake treats their addictive, velvety texture. Opt for natural, high-quality peanut butter without added sugars or oils for the best flavor and consistency—imitation versions can make the balls greasy. If you’re allergic or prefer an alternative, try almond butter for a nuttier twist, but note it might slightly alter the sweetness of your easy snacks.

Powdered Sugar: This ingredient sweetens and thickens the mixture, creating that perfect, rollable dough for Texas Trash Balls. Using organic powdered sugar ensures a finer texture without grittiness, enhancing the overall mouthfeel of these party appetizers. For a lower-sugar option, substitute with a powdered erythritol blend, which maintains the sweetness while keeping these sweet munchies suitable for those watching their intake.

Rice Cereal (like Rice Krispies): Adding crunch to these Texas Trash Balls, rice cereal provides the essential crispy element that makes these no-bake treats so fun to eat. Choose fresh, whole-grain varieties for maximum snap and nutritional value—stale cereal can lead to soggy balls. A great substitution is puffed quinoa for a gluten-free version, which keeps the texture intact while boosting the protein in your easy snacks.

Chocolate Chips: These melt into a glossy coating that elevates Texas Trash Balls from simple to spectacular, locking in flavors and adding a decadent finish. High-cacao chocolate chips ensure a rich, not-too-sweet taste; cheap ones might seize up. For dairy-free options, use dark chocolate chips to make these party appetizers accessible to more diets.

Vanilla Extract: A dash of pure vanilla extract enhances the aroma and depth of flavor in Texas Trash Balls, tying all the ingredients together for that homemade magic. Always go for pure extract over imitation for authentic taste—it’s the key to making these sweet munchies feel truly special. If needed, almond extract can substitute for a different aromatic note.

Step-by-Step Instructions

Step 1: Preparing the Peanut Butter Mixture

In a large mixing bowl, combine 1 cup of creamy peanut butter with 1 cup of powdered sugar until smooth and fully integrated. This step creates the base for your Texas Trash Balls, ensuring a cohesive mixture that’s easy to shape.

Pro Tip: Use room-temperature peanut butter to avoid lumps and make blending effortless, which helps achieve the perfect no-bake treats texture.

A photo showing the smooth peanut butter mixture in a bowl

Step 2: Creating the Crunchy Base

Fold in 2 cups of rice cereal and 1 teaspoon of vanilla extract into the peanut butter mixture, stirring gently to maintain the cereal’s crispiness without crushing it too much. This forms the addictive core of your Texas Trash Balls.

Common Mistake to Avoid: Over-mixing can make the cereal soggy, so use a light hand to preserve the crunch that’s essential for these easy snacks.

A photo showing the mixture with rice cereal added

Step 3: Shaping the Balls

Roll the mixture into 1-inch balls using your hands, placing them on a parchment-lined baking sheet. Aim for uniform sizes to ensure even chilling and the best party appetizers presentation.

Pro Tip: Lightly wet your hands to prevent sticking, making the process smoother for these sweet munchies.

A photo of shaped balls on a baking sheet

Step 4: Adding the Chocolate Coating

Melt 1 cup of chocolate chips in a microwave-safe bowl, stirring every 30 seconds until smooth. Dip each Texas Trash Ball into the chocolate, then place back on the sheet to set.

Common Mistake to Avoid: Overheating the chocolate can cause it to seize, so monitor closely to keep your no-bake treats glossy and perfect.

A photo of balls being dipped in chocolate

Step 5: Chilling for Perfection

Refrigerate the coated balls for at least 30 minutes to firm up, allowing the flavors to meld and the texture to become irresistibly addictive.

Pro Tip: For faster setting, use the freezer for 10-15 minutes, but don’t overdo it to avoid condensation on your easy snacks.

A photo of the finished, chilled Texas Trash Balls

Serving & Presentation

Elevate your Texas Trash Balls by arranging them on a decorative platter with a sprinkle of sea salt for a sweet-salty contrast, making them the star of any gathering. These no-bake treats pair wonderfully with fresh fruit like sliced apples or berries to balance their richness, or serve them alongside coffee for a post-dinner treat. For party appetizers, add colorful toothpicks and garnish with crushed nuts for visual appeal, ensuring they look as good as they taste and impress your guests with their easy snacks vibe.

Make-Ahead & Storage Solutions

Make-Ahead Strategy: Prepare the Texas Trash Balls up to 3 days in advance by shaping and coating them, then store in an airtight container in the fridge. This allows the flavors to intensify, making them even more addictive for your party appetizers.

Storing Leftovers: Keep any remaining Texas Trash Balls in an airtight container in the refrigerator for up to a week, or freeze them for up to 2 months to maintain their no-bake treats crunch—use parchment paper between layers to prevent sticking.

The Best Way to Reheat: For optimal texture, let frozen balls thaw in the fridge overnight, or microwave briefly for 10-15 seconds to restore that fresh, sweet munchies feel without melting the chocolate.

Frequently Asked Questions (FAQ)

What kind of “balls” are they, and what’s the main ingredient?

Texas Trash Balls are no-bake treats that resemble energy balls or truffles, featuring a crunchy, sweet exterior with a creamy center. The main ingredient is creamy peanut butter, which binds everything together and provides that addictive, nutty flavor, making them perfect easy snacks or party appetizers packed with simple, wholesome elements.

Are these Texas-style appetizers similar to cheese balls or dessert balls?

Yes, Texas Trash Balls share similarities with both cheese balls and dessert balls but lean more towards the sweet side as no-bake treats. Unlike savory cheese balls, these are sweet munchies made with peanut butter and chocolate, offering a dessert-like experience that’s lighter and crunchier, ideal for parties where you want a mix of flavors.

What are the best ways to mix and shape these addictive balls?

The best way to mix Texas Trash Balls is by using a sturdy spoon or your hands to gently fold in ingredients like rice cereal into the peanut butter base, ensuring even distribution without over-mixing. For shaping, roll into balls with slightly damp hands to avoid sticking, and chill briefly for easier handling—these techniques make your easy snacks uniform and professional-looking party appetizers.

Can these “game-changing balls” be made ahead of time for parties?

Absolutely, Texas Trash Balls are perfect for making ahead! Prepare them up to 3 days in advance, store in the fridge, and they’ll stay fresh and addictive. This no-bake approach makes them a stress-free option for party appetizers, allowing you to focus on other details while keeping your sweet munchies ready to serve.

How can I customize Texas Trash Balls for different dietary needs?

To customize, swap peanut butter for sunbutter in Texas Trash Balls for a nut-free version, or use gluten-free rice cereal to accommodate sensitivities. These adjustments keep the no-bake treats delicious and inclusive for all your easy snacks occasions.

Are Texas Trash Balls suitable for kids or as a healthy snack?

Yes, Texas Trash Balls can be kid-friendly sweet munchies, but for a healthier twist, reduce the sugar and add more nuts or seeds for extra protein. They’re versatile party appetizers that can be made nutritious with simple tweaks, making them a fun, balanced option for families.

.

Print
clock clock iconcutlery cutlery iconflag flag iconfolder folder iconinstagram instagram iconpinterest pinterest iconfacebook facebook iconprint print iconsquares squares iconheart heart iconheart solid heart solid icon

My Texas friend introduced me to these balls and its changed the game for me! My family is addicted!

  • Author: Chef Sally

Instructions


    Easy Slow Cooker Chicken Drumsticks

    Slow Cooker Chicken Drumsticks: The Only Recipe You’ll Ever Need

    If you’re a busy home cook craving a hassle-free dinner that delivers maximum flavor with minimal effort, look no further than this ultimate slow cooker chicken drumsticks recipe. Imagine coming home to tender, juicy chicken drumsticks infused with smoky barbecue goodness and a hint of garlicky aroma, all prepared with just three simple ingredients. This easy chicken drumstick recipe is perfect for weeknight meals or lazy weekends, turning your slow cooker into a magic pot of deliciousness. As a minimalist slow cooker recipe, it’s designed for those who want slow cooker chicken drumsticks without the fuss, making it the go-to choice for effortless, flavorful cooking.

    The flavors in this slow cooker chicken drumsticks dish are nothing short of extraordinary. Each bite offers a perfect balance of tangy barbecue sauce that coats the chicken in a sticky, caramelized glaze, while the minced garlic adds a subtle, aromatic punch that elevates the overall taste. The texture is unbelievably tender—think fall-off-the-bone goodness that melts in your mouth, achieved through the low and slow cooking process that locks in moisture and enhances the natural juiciness of the chicken. The aromas wafting from your kitchen will be irresistible, with the sweet and savory notes of barbecue mingling with the fresh scent of garlic, creating an inviting atmosphere that draws everyone to the table.

    What sets this slow cooker chicken drumsticks recipe from exorecipes.com apart is our commitment to simplicity and reliability, crafted by renowned Chef Sally to be the single best resource online. You’ll discover the Chef’s Secret that makes this 3 ingredient chicken a standout, along with step-by-step guidance, expert tips, and answers to all your questions. Whether you’re a novice or a seasoned cook, this version ensures foolproof results every time, helping you feel confident in the kitchen and impress your family with minimal prep. Stick around for nutrition details, storage hacks, and more—let’s dive into why this slow cooker chicken recipe is a game-changer.

    Prep Time: 10 minutes
    Cook Time: 6 hours
    Total Time: 6 hours 10 minutes
    Servings: 4

    Why This slow cooker chicken drumsticks Recipe is a Game-Changer

    The Chef’s Secret to this minimalist slow cooker recipe lies in the strategic use of just three ingredients—barbecue sauce, garlic, and the chicken itself—to create a depth of flavor that rivals more complex dishes. By letting the minced garlic infuse the sauce as it cooks, it releases its essential oils slowly, enhancing the barbecue’s sweetness without overpowering it. This technique not only simplifies the process but also ensures a balanced, restaurant-quality taste that makes your slow cooker chicken drumsticks stand out from ordinary ones.

    For unbeatable texture, the slow cooking method breaks down the connective tissues in the chicken drumsticks over 6-8 hours, resulting in meat that’s incredibly tender and juicy. The science behind it? Low heat gently renders the fat, keeping the chicken moist while allowing the barbecue sauce to form a glossy coating. This easy chicken drumstick recipe’s minimalist approach means no pre-browning is needed, yet you get that perfect, fall-apart tenderness every time.

    This recipe is foolproof because it’s been tested multiple times in real home kitchens, guaranteeing consistent results regardless of your experience level. With straightforward instructions and no room for error, it’s ideal for beginners tackling slow cooker chicken for the first time, making it a reliable staple for your 3 ingredient chicken meals.

    Ingredient Spotlight: Quality Makes the Difference

    Starting with the star of the show: 4 raw chicken drumsticks. These provide the hearty protein base for your slow cooker chicken drumsticks, offering juicy, flavorful meat that’s packed with essential nutrients like protein and B vitamins. Quality matters here—opt for fresh, organic chicken to avoid additives and ensure the best texture and taste. If you’re looking for substitutions, you could swap in chicken thighs for a slightly richer flavor, but drumsticks’ bone-in structure helps retain moisture during the long cook time, making them ideal for this minimalist slow cooker recipe.

    Next up is 1 cup of your favorite barbecue sauce, which serves as the flavorful glue that binds everything together in this easy chicken drumstick recipe. This ingredient adds a tangy, sweet, and smoky essence that caramelizes beautifully in the slow cooker, creating a sticky glaze that’s hard to resist. Choose a high-quality sauce with natural ingredients to enhance the overall dish—avoid anything with artificial preservatives for a cleaner taste. For substitutions, a homemade version using ketchup, brown sugar, and Worcestershire sauce works wonders, but stick to the cup measurement to maintain the recipe’s balance and prevent the chicken from becoming too sweet or dry.

    Finally, 2 cloves of minced garlic bring a pungent, aromatic kick to your 3 ingredient chicken, elevating it from simple to sensational. Garlic not only adds depth and a subtle spiciness but also offers health benefits like boosting immunity. Always use fresh garlic for the best flavor; pre-minced varieties can lack potency. If you’re out, a teaspoon of garlic powder can substitute in a pinch, but fresh is key for that authentic taste that makes this slow cooker chicken drumsticks recipe shine.

    Step-by-Step Instructions

    Step 1: Preparing the Chicken Drumsticks

    Begin by placing the 4 raw chicken drumsticks in the bottom of your slow cooker. Arrange them evenly to ensure even cooking and maximum flavor absorption. This step is crucial for building the base of your slow cooker chicken drumsticks dish.

    Pro Tip: Pat the chicken dry with a paper towel before adding it to remove excess moisture, which helps the barbecue sauce adhere better and prevents a watery result.

    A photo showing raw chicken drumsticks neatly placed in the slow cooker

    Step 2: Adding the Sauce and Garlic

    Pour 1 cup of your favorite barbecue sauce over the chicken drumsticks, making sure to coat them thoroughly. Then, sprinkle in the 2 cloves of minced garlic, distributing it evenly for that perfect garlicky infusion. This easy chicken drumstick recipe step ensures the flavors meld together during cooking.

    Common Mistake to Avoid: Don’t rush this—uneven distribution of garlic can lead to inconsistent flavors, so take a moment to mix it in gently to prevent hot spots.

    A photo showing barbecue sauce and garlic being added to the slow cooker

    Step 3: Cooking the Chicken

    Cover the slow cooker and set it to low heat, then cook for 6-8 hours or until the chicken is tender and fully cooked. The low and slow method allows the chicken to absorb all the flavors from the sauce and garlic, resulting in melt-in-your-mouth slow cooker chicken drumsticks.

    Pro Tip: Check the internal temperature with a meat thermometer to ensure it reaches 165°F for food safety, and resist the urge to lift the lid too often to maintain even cooking.

    A photo showing the finished slow cooker chicken drumsticks ready to serve

    Serving & Presentation

    To make your slow cooker chicken drumsticks truly impressive, serve them hot off the cooker on a large platter, drizzled with any remaining sauce for a glossy finish. Garnish with fresh herbs like chopped parsley or green onions to add a pop of color and freshness, enhancing the visual appeal of this 3 ingredient chicken masterpiece. For the best pairings, complement the tangy flavors with sides like creamy coleslaw, buttery cornbread, or a simple green salad—perfect for a balanced, American-style meal that highlights the tender texture of the chicken.

    Make-Ahead & Storage Solutions

    Make-Ahead Strategy: Prep this slow cooker chicken drumsticks recipe up to 3 days in advance by assembling the ingredients in the slow cooker insert and refrigerating it overnight. In the morning, simply plug it in and let it cook—ideal for busy schedules and easy meal prep with minimal effort.

    Storing Leftovers: Store any remaining slow cooker chicken in an airtight container in the fridge for up to 4 days to maintain freshness. For longer storage, freeze portions in freezer-safe bags for up to 3 months, ensuring you label them with the date.

    The Best Way to Reheat: To restore the original texture and flavor of your easy chicken drumstick recipe, reheat in a covered skillet over low heat with a splash of water or broth to keep it moist, or use the oven at 350°F for 15-20 minutes. Avoid microwaving to prevent drying out the meat.

    Frequently Asked Questions (FAQ)

    What are the best 3 ingredients to cook raw chicken drumsticks in a slow cooker?

    The best 3 ingredients for cooking raw chicken drumsticks in a slow cooker are 4 raw chicken drumsticks, 1 cup of barbecue sauce, and 2 cloves of minced garlic. This combination, as featured in our slow cooker chicken drumsticks recipe, creates a simple yet flavorful dish. The barbecue sauce provides moisture and tang, while garlic adds aromatic depth—ensuring tender, juicy results every time. For variations, you could swap barbecue sauce for teriyaki if you prefer an Asian twist, but stick to fresh ingredients for optimal taste.

    How long do raw chicken drumsticks take to cook in a slow cooker with just 3 ingredients?

    Raw chicken drumsticks typically take 6-8 hours on low heat in a slow cooker when using just 3 ingredients, as in this easy chicken drumstick recipe. Cooking on low ensures the meat reaches a safe internal temperature of 165°F while becoming incredibly tender. Factors like your slow cooker’s size and the drumsticks’ size might vary this slightly, so check for doneness around the 6-hour mark to avoid overcooking.

    Can I add vegetables to a slow cooker with raw chicken drumsticks and 3 other ingredients?

    Yes, you can absolutely add vegetables to a slow cooker with raw chicken drumsticks and the original 3 ingredients, making it a more wholesome 3 ingredient chicken meal with extras. For instance, add carrots, potatoes, or onions on top of the chicken before cooking—they’ll absorb the flavorful juices and be ready in the same 6-8 hours. Keep additions to a minimum to maintain the recipe’s simplicity, and ensure vegetables are cut into even pieces for uniform cooking.

    What is the best liquid to use when cooking raw chicken drumsticks in a slow cooker with only 3 ingredients?

    The best liquid for cooking raw chicken drumsticks in a slow cooker with only 3 ingredients is barbecue sauce, as it provides both moisture and flavor without needing extras. In this slow cooker chicken recipe, it creates a delicious glaze while keeping the chicken tender. If you want a variation, chicken broth could substitute for a lighter taste, but barbecue sauce’s thickness helps lock in flavors, making it ideal for this minimalist approach.

    Is this recipe suitable for beginners?

    Absolutely, this slow cooker chicken drumsticks recipe is perfect for beginners due to its straightforward steps and minimal ingredients. With just three items and a set-it-and-forget-it method, even novice cooks can achieve great results. Follow the instructions closely, and you’ll build confidence in using your slow cooker for other easy chicken drumstick recipes.

    What sides pair best with slow cooker chicken drumsticks?

    Great sides for slow cooker chicken drumsticks include coleslaw, cornbread, or grilled vegetables, as they complement the tangy barbecue flavors. These options enhance the American cuisine vibe of the dish, providing a balanced meal that’s both satisfying and simple to prepare alongside your 3 ingredient chicken.

    .

    Print
    clock clock iconcutlery cutlery iconflag flag iconfolder folder iconinstagram instagram iconpinterest pinterest iconfacebook facebook iconprint print iconsquares squares iconheart heart iconheart solid heart solid icon

    Slow Cooker Chicken Drumsticks

    • Author: Chef Sally
    • Prep Time: 10 minutes
    • Cook Time: 6 hours
    • Total Time: 6 hours 10 minutes
    • Yield: 4 1x
    • Method: Main
    • Cuisine: American

    Description

    A simple and flavorful recipe for tender chicken drumsticks cooked in a slow cooker with just three key ingredients.


    Ingredients

    Scale
    • 4 raw chicken drumsticks
    • 1 cup of your favorite barbecue sauce
    • 2 cloves of garlic, minced

    Instructions

    1. Place the raw chicken drumsticks in the bottom of the slow cooker.
    2. Pour the barbecue sauce over the chicken and add the minced garlic.
    3. Cover and cook on low for 6-8 hours or until the chicken is tender and fully cooked.

    Notes

    Ensure chicken reaches an internal temperature of 165°F for safety. Great for meal prep!


    Nutrition

    • Calories: 350
    • Sugar: 10g
    • Fat: 20g
    • Carbohydrates: 15g
    • Protein: 30g

    Vibrant Holiday Luck Bowl for Prosperity

    Holiday Luck Bowl: The Only Recipe You’ll Ever Need

    As the holiday season approaches, many of us turn to time-honored traditions to invite good fortune into the new year, and that’s where the Holiday Luck Bowl shines as a vibrant, customizable good luck bowl that brings families together. Imagine crafting a meal that’s not just delicious but steeped in symbolism—featuring fresh greens for prosperity and grains for abundance, all in one festive bowl. This recipe from exorecipes.com transforms ordinary ingredients into a personalized feast, making it the ultimate lucky recipe for New Year’s food celebrations. With its effortlessly customizable elements, like swapping in your family’s good luck charms, this Holiday Luck Bowl ensures every bite carries a touch of magic and health benefits.

    The Holiday Luck Bowl bursts with an irresistible symphony of flavors and textures that will tantalize your senses. Picture crisp mixed greens providing a refreshing crunch, balanced by the nutty earthiness of cooked quinoa that adds a hearty, satisfying chew. Halved cherry tomatoes offer a juicy burst of sweetness, while sliced red onion brings a sharp, invigorating zing. Creamy diced avocado lends a silky smoothness, and the crumbled feta cheese introduces a tangy saltiness that ties it all together. Drizzle on the light, zesty dressing—made with olive oil and lemon juice—and you’ll be greeted by an aromatic blend of fresh citrus and herbs, creating a festive bowl that’s as visually appealing as it is mouthwatering.

    What sets this Holiday Luck Bowl recipe apart on exorecipes.com is its reliable, chef-tested approach, crafted by the renowned Chef Sally, ensuring it’s the single best resource for home cooks seeking good luck charms in their meals. You’ll discover insider tips, from the “Chef’s Secret” on customization to foolproof techniques that guarantee success every time. Whether you’re hosting a New Year’s food gathering or simply want to infuse your day with positivity, this guide covers everything—from ingredient spotlights to storage solutions—empowering you to create a masterpiece that’s nutritious, fun, and full of holiday spirit.

    Prep Time: 15 minutes
    Cook Time: 20 minutes
    Total Time: 35 minutes
    Servings: 4

    Why This Holiday Luck Bowl Recipe is a Game-Changer

    The Chef’s Secret lies in its effortlessly customizable nature, allowing you to infuse your Holiday Luck Bowl with personal good luck charms, such as adding pomegranate seeds for prosperity or edamame for abundance, which elevates it from a simple salad to a symbolic festive bowl. This unique angle ensures that each bowl reflects cultural traditions, like those in lucky recipes for New Year’s food, making it adaptable for any holiday gathering while maintaining balanced flavors and textures.

    For unbeatable texture, the combination of fresh, crunchy mixed greens and fluffy cooked quinoa creates a contrast that enhances mouthfeel— the quinoa’s protein-packed structure absorbs the dressing without becoming soggy, thanks to its natural grain composition that holds up well under tossing, ensuring a fresh, lively bite every time.

    This recipe is foolproof for a reason: it’s been rigorously tested multiple times in our exorecipes.com kitchen to deliver consistent results, even for beginners, making it a trustworthy go-to for creating good luck charms in your holiday meals without any surprises.

    Ingredient Spotlight: Quality Makes the Difference for Holiday Luck Bowl

    Mixed Greens: These form the vibrant base of your Holiday Luck Bowl, providing a crisp, fresh crunch that symbolizes renewal and good fortune in lucky recipes. Opt for organic, locally sourced greens to maximize nutrient density and flavor— they offer essential vitamins A and C for a healthy boost. If unavailable, substitute with baby spinach for a similar tender texture, ensuring your festive bowl remains light and refreshing.

    Cooked Quinoa: As a hearty grain in this good luck bowl, quinoa adds a nutty, protein-rich element that promotes satiety and represents abundance in New Year’s food traditions. Choose high-quality, rinsed quinoa to avoid bitterness and ensure perfect fluffiness; its complete protein profile supports a balanced meal. For gluten-free alternatives, swap with brown rice to maintain that wholesome chew without altering the festive bowls’ overall integrity.

    Cherry Tomatoes: Halved cherry tomatoes bring a juicy, sweet-tart pop to your Holiday Luck Bowl, evoking the bright colors of good luck charms. Fresh, vine-ripened tomatoes enhance the visual appeal and provide lycopene for antioxidant benefits. If out of season, use grape tomatoes as a direct substitute to keep that burst of flavor, making your recipe adaptable for various festive occasions.

    Red Onion: Sliced red onion adds a sharp, pungent bite that balances the richness in this lucky recipe, symbolizing protection and good vibes. Select firm, brightly colored onions for the best crunch and flavor release; they’re rich in quercetin, an anti-inflammatory compound. Milder shallots can replace them if you prefer a subtler taste, ensuring your Holiday Luck Bowl remains inviting for all palates.

    Avocado: Diced avocado contributes a creamy, buttery texture to your good luck bowl, representing wealth and health in holiday traditions. Choose ripe, Hass avocados for their rich, monounsaturated fats that promote heart health. If avocados are unavailable, try mashed chickpeas as a vegan alternative to preserve creaminess without compromising the festive bowls’ luxurious feel.

    Feta Cheese: Crumbled feta adds a tangy, salty contrast in your Holiday Luck Bowl, enhancing its festive appeal as a nod to Mediterranean good luck charms. High-quality, sheep’s milk feta ensures a creamy yet crumbly texture; it’s packed with calcium. For a vegan version, substitute with plant-based feta alternatives to keep the dish inclusive and flavorful.

    Dressing (Olive Oil, Lemon Juice, Salt, and Pepper): This simple yet transformative dressing ties the Holiday Luck Bowl together, with olive oil providing a silky base and lemon juice adding zesty brightness for digestion-friendly vibes. Use extra-virgin olive oil for its antioxidant properties and fresh-squeezed lemon for maximum flavor. If needed, swap lemon with lime for a tropical twist, maintaining the light, herbaceous essence of this festive bowl.

    Step-by-Step Instructions

    Step 1: Preparing the Mixed Greens

    Start by washing and drying the 2 cups of mixed greens thoroughly to remove any grit, ensuring they remain crisp and vibrant for your Holiday Luck Bowl. Place them in a large bowl as the fresh base.

    Pro Tip: Always use a salad spinner for even drying—this prevents wilting and helps the greens absorb the dressing better, enhancing the overall texture in your lucky recipes.

    A photo showing freshly washed and dried mixed greens in a bowl

    Step 2: Adding the Cooked Quinoa and Vegetables

    Next, incorporate 1 cup of cooked quinoa, along with 1/2 cup halved cherry tomatoes, 1/4 cup sliced red onion, and 1 diced avocado into the bowl with the greens, creating a colorful, nutrient-packed layer for your good luck bowl.

    Common Mistake to Avoid: Don’t add the avocado too early, as it can brown; prepare it just before mixing to keep your festive bowls looking fresh and appealing.

    A photo showing the quinoa and vegetables layered on the greens

    Step 3: Incorporating the Feta Cheese

    Sprinkle 1/4 cup of crumbled feta cheese over the mixture, distributing it evenly to add tanginess and tie in the good luck charms of your Holiday Luck Bowl.

    Pro Tip: If using a vegan substitute, crumble it finely for better integration, ensuring the cheese-like element doesn’t overwhelm the fresh flavors in New Year’s food traditions.

    A photo showing feta cheese being added to the bowl

    Step 4: Creating the Dressing

    In a small bowl, whisk together 2 tablespoons of olive oil, 1 tablespoon of lemon juice, and a pinch of salt and pepper to taste, blending until emulsified for a light, zesty dressing that enhances your festive bowl.

    Common Mistake to Avoid: Over-whisking can make the dressing separate; whisk just until combined to maintain a smooth consistency for even coating.

    A photo showing the dressing being whisked in a small bowl

    Step 5: Tossing and Serving

    Pour the dressing over the salad and toss gently to combine all elements, then serve immediately for the best flavor and texture in your Holiday Luck Bowl.

    Pro Tip: Use tongs for gentle tossing to avoid bruising the greens, preserving the crunch that’s key to this lucky recipe’s success.

    A photo showing the final tossed salad ready to serve

    Serving & Presentation

    Elevate your Holiday Luck Bowl by plating it in individual bowls for a personal touch, garnishing with extra good luck charms like edible flowers or pomegranate seeds to symbolize prosperity. The vibrant colors— from the greens to the red tomatoes— make it a visually stunning centerpiece for New Year’s food gatherings. Pair this festive bowl with grilled proteins for a complete meal or serve it alongside crusty bread to soak up the dressing, complementing its fresh, balanced flavors perfectly.

    Make-Ahead & Storage Solutions

    Make-Ahead Strategy: Prep the mixed greens, cook the quinoa, and chop the vegetables up to 3 days in advance. Store them separately in airtight containers in the fridge to maintain freshness, then assemble just before serving to keep the textures crisp in your good luck bowl.

    Storing Leftovers: Refrigerate any leftovers in an airtight container for up to 2 days; the dressing should be added fresh to prevent sogginess. For freezing, avoid the greens and avocado, as they don’t thaw well—focus on freezing the quinoa separately for up to a month.

    The Best Way to Reheat: If reheating quinoa-based components, use a microwave on low power for 1-2 minutes or gently warm in a skillet to restore original texture. Add fresh greens and dressing after reheating to keep your festive bowls as lively as possible.

    Frequently Asked Questions (FAQ)

    What are the key ingredients for a good luck bowl?

    The key ingredients for a Holiday Luck Bowl include 2 cups of mixed greens for a fresh base, 1 cup of cooked quinoa for hearty substance, 1/2 cup halved cherry tomatoes for sweetness, 1/4 cup sliced red onion for zest, 1 diced avocado for creaminess, and 1/4 cup crumbled feta for tang, all tied together with a simple dressing. These elements not only create a balanced lucky recipe but also allow for customization with symbols like fruits for prosperity, making it ideal for New Year’s food traditions.

    Can I make a Holiday Luck Bowl vegetarian or vegan?

    Yes, this Holiday Luck Bowl is naturally vegetarian. For a vegan version, simply omit the feta cheese or substitute it with a plant-based alternative like crumbled tofu or vegan feta, as noted in the recipe details. This keeps the festive bowls protein-packed and flavorful while aligning with vegan diets, ensuring everyone can enjoy these good luck charms without compromise.

    How long does it take to assemble a Holiday Luck Bowl?

    It takes about 15 minutes to assemble a Holiday Luck Bowl once your ingredients are prepped, with a total time of 35 minutes including cooking the quinoa. This makes it a quick and efficient option for busy holiday schedules, perfect for whipping up New Year’s food that symbolizes good fortune without spending hours in the kitchen.

    What are some popular toppings for a Holiday Luck Bowl?

    Popular toppings for a Holiday Luck Bowl include nuts like almonds for crunch, seeds such as chia for added nutrition, or fruits like pomegranate arils to enhance the good luck theme. These festive bowl additions not only boost flavor and texture but also allow for personalization in lucky recipes, making it a versatile choice for holiday gatherings.

    What makes the Holiday Luck Bowl a symbol of good luck?

    The Holiday Luck Bowl incorporates ingredients that symbolize prosperity and health, such as greens for renewal and quinoa for abundance, drawing from various cultural New Year’s food traditions. This makes it a meaningful addition to your festivities, blending taste with positive intentions.

    Can children help prepare this recipe?

    Absolutely, kids can assist with washing greens, halving tomatoes, or tossing the salad, making it a fun family activity for creating good luck charms. Supervise them during chopping to ensure safety, turning meal prep into a holiday bonding experience.

    .

    Print
    clock clock iconcutlery cutlery iconflag flag iconfolder folder iconinstagram instagram iconpinterest pinterest iconfacebook facebook iconprint print iconsquares squares iconheart heart iconheart solid heart solid icon

    Holiday Luck Bowl

    • Author: Chef Sally
    • Prep Time: 15 minutes
    • Cook Time: 20 minutes
    • Total Time: 35 minutes
    • Yield: 4 1x
    • Method: Main
    • Cuisine: American

    Description

    A festive salad bowl featuring fresh greens, grains, and lucky symbols, perfect for holiday gatherings.


    Ingredients

    Scale
    • 2 cups mixed greens
    • 1 cup cooked quinoa
    • 1/2 cup cherry tomatoes, halved
    • 1/4 cup red onion, sliced
    • 1 avocado, diced
    • 1/4 cup feta cheese, crumbled
    • Dressing: 2 tablespoons olive oil, 1 tablespoon lemon juice, salt and pepper to taste

    Instructions

    1. Wash and dry the mixed greens, then place them in a large bowl.
    2. Add the cooked quinoa, cherry tomatoes, red onion, avocado, and feta cheese to the bowl.
    3. In a small bowl, whisk together the olive oil, lemon juice, salt, and pepper to make the dressing.
    4. Pour the dressing over the salad and toss gently to combine.
    5. Serve immediately, garnished with any additional toppings as desired.

    Notes

    For a vegan version, omit the feta cheese or substitute with a plant-based alternative. This recipe is highly customizable based on seasonal ingredients.


    Nutrition

    • Calories: 450
    • Sugar: 5g
    • Fat: 20g
    • Carbohydrates: 55g
    • Protein: 15g