“`html
Table of Contents
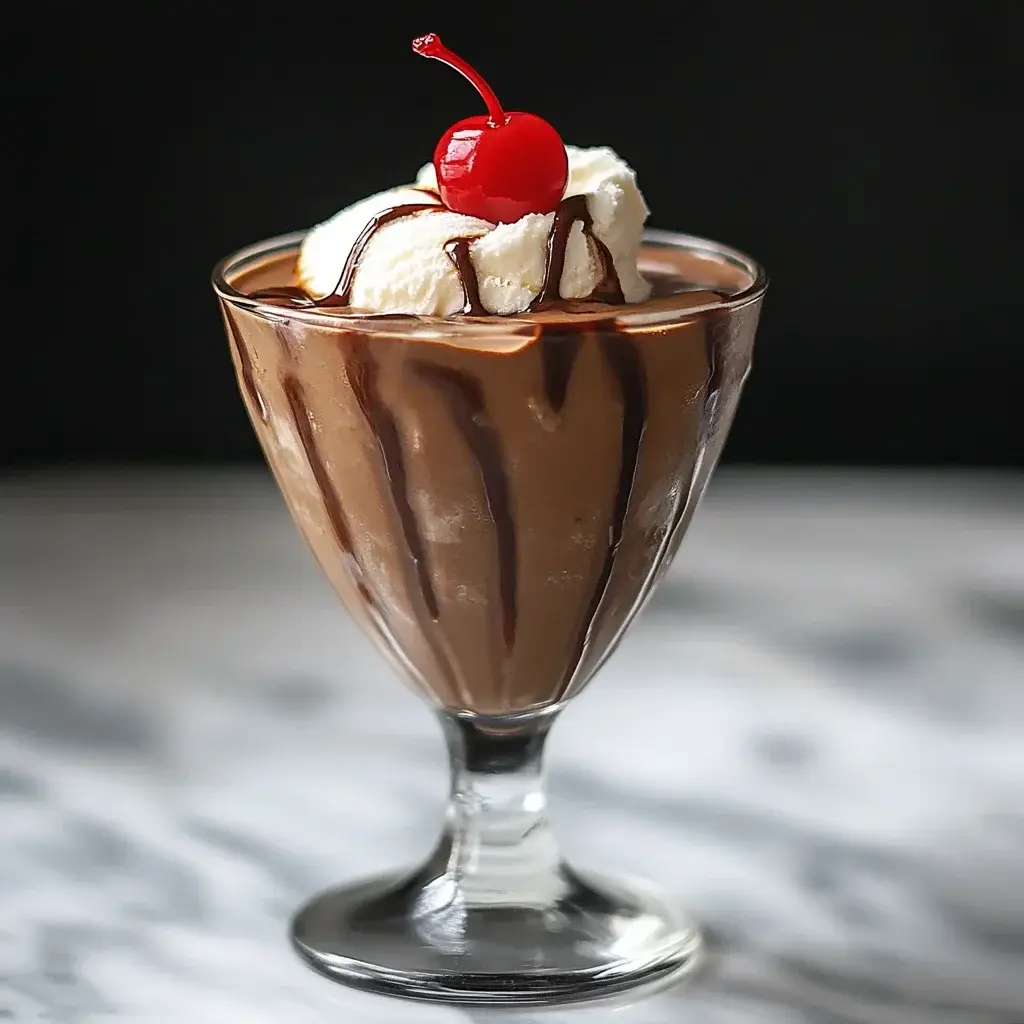
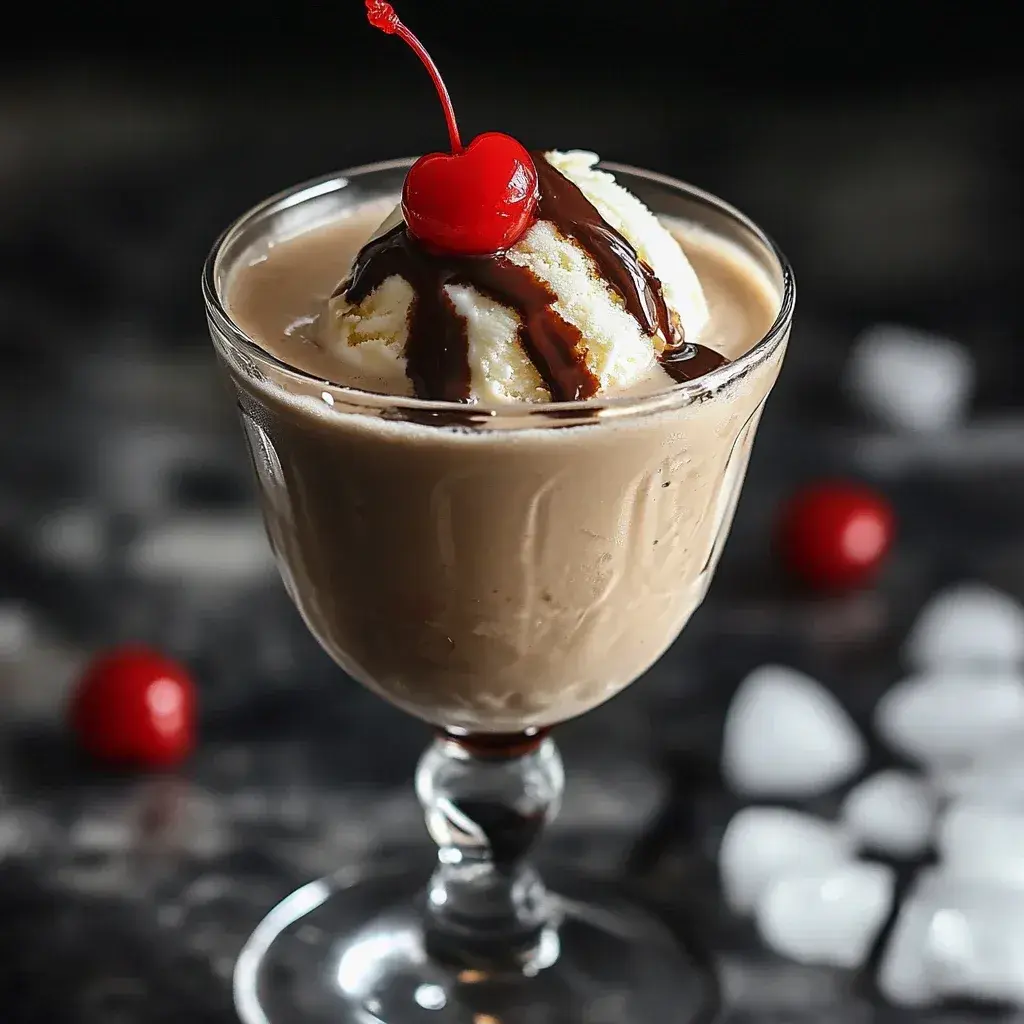
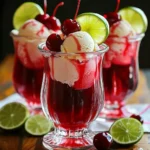
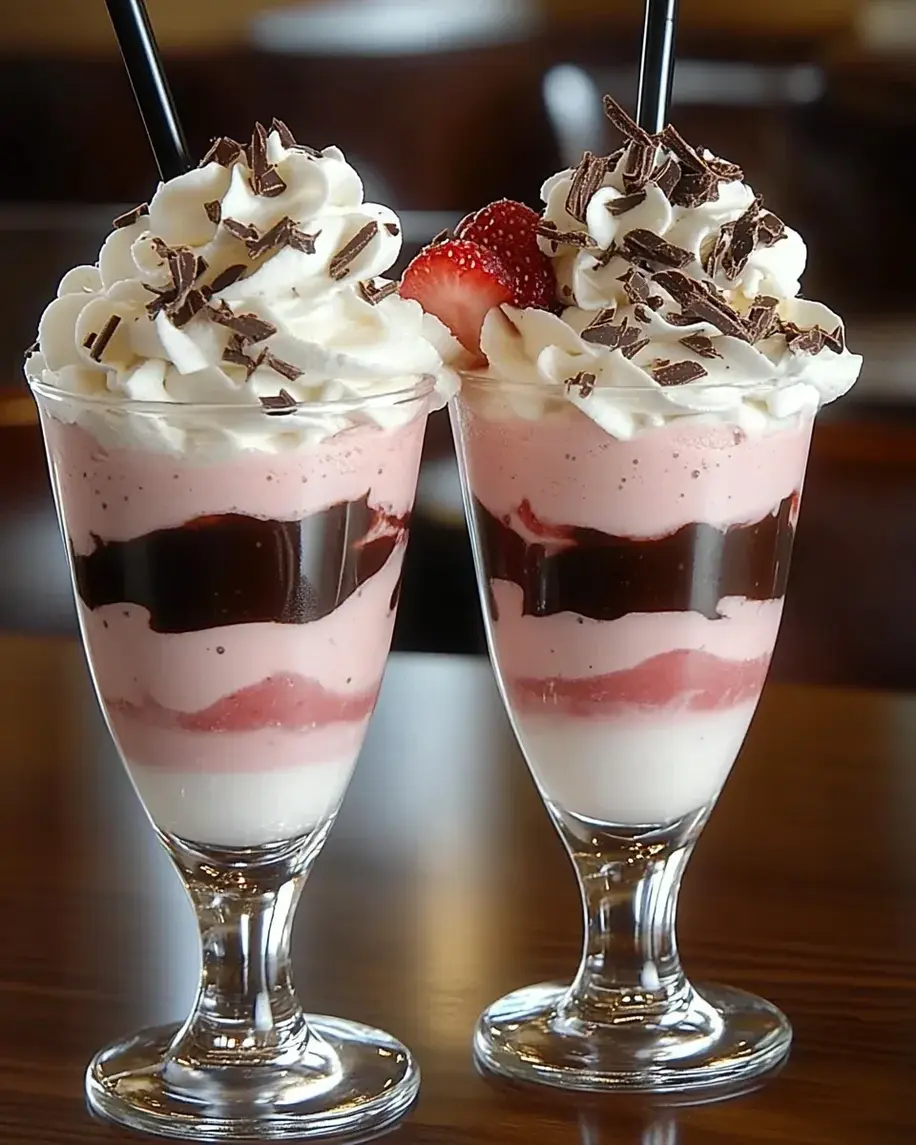
Pink and White Swirl Boozy Milkshake – Creamy & Indulgent
Indulge in a Dreamy Dessert Cocktail
Are you searching for that perfect dessert cocktail that’s both decadent and visually stunning? If you’re like many of our readers, you’re always on the lookout for a treat that elevates dessert time into an experience. Well, your search ends here! This Pink and White Swirl Boozy Milkshake is the ultimate indulgence, a creamy, dreamy blend that combines the rich flavors of chocolatey liqueurs with the luscious sweetness of vanilla ice cream and the fruity charm of Tequila Rose. Fresh strawberries add a delightful burst of freshness, making each sip a complex symphony of tastes. But it’s not just about the flavor; the beautiful two-tone swirl makes it a showstopper, as visually appealing as it is delicious. Get ready to impress your friends and delight your taste buds with this unforgettable concoction.
Ready to whip up this showstopper? Let’s dive into the magic!
The Star Ingredients
The magic of this milkshake lies in its carefully selected components, each bringing a unique character to the final masterpiece. Here’s what you’ll need:
Tequila Rose
This strawberry cream liqueur is the heart of our pink swirl. Its sweet, creamy, and slightly tangy profile is essential for the signature flavor and vibrant color. It adds a unique fruity kick that beautifully complements the chocolate notes.
Chocolate Liqueur
A good quality chocolate liqueur, like Godiva or a chocolate crème de Cacao, provides a deep, rich, and smooth chocolate foundation. This is where the indulgence truly shines.
Vanilla Ice Cream
The creamiest, dreamiest vanilla ice cream you can find is non-negotiable. It forms the luxurious base of our milkshake, ensuring a thick, velvety texture. Opt for a premium brand for the best results.
Fresh Strawberries
A handful of fresh, ripe strawberries will be blended to create the vibrant pink swirl. They offer a natural sweetness and a refreshing counterpoint to the rich liqueurs and ice cream.
Milk
Just a splash of whole milk will help achieve the perfect consistency without watering down the flavor. You can substitute with a dairy-free milk if preferred.
Optional Garnishes
Elevate your presentation with whipped cream, a fresh strawberry, a drizzle of chocolate syrup, or even a sprinkle of edible glitter for that extra touch of magic.
Perfectly Timed Creation
This decadent treat is surprisingly quick to assemble, making it perfect for spontaneous cravings or last-minute entertaining. With a total time of just 15 minutes, it’s significantly faster than the average dessert that often requires baking or extensive prep.
Crafting Your Swirl Masterpiece
Creating this visually stunning and incredibly delicious milkshake is a simple, multi-step process that promises a delightful outcome. Follow these steps for a perfect pour every time!
Chill Your Glasses
The first step to a perfectly frosty milkshake is to ensure your serving glasses are thoroughly chilled. Pop them into the freezer for at least 5-10 minutes before you begin blending. This not only keeps your milkshake colder for longer but also enhances the overall creamy texture.
Blend the Base
In your blender, combine the vanilla ice cream, chocolate liqueur, and a small splash of milk. Blend until the mixture is smooth and creamy. If it’s too thick, add a tiny bit more milk; if too thin, add a little more ice cream. You’re aiming for a thick, pourable consistency, like a very rich soft-serve.
Prepare the Strawberry Swirl
In a separate, small bowl (or a clean blender cup), combine the fresh strawberries. Add a tiny splash of Tequila Rose and blend or mash them with a fork until you have a slightly chunky or smooth puree, depending on your preference. This will be our vibrant pink component.
Combine and Swirl
Now for the artistry! Pour about half of the vanilla-chocolate base into your chilled glasses. Next, carefully spoon or drizzle dollops of the strawberry puree into the glasses. Then, pour the remaining vanilla-chocolate base over the top. Use a long spoon or a skewer to gently swirl the strawberry puree into the vanilla-chocolate mixture, creating those beautiful pink and white ribbons. Don’t over-mix; you want distinct swirls!
Garnish and Serve
Top your masterpiece with a generous swirl of whipped cream. Add a fresh strawberry on top for a pop of color and freshness. A drizzle of chocolate syrup can add another layer of decadence. Serve immediately and enjoy the applause!
Nutritional Highlights
While this is a decadent treat designed for indulgence, here’s a general idea of what you might find in a serving. Specifics will vary based on exact ingredients and portion sizes:
- Calories: Approximately 500-700 kcal per serving (highly dependent on ice cream and liqueur brands)
- Fat: 25-40g
- Carbohydrates: 50-70g
- Sugar: 45-65g
- Protein: 8-12g
Please note: This is an estimate. For precise nutritional information, consult the labels of your specific ingredients.
Healthier Twists
Looking for a slightly lighter version without sacrificing too much flavor? Try these swaps:
- Reduced-Fat Ice Cream: Use a good quality low-fat vanilla ice cream.
- Dairy-Free Milk: Opt for almond milk or oat milk.
- Sorbet Base: For a lighter, fruitier twist, consider using a strawberry sorbet blended with a smaller amount of liqueur and a splash of milk.
- Natural Sweeteners: If you find you need more sweetness, a touch of maple syrup or a date paste can be used sparingly.
Serving Sophistication
This milkshake is a dessert in itself, but it also pairs wonderfully with:
- Rich chocolate brownies
- Miniature cheesecakes
- A small side of fresh berries
- Anything that screams celebration!
Avoiding Common Pitfalls
To ensure your milkshake is perfect:
- Over-blending: This can melt the ice cream too quickly, resulting in a thin shake. Blend just until smooth.
- Not chilling the glasses: A warm glass means a less frosty, less enjoyable milkshake.
- Over-swirling: Resist the urge to mix the pink and white layers too much; the distinct swirls are part of its charm.
Savoring the Leftovers (If Any!)
Milkshakes are best enjoyed immediately. If you do have a little left, you can store it in an airtight container in the freezer for up to 24 hours. However, the texture will degrade, and it may become icy. You might need to re-blend or stir vigorously before serving.

Frequently Asked Questions
***Can I make this milkshake without alcohol?***
Absolutely! For a non-boozy version, omit the liqueurs. You can replace the Tequila Rose with strawberry syrup and the chocolate liqueur with chocolate syrup or a rich chocolate milk. You might need to adjust the sweetness.
***What kind of vanilla ice cream is best?***
A premium, full-fat vanilla bean ice cream will yield the creamiest and most flavorful results. The higher the fat content, the richer and smoother your milkshake will be.
***Can I use frozen strawberries?***
Yes, you can use frozen strawberries. Allow them to thaw slightly before blending or mashing to get a smoother puree. Be mindful that frozen strawberries might make the milkshake thicker, so you may need a little more milk.
***How do I get the perfect swirl effect?***
The key is to add dollops of the strawberry puree and then gently swirl with a thin tool like a skewer or the handle of a long spoon. Avoid over-mixing to maintain distinct ribbons of pink and white.
***Can I make the strawberry puree ahead of time?***
Yes, the strawberry puree can be made a few hours in advance and stored in an airtight container in the refrigerator. This can save you a few minutes when assembling the milkshake.
Conclusion
The Pink and White Swirl Boozy Milkshake is more than just a drink; it’s a celebration in a glass. Its delightful combination of creamy vanilla, rich chocolate, and fruity strawberry, all presented in a visually stunning swirl, makes it an instant crowd-pleaser. Whether you’re looking to impress at a party, treat yourself after a long week, or simply crave an exceptionally decadent dessert cocktail, this recipe delivers. Give it a try and prepare to be amazed by its simple creation and extraordinary taste!
Print
Pink and White Swirl Boozy Milkshake – Creamy & Indulgent
Description
If you’re looking for the ultimate indulgent dessert cocktail, you’ve just found it! ThisPink and White Swirl Boozy Milkshakeis a creamy, dreamy blend of chocolatey liqueurs, rich vanilla ice cream, and fruity Tequila Rose with fresh strawberries. Thebeautiful two-tone swirlmakes it just as stunning as it is delicious!
Ingredients
- ✔️ Ablender(for that perfect creamy texture!)✔️ Ahurricane glass(or any tall glass)✔️ Apitcher(to hold the white mixture while you blend the pink side)✔️ Aspoon(to help control the pour)
Instructions
- In a frozen drink blender, combineBaileys, Kahlua, vodka, vanilla ice cream, and ice. Blend until smooth and creamy. Pour into a separate pitcher and set aside.
- In the same blender (no need to rinse), blendTequila Rose, fresh strawberries, and crushed iceuntil smooth.
- Drizzlechocolate syrupinside your hurricane glass for a fancy swirl effect.
- Slowlypour both pink and white mixtures at the same timeon opposite sides of the glass, trying to keep equal parts until full. Use a spoon to guide the pour for a cleaner division.
- Top withwhipped creamand extrachocolate sprinklesfor the perfect finishing touch. Serve immediately and enjoy!
“`