Best Strawberry Pineapple Salsa – Easy and Refreshing
Introduction
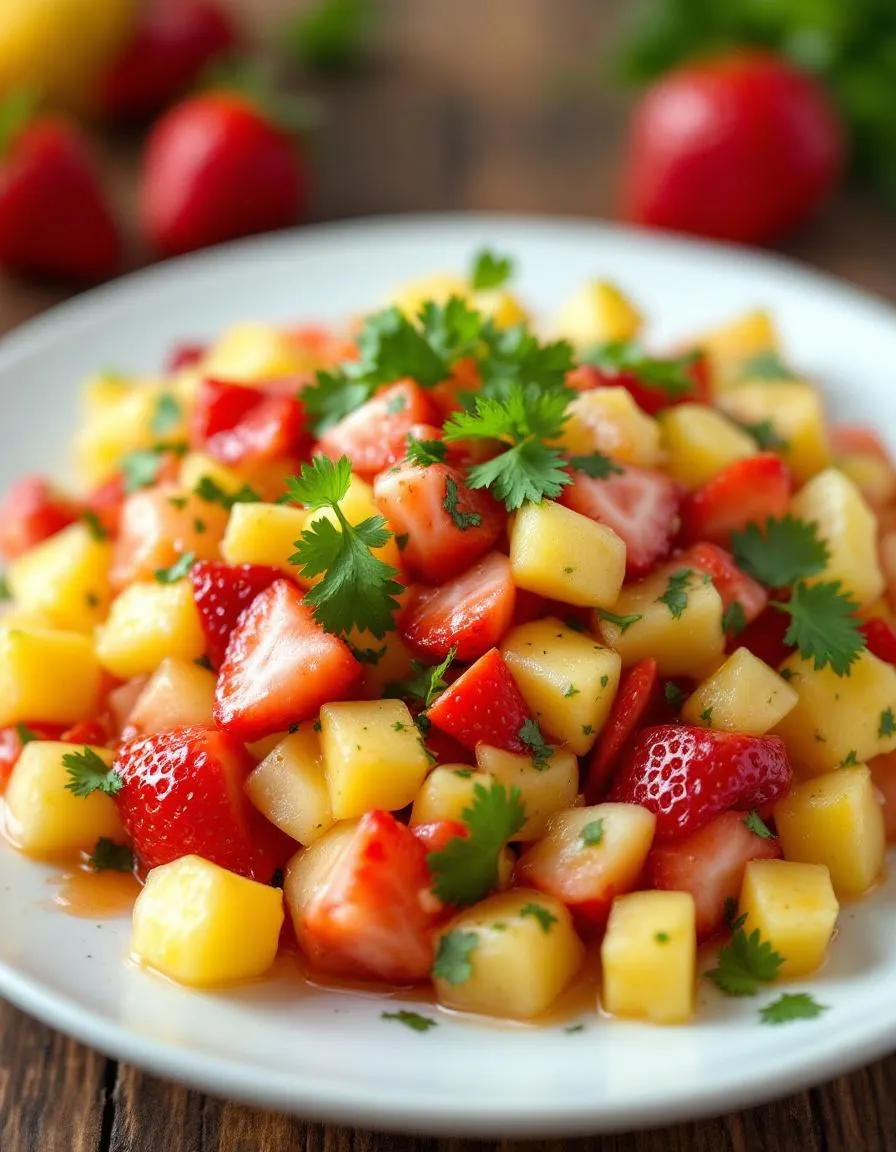
If you’ve ever craved a burst of fresh, vibrant flavors that dance on your tongue, you’re in the right place. Today, I’m sharing my irresistible Strawberry Pineapple Salsa—a sweet, tangy, and slightly spicy delight that’s perfect for summer gatherings or simply brightening up a weekday meal. Whether you’re hosting a backyard barbecue or just want to add a pop of color to your table, this recipe will quickly become your go-to for effortless elegance.
Strawberry Pineapple Salsa is a refreshing twist on traditional salsa, combining juicy strawberries, tropical pineapple, crisp red onion, and a hint of jalapeño for a balanced kick. Unlike heavy dips or overly complicated appetizers, this salsa lets the natural flavors shine while offering a guilt-free way to indulge. It pairs beautifully with grilled chicken, fish tacos, or even as a standalone snack with tortilla chips. Plus, it’s packed with vitamin C and antioxidants, making it as nutritious as it is delicious. If you love easy, crowd-pleasing recipes like my Mango Avocado Salsa, you’ll adore this fruity variation. And for those who enjoy meal prep, it’s a fantastic make-ahead option that only gets better as the flavors meld—just like my Overnight Oats.
Why I Love This Recipe
This Strawberry Pineapple Salsa holds a special place in my heart because it reminds me of lazy summer afternoons spent with my family. My grandmother used to make a similar version with whatever ripe fruit she had on hand, and the first bite always transported me to sunshine and laughter. Now, whenever I whip up a batch, it’s not just about the flavors—it’s about creating those same joyful moments for others. Simple, vibrant, and full of love, this salsa is more than a recipe; it’s a little jar of happiness.
Health and Nutrition
Why it’s good for your body
Strawberry Pineapple Salsa packs a vibrant mix of nutrients that boost your health in delicious ways. First, strawberries bring a hefty dose of vitamin C, which strengthens your immune system and promotes glowing skin. Meanwhile, pineapple adds digestive enzymes like bromelain, helping your body break down proteins more efficiently. Together, these fruits create a salsa that’s as nutritious as it is flavorful.
Additionally, Strawberry Pineapple Salsa delivers antioxidants that fight inflammation and protect your cells. The combination of strawberries and pineapple also provides natural sweetness without refined sugars, making it a smarter choice for satisfying cravings. Plus, the salsa’s bright colors signal high levels of phytonutrients, which support heart health and may reduce chronic disease risks.
Finally, this salsa offers hydration thanks to the high water content in both fruits. Whether you enjoy it as a dip or topping, Strawberry Pineapple Salsa keeps your snack light and refreshing. With every bite, you get fiber for digestion, vitamins for energy, and a burst of tropical flavor that makes healthy eating feel effortless.
How it fits in a healthy lifestyle
Strawberry Pineapple Salsa fits seamlessly into balanced diets, whether you’re gluten-free, vegan, or just aiming for more whole foods. It’s naturally free of gluten and dairy, making it a safe choice for those with dietary restrictions. For a heart-healthy boost, pair it with baked whole-grain chips or lean proteins like grilled chicken or fish.
This salsa also works well for meal prep, adding freshness to lunches without extra calories. Try it as a topping for breakfast bowls or alongside grilled shrimp skewers for a light dinner. Because it’s low in sodium and high in fiber, Strawberry Pineapple Salsa helps you stay full longer while keeping flavors bold. It’s proof that eating well doesn’t mean sacrificing taste.
Start by dicing fresh strawberries and pineapple into small, even pieces so they blend well in every bite. Next, finely chop red onion and jalapeño for a balanced kick—remove the seeds if you prefer less heat. Toss everything into a large bowl, then gently mix in chopped cilantro and a squeeze of lime juice to brighten the flavors. For extra depth, drizzle in a teaspoon of honey and a pinch of salt, stirring just until combined. Let the Strawberry Pineapple Salsa chill in the fridge for at least 15 minutes; this helps the flavors meld beautifully. Meanwhile, toast some tortilla chips in the oven for a warm, crispy contrast. If you’re short on time, use pre-diced pineapple from the store, but pat it dry to avoid a watery salsa. Serve it straight from the bowl or layer it over grilled chicken for a fresh twist.
Mistakes I’ve made and learned from
Early on, I rushed the chilling step and ended up with a salsa that tasted disjointed—now I never skip it. Another blunder? Over-mixing, which turned the Strawberry Pineapple Salsa mushy. A light hand keeps the texture perfect. I also learned the hard way that skipping the lime juice leads to browning strawberries; acid is key for vibrancy. For more tips on balancing sweet and spicy flavors, check out my guide to perfecting sweet-heat salsas. And if you’ve ever struggled with watery salsa, my fixing soggy salsa tricks will save the day. Trust me, a little patience pays off!
Strawberry Pineapple Salsa dances between sweet and spicy, a vibrant fusion that reflects its tropical roots. While salsas traditionally hail from Mexico, this fruity twist likely emerged in coastal regions where strawberries and pineapples thrive. Families in Hawaii, for instance, might add a splash of coconut milk for creaminess, while Mexican kitchens could toss in extra jalapeños for heat. My grandmother used to make a version with mint from her garden, turning it into a refreshing summer staple.
Across the Caribbean, cooks often swap strawberries for mangoes, but Strawberry Pineapple Salsa keeps its loyal fans. In the American South, you’ll find it piled high on grilled fish or served alongside cornbread at picnics. Meanwhile, in California, farm-to-table chefs might fold in avocado for richness. No matter the variation, the dish always brings people together—whether at backyard BBQs or beachside potlucks.
ays-cooking">How it fits in today’s cooking
Today, Strawberry Pineapple Salsa fits perfectly into modern meals, bridging healthy eating and bold flavors. Meal preppers love it as a topping for lunch bowls, while brunch enthusiasts layer it over pancakes or waffles for a sweet kick. It’s also a star at summer gatherings, pairing effortlessly with grilled meats or veggie dips.
Busy home cooks appreciate how adaptable it is. Some blend it into smoothies, while others use it to jazz up tacos or salads. With its bright colors and fresh taste, Strawberry Pineapple Salsa isn’t just a recipe—it’s a celebration of how global flavors can shine in everyday cooking.
Taste and Texture
What makes it delicious
Strawberry Pineapple Salsa bursts with bright, juicy flavors that dance on your tongue. The sweetness of ripe strawberries mingles with the tropical tang of pineapple, while a hint of lime adds a refreshing zing. Fresh cilantro and a touch of jalapeño bring earthy depth and a subtle kick, making every bite exciting. Meanwhile, the textures play perfectly together—crunchy red onion, soft fruit, and crisp bell peppers create a satisfying contrast. This salsa smells as vibrant as it tastes, with fragrant citrus and herbs teasing your senses before the first scoop. Whether you pair it with chips or grilled fish, Strawberry Pineapple Salsa delivers a lively, mouthwatering experience.
r">Boosting the flavor
For an extra flavor boost, try tossing in diced mango or a drizzle of honey to heighten the natural sweetness. If you love heat, swap jalapeños for serrano peppers or add a pinch of smoked paprika. A squeeze of orange juice can brighten the mix even further, while toasted coconut flakes add a nutty crunch. For more inspiration, explore our guide to perfect fruit salsa pairings or learn how to balance spices in our homemade salsa tips. With just a few tweaks, you can tailor this Strawberry Pineapple Salsa to your cravings.
Tips for Success
Best practices for results
Always use ripe strawberries and fresh pineapple for the best flavor in your Strawberry Pineapple Salsa. Additionally, finely dice all ingredients evenly so every bite has a balanced mix of sweet and tangy flavors. For extra freshness, chill the salsa for at least 30 minutes before serving. If you prefer a spicier kick, gradually add jalapeño and taste as you go to avoid overpowering the fruit. Finally, serve your Strawberry Pineapple Salsa with sturdy chips or as a topping for grilled fish to keep the texture perfect.
>Mistakes to avoid
Avoid overmixing the salsa, as it can turn mushy instead of staying crisp. Instead, gently fold the ingredients together just until combined. Also, don’t skip draining excess juice from the pineapple, or your Strawberry Pineapple Salsa may become too watery. For more tips on handling fresh fruit, check out our guide on choosing ripe fruit. Another common mistake is adding salt too early, which can draw out moisture and dilute the flavors. Instead, season right before serving. For additional seasoning tricks, explore our balancing flavors post.
Serving and Pairing Suggestions
How to serve this dish
Brighten up any table with Strawberry Pineapple Salsa by serving it in a colorful bowl or hollowed-out pineapple for a tropical touch. Meanwhile, garnish the edges with fresh mint leaves or a sprinkle of lime zest to make it pop. This vibrant salsa shines at summer barbecues, brunch spreads, or even as a festive appetizer during holidays. For a fun twist, pair it with homemade cinnamon sugar chips or serve it alongside grilled proteins for a sweet and tangy contrast.
What goes well with it
Elevate your meal by pairing Strawberry Pineapple Salsa with crispy coconut shrimp for a perfect balance of crunch and fruity freshness. Alternatively, spoon it over grilled chicken or fish to add a burst of flavor. For drinks, a chilled glass of mango iced tea or a zesty margarita complements the salsa’s tropical notes. If you’re hosting a gathering, try pairing it with our easy avocado dip or these crowd-pleasing cilantro lime shrimp tacos for a cohesive, flavorful spread.
Strawberry Pineapple Salsa pairs perfectly with grilled chicken, fish tacos, or tortilla chips. Its sweet and tangy flavor also makes it a great topping for pork dishes or a refreshing dip for summer parties.
How long does homemade Strawberry Pineapple Salsa last?
Fresh Strawberry Pineapple Salsa stays good for 2-3 days when stored in an airtight container in the refrigerator. For best results, consume it within 24 hours as the fruits soften over time.
rank-math-faq-item">
Can you freeze Strawberry Pineapple Salsa?
Freezing Strawberry Pineapple Salsa isn’t recommended because the texture of the fruits becomes mushy when thawed. For longer storage, consider canning it using a proper water bath method instead.
Is Strawberry Pineapple Salsa spicy?
Traditional Strawberry Pineapple Salsa has a mild sweetness with little to no heat, but you can add jalapeños or chili powder for spice. The natural flavors of strawberries and pineapple create a balanced, fruity base.
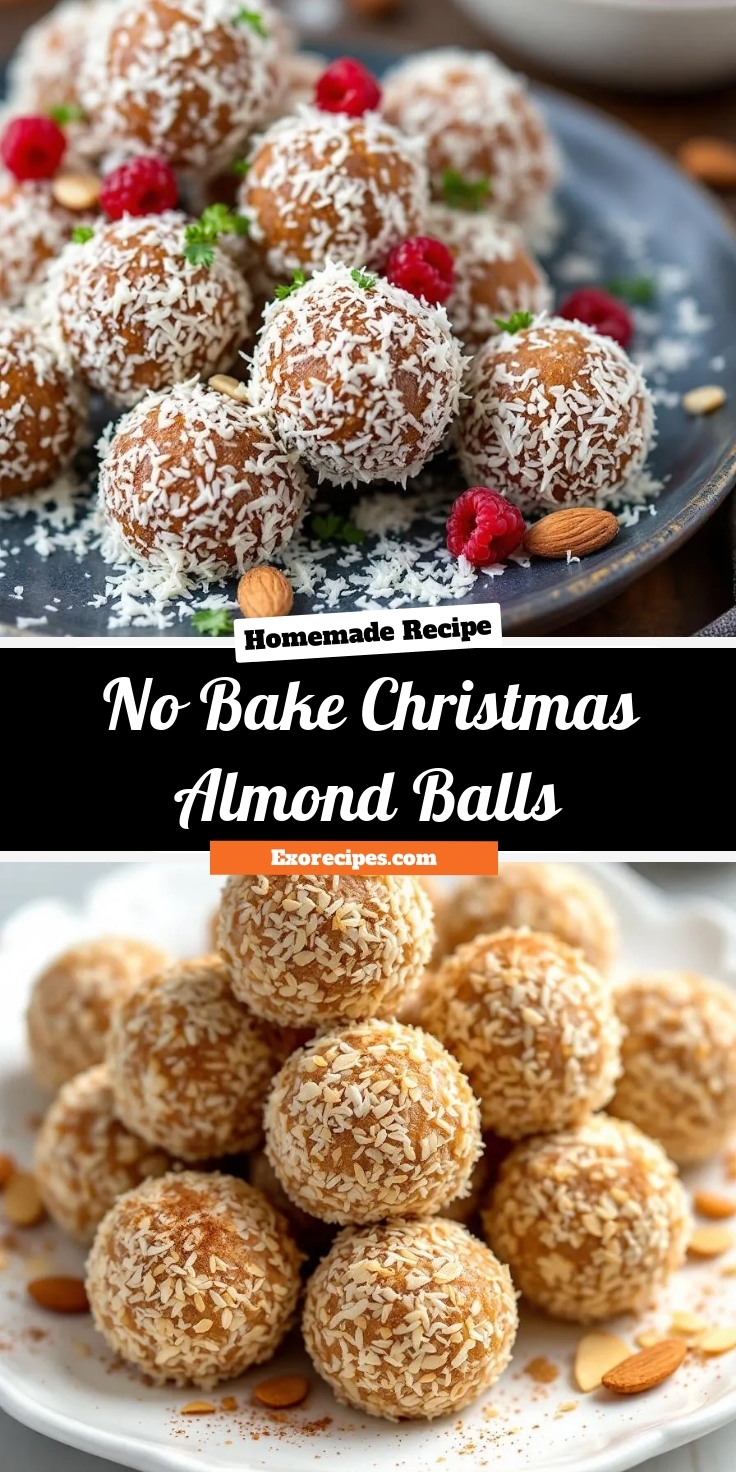
Easy No Bake Christmas Almond Balls Recipe
Introduction
Now, as the holiday season approaches, I want to share a recipe that captures the joy of festive baking without the hassle. These No Bake Christmas Almond Balls bring together rich flavors and effortless preparation, making them perfect for busy days when you still crave something special. Whether you’re hosting a party or simply treating yourself, this recipe delivers nostalgia and sweetness in every bite.
No Bake Christmas Almond Balls are a delightful twist on classic holiday treats, combining creamy almond butter, crunchy nuts, and a hint of festive spice. Unlike traditional baked goods, they require no oven time, so you can whip them up quickly while avoiding kitchen chaos. Moreover, they fit perfectly with my blog’s mission to celebrate simple, heartfelt cooking. If you love easy yet impressive desserts, you’ll adore these energy-packed bites. For more inspiration, check out my holiday treats collection or explore almond-based recipes for nutty variations.
Why I Love This Recipe
These No Bake Christmas Almond Balls hold a special place in my heart because they remind me of snowy evenings spent with my grandmother. She always had a jar of homemade treats ready, and the aroma of almonds and vanilla instantly takes me back. Beyond the nostalgia, I love how versatile they are—whether as a last-minute gift or a quick snack between holiday errands. They prove that delicious memories don’t need to be complicated.
Health and Nutrition
Why it’s good for your body
No Bake Christmas Almond Balls pack a nutritious punch while satisfying your sweet tooth. First, almonds provide healthy fats and protein, which keep you full and energized. Additionally, these tasty treats contain natural sweeteners like dates or honey, avoiding refined sugars. As a result, you get a steady energy boost without the crash.
Moreover, No Bake Christmas Almond Balls deliver fiber from ingredients like oats or coconut. Fiber supports digestion and helps maintain stable blood sugar levels. Meanwhile, almond butter or whole almonds contribute vitamin E, an antioxidant that promotes skin health. Because they’re no-bake, the nutrients stay intact, unlike baked goods that lose some benefits during cooking.
Finally, these festive bites often include spices like cinnamon, which may help regulate blood sugar. Since they’re easy to customize, you can boost their nutrition further by adding chia seeds or flaxseeds. Whether you enjoy them as a snack or dessert, No Bake Christmas Almond Balls offer a guilt-free way to indulge.
How it fits in a healthy lifestyle
No Bake Christmas Almond Balls fit seamlessly into a balanced diet. They’re naturally gluten-free, making them a great option for those with sensitivities. If you’re looking for heart-healthy snacks, the almonds and healthy fats support cardiovascular wellness. Plus, their protein content helps curb cravings, so you’re less likely to reach for processed junk.
For busy lifestyles, these treats are a lifesaver. Whip up a batch ahead of time, and you’ll have a wholesome snack ready whenever hunger strikes. Pair them with a smoothie bowl for a balanced breakfast or enjoy them post-workout for quick energy. If you’re meal prepping, check out these easy meal prep ideas to keep your week on track. No Bake Christmas Almond Balls prove that healthy eating can be simple, delicious, and festive.
Easy and delicious no-bake almond balls perfect for Christmas treats.
Ingredients
Scale
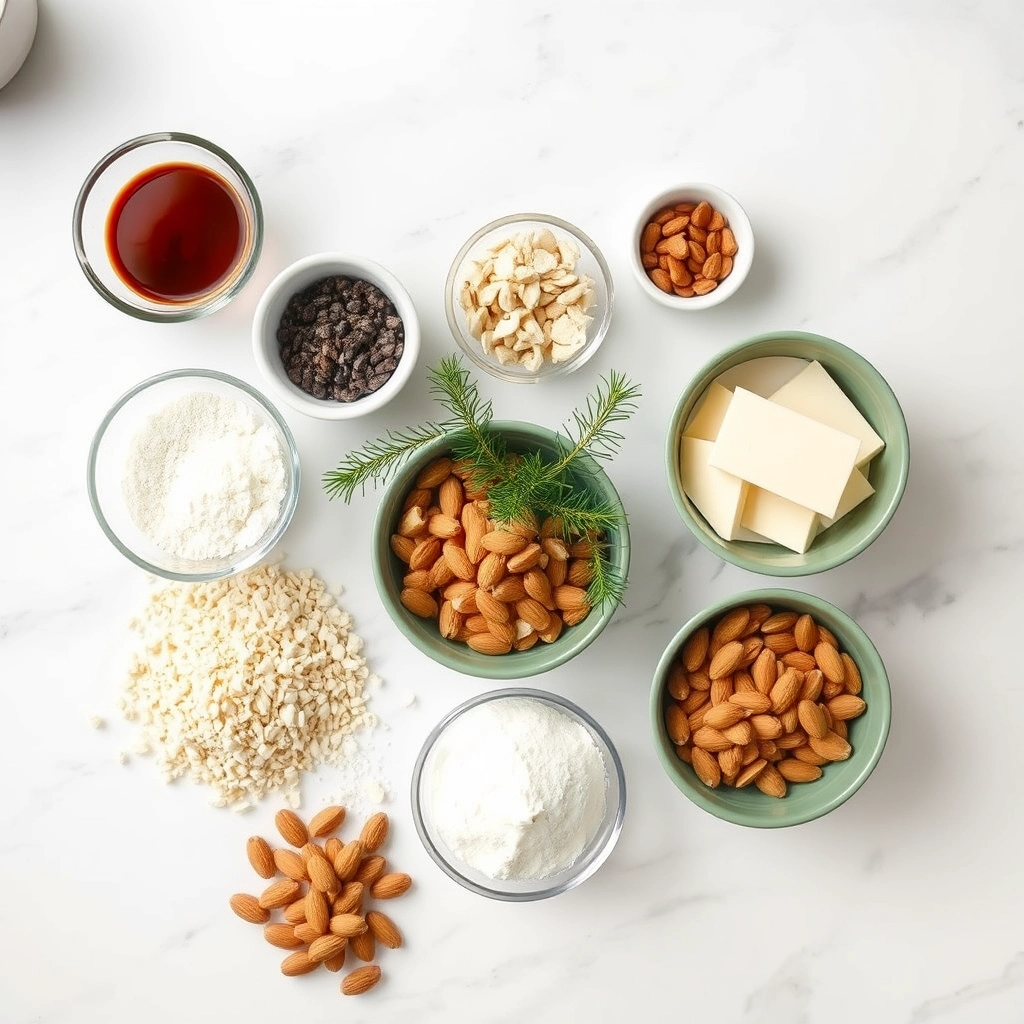
For the Crust:
2 cups almond flour
1/2 cup honey or maple syrup
1/2 cup almond butter
1 tsp vanilla extract
1/2 tsp cinnamon
1/4 tsp salt
1/2 cup shredded coconut (for rolling)
Instructions
1. Prepare the Crust:
In a large bowl, mix almond flour, honey or maple syrup, almond butter, vanilla extract, cinnamon, and salt until well combined.
Roll the mixture into small balls, about 1 inch in diameter.
Roll each ball in shredded coconut until fully coated.
Place the balls on a tray lined with parchment paper and refrigerate for at least 30 minutes to firm up.
Serve chilled and enjoy!
Notes
You can customize the seasonings to taste.
How to Prepare This Dish
Steps and time-saving tips
Start by gathering all your ingredients for No Bake Christmas Almond Balls to streamline the process. Combine almond flour, shredded coconut, and a pinch of salt in a large mixing bowl. Meanwhile, warm honey and almond butter in a small saucepan over low heat until they blend smoothly. Pour this mixture into the dry ingredients and stir vigorously until everything sticks together. If the dough feels too dry, add a splash of almond milk for moisture. Roll tablespoon-sized portions into balls, then chill them in the fridge for 15 minutes to firm up. While they set, melt dark chocolate in a double boiler or microwave, stirring frequently to avoid burning. Dip each ball halfway into the chocolate, letting excess drip off, then place them on parchment paper. Sprinkle crushed almonds or festive sprinkles on top before the chocolate hardens. For a quicker alternative, skip the dipping step and simply dust the No Bake Christmas Almond Balls with cocoa powder. Store them in an airtight container in the fridge for up to a week—if they last that long!
and-learned-from">Mistakes I’ve made and learned from
Early on, I rushed the mixing step for No Bake Christmas Almond Balls, leaving dry pockets in the dough. The result? Crumbly balls that fell apart before chilling. Now, I take an extra minute to knead the dough by hand, ensuring even consistency. Another lesson learned the hard way: overheating the chocolate. Once, I zapped it too long, and it seized into a grainy mess. Now, I melt it in short bursts, stirring between each interval. If you’re new to no-bake treats, my guide on common no-bake mistakes covers these pitfalls in detail. Also, if your almond butter separates, don’t panic—just give it a good stir or check out my tips for fixing runny nut butters. Trust me, a little patience saves a lot of frustration!
Cultural Connection and Variations
Where this recipe comes from
No Bake Christmas Almond Balls have a cozy, nostalgic charm that ties them to holiday traditions across cultures. Originating as a simple treat in European kitchens, they evolved into a festive staple, especially in Scandinavia and Germany, where almonds and spices dominate winter desserts. Families often pass down their own twists—some add a dash of cardamom, while others roll the balls in coconut or dip them in dark chocolate for extra richness.
In my home, we make No
Bake Christmas Almond Balls every December, mixing crushed almonds with honey and a hint of orange zest. My grandmother insisted they symbolized unity because we shaped them by hand together. Meanwhile, in Mediterranean variations, cooks might swap honey for dates or figs, blending them with almond flour for a chewier texture. No matter the version, these little bites always carry the warmth of shared moments.
How it fits in today’s cooking
Today, No Bake Christmas Almond Balls fit perfectly into modern kitchens because they’re quick, customizable, and packed with wholesome ingredients. Busy cooks love them for holiday parties, but they also shine as a healthy snack year-round. Many adapt the recipe with protein powder or chia seeds for an energy boost, proving tradition can meet trendy tastes.
They’re also a star at cookie swaps, pairing beautifully with classics like gingerbread cookies or peppermint bark. Whether you stick to the original or experiment with nut-free alternatives, these almond balls keep the spirit of connection alive—one sweet bite at a time.
>Taste and Texture
What makes it delicious
No Bake Christmas Almond Balls deliver a rich, nutty sweetness with every bite. The creamy almond butter base melts on your tongue, while the crunchy almond pieces add a satisfying contrast. Warm hints of cinnamon and vanilla wrap the flavors together, creating a cozy, festive aroma. Meanwhile, the chewy dates and oats give these treats a hearty texture that feels indulgent yet wholesome. Whether you savor them slowly or pop them straight into your mouth, No Bake Christmas Almond Balls offer a delightful balance of soft and crisp.
Boosting the flavor
For an extra layer of decadence, roll your No Bake Christmas Almond Balls in finely shredded coconut or drizzle them with dark chocolate. A pinch of cardamom or orange zest can brighten the flavor profile, adding a citrusy twist. If you love deeper spice notes, try blending in a dash of nutmeg or clove. For more inspiration, explore our guide to holiday dessert pairings or discover how to customize almond butter for richer results. Small tweaks make these treats even more irresistible.
Tips for Success
Best practices for results
Always chill the dough for at least 30 minutes before shaping your No Bake Christmas Almond Balls, as this helps them hold together perfectly. Use parchment paper when rolling the mixture to prevent sticking and ensure a smooth texture. For even flavor, toast the almonds lightly before blending them into the dough. If the mixture feels too sticky, simply dust your hands with powdered sugar while shaping the balls. Finally, store them in an airtight container to keep them fresh and delicious for days.
Mistakes to avoid
Avoid over-processing the almonds, or your No Bake Christmas Almond Balls may become too oily instead of crumbly. For the right consistency, pulse the nuts just until finely chopped. Many bakers also skip the chilling step, but this often leads to misshapen balls that fall apart. If you need more guidance on handling sticky dough, check out our no-bake troubleshooting guide. Also, resist the urge to substitute honey for maple syrup unless you adjust the dry ingredients, as explained in our sweetener substitutions post.
Serving and Pairing Suggestions
How to serve this dish
No Bake Christmas Almond Balls shine as a festive treat, so present them with flair. Arrange them on a decorative platter with a dusting of powdered sugar or edible glitter for a touch of holiday magic. Alternatively, stack them in a clear jar tied with a ribbon for a charming homemade gift. Since they require no baking, these almond balls make an ideal last-minute addition to cookie swaps, brunch spreads, or dessert buffets. For extra elegance, pair them with fresh mint leaves or cranberries as garnishes.
h-it">What goes well with it
Warm spiced chai tea enhances the cozy flavors of No Bake Christmas Almond Balls, creating a perfect balance of sweetness and spice. If you prefer something cooler, try a glass of creamy eggnog for a rich, festive pairing. For a savory contrast, serve these almond balls alongside a cheese board featuring sharp cheddar or tangy brie. Explore more holiday inspiration with our holiday dessert ideas or discover easy crowd-pleasers in our quick party recipes collection.
How do you make No Bake Christmas Almond Balls without peanut butter?
You can substitute peanut butter with almond butter, cashew butter, or sunflower seed butter for a nut-free version. No Bake Christmas Almond Balls still hold their shape well with these alternatives, and the almond flavor pairs perfectly with festive spices like cinnamon or nutmeg.
rank-math-faq-item">
Can you freeze No Bake Christmas Almond Balls for later?
Yes! No Bake Christmas Almond Balls freeze beautifully for up to 3 months in an airtight container. Thaw them at room temperature for 15-20 minutes before serving to maintain their soft, chewy texture.
What’s the best way to coat No Bake Christmas Almond Balls?
Roll them in powdered sugar, shredded coconut, or crushed nuts for a festive touch. For holiday flair, drizzle melted white chocolate over No Bake Christmas Almond Balls and add sprinkles before the chocolate sets.
Are No Bake Christmas Almond Balls gluten-free?
Absolutely! As long as you use certified gluten-free oats and uncontaminated ingredients, No Bake Christmas Almond Balls are naturally gluten-free. They’re a great treat for guests with dietary restrictions during the holidays.
>
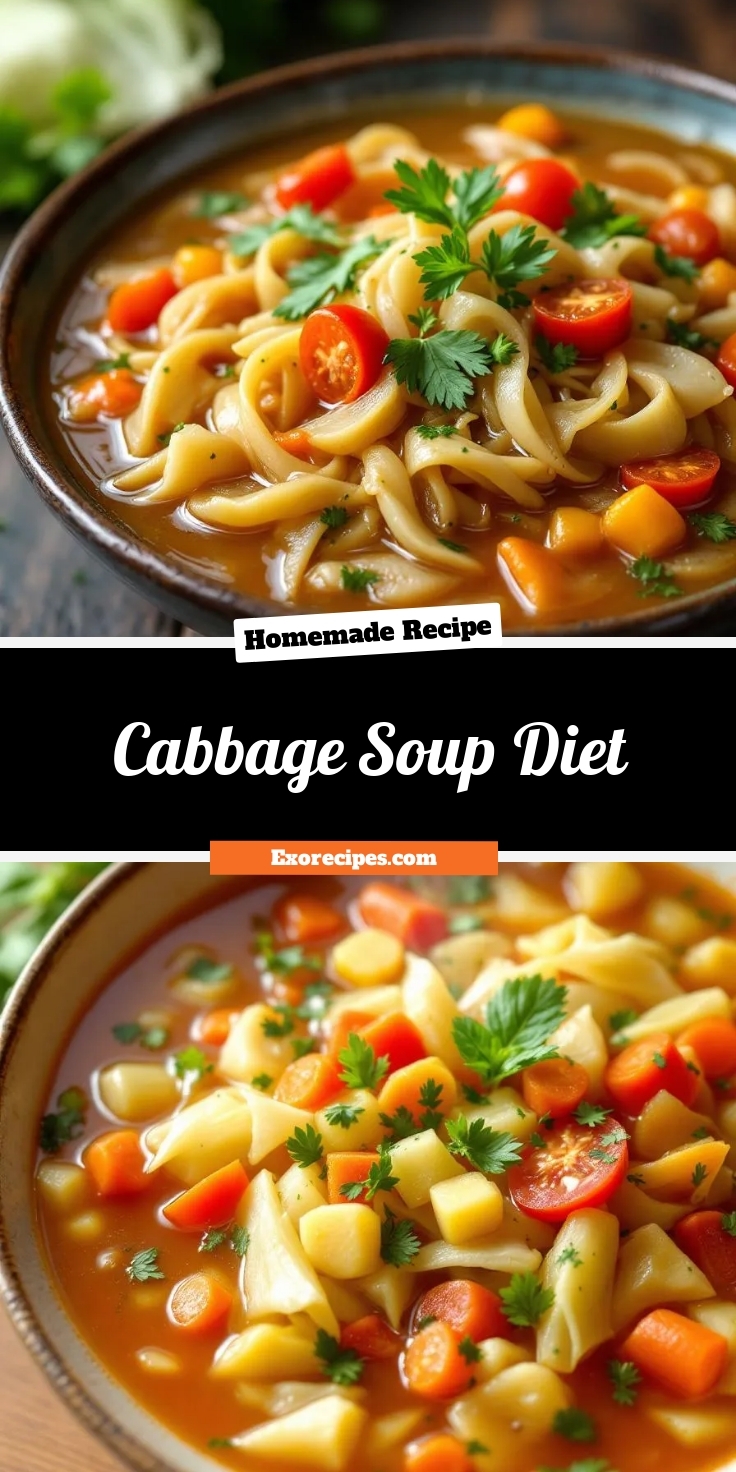
Best Cabbage Soup Diet – Easy Detox Recipe
Introduction
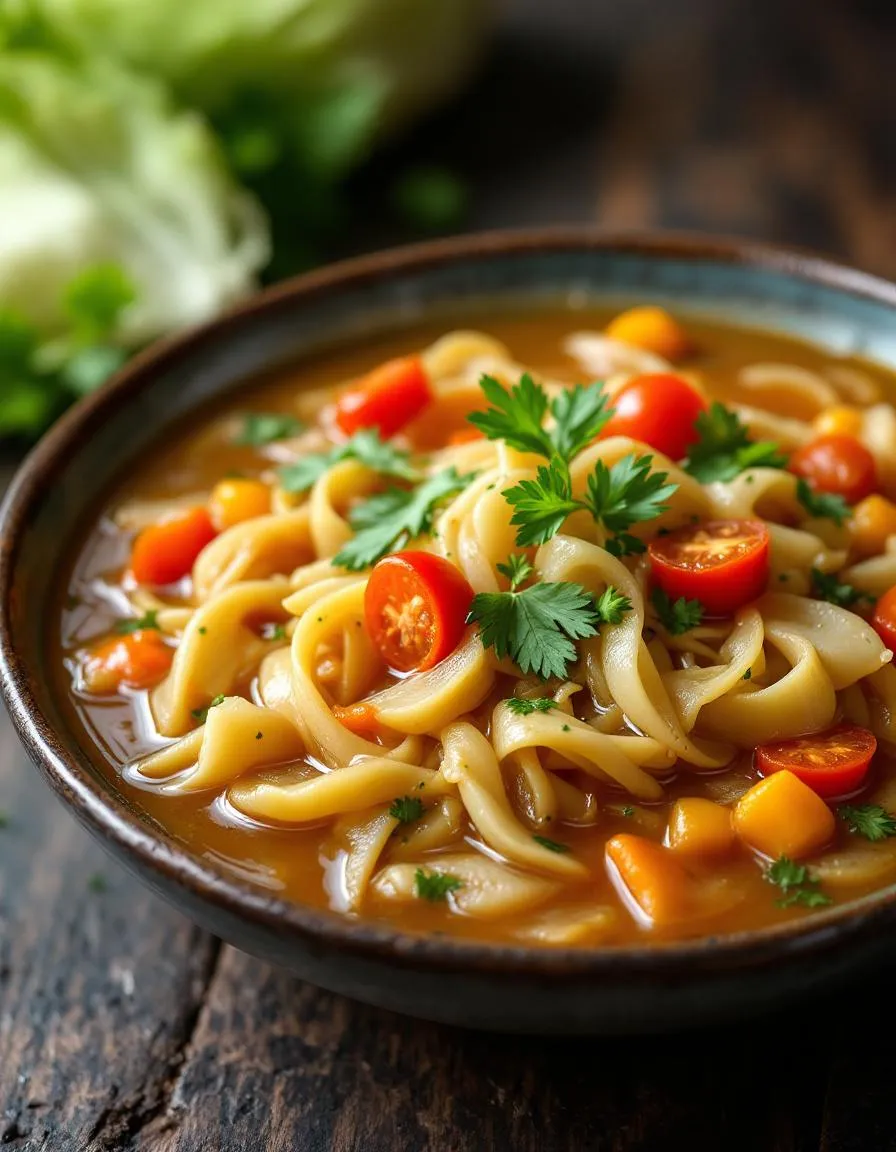
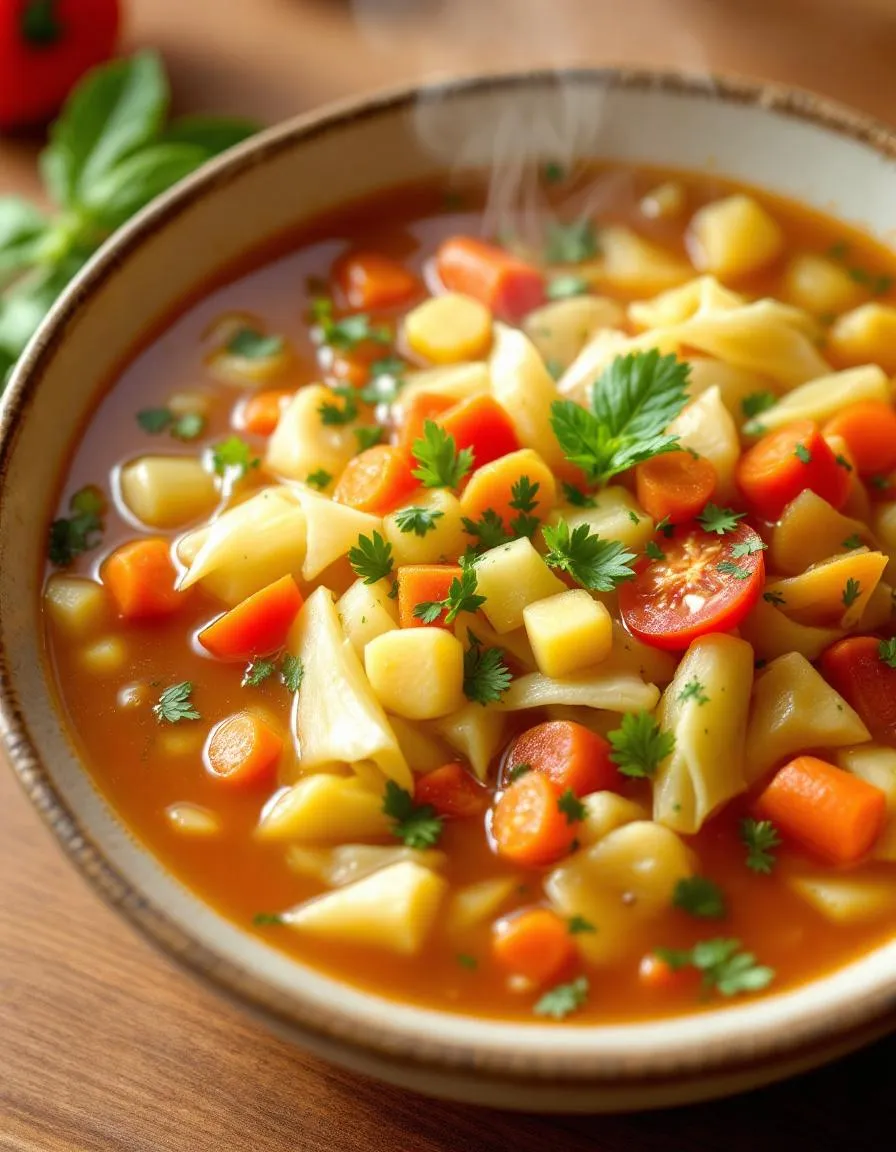
If you’ve ever felt stuck in a cycle of restrictive diets or struggled to find a simple, nourishing way to reset your eating habits, you’re not alone. That’s why I’m excited to share my take on the Cabbage Soup Diet—a humble yet powerful recipe that has helped countless people kickstart their wellness journey. Whether you’re looking for a short-term cleanse or just crave a comforting bowl of soup, this dish delivers flavor without fuss.
The Cabbage Soup Diet is a seven-day meal plan centered around a hearty, low-calorie cabbage-based soup. Unlike fad diets that promise unrealistic results, this approach focuses on simplicity and satiety. Packed with fiber-rich vegetables, it supports digestion while keeping you full. Many people turn to it for a quick reset, especially after indulgent seasons or when they need a break from heavy meals. At brekcakes.com, we believe in balanced, approachable eating, and this recipe fits perfectly with our philosophy. It’s not about deprivation but about rediscovering the joy of wholesome ingredients. For more inspiration, check out our healthy eating tips or explore our comfort food favorites for other satisfying options.
Why I Love This Recipe
This Cabbage Soup Diet recipe holds a special place in my heart because it reminds me of my grandmother’s kitchen. She swore by the power of simple, nourishing soups, and this one was her go-to during busy weeks. Every time I make it, I’m transported back to her cozy table, where good food and laughter always went hand in hand. Beyond nostalgia, I love how versatile and forgiving it is—you can tweak the ingredients to suit your taste, and it still turns out delicious. Most importantly, it’s a gentle reminder that healthy eating doesn’t have to be complicated.
Health and Nutrition
Why it’s good for your body
The Cabbage Soup Diet packs a nutritious punch while keeping calories low. First, cabbage delivers a hefty dose of vitamin C, which boosts immunity and supports collagen production. Additionally, the soup’s high fiber content aids digestion and helps you feel full longer, reducing unnecessary snacking. Since the diet emphasizes vegetables, you also get antioxidants that fight inflammation.
Moreover, the Cabbage Soup Diet encourages hydration, as the broth base keeps you replenished. While it’s not a long-term solution, the short-term focus on whole, unprocessed foods can kickstart healthier habits. For instance, the soup’s low sodium and fat content make it heart-friendly, especially when paired with lean proteins. Transitioning to a balanced diet afterward becomes easier because the soup helps reset cravings.
Finally, the Cabbage Soup Diet works well for detoxifying, as cabbage contains sulfur compounds that support liver function. Though it’s restrictive, the nutrient density ensures you still get essential vitamins. Just remember to pair it with other healthy choices, like our balanced meal prep strategies, for sustained results.
How it fits in a healthy lifestyle
The Cabbage Soup Diet fits neatly into a mindful eating plan, especially for those focusing on weight management or detox. While it’s not meant for long-term use, it complements a gluten-free or plant-forward approach by emphasizing vegetables and simple ingredients. For example, swapping heavy lunches with a bowl of this soup can cut calories without sacrificing nutrition.
Pair the Cabbage Soup Diet with protein-rich sides, like grilled chicken or tofu, to maintain energy levels. If you’re exploring heart-healthy options, the soup’s low cholesterol profile aligns perfectly. For more ideas on balancing meals, check out our quick healthy dinner recipes. Ultimately, this diet works best as a reset before adopting sustainable habits like portion control and whole-food choices.
Start by chopping fresh cabbage into bite-sized pieces, then toss them into a large pot with a drizzle of olive oil. Sauté the cabbage over medium heat for a few minutes until it softens slightly. Next, add diced onions, carrots, and celery to the pot, stirring everything together to let the flavors blend. Pour in low-sodium vegetable broth and crushed tomatoes, then bring the mixture to a gentle boil. Reduce the heat and let the Cabbage Soup Diet simmer for about 20 minutes, stirring occasionally to prevent sticking. For extra depth, toss in minced garlic, a pinch of paprika, and a bay leaf. Meanwhile, prep any additional veggies you love—bell peppers or zucchini work great. If you’re short on time, use pre-shredded coleslaw mix instead of chopping cabbage. Just before serving, remove the bay leaf and adjust the seasoning with salt and pepper. This soup tastes even better the next day, so consider making a double batch for easy leftovers.
and-learned-from">Mistakes I’ve made and learned from
Early on, I made my Cabbage Soup Diet too watery by adding excess broth, which diluted the flavor. Now, I measure liquids carefully and simmer longer if needed to concentrate the taste. Another blunder? Overcooking the cabbage until it turned mushy. These days, I keep it slightly crisp for better texture. If you’re new to soups, check out my guide on soup basics to avoid common pitfalls. Also, don’t skip tasting as you go—seasoning makes all the difference. For more tips on balancing flavors, my post on seasoning secrets breaks it down simply. Trust me, a little patience and these tweaks will transform your results.
“`
n-and-variations">Cultural Connection and Variations
Where this recipe comes from
The Cabbage Soup Diet has roots in frugal, resourceful cooking traditions. Many cultures have their own version of cabbage soup, often born from the need to stretch ingredients during lean times. In Eastern Europe, for example, hearty cabbage soups like kapusniak or shchi simmer for hours with smoked meats or mushrooms. Meanwhile, the Americanized Cabbage Soup Diet gained fame in the 1980s as a quick-fix weight-loss plan, though its simplicity echoes older, practical ways of cooking.
Families often put their own spin on the dish. Some add tomatoes for tang, while others toss in potatoes or carrots for heartiness. In my grandma’s kitchen, the Cabbage Soup Diet recipe always included a splash of apple cider vinegar for brightness. Across the globe, Korean kimchi jjigae turns cabbage into a spicy, fermented delight. These variations show how one humble ingredient can inspire countless flavors.
How it fits in today’s cooking
Today, the Cabbage Soup Diet remains popular for its simplicity and versatility. Busy home cooks love it for meal prep, while health-conscious eaters appreciate its low-calorie, veggie-packed profile. Modern twists might include quinoa or tofu for extra protein, proving this soup adapts to any diet. Plus, it’s a cozy staple during chilly months, much like our comforting winter soups collection highlights.
It’s also a gate
way to mindful eating. Whether you’re detoxing or just craving something light, the Cabbage Soup Diet fits seamlessly into today’s routines. For more inspiration, check out our healthy weeknight meals roundup. From grandma’s pot to your Instant Pot, this soup keeps connecting generations—one steaming bowl at a time.
Taste and Texture
What makes it delicious
The Cabbage Soup Diet delivers a light yet deeply satisfying flavor profile. Fresh cabbage lends a mild sweetness, while onions and garlic infuse the broth with a savory, aromatic depth. Each spoonful feels warming and hearty, with tender vegetables that soften just enough to melt in your mouth. Meanwhile, tomatoes add a tangy brightness, balancing the earthy notes of the soup. Whether enjoyed hot or chilled, the Cabbage Soup Diet keeps every bite refreshing and full of wholesome goodness.
Boosting the flavor
For an extra kick, try stirring in a pinch of smoked paprika or a dash of cayenne pepper. Fresh herbs like parsley or cilantro brighten the dish, while a squeeze of lemon juice enhances its zesty undertones. If you love creamy textures, swirl in a spoonful of Greek yogurt or avocado for richness. Pair your Cabbage Soup Diet with a side of crusty bread or explore our healthy sides for more inspiration. Craving protein? Toss in shredded chicken or tofu, or check out our plant-based protein guide for easy additions. Small tweaks make this classic soup even more irresistible.
Always chop your vegetables evenly so they cook uniformly in the Cabbage Soup Diet. For the best flavor, sauté the onions and garlic first to build a rich base. Additionally, use low-sodium broth to control the saltiness while still keeping the soup tasty. Stir the pot occasionally to prevent sticking, especially if you’re simmering for a long time. Finally, taste and adjust the seasoning just before serving to make sure your Cabbage Soup Diet hits all the right notes.
Mistakes to avoid
Avoid overcooking the cabbage, as it can turn mushy and lose its texture. Instead, add it toward the end of cooking so it stays slightly crisp. Many people also skip tasting as they go, which can lead to bland soup. Remember to season in layers for depth of flavor. For more seasoning tips, check out our guide on balancing flavors. Another common mistake is using too much water, which dilutes the taste. Follow the broth measurements closely, and if you need help with portion control, our soup basics article has great advice.
g-suggestions">Serving and Pairing Suggestions
How to serve this dish
For a cozy weeknight dinner, serve your Cabbage Soup Diet warm in deep bowls with a sprinkle of fresh parsley or chives on top. Meanwhile, if you’re hosting a casual gathering, consider pairing it with crusty whole-grain bread for dipping. To make it visually appealing, add colorful garnishes like thinly sliced red bell peppers or a swirl of Greek yogurt. This dish also shines during detox weeks or as a light lunch option, especially when you want something nourishing yet simple.
What goes well with it
A crisp green salad with lemon vinaigrette balances the hearty flavors of the Cabbage Soup Diet perfectly. Alternatively, try serving it alongside our garlic herb focaccia for a satisfying crunch. For drinks, herbal teas like peppermint or ginger complement the soup’s lightness, while a chilled glass of cucumber-infused water refreshes the palate. If you’re craving extra protein, our grilled lemon chicken makes a flavorful addition without overpowering the soup’s delicate taste.
math-faq-block">
How much weight can you lose on the Cabbage Soup Diet in a week?
The Cabbage Soup Diet may help you lose 5–10 pounds in a week, but results vary. This rapid weight loss comes from severe calorie restriction, not fat loss. Most experts recommend the Cabbage Soup Diet only as a short-term jumpstart.
Is the Cabbage Soup Diet safe long-term?
No, the Cabbage Soup Diet lacks essential nutrients and isn’t safe beyond 7 days. Long-term use may cause fatigue, dizziness, or muscle loss. For sustainable weight loss, pair balanced meals with exercise instead of relying solely on cabbage soup.
Can you eat anything else on the Cabbage Soup Diet?
Yes, the Cabbage Soup Diet allows limited foods like fruits, vegetables, and lean proteins on specific days. However, the plan is highly restrictive—cabbage soup remains the primary meal. Always check the official guidelines before adding other foods.
rank-math-faq-item">
Why does cabbage soup help you lose weight?
Cabbage soup is low in calories but high in fiber, which helps you feel full. The Cabbage Soup Diet works by creating a severe calorie deficit, forcing your body to burn stored energy. Remember, most weight lost is water weight, not fat.
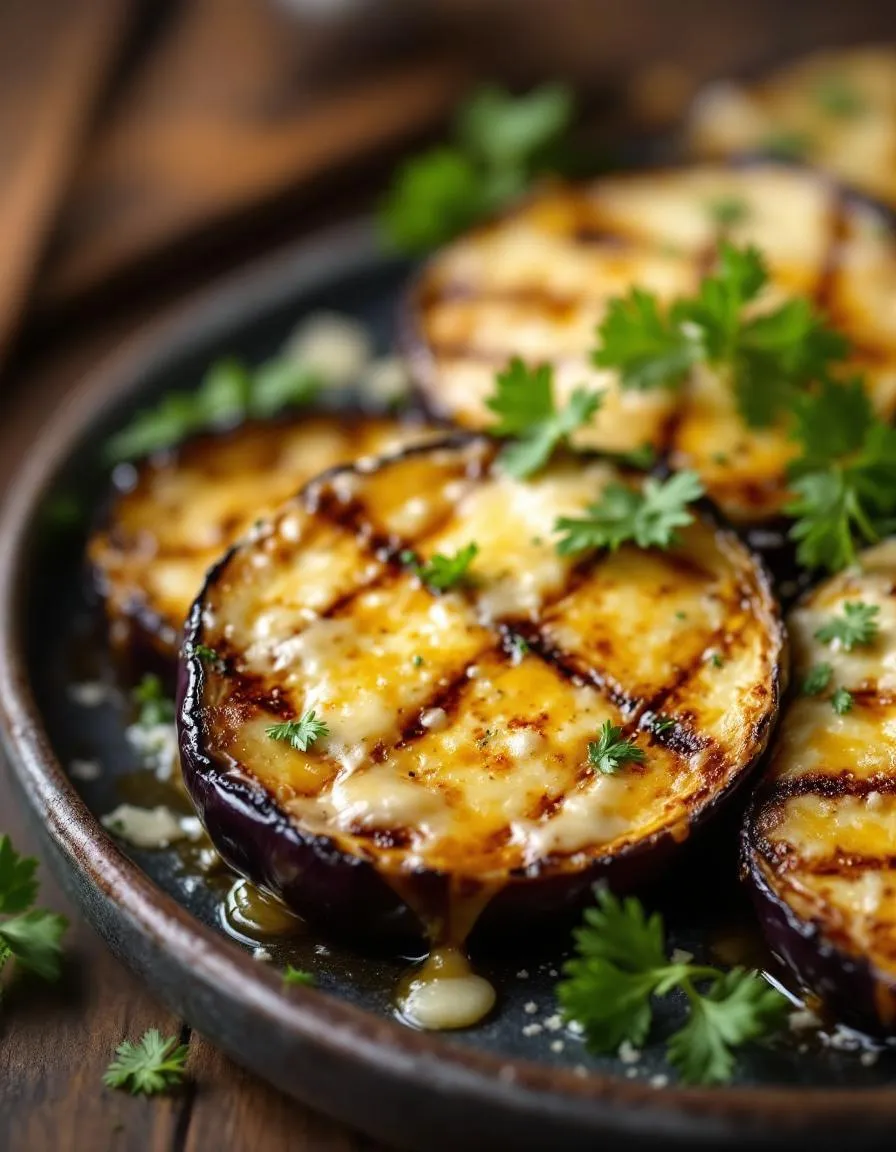
Easy Garlic Parmesan Grilled Eggplant Recipe
Introduction
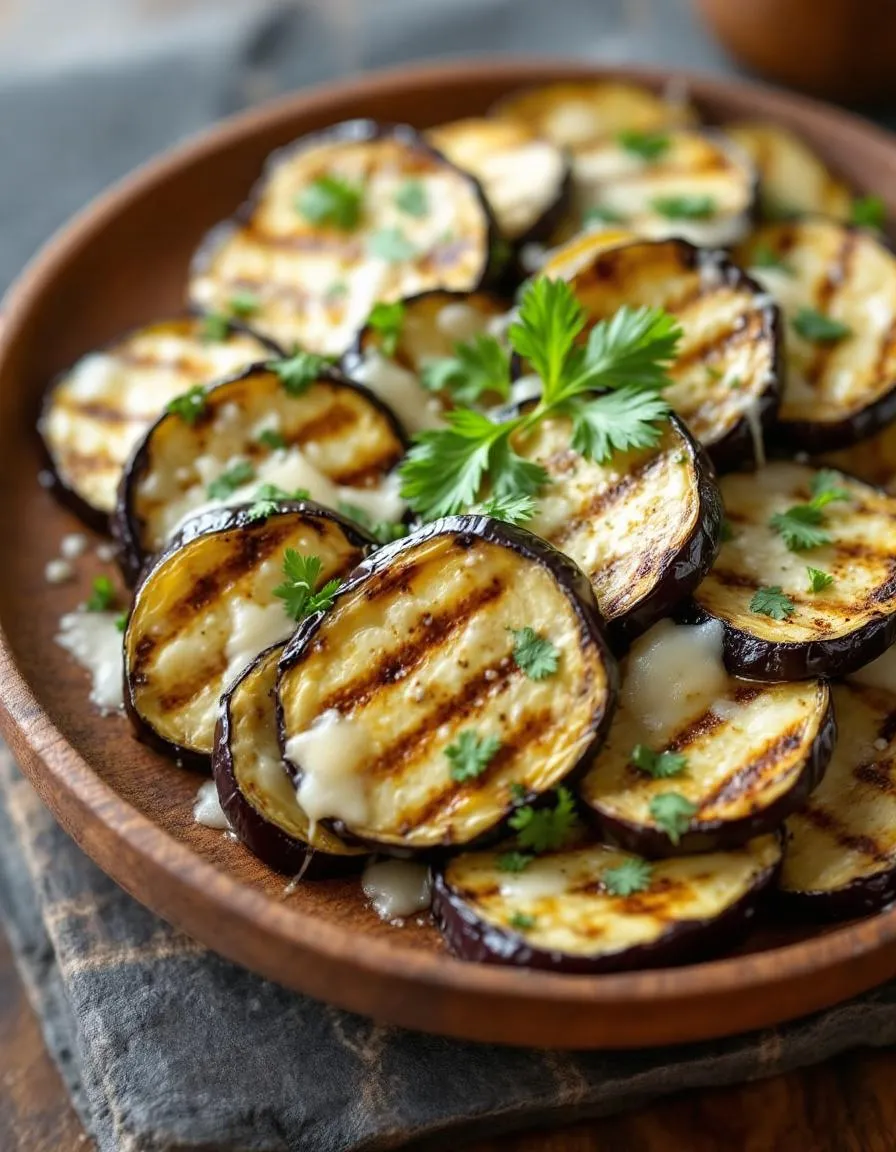
If you’ve ever craved a dish that’s both comforting and bursting with flavor, you’re in the right place. Today, I want to share something truly special—Garlic Parmesan Grilled Eggplant. This recipe isn’t just about feeding your body; it’s about nourishing your soul with smoky, cheesy goodness that transforms humble eggplant into a showstopper. Whether you’re a veggie lover or just looking for a crowd-pleasing side, this dish delivers every time.
Garlic Parmesan Grilled Eggplant combines tender, smoky eggplant with a savory blend of garlic, Parmesan, and herbs. The result? A dish that’s crispy on the outside, melt-in-your-mouth soft on the inside, and packed with umami richness. What makes it stand out is its versatility. Serve it as a hearty side at your next barbecue, layer it into sandwiches, or enjoy it as a light main course. Plus, it fits perfectly with the breezy, approachable vibe of brekcakes.com, where we celebrate simple ingredients with big flavors. If you’re new to grilling veggies, don’t worry—this recipe walks you through every step, just like our guide to perfect grilled vegetables. And if you love cheesy twists, you’ll adore how this dish pairs with our creamy garlic mashed potatoes for a full-flavored meal.
Why I Love This Recipe
Garlic Parmesan Grilled Eggplant holds a special place in my heart because it reminds me of summer evenings spent with family. My grandma used to grill eggplant with just a sprinkle of salt and olive oil, but over the years, I’ve added my own spin—loading it with garlic and Parmesan for that extra punch. Every time I make it, the aroma takes me back to those lazy, laughter-filled dinners. It’s proof that the simplest dishes often carry the deepest memories, and I hope it becomes a favorite in your kitchen too.
Health and Nutrition
Why it’s good for your body
Garlic Parmesan Grilled Eggplant packs a nutritious punch while delighting your taste buds. First, eggplant delivers a hefty dose of fiber, which keeps your digestion smooth and supports gut health. Additionally, this dish features heart-healthy olive oil, rich in monounsaturated fats that help lower bad cholesterol. The garlic not only adds bold flavor but also boasts immune-boosting properties, thanks to its natural antimicrobial compounds.
Moreover, Garlic Parmesan Grilled Eggplant provides a low-calorie yet satisfying option for anyone watching their weight. Eggplant itself is naturally low in carbs, making it a great choice for balanced eating. The Parmesan cheese adds a protein boost and calcium, which strengthens bones. Together, these ingredients create a dish that fuels your body without unnecessary additives.
Finally, grilling the eggplant enhances its natural flavors while keeping the cooking method light and healthy. Unlike frying, grilling preserves nutrients and avoids excess oil. Whether you enjoy it as a side or main dish, Garlic Parmesan Grilled Eggplant offers a delicious way to nourish your body. With every bite, you get a mix of vitamins, minerals, and antioxidants that promote overall wellness.
How it fits in a healthy lifestyle
Garlic Parmesan Grilled Eggplant effortlessly fits into a balanced diet, whether you follow specific dietary needs or simply aim for wholesome meals. For gluten-free eaters, this dish is a safe and flavorful option that doesn’t compromise on taste. Its heart-healthy profile also aligns with diets focused on cardiovascular wellness, thanks to olive oil’s benefits and eggplant’s fiber content.
If you’re meal prepping for the week, this recipe stores well and pairs beautifully with proteins like grilled chicken or tofu. For more gluten-free inspiration, check out our gluten-free meal ideas. Plus, the simplicity of Garlic Parmesan Grilled Eggplant makes it perfect for busy weeknights when you want something nutritious without fuss. Pair it with a fresh salad or quinoa for a complete meal.
Looking to add more plant-based dishes to your rotation? This recipe is a great start. Explore our vegetarian dinner options for more easy, nutrient-packed ideas. Whether you’re cooking for one or a family, Garlic Parmesan Grilled Eggplant helps you stay on track with your health goals while enjoying every bite.
A delicious and savory grilled eggplant dish with garlic and parmesan flavors.
Ingredients
Scale
For the Crust:
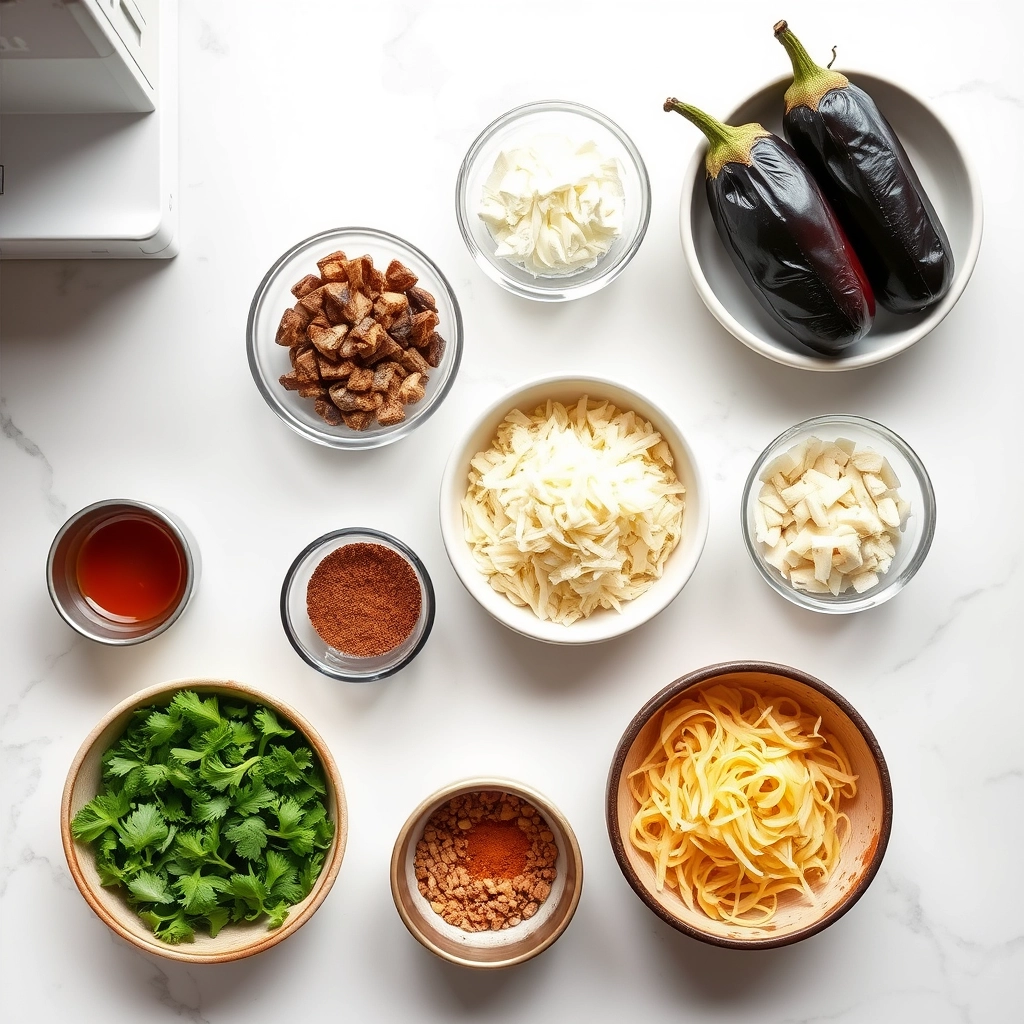
2 medium eggplants, sliced into 1/2-inch rounds
3 tablespoons olive oil
3 cloves garlic, minced
1/2 cup grated parmesan cheese
1 teaspoon dried oregano
1/2 teaspoon salt
1/4 teaspoon black pepper
2 tablespoons chopped fresh parsley
Instructions
1. Prepare the Crust:
Preheat the grill to medium-high heat.
In a small bowl, mix together olive oil, minced garlic, oregano, salt, and black pepper.
Brush both sides of the eggplant slices with the garlic oil mixture.
Grill the eggplant slices for about 4-5 minutes per side, until tender and grill marks appear.
Sprinkle grated parmesan cheese over the grilled eggplant slices while still hot.
Garnish with chopped fresh parsley before serving.
Notes
You can customize the seasonings to taste.
How to Prepare This Dish
Steps and time-saving tips
Start by slicing the eggplant into even ½-inch rounds so they cook uniformly. Lightly salt both sides and let them sit for 10 minutes to draw out excess moisture—this prevents sogginess. Meanwhile, whisk together olive oil, minced garlic, and a pinch of black pepper in a small bowl. Pat the eggplant dry with a paper towel, then generously brush both sides with the garlic oil mixture. Preheat your grill or grill pan to medium-high heat, and once hot, lay the slices in a single layer. Grill for 4-5 minutes per side until you see deep grill marks and the flesh turns tender. While the eggplant cooks, mix grated Parmesan, chopped parsley, and a dash of red pepper flakes in a separate bowl. As soon as you flip the slices, sprinkle the Parmesan blend over each one so it melts slightly. For a time-saving hack, prep the garlic oil and Parmesan mix ahead of time. If you’re short on space, grill the eggplant in batches to avoid overcrowding. Serve immediately with a drizzle of balsamic glaze or a squeeze of lemon for brightness.
and-learned-from">Mistakes I’ve made and learned from
I used to skip salting the eggplant, thinking it was an unnecessary step—big mistake. The slices turned out watery and lacked that perfect caramelized texture. Now I always salt them, even if I’m in a hurry. Another blunder? Grilling on high heat, which charred the outside before the inside softened. Medium-high heat is the sweet spot. If you’re new to grilling vegetables, my guide on grilling vegetables perfectly every time covers these nuances. Also, don’t overdo the Parmesan topping like I once did; it can overpower the eggplant’s natural flavor. For balance, pair this dish with something light, like the fresh herb salad with lemon dressing I love. Trust me, learning these lessons the hard way means you won’t have to.
Cultural Connection and Variations
Where this recipe comes from
Garlic Parmesan Grilled Eggplant carries a rich Mediterranean heritage, where eggplants thrive under the warm sun. In Italy, chefs often layer it with tomatoes and fresh basil, while in Greece, they might drizzle it with olive oil and feta. My grandmother, however, always added extra garlic and a generous sprinkle of Parmesan, turning it into the crispy, savory dish we love today.
Across the Middle East,
cooks prepare eggplant with tahini or yogurt sauces, but Garlic Parmesan Grilled Eggplant stands out for its bold simplicity. Some regions grill it over open flames for a smokier flavor, while others bake it for tenderness. No matter the method, the combination of garlic and Parmesan creates a universal appeal.
In my family, we serve this dish at summer gatherings, pairing it with grilled meats or fresh salads. The aroma alone brings everyone to the table. Whether you enjoy it as a side or a main, Garlic Parmesan Grilled Eggplant bridges cultures and tastes with every bite.
How it fits in today’s cooking
Today, Garlic Parmesan Grilled Eggplant fits perfectly into modern meals, especially for those seeking plant-based options with big flavor. Many cooks toss it into grain bowls or layer it on flatbreads for a quick dinner. Others pair it with dishes like Mediterranean Chicken Skewers for a balanced feast.
Seasonal cooking also e
mbraces this recipe, as eggplants peak in late summer. Plus, its versatility makes it a star at barbecues or cozy weeknight meals. For a lighter twist, some skip the cheese and add lemon zest, proving how adaptable it is. If you love easy, flavorful sides, try serving it alongside Roasted Garlic Mashed Potatoes for a comforting combo.
Whether you stick to tradition or experiment, Garlic Parmesan Grilled Eggplant remains a timeless favorite. It’s proof that simple ingredients can create unforgettable meals.
Taste and Texture
What makes it delicious
Garlic Parmesan Grilled Eggplant delivers a rich, savory experience with every bite. The eggplant turns tender and almost buttery on the grill, while the edges crisp up for a satisfying contrast. Fragrant garlic infuses each slice, and the nutty Parmesan melts into a golden crust that adds depth. Meanwhile, a hint of smokiness from the grill elevates the natural sweetness of the eggplant. Together, these layers create a dish that’s creamy, aromatic, and utterly irresistible. Whether you serve it as a side or the star of the meal, Garlic Parmesan Grilled Eggplant never fails to impress.
r">Boosting the flavor
For even bolder flavor, try brushing the eggplant with a garlic-herb butter before grilling. A sprinkle of red pepper flakes or smoked paprika can add a subtle kick, while a drizzle of balsamic glaze balances the richness with tangy sweetness. If you love fresh herbs, toss chopped basil or parsley over the top just before serving. For a creamy twist, pair it with a dollop of lemon tahini sauce to complement the Parmesan. With these easy tweaks, Garlic Parmesan Grilled Eggplant becomes even more memorable.
Tips for Success
Best practices for results
Slice your eggplant evenly to ensure uniform cooking, as thicker pieces may stay firm while thinner ones overcook. Always brush both sides with olive oil before grilling to prevent sticking and enhance flavor. For the best Garlic Parmesan Grilled Eggplant, season generously with garlic powder and freshly grated Parmesan right after grilling while the slices are still warm. Additionally, preheat your grill to medium-high heat so the eggplant develops a perfect char without turning mushy. Finally, let the slices rest for a few minutes before serving to lock in moisture and texture.
>Mistakes to avoid
Avoid salting the eggplant too heavily before grilling, as it can draw out too much moisture and leave the slices dry. Instead, lightly season just before cooking for balanced flavor. Another common mistake is flipping the eggplant too soon—wait until grill marks form to prevent tearing. For more grilling tips, check out our guide on perfect grilled vegetables. Also, don’t overcrowd the grill, as this lowers the heat and steams the eggplant instead of searing it. If you’re unsure about seasoning, our balancing flavors post will help you get it just right.
Serving and Pairing Suggestions
How to serve this dish
Garlic Parmesan Grilled Eggplant shines as a versatile dish that suits any occasion. For a casual family dinner, arrange the slices on a rustic wooden board with a sprinkle of fresh parsley and lemon zest for a pop of color. Alternatively, layer them elegantly on a platter with roasted cherry tomatoes and basil leaves to impress guests at your next gathering. Since the flavors deepen as they cool, you can also serve it at room temperature for summer picnics or potlucks. No matter how you plate it, the golden-brown crust and savory aroma will make it irresistible.
What goes well with it
Pair Garlic Parmesan Grilled Eggplant with a crisp white wine like Sauvignon Blanc to balance its rich, garlicky notes. If you prefer non-alcoholic options, a chilled mint lemonade complements the dish beautifully. For sides, try a light quinoa salad or a creamy roasted garlic hummus to round out the meal. The quinoa adds texture, while the hummus enhances the eggplant’s earthy undertones. Together, these pairings create a well-balanced and satisfying dining experience.
How do you keep grilled eggplant from getting soggy?
To prevent Garlic Parmesan Grilled Eggplant from turning soggy, slice it evenly (about ½-inch thick) and salt the slices for 20–30 minutes to draw out excess moisture. Pat them dry before grilling over medium-high heat for a crispy texture.
What pairs well with Garlic Parmesan Grilled Eggplant?
Garlic Parmesan Grilled Eggplant pairs beautifully with fresh salads, crusty bread, or grilled proteins like chicken or steak. For a vegetarian meal, serve it alongside quinoa or roasted vegetables.
rank-math-faq-item">
Can you make Garlic Parmesan Grilled Eggplant ahead of time?
Yes! Grill the eggplant slices ahead and store them in an airtight container for up to 2 days. Reheat in the oven or on the grill, then add the parmesan topping just before serving for the best flavor.
Is Garlic Parmesan Grilled Eggplant healthy?
Garlic Parmesan Grilled Eggplant is a nutritious choice—it’s low in calories, high in fiber, and packed with vitamins. Using minimal oil and fresh parmesan keeps it light while adding rich flavor.
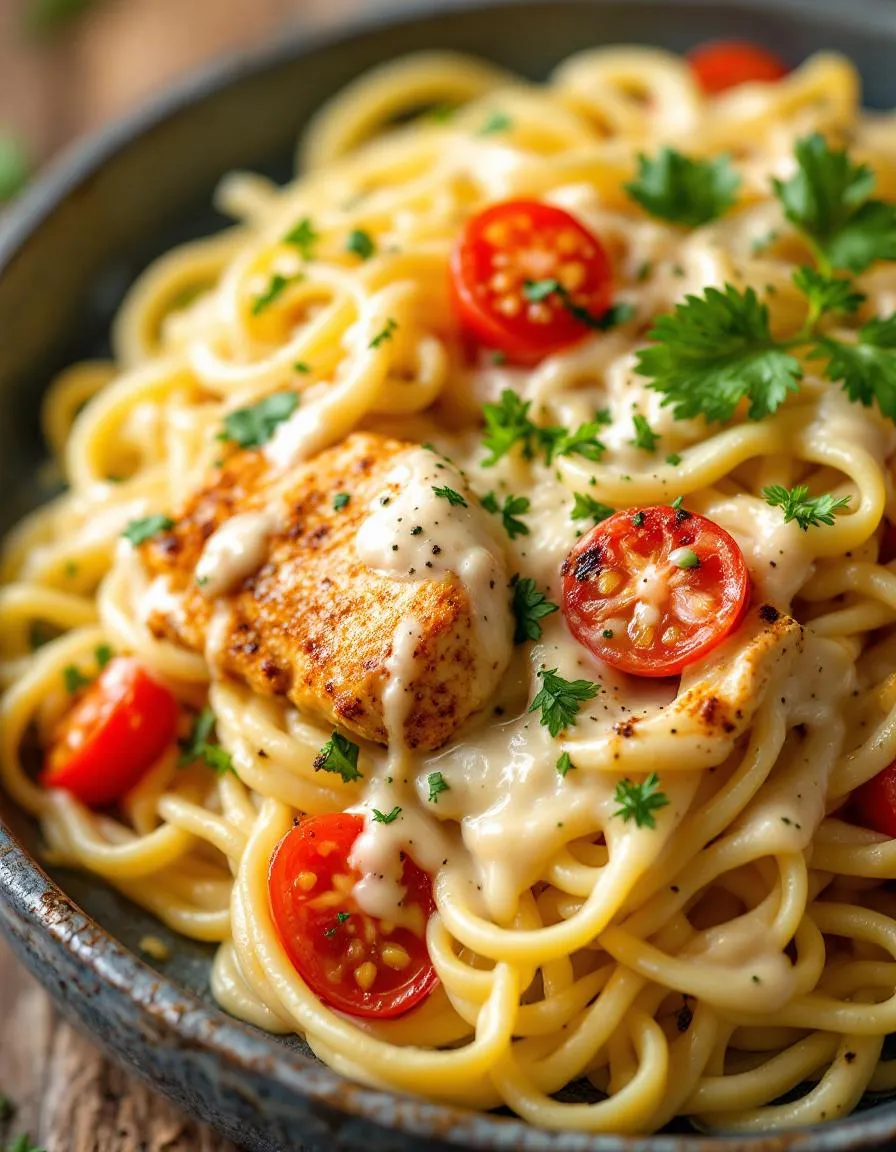
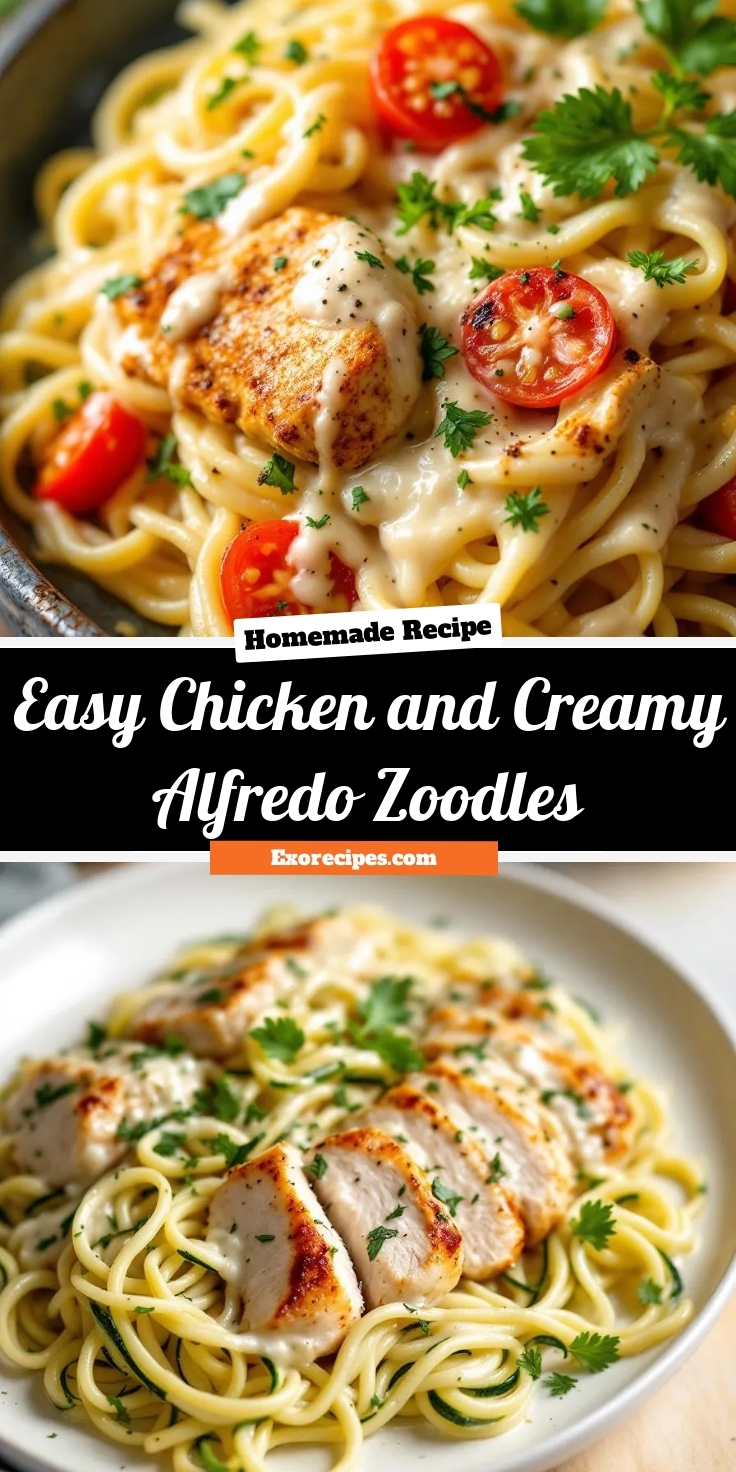
If you’re craving something comforting yet light, you’re in the right place. Easy Chicken and Creamy Alfredo Zoodles delivers all the richness of a classic pasta dish without the heaviness. Whether you’re juggling a busy schedule or simply want a wholesome meal, this recipe wraps you in cozy flavors while keeping things simple. Plus, it’s a fantastic way to sneak in extra veggies—something I always prioritize in my kitchen adventures.
Easy Chicken and Creamy Alfredo Zoodles combines tender chicken, spiralized zucchini, and a velvety Alfredo sauce for a dish that feels indulgent yet nourishing. Unlike traditional pasta, zucchini noodles (or zoodles) offer a fresh, low-carb twist, making this recipe perfect for anyone looking to enjoy a lighter version of a comfort-food favorite. The creamy sauce, infused with garlic and Parmesan, clings beautifully to every strand, ensuring each bite bursts with flavor. What makes this dish special is its versatility. You can serve it as a quick weeknight dinner or dress it up for a casual gathering. If you love dishes that balance simplicity and elegance, you’ll adore my Garlic Butter Shrimp Zoodles, which shares the same effortless charm. And if you’re new to spiralizing, don’t worry—my guide to kitchen tools for beginners will help you get started.
Why I Love This Recipe
Easy Chicken and Creamy Alfredo Zoodles holds a special place in my heart because it reminds me of cozy family dinners. When my kids first tried it, they couldn’t believe zucchini could taste this good. The dish also represents everything I stand for—quick, healthy, and full of flavor. Every time I make it, I’m reminded why I fell in love with cooking: it’s not just about feeding people, but about creating moments they’ll cherish.
Health and Nutrition
Why it’s good for your body
Easy Chicken and Creamy Alfredo Zoodles packs a nutritious punch while satisfying your cravings. First, zucchini noodles keep the dish light and low-carb, making it a great alternative to traditional pasta. Additionally, they deliver fiber and vitamins like C and K, which support digestion and immunity. Meanwhile, the lean chicken breast provides high-quality protein to help build and repair muscles.
Moreover, the creamy Alfredo sauce in Easy Chicken and Creamy Alfredo Zoodles offers a rich source of calcium from dairy, promoting strong bones. By using lighter ingredients like Greek yogurt or low-fat milk, you can enjoy the indulgence without excess calories. Furthermore, garlic and herbs in the sauce add antioxidants that fight inflammation and boost heart health.
Finally, this dish balances flavor and nutrition effortlessly. The combination of protein, veggies, and healthy fats keeps you full longer, reducing the urge to snack. Whether you need a post-workout meal or a cozy dinner, Easy Chicken and Creamy Alfredo Zoodles delivers both taste and wellness in every bite.
How it fits in a healthy lifestyle
Easy Chicken and Creamy Alfredo Zoodles fits perfectly into a balanced diet. If you follow a gluten-free or low-carb lifestyle, the zucchini noodles swap keeps things light yet satisfying. For those focusing on high-protein meals, the chicken adds lean fuel without heavy carbs. Plus, you can tweak the sauce to match your dietary needs, like using dairy-free options for a lactose-friendly version.
This dish also supports heart-healthy eating when you opt for olive oil and fresh herbs instead of heavy cream. Pair it with a side salad or roasted veggies for extra fiber, like our Garlic Roasted Brussels Sprouts. And if you love meal prepping, Easy Chicken and Creamy Alfredo Zoodles stores well for quick lunches. For more high-protein ideas, check out our Grilled Lemon Herb Salmon to keep your menu fresh and nutritious.
A low-carb twist on classic chicken Alfredo, using zucchini noodles for a lighter meal.
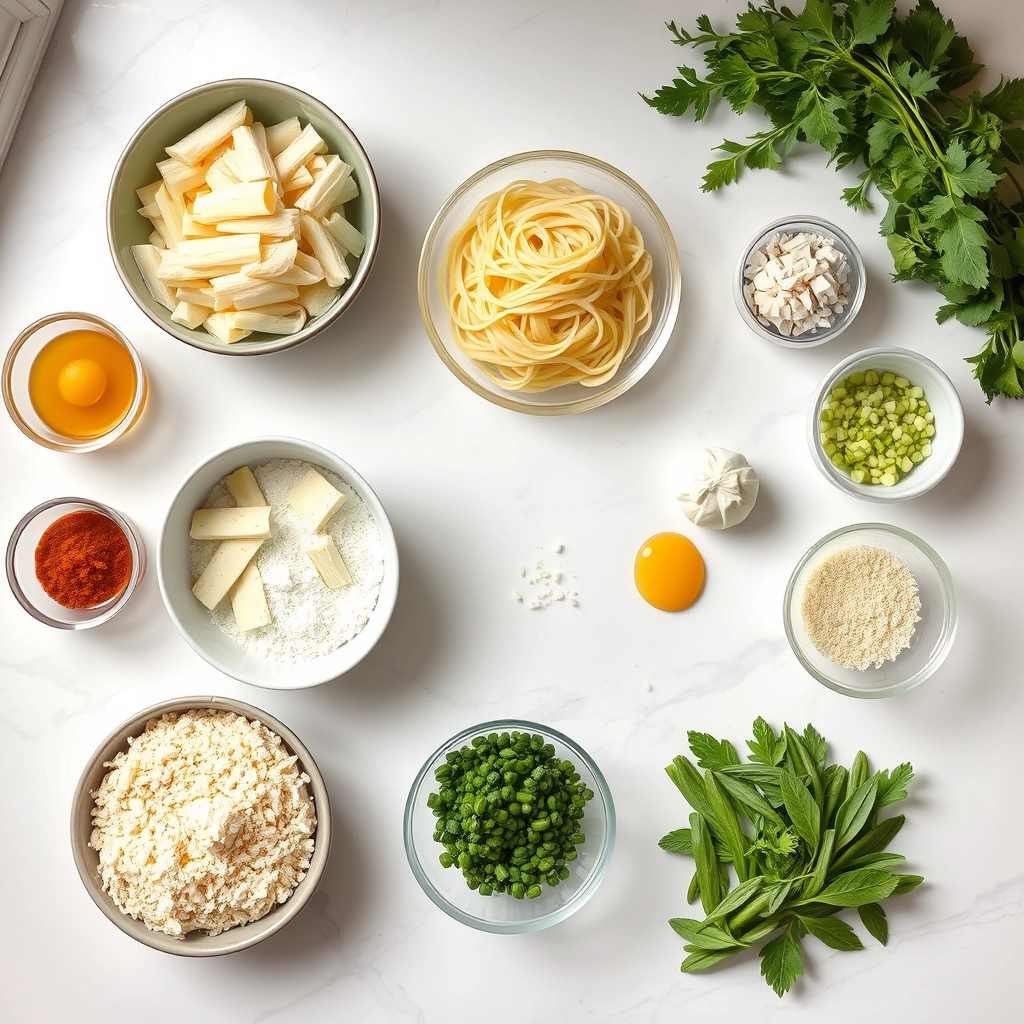
Ingredients
Scale
For the Crust:
2 large zucchinis, spiralized into noodles
2 boneless, skinless chicken breasts, sliced
1 cup heavy cream
1/2 cup grated Parmesan cheese
2 cloves garlic, minced
2 tbsp butter
1 tsp Italian seasoning
Salt and pepper to taste
Instructions
1. Prepare the Crust:
In a large skillet, melt butter over medium heat. Add chicken and cook until no longer pink, about 6-8 minutes. Remove and set aside.
In the same skillet, add garlic and sauté for 30 seconds until fragrant. Pour in heavy cream and bring to a simmer.
Stir in Parmesan cheese, Italian seasoning, salt, and pepper. Cook until sauce thickens slightly, about 3-4 minutes.
Add zucchini noodles and cooked chicken to the skillet. Toss gently to coat in the sauce and cook for 2-3 minutes until zoodles are tender but still crisp.
Serve immediately with extra Parmesan if desired.
Notes
You can customize the seasonings to taste.
s-dish">How to Prepare This Dish
Steps and time-saving tips
Start by prepping your ingredients for Easy Chicken and Creamy Alfredo Zoodles to save time later. Heat a large skillet over medium-high heat and drizzle olive oil. Add diced chicken breast, season with salt and pepper, and cook until golden brown, about 6-8 minutes. Meanwhile, spiralize your zucchini into zoodles and set them aside. In the same skillet, melt butter and whisk in minced garlic for 30 seconds until fragrant. Pour in heavy cream, then stir in grated Parmesan cheese until the Alfredo sauce thickens. Toss the zoodles into the skillet and fold them gently into the sauce, letting them soften slightly. Finally, mix in the cooked chicken and garnish with fresh parsley. For a quicker version, use pre-spiralized zoodles or rotisserie chicken. If the sauce feels too thick, thin it with a splash of pasta water or milk. Serve immediately while warm for the best texture.
Mistakes I’ve made and learned from
I once overcooked the zoodles, turning them mushy instead of tender-crisp. Now I add them last and let them warm through for just a minute or two. Another time, my Alfredo sauce broke because I rushed the cheese melting process. Low heat and constant whisking fixed that—patience is key! If you’re new to spiralizing, check out my kitchen tools guide for the best equipment. And if you love creamy sauces, my Alfredo sauce tips will help you avoid clumps and separation. Trust me, learning these tricks makes Easy Chicken and Creamy Alfredo Zoodles foolproof.
n-and-variations">Cultural Connection and Variations
Where this recipe comes from
Easy Chicken and Creamy Alfredo Zoodles might feel like a modern twist on Italian-American classics, but its roots run deeper. Traditional fettuccine Alfredo, born in Rome, originally featured just butter, Parmesan, and pasta. Over time, American cooks added cream for richness and chicken for heartiness. Meanwhile, swapping noodles for zucchini spirals reflects today’s love for lighter, veggie-packed meals.
In Italy, you’d rarely find Alfredo sauce with chicken—it’s all about the pasta. But in the U.S., we love protein-packed versions. Southern cooks might add a dash of Cajun spice, while Midwest families could stir in mushrooms. My grandma made her Alfredo with a splash of white wine, a trick I still use in my Easy Chicken and Creamy Alfredo Zoodles. Globally, similar dishes pop up: think Thai chicken with coconut milk noodles or Japanese mentaiko spaghetti, proving creamy pasta cravings are universal.
How it fits in today’s cooking
Easy Chicken and Creamy Alfredo Zoodles fits perfectly into today’s kitchens because it’s fast, flexible, and filling. Busy parents love it for weeknight dinners, while keto dieters appreciate the low-carb zoodles. Some cooks even prep it ahead for meal-prep Sundays, pairing it with roasted veggies for balance.
Seasonally, it shines i
n spring with fresh zucchini or in winter as cozy comfort food. Modern twists include dairy-free Alfredo or grilled shrimp swaps. For holiday potlucks, I’ve seen it baked with a breadcrumb topping—inspired by comfort food classics. Whether you stick to tradition or experiment, this dish adapts without losing its creamy, satisfying soul.
Taste and Texture
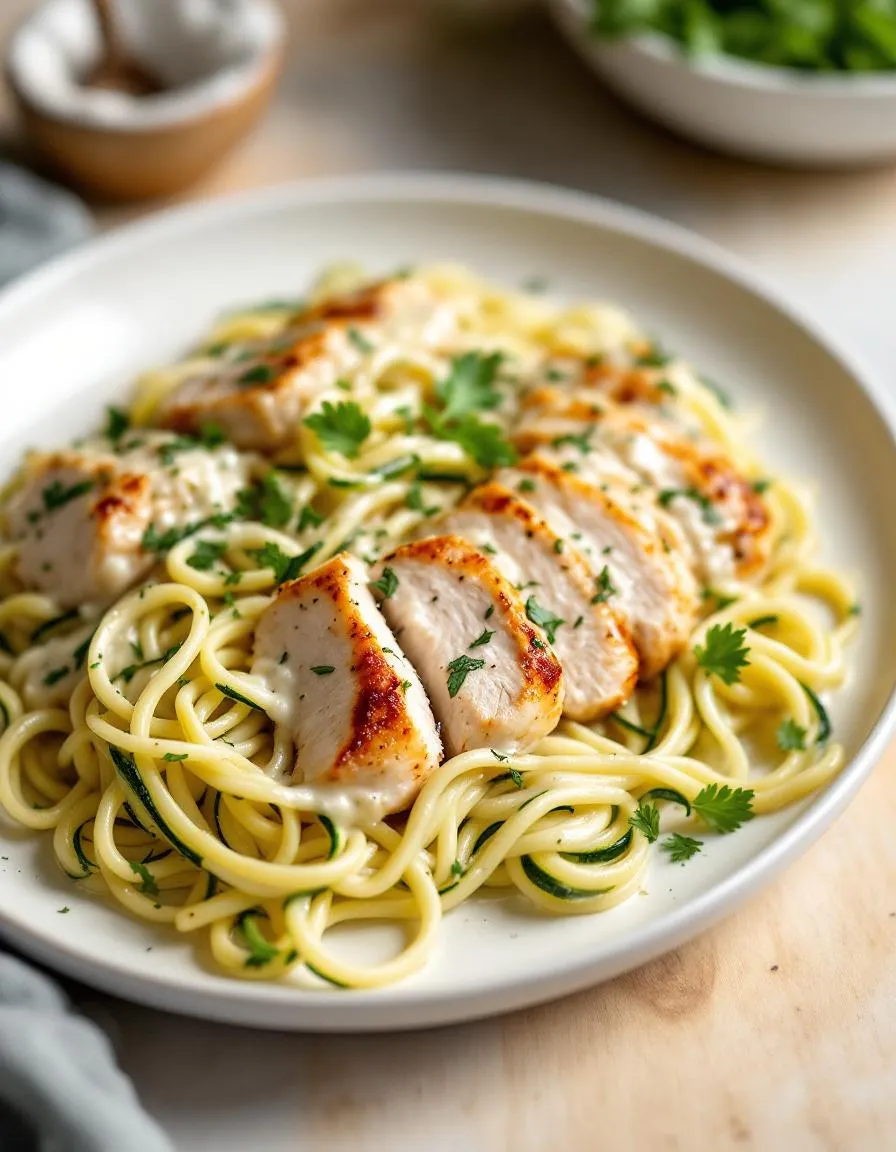
What makes it delicious
Easy Chicken and Creamy Alfredo Zoodles deliver a rich, satisfying bite that balances comfort and freshness. The tender, juicy chicken pairs perfectly with the velvety Alfredo sauce, while the zucchini noodles add a light, crisp contrast. Each forkful bursts with garlicky, buttery notes, thanks to the fragrant sauce clinging to every strand. Meanwhile, a hint of Parmesan adds a salty, nutty depth that lingers on the palate. Whether you crave something indulgent or wholesome, Easy Chicken and Creamy Alfredo Zoodles hit the spot with their creamy texture and savory flavors.
Boosting the flavor
Elevate your Easy Chicken and Creamy Alfredo Zoodles with a few easy tweaks. First, try stirring in sun-dried tomatoes for a tangy sweetness or topping it with crispy bacon for smoky crunch. For extra freshness, finish with a sprinkle of chopped basil or a squeeze of lemon. If you love heat, a pinch of red pepper flakes or a drizzle of homemade chili oil will add a spicy kick. Craving more depth? Swap the Alfredo sauce for a garlic Parmesan sauce to amplify the umami notes. Small changes make a big difference!
Always pat the chicken dry before seasoning to help it brown evenly in the pan. Meanwhile, spiralize your zucchini just before cooking to prevent excess moisture in your Easy Chicken and Creamy Alfredo Zoodles. For the creamiest sauce, warm the heavy cream slightly before adding it to the pan. Additionally, toss the zoodles gently to avoid breaking them, and serve immediately for the best texture. Finally, taste the sauce before serving and adjust the seasoning as needed.
Mistakes to avoid
Overcooking the zoodles is a common issue, so keep them slightly al dente since they soften quickly. Another mistake is crowding the pan when searing the chicken, which leads to steaming instead of browning. For perfectly cooked chicken every time, check out our guide on how to cook chicken breasts. Also, avoid adding cold cream directly to the pan, as it can cause the sauce to separate. If you struggle with sauce consistency, our Alfredo sauce tips will help you achieve the perfect velvety texture for your Easy Chicken and Creamy Alfredo Zoodles.
g-suggestions">Serving and Pairing Suggestions
How to serve this dish
For a restaurant-worthy presentation, plate Easy Chicken and Creamy Alfredo Zoodles in shallow bowls to highlight the rich sauce. Top with freshly grated Parmesan and a sprinkle of chopped parsley for a pop of color. Meanwhile, if you’re hosting a dinner party, consider serving it family-style in a large, warm skillet for a cozy, inviting feel. This dish shines at weeknight dinners but also works beautifully for casual gatherings or even a comforting holiday side. To make it extra special, add a lemon wedge on the side for a bright finishing touch.
What goes well with it
Pair Easy Chicken and Creamy Alfredo Zoodles with a crisp Caesar salad for a refreshing contrast to the creamy sauce. Alternatively, roasted garlic bread makes a perfect side for soaking up every last bit of Alfredo goodness. For drinks, try a chilled glass of Pinot Grigio or sparkling water with lemon to balance the richness. If you’re craving more Italian-inspired flavors, our garlic herb focaccia or tomato basil bruschetta would elevate the meal effortlessly.
math-faq-block">
Can I use regular pasta instead of zoodles for Easy Chicken and Creamy Alfredo Zoodles?
Yes, you can substitute regular pasta for zoodles if you prefer a traditional dish. However, using zucchini noodles keeps Easy Chicken and Creamy Alfredo Zoodles lower in carbs and adds extra veggies. Adjust cooking times since pasta takes longer to cook than zoodles.
How do I prevent my zoodles from getting soggy in Chicken Alfredo Zoodles?
To avoid soggy zoodles, pat them dry with a paper towel after spiralizing and cook them separately just before serving. Toss them with the Easy Chicken and Creamy Alfredo sauce right before eating to maintain texture. Overcooking is the main cause of sogginess.
What protein can I use instead of chicken in this zoodle recipe?
Shrimp, turkey, or tofu work well as substitutes for chicken in Easy Chicken and Creamy Alfredo Zoodles. For a vegetarian version, try chickpeas or mushrooms. Adjust cooking times based on your protein choice to ensure proper doneness.
rank-math-faq-item">
Is there a dairy-free alternative for the alfredo sauce in this recipe?
Yes, you can make a dairy-free alfredo sauce using cashews, coconut milk, or cauliflower as a base. Nutritional yeast adds a cheesy flavor to Easy Chicken and Creamy Alfredo Zoodles without dairy. Many store-bought vegan alfredo sauces also work well.