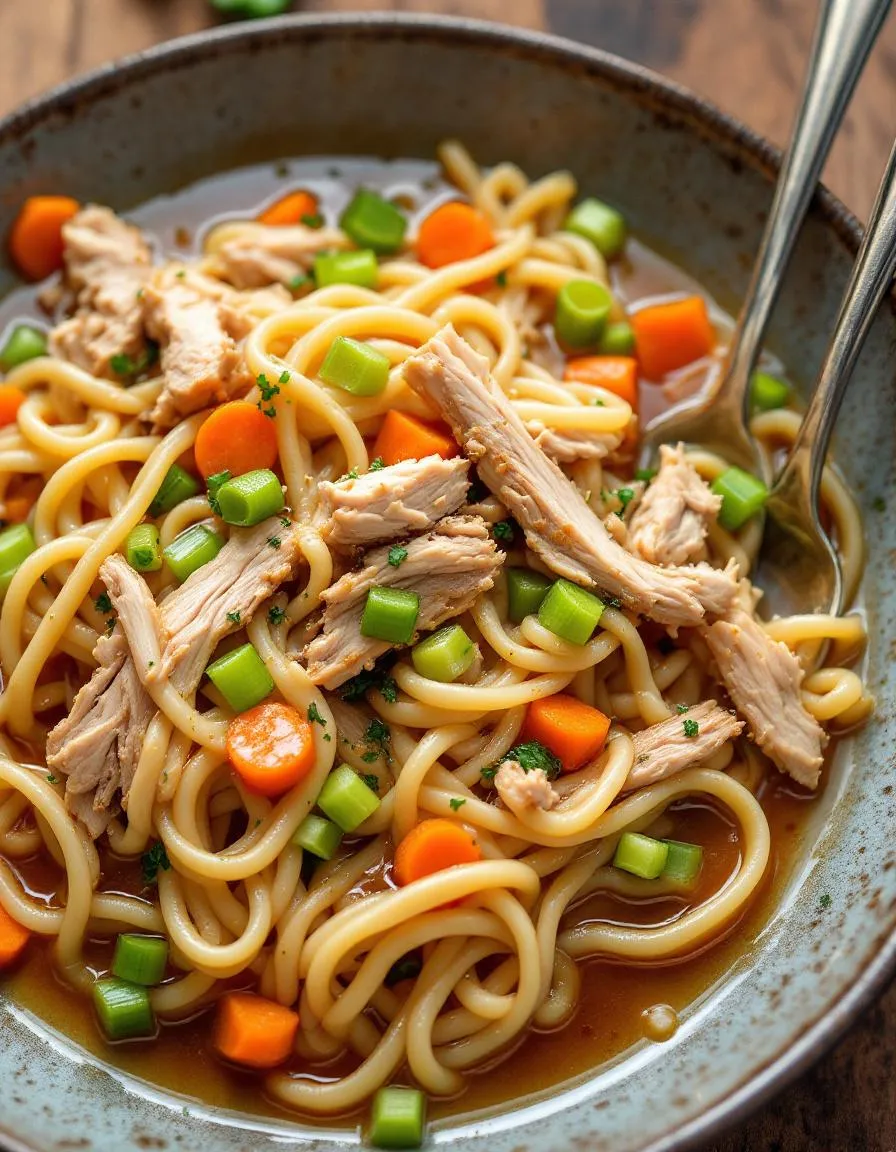
There’s something deeply comforting about a bowl of Instant Pot Chicken and Noodles—especially on those days when you crave a hug in food form. Whether you’re juggling a busy schedule or simply want a cozy meal that tastes like home, this recipe delivers. Plus, thanks to the Instant Pot, you can enjoy tender chicken, rich broth, and perfectly cooked noodles in a fraction of the time. Trust me, once you try it, you’ll wonder how you ever lived without it.
Instant Pot Chicken and Noodles is the ultimate comfort food, blending simplicity with soul-warming flavors. Unlike traditional stovetop versions, the Instant Pot locks in moisture, ensuring every bite is packed with tender chicken and silky noodles. This dish matters because it solves the age-old dilemma of wanting a homemade meal without spending hours in the kitchen. It’s also incredibly versatile—swap in your favorite veggies or adjust the seasoning to make it your own. If you love easy, hearty recipes, you’ll adore this one as much as my Instant Pot Beef Stew or my Creamy Tuscan Chicken. Perfect for weeknights or lazy Sundays, it’s a dish that brings people together with minimal effort.
Why I Love This Recipe
Instant Pot Chicken and Noodles holds a special place in my heart because it reminds me of my grandmother’s kitchen. She used to make a similar dish on rainy afternoons, and the aroma alone could lift anyone’s spirits. Now, whenever I make it, I feel that same warmth—and I love how it fills my home with nostalgia. Best of all, it’s a recipe that never fails to impress, whether I’m cooking for my family or sharing it with friends. Simple, satisfying, and full of love—just like the best meals should be.
Health and Nutrition
Why it’s good for your body
Instant Pot Chicken and Noodles delivers a powerhouse of nutrients in every comforting bite. First, the lean chicken breast provides high-quality protein to support muscle repair and keep you full longer. Additionally, the carrots and celery add fiber, vitamins A and K, and antioxidants to boost immunity and digestion. Meanwhile, the egg noodles offer energizing carbohydrates, especially when you opt for whole wheat varieties.
Because the Instant Pot locks in moisture and flavor, you retain more nutrients compared to traditional boiling methods. Moreover, the broth in Instant Pot Chicken and Noodles hydrates your body while delivering collagen from simmered bones, which may support joint health. The dish also balances sodium levels naturally, especially if you use low-sodium broth or fresh herbs for seasoning.
Finally, this meal is incredibly versatile. You can easily swap ingredients to fit dietary needs, like gluten-free noodles or extra veggies. Whether you need a post-workout recovery meal or a cozy immune-boosting dinner, Instant Pot Chicken and Noodles checks all the boxes for taste and nutrition.
How it fits in a healthy lifestyle
Instant Pot Chicken and Noodles fits seamlessly into balanced eating habits. For protein-focused diets, the chicken offers a lean source to help meet daily goals without excess fat. If you prefer gluten-free options, simply substitute regular noodles with rice noodles or zucchini ribbons, as suggested in our gluten-free pasta guide.
This dish also supports heart-healthy eating when you use low-sodium broth and load up on vegetables. The fiber from carrots and celery aids digestion, while the broth keeps you hydrated. For meal preppers, Instant Pot Chicken and Noodles stores well and reheats beautifully, making it a practical choice for busy weeks. Pair it with a fresh salad from our quick healthy salads roundup for a complete, nutrient-packed meal.
Start by setting your Instant Pot to sauté mode and heating a tablespoon of olive oil. Add diced onions and minced garlic, stirring until they soften and release their aroma. Next, toss in bite-sized chicken pieces, seasoning them with salt, pepper, and a pinch of thyme for extra flavor. Once the chicken turns golden, pour in low-sodium chicken broth and scrape the bottom to loosen any browned bits—this adds depth to your Instant Pot Chicken and Noodles. Secure the lid, switch to high pressure, and set the timer for 10 minutes. Meanwhile, whisk together a simple slurry of cornstarch and water to thicken the sauce later. When the timer beeps, carefully quick-release the pressure and stir in wide egg noodles. Lock the lid again and cook on high pressure for just 4 more minutes. Finally, release the pressure, stir in the slurry, and let the residual heat thicken the broth into a creamy, velvety sauce. For a time-saving twist, use pre-cut chicken or frozen noodles, but adjust cooking times slightly to avoid mushiness.
Mistakes I’ve made and learned from
Early on, I learned the hard way that overcooking noodles turns them into glue—especially if I left them in the Instant Pot too long after cooking. Now, I set a separate timer for the noodle step and immediately release the pressure to stop the cooking process. Another blunder? Skipping the slurry step, which left my broth watery. A reader tip from my Instant Pot basics guide saved me: always mix the slurry cold to prevent clumping. I also once overloaded the pot, triggering the dreaded “burn” warning. Now, I stick to the max fill line and layer ingredients as outlined in my common Instant Pot mistakes post. These tweaks made all the difference between a forgettable meal and the cozy, restaurant-worthy dish my family craves.
Instant Pot Chicken and Noodles carries the cozy charm of home cooking across generations. Originally, this dish roots itself in American comfort food, often appearing in Midwest kitchens where hearty, simple meals rule. Families would simmer chicken with thick egg noodles, creating a creamy, satisfying bowl perfect for chilly evenings. However, variations pop up worldwide. In Germany, a similar dish might use spaetzle instead of noodles, while in Asia, you’ll find lighter versions with rice noodles and ginger.
My grandma made her Instant Pot Chicken and Noodles with a splash of heavy cream and fresh thyme from her garden. Meanwhile, Southern cooks might swap in dumplings or add a kick of cayenne. No matter the twist, the soul of the dish stays the same: warmth, comfort, and a touch of nostalgia. Whether you grew up with it or discovered it later, Instant Pot Chicken and Noodles feels like a hug in a bowl.
ays-cooking">How it fits in today’s cooking
Today, Instant Pot Chicken and Noodles fits seamlessly into busy lives. Modern cooks love how the Instant Pot cuts cooking time without sacrificing flavor. It’s a go-to for weeknight dinners, yet special enough for holiday gatherings. Some families even pair it with holiday side dishes for a festive twist.
Others adapt it for meal prep or lighter eating, like using gluten-free noodles or adding extra veggies. The dish also shines in seasonal rotations, especially during fall and winter. For those craving more comfort food ideas, check out these cozy winter recipes. No matter how you serve it, Instant Pot Chicken and Noodles remains a timeless favorite.
Taste and Texture
What makes it delicious
Instant Pot Chicken and Noodles delivers a comforting, soul-warming experience with every bite. The tender chunks of chicken melt in your mouth, while the noodles soak up the rich, savory broth, creating a satisfyingly chewy texture. Fragrant herbs like thyme and parsley add a fresh, earthy aroma, while a touch of butter lends a creamy richness. Each spoonful balances hearty umami flavors with a subtle sweetness from carrots and onions. Whether you crave warmth on a chilly day or a quick family meal, Instant Pot Chicken and Noodles hits all the right notes.
r">Boosting the flavor
Elevate your Instant Pot Chicken and Noodles with a few easy tweaks. Stir in a splash of heavy cream for extra silkiness, or top with crispy fried shallots for a crunchy contrast. For a brighter kick, finish with a squeeze of lemon or a sprinkle of red pepper flakes. Pair it with a side of garlic herb dinner rolls to soak up every drop of broth. If you love bold flavors, try adding a dash of smoked paprika or a spoonful of homemade pesto sauce for an herby twist. Small changes make a big difference!
Tips for Success
Best practices for results
Always use fresh, high-quality chicken for the best flavor in your Instant Pot Chicken and Noodles. Additionally, layer the ingredients properly by placing the chicken at the bottom to ensure even cooking. For tender noodles, add them last and avoid overcooking by setting the Instant Pot to manual high pressure for just 5 minutes. Finally, let the pressure release naturally for 10 minutes before opening the lid to prevent a mushy texture.
>Mistakes to avoid
One common mistake is overcrowding the Instant Pot, which can lead to uneven cooking. Instead, leave enough space for the steam to circulate properly. Another error is skipping the natural release, which can cause the noodles to turn gummy. For more tips on perfecting pressure cooking, check out our guide on Instant Pot basics. Also, if your broth tastes bland, try seasoning in stages as explained in our seasoning soups article for deeper flavor.
Serving and Pairing Suggestions
How to serve this dish
For a cozy family dinner, ladle Instant Pot Chicken and Noodles into deep bowls to keep the broth warm. Top with fresh parsley or a sprinkle of grated Parmesan for a pop of color and flavor. Alternatively, serve it in a rustic bread bowl for a fun twist that soaks up every delicious drop. If you’re hosting a potluck, transfer the dish to a stylish slow cooker to keep it warm while guests help themselves. This comforting meal also shines during chilly holiday gatherings, especially when paired with warm rolls or a crisp side salad.
What goes well with it
Balance the richness of Instant Pot Chicken and Noodles with a bright, tangy side like our Easy Cucumber Salad, which adds a refreshing crunch. For heartier appetites, pair it with fluffy buttermilk biscuits or crusty garlic bread to mop up the savory broth. A chilled glass of iced tea or crisp white wine, such as Pinot Grigio, complements the dish perfectly. If you crave extra warmth, try our Momma’s Potato Soup as a starter for a comforting, soup-centric meal.
How long does it take to cook Instant Pot Chicken and Noodles?
Instant Pot Chicken and Noodles typically takes about 15 minutes of pressure cooking time, plus 5-10 minutes for natural release. The total prep and cook time is around 30 minutes, making it a quick and easy comfort food meal.
Can I use frozen chicken for Instant Pot Chicken and Noodles?
Yes, you can use frozen chicken breasts or thighs in Instant Pot Chicken and Noodles. Just add 5-7 extra minutes to the pressure cooking time to ensure the chicken cooks through completely before adding the noodles.
rank-math-faq-item">
What kind of noodles work best for Instant Pot Chicken and Noodles?
Egg noodles are the classic choice for Instant Pot Chicken and Noodles because they hold up well under pressure. You can also use wide pasta like fettuccine or even homemade noodles, but adjust cooking times slightly to prevent mushiness.
How do I thicken Instant Pot Chicken and Noodles?
For thicker Instant Pot Chicken and Noodles, mix 1-2 tablespoons of cornstarch with cold water and stir it in after cooking. Alternatively, let the pot sit on “Keep Warm” for 10 minutes – the noodles will absorb more liquid naturally.
Easy One-Pot Smoked Sausage And Rice Recipe
Introduction
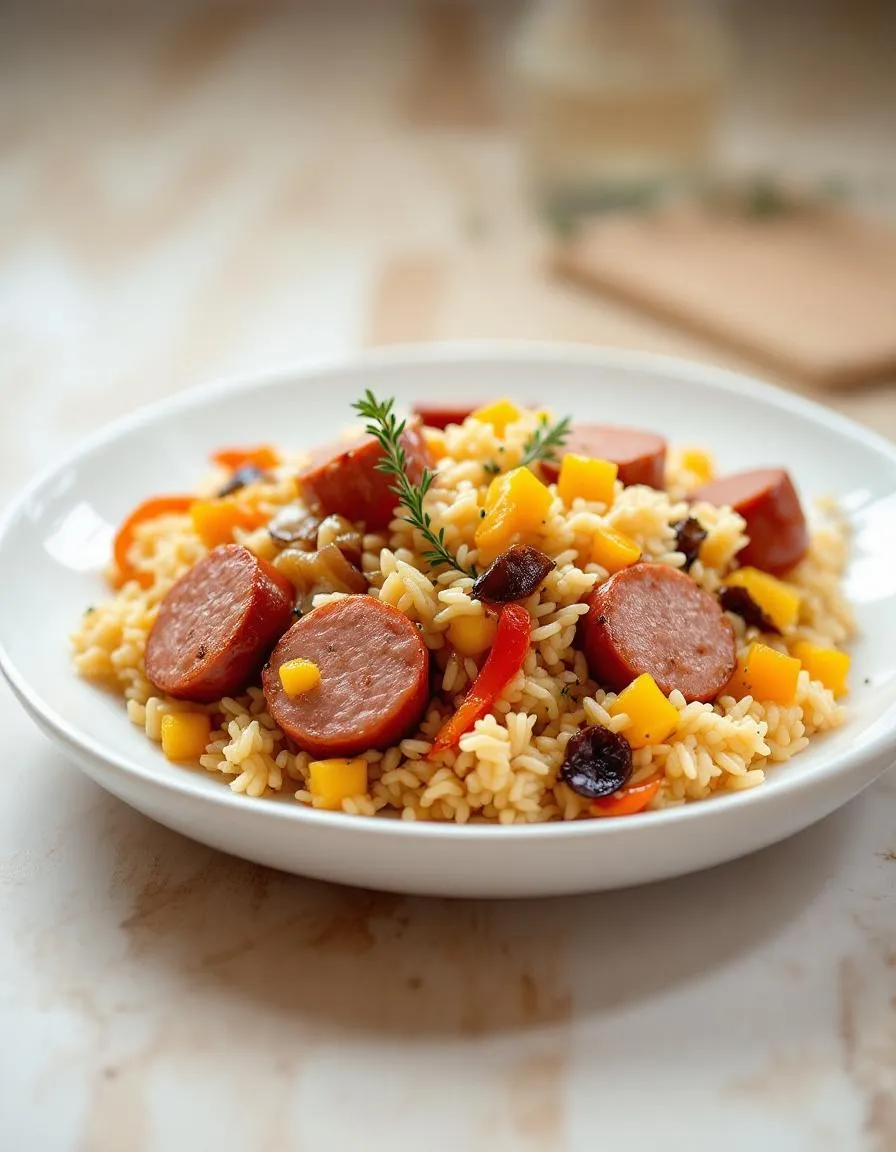
If you’re craving a meal that’s hearty, flavorful, and fuss-free, you’re in the right place. One-Pot Smoked Sausage And Rice is the kind of dish that feels like a warm hug after a long day. Whether you’re juggling a busy schedule or simply want a no-fuss dinner that delivers big on taste, this recipe will quickly become a go-to. Plus, with just one pot to clean, you’ll spend less time scrubbing and more time savoring every bite.
One-Pot Smoked Sausage And Rice is a comforting, all-in-one meal that combines smoky sausage, tender rice, and vibrant vegetables in a single skillet. What makes it special? For starters, it’s incredibly versatile—swap in your favorite veggies or adjust the spices to suit your taste. It’s also a lifesaver on hectic weeknights when you need something satisfying without the hassle. If you love easy dinners like my Creamy Tuscan Chicken, you’ll appreciate how this dish brings bold flavors together with minimal effort. And since it’s a one-pot wonder, you won’t have to sacrifice flavor for convenience. Whether you’re cooking for family or meal-prepping for the week, this recipe fits seamlessly into any routine. For more quick and delicious ideas, check out my 30-Minute Meals collection.
Why I Love This Recipe
This One-Pot Smoked Sausage And Rice holds a special place in my heart because it reminds me of cozy family dinners growing up. My mom used to make a similar dish, and the aroma alone would bring everyone to the table. Now, whenever I cook it, I feel that same sense of comfort and togetherness. It’s more than just a meal—it’s a reminder that the simplest recipes often create the best memories.
Health and Nutrition
Why it’s good for your body
One-Pot Smoked Sausage And Rice delivers a satisfying meal packed with nutrients. First, the smoked sausage provides a solid protein boost, which helps maintain muscle strength and keeps you full longer. Meanwhile, the rice offers complex carbohydrates for steady energy, making it a great choice for active lifestyles. Additionally, this dish often includes vegetables like bell peppers or onions, adding fiber and essential vitamins.
Because One-Pot Smoked Sausage And Rice combines protein, carbs, and veggies, it creates a well-rounded meal. For example, the iron in sausage supports healthy blood flow, while the antioxidants in vegetables fight inflammation. Furthermore, using brown rice instead of white boosts fiber content, aiding digestion. With balanced macros and micronutrients, this dish fuels your body efficiently.
One-Pot Smoked Sausage And Rice also saves time without sacrificing nutrition. Since everything cooks together, you retain more vitamins compared to overcooked sides. Plus, the smoky flavor satisfies cravings, reducing the urge for less healthy snacks. Ultimately, this meal proves that convenience and nutrition can go hand in hand.
How it fits in a healthy lifestyle
One-Pot Smoked Sausage And Rice fits seamlessly into balanced eating habits. If you follow a gluten-free diet, simply ensure your sausage and broth meet gluten-free standards. For those focusing on heart health, opt for lean turkey sausage and brown rice to cut saturated fat while keeping flavor. This dish also works well for meal prep, so you can plan ahead for busy weeks.
Pairing One-Pot Smoked Sausage And Rice with a side salad or steamed greens adds extra nutrients without extra effort. It’s also versatile enough to fit high-protein diets when you increase the sausage portion. If you’re curious about other easy, nutrient-packed meals, explore our guide to healthy one-pot recipes. Whether you need a quick dinner or a reliable lunch option, this dish adapts to your goals while keeping flavors bold and satisfying.
A hearty and flavorful one-pot meal featuring smoked sausage, rice, and vegetables for an easy weeknight dinner.
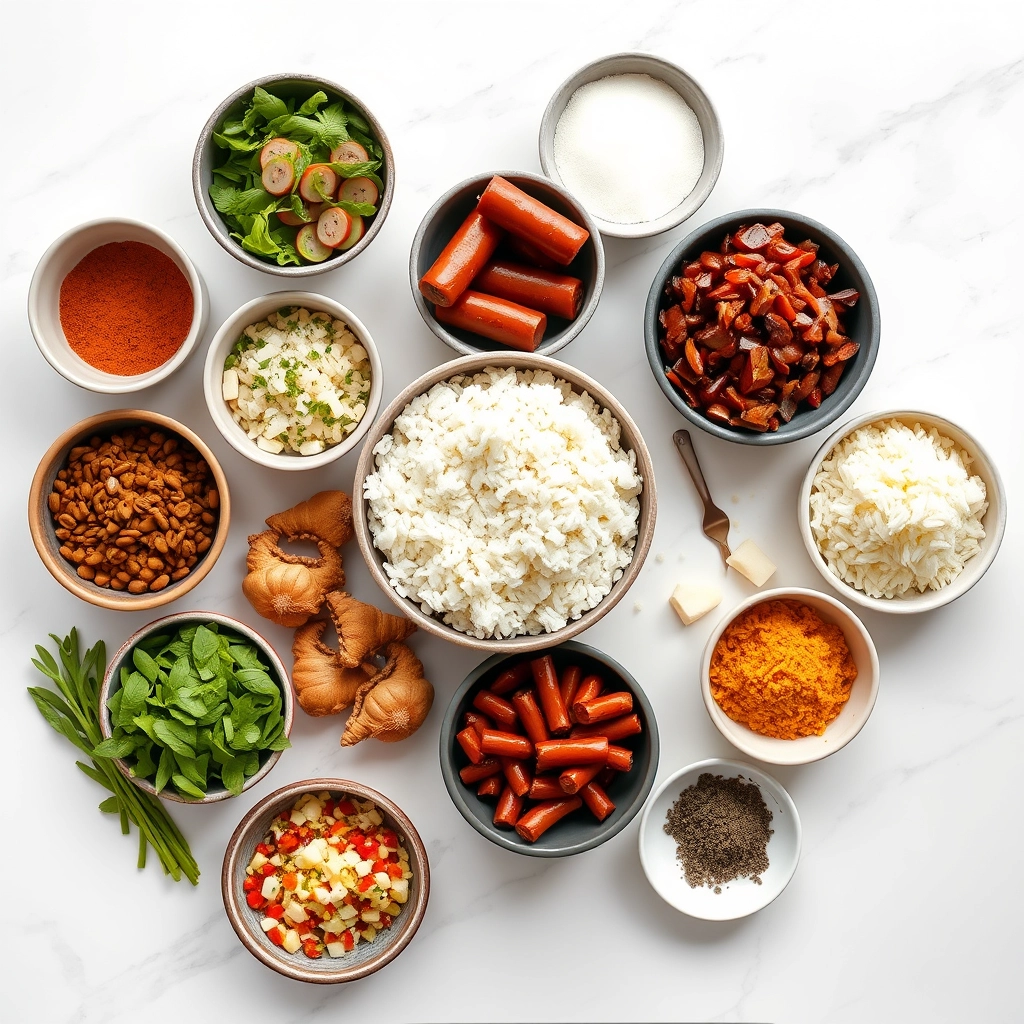
Ingredients
Scale
For the Crust:
1 lb smoked sausage, sliced into rounds
1 cup long-grain white rice
2 cups chicken broth
1 bell pepper, diced
1 small onion, diced
2 cloves garlic, minced
1 tbsp olive oil
1 tsp paprika
1/2 tsp dried thyme
Salt and pepper to taste
Instructions
1. Prepare the Crust:
Heat olive oil in a large skillet or pot over medium heat. Add the sliced sausage and cook until lightly browned, about 5 minutes.
Add the diced onion, bell pepper, and garlic. Sauté for 3-4 minutes until vegetables begin to soften.
Stir in the rice, paprika, thyme, salt, and pepper. Cook for 1 minute to toast the rice slightly.
Pour in the chicken broth and bring to a boil. Reduce heat to low, cover, and simmer for 18-20 minutes until rice is tender and liquid is absorbed.
Remove from heat and let sit covered for 5 minutes. Fluff with a fork before serving.
Notes
You can customize the seasonings to taste.
How to Prepare This Dish
Steps and time-saving tips
Start by heating a large pot or Dutch oven over medium heat. Add a drizzle of oil and toss in sliced smoked sausage, letting it brown for about 3 minutes while stirring occasionally. Next, toss in diced onions and minced garlic, sautéing until they soften and release their aroma. Meanwhile, rinse your rice under cold water to remove excess starch—this keeps your One-Pot Smoked Sausage And Rice from turning mushy. Stir the rice into the pot, coating it with the flavorful oils before pouring in chicken broth and a pinch of salt. Bring everything to a boil, then reduce the heat to low, cover the pot, and let it simmer for 18 minutes. Resist the urge to peek—trapping the steam ensures perfectly cooked rice. Once the timer goes off, fluff the rice with a fork and fold in frozen peas or diced bell peppers for a pop of color and crunch. For a time-saving twist, prep your veggies ahead or use pre-sliced sausage to cut down on active cooking time. Serve hot with a sprinkle of fresh parsley for a bright finish.
and-learned-from">Mistakes I’ve made and learned from
I once rushed the browning step for the sausage, thinking it didn’t matter—big mistake. Undercooked sausage left the entire dish tasting bland, so now I take my time to let it caramelize properly. Another blunder? Skipping the rice rinse. The result was a gummy, clumpy mess that stuck to the pot. Lesson learned: always rinse your rice! If you’re new to one-pot meals, my guide on one-pot cooking basics breaks down the essentials. And if you’ve ever struggled with timing, my meal prep hacks will help you streamline the process. Trust me, a little patience and prep go a long way with One-Pot Smoked Sausage And Rice.
Cultural Connection and Variations
Where this recipe comes from
One-Pot Smoked Sausage And Rice has roots in humble, hearty cooking traditions across the globe. In the American South, families often simmered smoked sausage with rice and whatever vegetables they had on hand, creating a filling meal that stretched ingredients. Meanwhile, in Spain, a similar dish called arroz con chorizo showcases the smoky, spicy flavors of local sausage. Even West African jollof rice shares a kinship, proving how versatile this combination truly is.
My grandmother made her
version of One-Pot Smoked Sausage And Rice with a splash of Cajun seasoning and bell peppers straight from her garden. She called it “poor man’s feast” because it fed a crowd without fuss. In Germany, cooks might swap the sausage for bratwurst and add caraway seeds, while in Louisiana, andouille sausage and a pinch of cayenne turn up the heat. No matter where you go, this dish adapts to local tastes while keeping its comforting core.
How it fits in today’s cooking
One-Pot Smoked Sausage And Rice still shines as a weeknight lifesaver, especially for busy families who crave flavor without the cleanup. Modern cooks love it for meal prep, doubling batches to stash in the freezer alongside dishes like Easy Chicken and Dumplings. It’s also a star at tailgates and potlucks, where its crowd-pleasing simplicity beats fussy recipes hands-down.
Today’s versions often lean lighter, using turkey sausage or cauliflower rice, but the soul of the dish stays the same. Whether you serve it as a cozy fall dinner or pair it with Garlic Butter Shrimp Pasta for a summer spread, One-Pot Smoked Sausage And Rice fits anywhere. That’s the beauty of a classic—it never goes out of style.
>Taste and Texture
What makes it delicious
One-Pot Smoked Sausage And Rice delivers a hearty, savory experience that comforts with every bite. The smoky, slightly spicy sausage infuses the dish with deep umami notes, while the rice soaks up all the rich flavors, becoming tender yet slightly chewy. Garlic and onions add a fragrant sweetness, balancing the smokiness perfectly. Meanwhile, the subtle crunch of bell peppers or celery introduces a fresh contrast. Every forkful of One-Pot Smoked Sausage And Rice feels satisfyingly creamy yet light, making it a crave-worthy meal that warms you from the inside out.
Boosting the flavor
For an extra flavor kick, try swapping regular smoked sausage for andouille to dial up the spice. A splash of chicken broth instead of water deepens the savoriness, while a sprinkle of smoked paprika enhances the smoky aroma. Top with fresh parsley or grated Parmesan for a bright finish. If you love bold flavors, pair it with a tangy creamy cilantro lime sauce or a drizzle of spicy honey glaze. These small tweaks transform an already delicious dish into something unforgettable.
Tips for Success
Best practices for results
Always brown the smoked sausage first to deepen the flavor of your One-Pot Smoked Sausage And Rice. Meanwhile, use a heavy-bottomed pot to prevent sticking and ensure even cooking. For perfectly tender rice, measure the liquid precisely and keep the lid on while simmering. Additionally, stir in fresh herbs just before serving to brighten the dish. Finally, let the One-Pot Smoked Sausage And Rice rest for 5 minutes off the heat—this helps the flavors meld beautifully.
Mistakes to avoid
Avoid overcrowding the pot when browning the sausage, as this steams instead of sears the meat. Instead, work in batches if needed. Also, resist the urge to lift the lid while the rice cooks, since this releases steam and extends the cooking time. If your rice turns out mushy, check out our guide on fixing undercooked rice for solutions. Lastly, don’t skip deglazing the pot after browning the sausage—those browned bits add incredible depth. For more flavor-boosting tricks, explore our tips on umami ingredients to elevate savory dishes.
Serving and Pairing Suggestions
How to serve this dish
One-Pot Smoked Sausage And Rice shines as a hearty, all-in-one meal, but you can elevate it with a few simple touches. For a cozy family dinner, serve it straight from the pot with a sprinkle of fresh parsley or green onions for a pop of color. Alternatively, transfer it to a rustic serving dish for a casual gathering. If you’re hosting a game day spread, consider pairing it with warm crusty bread for scooping up every flavorful bite. This dish also works beautifully for potlucks or holiday buffets since it stays warm and satisfying for hours.
h-it">What goes well with it
A crisp, tangy side like our Easy Cucumber Salad balances the richness of One-Pot Smoked Sausage And Rice perfectly. For a heartier option, try it with roasted Brussels sprouts or garlic butter green beans. If you love dipping sauces, whip up a batch of our Creamy Avocado Dressing to drizzle over the rice for extra creaminess. To drink, a chilled lager or sparkling lemonade complements the smoky flavors without overpowering them.
What type of sausage works best for One-Pot Smoked Sausage And Rice?
Kielbasa or Andouille sausage are ideal for One-Pot Smoked Sausage And Rice because they hold their shape well and add rich, smoky flavor. You can also use chicken or turkey smoked sausage for a lighter option. Avoid raw sausages as they won’t provide the same depth of flavor.
rank-math-faq-item">
Can I make One-Pot Smoked Sausage And Rice in a rice cooker?
Yes, you can adapt One-Pot Smoked Sausage And Rice for a rice cooker by browning the sausage separately first. Add all ingredients to the rice cooker and use the standard white rice setting. The texture may be slightly different than stovetop versions, but it’s a great hands-off method.
How do I prevent my One-Pot Smoked Sausage And Rice from becoming mushy?
To avoid mushy One-Pot Smoked Sausage And Rice, use the correct rice-to-liquid ratio (typically 1:2 for white rice) and don’t stir during cooking. Let the dish rest covered for 5-10 minutes after cooking to allow excess moisture to absorb. Medium or long-grain rice works better than short-grain varieties.
What vegetables go well with One-Pot Smoked Sausage And Rice?
Bell peppers, onions, and garlic are classic additions to One-Pot Smoked Sausage And Rice. For extra nutrition, try adding diced carrots, peas, or spinach. Roasted vegetables like zucchini or mushrooms also pair well if you want to serve them on the side.
>
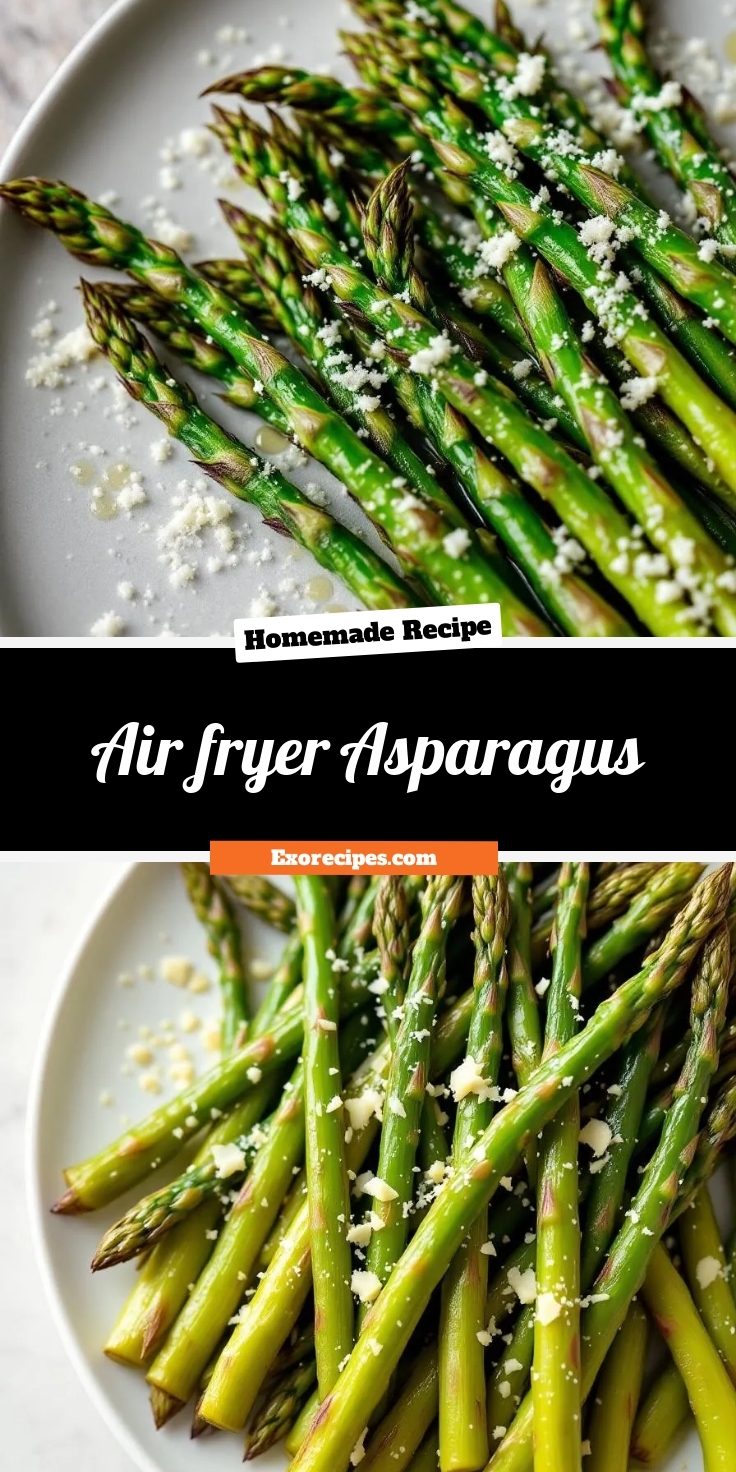
Easy Air Fryer Asparagus – Crisp and Tender Recipe
Introduction
If you’re looking for a quick, healthy, and utterly delicious side dish, let me introduce you to Air fryer Asparagus. Whether you’re a busy parent, a health-conscious foodie, or just someone who craves flavor without the fuss, this recipe will become your go-to. Moreover, it’s a game-changer for weeknight dinners or elegant gatherings. Trust me, once you try it, you’ll wonder how you ever lived without it.
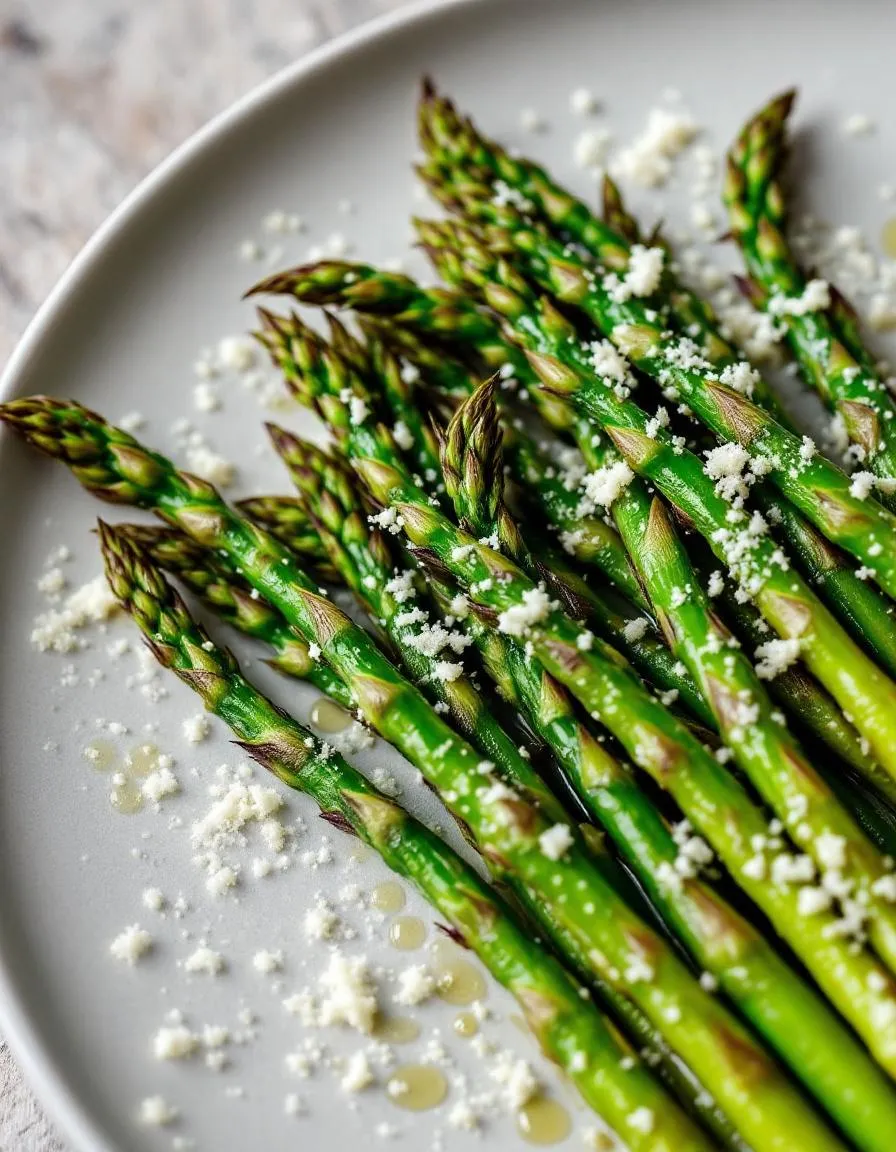
Air fryer Asparagus is exactly what it sounds like—fresh asparagus spears cooked to crispy perfection in an air fryer. Unlike traditional methods that can leave veggies soggy or overcooked, the air fryer locks in nutrients while delivering a satisfying crunch. This dish matters because it’s not just easy; it’s versatile. Pair it with grilled chicken for a protein-packed meal or serve it alongside your favorite pasta for a touch of elegance. At brekcakes.com, we celebrate recipes that balance simplicity and flavor, and this one fits perfectly. For more inspiration, check out our guide to healthy dinner ideas or explore our tips for mastering air fryer tricks.
Why I Love This Recipe
Air fryer Asparagus holds a special place in my heart because it reminds me of spring evenings spent with my family. My grandmother used to roast asparagus in the oven, but the air fryer version captures that same crispy texture in half the time. Every bite takes me back to those cozy dinners, and now I love sharing this modern twist with you. It’s proof that great food doesn’t have to be complicated—just made with care.
Health and Nutrition
Why it’s good for your body
Air fryer asparagus packs a powerful nutritional punch while keeping calories low. First, it delivers a hefty dose of fiber, which supports digestion and keeps you feeling full longer. Additionally, asparagus boasts antioxidants like vitamin E, which helps combat inflammation and promotes healthy skin. Since you cook it in an air fryer, you also avoid the excess oil often used in traditional roasting methods.
Moreover, air fryer asparagus provides essential vitamins like folate, crucial for cell repair and prenatal health. It also contains vitamin K, which strengthens bones and aids blood clotting. Because air frying preserves more nutrients than boiling, you get maximum benefits with minimal effort. Plus, the quick cooking time ensures the asparagus stays crisp and vibrant, making it as appealing to your eyes as it is to your body.
Finally, air fryer asparagus naturally contains prebiotics, which nourish gut bacteria and improve overall digestive health. Whether you enjoy it as a side or a snack, this dish supports your wellness goals without sacrificing flavor. With its blend of vitamins, minerals, and fiber, air fryer asparagus is a smart choice for anyone looking to eat healthier.
How it fits in a healthy lifestyle
Air fryer asparagus fits seamlessly into almost any diet plan. For gluten-free eaters, it’s a safe and flavorful option that pairs well with proteins like grilled chicken or salmon. If you’re focused on heart health, its low sodium and high potassium content help regulate blood pressure. Plus, the air fryer method cuts unnecessary fats, aligning with lean eating habits.
Busy weeknights call for simple, nutritious meals, and air fryer asparagus delivers. You can prep it in minutes alongside other quick air fryer recipes for a balanced dinner. It also works great in meal prep, staying fresh for days when stored properly. For those tracking macros, asparagus is low in carbs but high in nutrients, making it a staple for keto or low-calorie diets.
Craving more veggie-forward ideas? Try pairing air fryer asparagus with our healthy salad inspiration for a colorful, nutrient-dense plate. However you enjoy it, this dish makes eating well effortless and delicious.
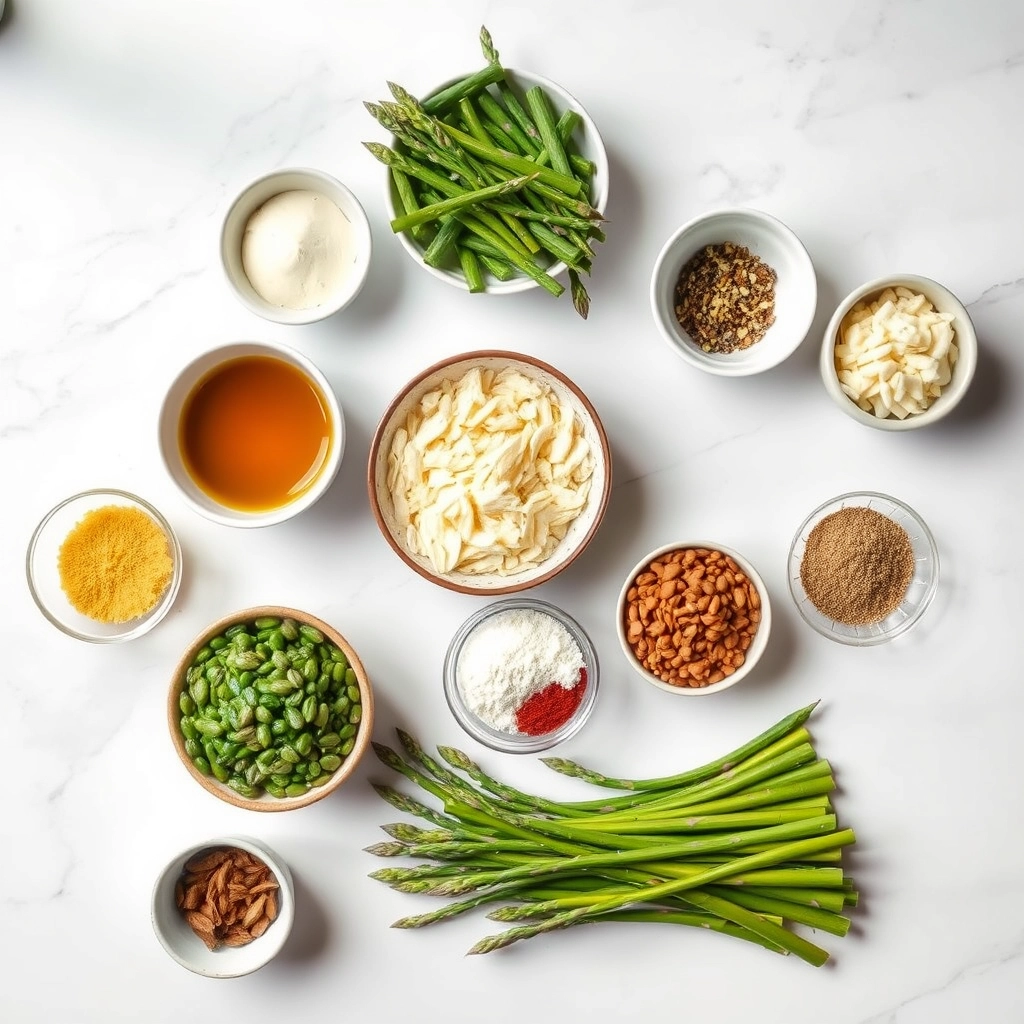
Crispy and tender asparagus cooked to perfection in the air fryer with minimal oil and maximum flavor.
Ingredients
Scale
For the Crust:
1 bunch asparagus (about 1 lb), trimmed
1 tbsp olive oil
1/2 tsp garlic powder
1/2 tsp salt
1/4 tsp black pepper
1 tbsp grated parmesan cheese (optional)
Instructions
1. Prepare the Crust:
Preheat air fryer to 375°F (190°C).
In a bowl, toss asparagus with olive oil, garlic powder, salt, and pepper until evenly coated.
Place asparagus in the air fryer basket in a single layer, working in batches if necessary.
Cook for 8-10 minutes, shaking the basket halfway through, until asparagus is tender and slightly crispy.
Sprinkle with parmesan cheese if desired and serve immediately.
Notes
You can customize the seasonings to taste.
“`html
s-dish">How to Prepare This Dish
Steps and time-saving tips
Start by rinsing your asparagus under cold water and patting it dry with a clean towel. Trim the tough ends—about an inch—to ensure tender bites. Next, toss the spears in a light drizzle of olive oil, making sure each one gets evenly coated. Sprinkle with salt, pepper, and any other seasonings you love, like garlic powder or a squeeze of lemon juice. Meanwhile, preheat your air fryer to 375°F for about 3 minutes so it’s ready to go. Arrange the asparagus in a single layer in the basket, leaving space between the spears for crispier results. Air fry for 6-8 minutes, shaking the basket halfway through to promote even cooking. For extra flavor, grate fresh parmesan over the top right after cooking or add a pinch of red pepper flakes. If you’re short on time, skip the preheating step—just add an extra minute or two to the cook time. Serve immediately while the asparagus is hot and crispy.
Mistakes I’ve made and learned from
I used to overcrowd the air fryer basket, thinking more asparagus meant faster prep. Instead, I ended up with unevenly cooked spears—some soggy, others burnt. Now I stick to a single layer, and it makes all the difference. Another lesson? Skipping the oil altogether led to dry, lackluster results. A light coating is key for that perfect crispiness. If you’re new to air frying, check out my guide on air fryer basics to avoid common pitfalls. And if you love pairing veggies with proteins, my perfect chicken breast recipe complements this dish beautifully. Trust me, learning these tricks saved my weeknight dinners!
Air fryer asparagus might seem like a modern twist, but its roots stretch back to ancient times. The Greeks and Romans prized asparagus for its delicate flavor and medicinal properties, often serving it fresh or lightly cooked. Today, we honor that tradition by crisping it to perfection in the air fryer, a method that locks in nutrients while adding a satisfying crunch.
Across Europe, cooks prepare asparagus differently based on local tastes. In France, they might drizzle it with browned butter and lemon, while Italians often pair it with Parmesan and prosciutto. Meanwhile, in my family, air fryer asparagus became a staple after my grandmother discovered how quickly it cooks compared to her old roasting method. She still insists on adding a pinch of garlic powder, just like her mother did.
Seasonality also plays
a role. In Germany, white asparagus dominates spring menus, celebrated with elaborate feasts. But with air fryer asparagus, you can enjoy vibrant green spears year-round, whether tossed in olive oil or spiced with paprika for a bolder kick.
How it fits in today’s cooking
Air fryer asparagus fits seamlessly into modern kitchens, especially for busy home cooks. Since it cooks in under 10 minutes, it’s perfect for weeknight dinners or last-minute holiday sides. Many families now include it in their Easter spreads, swapping out heavier dishes for something light yet flavorful.
Health-conscious eaters love it too, as the air fryer requires minimal oil without sacrificing texture. Some even repurpose leftovers into creative dishes, like tossing them into a quinoa salad or layering them over avocado toast. Whether you’re meal prepping or hosting a dinner party, air fryer asparagus adapts effortlessly to today’s cooking rhythms.
>Taste and Texture
What makes it delicious
Air fryer asparagus delivers a crave-worthy contrast of textures and flavors. The high heat crisps the spears into tender-crunchy perfection, while the inside stays juicy and slightly sweet. A hint of caramelization adds a smoky depth, especially when you toss the asparagus with olive oil and garlic. Meanwhile, the natural earthiness of the vegetable shines, balanced by a bright, fresh aroma that fills your kitchen. Every bite of Air fryer asparagus feels light yet satisfying, making it an irresistible side or snack.
Boosting the flavor
Elevate your Air fryer asparagus with creative twists. For a zesty kick, sprinkle lemon zest and grated parmesan right after cooking—the heat melts the cheese into a savory crust. Alternatively, drizzle with a creamy garlic herb sauce for extra richness. If you love heat, toss the spears with smoked paprika or chili flakes before air frying. For a refreshing finish, pair them with a tangy citrus vinaigrette. These small tweaks transform simple asparagus into a standout dish.
Tips for Success
Best practices for results
Always preheat your air fryer before adding the asparagus to ensure even cooking. For the best texture, trim the woody ends and toss the spears lightly in oil so they crisp without drying out. Additionally, shake the basket halfway through cooking to prevent uneven browning. Finally, season your Air fryer Asparagus right after cooking while it’s still hot for maximum flavor absorption.
Mistakes to avoid
Avoid overcrowding the air fryer basket, as this steams the asparagus instead of crisping it. Instead, cook in batches if needed for the best results. Also, don’t skip the oil entirely—just a light coating helps the seasoning stick and enhances texture. For more air fryer tips, check out our guide on air fryer basics. If your spears turn out soggy, you might need to adjust the temperature or timing—our perfect veggies guide covers troubleshooting in detail.
Serving and Pairing Suggestions
How to serve this dish
Elevate your Air fryer Asparagus by arranging it on a rustic wooden board or a sleek white platter for a striking contrast. For a pop of color, sprinkle freshly grated Parmesan or lemon zest on top. Alternatively, drizzle a touch of balsamic glaze for a glossy finish. Serve it warm at brunch alongside eggs or as a vibrant side during holiday gatherings. Since Air fryer Asparagus cooks quickly, you can easily prepare it last-minute while keeping it crisp and flavorful.
h-it">What goes well with it
Pair your Air fryer Asparagus with a creamy garlic aioli for a rich, tangy dip that balances its earthy notes. For a heartier meal, serve it alongside our herb-roasted chicken, as the herbs enhance the asparagus’s freshness. If you prefer a lighter option, try it with a crisp Sauvignon Blanc or our refreshing citrus avocado salad. The citrusy dressing brightens the dish while adding a creamy texture.
How long should you cook asparagus in an air fryer?
Air fryer asparagus typically cooks in 6–10 minutes at 375°F, depending on thickness. For tender-crisp results, shake the basket halfway through. Thinner spears cook faster, so adjust time accordingly to avoid overcooking.
rank-math-faq-item">
Do you need to flip asparagus in the air fryer?
Yes, flipping or shaking the asparagus halfway ensures even cooking. This prevents uneven browning and helps all sides crisp up perfectly. Air fryer asparagus benefits from this step for consistent texture.
What temperature is best for air fryer asparagus?
375°F is ideal for air fryer asparagus—hot enough to crisp the exterior without burning. Higher temps may dry out the spears, while lower temps won’t achieve that perfect caramelization. This balance delivers golden, flavorful results.
Should you soak asparagus before air frying?
No soaking needed—just rinse and pat dry. Excess moisture prevents proper crisping in the air fryer. For best results, toss asparagus lightly in oil right before cooking to enhance texture and flavor.
>
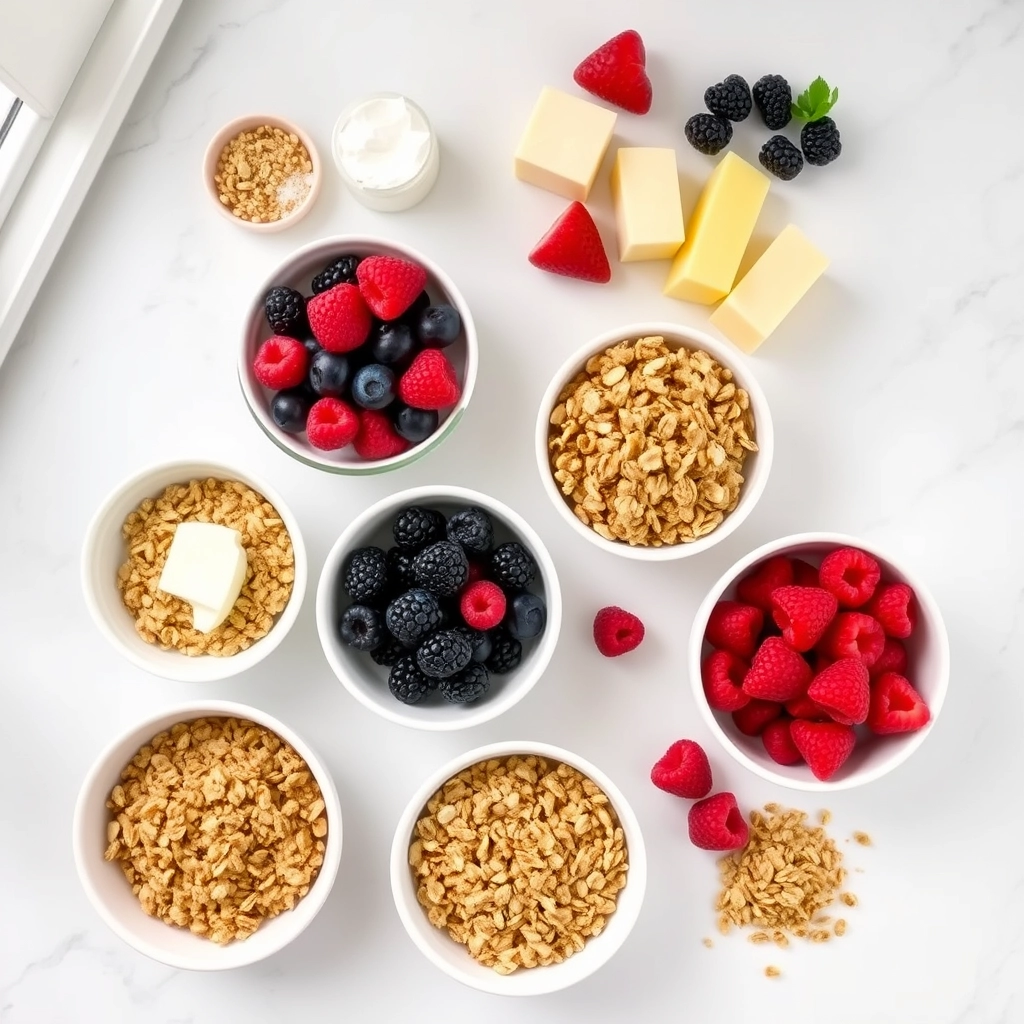
Easy Mixed Berry Frozen Yogurt Bites with Granola
Introduction
If you’re craving a sweet yet wholesome treat that’s as easy to make as it is delicious, you’re in the right place. Mixed Berry Frozen Yogurt Bites with Granola deliver a burst of fruity flavor and satisfying crunch in every bite. Whether you need a quick snack for busy afternoons or a guilt-free dessert to satisfy your sweet tooth, these little bites pack big taste. Plus, they’re perfect for meal prep, so you can enjoy them whenever the craving strikes.
Mixed Berry Frozen Yogurt Bites with Granola combine creamy yogurt, vibrant berries, and crunchy granola into a freezer-friendly delight. Unlike store-bought snacks loaded with additives, these bites let you control the ingredients, making them a healthier alternative for both kids and adults. They’re also incredibly versatile—swap the berries for your favorite seasonal fruits or adjust the granola to match your texture preference. If you love no-bake treats like my Peanut Butter Energy Balls, you’ll adore how simple and rewarding these yogurt bites are. Best of all, they align perfectly with brekcakes.com’s mission to share approachable, joy-filled recipes that fit real life.
Why I Love This Recipe
Mixed Berry Frozen Yogurt Bites with Granola hold a special place in my heart because they remind me of summer afternoons with my nieces. We’d layer yogurt and fruit together, giggling as we created messy but delicious masterpieces. Now, this recipe lets me recreate that fun in a neater, freezer-friendly format. They’re also a staple in my kitchen when I need a quick pick-me-up—proof that wholesome food can be both effortless and exciting. For more bite-sized inspiration, check out my Chocolate-Covered Strawberry Bites, another favorite that celebrates simplicity and flavor.
Health and Nutrition
Why it’s good for your body
Mixed Berry Frozen Yogurt Bites with Granola pack a nutritious punch while satisfying your sweet tooth. First, the mixed berries deliver antioxidants like vitamin C and polyphenols, which help combat inflammation and support immune health. Meanwhile, the yogurt provides probiotics for gut health and a dose of calcium for strong bones. Additionally, the granola adds fiber and healthy fats, keeping you fuller longer.
Because Mixed Berry Frozen Yogurt Bites with Granola use natural ingredients, they avoid the excessive sugars found in many store-bought desserts. The combination of protein from yogurt and complex carbs from granola also stabilizes blood sugar levels. Furthermore, the bite-sized portions encourage mindful eating, so you can enjoy a treat without overindulging.
Finally, Mixed Berry Frozen Yogurt Bites with Granola offer a quick energy boost, making them perfect for post-workout recovery or an afternoon pick-me-up. Whether you need a light snack or a guilt-free dessert, these bites deliver flavor and nutrition in every bite.
How it fits in a healthy lifestyle
Mixed Berry Frozen Yogurt Bites with Granola fit seamlessly into a balanced diet. If you’re watching your sugar intake, you can easily customize the recipe with low-sugar yogurt or fresh berries. For a gluten-free option, swap in certified gluten-free granola, like the one featured in our gluten-free snack guide.
These bites also work well for meal prep, offering a convenient grab-and-go option for busy days. Pair them with a protein-rich breakfast or enjoy them as a post-dinner treat. If you’re looking for more ways to incorporate wholesome snacks into your routine, check out our healthy dessert swaps for inspiration. With simple ingredients and endless versatility, Mixed Berry Frozen Yogurt Bites with Granola make healthy eating deliciously easy.
Wash and dry the mixed berries. If using strawberries, slice them into small pieces.
In a bowl, mix the Greek yogurt with honey if desired.
Line a baking sheet with parchment paper. Place small spoonfuls of yogurt on the sheet.
Top each yogurt dollop with a few pieces of mixed berries and a sprinkle of granola.
Freeze for at least 2 hours or until firm. Store in an airtight container in the freezer.
Notes
You can customize the seasonings to taste.
How to Prepare This Dish
Steps and time-saving tips
Start by gathering all your ingredients for Mixed Berry Frozen Yogurt Bites with Granola to streamline the process. First, mix the Greek yogurt with honey in a bowl until smooth, then gently fold in the fresh mixed berries. If you’re short on time, use frozen berries—just thaw and pat them dry to avoid excess moisture. Next, line a muffin tin with parchment paper or silicone liners for easy removal later. Spoon a thin layer of the yogurt mixture into each cup, then sprinkle a generous layer of granola on top. Repeat the layers once more, finishing with a drizzle of honey for extra sweetness. Pop the tin into the freezer for at least two hours, or until firm. To save time, prep these bites the night before so they’re ready when you need them. Once frozen, transfer them to an airtight container to prevent freezer burn. These Mixed Berry Frozen Yogurt Bites with Granola make a perfect grab-and-go snack, and you can customize them with your favorite toppings like chia seeds or dark chocolate chips.
and-learned-from">Mistakes I’ve made and learned from
When I first made Mixed Berry Frozen Yogurt Bites with Granola, I skipped the parchment paper and ended up struggling to pry them out of the tin. Now, I always use liners or a light spritz of cooking spray—trust me, it’s a game-changer. Another lesson? Don’t overmix the berries, or the yogurt turns pink and loses its creamy texture. For more tips on handling delicate ingredients, check out my guide on perfect yogurt textures. I also learned the hard way that soggy granola ruins the crunch factor. To avoid this, I now toast my granola lightly before layering it in, which adds a delicious crispness. If you’re new to granola prep, my homemade granola secrets post has all the details. These small tweaks make a big difference, turning a good snack into a great one.
Cultural Connection and Variations
Where this recipe comes from
Mixed Berry Frozen Yogurt Bites with Granola feel like a modern twist on classic summer treats, but their roots run deeper. Many cultures have long enjoyed frozen desserts, from Italian gelato to Middle Eastern booza. However, this particular recipe blends the creamy tang of yogurt with the crunch of granola, creating a texture that’s uniquely satisfying. In Greece, for instance, they might swap the granola for honey-drizzled nuts, while in Japan, matcha powder could replace the berries for a earthy twist.
In my family, Mixed Ber
ry Frozen Yogurt Bites with Granola became a staple during hot summers when fresh berries overflowed at local markets. My grandmother would layer them with homemade yogurt and oats, turning them into a wholesome snack. Meanwhile, in Scandinavian countries, you might find lingonberries instead of mixed berries, or even a sprinkle of cardamom for warmth. No matter the variation, the joy of biting into something cold, creamy, and crunchy stays the same.
How it fits in today’s cooking
Today, Mixed Berry Frozen Yogurt Bites with Granola fit perfectly into our fast-paced, health-conscious lives. They’re a guilt-free dessert that doubles as a quick breakfast or post-workout snack. Busy parents love them because they’re easy to prep ahead, just like these meal prep ideas that save time during hectic weeks. Plus, they’re a hit at parties, offering a lighter alternative to heavy cakes or cookies.
Modern cooks also get creative with substitutions, like using dairy-free yogurt or swapping granola for crushed protein bars. Some even layer them into parfaits for an Instagram-worthy treat, similar to these easy dessert recipes that balance flavor and convenience. Whether you enjoy them as a nostalgic summer bite or a year-round staple, these frozen yogurt bites prove that simple ingredients can still deliver big joy.
>Taste and Texture
What makes it delicious
Mixed Berry Frozen Yogurt Bites with Granola deliver a burst of bright, tangy sweetness balanced by earthy crunch. The frozen yogurt melts luxuriously on your tongue, creamy and cool, while juicy berries—like strawberries, blueberries, and raspberries—add pops of fruity freshness. Meanwhile, the granola brings a satisfying contrast with its toasty oats, nutty clusters, and subtle cinnamon warmth. Each bite feels like a playful dance between smooth and crisp, with a hint of vanilla tying everything together. Whether you savor them slowly or pop them straight from the freezer, Mixed Berry Frozen Yogurt Bites with Granola offer a refreshing treat that’s both light and indulgent.
Boosting the flavor
For an extra flavor boost, try drizzling honey or maple syrup over your Mixed Berry Frozen Yogurt Bites with Granola just before serving. The natural sweetness enhances the berries and complements the granola’s warmth. Alternatively, sprinkle a pinch of citrus zest—like lemon or orange—to brighten each bite. If you love texture, mix in chopped nuts or swap the granola for a chocolate coconut granola for a decadent twist. Craving more berry goodness? Pair these bites with a scoop of strawberry chia jam for a jammy, vibrant finish. Small tweaks make this treat even more irresistible!
Tips for Success
Best practices for results
Always use full-fat yogurt for the creamiest texture in your Mixed Berry Frozen Yogurt Bites with Granola. Meanwhile, press the granola firmly into the yogurt mixture so it sticks well after freezing. For even freezing, space the bites at least an inch apart on the tray. Additionally, let them chill for at least 4 hours to ensure they hold their shape perfectly. Finally, store them in an airtight container to prevent freezer burn and maintain freshness.
Mistakes to avoid
Avoid overmixing the yogurt and berries, as this can make the texture too runny. Instead, gently fold them together for the best consistency. Also, skip using thawed frozen berries, since excess moisture will prevent the bites from setting properly. For more tips on handling frozen desserts, check out our guide on perfecting frozen treats. Another common mistake is skipping the parchment paper, which makes removing the bites difficult. For easy release, line your tray as suggested in our no-stick baking tips.
Serving and Pairing Suggestions
How to serve this dish
Mixed Berry Frozen Yogurt Bites with Granola shine as a refreshing treat for any occasion. For a stunning presentation, arrange them on a chilled platter with fresh mint leaves or edible flowers. Alternatively, serve them in mini cupcake liners for a playful touch at brunch or summer gatherings. If you’re hosting a party, layer them with our Homemade Granola Clusters for extra crunch. These bites also make a delightful dessert for holidays—simply drizzle them with honey or sprinkle extra granola for a festive finish.
h-it">What goes well with it
Pair Mixed Berry Frozen Yogurt Bites with Granola with a crisp sparkling lemonade to balance the creamy texture. For a cozy twist, try them alongside a warm cup of chai tea, as the spices complement the berries beautifully. If you’re craving something heartier, serve them with our Vanilla Bean Yogurt Parfait for a layered breakfast or snack. Each pairing enhances the dish’s flavors while keeping it light and satisfying.
How do you make Mixed Berry Frozen Yogurt Bites with Granola?
To make Mixed Berry Frozen Yogurt Bites with Granola, blend mixed berries with Greek yogurt, spoon the mixture into small molds, sprinkle granola on top, and freeze for 2-3 hours. These bites are a perfect healthy snack or dessert option that combines creamy yogurt, tart berries, and crunchy granola.
rank-math-faq-item">
Can you use any type of yogurt for Mixed Berry Frozen Yogurt Bites?
Yes, you can use any yogurt, but Greek yogurt works best for Mixed Berry Frozen Yogurt Bites with Granola because it’s thicker and creamier. For a dairy-free option, try coconut or almond yogurt—just ensure it’s unsweetened to balance the natural sweetness of the berries and granola.
How long do Mixed Berry Frozen Yogurt Bites with Granola last in the freezer?
Mixed Berry Frozen Yogurt Bites with Granola stay fresh in the freezer for up to 2 weeks when stored in an airtight container. For the best texture, let them sit at room temperature for 1-2 minutes before eating to soften slightly.
Are Mixed Berry Frozen Yogurt Bites with Granola healthy?
Absolutely! Mixed Berry Frozen Yogurt Bites with Granola are packed with protein from yogurt, antioxidants from berries, and fiber from granola. They’re a nutritious alternative to sugary desserts, especially when made with low-sugar yogurt and homemade granola.
>
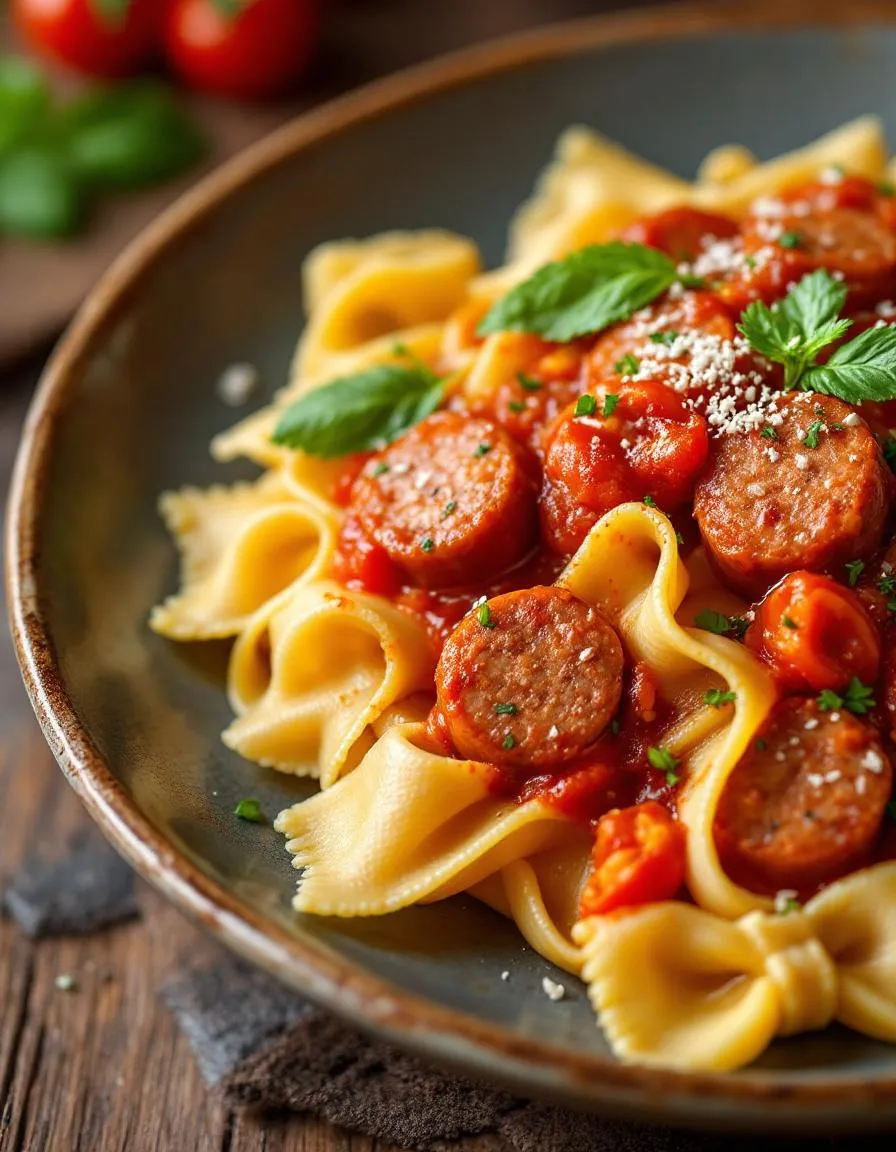
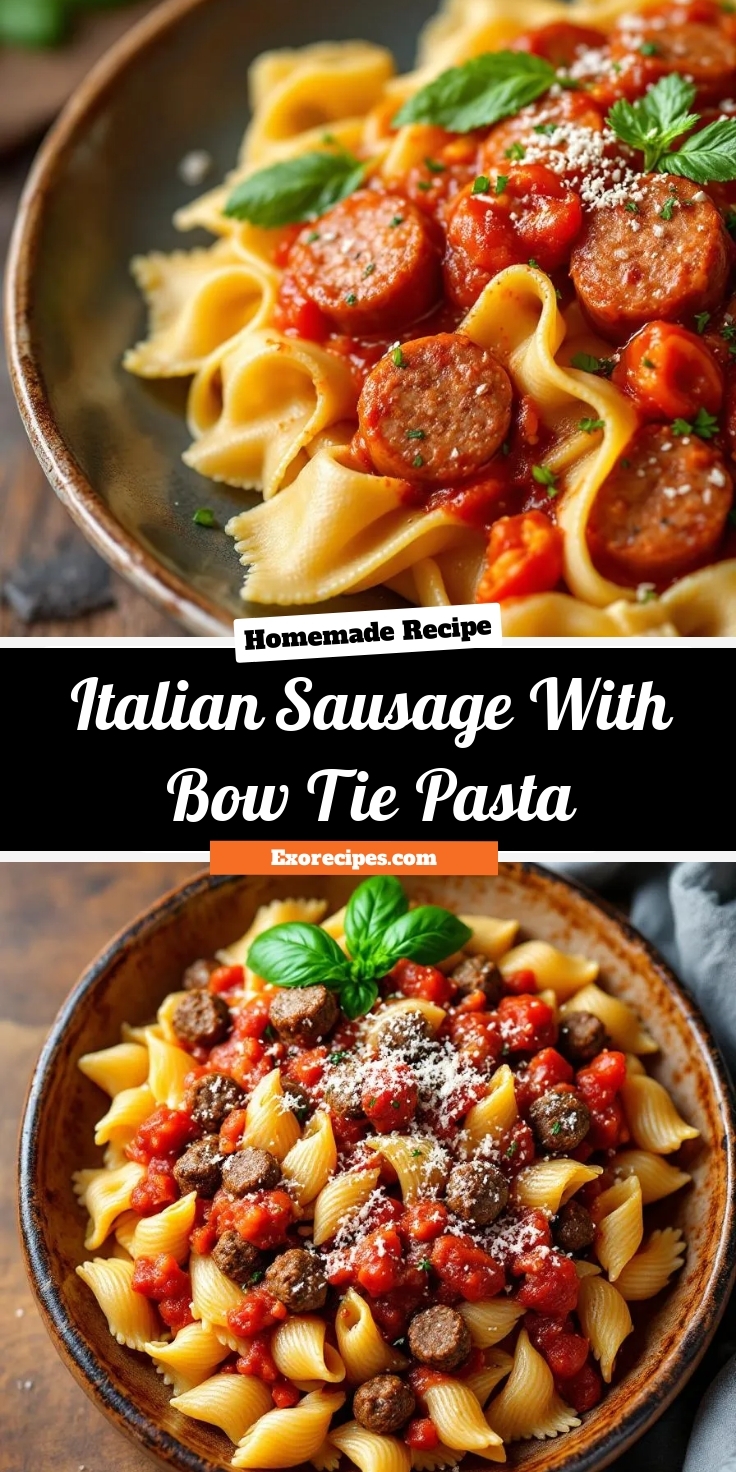
Best Italian Sausage With Bow Tie Pasta Recipe
Introduction
If you’re craving a dish that’s both comforting and bursting with flavor, you’re in the right place. Italian Sausage With Bow Tie Pasta is one of those meals that feels like a warm hug after a long day. Whether you’re cooking for family or treating yourself, this recipe delivers rich, savory goodness in every bite. Plus, it’s incredibly versatile—perfect for weeknight dinners or impressing guests without spending hours in the kitchen.
Italian Sausage With Bow Tie Pasta combines juicy, seasoned sausage with tender farfalle (those adorable little bow ties) in a creamy or tangy sauce, depending on your preference. The dish balances hearty protein with carbs in a way that satisfies deeply. What makes it special is how effortlessly it comes together, yet it always feels like a celebration. On brekcakes.com, we celebrate food that’s approachable but never boring, and this recipe fits right in. It’s a crowd-pleaser that adapts to your taste—swap in spicy sausage for a kick or keep it mild for picky eaters. Either way, you’ll find yourself making it again and again. For more cozy pasta inspiration, check out our Creamy Garlic Parmesan Pasta or explore quick weeknight dinners for busy days.
Why I Love This Recipe
Italian Sausage With Bow Tie Pasta holds a special place in my heart because it’s the meal I turn to when I need comfort without compromise. The first time I made it, I was hosting friends last-minute, and the way their faces lit up after the first bite told me everything. Now, it’s my go-to for turning ordinary evenings into something memorable. The simplicity lets the ingredients shine, but the flavors always feel indulgent—proof that great food doesn’t have to be complicated to be extraordinary.
Health and Nutrition
Why it’s good for your body
Italian Sausage With Bow Tie Pasta delivers a satisfying mix of protein, carbs, and healthy fats. First, the Italian sausage provides high-quality protein, which helps build muscle and keeps you full longer. Additionally, the pasta offers complex carbohydrates for steady energy, while the olive oil and vegetables contribute heart-healthy fats and fiber.
Moreover, this dish includes nutrient-rich ingredients like garlic, onions, and bell peppers. These veggies pack antioxidants that support immunity and reduce inflammation. Meanwhile, the tomatoes in the sauce provide lycopene, a powerful compound linked to heart health. Because Italian Sausage With Bow Tie Pasta balances macros and micronutrients, it fuels your body without leaving you sluggish.
Finally, the dish adapts easily to dietary preferences. For instance, you can swap regular pasta for whole-grain or gluten-free options. You can also lean on lean turkey sausage for a lighter version. Whether you enjoy it as a weeknight dinner or a meal prep staple, Italian Sausage With Bow Tie Pasta keeps nutrition simple and delicious.
How it fits in a healthy lifestyle
Italian Sausage With Bow Tie Pasta fits seamlessly into balanced eating habits. If you focus on protein intake, the sausage and cheese offer a solid boost. Pair it with a side salad for extra fiber, or try our balanced meal prep tips to make it part of your weekly routine.
For heart-conscious eaters, opt for low-sodium sausage and whole-grain pasta. The dish still delivers rich flavor while supporting cardiovascular wellness. If you need gluten-free options, simply substitute the bow ties with your favorite alternative. Explore our gluten-free pasta guide for the best swaps. Whether you prioritize macros, dietary restrictions, or just crave a hearty meal, this recipe adapts to your goals.
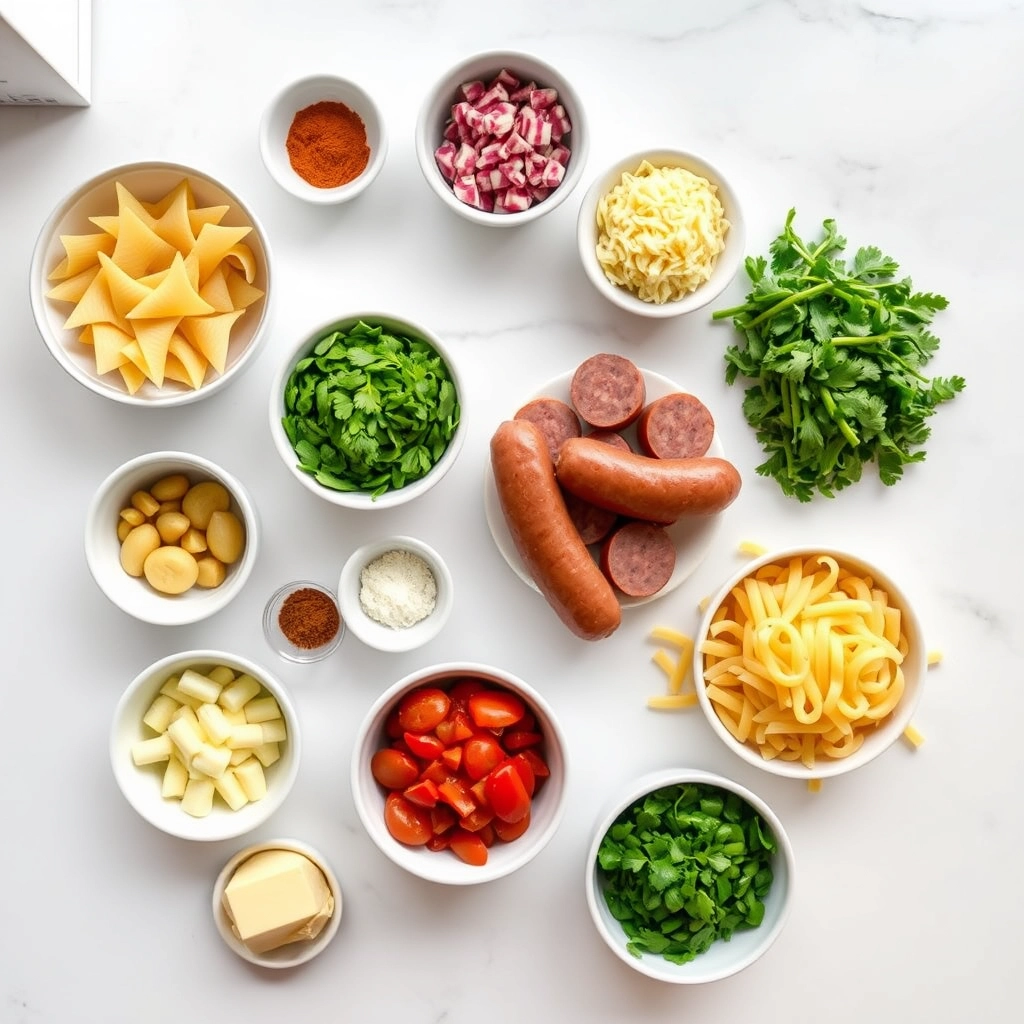
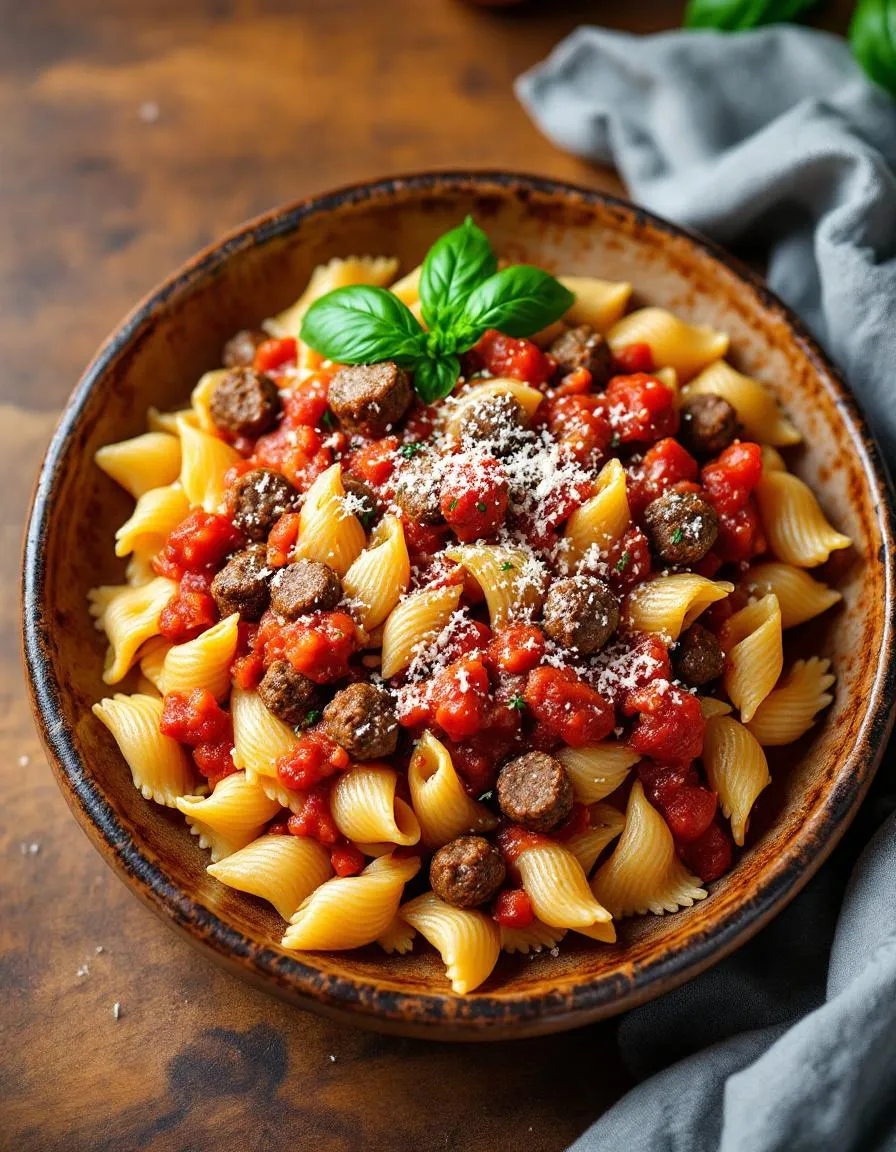
A hearty and flavorful dish combining Italian sausage with bow tie pasta in a rich tomato sauce.
Ingredients
Scale
For the Crust:
1 lb Italian sausage, casings removed
8 oz bow tie pasta
1 can (14.5 oz) diced tomatoes
1 small onion, diced
2 cloves garlic, minced
1/2 cup heavy cream
1 tsp dried basil
1 tsp dried oregano
Salt and pepper to taste
1/4 cup grated Parmesan cheese
2 tbsp olive oil
Instructions
1. Prepare the Crust:
Cook bow tie pasta according to package instructions. Drain and set aside.
Heat olive oil in a large skillet over medium heat. Add sausage and cook until browned, breaking it into small pieces.
Add diced onion and minced garlic to the skillet. Cook until onion is translucent.
Stir in diced tomatoes, basil, oregano, salt, and pepper. Simmer for 10 minutes.
Reduce heat to low and stir in heavy cream. Simmer for another 5 minutes.
Add cooked pasta to the skillet and toss to coat with the sauce.
Sprinkle with Parmesan cheese before serving.
Notes
You can customize the seasonings to taste.
How to Prepare This Dish
Steps and time-saving tips
Start by heating a large skillet over medium heat and browning the Italian sausage with a drizzle of olive oil, breaking it into bite-sized pieces as it cooks. Meanwhile, bring a pot of salted water to a boil and add the bow tie pasta, stirring occasionally to prevent sticking. While the pasta cooks, chop your favorite veggies—bell peppers, onions, and garlic work great—and toss them into the skillet with the sausage. Stir everything together until the veggies soften, then sprinkle in Italian seasoning for extra flavor. Drain the pasta al dente, reserving a cup of starchy water, and add it directly to the skillet. Pour in a splash of the pasta water to help the sauce cling to the noodles, then fold in grated Parmesan and fresh basil. For a time-saving twist, use pre-chopped frozen veggies or pre-cooked sausage to cut prep time in half. Let the dish rest for two minutes off the heat before serving to let the flavors meld.
and-learned-from">Mistakes I’ve made and learned from
Early on, I’d overcook the bow tie pasta, leaving it mushy—until I learned to set a timer for one minute less than the package instructions. Another blunder? Skipping the reserved pasta water, which made the dish too dry. Now I always keep that liquid gold handy to perfect the texture. If you’re new to working with Italian sausage, check out my guide on choosing the right sausage to avoid overly greasy results. And if you’ve ever wondered why your pasta dishes lack depth, my balancing pasta flavors post breaks down how to layer seasonings like a pro.
Cultural Connection and Variations
Where this recipe comes from
Italian Sausage With Bow Tie Pasta carries the heart of Italian-American comfort food, blending rustic flavors with simple elegance. Originating from Southern Italy, where sausages often feature fennel and pepper, this dish traveled to America with immigrants who adapted it using local ingredients. In Italy, you might find a similar dish with regional twists—some add spicy nduja in Calabria, while others in Tuscany swap bow ties for pappardelle. Meanwhile, Italian-American kitchens often toss in bell peppers or mushrooms for extra heartiness.
Families pass down thei
r own versions, too. Some simmer the sausage in red wine for depth, while others keep it quick with garlic and olive oil. My grandmother always added a pinch of sugar to balance the tomatoes, a trick she learned in Naples. Whether served at Sunday dinners or weeknight gatherings, Italian Sausage With Bow Tie Pasta bridges tradition and creativity. Even today, it’s a canvas for personal touches—like swapping in kale for greens or using turkey sausage for a lighter twist.
How it fits in today’s cooking
Italian Sausage With Bow Tie Pasta remains a weeknight hero because it’s fast, flexible, and deeply satisfying. Busy cooks love it for one-pan meals, while meal preppers double the recipe for easy lunches. During fall, it pairs perfectly with roasted squash, and in summer, fresh basil brightens it up. Many modern kitchens even sneak in extra veggies, like spinach or zucchini, to boost nutrition without losing flavor.
It’s also a star at potlucks and holidays, especially when served alongside crowd-pleasers like garlic butter steak bites or a crisp avocado cucumber salad. Whether you’re craving comfort or feeding a group, this dish adapts effortlessly. From stovetop to table in 30 minutes, it proves that classic flavors never go out of style.
>Taste and Texture
What makes it delicious
Italian Sausage With Bow Tie Pasta delivers a hearty, satisfying bite with layers of bold flavor and contrasting textures. The juicy, savory Italian sausage crumbles release a rich, garlicky aroma as they sizzle, while the bow tie pasta offers a tender yet slightly chewy base. A tangy tomato sauce clings to every nook of the pasta, balancing the dish with its bright, herb-infused sweetness. Meanwhile, melted Parmesan adds a salty, nutty depth, and a sprinkle of fresh basil brings a fragrant, peppery finish. Every forkful of Italian Sausage With Bow Tie Pasta feels indulgent yet comforting, making it a crowd-pleasing meal.
Boosting the flavor
For an extra flavor kick, try swapping sweet Italian sausage for spicy sausage to add a fiery depth. Alternatively, stir in a splash of heavy cream for a lusher, silkier sauce. A handful of toasted pine nuts or crispy pancetta bits will introduce a delightful crunch, while a drizzle of garlic-infused oil amps up the aroma. If you love herbs, fresh rosemary or a pinch of red pepper flakes will elevate the dish even further. Pair it with a simple lemony arugula salad to cut through the richness with a refreshing contrast.
Tips for Success
Best practices for results
First, always brown the Italian sausage thoroughly before adding other ingredients—this builds rich flavor in your Italian Sausage With Bow Tie Pasta. Meanwhile, cook the pasta just until al dente since it will soften slightly when tossed with the sauce. Additionally, reserve a cup of pasta water before draining; the starchy liquid helps bind the sauce perfectly. Finally, stir in fresh herbs like basil or parsley right before serving for a bright finish.
Mistakes to avoid
One common misstep is overcrowding the pan when browning the sausage, which steams instead of sears the meat. Instead, cook it in batches for even caramelization. Another issue is skipping the pasta water, making the sauce too thick or dry. For more sauce tips, check out our guide to perfecting pasta sauce consistency. Also, avoid overcooking the bow ties—they should hold their shape when mixed. If you’re new to pasta prep, our al dente pasta guide explains ideal doneness.
Serving and Pairing Suggestions
How to serve this dish
Italian Sausage With Bow Tie Pasta shines when you serve it family-style in a large, rustic bowl for a cozy dinner. Alternatively, plate individual portions with a sprinkle of fresh parsley or grated Parmesan for a pop of color. For special occasions, pair it with warm garlic bread and a crisp salad to round out the meal. Meanwhile, if you’re hosting a casual gathering, let guests serve themselves buffet-style alongside other Italian favorites. No matter how you present it, the savory flavors and playful bow tie pasta always delight.
h-it">What goes well with it
A light, citrusy white wine like Pinot Grigio balances the richness of Italian Sausage With Bow Tie Pasta perfectly. For a non-alcoholic option, try sparkling lemonade with a hint of basil. If you’re craving sides, roasted garlic green beans add a crisp contrast, while a simple Caprese salad brings freshness. For another hearty pairing, consider serving it with our garlic herb focaccia to soak up every flavorful bite. Finally, end the meal on a sweet note with our tiramisu cups for a classic Italian finish.
What goes well with Italian sausage and bow tie pasta?
Italian Sausage With Bow Tie Pasta pairs perfectly with garlic bread, a crisp green salad, or roasted vegetables like bell peppers and zucchini. For a richer meal, add a sprinkle of Parmesan cheese or a side of sautéed spinach. The dish’s bold flavors also complement a light white wine or sparkling water with lemon.
rank-math-faq-item">
Can I use a different pasta for Italian sausage with bow tie pasta?
Yes, you can substitute bow tie pasta with penne, rigatoni, or fusilli if preferred. The key is choosing a shape that holds the sauce well, just like bow ties do. Italian Sausage With Bow Tie Pasta works with most short pasta varieties, so feel free to experiment.
How do I make Italian sausage with bow tie pasta creamy?
To create a creamy version of Italian Sausage With Bow Tie Pasta, stir in heavy cream, cream cheese, or Alfredo sauce during the last few minutes of cooking. You can also reserve some pasta water to thicken the sauce naturally. This adds a luscious texture while keeping the dish flavorful.
Is Italian sausage with bow tie pasta spicy?
The spiciness depends on the sausage you use—mild Italian sausage keeps the dish family-friendly, while hot varieties add heat. For Italian Sausage With Bow Tie Pasta, you can control the spice level by choosing your preferred sausage or adding red pepper flakes to taste.