Best Monster Cookie Dessert Dip – Easy & Creamy Recipe
Introduction
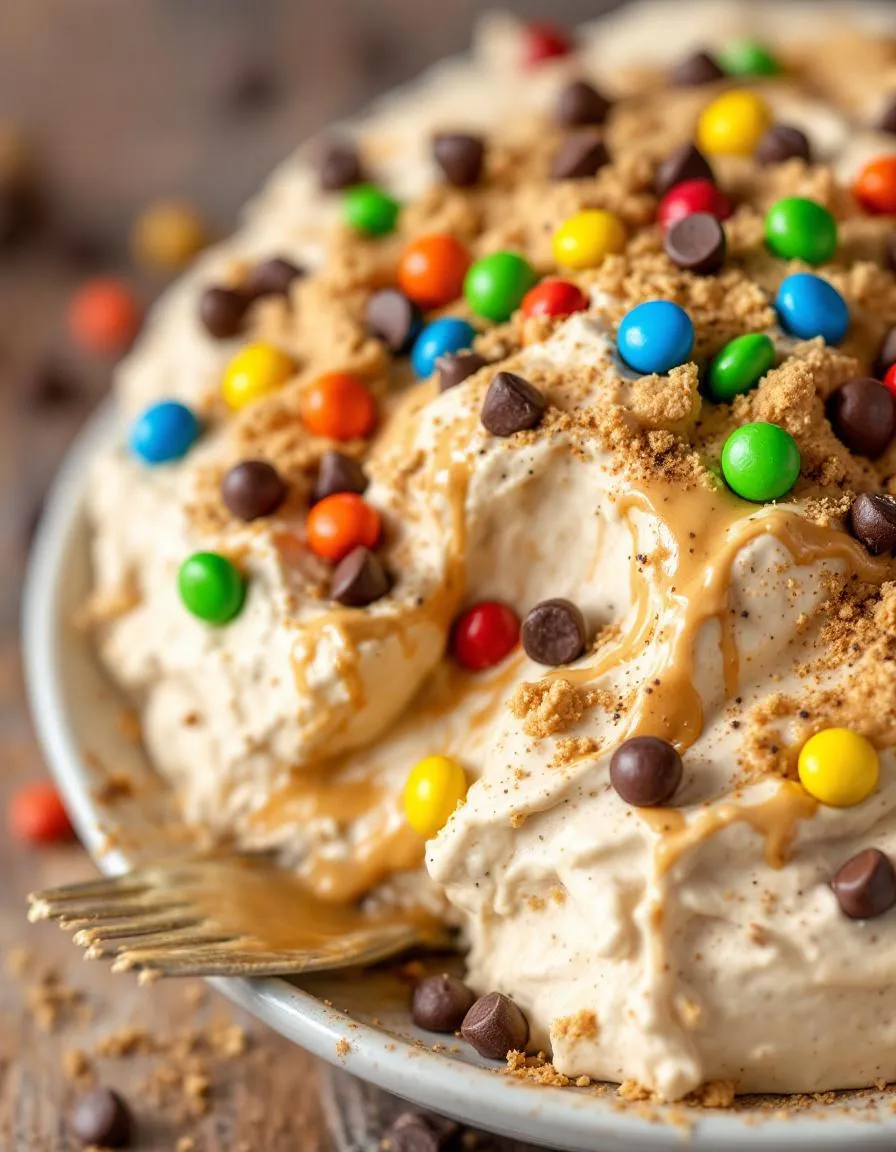
If you’ve ever craved a dessert that’s equal parts nostalgic and irresistible, you’re in the right place. Today, I’m sharing my go-to crowd-pleaser: Monster Cookie Dessert Dip. Whether you’re hosting a game night, celebrating a birthday, or simply treating yourself, this creamy, dreamy dip brings the joy of monster cookies to a whole new level. Plus, it’s so easy to whip up, you’ll wonder why you didn’t try it sooner.
Monster Cookie Dessert Dip combines the classic flavors of peanut butter, oats, and chocolate chips into a luscious, no-bake treat. Unlike traditional cookies, this dip delivers the same beloved taste in a shareable, dippable format—perfect for pairing with graham crackers, pretzels, or fresh fruit. What makes it special? It’s versatile enough for any occasion, from potlucks to late-night snacks, and it captures the playful spirit of my blog, where fun and flavor always take center stage. If you’re a fan of my no-bake desserts, you’ll adore this twist. And for those who love a bit of crunch, try adding extra mix-ins like M&M’s or crushed cookies, just like in my favorite cookie recipes.
Why I Love This Recipe
This recipe holds a special place in my heart because it reminds me of baking with my mom. She always added a handful of extra chocolate chips “for luck,” and I’ve carried that tradition into every batch of Monster Cookie Dessert Dip. It’s more than just a treat—it’s a little bite of happiness that brings people together. Every time I serve it, I watch smiles spread across the room, and that’s the magic I want to share with you.
Health and Nutrition
Why it’s good for your body
Monster Cookie Dessert Dip packs a surprising nutritional punch while satisfying your sweet tooth. First, it delivers a boost of protein from ingredients like Greek yogurt or nut butter, which helps keep you full longer. Additionally, the oats often found in this recipe provide fiber, supporting digestion and steady energy levels.
Moreover, Monster Cookie Dessert Dip includes healthy fats from sources like peanut butter or almond butter. These fats promote heart health and brain function. Meanwhile, natural sweeteners like honey or maple syrup offer a better alternative to refined sugar, reducing blood sugar spikes.
Finally, this dip often incorporates dark chocolate chips, which contain antioxidants. These compounds fight inflammation and support overall wellness. Whether you enjoy it with fruit or whole-grain crackers, Monster Cookie Dessert Dip turns indulgence into a smarter choice.
How it fits in a healthy lifestyle
Monster Cookie Dessert Dip fits seamlessly into balanced eating habits when enjoyed mindfully. For a protein-packed snack, pair it with apple slices or carrot sticks to add vitamins and crunch. If you follow a gluten-free diet, simply use certified gluten-free oats to keep it safe and delicious.
This dip also works well as a post-workout treat, thanks to its mix of protein and carbs. For more ideas on balancing treats with nutrition, check out our guide on healthy dessert swaps. If you’re meal prepping, whip up a batch and store it for quick, satisfying snacks throughout the week. For more tips on smart snacking, explore our meal prep essentials.
By controlling portion sizes and choosing wholesome pairings, you can enjoy Monster Cookie Dessert Dip without derailing your health goals. It’s all about balance and making every bite count.
A creamy, sweet dessert dip packed with oats, chocolate chips, and M&M’s, perfect for dipping cookies or fruit.
Ingredients
Scale
For the Crust:
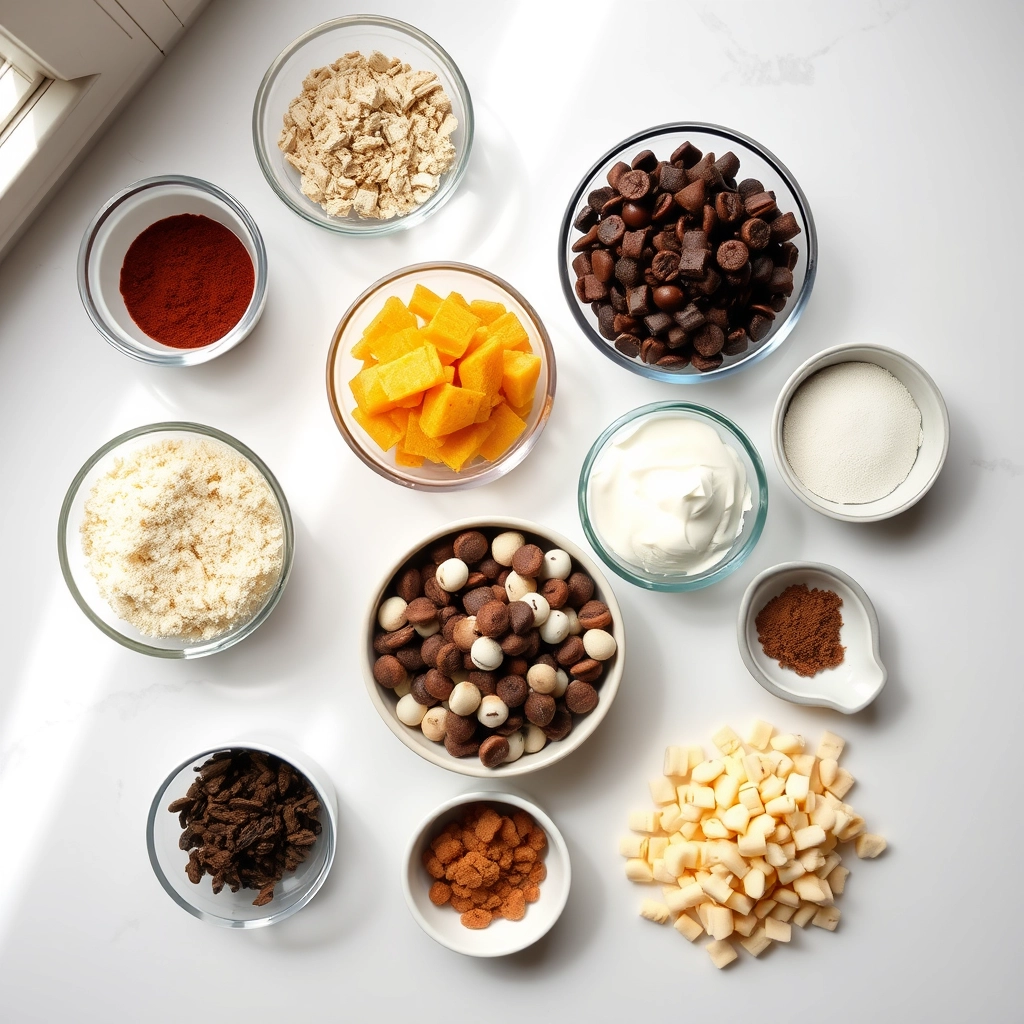
8 oz cream cheese, softened
1/2 cup unsalted butter, softened
1/2 cup creamy peanut butter
1 cup powdered sugar
1 tsp vanilla extract
1/2 cup quick oats
1/2 cup mini chocolate chips
1/2 cup mini M&M’s
Graham crackers or apple slices for serving
Instructions
1. Prepare the Crust:
In a large bowl, beat the cream cheese, butter, and peanut butter until smooth and creamy.
Add the powdered sugar and vanilla extract, mixing until fully combined.
Fold in the quick oats, mini chocolate chips, and mini M&M’s until evenly distributed.
Transfer the dip to a serving bowl and chill for at least 30 minutes before serving.
Serve with graham crackers or apple slices for dipping.
Notes
You can customize the seasonings to taste.
“`html
s-dish">How to Prepare This Dish
Steps and time-saving tips
Start by gathering all your ingredients for the Monster Cookie Dessert Dip so everything is within reach. Cream together softened butter, peanut butter, and cream cheese in a large bowl until smooth. This step ensures a rich, velvety base. Next, gradually mix in powdered sugar and vanilla extract, scraping the sides of the bowl to avoid lumps. For a quicker blend, use an electric mixer on medium speed. Fold in mini chocolate chips and colorful M&M’s by hand to keep their texture intact. Meanwhile, crush some oatmeal cookies into small chunks—this adds a delightful crunch. If you’re short on time, store-bought cookie crumbs work just as well. Transfer the dip to a serving bowl, then drizzle melted chocolate over the top for a fancy finish. Chill the Monster Cookie Dessert Dip for at least 30 minutes before serving, though an hour gives the flavors more time to meld. Serve with graham crackers, pretzels, or apple slices for dipping. To save time later, you can prepare the dip a day ahead and store it covered in the fridge.
Mistakes I’ve made and learned from
When I first made Monster Cookie Dessert Dip, I rushed the butter-softening step and ended up with a lumpy texture. Now, I let the butter sit at room temperature for at least an hour—or use the quick softening method from Brekcakes if I’m in a pinch. Another blunder? Overmixing the M&M’s, which caused the colors to bleed. Gently folding them in at the last minute keeps the dip vibrant. I also learned the hard way that skipping the chill time makes the dip too soft. For a firmer consistency, I stick to the full chilling time, just like I do with my No-Bake Cheesecake Dip. Trust me, patience pays off with this recipe!
Monster Cookie Dessert Dip brings together the playful spirit of classic monster cookies and the easygoing charm of a no-bake treat. Originating in the Midwest, where monster cookies (packed with oats, peanut butter, and M&M’s) reign supreme, this dip transforms those nostalgic flavors into a shareable crowd-pleaser. Families often whip it up for potlucks or game-day gatherings, where its bright colors and creamy texture steal the show.
Interestingly, variations pop up depending on where you go. In the South, some cooks add a splash of bourbon for a grown-up twist, while coastal regions might toss in crushed pretzels for salty contrast. Overseas, bakers in Australia sometimes swap peanut butter for Vegemite (yes, really!) for a uniquely local take. My grandma, however, always insisted on extra mini chocolate chips—because, as she said, “More chocolate means more love.” Whether you stick to tradition or experiment, Monster Cookie Dessert Dip always feels like a celebration.
ays-cooking">How it fits in today’s cooking
Today, Monster Cookie Dessert Dip thrives as a versatile favorite. Busy parents love it for quick after-school snacks, while food bloggers spotlight it as a must-have for holiday dessert spreads. Modern twists, like using protein-packed Greek yogurt or dairy-free alternatives, keep it fresh for health-conscious crowds. Plus, its no-fuss prep aligns perfectly with today’s demand for easy, fun recipes.
Social media fuels its popularity too. Instagrammers layer it into parfaits, while TikTokers dunk everything from apple slices to homemade cookies. Whether you serve it at a summer picnic or a cozy winter gathering, Monster Cookie Dessert Dip bridges generations and tastes—proof that some flavors never go out of style.
Taste and Texture
What makes it delicious
Monster Cookie Dessert Dip delivers a riot of flavors and textures in every bite. First, creamy peanut butter and rich cream cheese create a velvety base that melts on your tongue. Then, bursts of chewy oats and crunchy M&M’s add playful contrast, while mini chocolate chips weave in pockets of melty sweetness. The dip smells like a freshly baked cookie—warm, buttery, and faintly caramelized—thanks to brown sugar and vanilla. Whether you scoop it with graham crackers or apple slices, Monster Cookie Dessert Dip feels indulgent yet balanced, like eating cookie dough without the guilt.
r">Boosting the flavor
For an extra flavor boost, try swapping peanut butter with almond butter or cookie butter to add nutty depth. A sprinkle of flaky sea salt on top enhances the sweetness, while a drizzle of homemade caramel sauce adds gooey richness. If you love texture, fold in crushed pretzels or toffee bits for a salty-crunchy twist. For a cozy touch, pair the dip with cinnamon sugar tortilla chips—their warmth complements the dip’s cookie-like vibe perfectly. Experiment with mix-ins and toppings to make this dessert uniquely yours!
Tips for Success
Best practices for results
Always use room-temperature cream cheese for smooth blending in your Monster Cookie Dessert Dip. Otherwise, you might end up with lumps. Additionally, chill the dip for at least 30 minutes before serving to let the flavors meld perfectly. For the best texture, fold in the mini chocolate chips last so they stay intact. Finally, serve with sturdy dippers like pretzel rods or graham crackers to prevent breakage.
>Mistakes to avoid
Avoid overmixing the dip, as this can make it too dense. Instead, gently stir just until combined. Many people also forget to scrape the bowl while mixing, which leaves uneven pockets of ingredients. For more mixing tips, check out our guide on how to properly fold ingredients. Another common mistake is skipping the chilling step, which helps the Monster Cookie Dessert Dip hold its shape. If you’re short on time, learn how to speed up chilling without sacrificing texture.
Serving and Pairing Suggestions
How to serve this dish
Turn your Monster Cookie Dessert Dip into a showstopper by serving it in a colorful bowl or a hollowed-out chocolate chip cookie crust. For a festive touch, drizzle melted chocolate on top and sprinkle crushed M&M’s or mini chocolate chips. Meanwhile, arrange graham crackers, pretzel sticks, and fresh fruit like apple slices or strawberries around the dip for a fun, shareable spread. Perfect for game day, birthday parties, or holiday gatherings, this creamy dip always steals the spotlight.
What goes well with it
Pair your Monster Cookie Dessert Dip with a cold glass of milk or a creamy vanilla milkshake for a classic combo that highlights its rich flavors. Alternatively, try it alongside our Easy Cinnamon Roll Bites for a sweet-and-spicy contrast. If you’re hosting a dessert bar, add our Peanut Butter Pretzel Bars to balance the dip’s sweetness with a salty crunch. Each pairing elevates the experience, making every bite unforgettable.
What ingredients are in Monster Cookie Dessert Dip?
Monster Cookie Dessert Dip typically includes cream cheese, peanut butter, powdered sugar, vanilla extract, and mini M&M’s for that classic monster cookie flavor. Some recipes also add oats or crushed cookies for extra texture. This easy no-bake dip is perfect for parties or snacking.
How do you serve Monster Cookie Dessert Dip?
Monster Cookie Dessert Dip pairs perfectly with graham crackers, pretzels, or apple slices for dipping. You can also spread it on cookies or use it as a sweet filling for crepes. Serve it chilled in a bowl surrounded by dippers for a fun dessert spread.
rank-math-faq-item">
Can you make Monster Cookie Dessert Dip ahead of time?
Yes! Monster Cookie Dessert Dip actually tastes better when made 1-2 days ahead, as the flavors have time to meld. Just store it in an airtight container in the refrigerator and give it a quick stir before serving. The dip will keep for up to 5 days when properly refrigerated.
Is there a vegan version of Monster Cookie Dessert Dip?
Absolutely! You can make vegan Monster Cookie Dessert Dip by using dairy-free cream cheese, plant-based peanut butter, and vegan M&M’s. Substitute powdered sugar with coconut sugar or maple syrup for sweetness. The result is just as delicious as the original version.
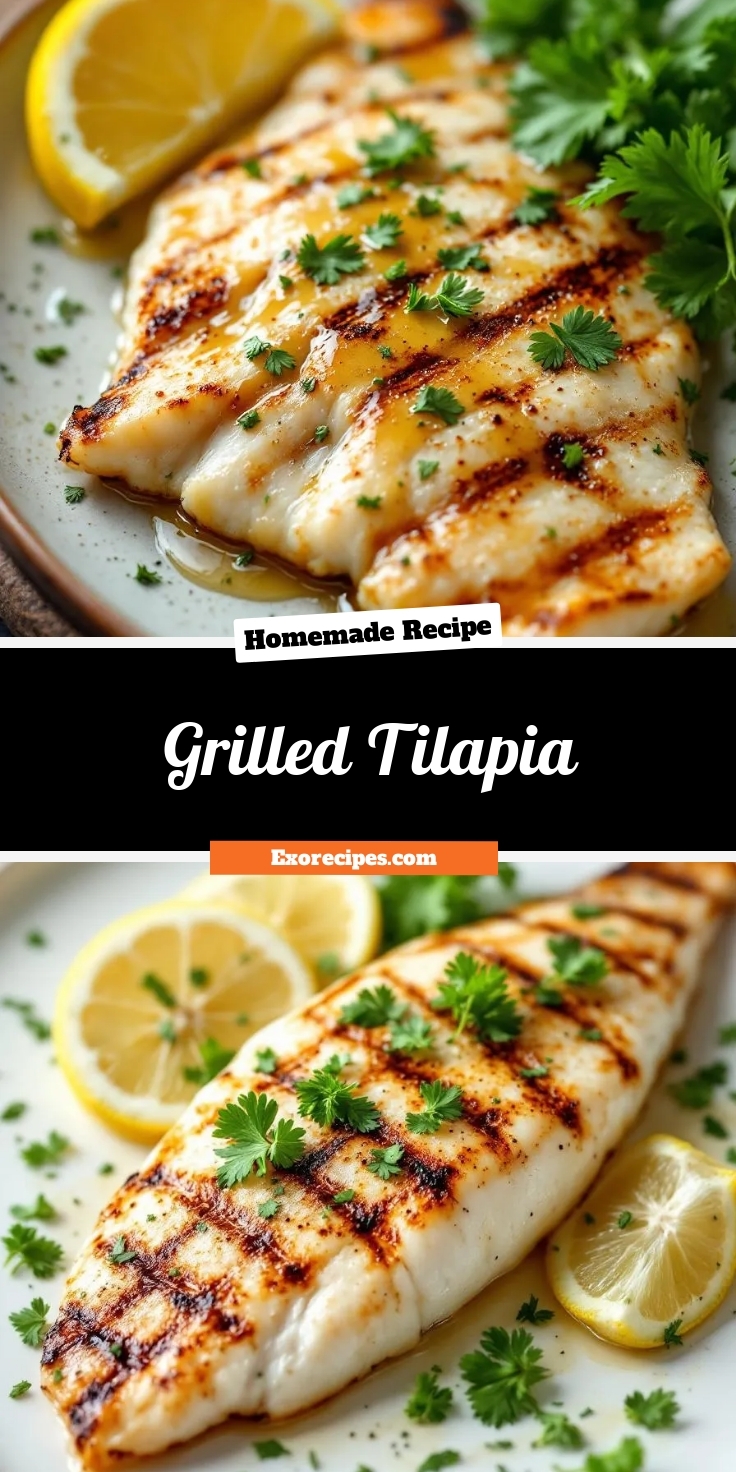
Best Grilled Tilapia – Easy and Flavorful Recipe
Introduction
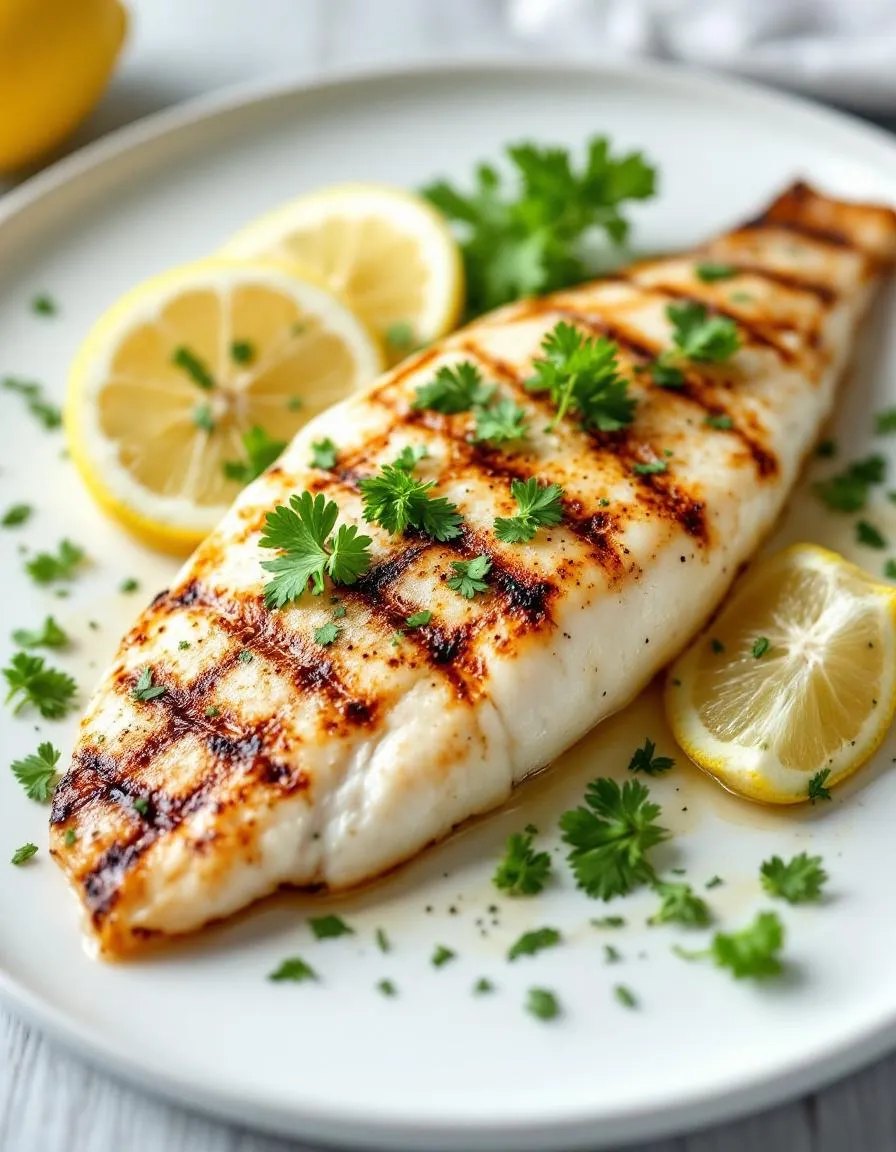
There’s something undeniably special about gathering around the table for a meal that feels both wholesome and effortless. If you’re craving a dish that delivers fresh flavors without hours of prep, Grilled Tilapia might just become your new go-to. Light, flaky, and packed with protein, this recipe brings the taste of summer to your plate any time of year. Plus, it pairs beautifully with so many sides—whether you’re serving it with a crisp salad or my favorite Garlic Herb Roasted Potatoes.
Grilled Tilapia is a versatile and healthy option that suits busy weeknights or relaxed weekend dinners. Unlike heavier proteins, tilapia cooks quickly and absorbs marinades beautifully, making it ideal for experimenting with flavors. Whether you’re a seasoned griller or just starting out, this dish rewards you with tender, juicy results every time. It’s also a fantastic way to introduce more seafood into your diet, especially if you’re looking for meals that align with a balanced eating plan. Best of all, the simplicity of Grilled Tilapia lets the natural sweetness of the fish shine, proving that great food doesn’t need to be complicated.
Why I Love This Recipe
Grilled Tilapia holds a special place in my heart because it reminds me of family beach trips where we’d cook fresh catches right on the shore. The smoky aroma of the grill, the sound of laughter, and the first bite of perfectly seasoned fish—it’s a memory I recreate every time I make this recipe. Even now, cooking Grilled Tilapia feels like bringing a little piece of those sunny days into my kitchen, and I hope it does the same for you.
Health and Nutrition
Why it’s good for your body
Grilled Tilapia packs a powerful nutritional punch while keeping calories low. First, it’s an excellent source of lean protein, which helps build muscle and keeps you full longer. Plus, this mild-flavored fish delivers essential nutrients like vitamin B12, selenium, and phosphorus. These support energy levels, immune function, and strong bones.
Another benefit of Grilled Tilapia is its heart-healthy omega-3 fatty acids. While not as rich as salmon, it still provides a modest amount to reduce inflammation and support brain health. Additionally, tilapia cooks quickly on the grill, preserving its nutrients without adding excess fat. This makes it a smart choice for anyone watching their weight or aiming for cleaner eating.
Finally, Grilled Tilapia fits seamlessly into balanced meals. Pair it with fiber-rich veggies or whole grains for a well-rounded plate. Because it’s so versatile, you can enjoy it with bold spices or simple lemon for extra flavor without empty calories. Whether you’re fueling workouts or just seeking lighter dinners, this fish delivers both taste and nutrition.
How it fits in a healthy lifestyle
Grilled Tilapia shines in almost any eating plan. If you follow a gluten-free diet, it’s a safe and satisfying option that pairs perfectly with quinoa or roasted vegetables. For those focused on heart health, its low saturated fat content aligns with American Heart Association guidelines. Just skip heavy sauces and opt for herbs or citrus instead.
Protein seekers will love how Grilled Tilapia supports muscle recovery without excessive calories. It’s also ideal for meal prep since it reheats well and stays tender. Need quick weeknight ideas? Try our 15-minute dinners for stress-free cooking. And if you’re exploring more seafood variety, check out our guide to budget-friendly fish for wallet-conscious nutrition. With so many benefits, Grilled Tilapia makes healthy eating effortless and delicious.
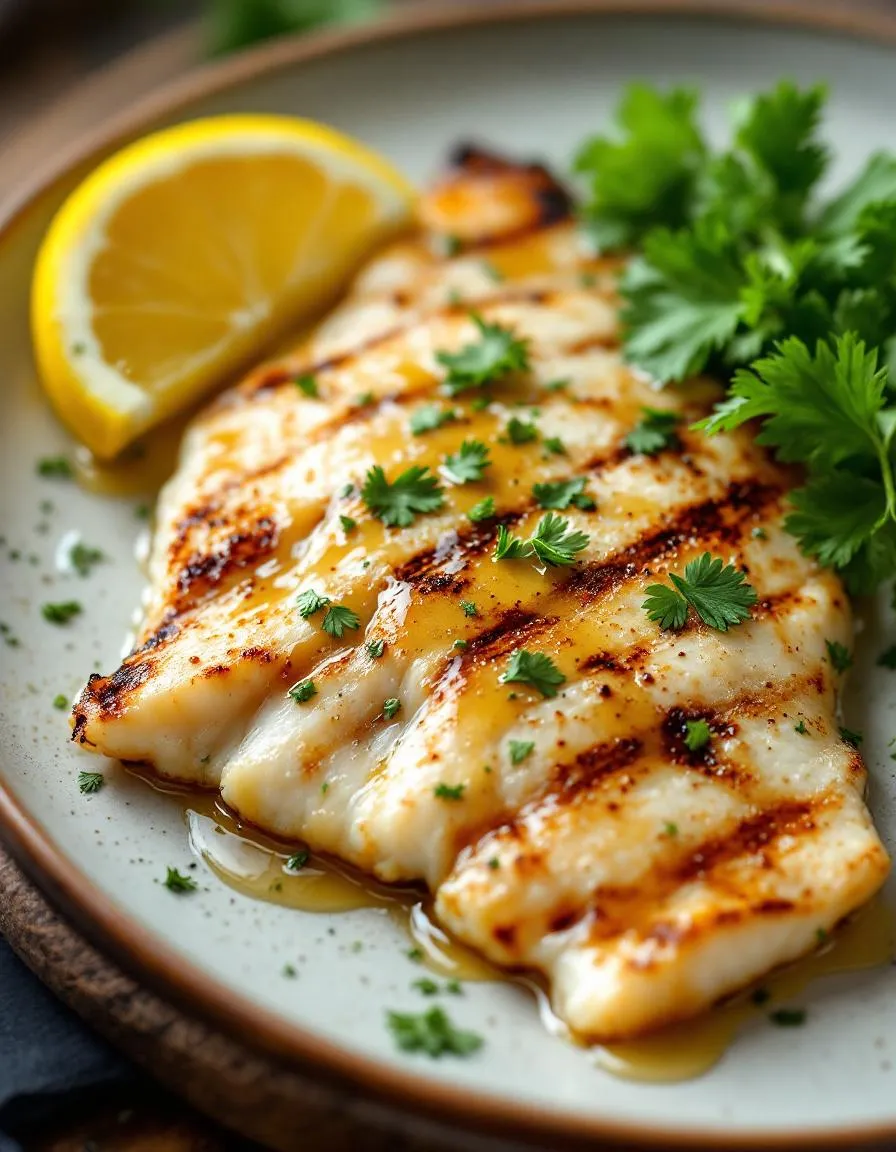
A simple and flavorful grilled tilapia recipe with a hint of lemon and herbs.
Ingredients
Scale
For the Crust:
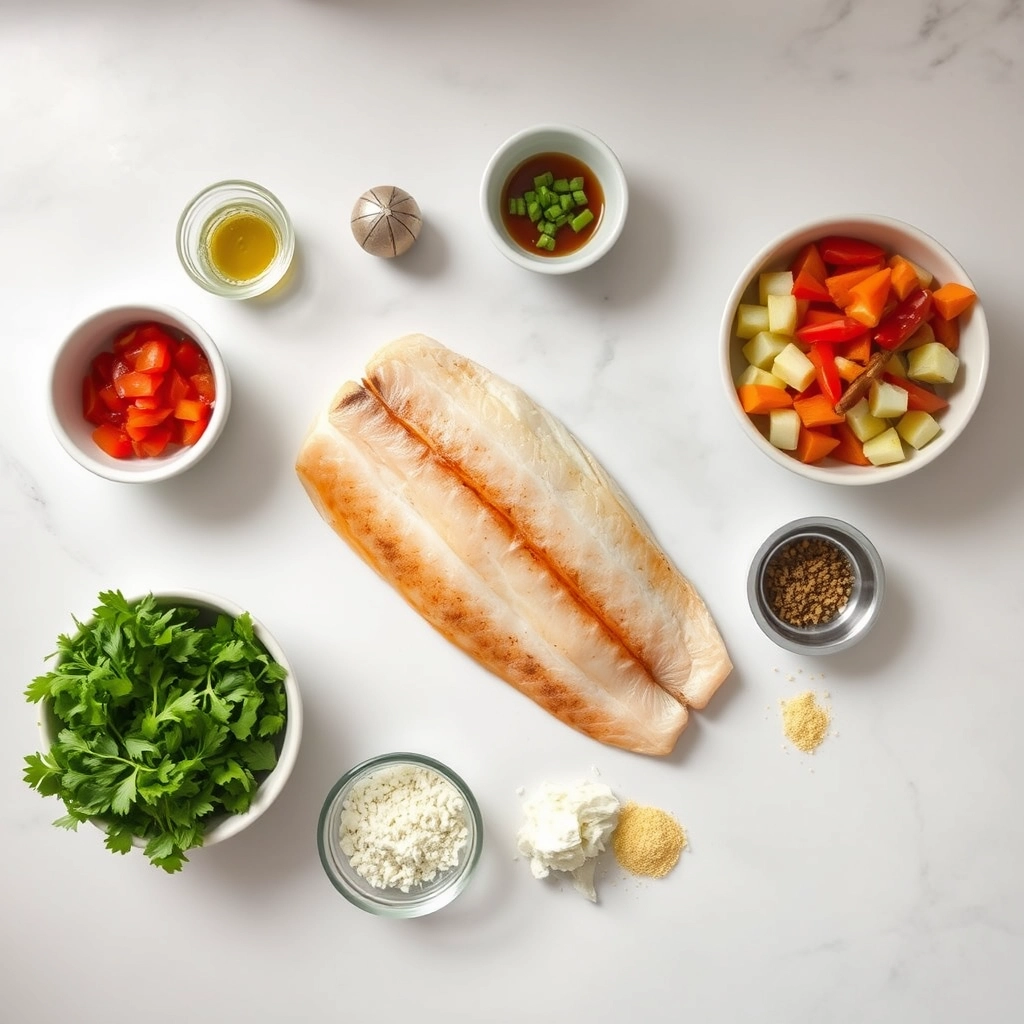
4 tilapia fillets
2 tablespoons olive oil
1 lemon, juiced and zested
2 cloves garlic, minced
1 teaspoon dried oregano
1 teaspoon paprika
Salt and pepper to taste
Fresh parsley for garnish
Instructions
1. Prepare the Crust:
Preheat the grill to medium-high heat.
In a small bowl, mix olive oil, lemon juice, lemon zest, garlic, oregano, paprika, salt, and pepper.
Brush the tilapia fillets with the marinade on both sides.
Grill the fillets for 3-4 minutes per side, or until the fish flakes easily with a fork.
Garnish with fresh parsley and serve immediately.
Notes
You can customize the seasonings to taste.
s-dish">How to Prepare This Dish
Steps and time-saving tips
Start by patting the Grilled Tilapia fillets dry with paper towels to ensure a crisp sear. Next, whisk together olive oil, lemon juice, minced garlic, and a pinch of salt and pepper in a small bowl. Drizzle this marinade over the fish, coating both sides evenly. Let it sit for 10 minutes while you preheat the grill to medium-high heat. Meanwhile, lightly oil the grates to prevent sticking. Once the grill is hot, place the fillets diagonally for those perfect grill marks. Cook for 3-4 minutes per side, resisting the urge to flip too early—this keeps the fish intact. If you’re short on time, a grill pan works just as well indoors. Serve immediately with a squeeze of fresh lemon and a sprinkle of chopped parsley. For extra flavor, try adding a dash of smoked paprika to the marinade. Keep an eye on the clock, though; overcooking can dry out Grilled Tilapia fast.
Mistakes I’ve made and learned from
I used to skip drying the fillets, which led to steaming instead of searing—now I never forget that step. Another blunder? Crowding the grill, which caused uneven cooking. Spacing out the Grilled Tilapia makes all the difference. If your fish sticks, check out my guide on grill maintenance to keep grates in top shape. And if you’re unsure about doneness, my fish cooking times cheat sheet saves the day. Trust me, a meat thermometer is worth the investment for perfectly flaky results every time.
n-and-variations">Cultural Connection and Variations
Where this recipe comes from
Grilled Tilapia carries a rich cultural legacy, especially in coastal regions where fresh fish dominates daily meals. In West Africa, cooks often marinate the fish in bold spices like cayenne and ginger before grilling it over open flames. Meanwhile, in Brazil, Grilled Tilapia might show up at weekend barbecues, slathered with lime and garlic. Families there serve it with farofa, adding a crunchy texture that contrasts the tender fish.
My own first taste of Grilled Tilapia came during a summer trip to Mexico, where street vendors topped it with vibrant mango salsa. The sweet and smoky combo hooked me instantly. Back home, my grandma tweaked the recipe by using a simple lemon-butter baste, proving how versatile this dish can be. Whether you prefer it spicy, citrusy, or herby, Grilled Tilapia adapts to local flavors without losing its essence.
How it fits in today’s cooking
Today, Grilled Tilapia thrives as a go-to for healthy weeknight dinners and festive gatherings alike. Busy home cooks love its quick cook time, often pairing it with easy vegetable sides for a balanced meal. During summer, it stars at backyard cookouts alongside grilled corn or zucchini, proving that simple ingredients shine brightest.
Modern twists, like air
-frying or cedar-plank grilling, keep the tradition fresh. Some even use it in tacos or salads, borrowing from global flavors. For those craving comfort food, try serving Grilled Tilapia with creamy mashed potatoes—a combo that feels both nostalgic and new. However you prepare it, this dish bridges generations and cuisines effortlessly.
Taste and Texture
What makes it delicious
Grilled Tilapia delights with its mild, slightly sweet flavor and tender, flaky texture. The high heat of the grill caramelizes the surface, creating a subtle smokiness that pairs perfectly with the fish’s natural buttery notes. Fresh herbs like cilantro or parsley add a bright, fragrant finish, while a squeeze of lemon enhances its delicate taste. Each bite melts in your mouth, offering a satisfying contrast between the crisp outer edges and the juicy, moist interior. Grilled Tilapia shines when seasoned simply, letting its clean, fresh flavor take center stage.
Boosting the flavor
Elevate your Grilled Tilapia by brushing it with garlic-infused olive oil before grilling for a rich, aromatic depth. Alternatively, try a zesty mango salsa for a sweet and tangy twist that complements the fish’s mildness. For a spicy kick, sprinkle smoked paprika or cayenne pepper. Pair it with a light citrus avocado salad to balance the smoky flavors, or drizzle with a creamy herb yogurt sauce for extra richness. Experiment with different marinades or rubs to keep every bite exciting.
First, pat the Grilled Tilapia fillets dry before seasoning to ensure a crisp exterior. Next, preheat your grill to medium-high heat for even cooking without sticking. Additionally, brush the grill grates lightly with oil to prevent the delicate fish from tearing. For extra flavor, marinate the Grilled Tilapia for at least 15 minutes before cooking. Finally, let the fish rest for a few minutes after grilling to lock in moisture.
Mistakes to avoid
Avoid overcooking the Grilled Tilapia by checking for doneness early—flaky flesh means it’s ready. Similarly, don’t skip the resting step, or the fish may lose its juiciness. If your grill isn’t hot enough, the fish might stick, so always preheat properly. For more grilling tips, check out our guide on mastering grilling techniques. Also, resist the urge to flip the fish too often—one gentle turn is enough, as explained in our perfect fish flips article.
g-suggestions">Serving and Pairing Suggestions
How to serve this dish
Grilled Tilapia shines when you plate it with vibrant colors and fresh garnishes. For a casual dinner, arrange the fish on a bed of lemon slices and parsley sprigs to highlight its light, flaky texture. Alternatively, serve it family-style on a large platter with grilled vegetables for a summer barbecue. If you’re hosting a special occasion, elevate the presentation by drizzling a citrus glaze over the Grilled Tilapia and pairing it with edible flowers. Either way, this versatile dish adapts beautifully to any setting.
What goes well with it
Pair Grilled Tilapia with a crisp white wine like Sauvignon Blanc to enhance its delicate flavors. For sides, try our Garlic Herb Roasted Potatoes, which add a savory contrast to the fish. If you prefer something lighter, a tangy mango salsa or our Creamy Cucumber Salad balances the dish perfectly. Finally, a squeeze of fresh lime or a drizzle of garlic butter ties everything together for a memorable meal.
math-faq-block">
How long should I grill tilapia?
Grilled tilapia cooks quickly—about 3–4 minutes per side over medium-high heat. The fish is done when it flakes easily with a fork and reaches an internal temperature of 145°F. Overcooking can dry out grilled tilapia, so keep a close eye on it.
What’s the best marinade for grilled tilapia?
A simple marinade of olive oil, lemon juice, garlic, and herbs like cilantro or thyme works perfectly for grilled tilapia. Let the fish marinate for 15–30 minutes to enhance flavor without breaking down the delicate texture. Avoid acidic marinades longer than an hour, as they can make grilled tilapia mushy.
Should you grill tilapia with the skin on?
Grilled tilapia is typically cooked skinless since the skin is thin and doesn’t crisp well. Removing it prevents sticking and ensures even cooking. If your tilapia has skin, place it skin-side down first and use a well-oiled grill grate.
rank-math-faq-item">
Is grilled tilapia healthy?
Yes, grilled tilapia is a lean, high-protein fish low in calories and rich in nutrients like selenium and vitamin B12. Grilling preserves its health benefits without adding excess fat. Pair grilled tilapia with vegetables for a balanced, nutritious meal.
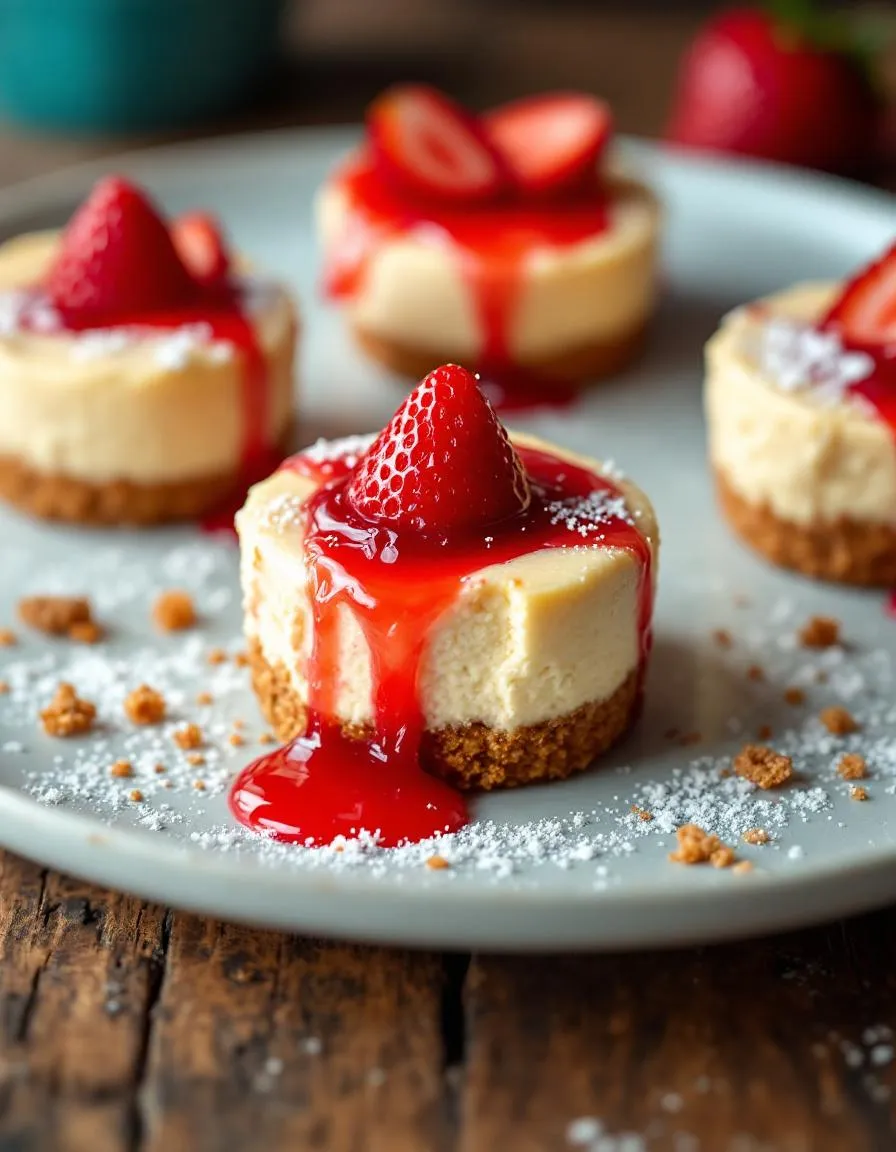
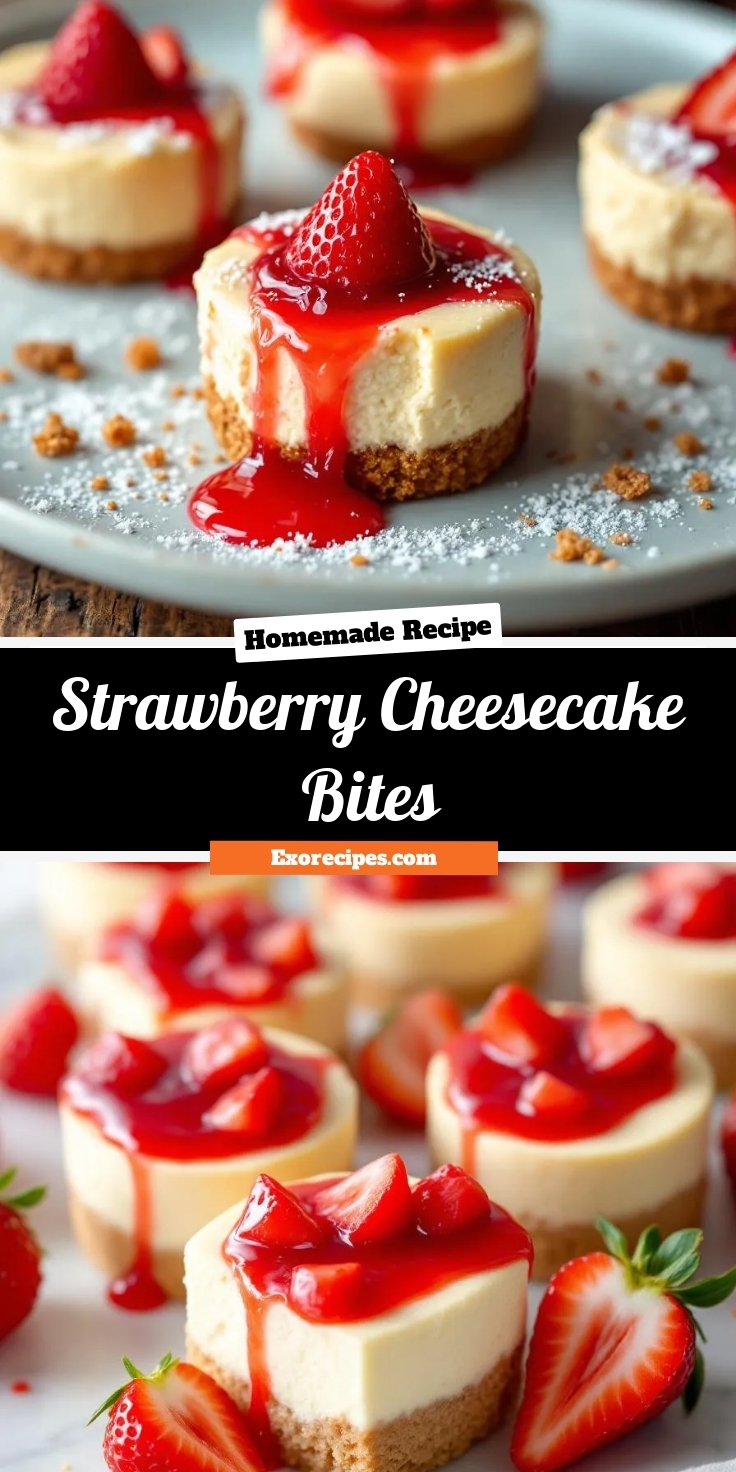
Easy Strawberry Cheesecake Bites – Perfect Party Treat
Introduction
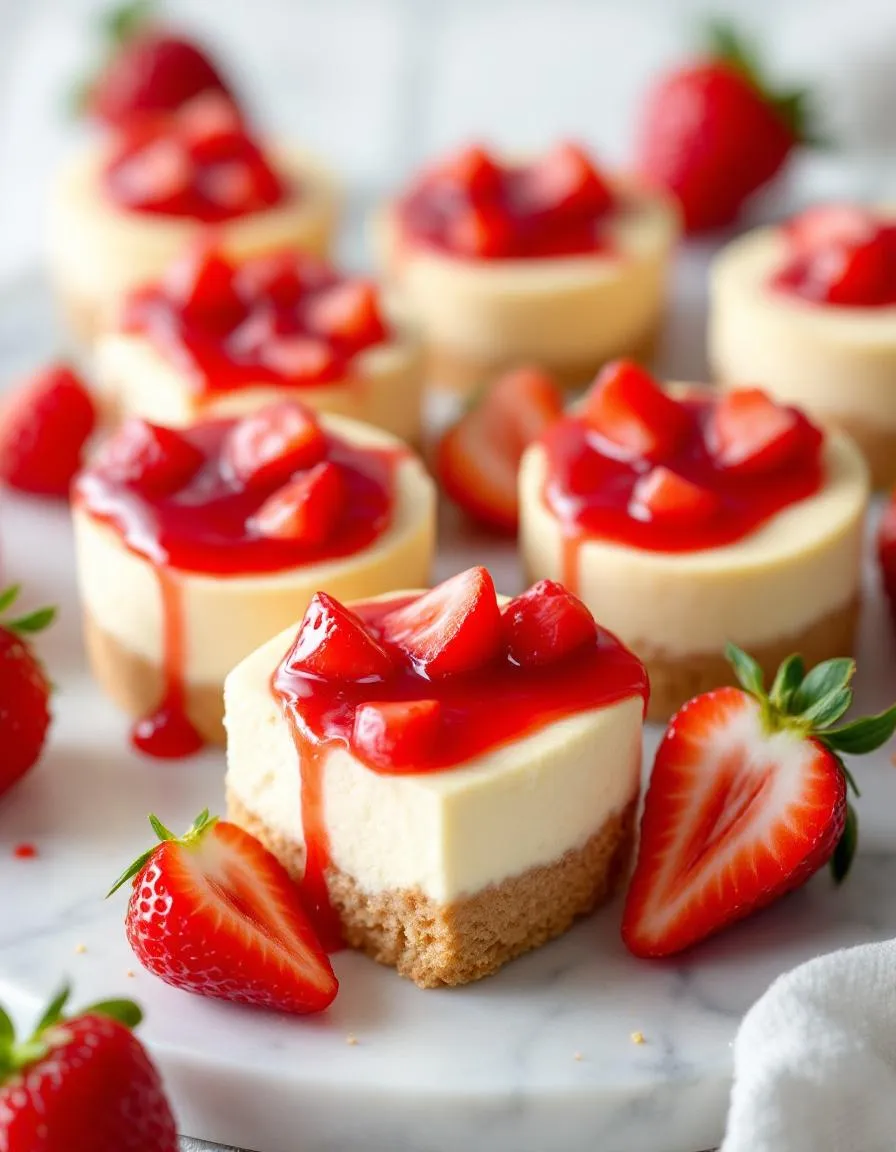
If you’ve ever craved a dessert that’s both indulgent and effortless, you’re in the right place. Strawberry Cheesecake Bites deliver all the creamy, fruity goodness of a classic cheesecake without the fuss. Whether you’re hosting a party or simply treating yourself, these little delights promise to bring joy with every bite. Plus, they’re perfect for sharing—though you might not want to!
Strawberry Cheesecake Bites combine a buttery graham cracker crust, velvety cream cheese filling, and fresh strawberry topping for a bite-sized dessert that’s impossible to resist. Unlike traditional cheesecakes, these mini versions require no baking, making them ideal for busy bakers or last-minute gatherings. They also fit beautifully into my philosophy of creating recipes that balance simplicity and decadence. If you love no-bake treats like my Easy No-Bake Desserts, you’ll adore these too. And for those who enjoy fruity twists, check out my Berry-Filled Recipes for more inspiration.
Why I Love This Recipe
Strawberry Cheesecake Bites hold a special place in my heart because they remind me of summer picnics with my family. My grandmother used to make a similar version, and the first time I recreated them, the taste transported me right back to those sunny afternoons. Now, I love how they bring people together—whether it’s my kids sneaking extras or friends asking for the recipe. They’re proof that the simplest desserts often create the sweetest memories.
Health and Nutrition
Why it’s good for your body
Strawberry Cheesecake Bites pack a surprising nutritional punch while satisfying your sweet tooth. First, fresh strawberries deliver a hefty dose of vitamin C, which supports immunity and skin health. Additionally, the natural antioxidants in strawberries help combat inflammation, making these bites a smarter indulgence. Meanwhile, the cream cheese provides a good source of calcium and protein, keeping bones strong and muscles fueled.
Because Strawberry Cheesecake Bites use wholesome ingredients, they offer a balanced treat without excessive processed sugars. For instance, opting for a graham cracker or almond flour crust adds fiber, which aids digestion. Furthermore, the portion-controlled size helps manage calorie intake, so you can enjoy dessert without overdoing it. With each bite, you get a blend of creamy texture, fruity freshness, and just enough sweetness to curb cravings.
Finally, Strawberry Cheesecake Bites make it easy to sneak in nutrients without sacrificing flavor. Whether you need a post-workout snack or a light dessert, these bites deliver satisfaction and nourishment. By combining protein, vitamins, and fiber, they prove that treats can be both delicious and nutritious.
How it fits in a healthy lifestyle
Strawberry Cheesecake Bites fit seamlessly into a balanced diet, especially if you prioritize moderation. For gluten-free eaters, swapping traditional crusts with almond flour or oats keeps these bites celiac-friendly. If you follow a heart-healthy plan, the strawberries’ potassium content helps regulate blood pressure, while the minimal added sugars align with better cardiovascular choices.
These bites also work well for meal preppers who want portioned desserts ready to grab. Pair them with a protein-packed snack like Greek yogurt parfait for a satisfying combo. For those tracking macros, the protein in cream cheese and the fiber from strawberries create a filling treat that won’t derail your goals. Plus, their small size makes them perfect for mindful eating—a key habit for long-term wellness.
Looking for more ways to enjoy guilt-free sweets? Explore our healthy dessert swaps for creative ideas. Whether you’re gluten-free, calorie-conscious, or just craving something sweet, Strawberry Cheesecake Bites prove that balance is always possible.
Delicious bite-sized strawberry cheesecake treats perfect for any occasion.
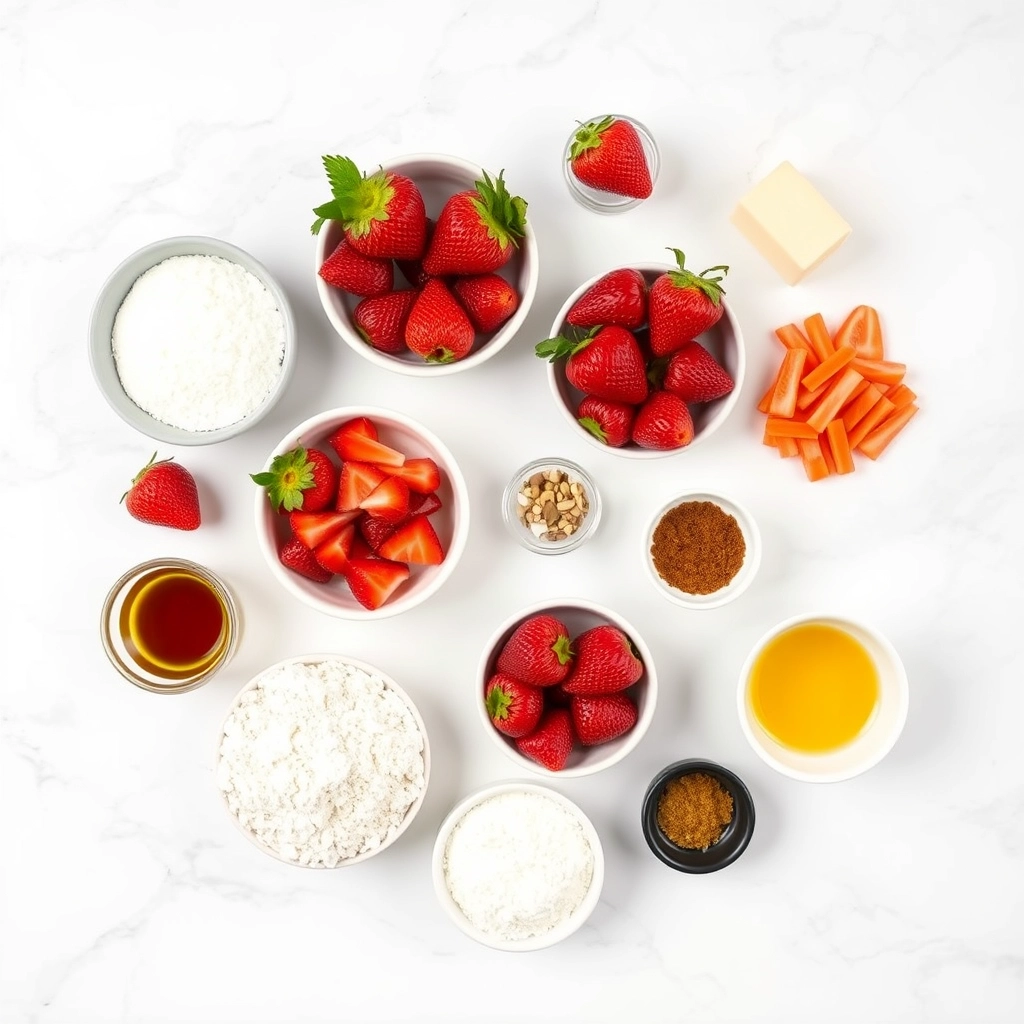
Ingredients
Scale
For the Crust:
1 1/2 cups graham cracker crumbs
1/4 cup melted butter
8 oz cream cheese, softened
1/4 cup powdered sugar
1 tsp vanilla extract
1/2 cup heavy whipping cream
1 cup fresh strawberries, diced
2 tbsp strawberry jam
Instructions
1. Prepare the Crust:
Mix graham cracker crumbs with melted butter and press into mini muffin tins to form crusts.
Bake crusts at 350°F for 5 minutes, then let cool.
Beat cream cheese, powdered sugar, and vanilla until smooth.
Whip heavy cream until stiff peaks form, then fold into cream cheese mixture.
Spoon cheesecake filling into cooled crusts.
Top with diced strawberries and a drizzle of strawberry jam.
Chill for at least 2 hours before serving.
Notes
You can customize the seasonings to taste.
s-dish">How to Prepare This Dish
Steps and time-saving tips
Start by crushing graham crackers into fine crumbs for the base of your Strawberry Cheesecake Bites. Mix them with melted butter and a pinch of sugar, then press the mixture firmly into mini muffin tins. Chill the crusts for 10 minutes while you prepare the filling. Meanwhile, beat cream cheese until smooth, then gradually add sugar and vanilla. Whisk in an egg just until combined—overmixing can make the filling dense. Spoon the mixture over the chilled crusts, filling each cup halfway. Bake at 325°F for 12-15 minutes until the centers barely jiggle. Let them cool completely before topping with fresh strawberry slices or a quick homemade glaze. For a time-saving hack, use store-bought strawberry jam thinned with a little water instead of making glaze from scratch. Refrigerate the bites for at least two hours to set, though overnight chilling gives the best texture. Serve cold, and watch them disappear!
Mistakes I’ve made and learned from
My first batch of Strawberry Cheesecake Bites turned out rubbery because I overbeat the filling—lesson learned! Now I mix just until the ingredients blend, which keeps them creamy. Another blunder? Skipping the chill time for the crust. It caused crumbs to mix into the filling, so I always let them firm up now. If your cheesecake tops crack, don’t panic. A strawberry topping covers it perfectly, like I did with these No-Bake Cheesecake Jars. For more troubleshooting, check out my tips on achieving the perfect cheesecake texture. Trust me, every mistake taught me something delicious!
n-and-variations">Cultural Connection and Variations
Where this recipe comes from
Strawberry Cheesecake Bites trace their roots to the classic American cheesecake, a dessert with deep ties to New York’s diner culture. However, their bite-sized form makes them a modern twist on tradition. Families often serve these mini treats at summer gatherings, where fresh strawberries shine. Meanwhile, in Japan, you might find a lighter version with matcha-infused crusts, while Italian cooks sometimes swap cream cheese for ricotta.
In my own kitchen, Strawberry Cheesecake Bites became a staple for baby showers and potlucks. My aunt always added a drizzle of balsamic glaze to balance the sweetness. Across the South, some bakers fold in pecans for crunch, while coastal regions might top them with a sprinkle of sea salt. No matter the variation, these little delights carry the warmth of shared moments.
How it fits in today’s cooking
Today, Strawberry Cheesecake Bites fit perfectly into our fast-paced lives. They’re ideal for meal prep, parties, or even a quick dessert after a weeknight dinner. Social media has also given them a boost, with home cooks experimenting with vegan cream cheese or gluten-free graham crackers. Their versatility keeps them trending.
Seasonally, they’
;re a hit at spring brunches and Fourth of July spreads. Many bakers now use them as a lighter alternative to classic desserts, proving that indulgence doesn’t need to be oversized. Whether you stick to tradition or get creative, these bites remind us that good food brings people together.
Taste and Texture
What makes it delicious
Strawberry Cheesecake Bites deliver a burst of sweet, tangy flavor in every bite. The creamy cheesecake filling melts on your tongue, while the buttery graham cracker crust adds a satisfying crunch. Fresh strawberries lend a juicy, slightly tart contrast, and their bright aroma makes each piece irresistible. Meanwhile, a hint of vanilla smooths out the flavors, creating a perfectly balanced treat. Whether chilled or slightly softened, Strawberry Cheesecake Bites offer a luscious texture that keeps you reaching for more.
Boosting the flavor
Elevate your Strawberry Cheesecake Bites with a drizzle of homemade chocolate ganache for a rich, decadent twist. Alternatively, sprinkle crushed freeze-dried strawberries on top to intensify the fruity punch. For a zesty kick, mix a pinch of lemon zest into the cheesecake filling—it brightens the entire dish. If you love layered flavors, pair these bites with a scoop of vanilla bean ice cream for a cool, creamy contrast. Small tweaks can transform an already delicious dessert into something extraordinary.
Always chill your cream cheese before mixing to prevent a runny batter. Meanwhile, use room-temperature eggs for smoother incorporation into the filling. For the best texture, press the crust firmly into each mold to avoid crumbly bottoms. Additionally, let your Strawberry Cheesecake Bites set in the fridge for at least 4 hours before serving. Finally, garnish with fresh strawberries right before serving to keep them vibrant and fresh.
Mistakes to avoid
Overmixing the batter can introduce too much air, leading to cracks during baking. Instead, gently fold ingredients until just combined. Another common error is skipping the water bath, which helps bake the Strawberry Cheesecake Bites evenly. For more baking tips, check out our guide on perfect cheesecake baking. Also, avoid using frozen strawberries for the topping, as they release excess moisture. For fresh strawberry handling tips, visit our strawberry prep guide.
g-suggestions">Serving and Pairing Suggestions
How to serve this dish
Strawberry Cheesecake Bites shine when you arrange them on a tiered dessert stand for an elegant touch. Alternatively, place them in mini cupcake liners for a charming individual serving. For a festive twist, drizzle melted chocolate over the top or add fresh mint leaves as a garnish. These bite-sized treats work perfectly at brunches, baby showers, or holiday gatherings. Meanwhile, if you want to impress guests, serve them alongside a scoop of vanilla ice cream for extra indulgence.
What goes well with it
Pair Strawberry Cheesecake Bites with a glass of sparkling rosé to highlight their fruity sweetness. If you prefer non-alcoholic options, try a chilled lavender lemonade for a refreshing contrast. For a richer experience, serve them with our homemade whipped cream or a side of chocolate-dipped strawberries. Each pairing enhances the creamy texture and bright berry flavor of these delightful bites.
math-faq-block">
How do you make Strawberry Cheesecake Bites without a crust?
You can make crustless Strawberry Cheesecake Bites by blending cream cheese, sugar, and vanilla, then folding in whipped cream for stability. Pour the mixture into mini molds or cupcake liners, top with fresh strawberry puree, and chill until firm. These no-crust bites are lighter but still deliver the classic Strawberry Cheesecake flavor.
Can you freeze Strawberry Cheesecake Bites for later?
Yes, Strawberry Cheesecake Bites freeze well for up to 2 months. Place them in a single layer on a baking sheet to freeze solid, then transfer to an airtight container with parchment between layers. Thaw in the fridge for 2–3 hours before serving to maintain the perfect texture.
What’s the best way to decorate Strawberry Cheesecake Bites?
For elegant Strawberry Cheesecake Bites, drizzle melted white chocolate or add a fresh strawberry slice on top. You can also dust them with powdered sugar or garnish with mint leaves for contrast. Keep decorations simple to let the creamy cheesecake and strawberry flavors shine.
rank-math-faq-item">
Are Strawberry Cheesecake Bites gluten-free?
Strawberry Cheesecake Bites can easily be made gluten-free by using almond flour or gluten-free graham crackers for the crust. Ensure all other ingredients, like cream cheese and strawberries, are naturally gluten-free. Always check labels if you’re serving them to someone with celiac disease.
Best State Fair Lemonade – Refreshing Homemade Recipe
Introduction
There’s something undeniably nostalgic about a frosty glass of State Fair Lemonade on a hot summer day. Whether you’re reminiscing about childhood trips to the fair or simply craving a refreshing sip of sunshine, this recipe delivers that perfect balance of tart and sweet. Moreover, it’s incredibly easy to whip up, making it a staple for backyard barbecues, picnics, or even just a quiet afternoon on the porch. Trust me, once you taste this vibrant drink, you’ll understand why it’s a crowd-pleaser year after year.
State Fair Lemonade isn’t just another lemonade recipe—it’s a celebration of simplicity and joy. Unlike store-bought versions packed with artificial flavors, this homemade delight uses fresh lemons, pure cane sugar, and a hint of secret inspiration to recreate that iconic fairground taste. For anyone who loves summer desserts or refreshing drinks, this recipe fits right into your repertoire. It’s also a fantastic pairing with picnic-friendly dishes, adding a bright, tangy contrast to savory bites. At brekcakes.com, we believe food should be both delicious and meaningful, and State Fair Lemonade perfectly captures that spirit with every sip.
Why I Love This Recipe
This recipe holds a special place in my heart because it reminds me of sticky-fingered summers spent with my grandparents at the local fair. They’d always buy me a giant cup of lemonade, and I’d sip it slowly, savoring the way the ice clinked against the cup. Now, whenever I make State Fair Lemonade, those memories come rushing back. It’s more than a drink—it’s a little taste of happiness, bottled up in a glass.
Health and Nutrition
Why it’s good for your body
State Fair Lemonade packs a refreshing punch while offering surprising health perks. First, it delivers a burst of vitamin C, which supports your immune system and helps your body absorb iron. Plus, the natural citrus flavor comes from real lemons, so you get antioxidants that fight free radicals. Meanwhile, the hydration boost keeps you energized, especially on hot days.
Another benefit of State Fair Lemonade is its ability to aid digestion. The acidity in lemons stimulates stomach enzymes, helping your body break down food more efficiently. Additionally, the drink’s light sweetness satisfies cravings without overwhelming your system with sugar. If you opt for a homemade version, you can control the sweetness even further.
Finally, State Fair Lemonade makes staying hydrated enjoyable. Unlike plain water, its tangy flavor encourages you to drink more, which is key for maintaining healthy skin and organ function. Whether you sip it at a summer picnic or after a workout, this classic drink keeps you refreshed and nourished.
How it fits in a healthy lifestyle
State Fair Lemonade fits seamlessly into a balanced diet. For those watching sugar intake, you can easily tweak the recipe with natural sweeteners like honey or stevia. It’s also naturally gluten-free and low in calories, making it a smart choice for anyone with dietary restrictions.
Pairing State Fair Lemonade with wholesome meals enhances its benefits. Try it alongside a grilled chicken salad for a light, nutrient-packed lunch. The vitamin C in the lemonade even helps your body absorb iron from leafy greens. If you’re looking for a post-workout refresher, combine it with a protein smoothie bowl to replenish electrolytes and support muscle recovery.
Moderation is key, but State Fair Lemonade proves that healthy choices can still be delicious. By enjoying it as part of a varied diet, you stay hydrated and satisfied without sacrificing flavor.
A refreshing, tangy lemonade that tastes just like the one you’d get at a state fair.
Ingredients
Scale
For the Crust:
1 cup fresh lemon juice (about 6–8 lemons)
1 cup granulated sugar
4 cups cold water
Ice cubes
Lemon slices for garnish
Instructions
1. Prepare the Crust:
In a small saucepan, combine sugar and 1 cup of water. Heat over medium heat until sugar dissolves completely to make a simple syrup. Remove from heat and let cool.
In a large pitcher, combine the cooled simple syrup, fresh lemon juice, and remaining 3 cups of cold water. Stir well.
Refrigerate for at least 30 minutes to chill. Serve over ice with lemon slices for garnish.
Notes
You can customize the seasonings to taste.
How to Prepare This Dish
Steps and time-saving tips
Start by juicing fresh lemons to get the brightest flavor for your State Fair Lemonade. Roll each lemon on the counter before cutting to maximize juice yield. Combine the lemon juice with cold water in a large pitcher, then whisk in granulated sugar until fully dissolved. For a smoother texture, dissolve the sugar in warm water first before adding the lemon juice and cold water. Stir in a pinch of salt to balance the sweetness and enhance the citrus notes. Chill the mixture for at least 30 minutes before serving over ice. To save time, prep the lemonade base ahead and refrigerate it overnight. Just give it a quick stir before pouring. Garnish with lemon slices or fresh mint for a refreshing touch. If you prefer a stronger lemon flavor, add extra zest or a splash of pure lemon extract. Serve immediately for the crispiest, most refreshing State Fair Lemonade experience.
and-learned-from">Mistakes I’ve made and learned from
Early on, I made the mistake of using bottled lemon juice for my State Fair Lemonade, and the flavor fell flat. Fresh lemons make all the difference, so now I always stock up when they’re in season. Another lesson? Over-sweetening. I once added too much sugar, drowning out the tartness. Now I dissolve the sugar in warm water first, tasting as I go. If you’re new to balancing flavors, check out my guide on perfecting sweet and tart. And if you’re short on time, skip the hand-squeezing—a citrus press speeds things up without sacrificing quality. For more quick fixes, my kitchen hacks post has plenty of tricks to streamline your prep.
Cultural Connection and Variations
Where this recipe comes from
State Fair Lemonade carries the nostalgic charm of summer afternoons spent under striped tents, with the hum of carnival rides in the background. Originating in the late 1800s at American state fairs, this sweet-tart drink quickly became a staple. Vendors would hand-shake it in tall jars, creating a frothy, refreshing treat to beat the heat. Today, families still associate State Fair Lemonade with carefree joy and simple pleasures.
Around the world, lemon
ade takes on unique twists. In Italy, they spike it with sparkling water for a fizzy limonata, while in India, they add cumin and mint for a savory kick. Some Southern U.S. versions of State Fair Lemonade swap sugar for honey or stir in fresh berries for extra flavor. My grandma, meanwhile, always insisted on floating thin lemon slices and a sprig of basil in hers—a small touch that made it feel special.
How it fits in today’s cooking
State Fair Lemonade still holds its own in modern kitchens, especially during backyard barbecues or as a cooling companion to spicy dishes. Many home cooks now experiment with infused syrups or swap in maple syrup for a deeper sweetness. It’s also a star at kids’ parties, often paired with treats like homemade funnel cakes for a full fair-inspired spread.
Beyond summer, this drink adapts beautifully to seasons—think warm spiced lemonade in winter or a rosemary-infused version for fall. Some even blend it into cocktails or freeze it into popsicles. For a lighter take, try pairing it with fresh berry parfaits for a balanced brunch. No matter how you tweak it, State Fair Lemonade remains a timeless sip of happiness.
>Taste and Texture
What makes it delicious
State Fair Lemonade bursts with bright, tangy sweetness that instantly refreshes your taste buds. The first sip delivers a zesty punch of fresh lemon juice, balanced perfectly by just enough sugar to smooth out the sharp edges. Meanwhile, the icy chill enhances its crisp, thirst-quenching quality, making it irresistible on a hot day. As you drink, the fragrant aroma of citrus dances in the air, while the smooth, slightly syrupy texture coats your mouth in sunshiney goodness. Whether you prefer it classic or with a twist, State Fair Lemonade captures that nostalgic carnival flavor—bold, lively, and utterly satisfying.
Boosting the flavor
For an extra flavor kick, try infusing your State Fair Lemonade with fresh herbs like mint or basil. These additions bring a subtle earthiness that complements the citrus beautifully. Alternatively, swap regular sugar for honey or agave syrup to add depth and a touch of floral sweetness. If you love fruity twists, muddle in ripe strawberries or raspberries for a vibrant, layered taste. For more inspiration, check out our guide to summer drink recipes or explore creative citrus dessert pairings to serve alongside your lemonade. A little experimentation can turn this classic drink into something extraordinary.
Tips for Success
Best practices for results
Always use freshly squeezed lemons for the brightest flavor in your State Fair Lemonade. Meanwhile, dissolve the sugar completely in warm water before mixing it with the lemon juice to prevent graininess. Additionally, chill the lemonade for at least two hours before serving to let the flavors meld perfectly. For an extra refreshing twist, serve it over crushed ice with a lemon slice garnish.
Mistakes to avoid
Avoid using bottled lemon juice, as it often lacks the vibrant taste of fresh lemons and can make your State Fair Lemonade taste flat. Instead, roll your lemons before juicing them to maximize yield, just like we recommend in our guide to juicing lemons. Furthermore, don’t skip straining the pulp unless you prefer a thicker texture—otherwise, check out our smooth vs. pulpy drinks comparison for tips on balancing consistency.
Serving and Pairing Suggestions
How to serve this dish
State Fair Lemonade shines when you serve it in tall, frosty glasses with plenty of ice. For a fun twist, rim the glasses with sugar or a mix of sugar and lemon zest. Meanwhile, garnish each drink with a fresh lemon slice or a sprig of mint to make it extra inviting. This refreshing beverage works perfectly at summer picnics, backyard barbecues, or even as a festive touch at holiday gatherings. If you want to impress guests, consider serving State Fair Lemonade in mason jars with colorful paper straws for a nostalgic fairground vibe.
h-it">What goes well with it
State Fair Lemonade pairs wonderfully with classic fair foods like crispy corn dogs or fluffy funnel cakes. The tart sweetness of the lemonade cuts through the richness of fried treats, creating a balanced flavor experience. Alternatively, try it alongside lighter fare such as a fresh summer berry salad for a refreshing contrast. For dessert, a slice of lemon blueberry cake enhances the citrus notes while adding a satisfyingly sweet finish. Whether you prefer savory or sweet, these pairings elevate every sip of State Fair Lemonade.
What makes State Fair Lemonade different from regular lemonade?
State Fair Lemonade stands out for its perfect balance of tartness and sweetness, often made with fresh-squeezed lemons and a hint of vanilla or other secret ingredients. Unlike store-bought lemonade, it’s typically prepared in large batches with a nostalgic, homemade taste that reminds people of summer fairs.
rank-math-faq-item">
How do you make State Fair Lemonade at home?
To recreate State Fair Lemonade, combine fresh lemon juice, sugar, and water in a 1:1:4 ratio, adjusting sweetness to taste. Some recipes add a splash of vanilla extract or a pinch of salt to mimic the signature fairground flavor.
Why is State Fair Lemonade so popular?
State Fair Lemonade gained fame for its refreshing, thirst-quenching quality at outdoor events, often served ice-cold in tall cups. Its association with fun summer memories and customizable flavors keeps it a crowd favorite year after year.
Can you use bottled lemon juice for State Fair Lemonade?
While fresh lemons yield the best flavor, bottled lemon juice works in a pinch for State Fair Lemonade—just expect a slightly less vibrant taste. For authenticity, stick with fresh-squeezed juice and adjust sugar levels to balance the acidity.
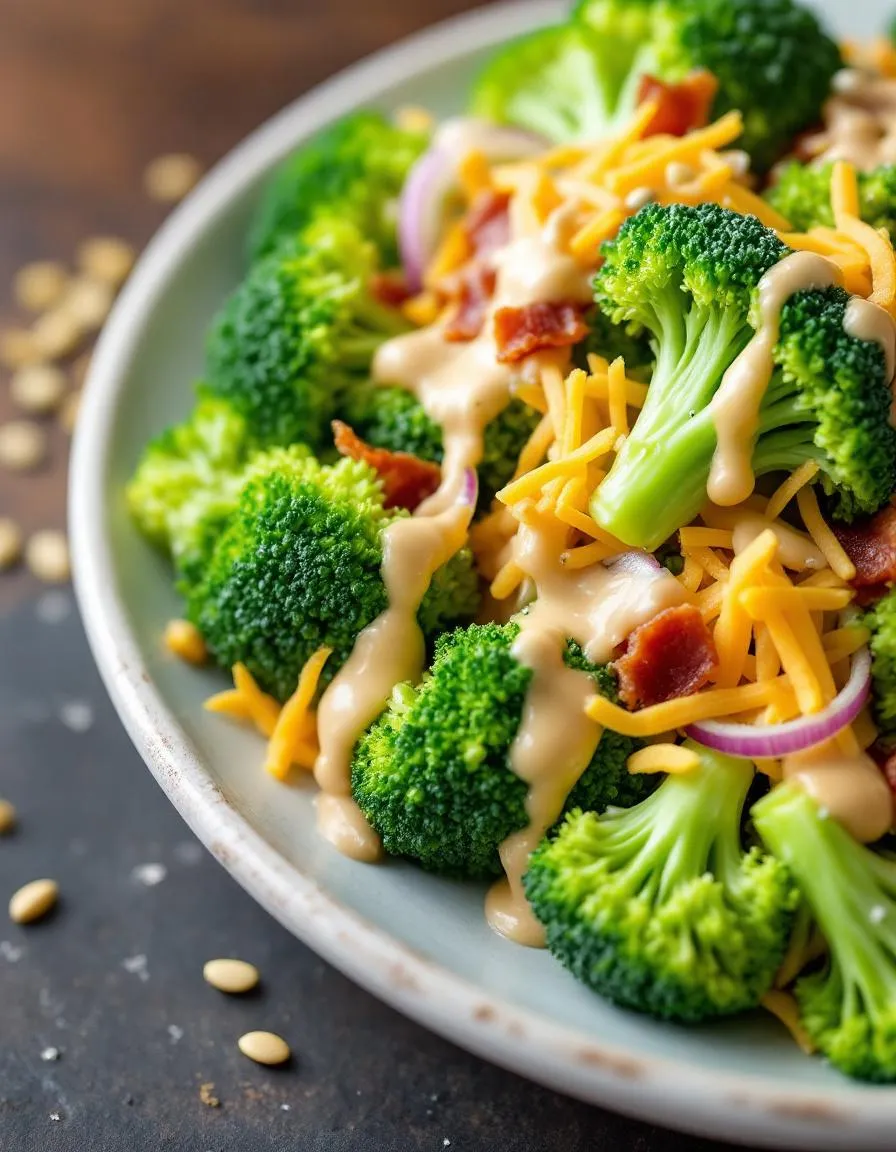
If you’ve ever craved a dish that’s both refreshing and satisfying, you’ll adore this Amish Broccoli Salad. Whether you’re hosting a summer barbecue or simply need a vibrant side dish for weeknight dinners, this recipe brings together crisp veggies, creamy dressing, and a touch of sweetness in every bite. Moreover, it’s a crowd-pleaser that even picky eaters can’t resist. After all, who wouldn’t love a salad that feels like a celebration on a plate?
Amish Broccoli Salad stands out because it balances simplicity with bold flavors. Unlike ordinary salads, it combines fresh broccoli, crunchy bacon, sharp cheddar, and a tangy-sweet dressing that ties everything together. This dish has roots in Amish cooking, where wholesome ingredients and hearty meals take center stage. On brekcakes.com, we celebrate recipes that honor tradition while fitting seamlessly into modern life. For example, if you love easy-to-make sides, you might also enjoy our Classic Potato Salad or Creamy Coleslaw. What makes this salad special is its versatility—it’s perfect for potlucks, picnics, or even as a make-ahead lunch option. Plus, it’s packed with texture and flavor, proving that healthy eating doesn’t have to be boring.
Why I Love This Recipe
This Amish Broccoli Salad holds a special place in my heart because it reminds me of family gatherings. My aunt used to make it for every reunion, and the moment I took my first bite, I knew I had to recreate it. The combination of crisp broccoli, smoky bacon, and that irresistible dressing feels like a hug in a bowl. Even now, whenever I prepare it, I’m transported back to those sunny afternoons filled with laughter and love. It’s more than just a recipe—it’s a memory I’m thrilled to share with you.
Health and Nutrition
Why it’s good for your body
Amish Broccoli Salad packs a powerful nutritional punch while tasting delicious. First, broccoli delivers a hefty dose of fiber, which keeps your digestion running smoothly and helps you feel full longer. Additionally, this crunchy veggie boasts high levels of vitamin C, strengthening your immune system and promoting healthy skin. Meanwhile, the sunflower seeds and raisins in Amish Broccoli Salad add healthy fats and natural sweetness, balancing flavors and nutrients.
Moreover, the Greek yogurt or mayo-based dressing offers probiotics or healthy fats, depending on your choice. These ingredients support gut health and provide sustained energy. Furthermore, the salad’s colorful mix of vegetables ensures you get a variety of antioxidants, which fight inflammation and protect your cells. Amish Broccoli Salad also contains minimal processed sugars, making it a smarter choice than many store-bought sides.
Finally, the dish adapts easily to dietary preferences. For instance, you can swap ingredients to boost protein or reduce carbs. Whether you enjoy it as a side or a light meal, Amish Broccoli Salad nourishes your body without sacrificing flavor.
How it fits in a healthy lifestyle
Amish Broccoli Salad fits seamlessly into a balanced diet, whether you’re focusing on weight management, heart health, or simply eating cleaner. Its high fiber content helps control cravings, making it a great addition to meal prep routines. You can pair it with grilled chicken or fish for a protein-packed lunch that keeps you energized all afternoon.
For those following gluten-free or vegetarian diets, this salad naturally meets those needs without requiring substitutions. The healthy fats from seeds and dressing also align with heart-healthy eating, supporting cholesterol levels and overall cardiovascular wellness. Plus, its versatility means you can tweak ingredients to match your macros or taste preferences, ensuring it works for your lifestyle.
Keep Amish Broccoli Salad in your rotation for a quick, nutrient-dense option that never feels boring. It’s proof that eating well can be both simple and satisfying.
A creamy and crunchy broccoli salad with a sweet and tangy dressing, perfect for picnics and potlucks.
Ingredients
Scale
For the Crust:
4 cups fresh broccoli florets
1/2 cup red onion, finely chopped
1/2 cup cooked bacon, crumbled
1/2 cup cheddar cheese, shredded
1/2 cup sunflower seeds
1/2 cup mayonnaise
2 tablespoons white vinegar
2 tablespoons granulated sugar
1/4 teaspoon salt
1/4 teaspoon black pepper
Instructions
1. Prepare the Crust:
In a large bowl, combine broccoli florets, red onion, bacon, cheddar cheese, and sunflower seeds.
In a small bowl, whisk together mayonnaise, white vinegar, sugar, salt, and black pepper until smooth.
Pour the dressing over the broccoli mixture and toss until evenly coated.
Cover and refrigerate for at least 1 hour before serving to allow flavors to meld.
Notes
You can customize the seasonings to taste.
How to Prepare This Dish
Steps and time-saving tips
First, chop the fresh broccoli into small, bite-sized florets for the Amish Broccoli Salad. Meanwhile, crisp up the bacon in a skillet until golden, then crumble it into small pieces. Next, whisk together the mayonnaise, vinegar, and sugar in a large bowl until smooth. Toss in the broccoli, bacon, shredded cheese, and diced red onion, then gently fold everything together until evenly coated. For extra crunch, stir in sunflower seeds or chopped almonds right before serving. If you’re short on time, prep the dressing a day ahead and store it in the fridge—just give it a quick stir before mixing. To save even more time, grab pre-chopped broccoli from the store. Finally, chill the salad for at least an hour to let the flavors meld, though overnight works even better. Serve cold with a sprinkle of extra cheese or bacon on top for a crowd-pleasing side dish.
and-learned-from">Mistakes I’ve made and learned from
Early on, I made the mistake of skipping the chilling step for my Amish Broccoli Salad, and the flavors fell flat. Now I always plan ahead—even 30 minutes in the fridge makes a difference. Another blunder? Overloading the dressing, which turned the salad soggy. I’ve since learned to start with half the dressing, toss lightly, and add more as needed. If you’re new to creamy salads, my guide to perfect dressing consistency can help avoid this pitfall. Also, don’t forget to blot the broccoli dry after washing—excess water dilutes the dressing, a lesson I learned the hard way. For more tips on balancing textures, check out my crunchy salad secrets. Trust me, a little patience pays off with this recipe!
Cultural Connection and Variations
Where this recipe comes from
Amish Broccoli Salad carries the humble charm of traditional Pennsylvania Dutch cooking, where fresh, garden-grown ingredients meet simple yet satisfying flavors. The Amish community, known for their farm-to-table lifestyle, often whips up this dish for potlucks, church gatherings, or family picnics. Unlike creamy mayo-heavy versions, authentic Amish Broccoli Salad leans on a tangy-sweet dressing with vinegar and sugar, letting the crunch of fresh veggies shine.
Across different region
s, cooks put their own spin on it. In the Midwest, you might find raisins or sunflower seeds mixed in for extra texture. Southern versions sometimes swap the dressing for a buttermilk base, while coastal areas toss in dried cranberries for a touch of sweetness. My grandma, for instance, always added crisp bacon bits—a twist her Ohio neighbors loved. No matter the variation, Amish Broccoli Salad remains a crowd-pleaser, bridging generations with its versatility.
How it fits in today’s cooking
Today, Amish Broccoli Salad fits perfectly into modern meal prep, whether as a quick lunch side or a star at summer BBQs. Health-conscious cooks often lighten it up with Greek yogurt instead of mayo, or they toss in quinoa for extra protein. Meanwhile, busy families appreciate how it stays fresh for days, making it a go-to for meal prep ideas that save time without sacrificing flavor.
Its adaptability also keeps it relevant for holidays. Picture it alongside Easter ham or as a bright counterpoint to Thanksgiving’s richer dishes. And let’s not forget potlucks—where it’s still a staple, just like classic potluck desserts. Whether you stick to tradition or tweak it to fit your pantry, Amish Broccoli Salad proves that some recipes never go out of style.
>Taste and Texture
What makes it delicious
Amish Broccoli Salad delivers a vibrant mix of flavors and textures that make every bite exciting. The crisp, fresh broccoli contrasts perfectly with the creamy, tangy dressing, while chewy bacon bits and sweet raisins add layers of richness. Each forkful bursts with a balance of savory, smoky, and subtly sweet notes, thanks to ingredients like sharp red onion and crunchy sunflower seeds. The salad smells fresh and inviting, with a hint of smokiness from the bacon. Whether you serve it chilled or at room temperature, Amish Broccoli Salad remains irresistibly satisfying.
Boosting the flavor
For an extra flavor kick, try swapping the raisins for dried cranberries or tossing in toasted almonds for added crunch. A drizzle of homemade honey mustard dressing can elevate the sweetness, while a sprinkle of smoked paprika enhances the smokiness. If you love bold flavors, mix in a handful of crumbled feta or sharp cheddar cheese. For more inspiration, check out these easy picnic side dishes that pair perfectly with Amish Broccoli Salad. Small tweaks can transform this classic into your new favorite dish.
Tips for Success
Best practices for results
Always chop the broccoli into small, bite-sized pieces for the best texture in your Amish Broccoli Salad. Meanwhile, make sure to dry the broccoli thoroughly after washing it to prevent a watery dressing. For extra crunch, toast the sunflower seeds lightly before adding them to the mix. Additionally, chill the salad for at least an hour before serving to let the flavors meld perfectly.
Mistakes to avoid
Avoid overdressing the salad, as too much mayonnaise can make it heavy and soggy. Instead, start with half the dressing and add more as needed. Another common mistake is skipping the bacon, but it adds a smoky depth that elevates the Amish Broccoli Salad. For more tips on balancing flavors, check out our guide on dressing ratios. Also, don’t forget to season the salad properly—under-seasoning can leave it tasting bland. Learn how to adjust flavors with our seasoning tips.
Serving and Pairing Suggestions
How to serve this dish
Amish Broccoli Salad shines when you serve it in a large, colorful bowl to highlight its vibrant mix of fresh broccoli, cheese, and crispy bacon. For a festive touch, garnish it with extra bacon bits or a sprinkle of sunflower seeds. Meanwhile, this salad makes a perfect side for summer picnics, potlucks, or even holiday gatherings because it stays fresh and crunchy for hours. If you want to elevate the presentation, try layering it in individual mason jars for a charming, portable option.
h-it">What goes well with it
Pair Amish Broccoli Salad with grilled meats like juicy pulled pork or smoky barbecue chicken for a satisfying contrast of flavors and textures. Alternatively, serve it alongside a hearty Classic Macaroni Salad to create a refreshing duo of cold sides. For drinks, a crisp iced tea or a tangy lemonade balances the salad’s creamy dressing perfectly. If you’re planning a full spread, add a slice of Buttermilk Cornbread to round out the meal with a touch of sweetness.
What is Amish Broccoli Salad made of?
Amish Broccoli Salad typically includes fresh broccoli florets, crispy bacon, sharp cheddar cheese, red onions, and sunflower seeds. The dressing is a creamy blend of mayonnaise, vinegar, and sugar, giving it a sweet and tangy flavor that complements the crunchy vegetables.
rank-math-faq-item">
How long does Amish Broccoli Salad last in the fridge?
Amish Broccoli Salad stays fresh for up to 3–4 days when stored in an airtight container in the refrigerator. For the best texture, add the bacon and sunflower seeds just before serving to keep them crisp.
Can I make Amish Broccoli Salad ahead of time?
Yes, you can prepare Amish Broccoli Salad a day in advance, but wait to add the bacon and dressing until serving time. This keeps the broccoli crisp and prevents the salad from becoming soggy.
Is Amish Broccoli Salad healthy?
Amish Broccoli Salad is packed with nutrients from fresh broccoli, but the mayo-based dressing and bacon add calories. For a lighter version, use Greek yogurt instead of mayonnaise and reduce the sugar.