There’s something undeniably comforting about a dish that balances simplicity and flavor perfectly. Glazed Carrots do just that—they transform humble roots into a sweet, buttery side that feels like a warm hug on any plate. Whether you’re prepping a weeknight dinner or a holiday feast, this recipe delivers nostalgia and elegance in every bite. Plus, it’s a fantastic way to sneak veggies into picky eaters’ meals without a fuss!
Glazed Carrots are a timeless classic, and for good reason. They combine tender carrots with a glossy, caramelized coating that enhances their natural sweetness. Unlike complicated sides, this dish requires just a handful of ingredients yet always impresses. It pairs beautifully with everything from roast chicken to holiday hams, making it a versatile staple in any cook’s repertoire. At brekcakes.com, we celebrate recipes that blend approachability with crowd-pleasing results, and Glazed Carrots fit that philosophy perfectly. They’re quick to prepare, universally loved, and proof that the simplest dishes often shine the brightest. For more easy veggie-forward ideas, check out our garlic green beans—another weeknight hero!
Why I Love This Recipe
Glazed Carrots hold a special place in my heart because they remind me of Sunday dinners at my grandma’s house. She’d simmer them slowly until they practically melted in your mouth, and that first bite always felt like coming home. Now, I love making them for my own family, watching my kids gobble them up without realizing they’re eating their veggies. It’s a small victory, but one that brings me so much joy—and I hope it does the same for you.
Health and Nutrition
Why it’s good for your body
Glazed Carrots pack a powerful nutritional punch while tasting delicious. First, they deliver a hefty dose of beta-carotene, which your body converts into vitamin A. This nutrient supports vision, immune function, and skin health. Additionally, the natural sweetness of Glazed Carrots satisfies cravings without relying on processed sugars.
Moreover, carrots contain fiber, which aids digestion and helps you feel full longer. When you enjoy Glazed Carrots, you also benefit from antioxidants like lutein and zeaxanthin. These compounds protect your eyes from age-related damage. Furthermore, the cooking process softens the carrots, making their nutrients easier to absorb.
Finally, Glazed Carrots offer a versatile way to add veggies to any meal. Whether you serve them as a side or mix them into grain bowls, they boost flavor and nutrition. Since they pair well with proteins and whole grains, you can easily create a balanced plate. With each bite, you get vitamins, fiber, and natural sweetness in one dish.
How it fits in a healthy lifestyle
Glazed Carrots fit seamlessly into a balanced diet. They work well for gluten-free or plant-based eating, and their low-calorie profile supports weight management. If you follow a heart-healthy plan, the fiber and potassium in carrots help regulate blood pressure. For meal prep, try pairing them with garlic herb chicken or adding them to a quinoa salad for extra texture.
Even on busy nights, Glazed Carrots come together quickly. Roast them while you prepare the rest of dinner, or make a big batch for leftovers. Their natural sugars caramelize during cooking, so you won’t need heavy sauces. Whether you prioritize convenience or nutrition, this dish delivers both without compromise.
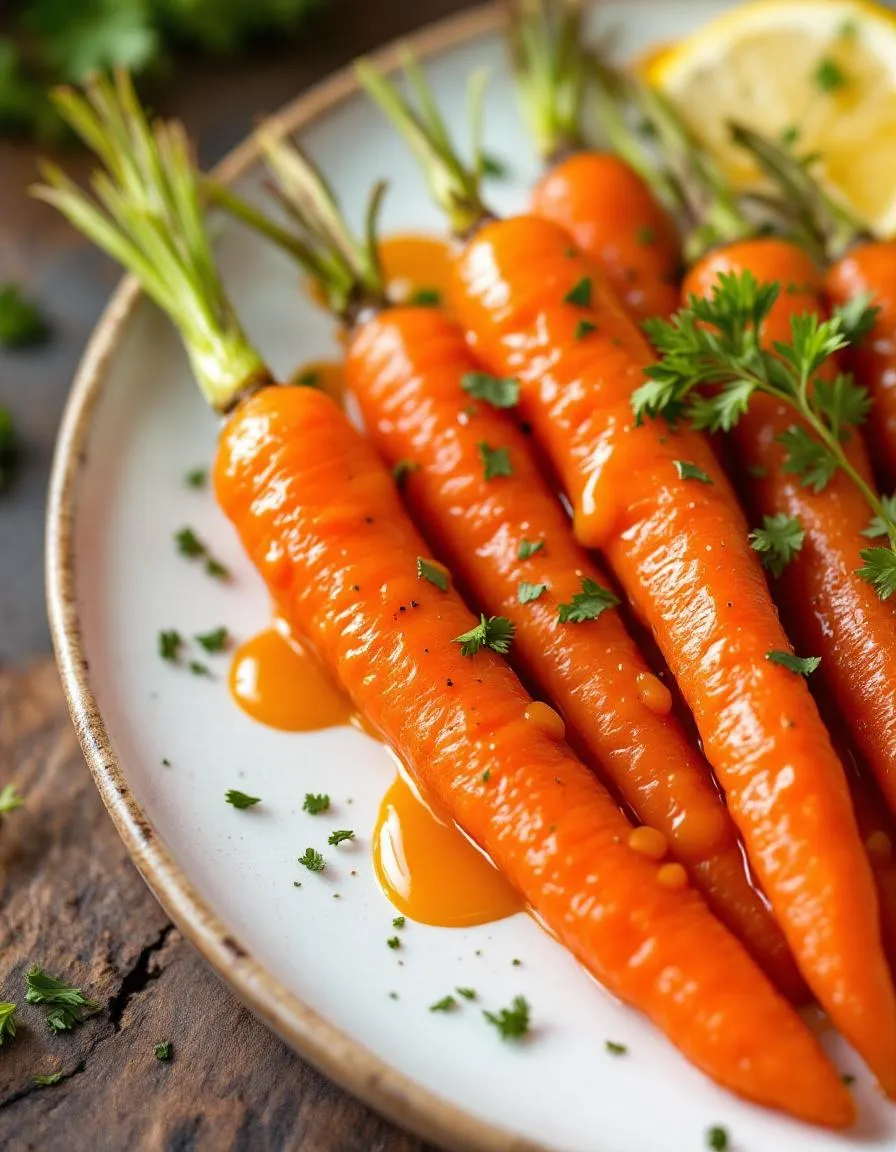
Sweet and tender glazed carrots with a buttery finish.
Ingredients
Scale
For the Crust:
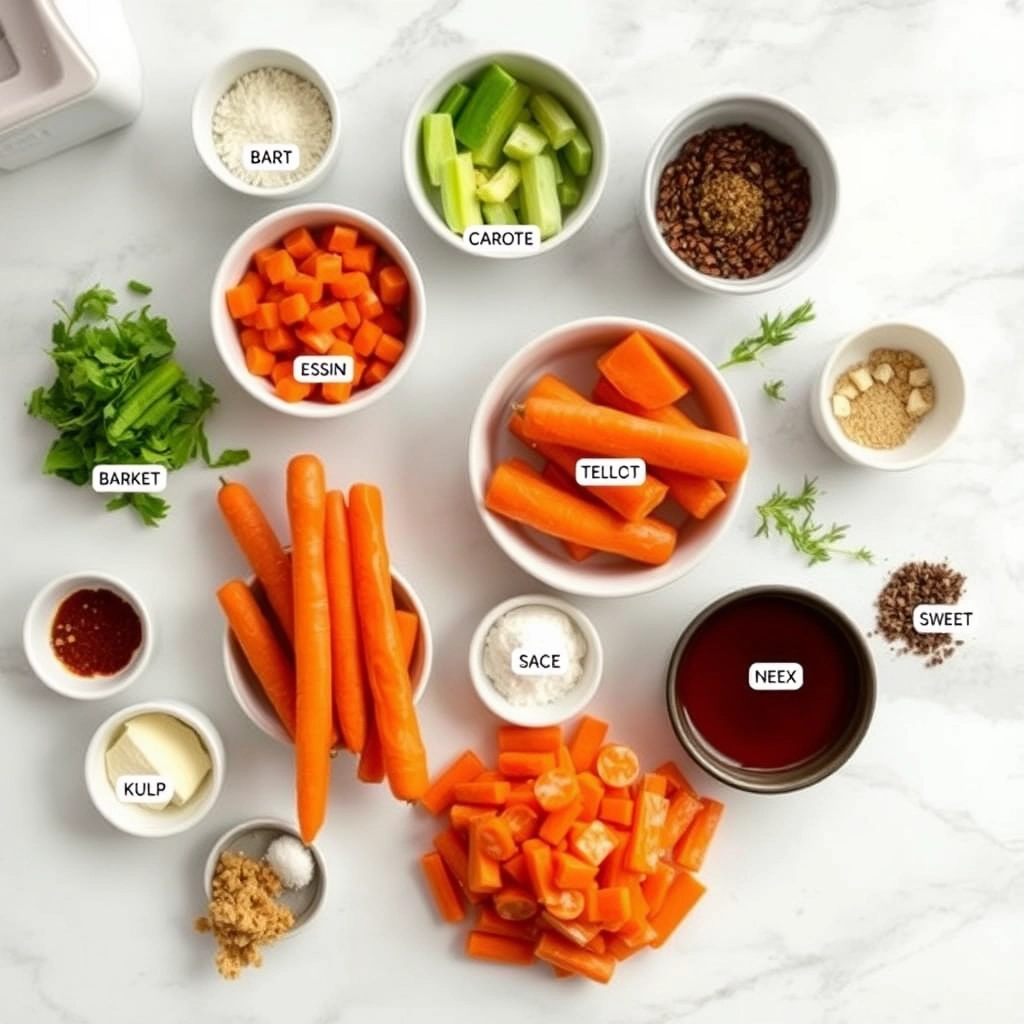
1 lb carrots, peeled and sliced
2 tbsp butter
2 tbsp brown sugar
1/4 cup water
1/2 tsp salt
1/4 tsp black pepper
Instructions
1. Prepare the Crust:
In a large skillet, melt butter over medium heat.
Add carrots, brown sugar, water, salt, and pepper. Stir to combine.
Cover and simmer for 15-20 minutes, stirring occasionally, until carrots are tender and glazed.
Notes
You can customize the seasonings to taste.
“`html
s-dish">How to Prepare This Dish
Steps and time-saving tips
Start by peeling and slicing your Glazed Carrots into even, bite-sized pieces so they cook uniformly. Toss them in a large bowl with melted butter, honey, and a pinch of salt until each piece glistens. Meanwhile, preheat your oven to 400°F to save time—this way, it’s ready when you are. Spread the carrots in a single layer on a parchment-lined baking sheet to prevent sticking and ensure even caramelization. Roast for 20 minutes, then give them a quick stir to coat them in the glaze that forms at the bottom of the pan. For extra flavor, sprinkle fresh thyme or a dash of cinnamon halfway through. If you’re short on time, parboil the carrots for 3 minutes before roasting to speed up the process. Once they’re fork-tender and glossy, pull them out and let them cool slightly before serving. The glaze will thicken as it rests, creating a perfect balance of sweet and savory.
Mistakes I’ve made and learned from
I used to overcrowd the baking sheet, which steamed the Glazed Carrots instead of roasting them, leaving them soggy. Now, I always leave space between each piece for crisp edges. Another blunder? Skipping the parchment paper—cleaning burnt glaze off the pan is no fun. For more kitchen hacks, check out my guide on perfect roasted vegetables. I also learned the hard way that overcooking carrots turns them mushy. A meat thermometer helps; aim for 205°F for tender-but-firm results. If you’re new to glazing, my sauces and glazes 101 post breaks down the basics. Trust me, a little patience goes a long way with this dish!
Glazed carrots have roots in European cuisine, where cooks often sweetened vegetables to balance hearty meals. In France, chefs might use butter and a touch of honey, while British versions lean toward brown sugar and thyme. Meanwhile, in the American South, you’ll find Glazed Carrots spiced with cinnamon or nutmeg, especially during holiday gatherings. My grandma always added orange zest, turning the dish into a bright, citrusy side that stole the show at Sunday dinners.
Across the globe, variations pop up in unexpected ways. In Morocco, cooks might toss carrots with harissa and honey for a spicy-sweet twist. Japanese recipes sometimes feature mirin and soy sauce, creating a savory glaze. Even within families, traditions differ. Some roast their Glazed Carrots for depth, while others simmer them gently on the stove. No matter the method, this dish bridges cultures—proving that a humble vegetable can adapt to any table.
ays-cooking">How it fits in today’s cooking
Today, Glazed Carrots remain a staple for both weeknight meals and festive feasts. Busy cooks love how quickly they come together, especially when paired with easy weeknight dinners. Health-conscious tweaks, like swapping sugar for maple syrup or coconut oil, keep the dish modern without losing its cozy appeal. Plus, their vibrant color makes them a natural fit for holiday spreads, earning a spot next to roasted turkey or vegetarian holiday mains.
Seasonal twists also keep the recipe fresh. Spring versions might feature fresh herbs, while autumn batches lean into warm spices. Whether you’re serving them at a family reunion or a casual dinner, Glazed Carrots bring a touch of tradition—and flexibility—to every plate.
Taste and Texture
What makes it delicious
Glazed carrots deliver a perfect balance of sweet and savory, with a glossy, buttery coating that clings to each tender bite. The natural sweetness of the carrots deepens as they caramelize, while a hint of brown sugar or honey adds a rich, velvety finish. Fresh herbs like thyme or rosemary infuse the dish with earthy, aromatic notes, making every forkful fragrant and inviting. The texture contrasts beautifully—soft yet slightly crisp at the edges, with a melt-in-your-mouth quality that keeps you reaching for more. Whether served as a side or a standout dish, Glazed Carrots bring warmth and comfort to any meal.
r">Boosting the flavor
Elevate your Glazed Carrots by tossing in a pinch of smoked paprika or a drizzle of balsamic reduction for a tangy twist. For a nutty crunch, sprinkle toasted pecans or almonds on top just before serving. If you love bold flavors, try adding a dash of garlic powder or a splash of orange juice to brighten the glaze. Pair them with a creamy dip like our herb yogurt sauce for a refreshing contrast, or serve alongside a garlic herb roasted chicken to let the sweetness shine. Small tweaks can transform this classic side into a memorable highlight.
Tips for Success
Best practices for results
For perfectly tender Glazed Carrots, always cut them into uniform slices so they cook evenly. Use medium heat to caramelize the glaze without burning it, and stir frequently to coat every piece. If the glaze thickens too quickly, add a splash of water to loosen it. Finally, let the Glazed Carrots rest for a minute before serving to help the flavors meld.
>Mistakes to avoid
Avoid overcrowding the pan, as steaming the carrots instead of sautéing them will make them soggy. For crisp-tender results, check out our guide on perfectly sautéed vegetables. Also, don’t skip tasting the glaze before adding it—overly sweet or salty flavors can overpower the dish. If you need balancing tips, our flavor-balancing guide has simple fixes.
Serving and Pairing Suggestions
How to serve this dish
Glazed carrots shine as a versatile side dish, whether you’re hosting a holiday feast or a casual weeknight dinner. For a festive touch, arrange them in a circular pattern on a white platter and sprinkle with fresh parsley or thyme. Alternatively, serve them family-style in a rustic ceramic bowl to complement cozy gatherings. Since they pair beautifully with roasted meats, consider placing them alongside your main protein for a balanced plate. Their vibrant color also makes them a stunning addition to brunch spreads, especially when paired with quiche or ham.
What goes well with it
Glazed carrots harmonize with rich, savory dishes like herb-roasted chicken or garlic mashed potatoes. For a refreshing contrast, try pairing them with a crisp green salad dressed in lemon vinaigrette. If you’re serving them at a holiday meal, our honey-glazed ham brings out their natural sweetness perfectly. To round out the meal, offer a glass of chilled Riesling or sparkling apple cider, which cuts through the caramelized glaze. For dessert, our cinnamon roll bites add a warm, spiced finish that complements the carrots’ subtle sweetness.
To make glazed carrots from scratch, peel and slice fresh carrots, then simmer them in a mixture of butter, brown sugar, and a pinch of salt until tender. The glaze thickens as the carrots cook, creating a sweet and savory side dish. Glazed carrots pair perfectly with roasted meats or holiday meals.
What’s the best way to reheat glazed carrots?
The best way to reheat glazed carrots is on the stovetop over low heat with a splash of water or broth to revive the glaze. Avoid microwaving, as it can make the carrots mushy. Stir occasionally to ensure the glaze coats the carrots evenly for the best texture.
rank-math-faq-item">
Can you freeze glazed carrots?
Yes, you can freeze glazed carrots, but the texture may soften slightly upon thawing. Store them in an airtight container with the glaze to preserve flavor. Reheat gently on the stovetop, adding a touch of butter to refresh the glaze before serving.
What herbs go well with glazed carrots?
Fresh thyme, parsley, or rosemary complement glazed carrots beautifully. Sprinkle chopped herbs over the dish just before serving for a bright contrast to the sweet glaze. For a warm spice note, try a pinch of cinnamon or nutmeg in the glaze.
Best High Protein Chicken Salad Recipe
Introduction
If you’re looking for a meal that’s both nourishing and delicious, you’ve come to the right place. Today, I’m sharing my go-to High Protein Chicken Salad—a dish that’s as versatile as it is satisfying. Whether you need a quick lunch, a post-workout refuel, or a family-friendly dinner, this recipe delivers flavor and nutrition without compromise. Plus, it’s packed with wholesome ingredients that keep you energized all day long.
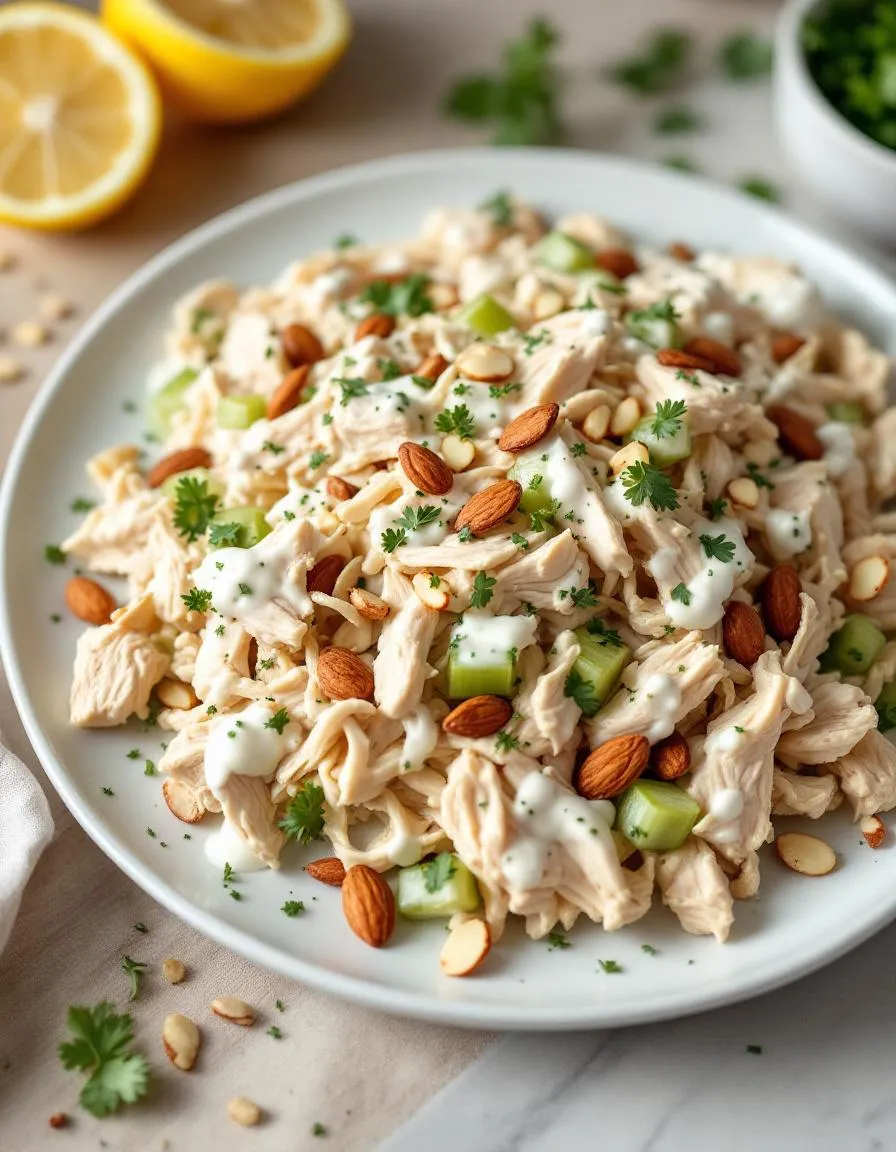
High Protein Chicken Salad is more than just a meal. It’s a balanced combination of tender chicken, crisp veggies, and creamy dressing, all working together to create a dish that’s both light and filling. Unlike store-bought versions loaded with preservatives, this homemade recipe lets you control every ingredient, ensuring freshness and quality. For anyone focused on fitness, meal prep, or simply eating well, this salad is a game-changer. And if you love easy, protein-packed recipes like this, you’ll adore my Healthy Meal Prep Ideas for more inspiration. The best part? It fits perfectly with brekcakes.com’s mission to make healthy eating simple, flavorful, and fun.
Why I Love This Recipe
This High Protein Chicken Salad holds a special place in my heart because it’s the recipe that got me through countless busy weeks. When I first started meal prepping, I needed something quick yet nutritious, and this salad became my lifesaver. Over time, I’ve tweaked it to perfection, adding my favorite herbs and spices for extra flavor. It’s also a hit with my family, especially when served with my Homemade Sourdough Bread. Every bite reminds me that eating well doesn’t have to be complicated—just wholesome, satisfying, and full of love.
Health and Nutrition
Why it’s good for your body
High Protein Chicken Salad packs a powerful nutritional punch, making it a smart choice for anyone looking to fuel their body well. First, the lean chicken provides a hefty dose of high-quality protein, which helps repair muscles and keeps you feeling full longer. Additionally, the fresh vegetables and greens often included in this dish deliver essential vitamins like A and C, boosting immunity and skin health.
Moreover, High Protein Chicken Salad often contains healthy fats from ingredients like avocado or olive oil, which support heart health and brain function. These fats also help your body absorb fat-soluble vitamins more efficiently. Meanwhile, the fiber from veggies and nuts aids digestion and stabilizes blood sugar levels, preventing energy crashes.
Another benefit of High Protein Chicken Salad is its versatility. You can easily customize it to include superfoods like kale or quinoa for an extra nutrient boost. Whether you enjoy it as a post-workout meal or a light lunch, this dish delivers balanced nutrition without sacrificing flavor. Finally, because it’s low in refined carbs, it fits seamlessly into low-carb or keto diets while still satisfying hunger.
How it fits in a healthy lifestyle
High Protein Chicken Salad effortlessly supports a variety of dietary goals, making it a staple for health-conscious eaters. If you’re following a high-protein diet, this dish helps meet your macros while keeping calories in check. It’s also naturally gluten-free, so it’s a safe option for those with sensitivities or celiac disease.
For meal preppers, High Protein Chicken Salad stores well and stays fresh for days, saving time during busy weeks. Pair it with a side of whole grains or a healthy snack for a complete, balanced meal. If you’re focused on heart health, simply opt for a light dressing and load up on veggies to keep sodium and saturated fat low.
Even if you’re just aiming for cleaner eating, this salad fits right in. Its simple ingredients align with meal planning tips that prioritize whole foods over processed options. Whether you need a quick lunch or a post-gym refuel, High Protein Chicken Salad adapts to your routine without compromising taste or nutrition.
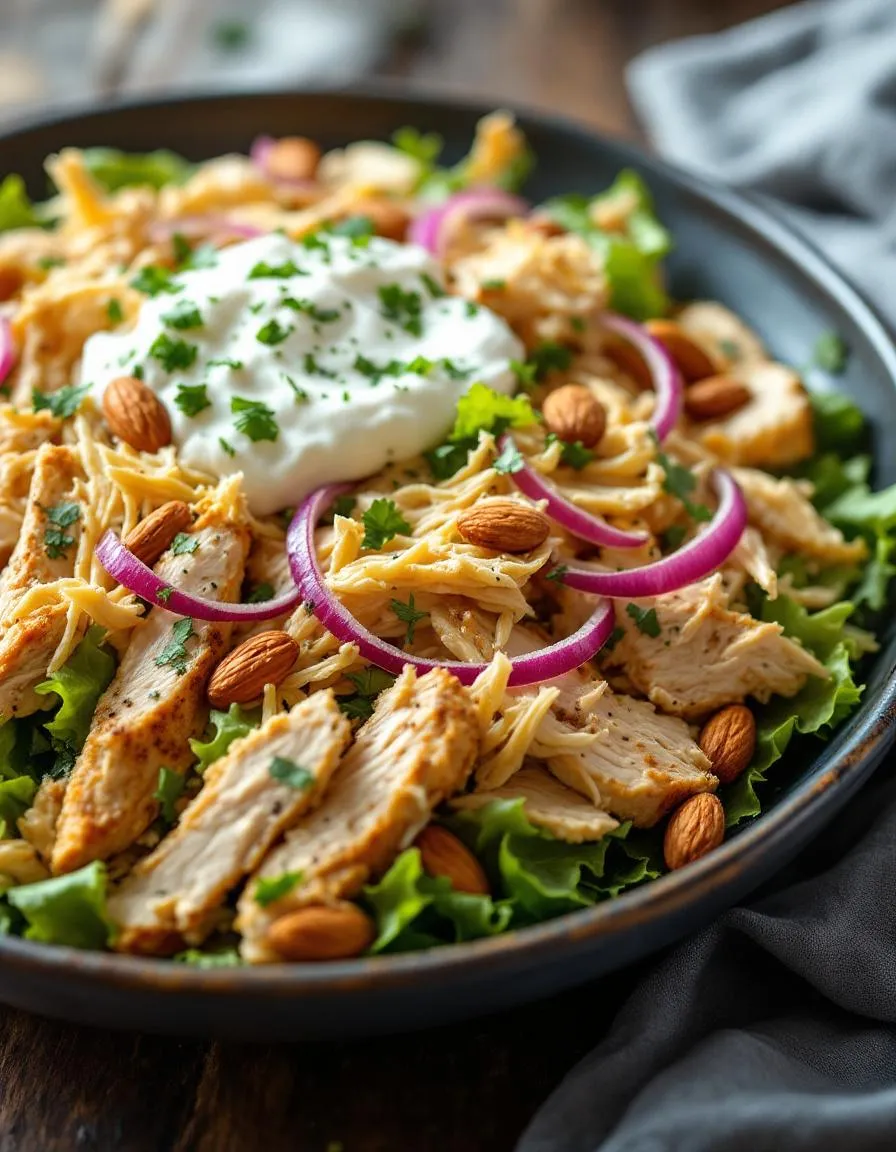
A nutritious and protein-packed chicken salad perfect for a healthy lunch or dinner.
Ingredients
Scale
For the Crust:
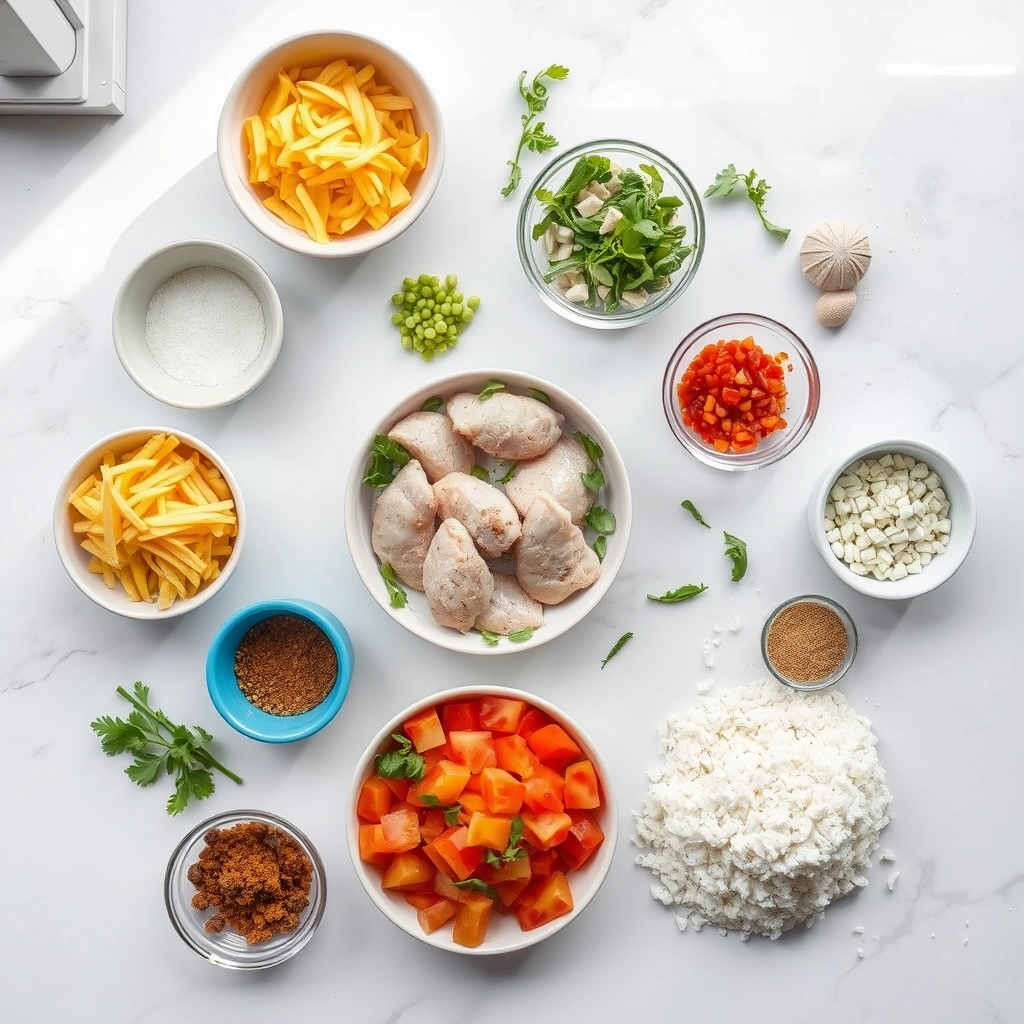
2 cups cooked chicken breast, shredded
1/2 cup Greek yogurt
1/4 cup celery, diced
1/4 cup red onion, finely chopped
1/4 cup almonds, chopped
1 tablespoon lemon juice
1 teaspoon Dijon mustard
Salt and pepper to taste
Instructions
1. Prepare the Crust:
In a large bowl, combine the shredded chicken, Greek yogurt, celery, red onion, and almonds.
Add the lemon juice, Dijon mustard, salt, and pepper. Mix well until all ingredients are evenly coated.
Refrigerate for at least 30 minutes before serving to allow flavors to meld.
Notes
You can customize the seasonings to taste.
How to Prepare This Dish
Steps and time-saving tips
Start by prepping your ingredients for the High Protein Chicken Salad to save time later. Chop the cooked chicken into bite-sized pieces, then dice the celery and red onion finely for a balanced texture. In a large bowl, whisk together Greek yogurt, Dijon mustard, and lemon juice until smooth. Next, fold in the chicken, celery, and onion until everything coats evenly. For extra flavor, sprinkle in fresh dill or parsley and a pinch of salt and pepper. Meanwhile, toast the almonds lightly in a dry pan for a crunchy topping. Once cooled, toss them into the salad or save them for garnish. If you’re meal prepping, store the High Protein Chicken Salad in an airtight container and chill it for at least 30 minutes to let the flavors meld. Serve it over a bed of greens, in a whole-grain wrap, or with crackers for a quick lunch. To speed things up, use leftover rotisserie chicken or pre-cooked chicken breast from your weekly batch cooking.
and-learned-from">Mistakes I’ve made and learned from
Early on, I made the mistake of over-mixing the High Protein Chicken Salad, which turned the chicken mushy. Now, I gently fold the ingredients just until combined to keep the texture perfect. Another lesson? Skipping the chilling time. Rushing meant the flavors didn’t develop, leaving the salad bland. Now, I plan ahead or make it the night before, like I do with my meal prep recipes. I also learned the hard way that not toasting nuts or seeds beforehand robs the dish of crunch. A quick toast transforms them, just like in my almond-toasting guide. Trust me, these small tweaks make all the difference!
Cultural Connection and Variations
Where this recipe comes from
High Protein Chicken Salad has roots in classic American comfort food, but its versatility lets it travel across cultures with ease. Originally, it likely started as a simple way to use leftover roast chicken, mixed with mayo and celery for a quick lunch. However, different regions and families have since put their own spin on it. In the South, for example, you might find it loaded with pecans and grapes for a sweet crunch. Meanwhile, in California, avocado often sneaks in for a creamy, healthy twist.
Globally, the concept o
f shredded chicken in a flavorful dressing pops up everywhere. In Thailand, they toss it with lime juice, fish sauce, and fresh herbs for a zesty larb-inspired version. Over in the Mediterranean, cooks might swap mayo for yogurt and add olives or sun-dried tomatoes. Even my grandma had her own take—she always added hard-boiled eggs and a dash of mustard for extra protein. No matter where you go, High Protein Chicken Salad adapts to local tastes while keeping its satisfying, nourishing core.
How it fits in today’s cooking
Today, High Protein Chicken Salad stays popular because it fits so many modern lifestyles. Meal preppers love it for its make-ahead convenience, while fitness fans appreciate its lean protein boost. Some cooks lighten it up with Greek yogurt instead of mayo, or pile it onto leafy greens for a low-carb lunch. Others, like those who enjoy easy meal prep ideas, rely on it as a staple for busy weeks.
It’s also a star at gatherings. Picnics, potlucks, and even fancy tea parties feature this dish—sometimes in lettuce wraps or stuffed into croissants for a touch of elegance. For families, it’s a nostalgic favorite that bridges generations. And if you’re exploring healthy eating tips, this salad checks all the boxes: customizable, protein-packed, and endlessly delicious. Whether you stick to the classic or experiment with global flavors, High Protein Chicken Salad earns its place in today’s kitchens.
>Taste and Texture
What makes it delicious
High Protein Chicken Salad delivers a satisfying crunch and creamy richness in every bite. Tender, juicy chicken pairs with crisp celery and red onion, while a tangy Greek yogurt dressing adds a bright, zesty kick. Fresh herbs like dill or parsley bring a fragrant aroma, and a squeeze of lemon juice balances the flavors with a refreshing citrus note. The texture is a delightful contrast—smooth from the dressing, yet hearty from the chicken and crunchy veggies. Whether you enjoy it on a sandwich or over greens, High Protein Chicken Salad keeps every mouthful exciting and flavorful.
Boosting the flavor
Elevate your High Protein Chicken Salad with a handful of toasted almonds or walnuts for extra crunch and healthy fats. For a bolder taste, mix in a spoonful of Dijon mustard or a dash of smoked paprika. If you love a touch of sweetness, toss in diced apples or grapes for a juicy contrast. A drizzle of homemade ranch dressing or a sprinkle of crumbled feta cheese can also take it to the next level. Craving more heat? Try adding chopped jalapeños or a pinch of cayenne. For more inspiration, explore our guide to healthy meal prep ideas to keep your lunches fresh and flavorful.
Tips for Success
Best practices for results
Always use fresh, high-quality chicken for the best flavor and texture in your High Protein Chicken Salad. For extra tenderness, poach the chicken instead of boiling it. Additionally, chop all ingredients evenly so every bite has a balanced mix. To enhance the flavors, let the salad chill for at least 30 minutes before serving. Finally, adjust the Greek yogurt or mayo ratio based on your preferred creaminess.
Mistakes to avoid
One common mistake is overcooking the chicken, which makes it dry. Instead, check for doneness early by ensuring the internal temperature reaches 165°F. Another error is skipping the resting time, but letting the High Protein Chicken Salad sit allows the flavors to meld. If you need ideas for meal prep storage, check out our guide on meal prep containers. Also, avoid overmixing the salad, as it can turn mushy. For more tips on keeping ingredients fresh, explore our produce storage guide.
Serving and Pairing Suggestions
How to serve this dish
For a fresh and inviting presentation, serve High Protein Chicken Salad in crisp lettuce cups or atop a bed of mixed greens. Alternatively, layer it between whole-grain bread or stuff it into a ripe avocado half for a satisfying lunch. If you’re hosting a gathering, arrange the salad in a large bowl and garnish with fresh herbs like parsley or dill for a pop of color. This dish shines at picnics, potlucks, or even as a quick weekday meal prep option.
h-it">What goes well with it
Pair High Protein Chicken Salad with a tangy cucumber mint lemonade for a refreshing contrast to its creamy texture. For a heartier meal, serve it alongside roasted sweet potato wedges or a light quinoa salad. If you love bold flavors, try drizzling it with our zesty garlic aioli or pairing it with crispy baked kale chips for extra crunch. For more inspiration, check out our favorite healthy summer sides or this easy meal prep guide to round out your menu.
How much protein is in a high protein chicken salad?
A typical high protein chicken salad contains around 30–40 grams of protein per serving, depending on the ingredients. Using grilled chicken breast, Greek yogurt, and nuts boosts the protein content significantly. This makes high protein chicken salad a great meal for fitness enthusiasts or anyone looking to increase protein intake.
rank-math-faq-item">
What are the best ingredients to add to high protein chicken salad?
The best ingredients for high protein chicken salad include lean chicken breast, Greek yogurt (instead of mayo), hard-boiled eggs, almonds, or chickpeas. Adding veggies like celery and spinach keeps it crunchy and nutritious. These choices maximize protein while keeping the dish flavorful and satisfying.
Can I meal prep high protein chicken salad for the week?
Yes, high protein chicken salad is perfect for meal prep! Store it in an airtight container for up to 4 days in the fridge. For best results, keep dressings or wet ingredients separate until ready to eat to maintain freshness. This makes it a convenient, protein-packed lunch option.
Is high protein chicken salad good for weight loss?
Absolutely! High protein chicken salad helps with weight loss by keeping you full longer and reducing cravings. Opt for low-calorie binders like Greek yogurt and load up on veggies to keep it lean. The high protein content also supports muscle maintenance during calorie deficits.
>
Best Autumn Harvest Salad – Easy Seasonal Recipe
Introduction
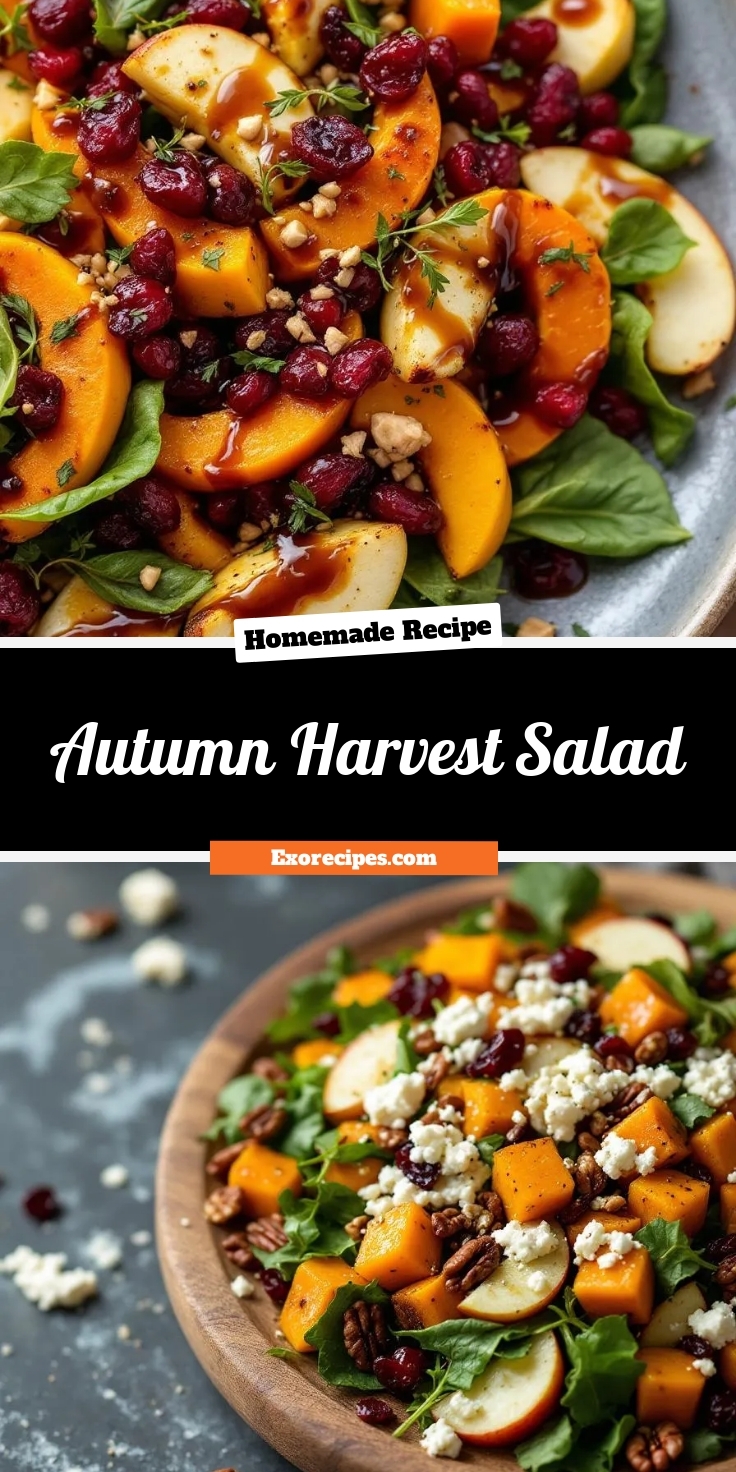
As the leaves turn golden and the air grows crisp, I find myself craving meals that celebrate the season’s bounty. That’s why I’m thrilled to share my Autumn Harvest Salad with you today. Whether you’re hosting a cozy gathering or simply treating yourself to a nourishing meal, this dish brings together vibrant flavors and textures that capture the essence of fall. Plus, it’s a fantastic way to enjoy fresh, seasonal produce while keeping things light and satisfying.
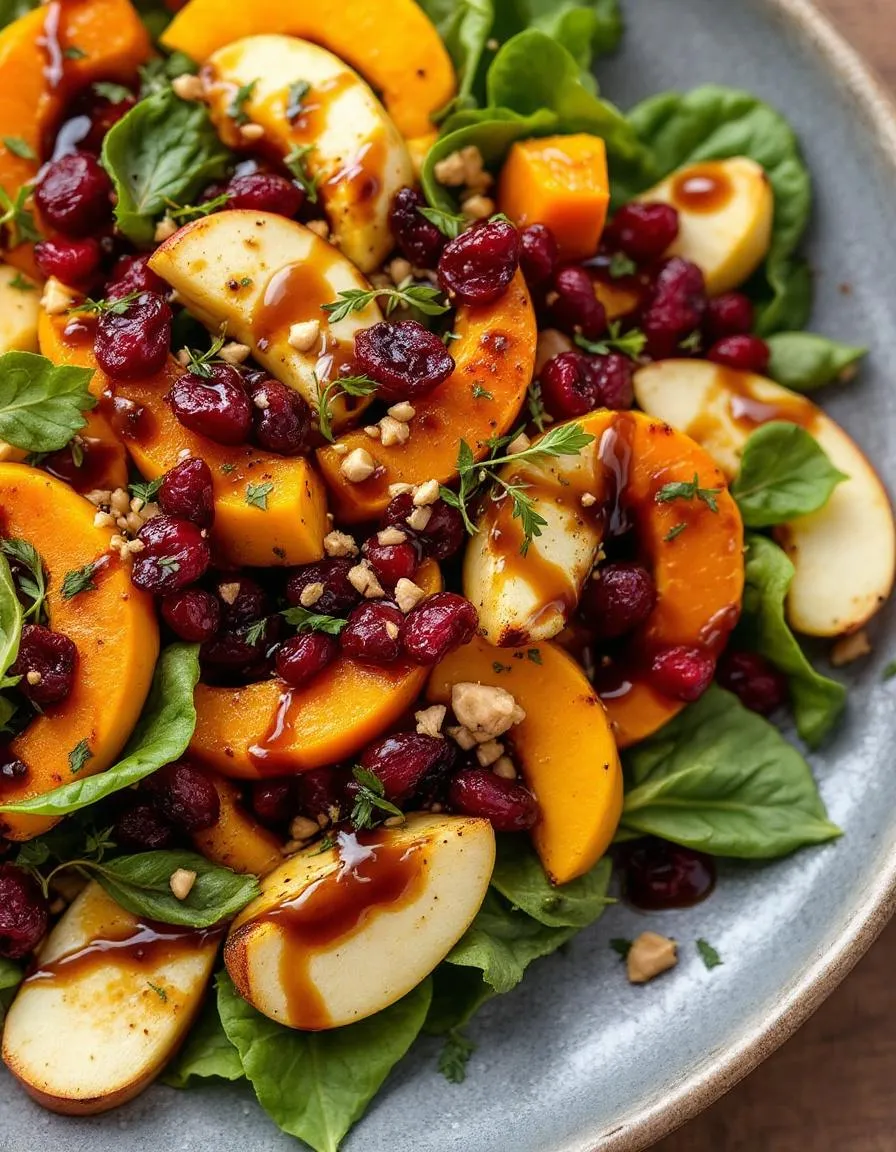
The Autumn Harvest Salad is a celebration of everything that makes this time of year special. Think crisp apples, roasted butternut squash, toasted pecans, and tangy cranberries, all tossed with hearty greens and a maple-dijon vinaigrette. Not only does it burst with color and flavor, but it also packs a nutritional punch, making it a perfect balance of indulgence and wellness. If you’re looking for more seasonal inspiration, check out my favorite fall desserts or explore easy meal prep ideas to simplify your week. This salad fits seamlessly into brekcakes.com’s mission of creating approachable, delicious recipes that feel like a warm hug.
Why I Love This Recipe
This Autumn Harvest Salad holds a special place in my heart because it reminds me of family gatherings around the table, where laughter and good food go hand in hand. I first made it for a Friendsgiving potluck years ago, and it quickly became a requested staple. There’s something magical about how the sweet, savory, and crunchy elements come together—it’s like eating a bite of autumn itself. Every time I prepare it, I’m transported back to those cozy moments, and I hope it brings the same joy to your kitchen.
Health and Nutrition
Why it’s good for your body
Autumn Harvest Salad packs a powerful nutritional punch with its vibrant mix of seasonal ingredients. First, the leafy greens provide a hefty dose of fiber, which supports digestion and keeps you feeling full longer. Additionally, the roasted squash and sweet potatoes deliver beta-carotene, a key nutrient for eye health and immune function. Meanwhile, the crunchy pecans add healthy fats that promote heart health and reduce inflammation.
Furthermore, Autumn Harvest Salad includes antioxidant-rich ingredients like cranberries and pomegranate seeds. These tiny powerhouses fight free radicals and may help lower the risk of chronic diseases. Thanks to the apple cider vinegar dressing, this dish also offers gut-friendly probiotics that aid in nutrient absorption. Plus, the lean protein from optional grilled chicken or chickpeas makes it a well-rounded meal for sustained energy.
Finally, Autumn Harvest Salad stands out because it balances sweet and savory flavors without relying on processed sugars. Instead, natural sweetness from roasted vegetables and fruits keeps blood sugar levels stable. Whether you enjoy it as a side or main course, this salad fuels your body with vitamins, minerals, and wholesome ingredients.
How it fits in a healthy lifestyle
Autumn Harvest Salad easily adapts to various dietary preferences, making it a versatile choice for health-conscious eaters. If you follow a gluten-free diet, you can enjoy it as is, since all ingredients are naturally free of gluten. For those focusing on heart health, the olive oil-based dressing and nuts provide monounsaturated fats that support cardiovascular wellness.
Meal preppers will love how well Autumn Harvest Salad holds up in the fridge, saving time during busy weeks. Pair it with a protein-packed smoothie bowl for a balanced breakfast or enjoy it alongside garlic herb roasted salmon for a protein-rich dinner. Its nutrient density and flexibility make it a smart addition to any eating plan, whether you aim to lose weight, boost energy, or simply eat more whole foods.
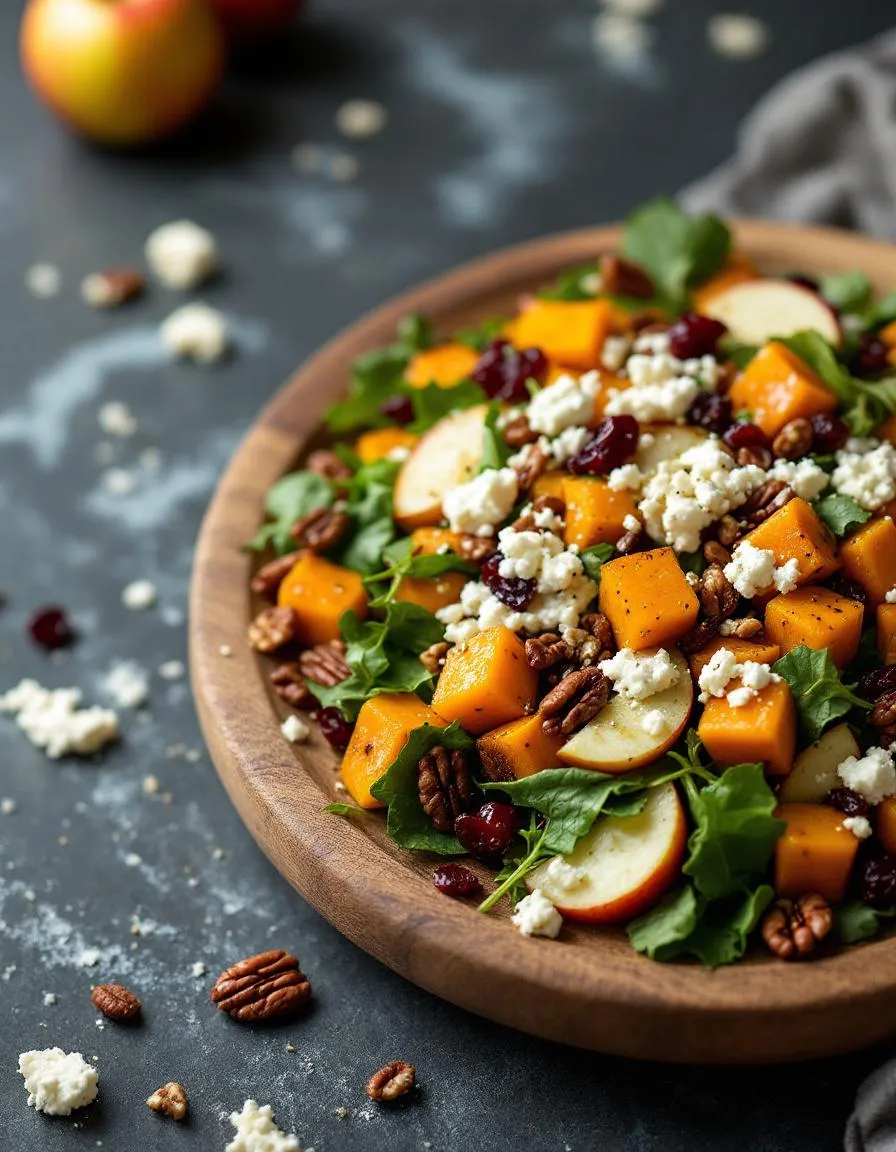
A vibrant and nutritious salad featuring seasonal autumn ingredients, perfect for a light lunch or side dish.
Ingredients
Scale
For the Crust:
4 cups mixed greens (spinach, kale, arugula)
1 medium butternut squash, peeled and cubed
1 large apple, thinly sliced
1/2 cup dried cranberries
1/2 cup pecans, toasted
1/4 cup crumbled feta cheese
2 tbsp olive oil
1 tbsp maple syrup
1 tsp cinnamon
1/2 tsp salt
1/4 tsp black pepper
2 tbsp balsamic vinaigrette
Instructions
1. Prepare the Crust:
Preheat oven to 400°F (200°C). Toss butternut squash cubes with olive oil, maple syrup, cinnamon, salt, and black pepper. Roast for 25-30 minutes until tender.
In a large bowl, combine mixed greens, sliced apple, dried cranberries, toasted pecans, and crumbled feta cheese.
Add the roasted butternut squash to the salad. Drizzle with balsamic vinaigrette and toss gently to combine.
Serve immediately and enjoy.
Notes
You can customize the seasonings to taste.
s-dish">How to Prepare This Dish
Steps and time-saving tips
Start by prepping all your ingredients for the Autumn Harvest Salad to save time later. First, rinse and chop the kale into bite-sized pieces, then massage it with a drizzle of olive oil to soften the leaves. Next, roast the butternut squash cubes at 400°F for about 20 minutes until they caramelize slightly. While the squash cooks, toast the pecans in a dry skillet for 3-4 minutes to enhance their nutty flavor. Meanwhile, whisk together the maple-Dijon dressing in a small bowl until smooth. Once the squash cools slightly, layer it over the kale along with thinly sliced apples, dried cranberries, and crumbled goat cheese. Drizzle the dressing over the top and gently toss everything to combine. For a time-saving hack, roast the squash and toast the pecans ahead of time—they’ll keep well in airtight containers for up to two days. If you’re serving the Autumn Harvest Salad later, hold off on adding the dressing until just before eating to keep the greens crisp.
Mistakes I’ve made and learned from
I’ve definitely learned a few lessons the hard way with this Autumn Harvest Salad. Early on, I’d skip massaging the kale, only to end up with a tough, bitter base that nobody enjoyed. Now, I never rush this step—it makes all the difference in texture and flavor. Another mistake? Overloading the salad with dressing, which turned it soggy within minutes. I’ve since mastered the art of lightly drizzling and tossing just before serving. If you’re new to balancing flavors, check out my guide on dressing ratios for foolproof results. And if your roasted squash sticks to the pan, try my roasting tips to keep it perfectly caramelized without the mess. Trust me, a little patience pays off with this dish!
n-and-variations">Cultural Connection and Variations
Where this recipe comes from
The Autumn Harvest Salad roots itself in the tradition of celebrating seasonal abundance. Farmers and home cooks across Europe and North America have long tossed together autumn’s brightest produce—think crisp apples, roasted squash, and hearty greens—to create vibrant, nourishing dishes. In Italy, for instance, you might find a version with bitter radicchio and figs, while German cooks often add warm potatoes and smoky bacon. Meanwhile, my grandmother’s take on Autumn Harvest Salad always included candied pecans for a sweet crunch.
This dish also carries cultural significance beyond the table. Many communities serve it during harvest festivals or Thanksgiving, symbolizing gratitude for the earth’s bounty. In Japan, chefs might incorporate kabocha squash and sesame dressing, blending local flavors with the salad’s cozy essence. No matter where you go, Autumn Harvest Salad adapts beautifully, reflecting both tradition and personal taste.
How it fits in today’s cooking
Today, Autumn Harvest Salad remains a staple for its versatility and healthful appeal. Busy home cooks love how easily it pairs with weeknight dinners, while meal preppers often layer it in jars for grab-and-go lunches. Plus, modern twists—like swapping in quinoa for extra protein or drizzling with vegan maple dressing—keep it fresh and exciting.
It’s also a star
at gatherings. Whether you’re hosting Friendsgiving or need a colorful side for fall dinner parties, this salad delivers. Food bloggers and chefs constantly reinvent it, proving that Autumn Harvest Salad isn’t just a relic of the past. It’s a living, evolving dish that fits seamlessly into today’s kitchens.
Taste and Texture
What makes it delicious
The Autumn Harvest Salad bursts with vibrant flavors and satisfying textures in every bite. Sweet roasted butternut squash melts in your mouth, while crisp apples add a refreshing crunch. Toasted pecans bring a buttery richness, and tangy dried cranberries balance the dish with a chewy, fruity pop. Fragrant rosemary and warm cinnamon in the dressing tie everything together, creating a cozy, aromatic experience. Whether you serve it as a side or a main, the Autumn Harvest Salad delivers a perfect harmony of earthy, sweet, and savory notes.
Boosting the flavor
For an extra layer of depth, try drizzling the Autumn Harvest Salad with a creamy maple tahini dressing or sprinkling crumbled goat cheese on top. If you love a smoky twist, swap the pecans for candied bacon bits or smoked almonds. A pinch of nutmeg or a splash of apple cider vinegar in the dressing can also elevate the autumnal flavors. For more inspiration, explore our guide to fall salad dressings or discover how to pair this dish with roasted vegetable combos for a heartier meal. Small tweaks make a big difference!
Always chop your ingredients uniformly for the Autumn Harvest Salad so every bite has balanced flavors. Meanwhile, toast the nuts lightly to enhance their crunch without burning them. For the best texture, massage the kale briefly with olive oil before adding other ingredients. Additionally, let the salad sit for 5 minutes after dressing to let the flavors meld. Finally, serve the Autumn Harvest Salad chilled for maximum freshness.
Mistakes to avoid
Avoid overdressing the Autumn Harvest Salad, as too much liquid can make the greens soggy. Instead, start with half the dressing and add more as needed. Also, skip pre-shredded cheese—it often lacks flavor compared to freshly grated varieties. If you’re unsure about balancing sweet and savory elements, check out our flavor pairing guide for inspiration. Finally, don’t skip toasting the nuts; raw nuts can taste bland. For more tips on prepping ingredients efficiently, read our knife skills guide.
g-suggestions">Serving and Pairing Suggestions
How to serve this dish
Bring out the vibrant colors of your Autumn Harvest Salad by serving it in a wide, shallow bowl or on a rustic wooden platter. For a festive touch, sprinkle toasted pumpkin seeds or pomegranate arils on top just before serving. Meanwhile, this salad shines at holiday gatherings, but it also makes a refreshing lunch or light dinner. If you want to impress guests, layer the ingredients in a glass trifle dish to showcase the seasonal produce.
What goes well with it
Pair your Autumn Harvest Salad with a warm slice of pumpkin bread for a cozy contrast to the crisp greens. Alternatively, a creamy butternut squash soup balances the salad’s tangy dressing perfectly. For drinks, try a sparkling apple cider or our favorite spiced chai latte to enhance the fall flavors. Each pairing highlights the salad’s earthy sweetness while adding comforting warmth.
math-faq-block">
What ingredients are in an Autumn Harvest Salad?
An Autumn Harvest Salad typically includes seasonal ingredients like roasted butternut squash, crisp apples, dried cranberries, pecans, and goat cheese. Tossed with mixed greens and a maple vinaigrette, this salad captures the flavors of fall. You can also add quinoa or roasted chicken for extra protein.
How do you make a dressing for Autumn Harvest Salad?
A simple maple balsamic vinaigrette pairs perfectly with Autumn Harvest Salad. Whisk together olive oil, balsamic vinegar, maple syrup, Dijon mustard, and a pinch of salt. The sweet and tangy flavors complement the salad’s roasted vegetables and fruits.
Can you make Autumn Harvest Salad ahead of time?
Yes, you can prep components of Autumn Harvest Salad in advance. Roast the squash, chop the apples, and toast the nuts a day ahead, but wait to assemble and dress the salad until serving to keep it fresh. Store ingredients separately in airtight containers.
rank-math-faq-item">
Is Autumn Harvest Salad healthy?
Absolutely! Autumn Harvest Salad is packed with nutrient-rich ingredients like leafy greens, squash, and nuts. The combination provides fiber, vitamins, and healthy fats. For a lighter option, use less cheese or swap the dressing for a lemon-tahini blend.
Best Homemade Hummus Recipe – Creamy & Easy
Introduction
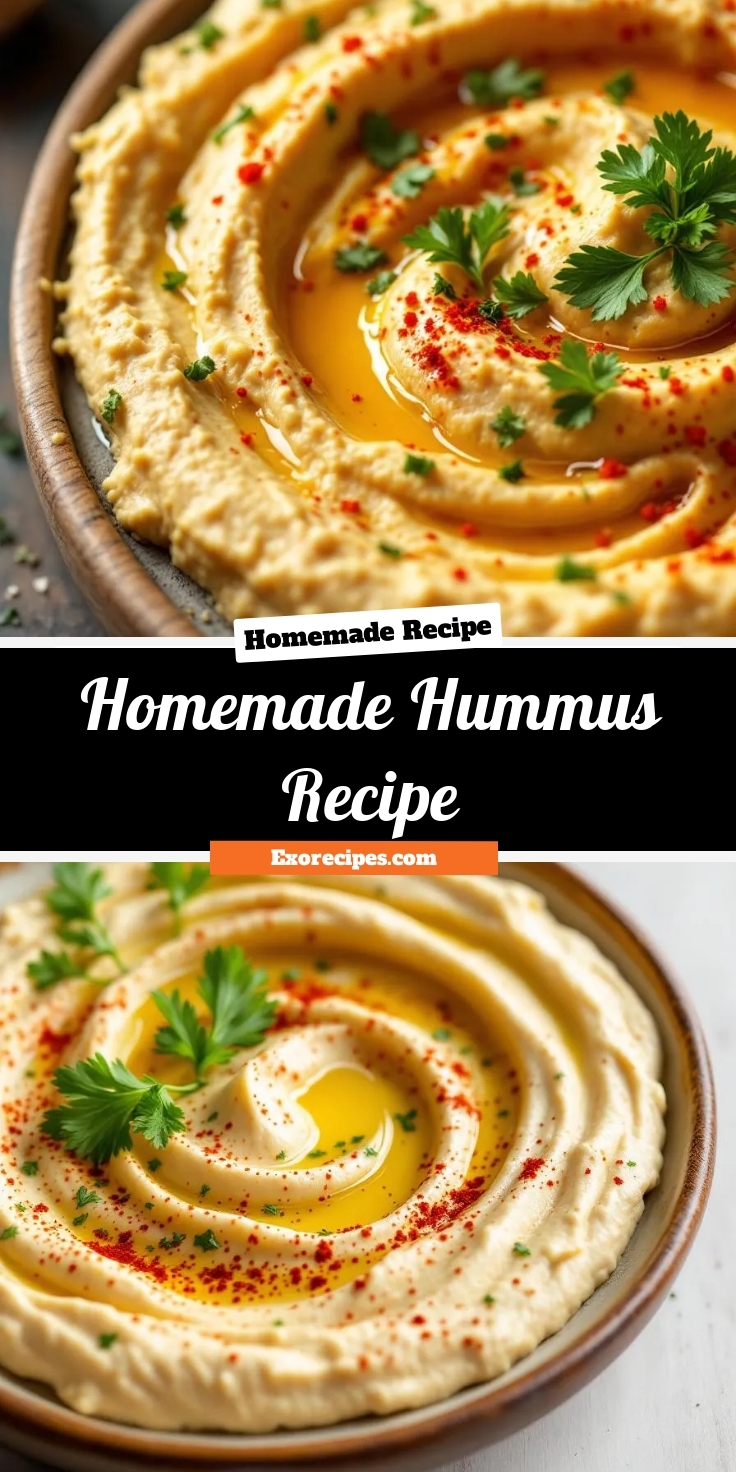
There’s something incredibly comforting about a bowl of creamy, flavorful hummus—especially when you make it yourself. Whether you’re hosting a gathering or simply craving a wholesome snack, this Homemade Hummus Recipe delivers a taste of tradition with every bite. Moreover, it’s a dish that brings people together, just like my favorite Mediterranean appetizers always do. Trust me, once you try this version, you’ll never go back to store-bought again.
Homemade hummus is more than just a dip—it’s a celebration of simple, wholesome ingredients. Unlike many processed alternatives, this recipe lets you control every element, from the velvety texture to the bold garlic and tahini flavors. It’s also incredibly versatile. Spread it on toast, pair it with fresh veggies, or serve it alongside my easy flatbread for a complete meal. What makes this recipe special is its balance of authenticity and accessibility. While hummus has deep roots in Middle Eastern cuisine, anyone can master it with a few pantry staples. Plus, it aligns perfectly with brekcakes.com’s mission to share approachable, joy-filled recipes that inspire confidence in the kitchen.
Why I Love This Recipe
This Homemade Hummus Recipe holds a special place in my heart because it reminds me of lazy Sunday afternoons spent with friends, scooping up hummus with warm pita and sharing stories. It’s one of the first dishes I ever perfected, and over the years, I’ve tweaked it to strike the ideal balance of tangy, creamy, and rich. Every time I make it, I’m transported back to those moments of connection—proof that food isn’t just nourishment, but a way to create lasting memories.
Health and Nutrition
Why it’s good for your body
Homemade Hummus Recipe packs a powerful nutritional punch while delighting your taste buds. First, chickpeas, the star ingredient, deliver plant-based protein and fiber to keep you full and energized. Additionally, tahini adds healthy fats that support brain function and reduce inflammation. Moreover, garlic and lemon juice provide antioxidants and vitamin C to boost immunity.
Since you control the ingredients, Homemade Hummus Recipe avoids preservatives and excess sodium found in store-bought versions. Furthermore, the fiber in chickpeas aids digestion and helps stabilize blood sugar levels. Olive oil, another key component, offers heart-healthy monounsaturated fats. As a result, this creamy dip supports both your physical health and your cravings for something satisfying.
Finally, Homemade Hummus Recipe adapts easily to dietary needs. Whether you need a vegan protein source or a gluten-free snack, it fits seamlessly. With every spoonful, you nourish your body without sacrificing flavor.
How it fits in a healthy lifestyle
Homemade Hummus Recipe effortlessly complements a balanced diet. Pair it with fresh veggies for a low-calorie, high-nutrient snack, or spread it on whole-grain toast for a fiber-rich breakfast. If you follow a plant-based lifestyle, it’s a fantastic way to meet your protein goals without relying on processed alternatives.
For those focusing on heart health, the olive oil and tahini in Homemade Hummus Recipe promote good cholesterol levels. It also fits gluten-free diets, making it a versatile staple. Need meal prep inspiration? Try pairing it with these easy meal prep ideas for a week of wholesome eating. Craving more plant-powered recipes? Explore our vegan lunch ideas to keep your meals exciting and nutritious.
Whether you enjoy it as a dip, spread, or salad topping, Homemade Hummus Recipe makes healthy eating simple and delicious. It’s a small change with big benefits for your everyday routine.
A creamy and flavorful homemade hummus made with chickpeas, tahini, and fresh lemon juice.
Ingredients
Scale
For the Crust:
1 can (15 oz) chickpeas, drained and rinsed
1/4 cup tahini
3 tablespoons fresh lemon juice
2 cloves garlic, minced
2 tablespoons olive oil
1/2 teaspoon ground cumin
1/2 teaspoon salt
2–3 tablespoons water
Paprika and parsley for garnish (optional)
Instructions
1. Prepare the Crust:
In a food processor, combine chickpeas, tahini, lemon juice, garlic, olive oil, cumin, and salt.
Process until smooth, scraping down the sides as needed.
Add water, one tablespoon at a time, until desired consistency is reached.
Transfer to a serving bowl and garnish with a drizzle of olive oil, paprika, and parsley if desired.
Serve with pita bread, vegetables, or crackers.
Notes
You can customize the seasonings to taste.
How to Prepare This Dish
Steps and time-saving tips
Start by draining and rinsing a can of chickpeas to remove excess sodium. Then, pat them dry with a paper towel to ensure your homemade hummus recipe turns out smooth. Toss the chickpeas into a food processor along with tahini, garlic, lemon juice, and a pinch of salt. Blend everything for about 30 seconds until the mixture looks crumbly. Next, drizzle in ice-cold water while the processor runs to help achieve that creamy texture. Scrape down the sides with a spatula and blend again until perfectly smooth. For extra flavor, toast cumin seeds lightly in a pan before grinding them into powder and stirring them into the hummus. If you’re short on time, skip the peeling step—just blend a little longer to compensate. Finally, transfer your homemade hummus to a bowl, drizzle with olive oil, and sprinkle smoked paprika on top for a restaurant-worthy finish.
and-learned-from">Mistakes I’ve made and learned from
I once rushed the blending process and ended up with grainy hummus because I didn’t add enough liquid. Now, I always pour in cold water slowly until the texture is just right. Another mistake? Using stale tahini—it made the whole batch taste bitter. I learned to check the expiration date and store it properly, as explained in my kitchen hacks guide. Also, over-garlicking ruined one batch, so I mince the cloves finely or roast them first for a milder kick. If you’re new to balancing flavors, my spice blends post has tips to help you adjust seasonings like a pro. Trust me, a little patience goes a long way with homemade hummus!
Cultural Connection and Variations
Where this recipe comes from
Hummus has roots that stretch back centuries, with many cultures claiming it as their own. While the exact origin of this creamy blend remains debated, most agree it likely began in the Middle East. The Homemade Hummus Recipe we know today carries the flavors of Lebanon, Israel, Egypt, and beyond, each region adding its own twist. Some versions use more tahini for a richer taste, while others keep it light with extra lemon. In my family, we toast the cumin seeds just before blending, a trick my grandmother learned in Damascus.
Travel through the Medi
terranean, and you’ll find endless variations. Greeks often skip the tahini entirely, favoring yogurt for tang. Palestinians might top theirs with warm spiced lamb, while Turks sprinkle on vibrant paprika. Even within households, the Homemade Hummus Recipe evolves—some like it chunky, others silky smooth. No matter the style, it always brings people together. Whether scooped with warm pita or drizzled with olive oil at a family gathering, hummus feels like home.
How it fits in today’s cooking
Today, hummus bridges tradition and modern convenience. Busy cooks love how quickly a Homemade Hummus Recipe comes together, yet it still feels special enough for weekend spreads. It’s a staple in meal prep, pairing perfectly with crunchy veggies or as a sandwich spread. Many now experiment with bold flavors, like roasted red pepper or even chocolate for dessert hummus. For those hosting gatherings, it’s a crowd-pleaser that fits right in with other easy appetizers, like these air fryer appetizers.
Health-conscious eaters also embrace hummus for its plant-based protein, making it a star in vegan and gluten-free diets. Some blend it into salad dressings or swirl it into soups for extra creaminess. And let’s not forget its role in festive spreads—it’s a must-have alongside dishes like these holiday brunch ideas. Whether you stick to the classics or get creative, hummus proves that simple ingredients can still shine in today’s kitchens.
>Taste and Texture
What makes it delicious
This Homemade Hummus Recipe delivers a velvety, creamy texture that melts effortlessly on your tongue. Each bite bursts with rich, nutty tahini and bright, lemony tang, while a hint of garlic adds depth. The earthy aroma of freshly ground cumin and chickpeas makes it irresistible. Meanwhile, a drizzle of olive oil lends a silky finish, elevating the smooth, almost whipped consistency. Whether scooped with warm pita or crisp veggies, this Homemade Hummus Recipe satisfies with its balanced, savory-sweet profile.
Boosting the flavor
For a smoky twist, swap regular paprika for roasted paprika or add a spoonful of smoky baba ganoush to the blend. Toasted pine nuts or a sprinkle of za’atar add crunch and herbal warmth. If you love heat, swirl in harissa or top with chili flakes. For extra freshness, pair it with cooling cucumber mint yogurt sauce. A squeeze of extra lemon or a dash of smoked sea salt can also brighten the flavors effortlessly.
Tips for Success
Best practices for results
For the creamiest Homemade Hummus Recipe, always blend your tahini and lemon juice first before adding other ingredients. This step creates a smooth base. Additionally, use ice-cold water to thin the hummus instead of olive oil, as it lightens the texture without making it greasy. Finally, let the flavors meld by chilling the hummus for at least 30 minutes before serving.
Mistakes to avoid
One common mistake is skipping the soaking step for dried chickpeas, which can lead to a gritty texture. Instead, soak them overnight or use our guide on how to cook dried chickpeas for perfect results. Another error is overloading the food processor, which prevents even blending. For best results, work in batches and check out our tips on food processor hacks to avoid clumpy hummus.
Serving and Pairing Suggestions
How to serve this dish
Elevate your Homemade Hummus Recipe by serving it in a shallow bowl with a swirl pattern for visual appeal. Drizzle extra virgin olive oil on top and sprinkle with paprika, chopped parsley, or toasted pine nuts for texture. Meanwhile, arrange colorful veggie sticks, warm pita wedges, or crispy falafel around the bowl for a stunning mezze platter. Perfect for casual gatherings, this dish also shines at holiday parties or as a healthy snack during game nights. For a brunch twist, pair it with fresh cucumber slices and hard-boiled eggs.
h-it">What goes well with it
Complement your Homemade Hummus Recipe with a refreshing mint lemonade or a crisp white wine like Sauvignon Blanc, which balances its creamy richness. For a heartier meal, serve it alongside our Mediterranean Stuffed Peppers or a tangy Lebanese Fattoush Salad. These pairings add vibrant flavors and textures while keeping the meal light and satisfying. Alternatively, offer a side of warm, fluffy flatbread for dipping to complete the experience.
What ingredients do I need for a basic homemade hummus recipe?
For a classic homemade hummus recipe, you’ll need chickpeas, tahini, lemon juice, garlic, olive oil, and salt. Some recipes also include cumin or paprika for extra flavor. Using high-quality tahini makes a big difference in your homemade hummus recipe’s creaminess.
rank-math-faq-item">
How do I make my homemade hummus smoother and creamier?
To achieve ultra-smooth homemade hummus, peel your chickpeas before blending and process them longer in the food processor. Adding ice water or extra olive oil while blending helps create that perfect creamy texture in your homemade hummus recipe.
Can I make hummus without tahini?
Yes, you can make a tahini-free homemade hummus recipe by substituting Greek yogurt, peanut butter, or omitting it entirely. However, tahini gives authentic flavor, so your homemade hummus will taste different without it.
How long does homemade hummus last in the refrigerator?
Properly stored in an airtight container, your homemade hummus recipe will stay fresh for 4-7 days in the fridge. Always check for off smells or mold before eating leftover homemade hummus.
>
Best High Protein Cheesecake Jars Recipe
Introduction
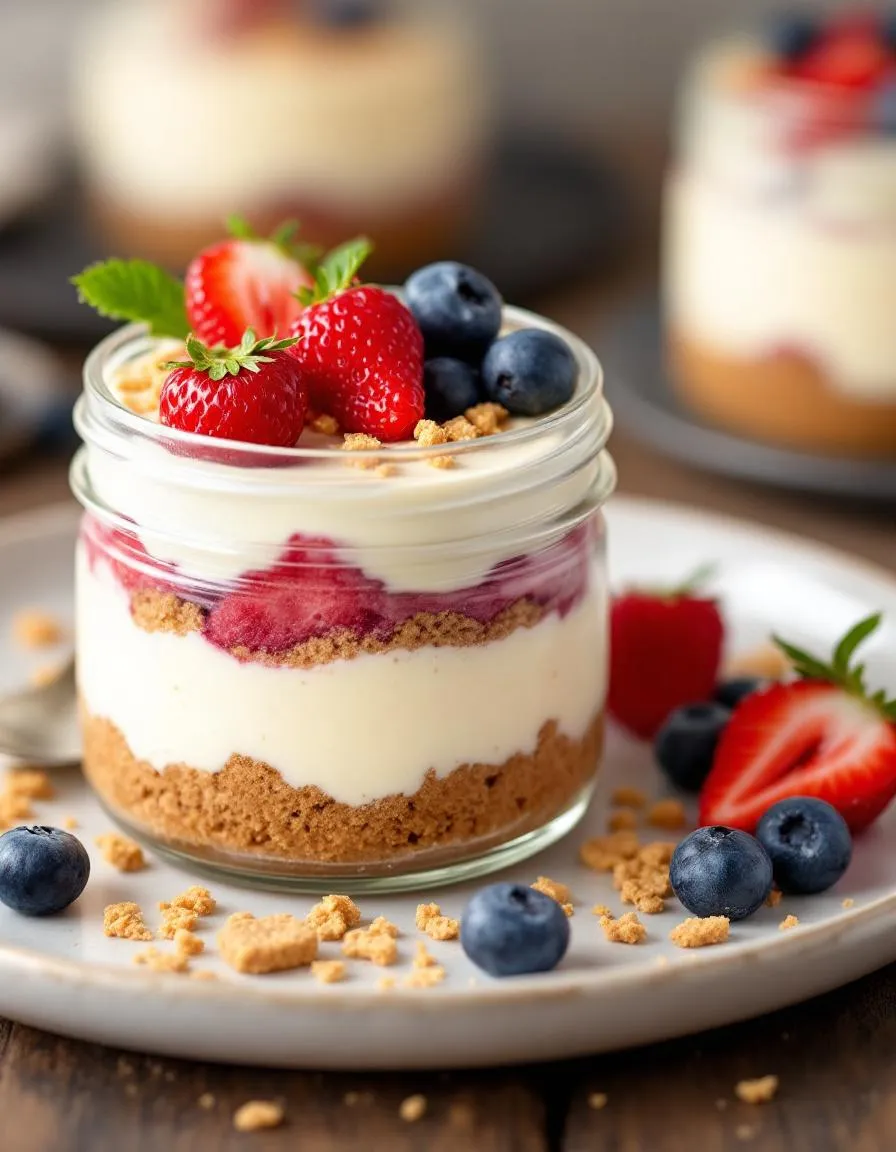
If you’ve ever craved something sweet but didn’t want to derail your health goals, I totally get it. That’s why I’m so excited to share these High Protein Cheesecake Jars with you. They’re creamy, dreamy, and packed with protein to keep you satisfied. Whether you need a post-workout treat or a guilt-free dessert, these little jars deliver big flavor without the regret. Plus, they’re incredibly easy to make—no baking required!
High Protein Cheesecake Jars are a game-changer for anyone who loves dessert but wants to stay on track. Imagine layers of velvety cheesecake filling, a crunchy graham cracker base, and your favorite toppings—all in a portable jar. Unlike traditional cheesecake, this version swaps heavy cream and sugar for protein-packed ingredients like Greek yogurt and protein powder. The result? A dessert that’s indulgent yet nourishing. At brekcakes.com, we believe healthy eating should never feel restrictive. That’s why recipes like this one fit perfectly with our mission to make wholesome food delicious and accessible. If you’re looking for more protein-rich treats, check out our High Protein Snacks roundup or explore our Meal Prep Ideas for busy weeks.
Why I Love This Recipe
These High Protein Cheesecake Jars hold a special place in my heart because they remind me that balance is key. As someone who adores dessert but also values feeling my best, I created this recipe to bridge the gap. Every spoonful takes me back to lazy Sunday afternoons experimenting in the kitchen, and now I love sharing that joy with you. They’re proof that you don’t have to choose between flavor and fitness—you can have both.
Health and Nutrition
Why it’s good for your body
High Protein Cheesecake Jars pack a nutritious punch while satisfying your sweet tooth. First, they deliver a generous dose of protein, which helps build and repair muscles, keeps you full longer, and stabilizes blood sugar. Because they use ingredients like Greek yogurt or protein powder, these jars support your daily protein needs without excess calories. Additionally, they often contain healthy fats from sources like almond flour or nut butters, which promote heart health and brain function.
Moreover, High Protein Cheesecake Jars can be lower in refined sugars compared to traditional desserts. Many recipes rely on natural sweeteners like honey or stevia, reducing the risk of energy crashes. The combination of protein and fiber-rich crusts also slows digestion, preventing sudden spikes in blood sugar. As a result, you enjoy a guilt-free treat that fuels your body.
Finally, these jars often include gut-friendly ingredients like probiotics from yogurt or cottage cheese. Over time, this supports digestion and immune health. Whether you need a post-workout snack or a balanced dessert, High Protein Cheesecake Jars offer a delicious way to nourish your body.
How it fits in a healthy lifestyle
High Protein Cheesecake Jars fit seamlessly into a balanced diet, especially if you prioritize protein or mindful eating. They work well as a post-workout recovery snack or a satisfying afternoon pick-me-up. Because they’re portion-controlled, they help prevent overindulgence while still feeling like a treat.
For those following specific diets, these jars shine. They’re naturally gluten-free when made with almond flour, and you can easily adapt them to be keto-friendly by swapping sweeteners. If you’re focused on heart health, the healthy fats in nuts and seeds support cholesterol levels. Plus, the high protein content aligns with fitness goals, making them a staple for active lifestyles.
Pair High Protein Cheesecake Jars with other nutrient-dense meals for a well-rounded approach. For more high-protein ideas, check out our protein-packed breakfasts. Or, if you’re exploring gluten-free options, our gluten-free desserts offer plenty of inspiration. With versatility and nutrition in every bite, these jars make healthy eating effortless and enjoyable.
A delicious and healthy high-protein cheesecake in convenient jars, perfect for meal prep or a quick dessert.
Ingredients
Scale
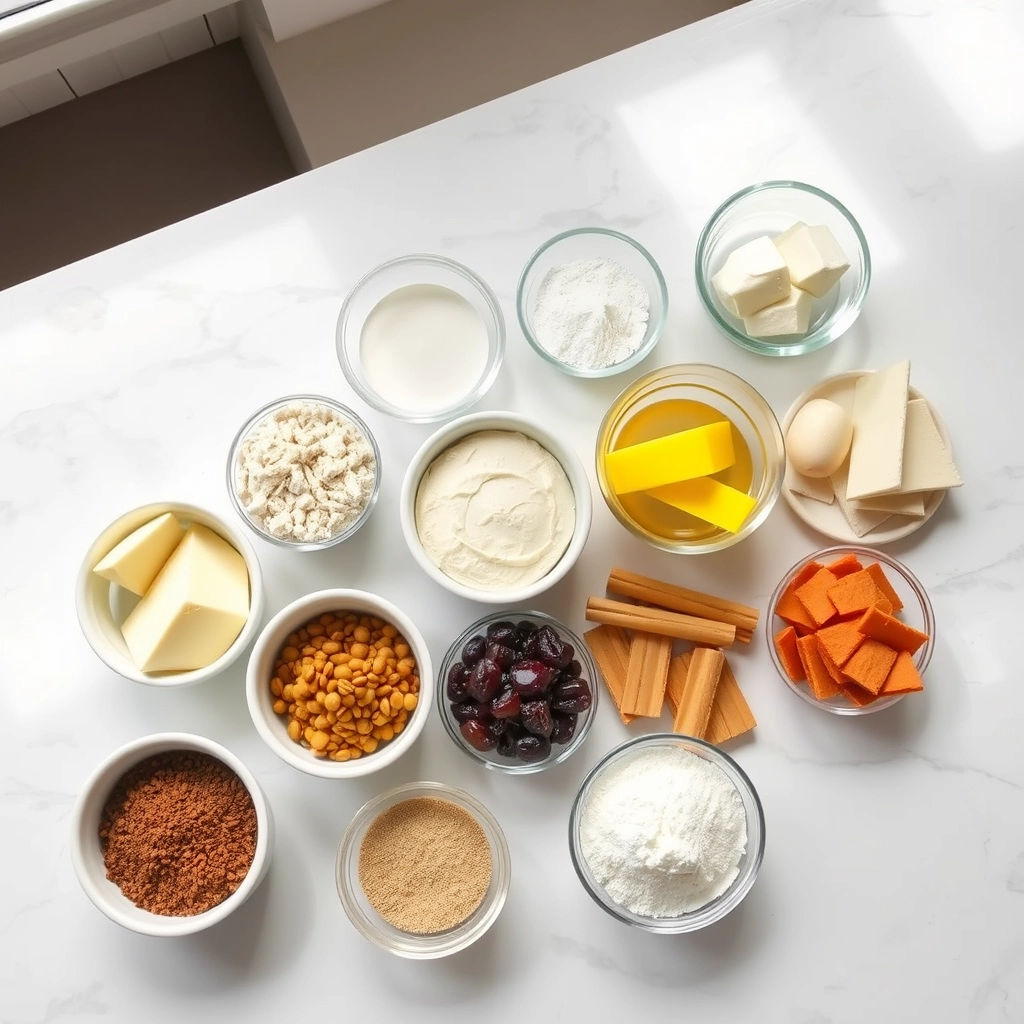
For the Crust:
1 cup low-fat cream cheese
1 cup Greek yogurt
1 scoop vanilla protein powder
2 tbsp honey or sugar-free syrup
1 tsp vanilla extract
1/2 cup graham cracker crumbs
1 tbsp melted butter
Fresh berries for topping (optional)
Instructions
1. Prepare the Crust:
In a bowl, mix graham cracker crumbs with melted butter until well combined. Press a spoonful into the bottom of each jar.
In another bowl, blend cream cheese, Greek yogurt, protein powder, honey, and vanilla extract until smooth and creamy.
Spoon the cheesecake mixture over the crust in the jars, filling them almost to the top.
Refrigerate for at least 2 hours or until set. Top with fresh berries before serving if desired.
Notes
You can customize the seasonings to taste.
s-dish">How to Prepare This Dish
Steps and time-saving tips
First, gather all your ingredients for the High Protein Cheesecake Jars to streamline the process. Start by mixing the crust ingredients—crushed graham crackers, protein powder, and melted butter—in a bowl until they clump together. Press this mixture firmly into the bottom of each jar, using the back of a spoon to create an even layer. Meanwhile, blend the cheesecake filling by whisking cream cheese, Greek yogurt, vanilla extract, and a touch of sweetener until smooth. For extra fluffiness, fold in whipped egg whites gently, but skip this step if you’re short on time.
Next, spoon the filling over the crust layers, leaving a little room at the top for toppings. If you’re in a rush, chill the jars for just 30 minutes instead of baking them—they’ll still set beautifully. For baked High Protein Cheesecake Jars, pop them in a water bath and bake at 325°F until the centers barely jiggle. Finally, drizzle with sugar-free caramel or fresh berries before serving. Pro tip: Prep the jars the night before for a no-fuss dessert the next day.
Mistakes I’ve made and learned from
I once overmixed the filling for my High Protein Cheesecake Jars, which made it dense instead of creamy. Now, I stop whisking as soon as the ingredients combine. Another blunder? Skipping the water bath for baked versions, which caused cracks. A simple fix is placing a pan of hot water on the oven rack below the jars. If you’re new to protein desserts, my guide on avoiding common protein baking mistakes has more troubleshooting tips. And if you love jar desserts, try my easy meal prep jar recipes for more inspo!
High Protein Cheesecake Jars might feel like a modern twist, but they actually draw inspiration from centuries-old cheesecake traditions. Cheesecake itself traces back to ancient Greece, where athletes ate it for strength before the Olympics. Today, we’ve reinvented it as a portable, protein-packed treat perfect for busy lifestyles. Some bakers layer theirs with nut butter or fruit compote, while others keep it simple with vanilla and a graham cracker crunch.
Around the world, cheesecake takes on unique personalities. In Japan, they love a fluffy, soufflé-style version, while Italians often ricotta for a lighter texture. High Protein Cheesecake Jars, however, cater to health-conscious foodies who crave indulgence without guilt. My family adds a scoop of whey protein to the filling for extra staying power, but you might spot gym-goers swapping in plant-based proteins or collagen peptides. No matter the variation, these jars prove that dessert can be both nourishing and nostalgic.
ays-cooking">How it fits in today’s cooking
High Protein Cheesecake Jars fit seamlessly into today’s on-the-go culture. Meal preppers love them because they’re easy to grab from the fridge, and fitness enthusiasts appreciate the balanced macros. Plus, they’re a hit at parties—imagine serving mini jars with toppings like sugar-free chocolate syrup or fresh berries. They’re also a clever way to use leftover ingredients, like that half-empty tub of Greek yogurt or almond flour.
Modern cooks keep reinventing this recipe. Some blend cottage cheese for extra protein, while others layer in keto granola for crunch. Whether you enjoy them post-workout or as a midnight snack, High Protein Cheesecake Jars bridge the gap between health and happiness. After all, who says you can’t have your cheesecake and eat it too?
Taste and Texture
What makes it delicious
High Protein Cheesecake Jars deliver a luscious, velvety smooth texture that melts effortlessly on your tongue. Each spoonful bursts with a rich, tangy cream cheese flavor, balanced by a subtle sweetness from natural sweeteners. The graham cracker crumb base adds a satisfying crunch, while vanilla or citrus zest infuses a fragrant brightness. Thanks to the protein-packed ingredients, these jars feel indulgent yet light, making them irresistible for dessert lovers. Whether chilled or slightly softened, High Protein Cheesecake Jars offer a decadent experience without the guilt.
r">Boosting the flavor
Elevate your High Protein Cheesecake Jars with a drizzle of sugar-free caramel or a handful of fresh berries for a juicy contrast. For a deeper flavor, mix in a spoonful of cocoa powder or espresso into the filling before layering. Crushed nuts or toasted coconut flakes add extra crunch, while a pinch of cinnamon or nutmeg warms up each bite. If you love experimenting, try pairing it with our High Protein Frosting for extra creaminess or our Protein Cookie Crumbs for a bolder base. The possibilities are endless, so get creative and make it your own!
Tips for Success
Best practices for results
Always use room-temperature cream cheese for smooth blending in your High Protein Cheesecake Jars. Meanwhile, chill the crust layer for at least 15 minutes before adding the filling to prevent sogginess. For the best texture, whip the filling on medium speed until fully creamy, but avoid overmixing. Additionally, let the jars set in the fridge for at least 4 hours—overnight works even better for firm results. Finally, top with fresh berries or a drizzle of sugar-free syrup just before serving for maximum freshness.
>Mistakes to avoid
One common mistake is skipping the step of greasing the jars lightly, which can make serving messy. Instead, use a light coating of cooking spray for easy release. Another error is substituting Greek yogurt with regular yogurt, as it thins the filling too much. For a foolproof alternative, try our high-protein yogurt substitutes guide. Also, resist the urge to skip the sweetener—even if using protein powder, a touch of erythritol or monk fruit enhances flavor. For more sweetener tips, check out our low-calorie sweetener breakdown to perfect your High Protein Cheesecake Jars every time.
Serving and Pairing Suggestions
How to serve this dish
High Protein Cheesecake Jars make a stunning yet effortless dessert for any occasion. For a brunch gathering, layer them in clear mason jars with fresh berries on top to add a pop of color. Meanwhile, during the holidays, sprinkle crushed peppermint or cinnamon for a festive touch. If you want to elevate the presentation, drizzle sugar-free caramel or chocolate sauce over the jars just before serving. These portable treats also work perfectly for picnics or meal prep—simply grab a jar and enjoy!
What goes well with it
Pair your High Protein Cheesecake Jars with a creamy latte or cold brew coffee for a balanced, indulgent treat. The rich flavors of the cheesecake complement the boldness of coffee beautifully. Alternatively, try serving them alongside a scoop of our High Protein Ice Cream for an extra-decadent dessert. If you prefer something lighter, a refreshing berry smoothie or our Protein Pancakes make a delightful breakfast combo. Each pairing enhances the creamy texture and protein-packed goodness of the cheesecake jars.
How much protein is in a high protein cheesecake jar?
Each high protein cheesecake jar typically contains 15–25 grams of protein, depending on the ingredients used. Protein sources like Greek yogurt, protein powder, or cottage cheese help boost the nutritional value while keeping the dessert delicious.
Can I make high protein cheesecake jars without protein powder?
Yes! You can substitute protein powder with ingredients like Greek yogurt, cottage cheese, or silken tofu to maintain the high protein content. These alternatives still create a creamy texture perfect for high protein cheesecake jars.
rank-math-faq-item">
Are high protein cheesecake jars good for weight loss?
High protein cheesecake jars can support weight loss when enjoyed in moderation, as protein helps keep you full longer. Opt for low-sugar versions and portion-controlled jars to align with your goals.
How long do high protein cheesecake jars last in the fridge?
High protein cheesecake jars stay fresh for 3–5 days when stored airtight in the refrigerator. For best texture, add toppings like fresh fruit or granola just before serving.