If you’ve ever craved a dish that’s both comforting and bursting with flavor, you’re in the right place. Today, I’m sharing my take on Caribbean-style Plantain Curry—a vibrant, soul-satisfying meal that brings together sweet, savory, and spicy in every bite. Whether you’re new to Caribbean cuisine or a longtime fan, this recipe will quickly become a favorite. Plus, it’s a fantastic way to use ripe plantains, which often sit on our countertops begging for attention.
Caribbean-style Plantain Curry is a celebration of bold flavors and rich cultural heritage. Unlike traditional curries, this dish leans on the natural sweetness of plantains, balanced by aromatic spices like turmeric, cumin, and Scotch bonnet peppers. What makes it special is its versatility. You can serve it as a hearty main with rice or enjoy it as a standalone stew. At brekcakes.com, we love recipes that tell a story, and this one reflects the warmth and vibrancy of Caribbean cooking. If you’re looking for more ways to spice up your meals, check out our Caribbean-inspired dishes or explore our guide to cooking with plantains.
Why I Love This Recipe
This Caribbean-style Plantain Curry holds a special place in my heart because it reminds me of a trip to Jamaica, where I first tasted the magic of plantains in savory dishes. The way the spices meld with the creamy texture of the plantains creates something truly unforgettable. Every time I make it, I’m transported back to those sun-drenched beaches and the kindness of the people who shared their culinary secrets with me. It’s more than just a recipe—it’s a delicious connection to memories and cultures I hold dear.
Health and Nutrition
Why it’s good for your body
Caribbean-style Plantain Curry packs a nutritious punch while delighting your taste buds. First, ripe plantains offer a rich source of fiber, which supports digestion and keeps you feeling full longer. Additionally, they provide essential vitamins like A and C, boosting immunity and skin health. Meanwhile, the curry’s blend of spices, such as turmeric and cumin, delivers anti-inflammatory benefits.
Moreover, Caribbean-style Plantain Curry often includes coconut milk, a creamy ingredient rich in healthy fats. These fats promote heart health and help your body absorb fat-soluble vitamins. The dish also typically features protein-rich legumes like chickpeas or lentils, making it a satisfying, plant-based meal. Together, these ingredients create a balanced dish that fuels your body without heavy processed ingredients.
Finally, Caribbean-style Plantain Curry stands out for its versatility. You can easily adjust the spice level or swap ingredients to suit dietary needs. Whether you enjoy it over rice or with a side of greens, this dish delivers both flavor and nourishment in every bite.
How it fits in a healthy lifestyle
Caribbean-style Plantain Curry fits seamlessly into a balanced diet. If you follow a gluten-free or vegan lifestyle, this dish naturally meets those requirements. Its plant-based proteins and fiber make it a great option for maintaining energy levels throughout the day. Plus, the healthy fats from coconut milk support brain function and satiety.
For those focused on heart health, the spices in Caribbean-style Plantain Curry, like turmeric, may help reduce inflammation. Pair it with a side of leafy greens or quinoa for an extra nutrient boost. If you’re looking for more plant-based meal ideas, check out our guide to easy vegan dinners. And if you want to explore other globally inspired healthy dishes, our balanced meal prep tips can help you stay on track. This curry proves that eating well doesn’t mean sacrificing flavor or convenience.
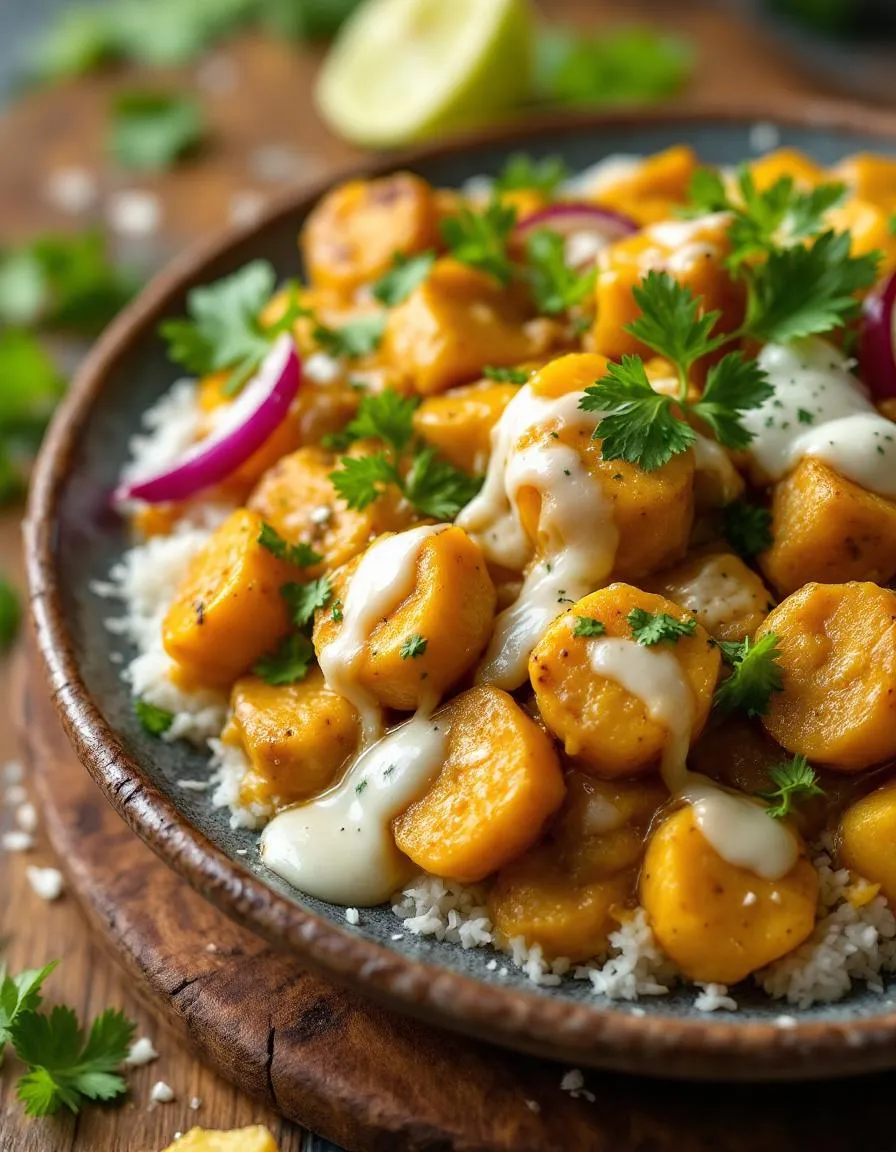
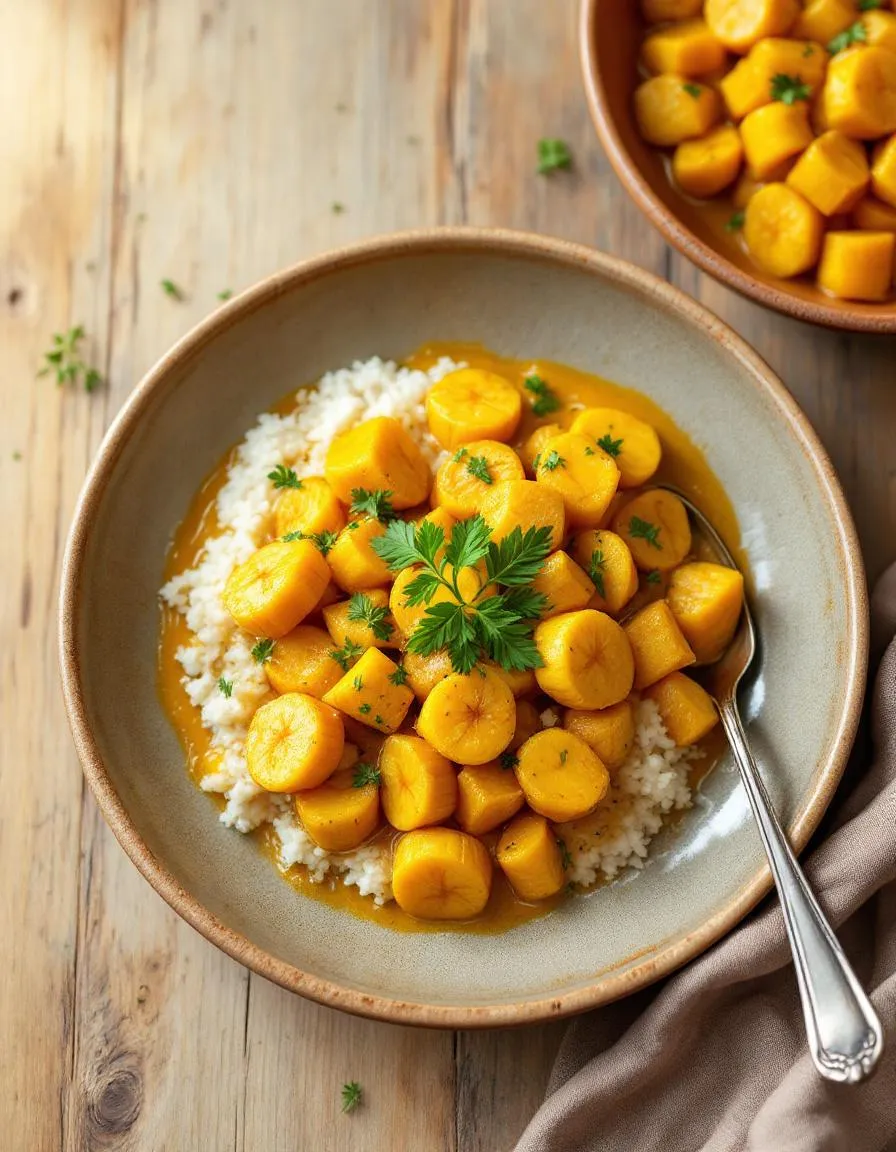
A flavorful and hearty curry featuring ripe plantains, coconut milk, and Caribbean spices.
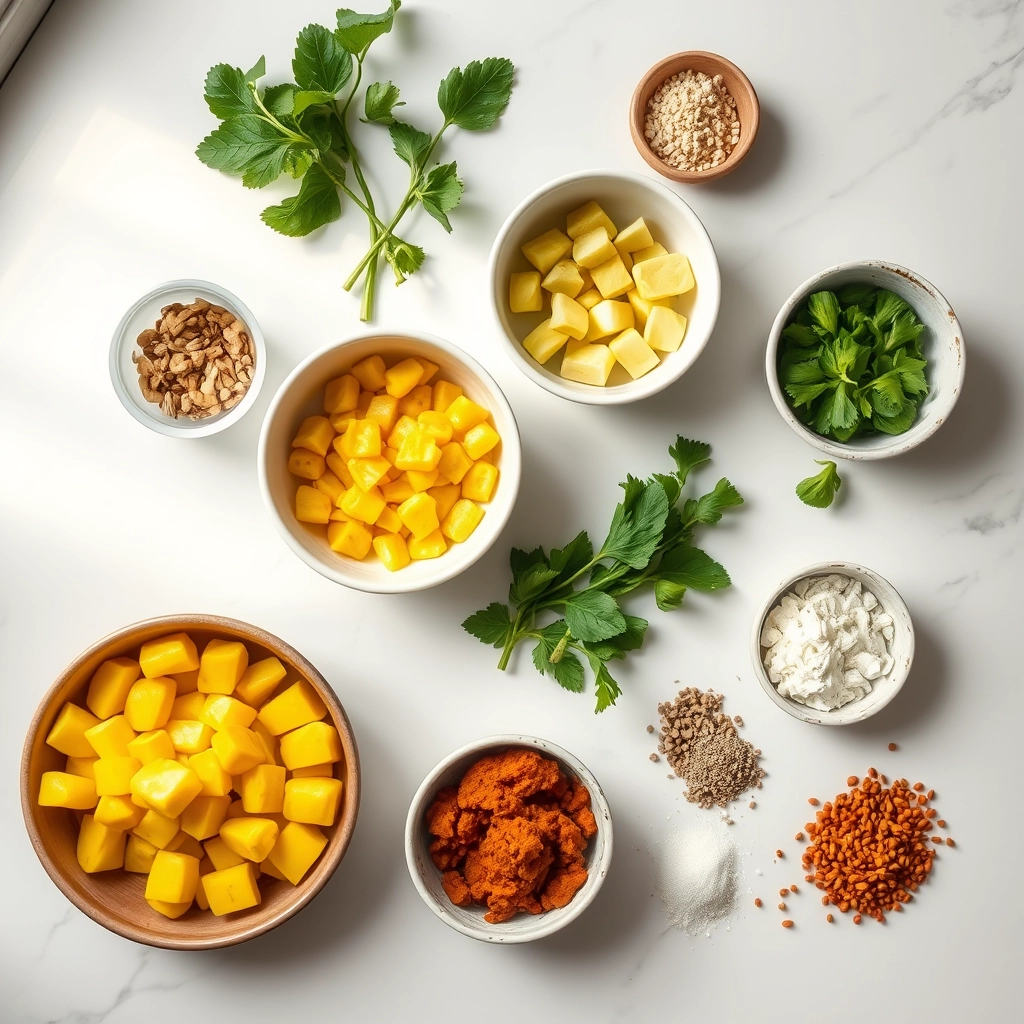
Ingredients
Scale
For the Crust:
2 ripe plantains, peeled and sliced
1 can (14 oz) coconut milk
1 onion, diced
2 cloves garlic, minced
1 tbsp curry powder
1 tsp ground allspice
1 scotch bonnet pepper (optional, for heat)
1 tbsp vegetable oil
1 cup vegetable broth
1 tsp thyme
Salt and pepper to taste
Instructions
1. Prepare the Crust:
Heat oil in a large pot over medium heat. Add onions and garlic, sauté until softened.
Stir in curry powder, allspice, and thyme, cooking for 1 minute until fragrant.
Add sliced plantains and scotch bonnet pepper (if using), stirring to coat with spices.
Pour in coconut milk and vegetable broth. Bring to a simmer and cook for 20-25 minutes, until plantains are tender.
Season with salt and pepper to taste. Serve hot over rice or with flatbread.
Notes
You can customize the seasonings to taste.
s-dish">How to Prepare This Dish
Steps and time-saving tips
Start by peeling and slicing your ripe plantains into thick rounds—this ensures they hold their shape while cooking. Heat a drizzle of oil in a deep skillet over medium heat, then lightly fry the plantains until golden. Remove them and set aside. In the same skillet, sauté diced onions, garlic, and ginger until fragrant. Stir in curry powder, turmeric, and a pinch of cayenne for that authentic Caribbean-style Plantain Curry kick. Next, pour in coconut milk and vegetable broth, letting the mixture simmer for a few minutes to meld the flavors. Gently fold the plantains back into the sauce, coating them evenly. Cover and simmer on low heat for 10-12 minutes, allowing the plantains to soak up the rich flavors. For a time-saving hack, prep your spices and chop veggies ahead of time. If the sauce thickens too much, just add a splash of broth. Serve warm over rice or with flatbread for a satisfying meal.
Mistakes I’ve made and learned from
Early on, I rushed the sautéing step, leaving my onions undercooked and the curry lacking depth. Now, I take my time until they’re caramelized and sweet. Another blunder? Using unripe plantains—they turned starchy and bland instead of tender and slightly sweet. Stick to ripe ones with black speckles for the best texture. If you’re new to Caribbean flavors, check out my guide on spice blends for beginners to nail the seasoning. And if your sauce ever splits (yes, it happens), a quick fix is blending in a teaspoon of cornstarch slurry. For more troubleshooting tips, my post on fixing broken sauces has saved many of my dishes.
n-and-variations">Cultural Connection and Variations
Where this recipe comes from
Caribbean-style Plantain Curry carries the vibrant spirit of the islands, blending African, Indian, and Indigenous influences into one hearty dish. Originally, West African cooks introduced plantains to the Caribbean, while Indian laborers brought curry spices during the colonial era. Today, families across Jamaica, Trinidad, and Barbados put their own spin on it—some use coconut milk for creaminess, others add fiery Scotch bonnet peppers for heat. In my grandmother’s kitchen, she simmered the curry with thyme and allspice, giving it a distinctly Jamaican warmth.
Beyond the Caribbean, you’ll find creative twists. In Puerto Rico, cooks might pair plantains with pork, while in Guyana, they often serve it with roti for a satisfying wrap. Even in my home, we sometimes swap green plantains for ripe ones when we crave a sweeter, softer texture. No matter the variation, Caribbean-style Plantain Curry always feels like a celebration of resilience and flavor. It’s a dish that tells stories—of migration, adaptation, and the joy of sharing a steaming pot with loved ones.
How it fits in today’s cooking
Caribbean-style Plantain Curry isn’t just a relic of the past—it’s a star in modern kitchens. Busy home cooks love it for its one-pot simplicity, while meal preppers appreciate how the flavors deepen overnight. During the holidays, it often shares the table with classics like jerk chicken, but it’s just as comforting on a chilly weeknight. Plus, plantains pack potassium and fiber, making it a hit with health-conscious eaters.
Today’s adaptati
ons keep it fresh. Some roast the plantains first for extra caramelization, while others toss in chickpeas for protein. I’ve even seen it reimagined as a filling for vegan tacos. Whether you stick to tradition or experiment, Caribbean-style Plantain Curry proves that great food only gets better with time. It’s a reminder that every bite connects us to history—and to each other.
Taste and Texture
What makes it delicious
Caribbean-style Plantain Curry delivers a symphony of bold, comforting flavors and irresistible textures. First, the creamy sweetness of ripe plantains melts into the rich, coconut-infused sauce, while aromatic spices like turmeric, cumin, and allspice create a warm, fragrant depth. Each bite balances tender plantains with a slight chew, soaking up the velvety curry base. Meanwhile, hints of Scotch bonnet or habanero peppers add a subtle heat that lingers just enough to excite the palate. The dish smells heavenly—think toasted spices mingling with fresh thyme and garlic. Whether you savor it with rice or flatbread, Caribbean-style Plantain Curry wraps you in layers of tropical comfort.
Boosting the flavor
Elevate your Caribbean-style Plantain Curry with a few easy tweaks. For extra richness, swirl in a spoonful of coconut cream just before serving. If you love heat, toss in a diced jalapeño or a pinch of cayenne. Crushed peanuts or toasted coconut flakes add a delightful crunch, while a squeeze of lime brightens the dish instantly. Pair it with a tangy mango chutney or a cooling cucumber raita to balance the spices. Craving more Caribbean inspiration? Try our Jerk Chicken for another flavor-packed meal, or explore our Coconut Rice as the perfect side. With these small touches, your curry will shine even brighter.
For the best Caribbean-style Plantain Curry, always choose ripe but firm plantains to balance sweetness and texture. Meanwhile, toast your spices lightly before adding them to the pot to deepen their flavor. Additionally, simmer the curry on low heat to let the plantains soften without turning mushy. Finally, taste and adjust the seasoning just before serving to ensure a well-balanced dish every time.
Mistakes to avoid
Avoid overcrowding the pan when sautéing onions and garlic, as this can lead to uneven cooking and dull flavors. Instead, give them space to caramelize properly. Also, resist the urge to stir the Caribbean-style Plantain Curry too often, as gentle cooking helps the flavors meld. For more on perfecting your curry technique, check out our guide on spice blends for curries. Lastly, don’t skip the fresh herbs at the end—they brighten the dish. Learn how to store herbs properly in our herb storage tips to keep them fresh longer.
g-suggestions">Serving and Pairing Suggestions
How to serve this dish
Caribbean-style Plantain Curry shines when you serve it with flair. For a vibrant presentation, ladle it over a bed of fluffy coconut rice and garnish with fresh cilantro or thinly sliced scallions. Meanwhile, if you’re hosting a casual gathering, consider serving it family-style in a colorful ceramic bowl with warm roti or flatbread on the side. This dish also makes a fantastic centerpiece for holiday meals, especially when paired with other Caribbean favorites. To elevate the visual appeal, add a squeeze of lime just before serving for a bright, citrusy finish.
What goes well with it
Pair Caribbean-style Plantain Curry with a refreshing mango lassi to balance the rich, spiced flavors. Alternatively, a crisp green salad with a tangy lime dressing lightens the meal perfectly. For heartier options, try serving it alongside our Jerk Chicken Skewers or a scoop of Coconut Rice Pilaf. Each pairing enhances the dish’s tropical notes while keeping the meal satisfying and well-rounded.
math-faq-block">
What makes Caribbean-style Plantain Curry different from other curries?
Caribbean-style Plantain Curry stands out for its use of ripe plantains, which add a natural sweetness and creamy texture. Unlike traditional curries, it often includes Caribbean spices like allspice, Scotch bonnet peppers, and coconut milk for a unique flavor profile. This dish blends tropical and savory elements for a truly distinctive meal.
Can I use green plantains instead of ripe ones for Caribbean-style Plantain Curry?
While ripe plantains are preferred for their sweetness, green plantains can be used if you prefer a starchier, less sweet version of Caribbean-style Plantain Curry. Just note that the texture will be firmer, and you may need to adjust cooking time. For authentic flavor, stick with yellow or black-ripe plantains.
What protein pairs best with Caribbean-style Plantain Curry?
Chicken, shrimp, or chickpeas are excellent protein choices for Caribbean-style Plantain Curry. Chicken thighs absorb the curry flavors beautifully, while shrimp adds a coastal twist. For a vegan version, chickpeas provide hearty texture while complementing the plantains’ sweetness.
rank-math-faq-item">
How do I store and reheat leftover Caribbean-style Plantain Curry?
Store Caribbean-style Plantain Curry in an airtight container in the refrigerator for up to 3 days. Reheat gently on the stovetop with a splash of water or coconut milk to revive the sauce. Avoid microwaving, as this can make the plantains mushy.
Best Savory Cheesesteak Tortellini in Creamy Provolone Sauce
Introduction
If you’re craving comfort food with a twist, you’re in the right place. Today, I’m sharing a recipe that combines the hearty flavors of a classic Philly cheesesteak with the cozy satisfaction of pasta. Savory Cheesesteak Tortellini in creamy provolone sauce is the ultimate weeknight dinner—rich, indulgent, and surprisingly simple to make. Whether you’re cooking for family or treating yourself, this dish delivers nostalgia and flavor in every bite.
Savory Cheesesteak Tortellini in creamy provolone sauce brings together tender tortellini, thinly sliced steak, caramelized onions, and bell peppers, all smothered in a velvety provolone sauce. This recipe matters because it transforms familiar ingredients into something extraordinary, perfect for busy cooks who refuse to sacrifice flavor. It fits the brekcakes.com tone by balancing approachability with creativity, just like my homemade pasta recipes. Plus, it’s versatile—swap the steak for mushrooms or use store-bought tortellini to save time. For more cheesy inspiration, check out my comfort food favorites.
Why I Love This Recipe
This dish holds a special place in my heart because it reminds me of family dinners growing up. My dad adored Philly cheesesteaks, and my mom always found ways to reinvent them. When I first made Savory Cheesesteak Tortellini in creamy provolone sauce, it felt like blending their traditions with my own culinary style. The creamy sauce hugs every ingredient, creating a harmony of textures and flavors that feels like a hug on a plate. Every time I make it, I’m reminded that the best meals aren’t just about taste—they’re about connection.
Health and Nutrition
Why it’s good for your body
Savory Cheesesteak Tortellini in creamy provolone sauce packs a flavorful punch while delivering real nutritional benefits. First, the dish combines lean protein from tender steak and cheese-filled tortellini, which helps build and repair muscles. Additionally, the creamy provolone sauce provides calcium for strong bones, making it a smart choice for long-term health.
Moreover, Savory Cheesesteak Tortellini in creamy provolone sauce includes onions and peppers, which add fiber and antioxidants. These ingredients support digestion and may reduce inflammation. The balanced mix of carbs, fats, and protein also keeps energy levels steady, so you avoid mid-meal crashes.
Finally, the dish offers comfort without excessive heaviness. While rich in flavor, Savory Cheesesteak Tortellini in creamy provolone sauce uses quality ingredients that satisfy cravings without overloading on empty calories. Whether you need a post-workout meal or a cozy dinner, this dish delivers both taste and nourishment.
How it fits in a healthy lifestyle
Savory Cheesesteak Tortellini in creamy provolone sauce fits seamlessly into balanced eating habits. For protein-focused diets, the steak and cheese provide a hearty dose to fuel active lifestyles. If you prefer gluten-free options, simply swap regular tortellini for a gluten-free alternative to enjoy the same rich flavors.
This dish also works well for meal prep, as it reheats beautifully for quick lunches or dinners. Pair it with a side of roasted vegetables or a crisp salad to round out your plate. For more ideas on balancing indulgent meals, check out our guide on healthy eating tips.
If you love hearty meals but want to keep portions in check, Savory Cheesesteak Tortellini in creamy provolone sauce is surprisingly versatile. Serve smaller portions alongside lighter dishes, or explore our meal planning strategies to make it part of your weekly routine. With smart choices, you can enjoy every bite without guilt.
A rich and comforting dish combining the flavors of a classic Philly cheesesteak with cheesy tortellini in a creamy provolone sauce.
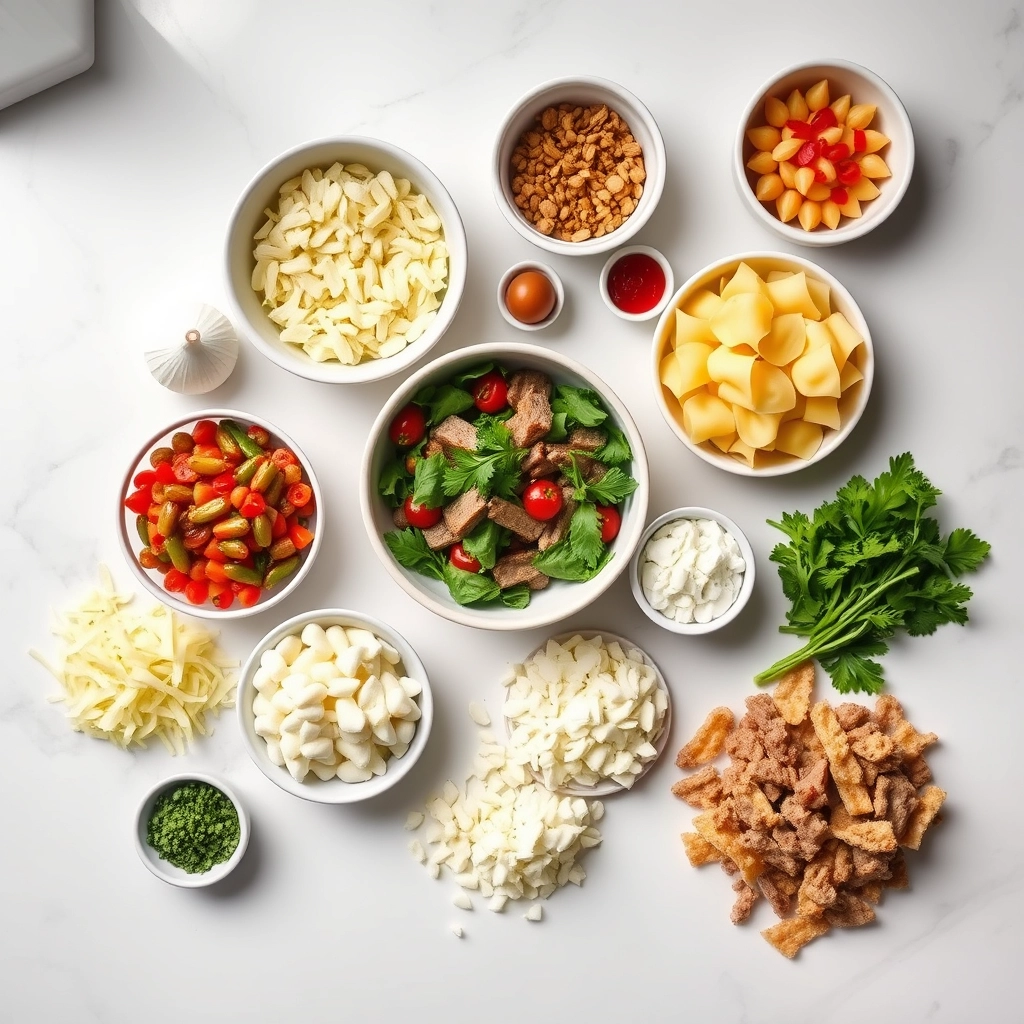
Ingredients
Scale
For the Crust:
1 lb cheese tortellini
1 lb ribeye steak, thinly sliced
1 green bell pepper, sliced
1 small onion, sliced
2 cloves garlic, minced
1 cup heavy cream
1 cup shredded provolone cheese
1/2 cup beef broth
2 tbsp butter
1 tbsp olive oil
1 tsp Worcestershire sauce
1/2 tsp black pepper
1/2 tsp salt
Instructions
1. Prepare the Crust:
Cook tortellini according to package directions. Drain and set aside.
In a large skillet, heat olive oil over medium-high heat. Add sliced steak and cook until browned. Remove from skillet and set aside.
In the same skillet, melt butter and sauté bell peppers and onions until softened. Add garlic and cook for 1 minute.
Pour in beef broth and Worcestershire sauce, scraping up any browned bits from the pan.
Reduce heat to medium-low. Stir in heavy cream and provolone cheese until smooth and creamy.
Return cooked steak to the skillet and add cooked tortellini. Stir to combine and heat through.
Season with salt and black pepper. Serve immediately.
Notes
You can customize the seasonings to taste.
“`html
s-dish">How to Prepare This Dish
Steps and time-saving tips
Start by heating a large skillet over medium-high heat and adding a drizzle of olive oil. Toss in thinly sliced ribeye steak and cook until it browns, about 3-4 minutes. Meanwhile, boil your favorite cheese-filled tortellini according to the package instructions—just be sure to salt the water for extra flavor. While the pasta cooks, whisk together heavy cream, grated provolone, and a pinch of garlic powder in a saucepan over low heat until the sauce melts into velvety smoothness. Drain the tortellini, then gently fold it into the creamy provolone sauce along with the cooked steak. For a time-saving hack, use pre-sliced steak from the butcher or frozen tortellini to cut prep work in half. Finally, garnish with fresh parsley and a crack of black pepper for a restaurant-worthy finish. The whole process takes under 30 minutes, making Savory Cheesesteak Tortellini in creamy provolone sauce perfect for busy weeknights.
Mistakes I’ve made and learned from
Early on, I rushed the sauce and ended up with grainy provolone because I cranked the heat too high—low and slow is key for that silky texture. Another time, I overcooked the tortellini, turning it mushy; now I set a timer for 1 minute less than the package suggests since it keeps cooking in the sauce. If you’re new to working with provolone, check out my guide on cheese melting tips to avoid clumping. And if you love this combo of flavors, you’ll adore my steak pasta roundup for more hearty, creamy inspirations. Trust me, a little patience and these tweaks make all the difference!
Savory Cheesesteak Tortellini in creamy provolone sauce blends two beloved comfort foods into one unforgettable dish. The recipe draws inspiration from Philadelphia’s iconic cheesesteak, where thinly sliced beef and melted cheese dominate the scene. Meanwhile, the tortellini brings a touch of Italian tradition, turning the meal into a hearty, pasta-based delight. Families in the Midwest often add mushrooms or bell peppers for extra depth, while some Southern cooks swap provolone for pepper jack to spice things up.
In my own kitchen, Savory Cheesesteak Tortellini in creamy provolone sauce became a game-day staple. Friends and family gather around the table, scooping up every cheesy bite. Across the globe, variations pop up—like using gouda in the Netherlands or adding kimchi for a Korean twist. No matter where you enjoy it, this dish always feels like a warm hug. Whether you stick to the classic or experiment, the creamy provolone sauce ties everything together beautifully.
ays-cooking">How it fits in today’s cooking
Today, Savory Cheesesteak Tortellini in creamy provolone sauce fits perfectly into busy weeknights and cozy weekend dinners. Modern cooks love its versatility, often pairing it with a crisp side salad or garlic bread for a complete meal. During the holidays, some families even serve it as a festive alternative to heavy roasts. Plus, meal preppers adore how well it reheats, making it a lunchbox favorite.
With so many ways to adapt it, this dish stays relevant year-round. For a lighter take, try swapping half-and-half for coconut milk or adding roasted veggies. Craving more protein? Toss in some grilled chicken. If you’re hosting a crowd, pair it with a decadent dessert for the ultimate comfort-food experience. No matter how you tweak it, Savory Cheesesteak Tortellini in creamy provolone sauce always delivers satisfaction.
Taste and Texture
What makes it delicious
Savory Cheesesteak Tortellini in creamy provolone sauce delivers a rich, indulgent experience with every bite. The tender tortellini, stuffed with juicy steak and melted cheese, pairs perfectly with the velvety provolone sauce, creating a luscious, creamy texture. Fragrant garlic and caramelized onions add depth, while a hint of black pepper brings a subtle warmth. Each forkful balances the hearty chew of the pasta with the smooth, decadent sauce, making it impossible to resist. The aroma alone—a mix of sizzling beef, toasted cheese, and herbs—will have everyone gathering around the table. Savory Cheesesteak Tortellini in creamy provolone sauce is a comfort food masterpiece, blending bold flavors and satisfying textures.
r">Boosting the flavor
For an extra flavor kick, try topping your Savory Cheesesteak Tortellini with crispy fried onions or a sprinkle of smoked paprika. If you love heat, a drizzle of homemade chili oil adds a spicy contrast to the creamy sauce. Swapping provolone for sharp cheddar or gouda can intensify the cheesiness, while a splash of Worcestershire sauce deepens the umami notes. Serve it alongside a fresh garlic parmesan salad to cut through the richness. With these tweaks, you’ll elevate an already delicious dish into something unforgettable.
Tips for Success
Best practices for results
First, always use fresh tortellini for the best texture in your Savory Cheesesteak Tortellini in creamy provolone sauce. Additionally, cook the steak strips just until they brown slightly to keep them tender. Meanwhile, stir the provolone sauce frequently over low heat to prevent clumping. Finally, toss the cooked tortellini gently with the sauce to coat evenly without breaking the pasta.
>Mistakes to avoid
Avoid overcooking the tortellini, as it can turn mushy in the Savory Cheesesteak Tortellini in creamy provolone sauce. Instead, check for doneness a minute before the package instructions suggest. Also, don’t skip resting the steak before slicing, or the juices will escape. For more on perfecting meat prep, see our guide on how to cook steak. Lastly, if your sauce thickens too much, thin it with a splash of pasta water rather than milk, which can dilute the flavor. Learn more about sauce consistency in our creamy sauce tips.
Serving and Pairing Suggestions
How to serve this dish
For a stunning presentation, serve Savory Cheesesteak Tortellini in creamy provolone sauce in shallow pasta bowls to highlight the rich sauce. Meanwhile, sprinkle freshly chopped parsley or chives on top for a pop of color. Alternatively, add a light dusting of grated Parmesan for extra flavor. This dish works perfectly for cozy weeknight dinners yet also shines at casual gatherings. If you want to elevate it further, pair it with crusty garlic bread for dipping into that luscious sauce.
What goes well with it
A crisp green salad with tangy vinaigrette balances the richness of Savory Cheesesteak Tortellini in creamy provolone sauce. For a heartier meal, try roasted Brussels sprouts or garlic butter mushrooms, which add earthy depth. Meanwhile, a chilled glass of Chardonnay or an amber ale enhances the savory notes. If you love cheesy flavors, our Creamy Spinach Artichoke Dip makes a fantastic starter. For dessert, something light like our Lemon Berry Trifle refreshes the palate beautifully.
What ingredients are in Savory Cheesesteak Tortellini in creamy provolone sauce?
Savory Cheesesteak Tortellini in creamy provolone sauce typically includes cheese-filled tortellini, thinly sliced steak, onions, bell peppers, mushrooms, and a rich provolone cheese sauce. The dish combines classic Philly cheesesteak flavors with tender pasta for a hearty meal. You can customize it with additional toppings like garlic or hot peppers.
How do you make the creamy provolone sauce for Savory Cheesesteak Tortellini?
The creamy provolone sauce for Savory Cheesesteak Tortellini is made by melting butter, whisking in flour to create a roux, then slowly adding milk and shredded provolone cheese until smooth. Season with salt, pepper, and a pinch of garlic powder for extra flavor. Stir the sauce into cooked tortellini and steak for a decadent finish.
rank-math-faq-item">
Can I use frozen tortellini for Savory Cheesesteak Tortellini in creamy provolone sauce?
Yes, frozen tortellini works perfectly for Savory Cheesesteak Tortellini in creamy provolone sauce—just boil it according to package directions before adding it to the dish. Fresh or refrigerated tortellini also work well if you prefer a softer texture. The key is ensuring the pasta is al dente before mixing it with the sauce and steak.
What sides pair well with Savory Cheesesteak Tortellini in creamy provolone sauce?
Savory Cheesesteak Tortellini in creamy provolone sauce pairs beautifully with garlic bread, a crisp green salad, or roasted vegetables like asparagus or Brussels sprouts. For a lighter option, try a tangy coleslaw to balance the richness of the provolone sauce. The dish is hearty enough to stand alone but benefits from fresh, contrasting sides.
Best Easy Butternut Squash Soup Recipe – Creamy & Delicious
Introduction
There’s something deeply comforting about a bowl of soup, especially when the weather turns chilly. That’s why I’m so excited to share my Easy Butternut Squash Soup Recipe with you today. Whether you’re a busy parent, a cooking newbie, or simply craving a cozy meal, this recipe delivers warmth and flavor without the fuss. Plus, it’s packed with nutrients, making it as wholesome as it is delicious. Trust me, one spoonful will make you feel like you’re wrapped in a cozy blanket.
This Easy Butternut Squash Soup Recipe is a celebration of simplicity. Butternut squash, with its naturally sweet and nutty flavor, takes center stage, while a handful of pantry staples like onions, garlic, and vegetable broth build layers of depth. What makes it special? First, it’s incredibly forgiving—no fancy techniques or hard-to-find ingredients. Second, it fits perfectly with the breezy, approachable vibe of brekcakes.com, where I love sharing recipes that feel like hugs on a plate. Whether you’re meal-prepping for the week or hosting a casual dinner, this soup adapts effortlessly. And if you’re looking for more cozy inspiration, check out my Comforting Fall Recipes or Quick Weeknight Dinners for ideas that’ll make your life tastier and easier.
Why I Love This Recipe
This soup holds a special place in my heart because it reminds me of crisp autumn evenings spent with my family. I’d watch my mom roast butternut squash, filling the house with an irresistible aroma, and now I get to recreate that magic in my own kitchen. The Easy Butternut Squash Soup Recipe isn’t just a dish—it’s a memory maker, a reminder that the simplest meals often leave the biggest impression. Every time I make it, I’m transported back to those moments, and I hope it brings you the same joy.
Health and Nutrition
Why it’s good for your body
Easy Butternut Squash Soup Recipe packs a powerful nutritional punch while keeping flavors rich and satisfying. First, butternut squash delivers a hefty dose of vitamin A, which supports vision and immune health. Additionally, its natural sweetness means you can skip excess sugar without sacrificing taste. Moreover, the soup’s creamy texture often comes from blending the squash itself, so you avoid heavy creams or unhealthy thickeners.
Beyond vitamins, Easy Butternut Squash Soup Recipe provides a great source of fiber. Fiber keeps digestion smooth and helps you feel full longer, making it easier to manage portions. Furthermore, the recipe often includes warming spices like cinnamon or nutmeg, which may help reduce inflammation. If you use low-sodium broth, the soup also becomes a heart-friendly option that supports balanced blood pressure.
Finally, Easy Butternut Squash Soup Recipe is versatile enough to fit various dietary needs. For instance, you can easily make it vegan by using plant-based broth. Whether you enjoy it as a light lunch or a cozy dinner starter, this soup nourishes your body without compromising on flavor.
How it fits in a healthy lifestyle
Easy Butternut Squash Soup Recipe fits seamlessly into a balanced diet, whether you’re focusing on weight management or simply eating cleaner. Its low-calorie yet nutrient-dense profile makes it ideal for meal prep, especially when paired with a protein like grilled chicken or a scoop of quinoa. For gluten-free eaters, this soup is naturally safe and satisfying.
If you’re exploring heart-healthy meals, try pairing this soup with our avocado toast variations for a fiber-rich combo. The soup also works well as part of a plant-based diet, aligning with recipes like our vegan meal prep ideas. Whether you need a quick weeknight dinner or a make-ahead lunch, Easy Butternut Squash Soup Recipe keeps your goals on track without extra effort.
Start by peeling and cubing the butternut squash for your Easy Butternut Squash Soup Recipe. If you’re short on time, grab pre-cut squash from the grocery store. Next, heat olive oil in a large pot over medium heat and sauté diced onions until they turn translucent. Add minced garlic and stir for about 30 seconds until fragrant. Toss in the squash cubes, along with a pinch of salt and pepper, then pour in vegetable broth until the squash is just covered. Bring the mixture to a boil, then reduce the heat and let it simmer for 20 minutes or until the squash becomes fork-tender.
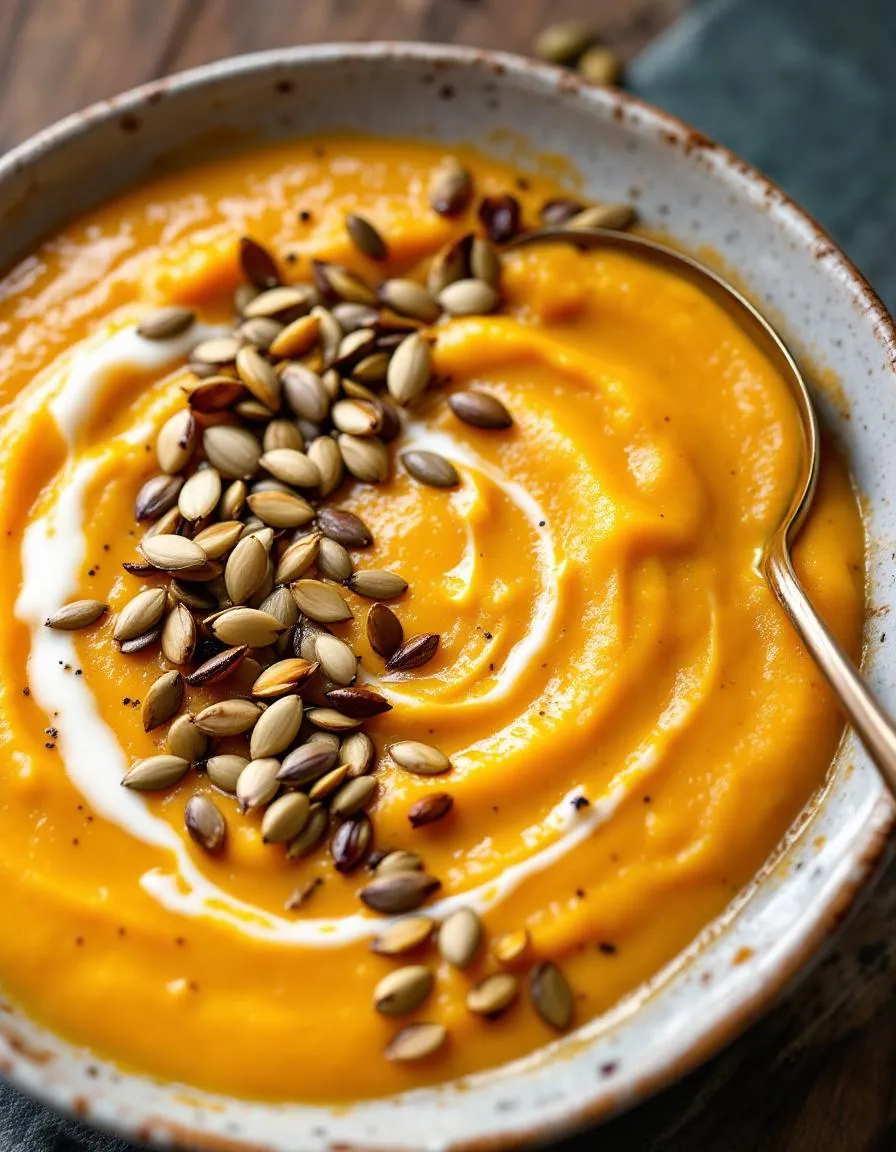
While the soup simmers, toast some pumpkin seeds in a dry skillet for a crunchy garnish. Once the squash is soft, blend the soup until smooth using an immersion blender or a regular blender in batches. For extra creaminess, stir in a splash of coconut milk or heavy cream. Taste and adjust the seasoning with more salt, pepper, or a dash of nutmeg. Finally, ladle the soup into bowls and top with those toasted pumpkin seeds, a drizzle of olive oil, or a sprinkle of fresh herbs. If you love cozy soups, you might also enjoy pairing this with a slice of garlic herb focaccia for a complete meal.
and-learned-from">Mistakes I’ve made and learned from
When I first made this Easy Butternut Squash Soup Recipe, I underestimated how long it takes to peel and chop a whole squash. After struggling with a dull knife, I learned that microwaving the squash for a minute softens the skin, making it easier to handle. Another time, I accidentally over-blended the soup, turning it gluey instead of velvety. Now, I pulse carefully and stop as soon as it’s smooth. If you’re new to soups, check out my guide on perfecting creamy soups to avoid these pitfalls. Trust me, a little patience goes a long way!
Cultural Connection and Variations
Where this recipe comes from
Easy Butternut Squash Soup Recipe has roots in the hearty, warming traditions of autumn harvests. Native Americans first cultivated butternut squash, and early settlers embraced its sweet, nutty flavor. Over time, this humble ingredient became a staple in fall and winter dishes across North America. Today, families from New England to the Pacific Northwest simmer their own versions, often adding local twists like maple syrup or smoky bacon.
Meanwhile, across the A
tlantic, Europeans blend butternut squash with spices like nutmeg and sage for a creamier texture. In the Caribbean, cooks might toss in coconut milk and Scotch bonnet peppers for a tropical kick. Even within the U.S., regional variations pop up. For instance, Southern chefs sometimes swap traditional herbs for a dash of cayenne, while Midwestern versions might lean into dairy with extra cream or cheddar garnishes. No matter where you go, Easy Butternut Squash Soup Recipe adapts beautifully to local tastes.
In my own kitchen, this soup signals the start of cozy season. My grandmother always added a splash of apple cider for tang, a trick she learned from her Pennsylvania Dutch neighbors. Whether you stick to the classics or experiment with global flavors, this dish carries stories in every spoonful.
How it fits in today’s cooking
Easy Butternut Squash Soup Recipe still shines in modern kitchens because it balances simplicity and versatility. Busy home cooks love how quickly it comes together, especially when using pre-cut squash or Instant Pot shortcuts. Meanwhile, food bloggers and chefs keep reinventing it—think vegan coconut versions or spicy harissa swirls. It’s a staple for Thanksgiving menus, but also fits seamlessly into weeknight dinners or meal-prep routines.
Health-conscious eaters
appreciate its nutrient-packed profile, often pairing it with dishes like our Roasted Vegetable Medley for a balanced meal. And let’s not forget its star power in cozy gatherings. Serve it in bread bowls for a fun twist, or alongside our Garlic Herb Focaccia for dipping. Whether you’re craving nostalgia or a fresh take, this soup proves some classics only get better with time.
Taste and Texture
What makes it delicious
This Easy Butternut Squash Soup Recipe wraps you in warmth with its velvety, creamy texture and rich, naturally sweet flavor. Roasted butternut squash melts into a silky-smooth base, while hints of caramelized onion and garlic add depth. A touch of cinnamon and nutmeg brings cozy warmth, making every spoonful fragrant and inviting. Meanwhile, a splash of coconut milk or cream balances the earthiness with just the right amount of richness. The soup feels luxurious yet light, perfect for savoring on chilly evenings. Whether you enjoy it as-is or with a garnish, the Easy Butternut Squash Soup Recipe delivers comfort in every bite.
Boosting the flavor
Elevate your Easy Butternut Squash Soup Recipe with a few creative tweaks. For a smoky twist, swirl in a dash of smoked paprika or top with crispy garlic herb croutons for contrast. If you love heat, a drizzle of sriracha or a sprinkle of red pepper flakes adds a spicy kick. For extra freshness, finish with a spoonful of herbed yogurt sauce or a handful of toasted pumpkin seeds. A squeeze of lime brightens the sweetness, while a sprinkle of grated Parmesan brings savory depth. Small changes make this soup endlessly adaptable—so have fun experimenting!
Always roast the butternut squash before blending to deepen its natural sweetness in your Easy Butternut Squash Soup Recipe. Use an immersion blender for the smoothest texture, and gradually add broth to control thickness. For extra richness, stir in a splash of coconut milk just before serving. Meanwhile, taste and adjust seasoning at the end, as flavors concentrate while cooking. Finally, garnish with toasted pumpkin seeds for a satisfying crunch.
Mistakes to avoid
Overcrowding the baking sheet when roasting squash leads to steaming instead of caramelization—space pieces evenly for the best results. Another common misstep is skipping the sauté step for onions and garlic, which weakens the soup’s flavor base. If your soup turns out too thin, simmer it longer or blend in a cooked potato for thickness. For more soup-making tricks, check out our guide on perfecting soup textures. Also, avoid over-blending, which can make the soup gluey; learn proper techniques in our kitchen tools breakdown.
g-suggestions">Serving and Pairing Suggestions
How to serve this dish
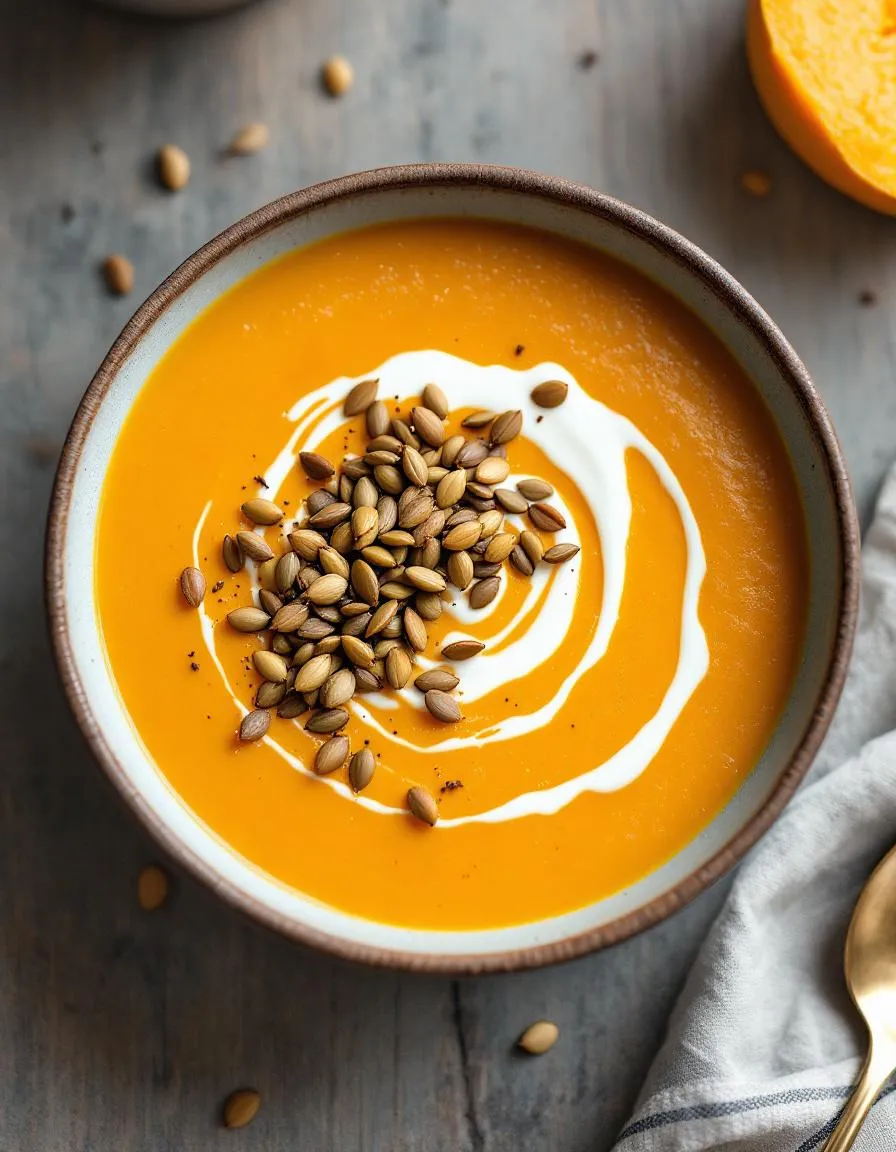
Serve your Easy Butternut Squash Soup Recipe in warm, rustic bowls to highlight its creamy texture and rich color. For a festive touch, drizzle a swirl of coconut milk or yogurt on top and sprinkle with toasted pumpkin seeds or fresh thyme. Meanwhile, if you’re hosting a holiday gathering, pair it with crusty bread for a cozy starter. Alternatively, serve it in small mugs for a fun appetizer at casual get-togethers. The vibrant orange hue makes it a stunning centerpiece for autumn brunches or Thanksgiving feasts.
What goes well with it
Elevate your Easy Butternut Squash Soup Recipe with a crisp, slightly sweet white wine like Riesling or a light-bodied Chardonnay. The acidity cuts through the soup’s richness beautifully. For a heartier meal, pair it with a warm slice of our Garlic Herb Focaccia, which adds a savory contrast. Finally, balance the sweetness with a tangy side like our Roasted Brussels Sprouts, whose caramelized edges complement the soup’s smoothness perfectly.
math-faq-block">
How long does it take to make Easy Butternut Squash Soup?
This Easy Butternut Squash Soup Recipe takes about 30-40 minutes total, including prep and cooking time. Roasting the squash first adds depth of flavor, but you can also simmer it directly in the pot to save time.
Can I use frozen butternut squash for this soup?
Yes! Frozen butternut squash works perfectly in this Easy Butternut Squash Soup Recipe. Just thaw it slightly before blending, and adjust cooking time since it softens faster than fresh squash.
What can I substitute for heavy cream in butternut squash soup?
For a lighter version of Easy Butternut Squash Soup, try coconut milk, Greek yogurt, or cashew cream. These alternatives still create a creamy texture while keeping the soup rich and flavorful.
rank-math-faq-item">
How do I store leftover butternut squash soup?
This Easy Butternut Squash Soup Recipe keeps well in an airtight container for 3-4 days in the fridge. For longer storage, freeze it for up to 3 months—just reheat gently to maintain the smooth texture.
Best Strawberry Banana Smoothie – Quick & Easy Recipe
Introduction
There’s something undeniably comforting about a Strawberry Banana Smoothie. Whether you’re rushing out the door in the morning or craving a refreshing pick-me-up, this vibrant blend delivers both nutrition and nostalgia. Plus, it’s a fantastic way to use up ripe fruit while treating yourself to a creamy, dreamy sip. If you’ve ever struggled with quick breakfast ideas, this recipe will become your go-to solution—simple, satisfying, and packed with flavor.
A Strawberry Banana Smoothie isn’t just a drink; it’s a little burst of joy in a glass. Combining the natural sweetness of strawberries with the creamy richness of bananas, this classic blend offers a perfect balance of taste and texture. What makes it truly special is its versatility. You can enjoy it as a post-workout refresher, a kid-friendly snack, or even a light dessert. Here at brekcakes.com, we celebrate recipes that fit seamlessly into busy lives without sacrificing flavor or quality. That’s why this smoothie aligns perfectly with our mission—wholesome, effortless, and downright delicious. For more inspiration, check out our healthy breakfast ideas or explore summer refreshers for seasonal twists.
Why I Love This Recipe
This Strawberry Banana Smoothie holds a special place in my heart because it reminds me of lazy summer mornings with my grandma. She’d toss whatever fruit we had into the blender, and somehow, it always tasted like sunshine. Now, whenever I make it, I’m transported back to those carefree days. It’s more than a recipe—it’s a sweet, simple reminder that the best moments often come from the simplest ingredients.
Health and Nutrition
Why it’s good for your body
A Strawberry Banana Smoothie packs a powerful punch of vitamins and minerals. First, strawberries deliver a hefty dose of vitamin C, which boosts immunity and promotes glowing skin. Meanwhile, bananas provide potassium, a key nutrient for maintaining healthy blood pressure and muscle function. Together, they create a delicious and nutritious blend.
Additionally, this smoothie offers a natural energy boost without added sugars. Because strawberries and bananas contain fiber, they help regulate digestion and keep you feeling full longer. Furthermore, the antioxidants in strawberries combat inflammation, while bananas contribute to heart health. Whether you enjoy it for breakfast or a snack, a Strawberry Banana Smoothie fuels your body with clean, wholesome ingredients.
Finally, this smoothie supports hydration, especially when you use almond milk or coconut water as the base. Since both fruits have high water content, they help replenish fluids. Plus, the natural sweetness satisfies cravings without processed sugars. For a quick, nutrient-dense option, a Strawberry Banana Smoothie checks all the boxes.
How it fits in a healthy lifestyle
A Strawberry Banana Smoothie fits seamlessly into a balanced diet. If you follow a gluten-free or dairy-free lifestyle, simply swap regular yogurt for a plant-based alternative. It also works well for heart-healthy eating, thanks to the potassium and fiber content. For an extra protein boost, add a scoop of nut butter or Greek yogurt.
This smoothie makes meal prep effortless. Whip it up in minutes for a busy morning or post-workout refuel. Pair it with a slice of whole-grain toast or a handful of nuts for a complete meal. If you love easy, nutritious recipes, explore our healthy breakfast ideas for more inspiration. For those tracking macros, check out our high-protein snacks to customize your smoothie even further.
Whether you prioritize convenience, nutrition, or flavor, a Strawberry Banana Smoothie adapts to your goals. It’s a simple way to enjoy a wholesome treat while staying on track.
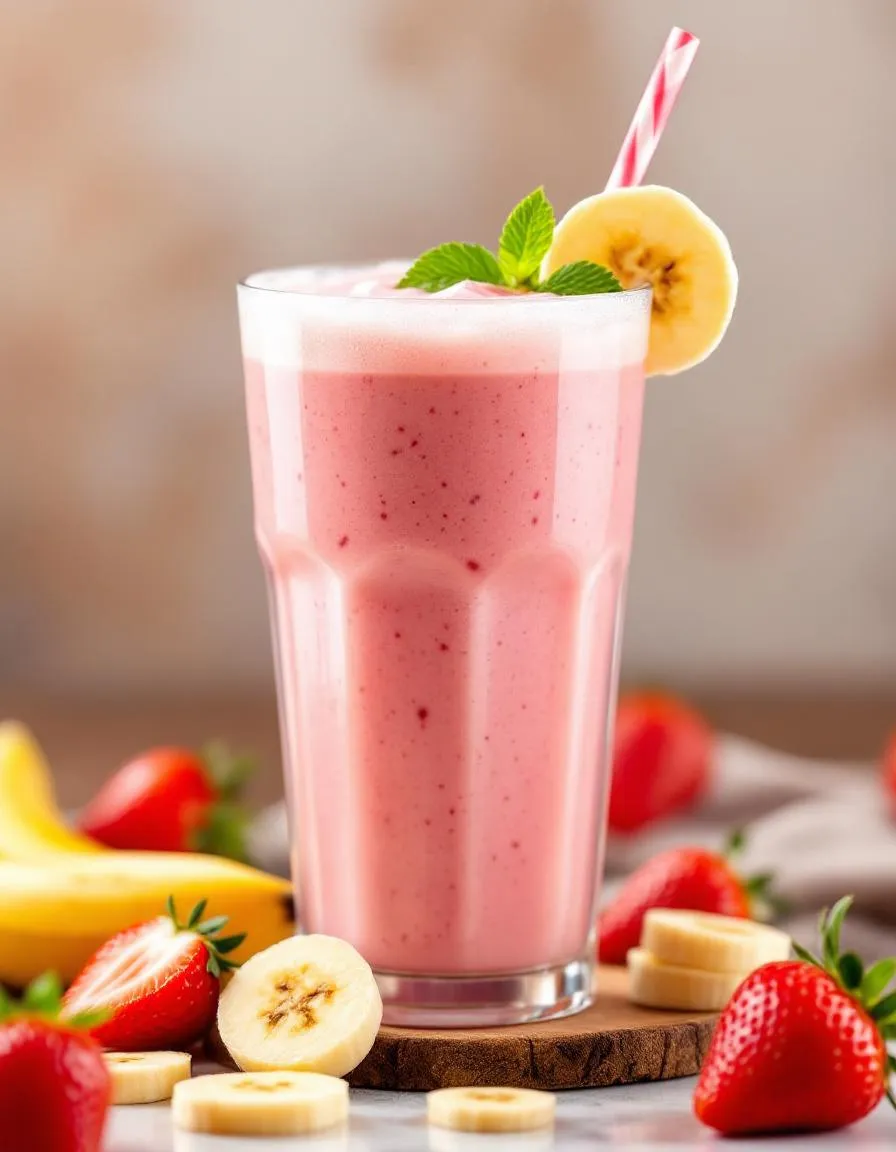
A refreshing and nutritious smoothie perfect for breakfast or a quick snack.
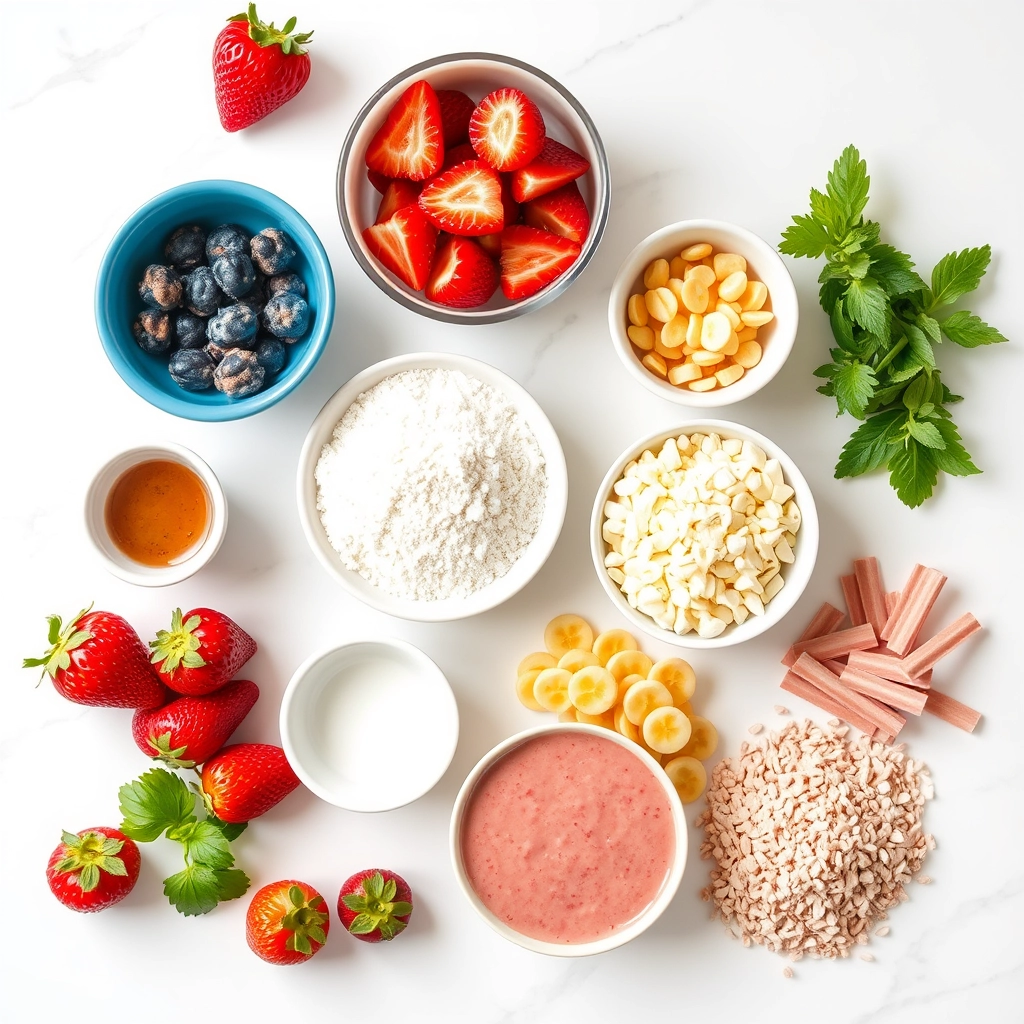
Ingredients
Scale
For the Crust:
1 cup fresh strawberries, hulled
1 ripe banana
1/2 cup Greek yogurt
1/2 cup milk (or almond milk)
1 tablespoon honey (optional)
1/2 cup ice cubes
Instructions
1. Prepare the Crust:
Add strawberries, banana, yogurt, milk, and honey (if using) to a blender.
Blend on high speed until smooth.
Add ice cubes and blend again until smooth and frothy.
Notes
You can customize the seasonings to taste.
s-dish">How to Prepare This Dish
Steps and time-saving tips
Start by gathering all your ingredients for the Strawberry Banana Smoothie—fresh strawberries, ripe bananas, yogurt, milk, and a touch of honey if you like it sweeter. First, wash the strawberries thoroughly under cold water and hull them to remove the stems. Slice the bananas into chunks for easier blending. Next, toss the strawberries and bananas into your blender, followed by a generous scoop of yogurt and a splash of milk. Blend everything on high until smooth, pausing to scrape down the sides if needed. If the mixture feels too thick, add a little more milk until it reaches your preferred consistency. For a frostier texture, throw in a handful of ice cubes before blending. Finally, taste and adjust the sweetness with honey if desired. Pour the Strawberry Banana Smoothie into glasses and serve immediately for the freshest flavor. To save time, prep your fruit the night before and store it in the fridge so you can blend and go in the morning. Another tip: freeze overripe bananas ahead of time—they add natural sweetness and a creamy texture without extra sugar.
Mistakes I’ve made and learned from
When I first made this Strawberry Banana Smoothie, I underestimated how crucial ripe bananas are. Using underripe ones left the drink bland and starchy—now I wait until they’re speckled for maximum sweetness. Another blunder? Overloading the blender with ice, which watered down the flavor. I learned to use frozen fruit instead for a thicker, tastier result. If you’re new to smoothies, check out my guide on choosing the right blender to avoid uneven blending. And if you’re curious about other flavor combos, my healthy smoothie variations post has plenty of inspiration. Trust me, a few tweaks make all the difference!
n-and-variations">Cultural Connection and Variations
Where this recipe comes from
The Strawberry Banana Smoothie feels like a sunny morning in a glass, blending two of nature’s sweetest fruits into a timeless favorite. While its exact origins are hazy, many tie it to the health-conscious movements of the 1970s, when blenders became kitchen staples and people craved quick, nutritious options. However, cultures worldwide have their own twists. In Brazil, they might add açaí for extra richness, while in India, a sprinkle of cardamom elevates the flavor. Some Caribbean versions even sneak in coconut milk for creaminess.
In my family, the Strawberry Banana Smoothie was a weekend ritual. My grandma always tossed in a spoonful of honey and a dash of cinnamon, claiming it “woke up the soul.” Seasonally, it shifts too—summer calls for fresh-picked berries, while frozen fruit keeps it vibrant year-round. Whether you sip it as a post-workout refresher or a lazy brunch treat, this smoothie adapts effortlessly, proving some combinations never go out of style.
How it fits in today’s cooking
Today, the Strawberry Banana Smoothie holds its ground as a go-to for busy lifestyles. Meal-preppers love it because they can batch-freeze ingredients, and fitness fans rely on its natural energy boost. Modern twists include adding protein powder or swapping dairy for almond milk, making it a staple in plant-based diets. It’s also a star in kid-friendly menus—parents sneak in spinach or chia seeds without a fuss.
Beyond practicality, it
’s a nostalgic comfort. Cafés serve it as a creamy companion to breakfast pastries, and home cooks blend it for post-school snacks. Whether you’re fueling a workout or craving a sweet moment, the Strawberry Banana Smoothie fits seamlessly into how we eat now—simple, adaptable, and always satisfying.
Taste and Texture
What makes it delicious
A Strawberry Banana Smoothie bursts with sweet, fruity flavors that dance on your tongue. Ripe strawberries lend a bright, tangy freshness, while bananas add a velvety, mellow sweetness. Together, they create a perfectly balanced sip that’s both refreshing and indulgent. The texture? Ultra-creamy and smooth, thanks to the natural thickness of blended bananas. Every gulp feels like a luscious treat, with a subtle floral aroma from the strawberries that makes it irresistible. Whether you sip it for breakfast or as a snack, this Strawberry Banana Smoothie delivers a satisfying, fruity escape.
Boosting the flavor
Elevate your Strawberry Banana Smoothie with a few easy tweaks. For extra richness, swap regular yogurt for Greek yogurt, which adds a tangy punch and protein boost. A drizzle of honey or a sprinkle of cinnamon deepens the sweetness without overpowering the fruit. Craving crunch? Top it with homemade granola for a delightful contrast to the creamy blend. Alternatively, a splash of vanilla extract or a handful of spinach (for a hidden nutrient kick) keeps the flavor vibrant. With these simple upgrades, your smoothie becomes even more crave-worthy.
Always freeze your bananas beforehand to create a thicker, creamier Strawberry Banana Smoothie. Similarly, use chilled strawberries for a refreshing texture. If you prefer a sweeter taste, add a touch of honey or maple syrup instead of refined sugar. For the best consistency, blend the liquid and yogurt first before adding the fruit. Finally, serve your Strawberry Banana Smoothie immediately to enjoy its vibrant flavor and smooth texture.
Mistakes to avoid
Avoid overloading the blender with too much fruit at once, as this can strain the motor and leave chunks. Instead, pulse the ingredients in batches if needed. Another common mistake is using watery or underripe strawberries, which dilute the flavor. For perfectly ripe fruit, check out our guide on how to pick sweet strawberries. Also, skip adding ice cubes unless necessary, as frozen fruit already provides the right chill. If you need tips on balancing flavors, our smoothie flavor combinations article offers great ideas.
g-suggestions">Serving and Pairing Suggestions
How to serve this dish
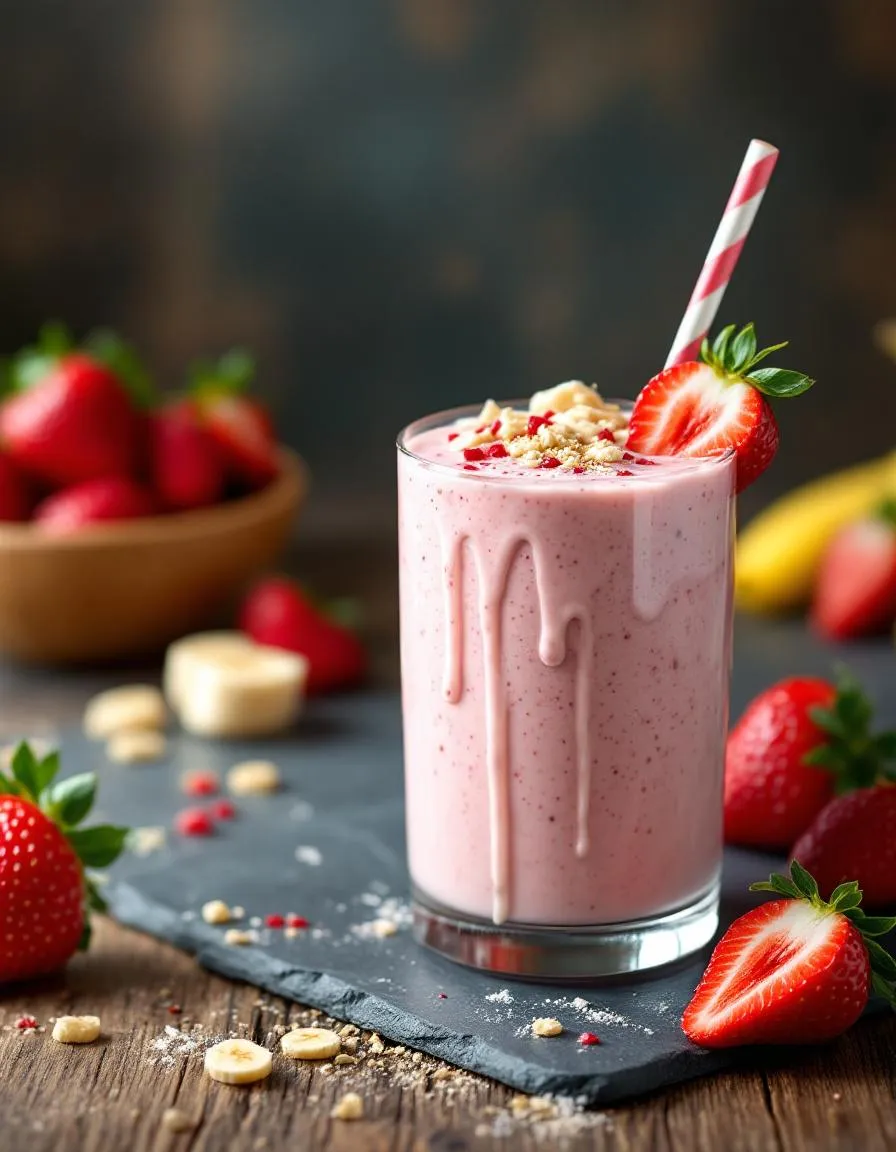
Elevate your Strawberry Banana Smoothie by serving it in a chilled mason jar or a tall glass with a colorful straw. For a brunch gathering, layer it with granola and yogurt in a parfait glass for a stunning visual effect. Meanwhile, garnish the rim with fresh strawberry slices or a banana wheel to make it extra inviting. This refreshing drink also shines at summer picnics or as a quick post-workout treat. If you want to impress guests, drizzle a swirl of honey on top or add a sprig of mint for a pop of color.
What goes well with it
Pair your Strawberry Banana Smoothie with a buttery almond croissant for a delightful breakfast combo. The smoothie’s sweetness balances the croissant’s rich, flaky texture perfectly. Alternatively, try it alongside a bowl of overnight oats for a fiber-packed meal. If you’re craving something savory, our fluffy spinach and feta quiche makes a fantastic contrast to the smoothie’s fruity flavors. For a lighter option, serve it with a handful of homemade granola clusters for added crunch.
math-faq-block">
What are the benefits of a Strawberry Banana Smoothie?
A Strawberry Banana Smoothie is packed with vitamins, fiber, and antioxidants from the fruit. It’s a great way to boost energy, support digestion, and enjoy a delicious, nutrient-rich drink. The combination of strawberries and bananas also provides natural sweetness without added sugars.
Can I make a Strawberry Banana Smoothie without yogurt?
Yes! You can substitute yogurt with almond milk, coconut milk, or even water for a dairy-free Strawberry Banana Smoothie. Adding a splash of orange juice or a handful of oats can enhance the texture and flavor while keeping it creamy.
How do I thicken my Strawberry Banana Smoothie?
For a thicker Strawberry Banana Smoothie, try adding frozen fruit, Greek yogurt, or a tablespoon of chia seeds. You can also blend in ice cubes or a small amount of avocado for extra creaminess without altering the taste.
rank-math-faq-item">
Is a Strawberry Banana Smoothie good for weight loss?
A Strawberry Banana Smoothie can support weight loss if made with low-calorie ingredients like unsweetened almond milk and no added sugars. It’s a filling, nutrient-dense option that helps curb cravings while providing essential vitamins and minerals.
Best Ground Beef Tacos – Easy and Flavorful Recipe
Introduction
There’s something undeniably comforting about a plate of sizzling Ground Beef Tacos. Whether it’s a busy weeknight or a casual gathering with friends, this dish never fails to bring people together. Plus, with endless topping options, everyone can customize their perfect bite. If you’ve ever craved a meal that’s both easy to make and packed with flavor, you’re in the right place. Let’s dive into why Ground Beef Tacos deserve a spot in your regular recipe rotation.
Ground Beef Tacos are a timeless classic, blending seasoned beef, crisp shells, and fresh toppings into a meal that’s as versatile as it is delicious. What makes them special is their simplicity—you don’t need fancy techniques or hard-to-find ingredients. Just a handful of pantry staples, like the ones I often use in my Homemade Taco Seasoning, transform basic ground beef into something extraordinary. Beyond convenience, tacos also offer a fun, interactive way to eat. From kids building their own creations to adults loading up on spicy toppings, they’re a crowd-pleaser for all ages. And if you love easy, family-friendly meals, you’ll appreciate how well this recipe pairs with sides like my Creamy Mexican Street Corn.
Why I Love This Recipe
Ground Beef Tacos hold a special place in my heart because they remind me of Sunday dinners with my family. My dad would always take charge of browning the beef while my mom chopped fresh veggies, and my siblings and I argued over who got the first bite. Even now, the smell of sizzling spices transports me back to those loud, laughter-filled nights. It’s more than just a meal—it’s a tradition I’m thrilled to share with you.
Health and Nutrition
Why it’s good for your body
Ground Beef Tacos pack a powerful nutritional punch while delivering bold flavors. First, the lean ground beef provides high-quality protein, which helps build muscle and keeps you full longer. Additionally, it supplies essential nutrients like iron, zinc, and B vitamins, which support energy levels and immune function. When you pair it with fiber-rich toppings like lettuce, tomatoes, and beans, Ground Beef Tacos become a well-rounded meal.
Moreover, the customizable nature of Ground Beef Tacos lets you boost their health benefits even further. For example, adding avocado adds heart-healthy fats, while salsa contributes antioxidants. Even the tortillas can be a smart choice if you opt for whole-grain or low-carb alternatives. Because of this flexibility, Ground Beef Tacos can easily fit into various dietary preferences without sacrificing taste.
Finally, the combination of protein, fiber, and healthy fats in Ground Beef Tacos helps stabilize blood sugar levels. This means you avoid energy crashes and stay satisfied for hours. Whether you’re fueling up after a workout or enjoying a family dinner, Ground Beef Tacos offer both nourishment and indulgence in every bite.
How it fits in a healthy lifestyle
Ground Beef Tacos work beautifully in a balanced diet, especially if you prioritize nutrient-dense ingredients. For a high-protein meal, load them with extra lean beef and black beans. If you’re watching carbs, swap traditional tortillas for lettuce wraps or low-carb tortillas. The versatility makes them a go-to option for meal prep or quick weeknight dinners.
They also align with heart-healthy eating when you use lean beef and load up on veggies. For gluten-free diets, simply choose corn tortillas or grain-free alternatives. Plus, by controlling portion sizes and toppings, you can enjoy Ground Beef Tacos without overdoing calories. If you’re looking for more ways to balance indulgence with nutrition, check out our guide to healthy comfort food swaps. With smart choices, this classic dish easily supports your wellness goals.
Start by heating a large skillet over medium-high heat and browning the ground beef until it crumbles easily. Meanwhile, chop your onions and garlic to save time. Once the beef turns golden, drain any excess fat, then toss in the onions and garlic to soften them. Stir in your taco seasoning and a splash of water, letting the mixture simmer for a few minutes until fragrant. While the beef cooks, warm your tortillas in a dry pan or microwave them wrapped in a damp paper towel for 30 seconds. Layer the seasoned beef onto each tortilla, then top with shredded lettuce, diced tomatoes, and a generous sprinkle of cheese. Drizzle with sour cream or hot sauce if you like extra flavor. For a time-saving twist, prep your toppings ahead of time or use pre-shredded cheese. Serve immediately while everything stays warm and fresh.
Mistakes I’ve made and learned from
Early on, I used to overcrowd the skillet with ground beef, which steamed instead of browned, leaving it soggy. Now, I cook it in batches for a crispier texture. Another mistake? Skipping the step to drain excess fat, which made the tacos greasy. A quick tip: blot the beef with a paper towel if needed. I also learned the hard way that cold tortillas crack easily—warming them first makes all the difference. If you’re new to seasoning blends, check out my guide on homemade taco seasoning for a fresher taste. And if you’re short on time, my kitchen hacks post has tricks to streamline prep without sacrificing flavor.
Ground Beef Tacos trace their roots to the vibrant streets of Mexico, where tacos began as simple, portable meals for miners and laborers. Over time, this humble dish crossed borders, evolving into the hearty, flavor-packed version we know today. In Northern Mexico, you’ll often find Ground Beef Tacos stuffed with seasoned meat, fresh cilantro, and a squeeze of lime, while coastal regions might swap beef for seafood. Meanwhile, Tex-Mex cuisine gave us the iconic crunchy shell, melted cheese, and toppings like sour cream—proof that food tells a story of cultural exchange.
In my family, Ground Beef Tacos became a weekly ritual. My grandma insisted on homemade tortillas, while my dad piled on jalapeños for extra heat. Friends from California introduced avocado crema, and a college roommate swore by adding black beans. Whether served at a summer cookout or a cozy winter dinner, Ground Beef Tacos adapt effortlessly. Across the globe, chefs tweak the recipe—some adding Korean gochujang or Indian spices—proving that this dish thrives on creativity.
ays-cooking">How it fits in today’s cooking
Ground Beef Tacos still dominate dinner tables because they’re quick, customizable, and universally loved. Busy parents lean on them for 30-minute meals, while meal preppers batch-cook the filling for easy lunches. During football season, they’re a game-day staple, layered with toppings for a build-your-own bar. Even health-conscious cooks lighten them up with turkey or plant-based crumbles, proving their versatility.
Modern twists keep the dish fresh, like swapping shells for lettuce wraps or adding pineapple salsa for a sweet kick. Food bloggers rave about pairing Ground Beef Tacos with sheet-pan sides, streamlining cleanup. Whether you’re craving nostalgia or experimenting with global flavors, this recipe bridges generations and cuisines—one delicious bite at a time.
Taste and Texture
What makes it delicious
Ground Beef Tacos deliver a mouthwatering mix of savory, spicy, and fresh flavors in every bite. The seasoned beef sizzles with rich umami notes, thanks to garlic, cumin, and smoky paprika, while a hint of lime brightens the dish. Warm corn tortillas add a slightly crisp yet tender texture, cradling the juicy, well-spiced filling. Toppings like cool, creamy avocado, crunchy shredded lettuce, and tangy pico de gallo create a lively contrast. Each forkful bursts with layers of flavor, making Ground Beef Tacos irresistibly satisfying. Plus, the aroma of toasted spices and fresh cilantro wafting from the plate will have everyone rushing to the table.
r">Boosting the flavor
Elevate your Ground Beef Tacos with a few easy tweaks. First, swap ground beef for chorizo to add a smoky, slightly spicy kick. For extra freshness, top with a zesty mango salsa or pickled red onions—their bright acidity cuts through the richness. A drizzle of creamy chipotle sauce adds depth, while a sprinkle of crumbled queso fresco brings salty creaminess. If you love heat, stir minced jalapeños into the beef or serve with a side of salsa verde. Experiment with warm spices like cinnamon or cocoa powder for a deeper, mole-inspired twist. Small changes make a big difference!
Tips for Success
Best practices for results
Always brown the ground beef well before adding seasonings to develop deep flavor in your Ground Beef Tacos. Meanwhile, warm your tortillas just before serving to keep them soft and pliable. For the best texture, drain excess grease from the beef after cooking but leave a little for moisture. Additionally, toast your taco shells lightly if using crunchy varieties to prevent sogginess. Finally, layer your toppings strategically by adding cheese first so it melts slightly from the heat of the meat.
>Mistakes to avoid
One common mistake is overcooking the beef, which makes it dry instead of juicy. Instead, remove it from the heat as soon as it’s no longer pink. Another error is overloading tacos with toppings, which causes them to fall apart. For balanced flavors, follow our guide to perfect taco toppings. Also, avoid using cold tortillas straight from the fridge, as they crack when folded. For more tips on handling tortillas, check out our tortilla preparation guide. Lastly, don’t skip resting the meat for a few minutes after cooking—this helps redistribute the juices in your Ground Beef Tacos.
Serving and Pairing Suggestions
How to serve this dish
Ground Beef Tacos shine when you serve them with style. For a festive touch, arrange them on a colorful platter with lime wedges, fresh cilantro, and diced onions. Alternatively, set up a DIY taco bar for gatherings so everyone can customize their toppings. If you want a cozy weeknight meal, simply plate them with a side of warm tortillas and let the savory aroma take center stage. Either way, these tacos turn any occasion into a celebration.
What goes well with it
Pair Ground Beef Tacos with a refreshing mango margarita to balance the rich flavors. For sides, try a crisp avocado salad or cheesy elote for a satisfying contrast. If you love bold flavors, drizzle them with our creamy chipotle sauce or serve alongside smoky black beans. For dessert, a slice of tres leches cake or churros makes the perfect sweet finish.
What is the best way to season ground beef for tacos?
The best way to season ground beef for tacos is to use a blend of chili powder, cumin, garlic powder, onion powder, paprika, and salt. Brown the meat first, then add the spices with a splash of water to help them coat evenly. This method ensures flavorful Ground Beef Tacos every time.
How do you keep ground beef tacos from getting soggy?
To prevent soggy Ground Beef Tacos, drain excess grease after browning the meat and avoid overloading with wet ingredients like salsa. Lightly toast your tortillas before assembling, and layer lettuce or cheese first to create a moisture barrier.
rank-math-faq-item">
Can I make ground beef taco meat ahead of time?
Yes! Ground beef taco meat stores well for 3-4 days refrigerated or up to 3 months frozen. Reheat with a tablespoon of water to restore moisture. This makes Ground Beef Tacos perfect for meal prep or quick weeknight dinners.
What toppings go best with ground beef tacos?
Classic toppings for Ground Beef Tacos include shredded lettuce, diced tomatoes, grated cheese, sour cream, and fresh cilantro. For extra flavor, add pickled onions, jalapeños, guacamole, or a squeeze of lime juice to brighten up the dish.