Easy Vegetable Stir Fry – Quick and Healthy Recipe
Introduction
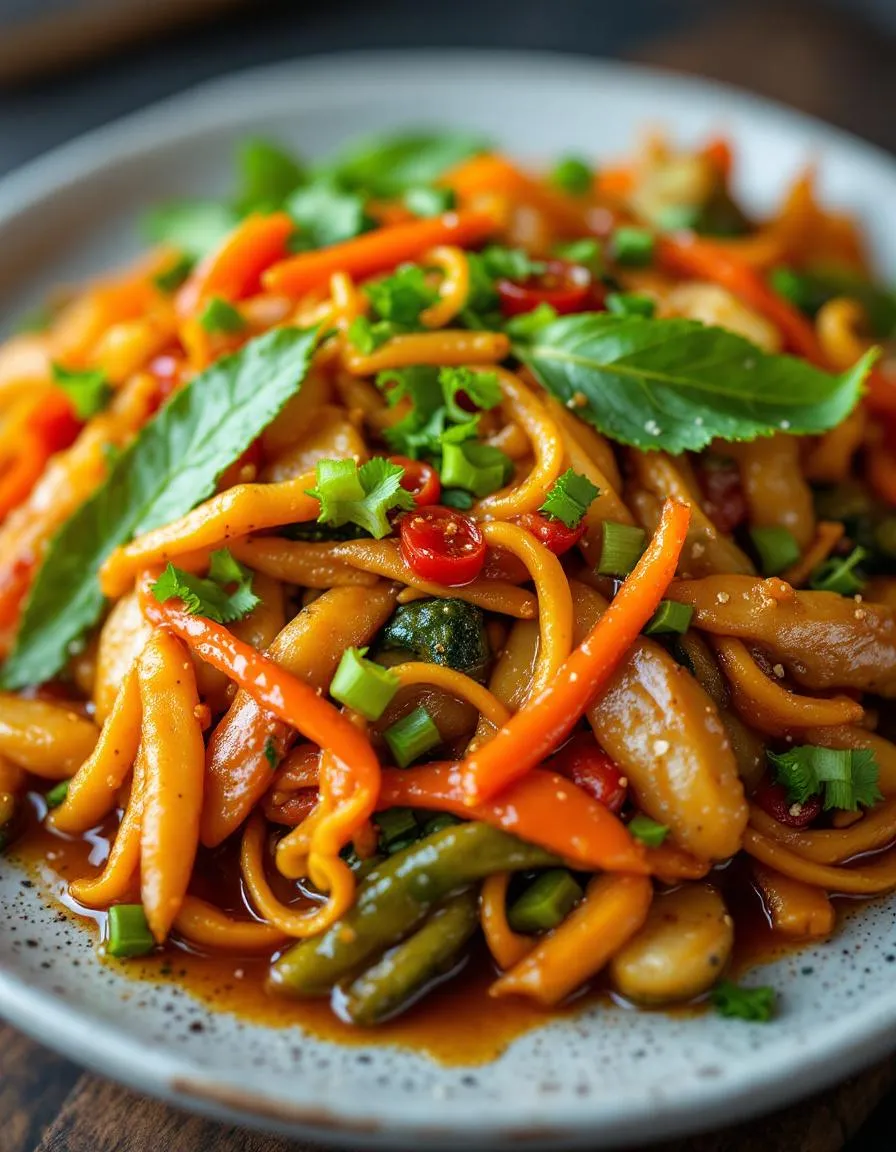
There’s something incredibly comforting about a dish that’s both quick to make and bursting with flavor. That’s exactly why Vegetable Stir Fry holds a special place in my weeknight dinner rotation. Whether you’re juggling a busy schedule or simply craving a vibrant, nutrient-packed meal, this recipe delivers. Plus, it’s endlessly customizable, so you can toss in whatever veggies you have on hand. After all, great cooking should be as flexible as it is delicious.
Vegetable Stir Fry is more than just a meal—it’s a celebration of fresh, colorful ingredients coming together in perfect harmony. Originating from Chinese cuisine, this dish has won hearts worldwide for its simplicity and versatility. What makes it truly special is how effortlessly it adapts to different tastes and dietary needs. Whether you’re a vegetarian, vegan, or just looking to add more greens to your plate, a well-made stir fry never disappoints. At brekcakes.com, we believe food should be joyful and approachable, and this recipe embodies that philosophy. For more inspiration, check out our guide to quick weeknight dinners or explore our tips for prepping veggies like a pro.
Why I Love This Recipe
This Vegetable Stir Fry recipe takes me back to my college days, when I’d whip it up between study sessions. It was my go-to for fueling late-night brainstorming (and occasional procrastination). Even now, the sizzle of veggies in the pan feels like a tiny victory—proof that a wholesome meal doesn’t need hours or fancy techniques. Most importantly, it’s a dish that brings people together. My family loves customizing their bowls with extra garlic or a dash of chili, making every bite uniquely theirs. That’s the beauty of cooking: a single recipe can hold a million memories.
Health and Nutrition
Why it’s good for your body
Vegetable Stir Fry packs a powerful punch of nutrients while keeping calories in check. First, it delivers a colorful mix of vitamins and minerals because it combines fresh veggies like bell peppers, broccoli, and carrots. These ingredients boost immunity, support vision, and even promote healthy skin. Additionally, Vegetable Stir Fry retains more nutrients than boiled vegetables since the quick cooking process locks in goodness.
Moreover, this dish is rich in fiber, which aids digestion and keeps you feeling full longer. Fiber also helps regulate blood sugar levels, making Vegetable Stir Fry a smart choice for those managing diabetes. Furthermore, when you use heart-healthy oils like olive or avocado oil, you add beneficial fats that support brain function and reduce inflammation. The dish naturally stays low in sodium, especially if you opt for reduced-sodium soy sauce or coconut aminos.
Finally, Vegetable Stir Fry adapts easily to protein preferences. Whether you add tofu, chicken, or shrimp, you can customize it to meet your dietary needs. The versatility ensures you get a balanced meal without sacrificing flavor or nutrition. With every bite, you fuel your body with wholesome ingredients that work together to keep you energized and satisfied.
How it fits in a healthy lifestyle
Vegetable Stir Fry fits seamlessly into almost any eating plan. For gluten-free diets, simply swap regular soy sauce for tamari or a gluten-free alternative. If you follow a heart-healthy approach, load up on leafy greens and lean proteins while keeping oils moderate. The dish also works well for meal prep, saving time during busy weeks without compromising nutrition.
Pairing Vegetable Stir Fry with quinoa or brown rice adds complex carbs for sustained energy. If you need more protein, toss in edamame or grilled chicken. For inspiration on balancing meals, check out our guide to healthy meal prep ideas. You can also explore plant-based diet tips to make this dish even more nutrient-dense. Whether you aim for weight management, better digestion, or simply eating cleaner, Vegetable Stir Fry makes it easy to stay on track.
Start by heating a large wok or skillet over medium-high heat and drizzle in a tablespoon of oil. Once the oil shimmers, toss in minced garlic and ginger, stirring for just 10 seconds until fragrant. Next, add your toughest vegetables first—like carrots and bell peppers—since they take longer to soften. Stir them frequently for about 3 minutes before adding quicker-cooking veggies like broccoli and snap peas. Meanwhile, whisk together soy sauce, a splash of rice vinegar, and a pinch of sugar in a small bowl for an easy sauce. Pour it over the vegetables, then toss everything together until evenly coated. For extra flavor, sprinkle toasted sesame seeds or a dash of red pepper flakes right before serving. To save time, chop all your vegetables ahead and store them in airtight containers. If you’re short on stove space, try using a sheet pan for roasting the veggies instead—just crank the oven to 425°F and roast for 15 minutes, tossing halfway.
Mistakes I’ve made and learned from
I used to overcrowd the pan, thinking I could cook all my vegetables at once. Big mistake! They ended up steaming instead of crisping, turning soggy and bland. Now I cook in batches or use a bigger wok for even heat distribution. Another blunder? Skipping the sauce taste test. Once, I accidentally made my Vegetable Stir Fry way too salty because I didn’t adjust the soy sauce. Now I always taste and tweak the sauce before adding it, just like I do with my go-to marinades. Oh, and if your veggies seem dry, don’t drown them in sauce—just add a splash of broth or water to loosen things up. For more on balancing flavors, check out my umami-boosting tricks. Trust me, a little patience goes a long way with stir-fries!
Vegetable Stir Fry traces its roots to ancient Chinese cooking, where chefs quickly cooked fresh ingredients over high heat to preserve texture and nutrients. Over time, the dish traveled across Asia, adapting to local flavors. In Thailand, cooks might add coconut milk and lemongrass, while in Japan, soy sauce and sesame oil give it a distinct umami twist. Even within China, regional variations shine—Sichuan-style Vegetable Stir Fry packs a spicy punch, while Cantonese versions keep it light and crisp.
In my family, Vegetable Stir Fry became a weeknight staple because it’s flexible and fast. My grandma tossed in whatever veggies she had, from bell peppers to bok choy, always finishing with a splash of garlic and ginger. Meanwhile, my aunt’s Korean-inspired version includes gochujang for a sweet-spicy kick. No matter the variation, the heart of Vegetable Stir Fry remains the same: fresh, vibrant ingredients cooked with care.
ays-cooking">How it fits in today’s cooking
Today, Vegetable Stir Fry fits perfectly into busy lifestyles and plant-forward diets. It’s a go-to for meal preppers, who pair it with quinoa or healthy grains for balanced lunches. Modern cooks also experiment with global flavors, like adding turmeric for an anti-inflammatory boost or swapping soy sauce for tamari to keep it gluten-free. Whether you’re cooking for one or feeding a crowd, Vegetable Stir Fry adapts effortlessly.
Seasonal eating keeps the dish exciting, too. In summer, zucchini and snap peas shine, while winter calls for hearty squash and kale. Some even serve it as a festive side during holidays, proving its versatility. For more inspiration, check out these quick weeknight dinners that pair perfectly with a vibrant Vegetable Stir Fry. No matter how you slice it, this dish stays a timeless favorite.
Taste and Texture
What makes it delicious
Vegetable Stir Fry bursts with vibrant flavors and satisfying textures that make every bite exciting. The crisp snap of fresh bell peppers and carrots contrasts beautifully with the tender chew of mushrooms, while garlic and ginger infuse the dish with a warm, fragrant aroma. A savory-sweet sauce coats each vegetable, creating a glossy, umami-rich finish that lingers on the palate. Whether you savor the earthy notes of broccoli or the subtle heat from a dash of chili flakes, Vegetable Stir Fry delivers a balanced, mouthwatering experience that keeps you reaching for more.
r">Boosting the flavor
Elevate your Vegetable Stir Fry by toasting sesame seeds for a nutty crunch or drizzling with a tangy homemade teriyaki sauce for extra depth. For a spicy kick, toss in sriracha or a sprinkle of crushed red pepper. Meanwhile, fresh herbs like cilantro or Thai basil brighten the dish, while a squeeze of lime adds zesty contrast. If you love bold flavors, try marinating tofu in this garlic-ginger marinade before adding it to the stir fry. Small tweaks make a big difference, so experiment and enjoy!
Tips for Success
Best practices for results
Always chop your vegetables evenly so they cook at the same rate in your Vegetable Stir Fry. Meanwhile, heat your wok or skillet until it’s very hot before adding oil—this prevents sticking and ensures a crisp texture. Furthermore, stir constantly to avoid burning and distribute flavors evenly. For the best results, add sauces last to keep the veggies vibrant and crunchy. Finally, taste and adjust seasoning just before serving to perfect your Vegetable Stir Fry every time.
>Mistakes to avoid
Overcrowding the pan is a common mistake that steams vegetables instead of stir-frying them. Instead, cook in batches if needed to maintain high heat. Another error is using low-quality oil with a low smoke point, which can ruin the flavor. Opt for peanut or avocado oil for better results. Additionally, skipping the prep work—like pre-measuring sauces—often leads to overcooked veggies. For more kitchen efficiency tips, check out our guide on meal prep strategies. Lastly, underseasoning dulls the dish, so balance flavors with our homemade sauce recipes for a foolproof Vegetable Stir Fry.
Serving and Pairing Suggestions
How to serve this dish
For a vibrant presentation, serve your Vegetable Stir Fry in a wide, shallow bowl to showcase its colorful mix of crisp veggies. Top it with sesame seeds or fresh cilantro for a pop of texture and flavor. Alternatively, pack it into lettuce cups for a fun, hands-on meal perfect for casual gatherings. Whether you’re hosting a weeknight dinner or a festive brunch, this dish adapts beautifully. To make it extra special, pair it with chopsticks and a side of steamed rice for a complete experience.
What goes well with it
Complement your Vegetable Stir Fry with a refreshing glass of iced green tea, which balances the dish’s savory notes. For a heartier meal, serve it alongside fluffy jasmine rice or our Garlic Noodles, which add a rich, garlicky depth. If you love dipping sauces, try our Creamy Peanut Sauce for a nutty contrast that elevates every bite. Each pairing enhances the stir fry’s fresh, crisp flavors while keeping the meal satisfying.
What vegetables are best for a vegetable stir fry?
Crunchy vegetables like bell peppers, broccoli, carrots, and snap peas work best in a vegetable stir fry. These hold their texture during quick cooking. For variety, add mushrooms or baby corn to your vegetable stir fry for extra flavor and nutrients.
How do you keep vegetable stir fry from getting soggy?
Use high heat and cook vegetables quickly to prevent sogginess in your vegetable stir fry. Cut veggies uniformly and avoid overcrowding the pan—stir constantly for even cooking. Patting vegetables dry before cooking also helps maintain crispness.
rank-math-faq-item">
What sauce goes well with vegetable stir fry?
A simple soy-ginger sauce or teriyaki sauce complements vegetable stir fry perfectly. For spice lovers, try a sriracha-honey blend. Homemade sauces let you control the sodium and sweetness in your vegetable stir fry.
Can you make vegetable stir fry ahead of time?
Vegetable stir fry tastes best fresh, but you can prep ingredients 1-2 days ahead. Store chopped veggies separately and cook just before serving. Reheated vegetable stir fry may lose some crispness but still makes a tasty meal.
Best Creamy Garlic Sauce – Rich & Flavorful Recipe
Introduction
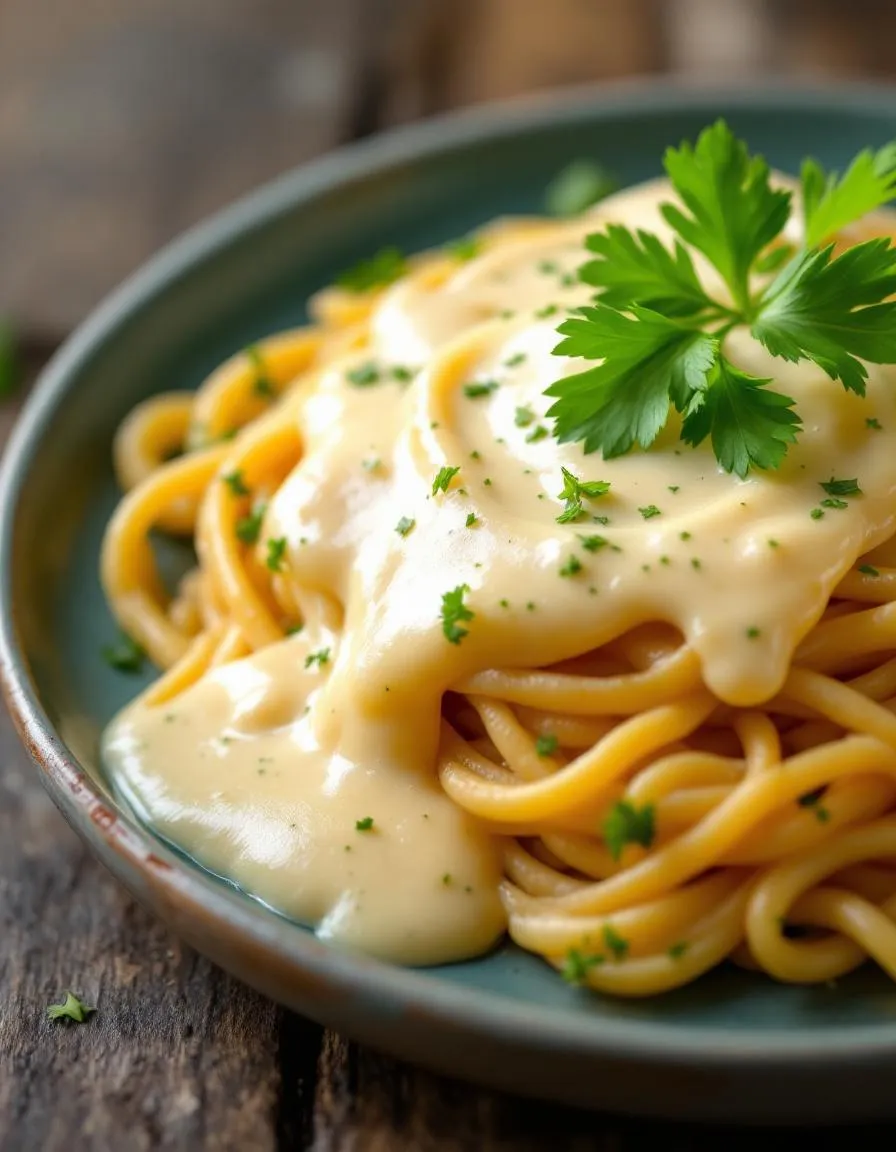
There’s something undeniably comforting about a rich, velvety sauce that transforms even the simplest dish into something special. That’s exactly why I’m so excited to share my Creamy Garlic Sauce with you today. Whether you’re drizzling it over pasta, pairing it with grilled chicken, or using it as a dip for crusty bread, this sauce has a way of making every bite feel like a warm hug. Plus, it’s incredibly easy to whip up, even on busy weeknights when you need a little extra comfort.
Creamy Garlic Sauce is a versatile, flavor-packed staple that elevates countless dishes with its luxurious texture and bold garlic notes. Unlike store-bought versions, this homemade recipe lets you control the ingredients, ensuring a fresher, more vibrant taste. The combination of garlic, butter, cream, and a touch of Parmesan creates a harmony of flavors that’s both indulgent and balanced. For anyone who loves hearty, satisfying meals, this sauce is a game-changer. It fits perfectly with the cozy, approachable vibe of brekcakes.com, where I strive to share recipes that feel like they’re made by a friend. If you’re looking for more inspiration, check out my Garlic Butter Shrimp or Creamy Mushroom Pasta—both pair beautifully with this sauce.
Why I Love This Recipe
This Creamy Garlic Sauce holds a special place in my heart because it reminds me of Sunday dinners with my family. My dad used to make a similar version, and the smell of garlic simmering in butter would fill the whole house. Now, whenever I make it, I’m transported back to those moments of laughter and shared meals. It’s more than just a recipe—it’s a little piece of home that I’m thrilled to pass on to you.
Health and Nutrition
Why it’s good for your body
Creamy Garlic Sauce packs a flavorful punch while offering surprising health benefits. First, garlic contains allicin, a compound known for its immune-boosting properties. When you enjoy Creamy Garlic Sauce, you get these benefits in a delicious, versatile form. Additionally, garlic supports heart health by helping to regulate blood pressure and cholesterol levels. Even better, the sauce often includes yogurt or olive oil, which add probiotics and healthy fats.
Moreover, Creamy Garlic Sauce can enhance nutrient absorption. Garlic helps your body utilize iron and zinc more efficiently, especially when paired with iron-rich foods like spinach or lean meats. The creamy base, whether yogurt or a plant-based alternative, also provides calcium and protein. For those watching their calorie intake, the sauce delivers big flavor without excessive calories, making it a smart choice for mindful eating.
Finally, Creamy Garlic Sauce adds depth to meals without relying on processed ingredients. Unlike store-bought sauces loaded with preservatives, a homemade version keeps things clean and nutritious. Whether you drizzle it over roasted vegetables or use it as a dip, you’re treating your body to a boost of flavor and wellness.
How it fits in a healthy lifestyle
Creamy Garlic Sauce effortlessly fits into a balanced diet. If you’re following a gluten-free or low-carb lifestyle, this sauce adds richness without grains or excess carbs. Pair it with grilled chicken or zucchini noodles for a satisfying, nutrient-dense meal. For heart-healthy eating, the olive oil or avocado in many recipes provides monounsaturated fats, which support cardiovascular health.
You can also incorporate Creamy Garlic Sauce into meal prep for convenience. Whip up a batch at the start of the week and use it to elevate simple dishes like healthy meal prep bowls. It’s a great way to avoid bland food while staying on track with your goals. If you’re exploring plant-based eating, try swapping dairy for cashew cream or coconut yogurt in the recipe. For more inspiration, check out these vegan sauce alternatives to customize the sauce to your dietary needs.
Ultimately, Creamy Garlic Sauce proves that healthy eating doesn’t mean sacrificing flavor. With smart ingredient choices, it complements everything from salads to proteins, making nutritious meals more enjoyable.
Start by mincing fresh garlic cloves finely to release their full flavor. Heat a medium saucepan over low heat and melt butter, then sauté the garlic until fragrant but not browned. Whisk in flour to create a roux, cooking it for just a minute to remove the raw taste. Gradually pour in warm milk while continuously whisking to prevent lumps from forming. Once the sauce thickens, reduce the heat and stir in grated parmesan until it melts smoothly. For extra creaminess, fold in a splash of heavy cream right at the end. Season with salt, pepper, and a pinch of nutmeg for depth. If you’re short on time, use pre-minced garlic or a garlic press to speed up prep. Keep the heat low throughout to avoid scorching, and remember to stir frequently for the silkiest texture. The whole process takes about 15 minutes, but the rich flavor makes it worth every second.
and-learned-from">Mistakes I’ve made and learned from
I once rushed the roux and ended up with a pasty, floury sauce that no amount of whisking could fix. Now I patiently cook the flour-butter mixture for a full minute before adding liquid. Another time, I used cold milk straight from the fridge, which caused the sauce to separate—lesson learned! Always warm your dairy slightly first, like I do in my perfect béchamel sauce tutorial. Overheating the garlic was another early mistake; burnt garlic turns bitter fast. For balanced flavor, follow the gentle sauté method I use in this garlic butter shrimp recipe. These small adjustments transformed my creamy garlic sauce from mediocre to restaurant-quality every time.
“`
n-and-variations">Cultural Connection and Variations
Where this recipe comes from
Creamy Garlic Sauce has roots that stretch across continents, blending rich culinary traditions into one versatile dish. Many trace its origins to French cuisine, where chefs perfected the art of emulsifying butter, cream, and garlic into a velvety sauce. However, you’ll find similar variations in Mediterranean kitchens, where yogurt or olive oil often replaces cream for a tangier twist. Even in Eastern Europe, cooks might stir in sour cream or dill for a heartier, herb-infused version.
In my family, Creamy Garlic Sauce was a Sunday staple—drizzled over roasted chicken or mashed potatoes for an extra layer of comfort. My grandmother swore by a splash of white wine to brighten the flavors, while my aunt preferred a smoky paprika kick. Around the world, regional tweaks make this sauce uniquely local. In the American South, for example, some cooks blend it with buttermilk for a lighter, tangier take. No matter the variation, though, Creamy Garlic Sauce always brings people together with its bold, comforting taste.
How it fits in today’s cooking
Today, Creamy Garlic Sauce remains a kitchen superstar because it’s endlessly adaptable. Home cooks love it for weeknight dinners, tossing it with pasta or using it as a dip for garlic knots. Meanwhile, food bloggers and chefs reinvent it with modern twists—think dairy-free versions with cashew cream or roasted garlic for deeper flavor. It’s also a holiday favorite, elevating everything from Thanksgiving turkey to Christmas prime rib.
What keeps this sauce r
elevant? Its simplicity and crowd-pleasing appeal. Whether you’re meal prepping or hosting a dinner party, Creamy Garlic Sauce fits right in. For a quick upgrade, try swirling it into creamy mushroom soup or layering it on flatbreads. No wonder it’s stood the test of time—it’s the ultimate flavor booster for any occasion.
Taste and Texture
What makes it delicious
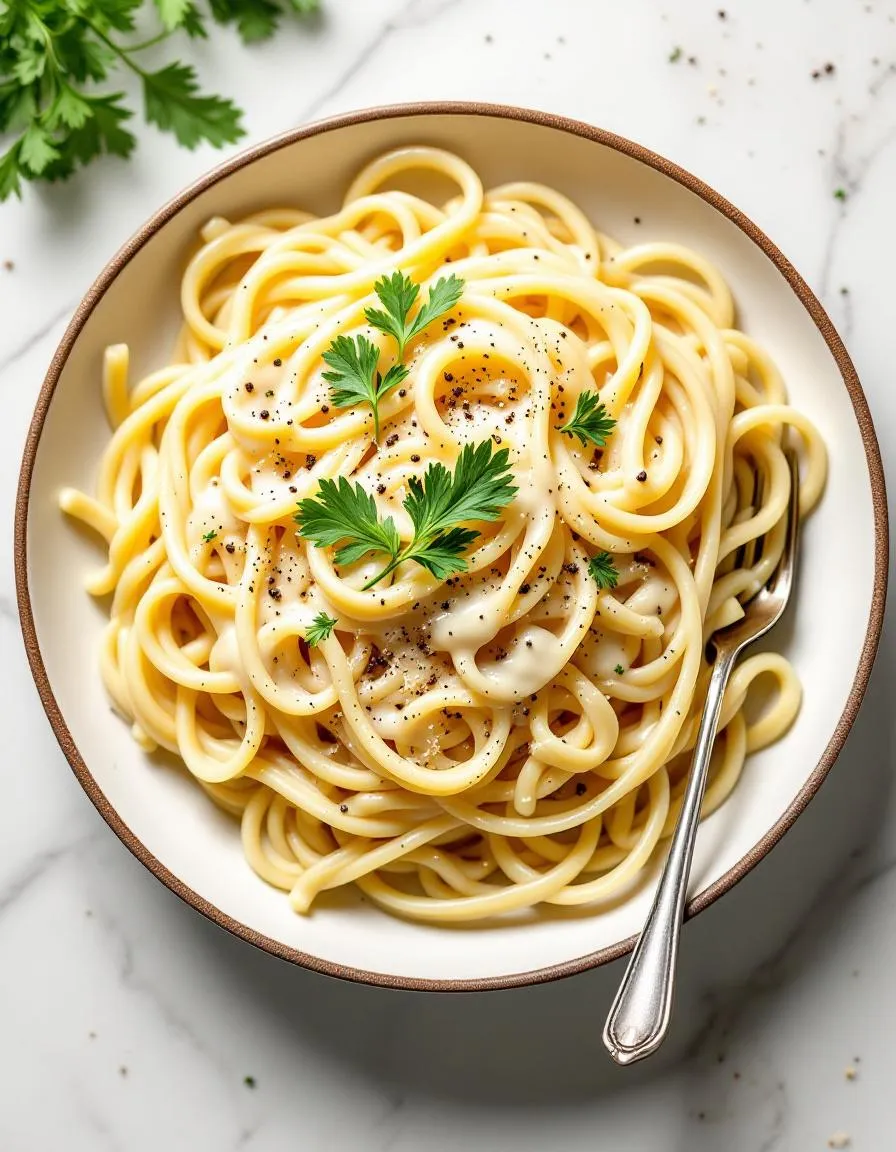
Creamy Garlic Sauce wraps your taste buds in a velvety, rich embrace, balancing bold garlic notes with a smooth, buttery finish. Each spoonful delivers a fragrant punch of roasted garlic, softened by the lush creaminess of Parmesan and heavy cream. Meanwhile, a hint of lemon zest cuts through the richness, adding a bright, tangy twist. The sauce clings perfectly to pasta or grilled meats, creating a mouth-coating texture that’s indulgent yet light. Whether drizzled or dunked, Creamy Garlic Sauce turns every bite into a savory, aromatic delight.
Boosting the flavor
Elevate your Creamy Garlic Sauce by stirring in a pinch of smoked paprika for a warm, earthy depth or a handful of fresh herbs like parsley or thyme for a garden-fresh lift. For extra umami, blend in a spoonful of white miso paste, which adds a subtle fermented complexity. If you love heat, a dash of chili flakes or a swirl of spicy honey creates a sweet-and-fiery contrast. Experiment with toasted breadcrumbs or crispy bacon bits for a crunchy counterpoint to the sauce’s silkiness. Small tweaks make big flavor waves!
For the smoothest Creamy Garlic Sauce, always mince the garlic finely to prevent chunks. Additionally, warm the cream slightly before adding it to the pan to avoid curdling. Stir constantly over low heat for a velvety texture, and season gradually to balance the flavors. Finally, let the sauce rest for a few minutes before serving so the flavors meld perfectly.
Mistakes to avoid
One common mistake is rushing the garlic cooking process, which can lead to a bitter taste. Instead, sauté it gently until fragrant for the best Creamy Garlic Sauce. Another error is using high heat, which may cause the sauce to separate. For more tips on controlling heat, check out our guide on perfect simmering temperatures. Also, avoid adding cold dairy directly to the pan, as it can break the emulsion. Learn how to handle dairy properly in our dairy in sauces tutorial.
g-suggestions">Serving and Pairing Suggestions
How to serve this dish
Elevate your Creamy Garlic Sauce by drizzling it over grilled chicken or roasted vegetables for a restaurant-worthy presentation. For a festive touch, serve it in a small gravy boat or ramekin alongside a charcuterie board during holiday gatherings. Meanwhile, brighten up weeknight dinners by garnishing the sauce with fresh parsley or a sprinkle of paprika. Whether you’re hosting brunch or a cozy family meal, this versatile sauce adds richness to every bite.
What goes well with it
Pair Creamy Garlic Sauce with crispy garlic bread or fluffy mashed potatoes for a comforting combo. The sauce’s velvety texture balances the crunch of bread or the creaminess of potatoes perfectly. Alternatively, try it with a crisp white wine like Sauvignon Blanc, which cuts through the richness. For a complete meal, serve it alongside our Herb-Roasted Chicken or drizzle it over Garlic Parmesan Pasta for double the garlicky goodness.
math-faq-block">
What is creamy garlic sauce made of?
Creamy garlic sauce typically combines minced garlic, butter, heavy cream, and Parmesan cheese for a rich flavor. Some recipes add herbs like parsley or a splash of lemon juice to brighten the taste. This versatile sauce pairs perfectly with pasta, chicken, or as a dipping sauce for bread.
How do you thicken creamy garlic sauce?
To thicken creamy garlic sauce, simmer it longer to reduce the liquid or add a slurry of cornstarch and water. Incorporating extra Parmesan cheese or a touch of flour while whisking also helps achieve a thicker consistency. The ideal creamy garlic sauce should coat the back of a spoon without being too runny.
Can I make creamy garlic sauce without dairy?
Yes! For a dairy-free creamy garlic sauce, substitute coconut milk, cashew cream, or almond milk for heavy cream. Nutritional yeast or vegan Parmesan can replace the cheesy flavor while maintaining the rich texture. This alternative still delivers the bold garlic taste you expect from traditional creamy garlic sauce.
rank-math-faq-item">
What dishes go well with creamy garlic sauce?
Creamy garlic sauce elevates pasta dishes, grilled chicken, shrimp, or roasted vegetables beautifully. It also works as a delicious dip for breadsticks, pizza crusts, or even crispy fries. The sauce’s rich flavor complements both simple weeknight meals and fancier dinner recipes.
Best Creamy Chicken Pasta with Sun-dried Tomatoes
Introduction
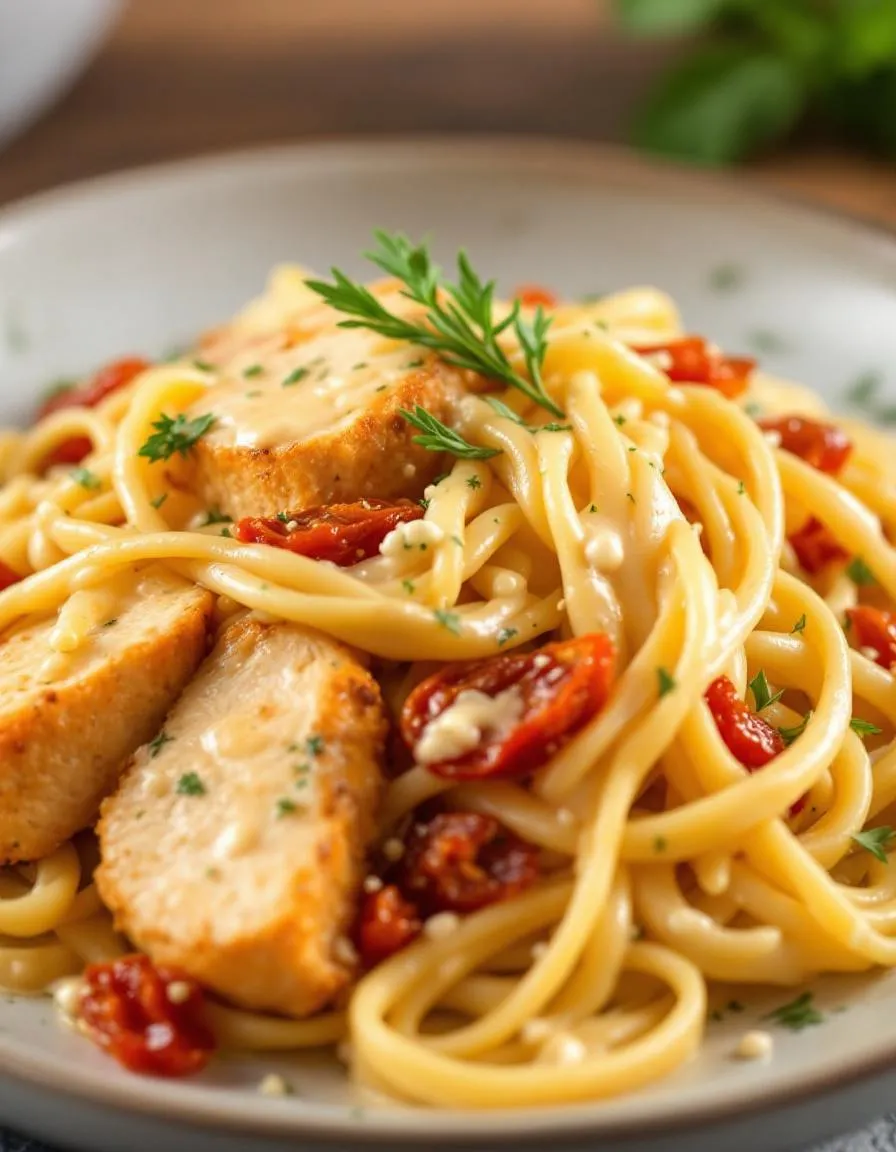
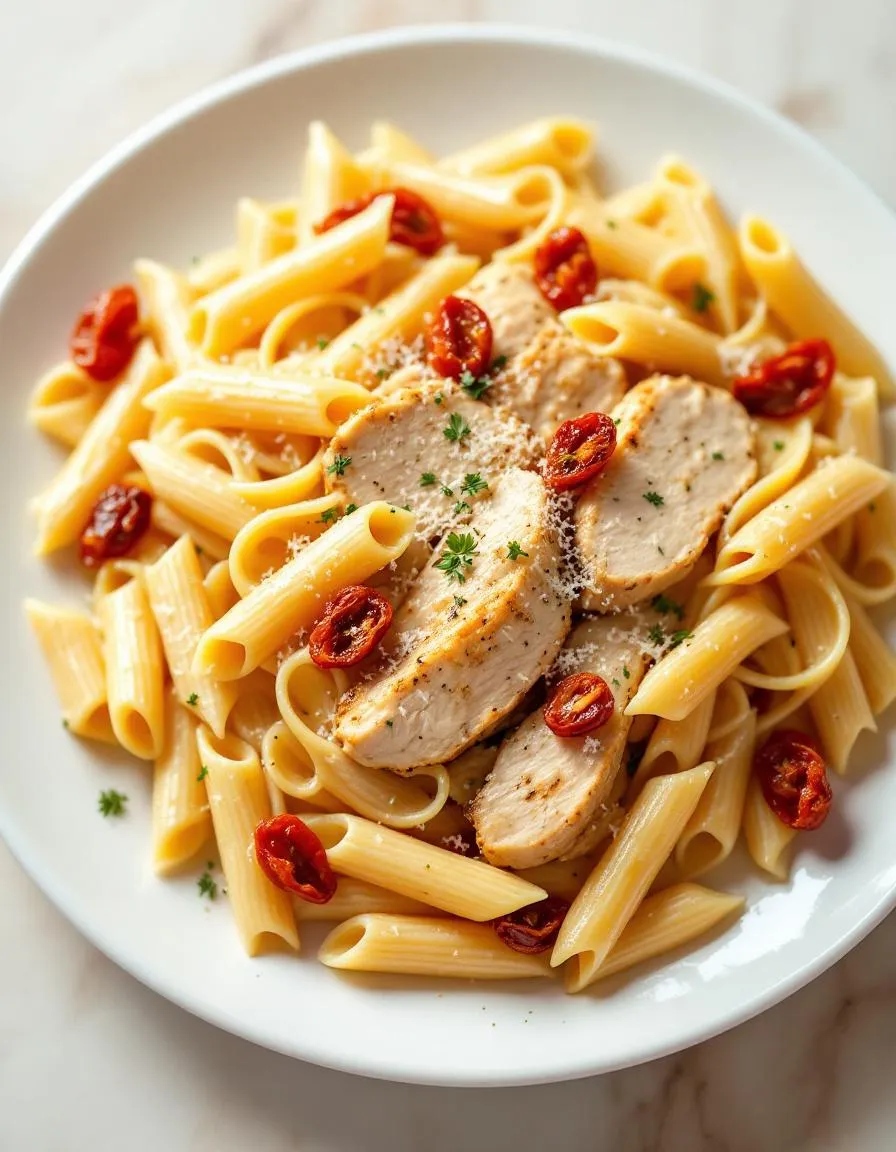
If you’ve ever craved a dish that feels like a cozy hug, you’re in the right place. Today, I’m sharing my Creamy Chicken Pasta with Sun-dried Tomatoes—a recipe that balances rich flavors with effortless elegance. Whether you’re cooking for a weeknight dinner or impressing guests, this dish delivers comfort and sophistication in every bite. Plus, it’s one of those meals that tastes even better the next day, making it perfect for meal prep or leftovers.
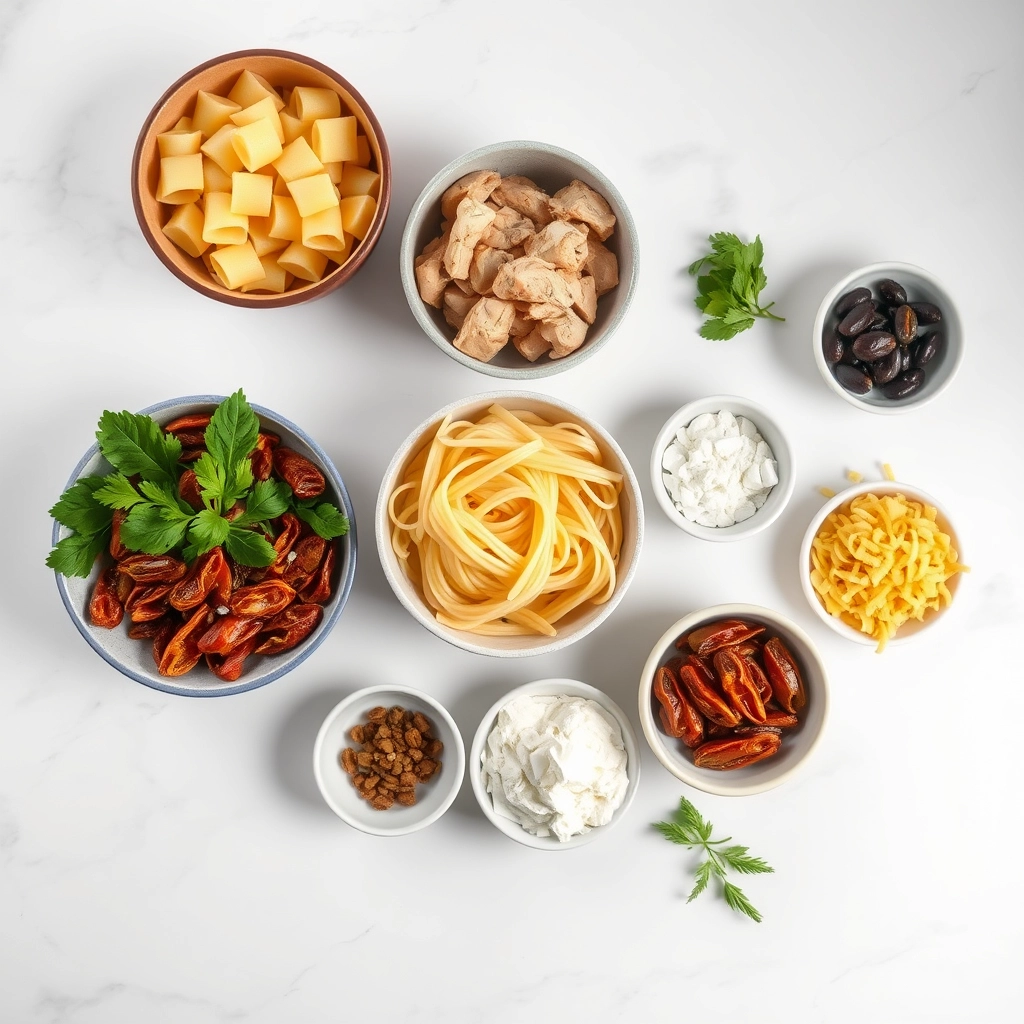
Creamy Chicken Pasta with Sun-dried Tomatoes is a celebration of simplicity and depth. Tender chicken, al dente pasta, and vibrant sun-dried tomatoes mingle in a velvety sauce that’s both luxurious and approachable. What makes this recipe special is its versatility. You can customize it with your favorite herbs or swap ingredients based on what’s in your pantry. For more inspiration on adaptable meals, check out my 5-Ingredient Dinners collection. This dish also aligns perfectly with my philosophy that great food doesn’t have to be complicated. If you love easy yet impressive recipes, you’ll adore my 30-Minute Meals guide too. Creamy Chicken Pasta with Sun-dried Tomatoes is a testament to how a few quality ingredients can create something unforgettable.
Why I Love This Recipe
This Creamy Chicken Pasta with Sun-dried Tomatoes holds a special place in my heart because it’s the dish I turn to when I need comfort without compromise. I first made it during a rainy weekend when I wanted something hearty yet bright, and it instantly became a family favorite. The tangy sun-dried tomatoes cut through the richness of the sauce, while the chicken adds just the right amount of heartiness. Every time I make it, I’m reminded why cooking is my love language—it’s about creating moments, not just meals.
Health and Nutrition
Why it’s good for your body
Creamy Chicken Pasta with Sun-dried Tomatoes packs a nutritious punch while satisfying your taste buds. First, the lean chicken breast delivers high-quality protein to support muscle repair and keep you full longer. Additionally, sun-dried tomatoes add a burst of antioxidants like lycopene, which may promote heart health. Meanwhile, the creamy sauce, when made with Greek yogurt or light cream, offers calcium without excessive calories.
Moreover, this dish includes complex carbs from whole wheat pasta, providing steady energy. The fiber in whole grains aids digestion and helps maintain balanced blood sugar levels. Furthermore, herbs like basil or oregano not only enhance flavor but also bring anti-inflammatory benefits. With each bite of Creamy Chicken Pasta with Sun-dried Tomatoes, you get a well-rounded meal that fuels your body.
Finally, the dish balances indulgence and nutrition. Olive oil, often used in the preparation, contributes healthy fats that support brain function. By combining these ingredients, Creamy Chicken Pasta with Sun-dried Tomatoes becomes a delicious way to nourish yourself without sacrificing flavor.
How it fits in a healthy lifestyle
Creamy Chicken Pasta with Sun-dried Tomatoes fits seamlessly into a balanced diet. For those focusing on protein intake, the chicken and Greek yogurt base make it a smart choice. If you prefer gluten-free options, simply swap regular pasta for a chickpea or brown rice alternative. This flexibility ensures the dish aligns with various dietary needs.
Planning meals ahead? This recipe stores well, making it ideal for meal prep. Pair it with a side salad for extra veggies, or adjust portion sizes to match your calorie goals. For heart-healthy eaters, using olive oil and lean protein keeps saturated fats in check. If you love flavorful yet wholesome dinners, explore more balanced dinner recipes to keep your routine exciting. Creamy Chicken Pasta with Sun-dried Tomatoes proves that eating well never means compromising on taste.
A rich and flavorful pasta dish featuring tender chicken, sun-dried tomatoes, and a creamy garlic sauce.
Ingredients
Scale
For the Crust:
8 oz penne pasta
2 boneless, skinless chicken breasts, sliced
1/2 cup sun-dried tomatoes, chopped
3 cloves garlic, minced
1 cup heavy cream
1/2 cup grated Parmesan cheese
2 tbsp olive oil
1 tsp dried basil
Salt and pepper to taste
Instructions
1. Prepare the Crust:
Cook pasta according to package instructions. Drain and set aside.
Heat olive oil in a large skillet over medium heat. Add chicken and cook until no longer pink, about 6-8 minutes.
Add garlic and sun-dried tomatoes to the skillet. Cook for 1-2 minutes until fragrant.
Pour in heavy cream and bring to a simmer. Stir in Parmesan cheese and dried basil.
Add cooked pasta to the skillet and toss to coat in the sauce. Season with salt and pepper.
Serve hot, garnished with extra Parmesan if desired.
Notes
You can customize the seasonings to taste.
How to Prepare This Dish
Steps and time-saving tips
Start by heating a large skillet over medium heat and drizzling in olive oil. Add diced chicken breast, seasoning it with salt, pepper, and a pinch of garlic powder for extra flavor. While the chicken cooks, boil your pasta in salted water until al dente—this ensures it holds up well in the creamy sauce later. Meanwhile, drain and chop sun-dried tomatoes, reserving a bit of their oil for sautéing. Once the chicken turns golden, remove it from the skillet and set it aside. In the same pan, sauté minced garlic and sun-dried tomatoes until fragrant, then whisk in heavy cream and grated Parmesan until smooth. Toss the cooked pasta and chicken back into the skillet, folding everything together gently. For a time-saving tip, prep your ingredients ahead—chop the chicken and measure the cream and cheese the night before. If the sauce thickens too much, loosen it with a splash of pasta water. Finish with fresh basil and an extra sprinkle of Parmesan for a restaurant-worthy touch.
and-learned-from">Mistakes I’ve made and learned from
I once rushed the sauce and ended up with grainy Parmesan because I didn’t let it melt slowly into the cream. Now, I whisk it in gradually over low heat, just like I do with my perfect Alfredo sauce. Another blunder? Overcooking the sun-dried tomatoes until they turned rubbery. Lesson learned: add them late in the sautéing process to preserve their texture. If you’re new to balancing creamy pasta dishes, check out my creamy pasta basics guide for foolproof techniques. Trust me, a little patience goes a long way with this dish!
Cultural Connection and Variations
Where this recipe comes from
Creamy Chicken Pasta with Sun-dried Tomatoes feels like a love letter to Italian home cooking with a modern twist. While pasta dishes have deep roots in Italy, this particular version blends rich, velvety sauces with the bold tang of sun-dried tomatoes—a staple in Mediterranean pantries. Interestingly, sun-dried tomatoes gained popularity in Southern Italy as a way to preserve summer’s harvest, and today, they add a punch of umami to dishes worldwide.
In my family, we tweak
the recipe by swapping heavy cream for Greek yogurt when we want a lighter touch. Meanwhile, in Northern Italy, cooks might use mascarpone for extra richness. Across the Atlantic, American kitchens often add spinach or mushrooms for extra veggies. No matter where you go, Creamy Chicken Pasta with Sun-dried Tomatoes adapts beautifully, making it a global comfort food favorite.
How it fits in today’s cooking
Today, this dish shines as a quick weeknight dinner or a cozy weekend treat. Busy cooks love it because they can prep it in 30 minutes, yet it feels indulgent enough for date nights. Plus, it’s versatile—swap chicken for shrimp or keep it vegetarian with roasted cauliflower. Seasonal twists work too, like adding fresh basil in summer or sage in fall.
For those meal-prepping, Creamy Chicken Pasta with Sun-dried Tomatoes stores well, making it a smart choice for easy meal prep ideas. It also pairs perfectly with a crisp salad or crusty bread, just like the garlic butter dinner rolls we adore. Whether you’re cooking for one or hosting friends, this dish fits seamlessly into modern life while keeping tradition alive.
>Taste and Texture
What makes it delicious
Creamy Chicken Pasta with Sun-dried Tomatoes delivers a rich, velvety bite that melts in your mouth. The sauce wraps around each noodle, offering a luxurious, buttery smoothness balanced by the chewy, slightly tangy sun-dried tomatoes. Fragrant garlic and herbs infuse every forkful, while tender chicken adds a satisfying, juicy contrast. Meanwhile, the sun-dried tomatoes pop with a sweet-yet-savory intensity, elevating the dish beyond ordinary pasta. Every bite of Creamy Chicken Pasta with Sun-dried Tomatoes feels indulgent yet fresh, thanks to bright notes from Parmesan and a hint of black pepper.
Boosting the flavor
For an even bolder twist, try swapping heavy cream with mascarpone for an extra-decadent sauce. Alternatively, sprinkle toasted pine nuts or crispy pancetta on top for a crunchy contrast. If you love heat, a pinch of red pepper flakes or a drizzle of homemade chili oil will add a spicy kick. Fresh basil or a squeeze of lemon brightens the dish, while a side of garlic breadsticks soaks up every last drop of sauce. With these tweaks, Creamy Chicken Pasta with Sun-dried Tomatoes becomes a customizable masterpiece.
Tips for Success
Best practices for results
Always cook the chicken just until it reaches 165°F to keep it tender in your Creamy Chicken Pasta with Sun-dried Tomatoes. Meanwhile, reserve a cup of pasta water before draining—this helps adjust the sauce consistency later. For the creamiest texture, stir in the sun-dried tomatoes and Parmesan off the heat to prevent clumping. Finally, garnish with fresh basil right before serving for a vibrant finish.
Mistakes to avoid
Overcooking the pasta is a common pitfall, so check it a minute early since it keeps cooking in the sauce. Additionally, avoid adding cold cream directly to the pan, as it can curdle—warm it slightly first. For more sauce troubleshooting, check out our guide on fixing broken sauces. Lastly, don’t skip toasting the garlic; raw garlic overwhelms the dish. Learn how to balance flavors with our garlic cooking tips for better results every time.
Serving and Pairing Suggestions
How to serve this dish
For a restaurant-worthy presentation, plate your Creamy Chicken Pasta with Sun-dried Tomatoes in wide, shallow bowls to showcase the rich sauce. Top it with a sprinkle of fresh basil or parsley for a pop of color. Alternatively, serve it family-style in a large ceramic dish for cozy gatherings. This dish shines at dinner parties, but it’s also perfect for weeknight meals when you want something special. To elevate the experience, add a side of warm garlic bread for dipping into the creamy sauce.
h-it">What goes well with it
A crisp white wine like Pinot Grigio balances the richness of Creamy Chicken Pasta with Sun-dried Tomatoes, while a light arugula salad with lemon vinaigrette adds a refreshing contrast. For heartier appetites, pair it with our Garlic Parmesan Roasted Broccoli to round out the meal. If you love bread, try our Rosemary Focaccia—its herby flavor complements the pasta beautifully. Finish with a simple dessert, like lemon sorbet, to cleanse the palate.
What type of pasta works best for Creamy Chicken Pasta with Sun-dried Tomatoes?
Short pasta shapes like penne, fusilli, or farfalle work best for Creamy Chicken Pasta with Sun-dried Tomatoes because they hold the sauce well. Avoid delicate noodles like angel hair, as the rich sauce and chunky ingredients need sturdier pasta to create a balanced bite.
rank-math-faq-item">
Can I use fresh tomatoes instead of sun-dried in Creamy Chicken Pasta?
While fresh tomatoes add juiciness, sun-dried tomatoes provide concentrated flavor and chewy texture that define Creamy Chicken Pasta with Sun-dried Tomatoes. If substituting, use oil-packed sun-dried tomatoes for closest results, or roast fresh tomatoes to intensify their sweetness.
How do I prevent the cream sauce from separating in this dish?
Keep heat at medium-low when making the sauce for Creamy Chicken Pasta with Sun-dried Tomatoes, and stir constantly while adding dairy. A splash of starchy pasta water helps emulsify the sauce, while grated Parmesan acts as a stabilizer. Never let the sauce boil vigorously.
What protein alternatives work with this sun-dried tomato pasta?
Shrimp, Italian sausage, or mushrooms make excellent substitutes in Creamy Chicken Pasta with Sun-dried Tomatoes for varied dietary needs. For vegetarian versions, double the sun-dried tomatoes and add white beans or grilled zucchini while keeping the same luxurious cream sauce base.
>
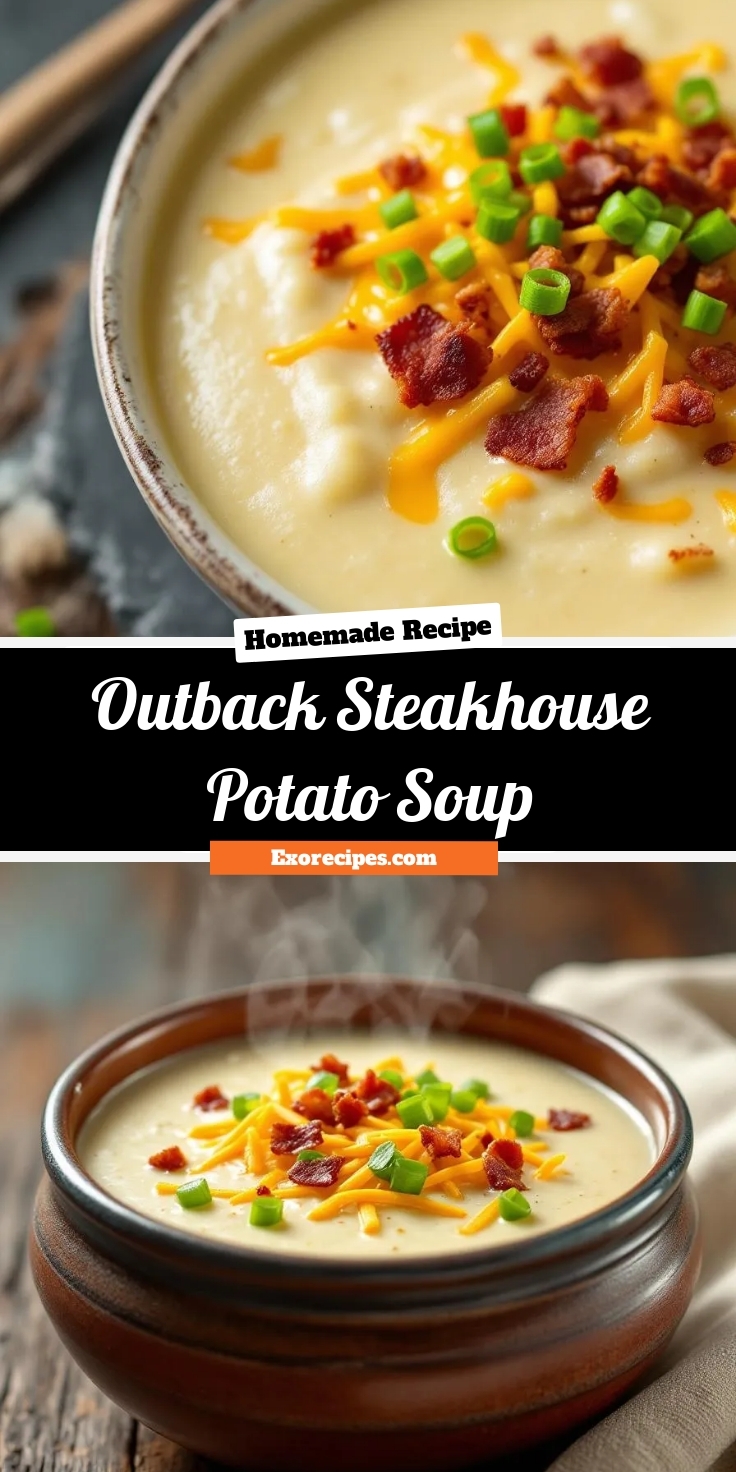
Best Outback Steakhouse Potato Soup Recipe
Introduction
There’s something deeply comforting about a bowl of creamy, hearty soup, especially when it reminds you of your favorite restaurant. That’s exactly why I’m sharing my take on Outback Steakhouse Potato Soup—a dish that brings back memories of cozy dinners and shared laughter. Whether you’re craving a taste of nostalgia or simply want to whip up a restaurant-quality meal at home, this recipe delivers rich flavor and soul-warming satisfaction in every spoonful.
Outback Steakhouse Potato Soup is a beloved classic, known for its velvety texture, smoky bacon, and perfectly balanced seasoning. Unlike many heavy soups, this version strikes the ideal harmony between indulgence and comfort. What makes it special? First, it captures the essence of Outback’s signature dish while using simple, accessible ingredients. Second, it fits seamlessly into home cooking, whether you’re meal prepping or serving a crowd. If you’ve ever enjoyed my Creamy Chicken and Rice Soup, you’ll appreciate how this recipe delivers similar comfort with a bolder, steakhouse-inspired twist. Plus, it pairs wonderfully with a fresh side, like the Garlic Parmesan Dinner Rolls from my collection.
Why I Love This Recipe
Outback Steakhouse Potato Soup holds a special place in my heart because it reminds me of family gatherings and slow Sunday dinners. I first fell in love with it during a birthday celebration at the restaurant, and after countless attempts to recreate it, I finally nailed the perfect blend of flavors. What I adore most is how it transforms humble potatoes into something extraordinary—just like my grandma taught me when we cooked together. Every time I make it, I’m transported back to those moments, and now I get to share that joy with you.
Health and Nutrition
Why it’s good for your body
Outback Steakhouse Potato Soup packs a nutritious punch while delivering rich, comforting flavor. First, it provides a hearty dose of potassium from its base of creamy potatoes, which helps regulate blood pressure and supports muscle function. Additionally, the soup includes fiber to promote digestion and keep you feeling full longer. Because it contains real ingredients like cheese and bacon, Outback Steakhouse Potato Soup also offers protein to fuel your day.
Moreover, this soup delivers essential vitamins like vitamin C and B6, which boost immunity and energy levels. While it’s indulgent, you can enjoy it in moderation as part of a balanced diet. For instance, the calcium from the dairy supports bone health, and the iron content helps maintain healthy blood cells. Furthermore, the natural carbs in the potatoes provide steady energy without spiking blood sugar too quickly.
Finally, Outback Steakhouse Potato Soup satisfies cravings without excessive additives. By using simple, recognizable ingredients, it avoids unnecessary preservatives. Whether you need a warm meal on a chilly day or a filling lunch, this soup offers both comfort and nutrition in every bowl.
How it fits in a healthy lifestyle
Outback Steakhouse Potato Soup can easily fit into a mindful eating plan. If you’re watching your gluten intake, you’ll appreciate that the classic version contains no wheat-based thickeners. Pair it with a fresh side salad for a balanced meal that keeps portions in check. For those focusing on protein, adding a lean protein like grilled chicken boosts its nutritional profile.
This soup also works well for meal prep, especially when you need quick, satisfying options during busy weeks. If you love cozy recipes, explore our comfort food meal prep guide for more ideas. Additionally, if you’re aiming for heart-healthy choices, enjoy it alongside fiber-rich veggies like roasted Brussels sprouts. For more tips on balancing indulgent dishes, check out our healthy eating without sacrificing flavor post. With smart pairings and moderation, Outback Steakhouse Potato Soup becomes a delicious part of your wellness routine.
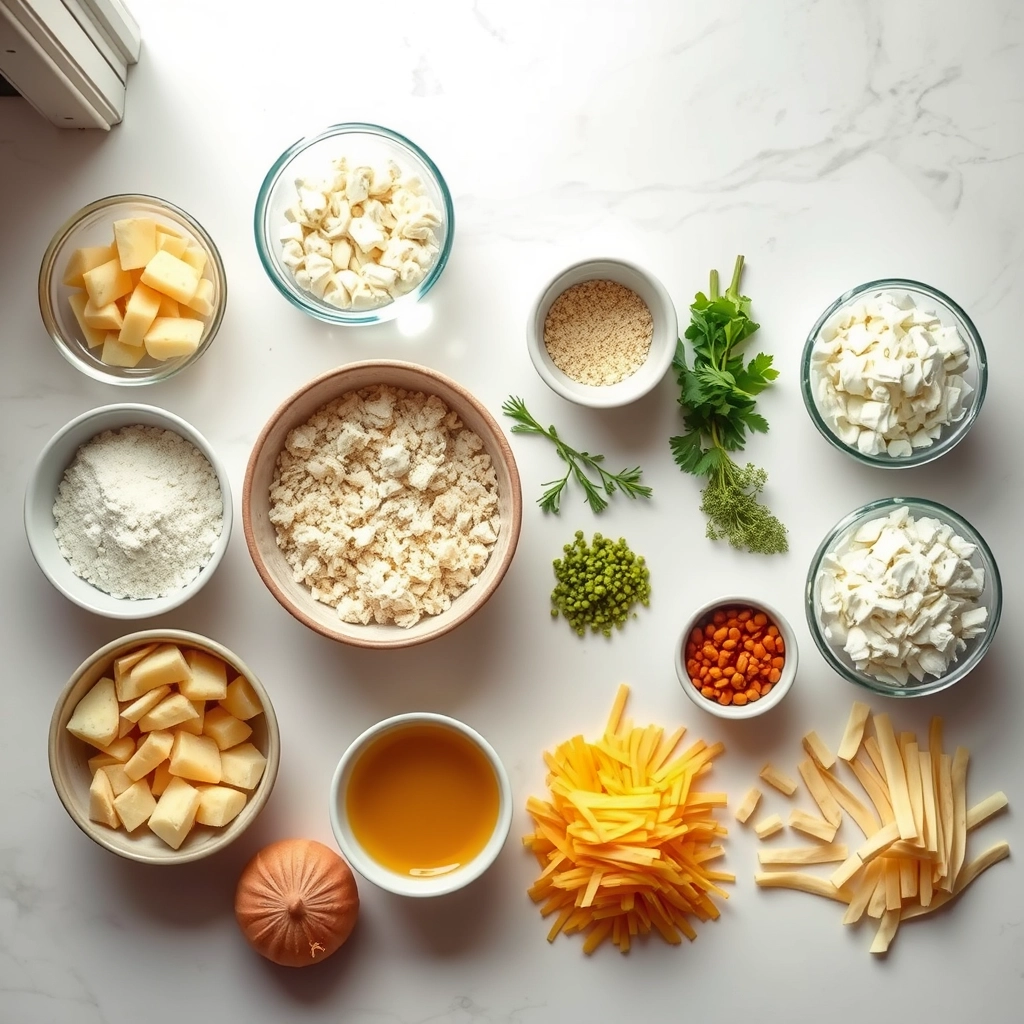
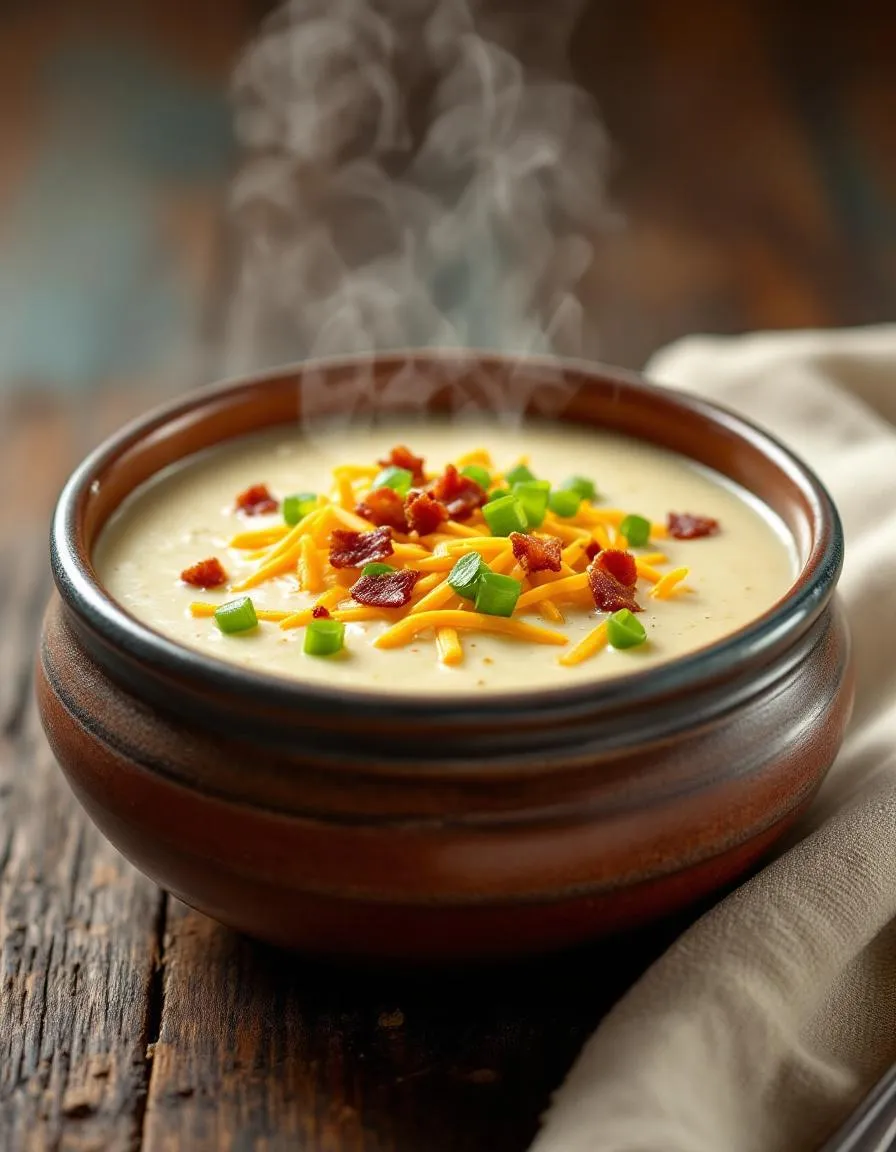
A creamy and hearty potato soup inspired by Outback Steakhouse, perfect for a comforting meal.
Ingredients
Scale
For the Crust:
4 large russet potatoes, peeled and diced
1 medium onion, finely chopped
4 cups chicken broth
2 cups heavy cream
1/2 cup butter
1/2 cup all-purpose flour
1 teaspoon salt
1/2 teaspoon black pepper
1/2 teaspoon garlic powder
1/2 teaspoon paprika
1 cup shredded cheddar cheese
6 slices bacon, cooked and crumbled
2 green onions, sliced
Instructions
1. Prepare the Crust:
In a large pot, melt the butter over medium heat. Add the chopped onion and sauté until translucent.
Stir in the flour and cook for 1-2 minutes to form a roux.
Gradually whisk in the chicken broth, ensuring no lumps remain.
Add the diced potatoes, salt, pepper, garlic powder, and paprika. Bring to a boil, then reduce heat and simmer for 15-20 minutes, or until potatoes are tender.
Stir in the heavy cream and simmer for an additional 5 minutes.
Use a potato masher to slightly thicken the soup, leaving some chunks for texture.
Stir in the shredded cheddar cheese until melted and well combined.
Serve hot, garnished with crumbled bacon and sliced green onions.
Notes
You can customize the seasonings to taste.
How to Prepare This Dish
Steps and time-saving tips
Start by dicing the potatoes into small, even cubes so they cook quickly and evenly. Meanwhile, melt butter in a large pot over medium heat, then sauté the onions until they turn translucent. Stir in minced garlic for just 30 seconds to avoid burning it. Next, whisk in flour to create a roux, which thickens the Outback Steakhouse Potato Soup beautifully. Gradually pour in chicken broth while stirring constantly to prevent lumps. Add the potatoes, bring the mixture to a gentle boil, then reduce the heat and let it simmer until the potatoes soften. For a creamy texture, blend half the soup lightly with an immersion blender or mash some potatoes against the pot’s side. Stir in heavy cream, shredded cheese, and crispy bacon bits, then season with salt and pepper. Finally, let the soup simmer for five more minutes so the flavors meld. To save time, prep your ingredients ahead or use pre-shredded cheese. If the soup thickens too much, thin it with a splash of broth or milk.
and-learned-from">Mistakes I’ve made and learned from
I once rushed the roux and ended up with a lumpy Outback Steakhouse Potato Soup—now I whisk patiently and add the broth slowly. Another time, I overcooked the potatoes, turning them mushy. Now I check for doneness by piercing them with a fork after 15 minutes. If you’re new to soups, my guide on perfect roux techniques can help avoid texture issues. Also, don’t skip garnishes! Fresh chives or extra cheese make a difference, just like in my soup garnishing ideas post. Taste as you go, and adjust seasoning before serving—it’s easier to fix early.
Cultural Connection and Variations
Where this recipe comes from
Outback Steakhouse Potato Soup carries the heartwarming flavors of Australian-inspired comfort food, even though the chain itself hails from Florida. The dish blends creamy potatoes, smoky bacon, and sharp cheddar into a rich, satisfying bowl that feels like a hug from the inside. While the recipe leans into American steakhouse traditions, you’ll find similar potato soups worldwide with their own twists. In Ireland, they might add leeks for a rustic touch, while Germans often pair it with sausage for extra heft.
Families often put thei
r own spin on Outback Steakhouse Potato Soup, too. Some swap regular potatoes for sweet potatoes or add a dash of hot sauce for kick. Others toss in extra veggies like corn or carrots to stretch the meal. Personally, I love topping mine with crispy fried onions for crunch. No matter how you tweak it, the soup stays a crowd-pleaser, whether served at a weeknight dinner or a cozy gathering.
How it fits in today’s cooking
Outback Steakhouse Potato Soup still shines in modern kitchens because it’s both nostalgic and adaptable. Busy cooks appreciate how easily it comes together, especially when using shortcuts like pre-shredded cheese or instant potatoes. Meanwhile, foodies might elevate it with gourmet toppings like truffle oil or artisan bacon. It’s the kind of dish that fits right into quick weeknight dinners or leisurely weekend meals.
Seasonally, this soup thrives in fall and winter, but lighter versions with fresh herbs work year-round. Some even serve it as a starter for holiday feasts, pairing it with holiday baking ideas for a full spread. Whether you stick to the classic recipe or experiment, Outback Steakhouse Potato Soup remains a timeless comfort food that bridges generations and tastes.
>Taste and Texture
What makes it delicious
Outback Steakhouse Potato Soup wraps you in comfort with its velvety, creamy texture and rich, savory flavor. Each spoonful delivers a luscious blend of buttery potatoes, smoky bacon, and sharp cheddar cheese, while a hint of garlic and onion adds depth. The soup smells irresistible, with warm, buttery aromas mingling with the earthy scent of fresh herbs. Meanwhile, tender potato chunks melt in your mouth, and crispy bacon bits provide a satisfying crunch. Outback Steakhouse Potato Soup strikes the perfect balance between hearty and indulgent, making it a crave-worthy classic.
Boosting the flavor
For an extra flavor kick, try stirring in a dollop of sour cream or tangy Greek yogurt to brighten the richness. Crispy fried shallots or extra shredded cheese on top add texture, while a dash of smoked paprika enhances the bacon’s smokiness. If you love bold flavors, swap regular potatoes for roasted sweet potatoes or mix in a spoonful of homemade ranch seasoning for a herby twist. Whether you tweak the toppings or experiment with spices, Outback Steakhouse Potato Soup welcomes creative upgrades.
Tips for Success
Best practices for results
For the creamiest Outback Steakhouse Potato Soup, always use russet potatoes since they break down easily and thicken the broth. Meanwhile, stir the soup frequently to prevent sticking, especially once you add the cheese. Additionally, let the soup simmer uncovered for at least 20 minutes to deepen the flavors. Finally, garnish with fresh chives and crispy bacon right before serving for that signature Outback Steakhouse Potato Soup texture.
Mistakes to avoid
One common mistake is rushing the roux—cook it until golden brown to avoid a floury taste in your Outback Steakhouse Potato Soup. Similarly, avoid over-blending the potatoes if you prefer a chunkier texture. For more tips on perfecting creamy soups, check out our guide on soup thickening techniques. Another error is skipping the heavy cream, which gives the soup its rich consistency. If you need dairy-free alternatives, explore our plant-based soup swaps for equally delicious results.
Serving and Pairing Suggestions
How to serve this dish
Outback Steakhouse Potato Soup shines when you serve it piping hot in a rustic bread bowl for a cozy, hearty meal. Alternatively, ladle it into elegant soup cups for a more refined presentation at dinner parties. Top it with crispy bacon bits, shredded cheddar, and a sprinkle of fresh chives to mimic the restaurant experience. For holidays or game-day gatherings, set up a toppings bar with sour cream, green onions, and croutons so everyone can customize their bowl. This soup also makes a comforting starter for a steakhouse-style dinner at home.
h-it">What goes well with it
Pair Outback Steakhouse Potato Soup with a crisp side salad to balance its creamy richness. Try our Classic Caesar Salad for a refreshing contrast. For heartier appetites, serve it alongside warm, buttery rolls or our Garlic Herb Focaccia. If you’re enjoying it as a main course, a glass of chilled Chardonnay or an amber ale enhances its savory flavors. Finally, drizzle a touch of hot sauce over the soup for those who love a spicy kick.
What are the ingredients in Outback Steakhouse Potato Soup?
Outback Steakhouse Potato Soup typically includes russet potatoes, bacon, onions, celery, heavy cream, chicken broth, and cheddar cheese. The soup is known for its rich, creamy texture and smoky bacon flavor, making it a fan favorite at the restaurant.
rank-math-faq-item">
How can I make Outback Steakhouse Potato Soup at home?
You can recreate Outback Steakhouse Potato Soup by sautéing bacon, onions, and celery, then simmering with potatoes and chicken broth. Blend part of the soup for creaminess, then stir in heavy cream and cheese for that signature Outback flavor.
Is Outback Steakhouse Potato Soup gluten-free?
Outback Steakhouse Potato Soup is not officially listed as gluten-free, as it may contain thickeners or shared kitchen equipment. If you’re gluten-sensitive, check with your server or consider making a homemade version with gluten-free ingredients.
Why is Outback Steakhouse Potato Soup so creamy?
Outback Steakhouse Potato Soup achieves its creamy texture through a combination of blended potatoes and heavy cream. The restaurant-style consistency comes from partially pureeing the soup while leaving some potato chunks for texture.
>
Ultimate Vanilla Bean Brown Butter Cheesecake Recipe
Introduction
There’s something undeniably special about a dessert that feels both luxurious and comforting. That’s exactly what you’ll find with this Vanilla Bean Brown Butter Cheesecake. Whether you’re celebrating a milestone or simply treating yourself after a long week, this recipe delivers rich, velvety perfection with every bite. Plus, the nutty depth of brown butter paired with fragrant vanilla beans creates a flavor profile that’s impossible to resist. Trust me, once you try it, you’ll understand why it’s become a staple in my kitchen.
Vanilla Bean Brown Butter Cheesecake isn’t just another dessert—it’s a showstopper that balances elegance with approachability. The brown butter adds a toasty, caramel-like complexity, while the vanilla bean seeds infuse every layer with their floral sweetness. Unlike traditional cheesecakes, this version has a subtle depth that keeps you coming back for another slice. It’s perfect for dinner parties, holiday gatherings, or even a quiet night in with a cup of coffee. If you’ve ever struggled with cheesecakes cracking or turning out too dense, don’t worry. My step-by-step method ensures a creamy, crack-free result every time. For more foolproof baking tips, check out my guide on perfect cheesecake techniques. And if you love brown butter as much as I do, you’ll adore my brown butter cookie recipe, which highlights its versatility.
Why I Love This Recipe
This Vanilla Bean Brown Butter Cheesecake holds a special place in my heart because it reminds me of the first time I truly fell in love with baking. I remember testing this recipe for a friend’s birthday, and the way her face lit up after the first bite made all the effort worth it. Since then, I’ve shared it with countless friends and family members, each time watching their reactions with the same joy. It’s more than just a dessert—it’s a little piece of happiness I get to create and share. That’s the magic of baking, and it’s why I’ll always cherish this recipe.
Health and Nutrition
Why it’s good for your body
Vanilla Bean Brown Butter Cheesecake offers more than just incredible flavor. First, the brown butter adds a rich depth while providing healthy fats that support brain function. Additionally, vanilla bean contains antioxidants that help combat inflammation, making this dessert a smarter indulgence. The cream cheese base delivers a dose of protein and calcium, which strengthens bones and muscles.
Moreover, Vanilla Bean Brown Butter Cheesecake uses simple, high-quality ingredients without unnecessary additives. For instance, real vanilla bean enhances both taste and potential health benefits compared to artificial extracts. Meanwhile, the natural sweetness from ingredients like honey or maple syrup (if used) can offer a better alternative to refined sugars. As a result, you satisfy cravings without the energy crash.
Finally, this cheesecake balances indulgence with nutrients. While it’s a treat, the combination of fats, proteins, and antioxidants makes it more satisfying than empty-calorie desserts. So when you enjoy Vanilla Bean Brown Butter Cheesecake, you’re treating your body as well as your taste buds.
How it fits in a healthy lifestyle
Vanilla Bean Brown Butter Cheesecake fits perfectly into a balanced diet when enjoyed mindfully. For example, pairing a small slice with fresh berries adds fiber and vitamins, creating a more nutritious dessert. If you follow a gluten-free lifestyle, this cheesecake easily adapts by using almond flour or another gluten-free crust alternative.
You can also incorporate it into special occasions without derailing health goals. Since it’s rich and satisfying, a little goes a long way, helping with portion control. For more tips on balancing treats with nutrition, check out our guide on healthy dessert swaps. And if you’re curious about ingredient benefits, our baking with natural sweeteners post dives deeper into smarter sugar choices.
Ultimately, Vanilla Bean Brown Butter Cheesecake proves that delicious desserts can align with a healthy lifestyle. By focusing on quality ingredients and mindful eating, you can enjoy every bite guilt-free.
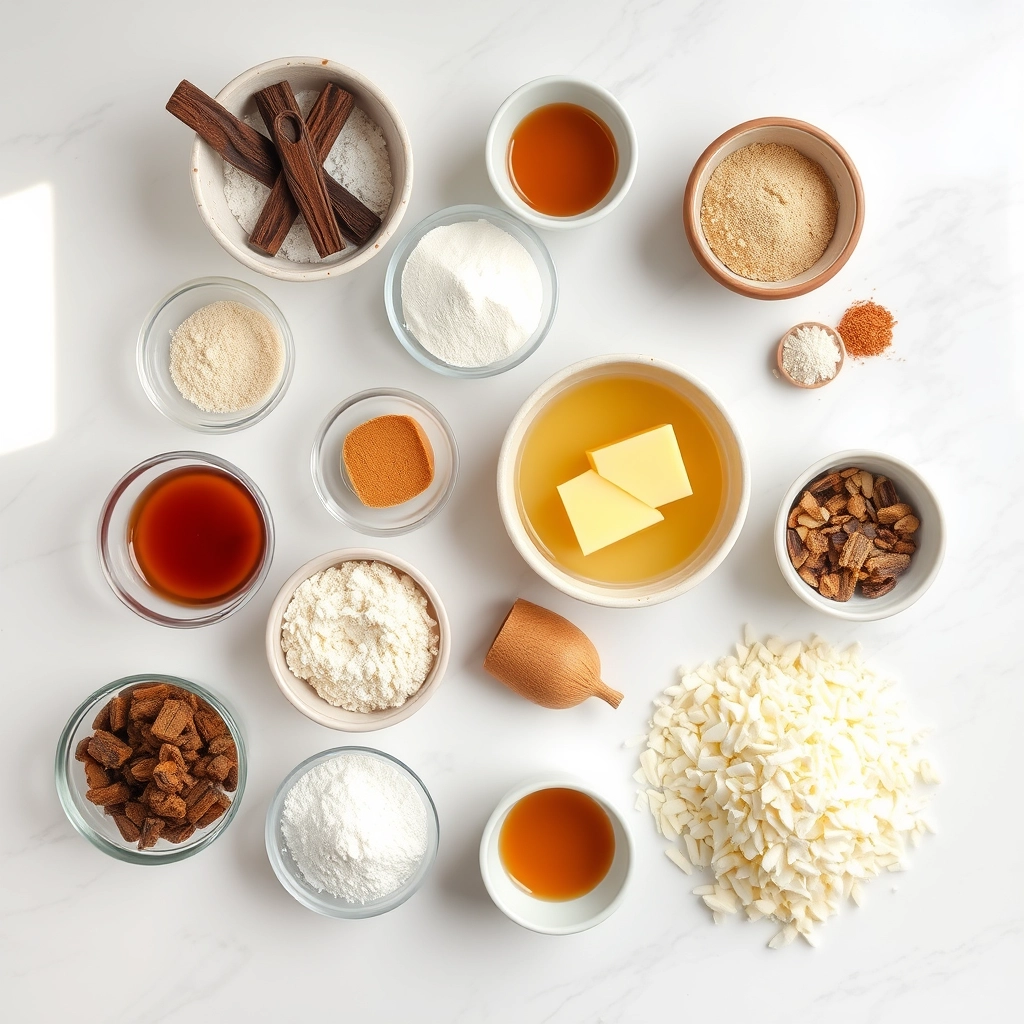
A rich and creamy cheesecake with the nutty depth of brown butter and aromatic vanilla bean.
Ingredients
Scale
For the Crust:
1 1/2 cups graham cracker crumbs
1/4 cup granulated sugar
6 tbsp unsalted butter, browned and cooled
24 oz cream cheese, softened
1 cup granulated sugar
3 large eggs
1 vanilla bean, split and seeds scraped
1 cup sour cream
1 tsp vanilla extract
1/4 tsp salt
Instructions
1. Prepare the Crust:
Preheat oven to 325°F. Grease a 9-inch springform pan.
Mix graham cracker crumbs, 1/4 cup sugar, and brown butter. Press into the pan bottom.
Beat cream cheese and 1 cup sugar until smooth. Add eggs one at a time, then vanilla seeds, sour cream, vanilla extract, and salt.
Pour filling over crust. Bake for 50-55 minutes until center is set but slightly jiggly.
Cool in oven with door ajar for 1 hour, then refrigerate for at least 4 hours before serving.
Notes
You can customize the seasonings to taste.
“`html
="how-to-prepare-this-dish">How to Prepare This Dish
Steps and time-saving tips
Start by browning the butter for your Vanilla Bean Brown Butter Cheesecake. Melt it in a light-colored pan over medium heat, stirring often until it turns golden and smells nutty. Let it cool slightly while you prep the crust. Crush graham crackers into fine crumbs, then mix them with sugar and a pinch of salt. Stir in the browned butter until the crumbs hold together when pressed. Press this mixture firmly into your springform pan, using the bottom of a glass to even it out. Chill the crust for 15 minutes to set. Meanwhile, beat the cream cheese until smooth, then add sugar and vanilla bean paste, scraping the bowl often. Whisk in eggs one at a time, mixing just until combined. Finally, fold in the sour cream and a splash of heavy cream for richness. Pour the filling over the chilled crust, then bake in a water bath to prevent cracks. Let the cheesecake cool gradually in the oven with the door slightly ajar, then chill it overnight for the best texture. For a time-saving trick, brown extra butter ahead and store it in the fridge—it keeps for weeks.
Mistakes I’ve made and learned from
My first attempt at Vanilla Bean Brown Butter Cheesecake ended with a soggy crust because I rushed the butter-cooling step. Now, I let it sit until it’s warm but not hot—about 10 minutes—before mixing it with the crumbs. Another disaster? Overbaking. I used to pull the cheesecake out when the center looked set, but it kept cracking. Now, I rely on the jiggle test: the edges should be firm while the center wobbles slightly, like this guide suggests. And if you’re new to water baths, don’t skip the foil wrap around the pan—I learned that the hard way when my springform leaked. For more troubleshooting, check out these fixes for common cheesecake issues. Trust me, patience pays off with this dessert.
Vanilla Bean Brown Butter Cheesecake feels like a love letter to both tradition and innovation. Cheesecake itself traces back to ancient Greece, but the brown butter twist and fragrant vanilla beans give this version a modern, deeply aromatic upgrade. In France, bakers might swap the graham cracker crust for a buttery sable base, while in Japan, they often lighten the texture with whipped cream or matcha for a delicate finish. Meanwhile, my grandma’s version always included a splash of bourbon—her Southern roots shining through.
Seasonally, this desser
t fits right in with holiday feasts or summer gatherings. The warm, nutty notes from brown butter make it a winter favorite, yet the bright vanilla keeps it fresh for spring. Some bakers even infuse the brown butter with spices like cardamom or cinnamon, tying it to regional flavors. No matter where you enjoy Vanilla Bean Brown Butter Cheesecake, it carries that universal magic of comfort and celebration.
How it fits in today’s cooking
Today, Vanilla Bean Brown Butter Cheesecake bridges nostalgia and contemporary tastes. Home cooks love it for special occasions, but it’s also adaptable enough for weeknight indulgences. Many simplify the recipe by using no-bake methods, while others experiment with gluten-free crusts or dairy-free alternatives. Its rich flavor pairs perfectly with seasonal fruits, like the berry compote that brightens every bite.
Social media has also given this dessert new life, with bakers showcasing swirls of caramel or layers of chocolate ganache. Whether served at a dinner party or packed into lunchboxes as mini cheesecakes, it’s a timeless treat that keeps evolving. After all, great recipes—like this one—never really fade. They just find new ways to delight us.
>Taste and Texture
What makes it delicious
Vanilla Bean Brown Butter Cheesecake delivers a luxurious sensory experience from the first bite. The rich, nutty aroma of brown butter mingles with the sweet, floral notes of real vanilla bean, creating a fragrance that’s downright irresistible. As you take a forkful, the velvety smooth filling melts on your tongue, balanced by a buttery, slightly crisp graham cracker crust. Meanwhile, the vanilla bean speckles add tiny bursts of warmth, while the brown butter lends a toasty depth that elevates the classic cheesecake flavor. Every slice of Vanilla Bean Brown Butter Cheesecake feels indulgent yet perfectly balanced—creamy but not heavy, sweet but not cloying.
Boosting the flavor
For an extra layer of decadence, drizzle warm caramel sauce over each slice or sprinkle flaky sea salt to heighten the brown butter’s richness. If you love fruity contrasts, try topping your Vanilla Bean Brown Butter Cheesecake with a quick berry compote for a tangy twist. Alternatively, swap the graham crust for a toasted hazelnut crust to amplify the nutty undertones. A dusting of cinnamon or a splash of bourbon in the batter can also add warmth, making this dessert even more memorable.
Tips for Success
Best practices for results
Always use room-temperature cream cheese for your Vanilla Bean Brown Butter Cheesecake to ensure a smooth, lump-free batter. Meanwhile, brown the butter slowly over medium heat until it turns nutty and golden, then let it cool slightly before mixing. Additionally, scrape the vanilla bean seeds thoroughly to maximize flavor without overpowering the dessert. For best results, bake the cheesecake in a water bath to prevent cracks and achieve even cooking. Finally, chill it overnight for a firm, creamy texture that slices perfectly.
Mistakes to avoid
Avoid overmixing the batter once you add the eggs, as this can incorporate too much air and cause the Vanilla Bean Brown Butter Cheesecake to puff and crack. Instead, mix just until combined. Also, never skip the water bath—it’s crucial for gentle heat distribution, as explained in our water bath guide. Another common mistake is slicing the cheesecake too soon; always wait until it’s fully chilled. For more troubleshooting tips, check out our guide to fixing cracks.
Serving and Pairing Suggestions
How to serve this dish
Elevate your Vanilla Bean Brown Butter Cheesecake by serving it on a sleek white plate for a modern look. Meanwhile, drizzle a thin caramel swirl on top or add fresh berries for a pop of color. For special occasions, dust the plate with edible gold flakes to make it feel extra luxurious. Alternatively, slice it into mini portions for a brunch buffet or holiday gathering. Since this cheesecake has rich flavors, let it sit at room temperature for 10 minutes before serving to enhance its creamy texture.
h-it">What goes well with it
Pair your Vanilla Bean Brown Butter Cheesecake with a warm cup of spiced chai tea to highlight its warm vanilla notes. If you prefer something cold, try a scoop of homemade cinnamon ice cream for a cozy contrast. For a fruity twist, serve it alongside our berry compote to balance the richness. Additionally, a glass of dessert wine like Moscato complements the brown butter depth perfectly. If you love layered flavors, our salted caramel sauce adds a delightful salty-sweet finish.
What makes Vanilla Bean Brown Butter Cheesecake different from regular cheesecake?
Vanilla Bean Brown Butter Cheesecake stands out with its rich, nutty flavor from browned butter and the aromatic depth of real vanilla beans. Unlike regular cheesecake, the brown butter adds a toasty complexity that pairs perfectly with the creamy texture.
rank-math-faq-item">
Can I use vanilla extract instead of vanilla beans in Vanilla Bean Brown Butter Cheesecake?
Yes, you can substitute vanilla extract, but the flavor won’t be as intense or aromatic as using real vanilla beans. For the best results in Vanilla Bean Brown Butter Cheesecake, use at least 1 tablespoon of high-quality vanilla extract to mimic the bean’s flavor.
How do I prevent cracks in my Vanilla Bean Brown Butter Cheesecake?
To avoid cracks, bake the Vanilla Bean Brown Butter Cheesecake in a water bath and let it cool gradually in the oven with the door slightly ajar. Overmixing or overbaking can also cause cracks, so follow the recipe closely.
What’s the best way to serve Vanilla Bean Brown Butter Cheesecake?
Serve Vanilla Bean Brown Butter Cheesecake chilled, topped with fresh berries, caramel drizzle, or a dusting of powdered sugar. The creamy, nutty flavors shine when paired with simple, complementary toppings.