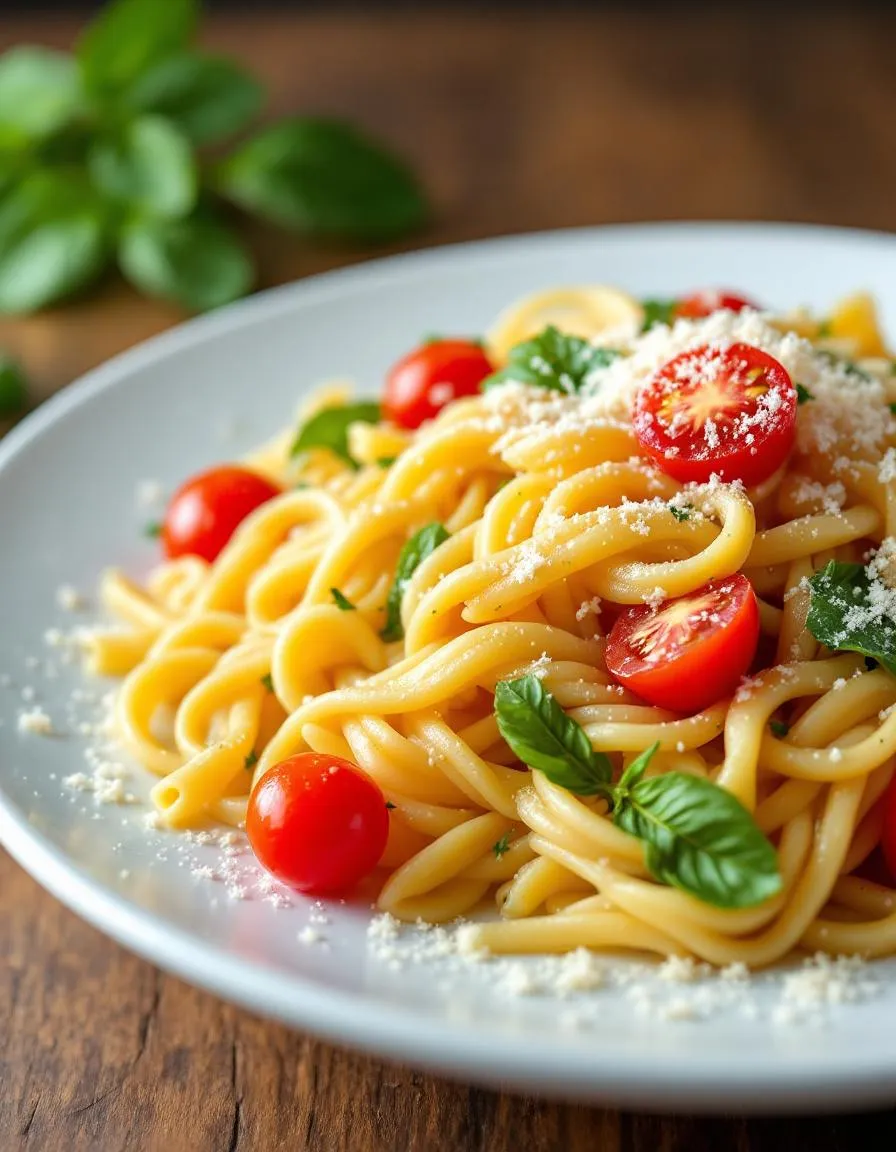
There’s something undeniably comforting about a bowl of Classic Pasta Salad. Whether you’re prepping for a summer picnic, a potluck with friends, or just craving a satisfying lunch, this dish never fails to hit the spot. Moreover, it’s a versatile crowd-pleaser that brings people together, and today, I’m thrilled to share my tried-and-true version with you. After all, food tastes better when it’s made with joy and shared with those you love.
Classic Pasta Salad is more than just a side dish—it’s a celebration of fresh flavors and textures. Typically featuring tender pasta, crisp vegetables, and a tangy dressing, it’s a staple at gatherings for good reason. Not only does it hold up well in the fridge, but it also adapts effortlessly to whatever ingredients you have on hand. At brekcakes.com, we believe in recipes that are both approachable and delicious, and this one perfectly embodies that philosophy. If you’re looking for more inspiration, check out our guide to easy weeknight dinners or our tips for meal prep ideas to make your cooking routine smoother.
Why I Love This Recipe
Classic Pasta Salad holds a special place in my heart because it reminds me of lazy summer afternoons with my family. My mom would always whip up a big batch for barbecues, and I loved how something so simple could bring everyone together. Now, whenever I make it, I feel that same sense of connection and nostalgia. It’s a recipe that’s as much about the memories as it is about the flavors, and I hope it becomes a favorite in your home too.
Health and Nutrition
Why it’s good for your body
Classic Pasta Salad packs a nutritious punch while delighting your taste buds. First, it combines whole-grain or enriched pasta with fresh vegetables, delivering fiber and essential vitamins. For example, cherry tomatoes and bell peppers add vitamin C, while cucumbers keep you hydrated. Additionally, the olive oil in the dressing provides heart-healthy monounsaturated fats.
Moreover, Classic Pasta Salad offers a balanced mix of macronutrients. The pasta supplies energizing carbohydrates, while ingredients like chickpeas or cheese add plant-based or dairy protein. Furthermore, the dish includes healthy fats from olives or avocado, which support brain function. Since you can customize the ingredients, you can easily boost its nutritional profile with lean proteins like grilled chicken.
Finally, Classic Pasta Salad makes it simple to eat more vegetables. By tossing in spinach, carrots, or broccoli, you increase your daily fiber intake without sacrificing flavor. Whether you enjoy it as a side or main dish, this recipe helps you meet your nutrient goals effortlessly.
How it fits in a healthy lifestyle
Classic Pasta Salad fits perfectly into a balanced diet. If you follow a gluten-free lifestyle, simply swap regular pasta for a gluten-free alternative like brown rice or quinoa pasta. For those focusing on heart health, the olive oil and veggies align with Mediterranean diet principles. You can even make it high-protein by adding grilled shrimp or tofu, turning it into a satisfying meal.
This dish also suits meal prep routines. Prepare a big batch on Sunday, and you’ll have ready-to-go lunches for the week. Pair it with a light soup or a healthy snack for a complete meal. If you’re watching portions, serve it alongside a balanced dinner to keep calories in check. Classic Pasta Salad adapts to your needs, making healthy eating both convenient and delicious.
First, bring a large pot of salted water to a boil and cook the pasta until al dente. While the pasta cooks, chop your favorite vegetables—like crisp bell peppers, juicy cherry tomatoes, and crunchy cucumbers—into bite-sized pieces. Drain the pasta and rinse it under cold water to stop the cooking process. Meanwhile, whisk together a tangy dressing using olive oil, vinegar, a pinch of sugar, and your preferred herbs. Toss the cooled pasta with the veggies in a large bowl, then drizzle the dressing over everything. Gently fold in some cubed cheese or sliced olives for extra flavor. For the best results, chill the Classic Pasta Salad for at least 30 minutes before serving. If you’re short on time, use pre-chopped veggies or store-bought dressing to speed things up. Just remember, letting the salad sit for a bit helps the flavors meld beautifully.
Mistakes I’ve made and learned from
I once overcooked the pasta, turning my Classic Pasta Salad into a mushy mess. Now I set a timer and taste-test a minute early to avoid this. Another time, I skipped rinsing the pasta, and it clumped together—lesson learned! For perfect texture, always rinse and drain well. If you’re unsure about balancing flavors, check out my guide to dressing ratios for foolproof tips. Also, don’t forget to season as you go. I underestimated salt once, and the whole dish fell flat. For more on seasoning tricks, my salt-savvy guide has saved many of my recipes. Trust me, these small tweaks make a big difference!
Classic Pasta Salad has roots in Mediterranean cuisine, where cooks tossed leftover pasta with fresh vegetables, olives, and tangy dressings. Over time, it traveled to America, becoming a staple at picnics and potlucks. Families often tweak the recipe, adding their favorite ingredients like salami, cheese, or even pickles. In Italy, you might find a simpler version with cherry tomatoes and basil, while in Germany, they love a creamy mayo-based twist.
My grandmother made Classic Pasta Salad every summer, loading it with crisp bell peppers and her secret herb blend. Meanwhile, in the South, cooks might swap Italian dressing for a zesty ranch or add a dash of hot sauce for kick. No matter the variation, this dish brings people together. Whether it’s a backyard BBQ or a holiday spread, Classic Pasta Salad always finds its way to the table.
ays-cooking">How it fits in today’s cooking
Today, Classic Pasta Salad remains a go-to for busy weeknights and festive gatherings. Modern cooks love its versatility, tossing in quinoa or kale for a health boost. Some even serve it as a main dish, pairing it with grilled chicken or shrimp. For meal prep fans, it’s a lifesaver—just whip up a big batch and enjoy it all week.
Seasonal twists keep it fresh, too. In spring, try adding asparagus or peas, or swap the dressing for a light lemon vinaigrette. During the holidays, cranberries and walnuts give it a festive touch. Craving more inspiration? Check out our easy weeknight dinners for quick ideas. And if you’re hosting a crowd, our summer party recipes will make Classic Pasta Salad the star of the show.
Taste and Texture
What makes it delicious
Classic Pasta Salad delivers a vibrant medley of flavors and textures that make every bite exciting. The al dente pasta offers a satisfying chew, while crisp vegetables like bell peppers and cucumbers add a refreshing crunch. Juicy cherry tomatoes burst with sweetness, and tangy black olives bring a briny depth. Meanwhile, the creamy dressing coats everything in a rich, herby embrace, with hints of garlic and Parmesan adding savory warmth. Every forkful of Classic Pasta Salad feels balanced—bright, hearty, and utterly craveable.
r">Boosting the flavor
Elevate your Classic Pasta Salad with a few easy tweaks. For extra zing, swap the dressing for a homemade Italian dressing, packed with fresh herbs and citrus notes. Alternatively, toss in roasted red peppers or artichoke hearts for a smoky, tangy twist. Crumbled feta or toasted pine nuts add salty richness, while a sprinkle of quick-pickled onions introduces a punchy brightness. Experiment with fresh basil or a dash of red pepper flakes to wake up the flavors even more. With these simple upgrades, your Classic Pasta Salad will shine even brighter.
Tips for Success
Best practices for results
Always cook the pasta al dente for Classic Pasta Salad, as it holds up better when mixed with dressing. Meanwhile, chill the salad for at least an hour before serving to let the flavors blend. For the best texture, use fresh vegetables and drain them well to prevent excess moisture. Additionally, toss the salad gently to keep the ingredients intact while evenly coating everything. Finally, taste and adjust the seasoning just before serving for a perfectly balanced Classic Pasta Salad.
>Mistakes to avoid
Avoid overcooking the pasta, as it turns mushy once dressed. Instead, check it a minute early and rinse it under cold water to stop the cooking process. Many people also forget to reserve some dressing to refresh the Classic Pasta Salad before serving. For more dressing tips, check out our guide on salad dressing ratios. Another common mistake is skipping the resting time, which weakens the flavors. If you’re short on time, learn how to quickly chill dishes without sacrificing taste.
Serving and Pairing Suggestions
How to serve this dish
Classic Pasta Salad shines when you serve it in a large, colorful bowl to highlight its vibrant ingredients. For a festive touch, garnish with fresh herbs like basil or parsley and a sprinkle of grated Parmesan. Meanwhile, this dish works perfectly for picnics, potlucks, or summer barbecues since it stays fresh and flavorful at room temperature. If you want to elevate the presentation, layer it over a bed of crisp lettuce or serve it in individual mason jars for a fun, portable twist.
What goes well with it
Pair Classic Pasta Salad with grilled chicken or lemon garlic shrimp for a protein-packed meal. The smoky flavors of the grill balance the salad’s tangy dressing beautifully. Alternatively, serve it alongside our garlic bread sticks for a comforting carb-loaded combo. For drinks, a chilled glass of rosé or sparkling lemonade complements the dish’s refreshing taste. If you crave something creamy, try dipping warm soft pretzel bites into the extra dressing for a satisfying bite.
What are the best pasta shapes for Classic Pasta Salad?
Short, sturdy shapes like rotini, penne, or farfalle work best for Classic Pasta Salad because they hold dressing well and provide a satisfying bite. Avoid long noodles like spaghetti, as they don’t mix as easily with other ingredients. Classic Pasta Salad benefits from textures that complement crunchy veggies and creamy dressings.
How long can Classic Pasta Salad last in the fridge?
Classic Pasta Salad stays fresh for 3-5 days when stored in an airtight container in the refrigerator. For best results, add delicate ingredients like fresh herbs right before serving. The flavors often improve after a day, making Classic Pasta Salad a great make-ahead dish for gatherings.
rank-math-faq-item">
What dressing is best for Classic Pasta Salad?
Italian dressing or a creamy ranch are popular choices for Classic Pasta Salad, but a simple vinaigrette with olive oil and vinegar works too. The key is using enough dressing to coat the pasta without making it soggy. Classic Pasta Salad tastes best when the dressing complements the other ingredients without overpowering them.
Can I make Classic Pasta Salad without mayonnaise?
Absolutely! Classic Pasta Salad can be just as delicious with oil-based dressings, yogurt, or avocado for creaminess. Many recipes skip mayonnaise entirely for a lighter version. The dish remains flavorful with fresh veggies, herbs, and a tangy dressing.
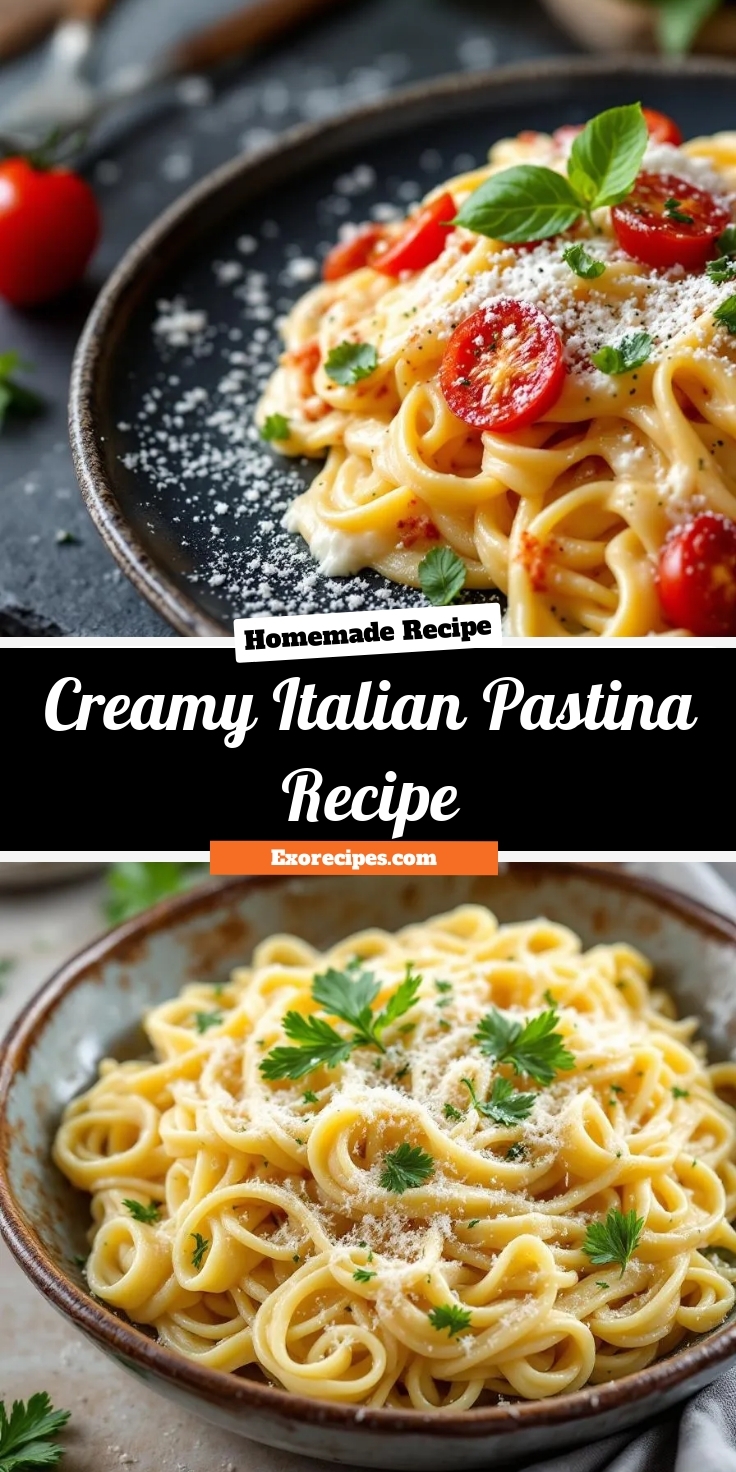
Best Creamy Italian Pastina Recipe – Quick & Comforting
Introduction
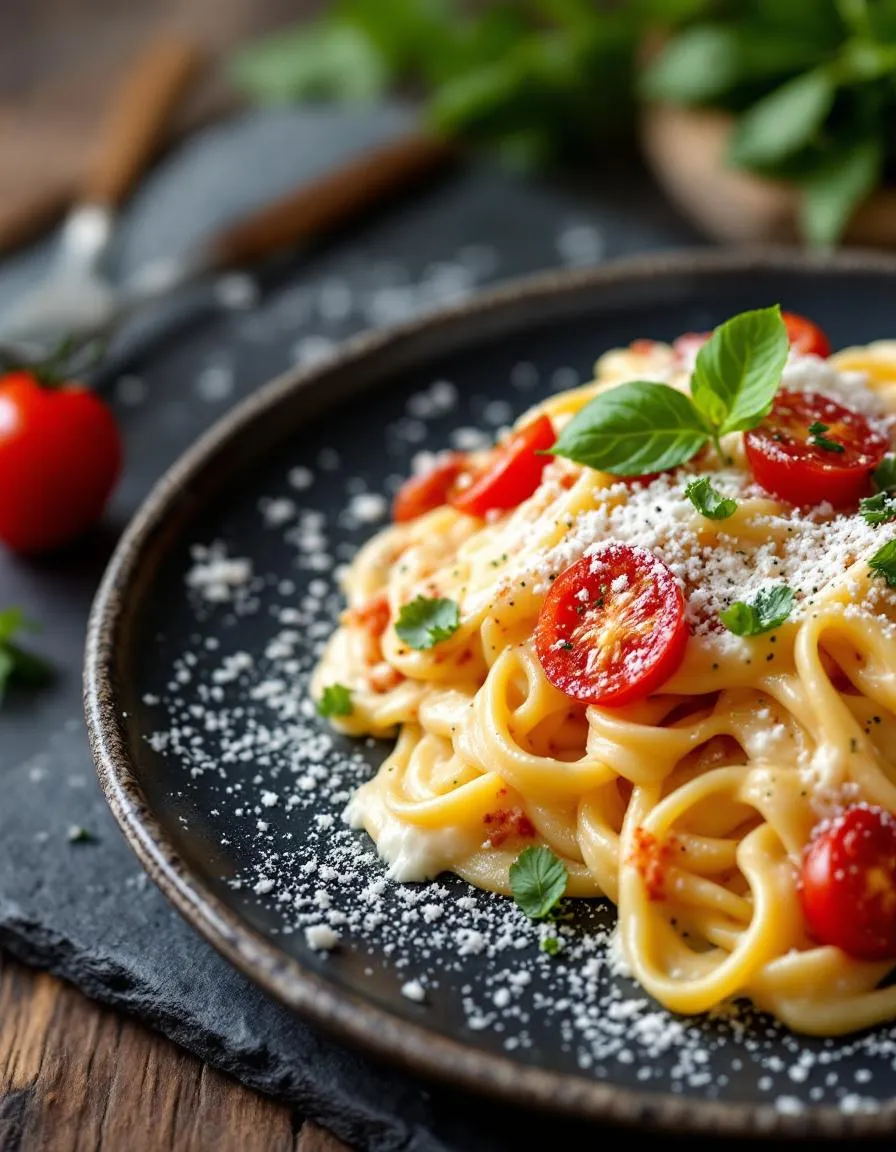
There’s something deeply comforting about a bowl of pasta, especially when it’s a Creamy Italian Pastina Recipe. Whether you’re craving a nostalgic childhood dish or need a quick, soul-warming meal, this recipe delivers. Moreover, it’s perfect for busy weeknights or lazy weekends when you want something simple yet satisfying. After all, food should make you feel good, and this dish does exactly that—with every creamy, flavorful bite.
Creamy Italian Pastina Recipe is a humble yet irresistible dish that transforms tiny pasta stars into a rich, velvety masterpiece. Traditionally, Italian families prepare pastina as a comforting meal for little ones, but honestly, adults adore it just as much. The magic lies in its simplicity—butter, cheese, and a touch of cream create a luscious texture that melts in your mouth. Unlike heavier pasta dishes, pastina feels light yet indulgent, making it ideal for any time of day. Here at brekcakes.com, we celebrate recipes that blend tradition with approachable techniques, and this one fits perfectly. Plus, if you love cozy meals, you’ll also enjoy our Classic Chicken Pot Pie or Garlic Butter Shrimp Pasta—both are equally comforting and crowd-pleasing.
Why I Love This Recipe
This Creamy Italian Pastina Recipe holds a special place in my heart because it reminds me of rainy afternoons at my grandmother’s house. She’d stir the pot with such care, always adding an extra sprinkle of cheese just for me. Now, whenever I make it, I feel that same warmth—and I love sharing that feeling with others. It’s more than just food; it’s a little bowl of love.
Health and Nutrition
Why it’s good for your body
First, Creamy Italian Pastina Recipe packs a nutritious punch with simple, wholesome ingredients. Because it features pastina, a small pasta rich in carbohydrates, it delivers steady energy without spiking blood sugar. Additionally, the dish includes olive oil, which provides heart-healthy monounsaturated fats to support cardiovascular health.
Moreover, Creamy Italian Pastina Recipe often incorporates Parmesan cheese, a great source of calcium and protein. These nutrients strengthen bones and muscles while keeping you full longer. The recipe also balances comfort and nutrition, making it a smart choice when you crave something cozy yet nourishing.
Finally, the dish adapts easily to dietary needs. For instance, you can swap regular pastina for whole-grain or gluten-free versions. Whether you enjoy it as a light lunch or a satisfying side, Creamy Italian Pastina Recipe offers both flavor and wellness benefits in every bite.
How it fits in a healthy lifestyle
Creamy Italian Pastina Recipe fits seamlessly into a balanced diet. If you follow a Mediterranean-inspired eating plan, this dish aligns perfectly with its emphasis on whole grains, healthy fats, and moderate dairy. You can pair it with a fresh salad or roasted vegetables for a well-rounded meal.
For those managing gluten sensitivities, simply choose gluten-free pastina to enjoy the same creamy texture. The recipe also works well as part of a meal prep routine, saving time while keeping nutrition on track. Plus, its simple ingredients make it a budget-friendly option for families.
If you love exploring wholesome recipes, try pairing this dish with our hearty vegetable soup for extra fiber and vitamins. Whether you prioritize convenience, flavor, or nutrition, Creamy Italian Pastina Recipe supports your goals without compromise.
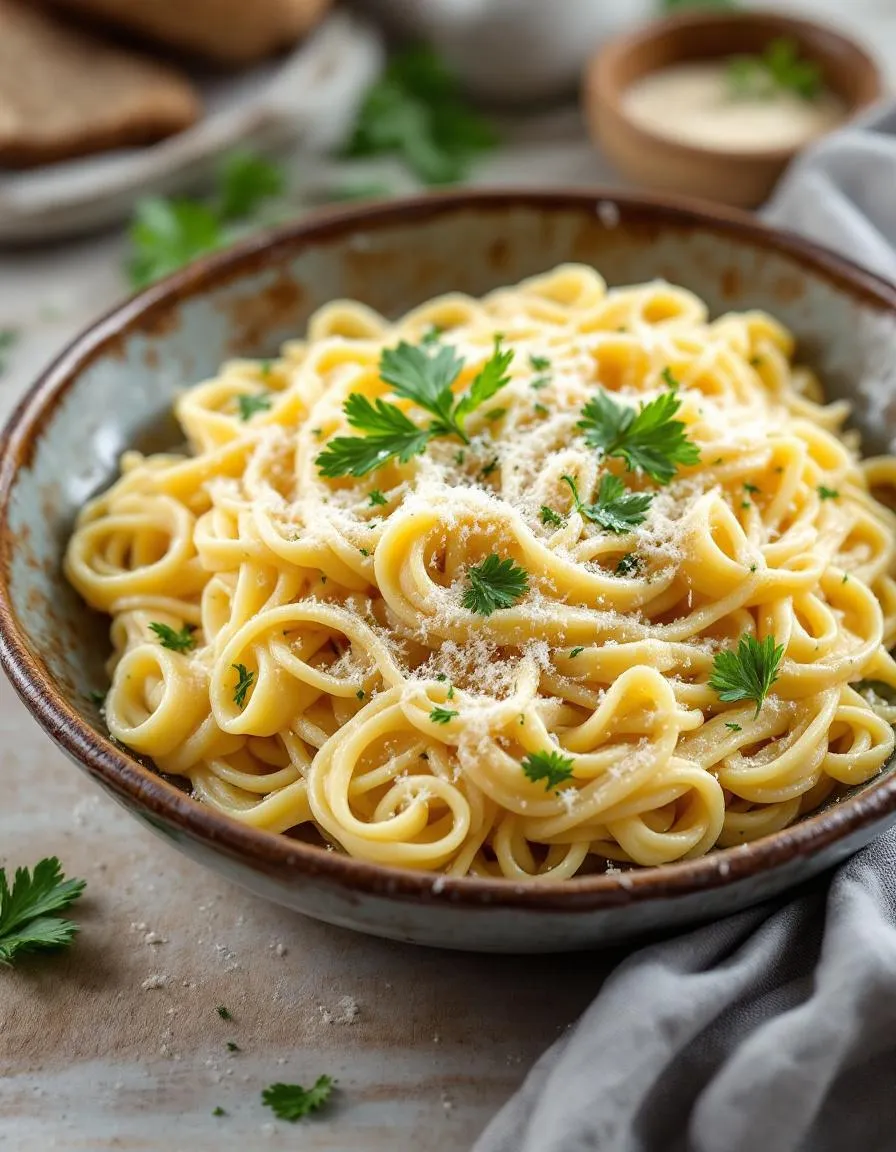
A comforting and creamy Italian pastina dish that’s perfect for a quick and delicious meal.
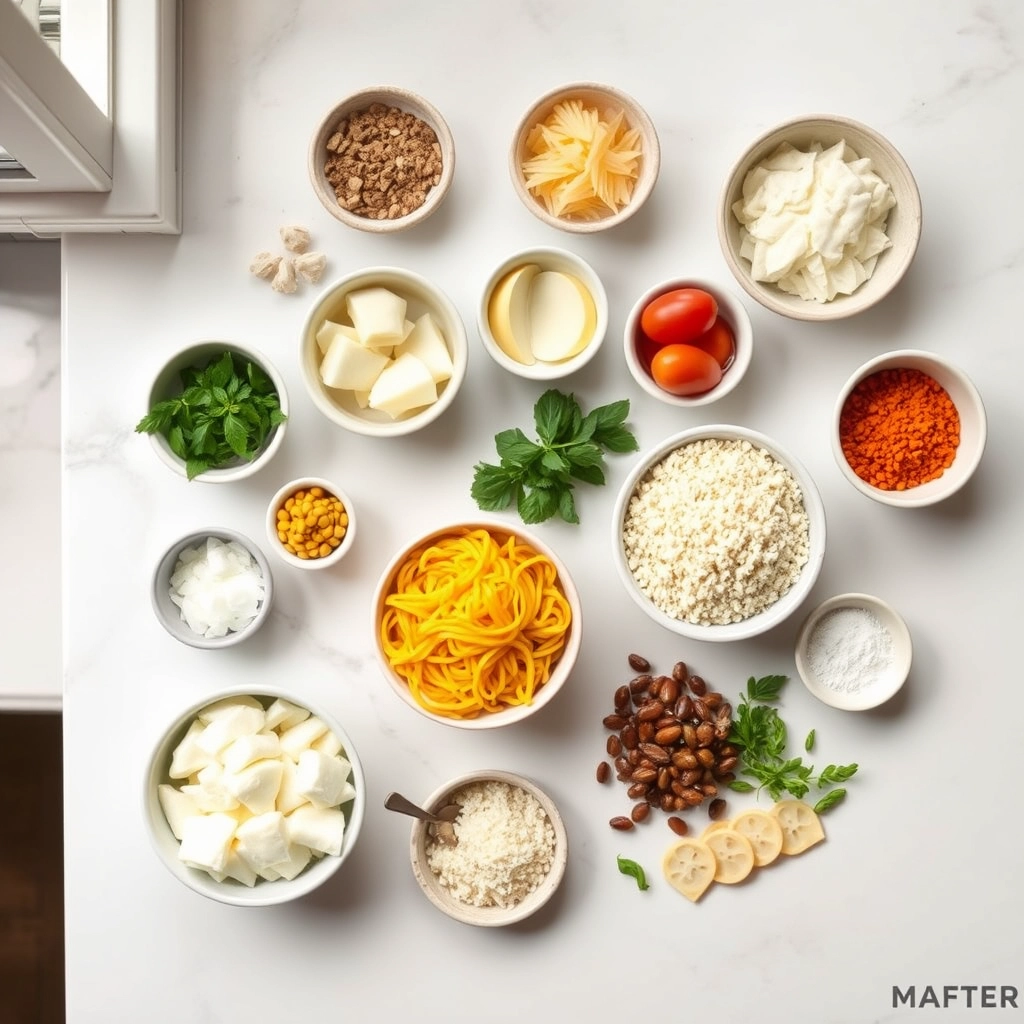
Ingredients
Scale
For the Crust:
1 cup pastina pasta
2 cups chicken broth
1/2 cup heavy cream
1/4 cup grated Parmesan cheese
1 tablespoon butter
1 clove garlic, minced
1/4 teaspoon salt
1/4 teaspoon black pepper
1 tablespoon fresh parsley, chopped
Instructions
1. Prepare the Crust:
In a medium saucepan, bring the chicken broth to a boil.
Add the pastina and cook according to package instructions until al dente, about 5-7 minutes.
Drain any excess broth, leaving about 1/4 cup in the saucepan.
Reduce heat to low and stir in the heavy cream, Parmesan cheese, butter, and minced garlic.
Season with salt and pepper, stirring continuously until the mixture is creamy and well combined.
Garnish with fresh parsley before serving.
Notes
You can customize the seasonings to taste.
s-dish">How to Prepare This Dish
Steps and time-saving tips
Start by bringing a large pot of salted water to a rolling boil for your Creamy Italian Pastina Recipe. While the water heats, finely chop fresh parsley and grate Parmesan cheese to save time later. Once the water boils, stir in the pastina and cook until al dente, usually about 6-8 minutes. Meanwhile, heat olive oil in a skillet over medium heat and sauté minced garlic until fragrant, about 30 seconds. Drain the pastina, reserving a cup of pasta water, then return it to the pot. Quickly whisk in butter, heavy cream, and half the Parmesan until the mixture turns velvety. If the sauce feels too thick, drizzle in reserved pasta water a tablespoon at a time. Fold in the garlic, parsley, and remaining cheese, then season with salt and black pepper. For a richer flavor, let the dish rest for 2 minutes before serving. To speed things up, prep all ingredients before cooking and use pre-grated cheese—though freshly grated melts smoother. Serve warm with a sprinkle of red pepper flakes for a subtle kick.
Mistakes I’ve made and learned from
I once rushed the garlic step in my Creamy Italian Pastina Recipe, burning it because the skillet was too hot. The bitter taste ruined the entire batch, so now I keep the heat medium-low and stir constantly. Another time, I skipped reserving pasta water, leaving the sauce gluey instead of silky. Lesson learned: always save that liquid gold! If you’re new to pastas, my guide on avoiding common pasta mistakes breaks down these pitfalls. Also, don’t overcook the pastina—it keeps softening in the sauce. For perfect doneness, check out my pasta cooking times cheat sheet. Trust me, a timer is your best friend here.
n-and-variations">Cultural Connection and Variations
Where this recipe comes from
Every spoonful of Creamy Italian Pastina Recipe whispers stories of Italian kitchens, where grandmothers stir love into tiny star-shaped pasta. This dish, often called “pastina in brodo,” roots itself in Italy’s tradition of comforting soups, especially for children or anyone needing a warm hug in a bowl. Families in Rome might simmer it with Parmesan and butter, while Sicilian cooks might add a splash of lemon zest for brightness. Even across the Atlantic, Italian-American homes tweak the recipe—some swirl in eggs for stracciatella, while others fold in fresh herbs or a drizzle of olive oil.
In my own kitchen, the Creamy Italian Pastina Recipe became a lifeline during chilly winters, inspired by my nonna’s habit of tossing in leftover roasted garlic or a handful of spinach. Interestingly, Mexico has a similar dish, “sopa de estrellitas,” where cooks toast the pasta first for depth. Meanwhile, Greek “kritharaki” swaps pastina for orzo but keeps the soul-soothing simplicity. No matter the variation, this dish proves that tiny pasta can carry big traditions.
How it fits in today’s cooking
Today, the Creamy Italian Pastina Recipe thrives as both a quick weeknight fix and a nostalgic weekend project. Busy parents lean on its 15-minute cook time, while food bloggers riff on it with trendy twists—think coconut milk for dairy-free creaminess or turmeric for golden warmth. It’s also a star during holidays, often served as a first course at Christmas Eve dinners, much like our holiday appetizer favorites.
Modern cooks also pair
it with global flavors, from miso paste to harissa, proving its versatility. Whether you’re meal-prepping or craving comfort after a long day, this dish fits seamlessly. For more cozy inspiration, check out our comfort food dinners roundup, where pastina sits proudly beside other timeless classics. After all, good food—like good stories—never goes out of style.
Taste and Texture
What makes it delicious
The Creamy Italian Pastina Recipe wraps you in comfort with its rich, velvety texture and layers of savory flavor. Each spoonful melts in your mouth, thanks to the luscious blend of butter, Parmesan, and starchy pasta water. Fragrant garlic and fresh herbs like parsley or basil add a bright, aromatic kick, while the subtle tang of grated Pecorino Romano deepens the taste. Meanwhile, the tiny pastina noodles hold just the right amount of bite, creating a satisfying contrast to the silky sauce. Whether you savor it as a cozy weeknight meal or a nostalgic childhood dish, the Creamy Italian Pastina Recipe delivers warmth in every bite.
Boosting the flavor
Elevate your Creamy Italian Pastina Recipe with a few easy tweaks. For extra richness, stir in a splash of heavy cream or a dollop of mascarpone. Crispy pancetta or sautéed mushrooms add umami depth, while a pinch of red pepper flakes brings gentle heat. If you love fresh herbs, try topping your bowl with a handful of arugula or basil for a peppery lift. Pair it with a side of garlic butter dinner rolls to soak up every last drop of sauce. Craving something tangy? A squeeze of lemon zest brightens the dish beautifully, just like in this lemon herb roasted chicken. Small changes make a big difference!
Always use freshly grated Parmesan for the Creamy Italian Pastina Recipe, as pre-shredded cheese often contains anti-caking agents that affect texture. Meanwhile, stir the pastina frequently while cooking to prevent clumping and ensure even creaminess. For the richest flavor, simmer the broth gently rather than boiling it vigorously. Additionally, let the dish rest for two minutes off the heat before serving so the sauce thickens perfectly.
Mistakes to avoid
Avoid overcooking the pastina, as it turns mushy quickly—check for doneness a minute early since it keeps cooking in the hot sauce. Furthermore, don’t skip toasting the garlic lightly in butter first; raw garlic can overpower the Creamy Italian Pastina Recipe. If your sauce seems too thick, gradually add warm broth or milk instead of water for better flavor balance. For more pasta tips, explore our guide on achieving perfect al dente texture, or troubleshoot sauces with our creamy sauce secrets.
g-suggestions">Serving and Pairing Suggestions
How to serve this dish
For a cozy family dinner, serve Creamy Italian Pastina Recipe in shallow bowls to highlight its rich texture. Meanwhile, garnish with a sprinkle of fresh parsley or grated Parmesan for a pop of color and extra flavor. If you’re hosting a casual gathering, consider pairing it with crusty bread for dipping. Additionally, this dish shines at holiday potlucks since its comforting warmth makes it a crowd-pleaser. To elevate the presentation, drizzle a touch of high-quality olive oil just before serving.
What goes well with it
A crisp white wine like Pinot Grigio balances the creaminess of Creamy Italian Pastina Recipe perfectly. Alternatively, a light arugula salad with lemon vinaigrette adds a refreshing contrast. For heartier meals, try serving it alongside our Garlic Herb Roasted Chicken to round out the menu. Finally, if you crave something sweet afterward, our Classic Tiramisu makes a delightful finale.
math-faq-block">
What is the best pasta to use for Creamy Italian Pastina Recipe?
Traditional Creamy Italian Pastina Recipe calls for pastina, the smallest pasta shape, but you can also use orzo or stelline if pastina isn’t available. The tiny size helps absorb the creamy sauce perfectly, creating a comforting texture.
Can I make Creamy Italian Pastina Recipe without cheese?
Yes, you can omit cheese for a dairy-free version, but it won’t have the same rich flavor. For creaminess without cheese, try blending cooked pastina with olive oil, garlic, and a splash of starchy pasta water.
How do I prevent my Creamy Italian Pastina Recipe from becoming too thick?
Reserve some pasta water before draining—this starchy liquid helps thin the sauce if your Creamy Italian Pastina Recipe gets too thick. Stir in a tablespoon at a time until you reach the perfect consistency.
rank-math-faq-item">
What protein pairs well with Creamy Italian Pastina Recipe?
Grilled chicken, shrimp, or Italian sausage complement Creamy Italian Pastina Recipe beautifully. For a vegetarian option, try adding white beans or sautéed mushrooms for extra protein and texture.
Best Shrimp Marinade – Easy and Flavorful Recipe
Introduction
There’s something truly special about a dish that brings people together, and that’s exactly what this Shrimp Marinade does. Whether you’re hosting a summer barbecue or simply craving a flavorful weeknight meal, this marinade transforms ordinary shrimp into a mouthwatering masterpiece. Plus, it’s incredibly versatile—toss it on the grill, bake it, or even skewer it for kebabs. No matter how you serve it, the bold flavors will leave everyone asking for seconds.
A great Shrimp Marinade does more than just add flavor; it elevates the entire dish. By combining fresh herbs, zesty citrus, and a hint of spice, this marinade locks in moisture while infusing every bite with brightness. Unlike store-bought versions, you control the ingredients, ensuring a healthier, tastier result. If you love seafood, you’ll appreciate how this recipe complements shrimp’s natural sweetness without overpowering it. For more inspiration, check out my Grilled Shrimp Skewers or explore my Garlic Butter Shrimp for another quick and delicious option.
Why I Love This Recipe
This Shrimp Marinade holds a special place in my heart because it reminds me of family beach trips. My dad used to grill marinated shrimp while we played in the sand, and the smell alone would draw us back to the picnic table. Now, I make it for my own family, and it never fails to create those same joyful moments. Simple, vibrant, and full of love—just like the best recipes should be.
Health and Nutrition
Why it’s good for your body
Shrimp marinade packs a flavorful punch while delivering real health benefits. First, shrimp itself is a lean protein source, and when you pair it with a well-balanced marinade, you boost both taste and nutrition. For instance, many shrimp marinades include olive oil, which provides heart-healthy monounsaturated fats. Additionally, garlic and citrus juices often found in shrimp marinade offer antioxidants and immune-boosting properties.
Moreover, shrimp marinade can help you absorb more nutrients. The acidity from ingredients like lemon or lime juice not only tenderizes the shrimp but also aids in breaking down proteins for easier digestion. Meanwhile, herbs like parsley or cilantro add a dose of vitamins K and C. Since shrimp is naturally low in calories, a flavorful marinade lets you enjoy a satisfying meal without excess fat or sugar.
Finally, shrimp marinade keeps meals exciting while supporting wellness. By using fresh ingredients, you avoid processed additives common in store-bought sauces. Whether you grill, bake, or sauté, shrimp marinade turns a simple dish into a nutrient-rich powerhouse. Plus, the combination of protein, healthy fats, and vitamins makes it a smart choice for anyone looking to eat well.
How it fits in a healthy lifestyle
Shrimp marinade fits effortlessly into a balanced diet, whether you’re focusing on high-protein meals, heart-healthy eating, or gluten-free options. Since shrimp is naturally low in carbs and rich in protein, it’s perfect for those managing weight or building muscle. Pair it with a veggie-packed side, like our grilled vegetable medley, for a complete, nutrient-dense meal.
For heart health, opt for a marinade with olive oil and fresh herbs instead of heavy creams or butter. This keeps saturated fats in check while maximizing flavor. If you’re meal prepping, shrimp marinade saves time—marinate a batch ahead and cook it quickly for busy weeknights. Need more inspiration? Check out our quick healthy dinners for ideas that align with your goals. With simple swaps and smart pairings, shrimp marinade makes healthy eating delicious and sustainable.
Start by rinsing the shrimp under cold water and patting them dry with paper towels. Next, whisk together olive oil, minced garlic, lemon juice, smoked paprika, and a pinch of salt in a large bowl. Then, add the shrimp to the marinade and gently toss until every piece is evenly coated. For the best flavor, let the shrimp sit in the marinade for at least 15 minutes, though 30 minutes is ideal if you have the time. Meanwhile, preheat your grill or skillet to medium-high heat to ensure a perfect sear. Once hot, cook the shrimp for just 2-3 minutes per side until they turn pink and slightly curled. Avoid overcooking, or they’ll become rubbery. For a time-saving hack, prep the marinade ahead and store it in the fridge for up to a day. You can also thread the shrimp onto skewers before marinating for quicker grilling. Serve immediately with a drizzle of reserved marinade and fresh herbs for a vibrant finish.
Mistakes I’ve made and learned from
I once rushed the marinating step and ended up with bland shrimp—lesson learned! Now I always give the shrimp at least 15 minutes to soak up the flavors. Another blunder? Overcrowding the skillet, which steamed the shrimp instead of searing them. Cooking in batches takes a little longer, but it’s worth it for that perfect caramelized crust. If you’re new to grilling seafood, check out my guide on grilling seafood like a pro to avoid common pitfalls. Also, don’t toss the marinade after use—simmer it for a minute to kill bacteria, then drizzle it over the cooked shrimp for extra flavor. For more marinade inspiration, explore my 5 easy marinades for summer to mix things up.
Shrimp Marinade carries a rich history, blending coastal traditions with global influences. In the Caribbean, cooks often infuse it with citrus and Scotch bonnet peppers for a fiery kick, while Mediterranean versions lean on olive oil, garlic, and herbs like oregano. Meanwhile, in Southeast Asia, locals might add lemongrass or coconut milk for a fragrant twist. Every region makes Shrimp Marinade its own, reflecting local flavors and customs.
Growing up, my family’s version of Shrimp Marinade always included a splash of beer—a trick my grandfather picked up from a fisherman in Galicia. He swore it tenderized the shrimp while adding depth. Even now, that small detail connects me to those seaside summers. Whether served at a backyard BBQ or a seaside feast, Shrimp Marinade bridges cultures through shared love of bold, fresh flavors.
ays-cooking">How it fits in today’s cooking
Today, Shrimp Marinade remains a staple for its versatility and quick prep. Busy home cooks streamline it with pantry staples, while food enthusiasts experiment with exotic spices or smoky paprika rubs for depth. It’s perfect for weeknight dinners yet fancy enough for holiday spreads—especially paired with garlic herb focaccia.
Thanks to social media, modern twists like air-fried marinated shrimp or keto-friendly versions keep the dish trending. Yet, no matter how we adapt it, the soul of Shrimp Marinade stays the same: a celebration of simplicity and flavor. Whether you’re grilling by the beach or meal-prepping for the week, this dish fits seamlessly into today’s kitchens.
Taste and Texture
What makes it delicious
Shrimp Marinade bursts with bright, tangy flavors and a hint of sweetness, thanks to fresh lemon juice and a touch of honey. The garlic and herbs add a fragrant depth, while the olive oil keeps every bite juicy and tender. When you take a bite, the shrimp soak up the marinade, delivering a perfect balance of savory and zesty. The texture turns out succulent and slightly firm, with just enough bite to satisfy. Whether grilled or sautéed, Shrimp Marinade transforms simple shrimp into a mouthwatering dish that’s impossible to resist.
r">Boosting the flavor
For an extra kick, try adding a pinch of red pepper flakes or smoked paprika to your Shrimp Marinade. Alternatively, swap honey for maple syrup to introduce a richer, caramelized sweetness. If you love bold flavors, serve the shrimp with a drizzle of garlic herb sauce or a side of citrus avocado salsa. These pairings elevate the dish without overpowering the natural taste of the shrimp. A squeeze of fresh lime right before serving also brightens every bite, making the flavors pop even more.
Tips for Success
Best practices for results
Always marinate shrimp for at least 20 minutes to let the flavors fully absorb, but never exceed 2 hours to prevent the acid from toughening the shrimp. Use fresh citrus juice in your Shrimp Marinade for the brightest taste, and whisk the ingredients thoroughly before adding the shrimp. For even coating, toss the shrimp in the marinade halfway through. Meanwhile, pat the shrimp dry before marinating to help the mixture cling better.
>Mistakes to avoid
Overcrowding the shrimp in the marinade prevents even flavor distribution, so use a wide, shallow dish instead. Skipping the oil in your Shrimp Marinade can lead to dryness, so always include it for juicier results. If you accidentally over-marinate, rinse the shrimp briefly and pat them dry before cooking. For more grilling tips, check out our guide on perfectly grilled seafood. Also, avoid substituting dried herbs for fresh without adjusting quantities—learn the right ratios in our herb substitution cheat sheet.
Serving and Pairing Suggestions
How to serve this dish
Elevate your Shrimp Marinade by serving it on a vibrant platter with lemon wedges and fresh herbs like cilantro or parsley. For a casual gathering, skewer the shrimp and arrange them over a bed of crisp greens. Alternatively, turn it into an elegant appetizer by pairing it with toasted baguette slices for dipping. Whether you’re hosting a summer barbecue or a cozy dinner party, this dish adapts beautifully. To make it extra inviting, drizzle a little extra marinade over the top just before serving.
What goes well with it
Pair your Shrimp Marinade with a chilled glass of Sauvignon Blanc or a citrusy mocktail to balance the bold flavors. For sides, try our Garlic Herb Roasted Potatoes—their crispy texture contrasts perfectly with the tender shrimp. If you prefer something lighter, a simple Avocado Cucumber Salad adds refreshing crunch. Finally, a tangy remoulade or garlic aioli makes an excellent dipping sauce for extra richness.
Shrimp marinade works best when left for 15–30 minutes, as shrimp are delicate and can become mushy if marinated too long. Avoid exceeding 1 hour, especially with acidic ingredients like citrus or vinegar. For bold flavor, 20 minutes is ideal for most shrimp marinade recipes.
What’s the best oil for shrimp marinade?
Extra-virgin olive oil is the top choice for shrimp marinade due to its rich flavor and ability to carry herbs and spices. Neutral oils like avocado or grapeseed also work well if you prefer milder bases. Avoid heavy oils that can overpower the shrimp’s natural sweetness.
rank-math-faq-item">
Can you use lemon juice in shrimp marinade?
Yes, lemon juice adds bright acidity to shrimp marinade but should be used in moderation—1–2 tablespoons per pound of shrimp. Combine it with oil and herbs to balance the acidity. Limit marinating time to 30 minutes to prevent the shrimp from becoming tough.
Do you rinse shrimp after marinating?
No, rinsing removes flavor—simply pat shrimp dry with paper towels before cooking. Leaving a light coating of the shrimp marinade enhances taste and promotes better browning. For grilling, shake off excess marinade to prevent flare-ups.
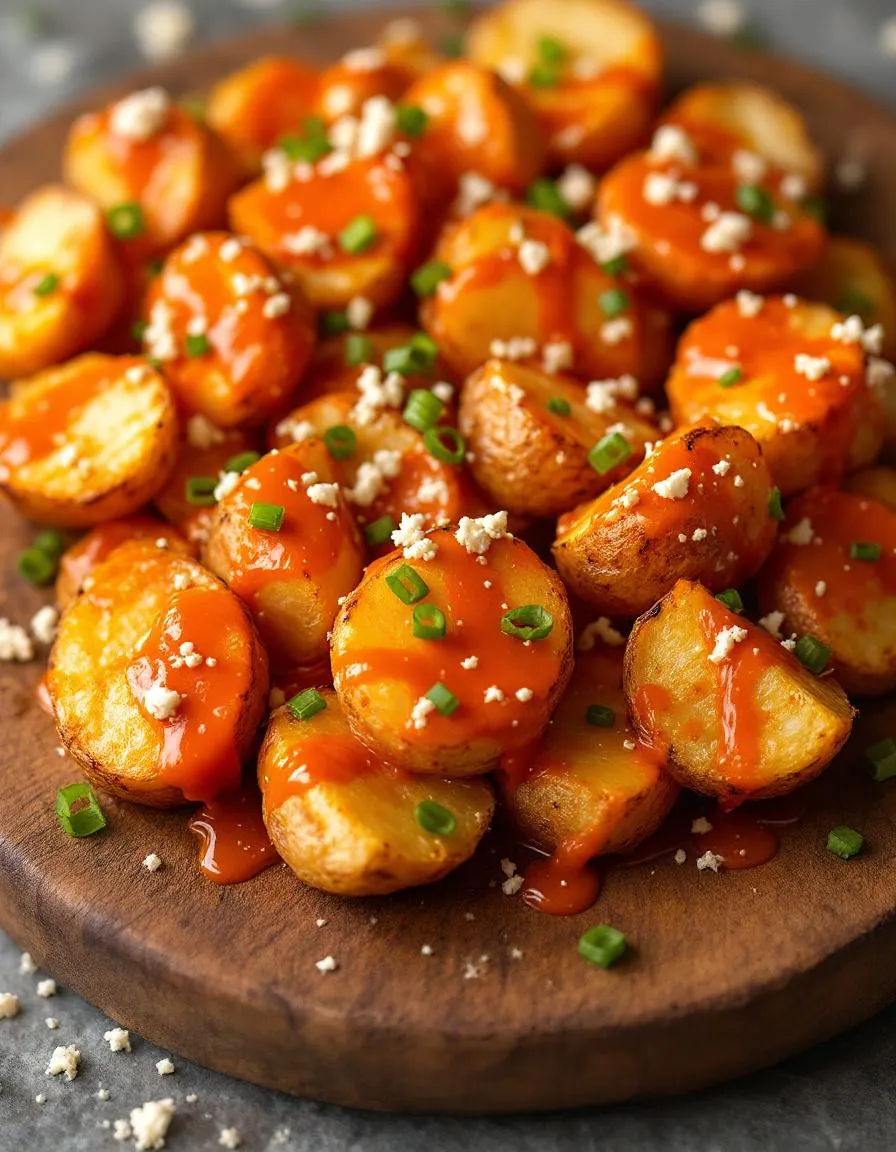
Best Smashed Buffalo Potatoes – Spicy & Crispy
Introduction
If you crave a dish that’s crispy, spicy, and downright addictive, you’re in the right place. Today, I’m sharing my ultimate comfort food—Smashed Buffalo Potatoes. Whether you need a game-day snack or a weeknight side with serious personality, these potatoes deliver bold flavor and satisfying crunch. Plus, they’re incredibly easy to make, which means you can enjoy restaurant-worthy results without the fuss.
Smashed Buffalo Potatoes are exactly what they sound like—golden, crispy smashed potatoes tossed in a fiery buffalo sauce that’s equal parts tangy and spicy. Unlike traditional roasted potatoes, these gems get flattened before baking, creating maximum surface area for that irresistible crunch. What makes them special? They strike the perfect balance between comfort and excitement, much like my favorite Spicy Honey Glazed Chicken. They’re versatile too. Serve them as a party appetizer, a side for grilled meats, or even a standalone snack when cravings hit. Best of all, they fit the brekcakes.com vibe: approachable, flavorful, and always crowd-pleasing. If you love bold flavors, you’ll adore these potatoes as much as my Garlic Parmesan Wings.
Why I Love This Recipe
These Smashed Buffalo Potatoes hold a special place in my heart because they remind me of lazy Sunday afternoons with friends. I first made them for a casual get-together, and within minutes, the tray was empty. There’s something magical about how the crispy edges soak up the buffalo sauce while staying sturdy enough to pick up. Every time I make them, I’m transported back to those laughter-filled moments—proof that great food isn’t just about taste, but the memories it creates.
Health and Nutrition
Why it’s good for your body
Smashed Buffalo Potatoes pack a nutritious punch while delivering bold flavor. First, they offer a hearty dose of fiber thanks to the potato skins, which keeps digestion smooth and supports gut health. Additionally, the spicy buffalo sauce adds capsaicin, a compound that may boost metabolism and reduce inflammation. Meanwhile, the dish provides complex carbohydrates for steady energy, making it a smart choice for active lifestyles.
Moreover, Smashed Buffalo Potatoes include healthy fats if you drizzle them with olive oil or top them with Greek yogurt instead of traditional ranch. These fats help your body absorb fat-soluble vitamins like A and D. Since potatoes are naturally gluten-free, this dish also suits those with dietary restrictions. Finally, the protein from optional toppings like shredded chicken or chickpeas turns Smashed Buffalo Potatoes into a balanced meal that satisfies hunger longer.
How it fits in a healthy lifestyle
Smashed Buffalo Potatoes fit seamlessly into a balanced diet. For a heart-healthy twist, use avocado oil and limit high-sodium sauces. If you’re meal prepping, pair them with lean proteins like grilled chicken or tofu for a complete, macro-friendly lunch. They also work well as a flavorful side dish for gluten-free dinners, ensuring everyone at the table enjoys a tasty yet nutritious option.
Craving something indulgent but mindful? Swap heavy dressings for a light yogurt-based buffalo dip to cut calories without sacrificing taste. Plus, the dish’s versatility means you can adjust spice levels or toppings to match your preferences. For more inspiration on balancing comfort food and nutrition, explore our healthy meal prep tips. Whether you’re fueling workouts or simply enjoying a cozy night in, Smashed Buffalo Potatoes make healthy eating deliciously easy.
First, preheat your oven to 425°F and line a baking sheet with parchment paper. While the oven heats, scrub the potatoes thoroughly and pat them dry. Next, toss them in olive oil, salt, and pepper, then spread them evenly on the baking sheet. Roast the potatoes for about 30 minutes until they turn tender and slightly golden. Meanwhile, whisk together melted butter, hot sauce, and garlic powder in a small bowl for the buffalo sauce. Once the potatoes finish roasting, use a spatula or glass to gently smash each one flat. Drizzle the buffalo sauce generously over the smashed potatoes and return them to the oven for another 10-15 minutes until crispy. For a time-saving tip, parboil the potatoes for 10 minutes before roasting to speed up cooking. Finally, garnish with fresh chopped parsley and crumbled blue cheese for extra flavor.
and-learned-from">Mistakes I’ve made and learned from
When I first made Smashed Buffalo Potatoes, I skipped drying them after washing, which made them steam instead of crisp up. Now, I always pat them thoroughly dry before roasting. Another mistake was overcrowding the baking sheet, leading to uneven cooking. Spacing them out properly ensures they crisp evenly. If you struggle with soggy potatoes, try my crispy roasted potatoes guide for more tips. Also, I once used too much buffalo sauce, making the dish overly spicy. Balancing the sauce with a touch of honey or ranch dressing, like in my buffalo chicken dip recipe, helps tame the heat without losing flavor.
“`
n-and-variations">Cultural Connection and Variations
Where this recipe comes from
Smashed Buffalo Potatoes bring together two beloved comfort foods—crispy roasted potatoes and tangy buffalo sauce—into one irresistible dish. While the exact origin isn’t documented, the recipe likely evolved from classic American bar food, where buffalo wings and loaded potatoes often share the spotlight. In the South, you might find a spicier version with cayenne or hot honey, while Midwest cooks sometimes swap blue cheese crumbles for ranch dressing. Even internationally, similar dishes pop up. For example, in Australia, they might serve smashed potatoes with chili sauce, and in Mexico, a lime crema could replace the traditional buffalo drizzle.
In my family, Smashed Buffalo Potatoes became a game-day staple after my uncle tossed leftover wing sauce over roasted spuds on a whim. Now, we make them year-round, adjusting the heat level depending on who’s at the table. Some relatives add extra garlic or smoked paprika, proving how versatile this dish can be. Whether you’re serving them at a backyard BBQ or a cozy winter gathering, Smashed Buffalo Potatoes always spark conversations—and empty plates.
How it fits in today’s cooking
Today, Smashed Buffalo Potatoes fit perfectly into our fast-paced, flavor-driven food culture. They’re a crowd-pleaser for casual dinners, yet fancy enough for holiday spreads. Modern cooks love how easily they adapt to dietary preferences—swap vegan butter and dairy-free ranch for a plant-based twist, or air-fry the potatoes for a lighter crunch. Plus, they pair wonderfully with other easy recipes, like quick weeknight dinners or meal-prep favorites.
Social media has also g
iven this dish a boost, with food bloggers showcasing creative riffs—think buffalo cauliflower toppings or sweet potato versions. Whether you’re craving nostalgia or a new twist, Smashed Buffalo Potatoes prove that comfort food never goes out of style.
Taste and Texture
What makes it delicious
Smashed Buffalo Potatoes deliver a bold, crave-worthy experience with every bite. The crispy, golden edges contrast perfectly with the fluffy, tender centers, while the spicy Buffalo sauce adds a tangy, fiery kick. Each mouthful bursts with savory garlic, buttery richness, and a hint of smoky paprika. Meanwhile, the creamy blue cheese or cool ranch drizzle balances the heat, creating a harmony of flavors. The aroma alone—a mix of sizzling spices and roasted potatoes—will have everyone gathering around the table. Smashed Buffalo Potatoes aren’t just a side dish; they’re a flavor-packed sensation you’ll crave again and again.
Boosting the flavor
For an extra flavor boost, try tossing your Smashed Buffalo Potatoes with a sprinkle of sharp cheddar or crumbled bacon before baking. If you love heat, add a dash of cayenne or a drizzle of homemade hot honey glaze for sweet-and-spicy depth. Fresh herbs like chives or cilantro brighten the dish, while a side of creamy avocado dip adds cool contrast. Experiment with smoked gouda or a squeeze of lime to elevate the tangy Buffalo vibe. With these tweaks, your potatoes will steal the spotlight every time.
First, always boil your potatoes until fork-tender before smashing them. This ensures the perfect texture for your Smashed Buffalo Potatoes. Additionally, use a sturdy baking sheet lined with parchment paper to prevent sticking and promote even crisping. For extra flavor, generously brush the potatoes with buffalo sauce right after smashing them. Finally, bake at a high temperature to achieve that irresistible golden crunch.
Mistakes to avoid
Avoid overcrowding the baking sheet, as this steams the potatoes instead of crisping them. Instead, leave space between each piece for optimal airflow. Also, don’t skip the parchment paper—without it, your Smashed Buffalo Potatoes may stick or burn. For more troubleshooting tips, check out our guide on fixing soggy roasted vegetables. Another common mistake is under-seasoning, so taste your buffalo sauce before applying it. If you need sauce inspiration, explore our homemade wing sauce variations for bold flavor ideas.
g-suggestions">Serving and Pairing Suggestions
How to serve this dish
For a crowd-pleasing presentation, pile Smashed Buffalo Potatoes high on a rustic wooden board or colorful platter. Meanwhile, drizzle extra buffalo sauce over the top and sprinkle with crumbled blue cheese or fresh chives for a vibrant finish. These crispy bites shine at game-day gatherings, but they also make a fun twist for brunch alongside scrambled eggs. If you want to elevate the visual appeal, serve them in mini cast-iron skillets with a side of ranch dressing for dipping.
What goes well with it
Cool down the heat of Smashed Buffalo Potatoes with a crisp, tangy side like our Creamy Cucumber Salad. The refreshing crunch balances the spicy kick perfectly. Alternatively, pair them with juicy grilled chicken or crispy fried shrimp for a hearty meal. For drinks, a frosty lager or zesty margarita cuts through the richness, while our Spicy Mango Mocktail offers a non-alcoholic option with complementary flavors.
math-faq-block">
What are Smashed Buffalo Potatoes?
Smashed Buffalo Potatoes are a crispy, flavorful side dish made by boiling small potatoes, smashing them flat, and baking or frying until golden. They’re tossed in a spicy buffalo sauce, giving them a tangy kick similar to buffalo wings. These potatoes are perfect for game day or as a crowd-pleasing appetizer.
How do you make Smashed Buffalo Potatoes crispy?
For extra-crispy Smashed Buffalo Potatoes, boil the potatoes until just tender, then smash them thin for maximum surface area. Bake at a high temperature (425°F or higher) with a drizzle of oil until golden and crunchy. Tossing them in buffalo sauce after baking preserves their crispiness while adding bold flavor.
Can I make Smashed Buffalo Potatoes ahead of time?
Yes! Prep Smashed Buffalo Potatoes by boiling and smashing them a day in advance, then refrigerate. Bake just before serving and toss with buffalo sauce. For best results, avoid saucing them ahead—this keeps the potatoes crispy. Reheat leftovers in the oven to maintain texture.
rank-math-faq-item">
What dipping sauces go well with Smashed Buffalo Potatoes?
Classic pairings include cool ranch, blue cheese dressing, or a yogurt-based dip to balance the heat. For extra flavor, try drizzling Smashed Buffalo Potatoes with garlic aioli or cilantro lime crema. These sauces complement the spicy, tangy profile while adding creamy contrast.
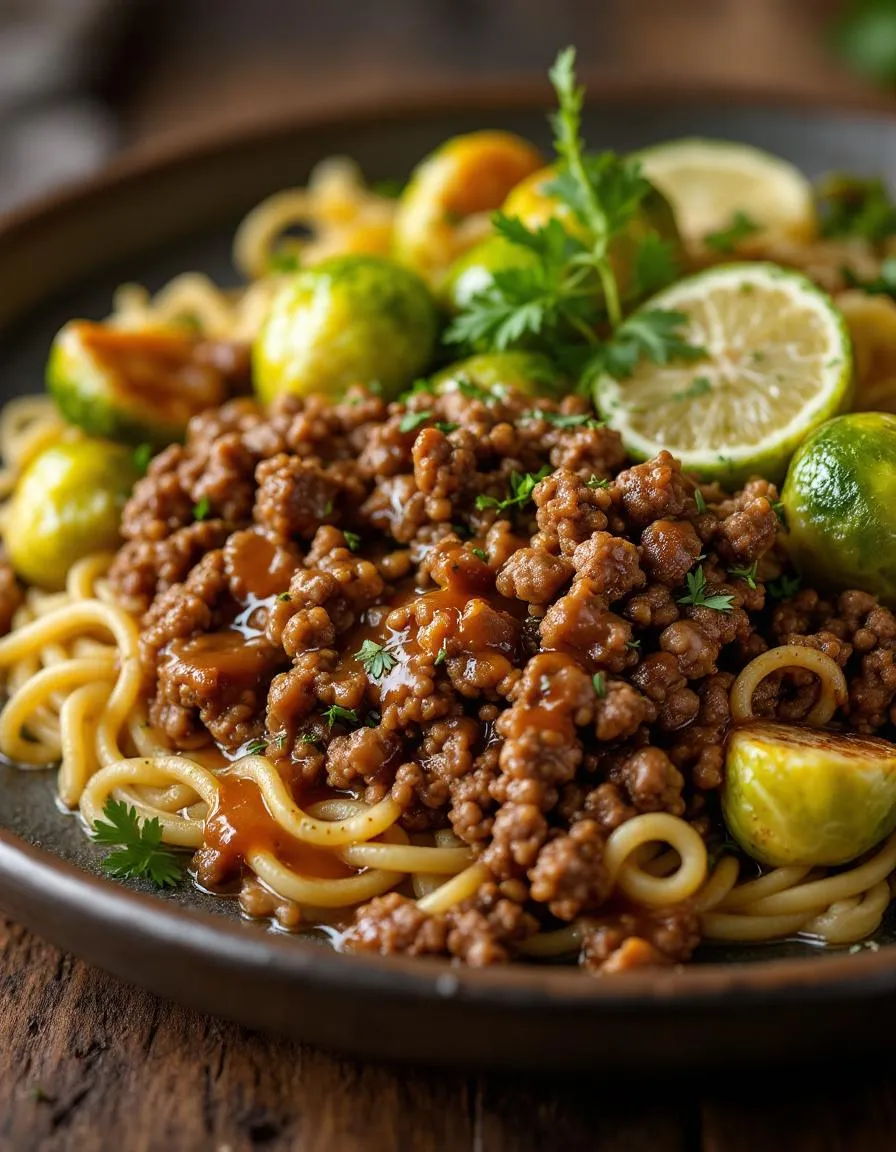
Easy Ground Beef and Brussels Sprouts Recipe
Introduction
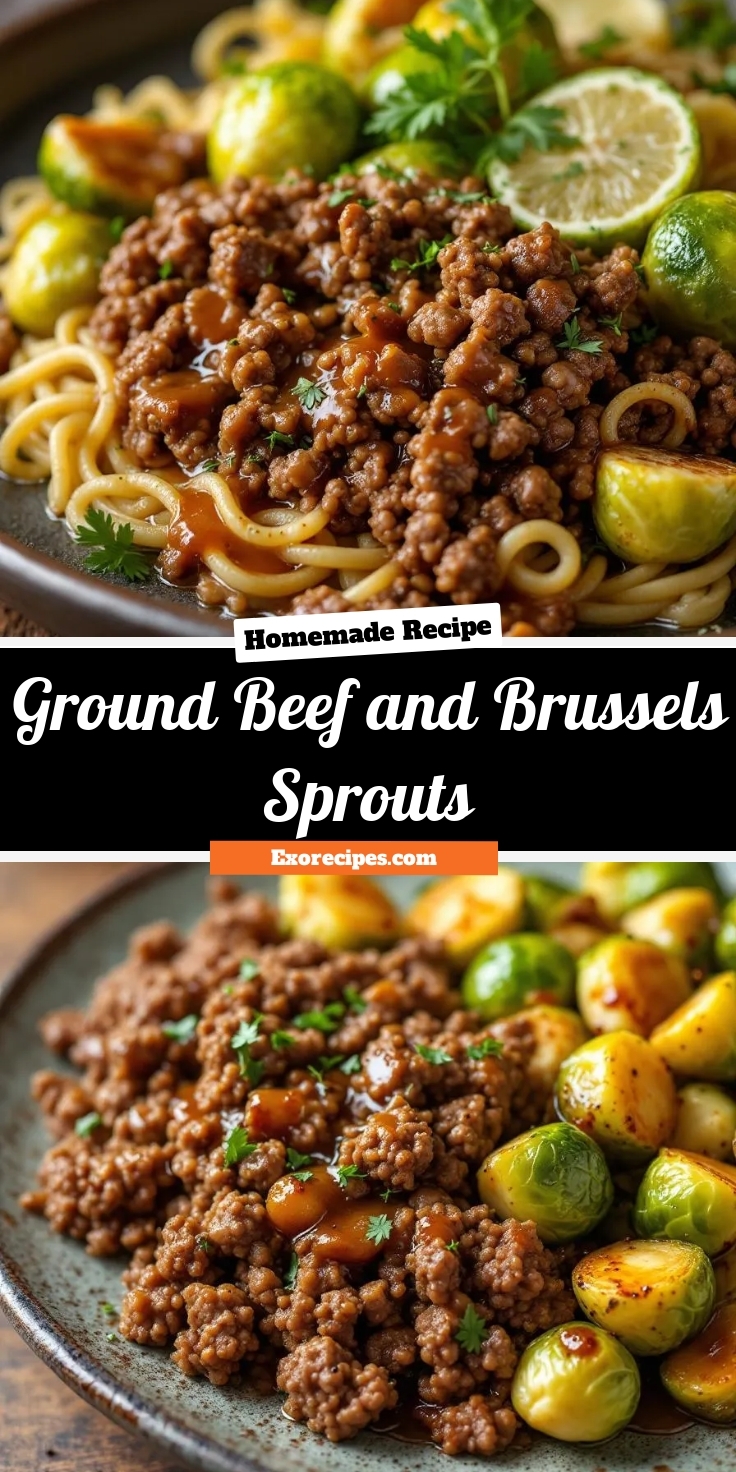
If you’re looking for a hearty, flavorful dish that brings comfort and nutrition to the table, you’ll adore this Ground Beef and Brussels Sprouts recipe. Whether you’re cooking for a busy weeknight or a cozy family dinner, this combination delivers rich flavors and wholesome goodness. Plus, it’s incredibly versatile—perfect for meal prep or impressing guests. After all, nothing beats the satisfaction of a dish that’s as nourishing as it is delicious.
Ground Beef and Brussels Sprouts might sound like an unlikely pair, but trust me, they’re a match made in culinary heaven. The savory depth of ground beef balances the earthy, slightly sweet notes of roasted Brussels sprouts, creating a harmony of textures and tastes. This dish matters because it’s a fantastic way to pack protein and veggies into one satisfying meal. It’s also quick to prepare, making it ideal for anyone juggling a hectic schedule. At brekcakes.com, we celebrate recipes that are both approachable and exceptional, and this one fits perfectly. If you love easy yet impressive meals, you’ll also enjoy our one-pan wonders or our guide to quick dinner ideas.
Why I Love This Recipe
This Ground Beef and Brussels Sprouts recipe holds a special place in my heart because it reminds me of Sunday dinners with my family. My dad would always request something hearty, while my mom insisted on getting our greens in. This dish became our compromise—a flavorful, balanced meal that pleased everyone. Even now, every time I make it, I feel that same warmth and togetherness. It’s more than just food; it’s a reminder of how simple ingredients can bring people closer.
Health and Nutrition
Why it’s good for your body
Ground beef and Brussels sprouts pack a powerful nutritional punch. First, ground beef delivers high-quality protein, which helps build muscle and keeps you full longer. Additionally, it provides iron, a key nutrient for energy and oxygen transport in your body. Meanwhile, Brussels sprouts bring fiber to the table, supporting digestion and gut health.
Beyond protein and fiber, this combo offers essential vitamins. For example, Brussels sprouts supply vitamin C, boosting immunity and skin health. At the same time, ground beef contains B vitamins, which aid metabolism and brain function. Together, they create a balanced meal that fuels your body efficiently.
Moreover, ground beef and Brussels sprouts work well for heart health when prepared mindfully. Lean ground beef reduces saturated fat intake, while Brussels sprouts contribute antioxidants that fight inflammation. Ultimately, this pairing proves you don’t have to sacrifice flavor for nutrition.
How it fits in a healthy lifestyle
Ground beef and Brussels sprouts fit seamlessly into a balanced diet. If you’re focused on high-protein meals, this combo helps meet your goals without relying on processed options. For gluten-free eaters, it’s a naturally safe choice that doesn’t skimp on flavor or nutrients.
Planning meals ahead? Try prepping ground beef and Brussels sprouts for quick weeknight dinners. Pair them with healthy meal prep ideas to stay on track. If you’re watching your heart health, opt for lean ground beef and roast the Brussels sprouts with olive oil for a lighter twist.
Looking for more ways to enjoy these ingredients? Check out our balanced dinner recipes for inspiration. Whether you’re fueling workouts or simply eating well, ground beef and Brussels sprouts make it easy to nourish your body every day.
A hearty and healthy dish combining savory ground beef with roasted Brussels sprouts.
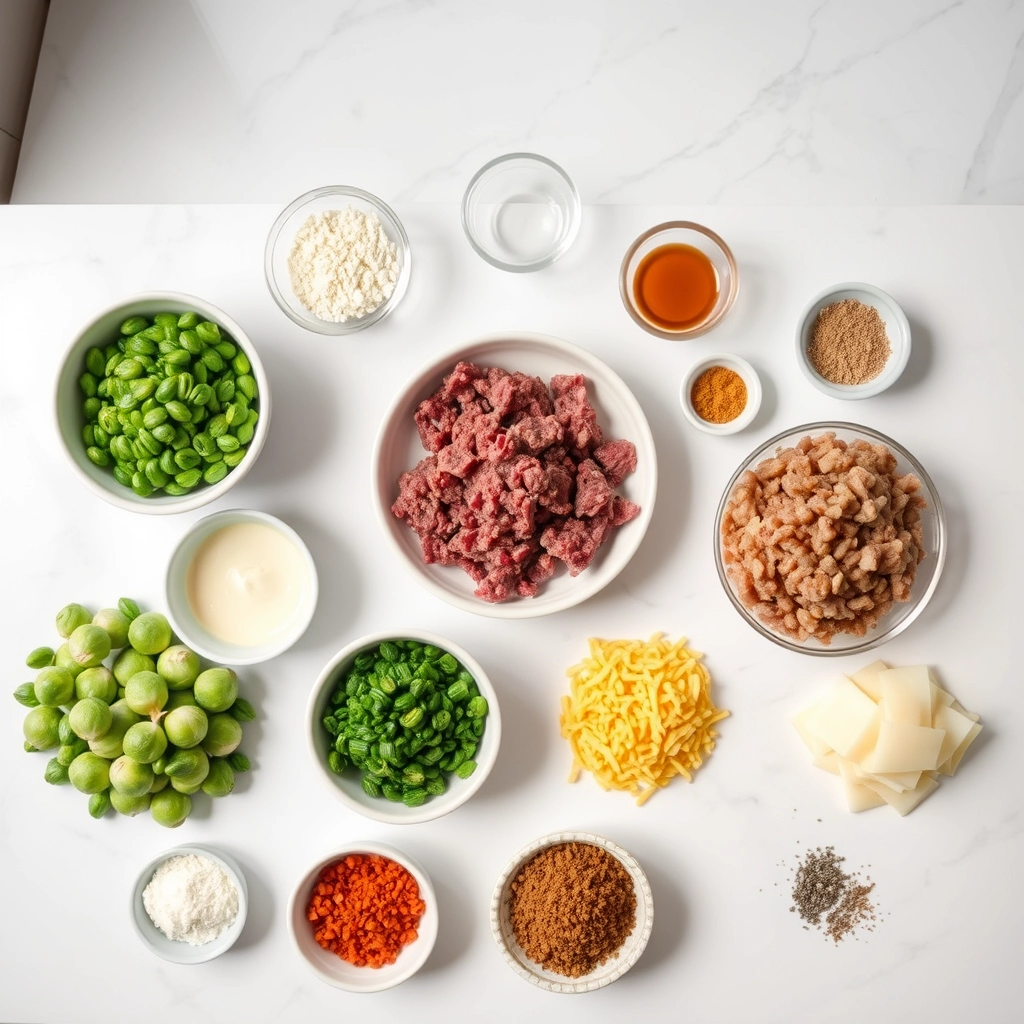
Ingredients
Scale
For the Crust:
1 lb ground beef
1 lb Brussels sprouts, trimmed and halved
2 tbsp olive oil
1 tsp garlic powder
1 tsp onion powder
1/2 tsp salt
1/2 tsp black pepper
1 tbsp soy sauce
1 tbsp Worcestershire sauce
Instructions
1. Prepare the Crust:
Preheat oven to 400°F (200°C). Toss Brussels sprouts with 1 tbsp olive oil, garlic powder, onion powder, salt, and pepper. Spread on a baking sheet and roast for 20-25 minutes until tender and slightly crispy.
In a large skillet, heat remaining olive oil over medium heat. Add ground beef and cook until browned, breaking it apart with a spoon.
Stir in soy sauce and Worcestershire sauce. Cook for another 2-3 minutes. Combine with roasted Brussels sprouts and serve warm.
Notes
You can customize the seasonings to taste.
s-dish">How to Prepare This Dish
Steps and time-saving tips
Start by heating a large skillet over medium-high heat and browning the ground beef until it’s fully cooked, breaking it into small crumbles as it sizzles. Meanwhile, trim the Brussels sprouts and slice them in half for even cooking. Once the beef is done, transfer it to a plate and drain any excess grease, but leave a bit to sauté the sprouts for extra flavor. Toss the Brussels sprouts into the same skillet, cut side down, and let them caramelize for a few minutes until golden brown. Stir occasionally to prevent burning, then add a splash of broth or water to help them soften. Return the ground beef to the skillet and mix everything together, seasoning with salt, pepper, and a pinch of garlic powder for depth. For a time-saving twist, use pre-shredded Brussels sprouts or swap in frozen ones—just thaw and pat them dry first. If you’re short on time, prep the ingredients the night before and store them in the fridge. This dish comes together in under 30 minutes, making it perfect for busy weeknights.
Mistakes I’ve made and learned from
I used to overcrowd the skillet with Brussels sprouts, which steamed them instead of giving them that crispy edge I love. Now I cook them in batches or use a wider pan for better browning. Another blunder? Underseasoning the ground beef. It’s easy to forget that lean beef needs a little extra flavor boost, so I always taste and adjust before adding the sprouts. If you’re new to cooking with Brussels sprouts, check out my guide on how to cook Brussels sprouts perfectly every time for more tips. And if you’ve ever wondered why your ground beef turns out dry, my post on keeping ground beef juicy and flavorful covers simple fixes. Trust me, a few small tweaks make all the difference!
n-and-variations">Cultural Connection and Variations
Where this recipe comes from
Ground Beef and Brussels Sprouts might sound like a modern weeknight dinner, but its roots stretch back to hearty European home cooking. In Belgium, where Brussels sprouts got their name, locals often pair the veggie with rich meats like sausage or bacon. Meanwhile, in the American Midwest, families have long combined ground beef with whatever veggies they had on hand, creating comforting one-pan meals. My grandma used to toss Ground Beef and Brussels Sprouts with a splash of Worcestershire sauce, turning it into a savory skillet dish that warmed us up after snowy evenings.
Across the globe, variations pop up depending on local flavors. In Korea, you might find Brussels sprouts stir-fried with ground pork and gochujang, while Italian cooks could roast them with ground beef, garlic, and a shower of Parmesan. Some families roast the sprouts for crunch, others braise them for tenderness, but the magic always happens when those caramelized edges meet the savory depth of ground beef. Whether it’s a German-inspired version with caraway or a Tex-Mex twist with cumin, this combo adapts beautifully to any pantry.
How it fits in today’s cooking
Today, Ground Beef and Brussels Sprouts shines as a versatile hero for busy cooks. It’s a natural fit for meal prep routines, since it reheats beautifully and packs in protein and veggies. During fall and winter, it becomes a seasonal staple, especially when paired with sweet potatoes or cranberries for holiday tables. Modern twists, like adding sriracha mayo or swapping beef for turkey, keep it fresh for health-conscious eaters.
What makes it timeless?
Its simplicity. You can whip it up in 30 minutes, yet it feels hearty enough for Sunday supper. Some cooks even sneak it into comfort food mashups, like stuffing it into bell peppers or topping flatbreads. Whether you’re craving nostalgia or need a quick fridge clean-out meal, Ground Beef and Brussels Sprouts bridges the gap between tradition and today’s kitchen rhythms.
Taste and Texture
What makes it delicious
Ground Beef and Brussels Sprouts create a hearty, savory dish with layers of contrasting textures. The beef browns into juicy, tender crumbles, while the Brussels sprouts caramelize into crispy-edged, slightly sweet bites. Aromatic garlic and onions deepen the umami richness, and a splash of soy sauce or Worcestershire adds a tangy depth. Each forkful balances the meaty chew of ground beef with the satisfying crunch of roasted Brussels sprouts—making it irresistibly comforting. Plus, the earthy aroma of roasted sprouts mingling with sizzling beef will have everyone gathering around the kitchen.
Boosting the flavor
For extra flair, try swapping ground beef with Italian sausage or adding a sprinkle of smoked paprika to amplify the smokiness. A drizzle of balsamic glaze brightens the dish with a touch of acidity, while toasted pine nuts add buttery crunch. Love heat? Toss in red pepper flakes or serve with a side of creamy avocado dressing for cooling contrast. Experimenting with fresh herbs like thyme or rosemary also elevates the flavors without overpowering the star ingredients.
Always brown the ground beef first to develop rich flavor before mixing it with Brussels sprouts. Meanwhile, trim the sprouts evenly so they cook at the same rate. For extra crispiness, roast the Brussels sprouts at 425°F until their edges turn golden. Additionally, season generously with salt and pepper to enhance the natural flavors of both the ground beef and Brussels sprouts. Finally, let the dish rest for a few minutes before serving to allow the juices to redistribute.
Mistakes to avoid
Avoid overcrowding the pan when cooking ground beef, as this steams the meat instead of browning it. Instead, cook in batches if needed. Similarly, don’t skip trimming the Brussels sprouts, as tough stems can make them chewy. For more on perfecting vegetable prep, check out our guide to chopping vegetables efficiently. Also, resist stirring the sprouts too often while roasting—this prevents them from caramelizing properly. If you’re unsure about seasoning, our seasoning balance tips can help you adjust flavors like a pro.
g-suggestions">Serving and Pairing Suggestions
How to serve this dish
Ground Beef and Brussels Sprouts shine when you plate them with intention. For a rustic look, serve the dish family-style in a large skillet or a warm ceramic bowl. Alternatively, layer the savory ground beef over a bed of roasted Brussels Sprouts for an elegant dinner presentation. Meanwhile, a sprinkle of fresh parsley or grated Parmesan adds a pop of color and flavor. This hearty combo works beautifully for weeknight dinners, yet it also fits right in at holiday gatherings or potlucks. If you want extra texture, top it with toasted breadcrumbs or crispy fried onions just before serving.
What goes well with it
Pair Ground Beef and Brussels Sprouts with creamy mashed potatoes for a comforting, balanced meal. The buttery potatoes soften the dish’s bold flavors, making every bite satisfying. Alternatively, try a tangy yogurt sauce or a drizzle of balsamic glaze to brighten the richness of the beef. For drinks, a medium-bodied red wine like Merlot or a crisp apple cider complements the savory notes perfectly. If you’re craving more veggie-forward sides, consider serving it with a light garlic roasted asparagus or a refreshing cucumber tomato salad. These pairings keep the meal vibrant and well-rounded.
math-faq-block">
How do you cook ground beef and Brussels sprouts together?
Brown the ground beef in a skillet over medium heat, then add halved Brussels sprouts and cook until tender. Season with garlic, salt, and pepper for a simple, flavorful dish. Ground beef and Brussels sprouts pair well for a quick weeknight meal.
Are ground beef and Brussels sprouts healthy?
Yes, ground beef provides protein and iron, while Brussels sprouts are rich in fiber and vitamins. Opt for lean ground beef and roast the sprouts to keep the dish nutritious. Together, they make a balanced meal.
What spices go well with ground beef and Brussels sprouts?
Garlic, smoked paprika, and thyme enhance the flavors of ground beef and Brussels sprouts. For a kick, add red pepper flakes or cumin. These spices create a savory, well-seasoned dish.
rank-math-faq-item">
Can you make a casserole with ground beef and Brussels sprouts?
Absolutely! Layer cooked ground beef and Brussels sprouts with cheese or a creamy sauce, then bake until bubbly. This hearty casserole combines the richness of beef with the earthy taste of sprouts.